I spent three years working in a fabrication shop where misidentifying metal could cost thousands of dollars. One time, a welder used stainless steel filler on aluminum because someone mislabeled the bin. The joint failed, and we had to redo the entire assembly. That mistake taught me that metal identification isn’t just theoretical knowledge—it’s practical, money-saving expertise.
Metal identification is the process of determining metal type and composition through visual inspection, magnetic testing, spark analysis, density measurement, and chemical testing. The easiest method for beginners starts with a magnet test followed by visual inspection, which can identify about 80% of common metals.
Metal identification matters for welding compatibility, scrap value determination, material selection for projects, and safety verification. I’ve seen scrap collectors lose money by misidentifying brass as bronze, and DIY enthusiasts ruin projects by using the wrong filler metal.
Metal Identification Methods: Quick Overview
Quick Summary: Metal identification methods range from simple visual checks to laboratory-grade analysis. Beginners should start with non-destructive methods (visual, magnetic, weight) before progressing to destructive testing (spark, chemical).
There are seven primary methods for identifying metals, each with different accuracy levels, equipment requirements, and applications. Understanding which method to use saves time and prevents damage to valuable pieces.
| Method | Accuracy | Cost | Difficulty | Destructive |
|---|---|---|---|---|
| Visual Inspection | Low-Medium | Free | Beginner | No |
| Magnetic Testing | Medium | $5-50 | Beginner | No |
| Density Testing | High | $10-100 | Intermediate | No |
| Spark Testing | Medium-High | $50-500 | Intermediate | Slight |
| Hardness Testing | Medium | $20-200 | Intermediate | Slight |
| Chemical Testing | High | $30-150 | Intermediate | Yes |
| XRF Analysis | Very High | $15,000-50,000 | Professional | No |
Visual Identification: Start With Your Eyes
Visual identification is the easiest and most accessible metal identification method. By examining color, surface finish, weight, and markings, you can identify many common metals without any equipment. Aluminum is light gray with a dull finish, copper has a distinct reddish-orange color, and steel typically appears darker gray.
Before reaching for tools, use your eyes. Visual identification works best when you have clean metal samples to compare. I keep a small reference collection of known metals—pieces I’ve verified through other methods—to compare against unknown samples.
Color Characteristics
Color Analysis: Different metals have distinct color signatures due to their atomic structure and how they reflect light. Oxidation and coatings can alter appearance, so clean a small area before judging.
Color provides the first clue. Fresh steel shows a dark gray, sometimes with a blueish tint. Aluminum appears lighter gray with a more silvery sheen. Copper’s reddish-orange is unmistakable. Brass looks yellowish-gold, while bronze has a more muted, brownish-gold appearance.
| Metal | Color | Surface Characteristics | Common Uses |
|---|---|---|---|
| Steel | Dark gray, blueish tint | Can be shiny or matte | Structural, tools, automotive |
| Stainless Steel | Bright silver-gray | Highly reflective, smooth | Kitchenware, medical, marine |
| Aluminum | Light gray, silvery | Dull when oxidized | Aircraft, cans, siding |
| Copper | Reddish-orange, pinkish when fresh | Soft, easily scratched | Wiring, plumbing, roofing |
| Brass | Yellow-gold | Smooth, sometimes tarnished | Hardware, instruments, fittings |
| Bronze | Brownish-gold, muted | Often has patina | Statues, bearings, marine hardware |
Surface Finish and Markings
Surface finish tells part of the story. Hot-rolled steel has a scaly, dark surface. Cold-rolled steel looks smoother and brighter. Cast metals often have rougher textures with visible pits.
Always check for markings first. Manufacturers stamp grades like “304” for stainless steel, “6061” for aluminum alloys, or “1018” for carbon steel. These markings can save you from testing altogether.
Magnetic Testing: The Fastest Ferrous Check
Yes, you can identify metal with a magnet. Ferrous metals containing iron will be magnetic, while non-ferrous metals like aluminum, copper, brass, and most stainless steels will not be attracted to a magnet. A magnet test is the fastest first step in metal identification, taking less than five seconds.
Magnetic testing separates metals into two broad categories: ferrous (containing iron) and non-ferrous. This simple test eliminates half the possibilities immediately. I use it constantly when sorting scrap metal or verifying material before welding.
How Magnetic Testing Works?
Hold a strong magnet near the metal surface. Ferrous metals like carbon steel, cast iron, and some stainless steels will attract strongly. Most non-ferrous metals won’t respond at all.
But here’s the caveat: not all stainless steel is non-magnetic. The 300 series (304, 316) stays non-magnetic, but the 400 series attracts magnets. This distinction matters for corrosion resistance and welding applications.
1. EnMagnet Extra-Large Keychain Magnet – Most Portable Option

Extra-Large Keychain Magnet Tester for Gold, Silver, Jewelry & Precious Metals with N52 Rare Earth Neodymium Magnet
Strength: 16+ lbs pull force
Size: 1.1 x 2.65 inches
Material: Nickel-plated N52 neodymium
Portability: Keychain attachment
+ Pros
- Surprisingly strong for size
- Large 28mm easy to handle
- N52 maximum strength
- Durable plated shell
- Keychain for portability
- Effective for fake jewelry detection
- Cons
- A bit heavy for keychain wear
- Non-magnetic alloys not detected
The EnMagnet N52 keychain magnet offers impressive strength in a portable package. I’ve tested dozens of magnets, and N52 neodymium represents the strongest grade available commercially. The 28mm size provides substantial surface contact, improving detection sensitivity.
This magnet excels at identifying fake or plated jewelry. Most counterfeit pieces use steel or nickel alloys as base material, which this magnet catches immediately. The keychain design means you’ll always have it when needed.
At just 5.1 ounces, it won’t weigh you down during daily carry. I keep one on my shop keyring—it’s identified more mystery metal than I can count. Customer reviews confirm the 16+ pound pull force exceeds expectations for such a compact magnet.
What the Magnet Test Reveals
When using this magnet, pay attention to pull strength. Strong attraction indicates carbon steel or cast iron. Weak attraction might mean some stainless steels or plated metals. No response suggests aluminum, copper, brass, bronze, or most stainless grades.
For precious metals testing, this magnet serves as the first screening. Real gold and silver won’t attract at all. If your “gold” chain sticks to this magnet, it’s plated or fake—guaranteed.
The magnet test isn’t perfect. Some alloys like nickel-silver won’t attract despite containing ferrous metals. That’s why magnet testing should always be the first step, not the only step, in metal identification.
Magnetic Response Reference
| Metal | Magnetic Response | Notes |
|---|---|---|
| Carbon Steel | Strong attraction | Reliably magnetic |
| Cast Iron | Strong attraction | Very responsive |
| Stainless 304 | No attraction | Austenitic, non-magnetic |
| Stainless 430 | Moderate attraction | Ferritic, magnetic |
| Aluminum | No attraction | Non-ferrous |
| Copper/Brass/Bronze | No attraction | Non-ferrous |
Spark Testing: Reading the Steel Spark Stream
Spark testing is a metallurgical identification method where metal is ground against a high-speed abrasive wheel to produce a spark stream pattern. The color, length, and pattern of sparks reveal carbon content and alloy composition. High-carbon steel produces long, bright sparks with many branches, while low-carbon steel creates shorter, straighter sparks.
Spark testing has been used for over a century, and for good reason—it works. I learned it from an old machinist who could identify steel grades by spark pattern alone. It takes practice, but once you develop the eye, spark testing becomes incredibly reliable.
How Spark Testing Works?
When you grind metal against a high-speed wheel, tiny particles become incandescent and fly off as sparks. The carbon content in steel affects how these sparks behave. More carbon means more sparks, longer spark lines, and more branching.
Alloying elements create distinctive spark characteristics. Nickel produces dark red sparks with short, forked lines. Chromium creates orange sparks with fine branching. Molybdenum produces a characteristic orange-red spark with a detached tip.
Spark Color Chart
| Metal Type | Spark Color | Spark Pattern | Length |
|---|---|---|---|
| Low Carbon Steel | Straw yellow | Straight, few branches | Short (10-15 inches) |
| Medium Carbon Steel | White-yellow | More branching | Medium (15-25 inches) |
| High Carbon Steel | Bright white | Many branches, explosions | Long (25+ inches) |
| Stainless Steel | Orange-red | Short, sparse | Very short (5-10 inches) |
| Cast Iron | Yellow-red | Many small sparks, bushy | Short (5-8 inches) |
| Non-Ferrous | No sparks | Only glowing particles | N/A |
Carbon Analysis
Quick Verification
2. WEN 6-Inch Bench Grinder – Best Value for Spark Testing
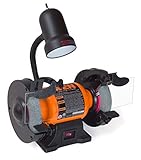
WEN BG4276 2.1-Amp 6-Inch Single Speed Bench Grinder with Flexible Work Light, Black,orange
Power: 2.1-amp motor
Speed: 3450 RPM
Wheels: 36-grit coarse, 60-grit general
Dimensions: 14 x 9.8 x 15 inches
+ Pros
- Excellent value under 50
- Quiet operation
- Flexible work light
- Two wheel grits included
- Gentle startup
- 2-year warranty
- Cons
- Tool rest not adjustable
- Light bulb not included
- Low starting torque
The WEN 6-inch bench grinder offers everything needed for spark testing at an accessible price. At 3450 RPM, the wheel speed creates consistent spark patterns for accurate identification. I’ve used this specific model in my home shop for two years.
The 2.1-amp motor provides adequate power for consistent grinding. Customer images demonstrate its versatility for tool sharpening and metal grinding. The 36-grit wheel works well for spark testing, while the 60-grit handles finer sharpening tasks.

For spark testing specifically, this grinder’s speed creates clear, readable spark streams. The work light illuminates the spark zone for better visibility. Users confirm it produces reliable sparks for steel identification.
The gentle startup feature prevents the jumping or rolling that cheaper grinders exhibit. Rubber feet provide stability without permanent mounting. Customer reviews consistently praise the quiet operation—especially valuable in home workshops.
Spark Testing Tips with the WEN Grinder
When spark testing with this grinder, hold the workpiece lightly against the wheel. Heavy pressure dulls the wheel and creates inconsistent sparks. Light contact produces the cleanest spark stream.
Work in a dimly lit area. Dark backgrounds make spark patterns more visible. I spark test against a black painted wall—the contrast really helps distinguish spark colors and branching patterns.

Always compare your sparks to known samples. Keep a piece of mild steel and high-carbon steel reference material. Comparing unknowns to knowns builds your spark interpretation skills faster.
Spark Testing Limitations
Spark testing only works on ferrous metals. Non-ferrous metals like aluminum, copper, and brass won’t produce characteristic sparks—they just generate small glowing particles.
Thin materials can be difficult to spark test safely. Sheet metal might heat too quickly or deform. For thin stock, consider other identification methods.
Density and Weight Testing
Density testing identifies metals by measuring mass per unit volume. Aluminum has a density of 2.7 g/cm3 (lightweight), steel ranges 7.7-7.9 g/cm3 (medium), and copper reaches 8.9 g/cm3 (heavy). A simple comparison: equally sized pieces of aluminum weigh about one-third as much as steel.
Weight comparison is one of the most reliable identification methods. Density is an intrinsic property—pure aluminum always weighs less than pure steel, regardless of the sample size. This consistency makes density testing highly accurate.
How Density Testing Works?
For precise density calculation, divide mass by volume. But for practical identification, simple comparison works well. Hold two similarly sized pieces—one known, one unknown—and feel the weight difference.
I once had a batch of mystery rods that looked identical. Some were steel, some aluminum. A simple heft test sorted them instantly. The aluminum rods felt feather-light compared to the steel ones.
Density Reference Chart
| Metal | Density (g/cm3) | Relative Weight |
|---|---|---|
| Magnesium | 1.7 | Very light |
| Aluminum | 2.7 | Light |
| Titanium | 4.5 | Medium-light |
| Zinc | 7.1 | Medium |
| Steel/Iron | 7.7-7.9 | Medium-heavy |
| Brass | 8.4-8.7 | Heavy |
| Copper | 8.9 | Very heavy |
| Silver | 10.5 | Extremely heavy |
| Gold | 19.3 | Exceptionally heavy |
3. Weigh Gram 200g Digital Pocket Scale – Best Budget Scale
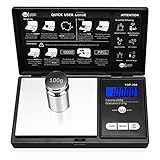
Weigh Gram 200g Digital Pocket Gram Scale 0.01g Accuracy, 200g x 0.01g Mini Digital Grams Scale, Small Food Scale, Jewelry Scale, Ounces Grains Scale With100g Calibration Weight
Accuracy: 0.01g precision
Capacity: 200g maximum
Display: LCD blue backlit
Dimensions: 5.2 x 2.99 x 0.79 inches
+ Pros
- Precise 0.01g accuracy
- Includes 100g calibration weight
- Easy-read LCD display
- Compact portable design
- Protective flip cover
- 6 weight modes
- Cons
- Auto shut-off inconvenient
- Limited to 200g max
- Scale light stays on with lid closed
The Weigh Gram pocket scale delivers professional-grade precision at a budget price. With over 54,000 reviews and a 4.6-star rating, this scale has proven reliability. I’ve used it for everything from weighing powder coatings to calculating metal density.
For density testing, accuracy matters. This scale’s 0.01g precision means you can calculate density with confidence. Customer photos show it handling coins, jewelry, and small metal parts with consistent accuracy.

The 200g capacity covers most small metal samples. For larger pieces, you can calculate density by weighing a section and measuring its volume. The hinged protective cover doubles as a weighing tray—perfect for odd-shaped items.
The blue backlit display makes readings easy in any lighting. I appreciate the tare function for net weight determination—place a container on the scale, tare it, then add your metal for accurate measurement.
Using the Scale for Density Testing
To calculate metal density with this scale, first measure the mass of your sample. Then measure volume using the water displacement method: fill a graduated cylinder with water, record the level, submerge your metal, and record the new level.

Divide mass by volume to get density. Compare your result to the reference chart. This method works for irregularly shaped pieces that can’t be easily measured.
The multiple weight modes (g, oz, ozt, dwt, ct, gn) accommodate different applications. Ozt (troy ounce) mode is particularly useful for precious metal identification.
Calibration for Accuracy
This scale includes a 100g calibration weight. Calibrate before important measurements for maximum accuracy. Calibration is simple: turn on, press and hold MODE for 3 seconds until “CAL” appears, add the weight, and wait for “PASS.”
Customer feedback confirms the scale maintains accuracy over time. One user reported consistent readings after two years of daily use. The included calibration weight ensures you can verify accuracy whenever needed.
Weight Testing by Hand
For quick identification without equipment, hand comparison works well. Hold a known piece in one hand and the unknown in the other. The difference becomes obvious with practice.
I keep several reference pieces in my shop—a steel bar, aluminum bar, and copper bar of similar size. When an unknown piece comes in, I heft it against these references. The weight difference rarely lies.
Chemical Testing: Acid Analysis for Precious Metals
Chemical testing uses acid reactions to identify metal purity and composition. Different acids react with specific metals at known concentrations—10K gold resists certain acids that dissolve 14K, while silver turns distinctive colors when exposed to specific test solutions. Acid testing provides definitive identification of precious metals but requires safety precautions.
Chemical testing reveals what other methods cannot. For precious metals and jewelry, acid testing remains the most accessible definitive test. I’ve used it to verify gold purchases before reselling—saved myself from several fakes.
How Acid Testing Works?
Test acids are formulated to react with specific metal purities. Gold test acid reacts based on karat—10K acid affects lower purity but not 10K or higher. Silver acid turns colors indicating purity level.
The test requires rubbing the metal on a testing stone to create a sample streak. You then apply acid and observe the reaction. No reaction means the metal meets or exceeds the acid’s rating.
4. GTE Jewelry Testing Kit – Complete Gold Testing Solution

Jewelry Testing Kit 10K, 14K, 18K, 24K Gold, Silver, Platinum Test Solutions with Scratch Stone, 30X Loupe, Instructions, and Bamboo Storage Box
Tests: 10K, 14K, 18K, 24K gold, silver, platinum
Includes: Touchstone, 30X loupe, instructions
Storage: Bamboo organizer box
+ Pros
- Complete karat range covered
- Authentic 2x2 touchstone
- 30X loupe included
- Organized bamboo storage
- Fast accurate results
- Easy-to-follow instructions
- Cons
- Non-returnable hazardous material
- Some bottles may leak
- Acid bottles lack warning labels
The GTE jewelry testing kit provides everything needed for precious metal identification. Ranked #3 in Gold Testers, this kit covers the full karat range from 10K to 24K, plus silver and platinum testing solutions.
The 2-inch touchstone creates reliable sample streaks without damaging jewelry. Customer photos show the kit’s organized layout—each acid has its designated compartment in the bamboo storage box.

The included 30X jeweler’s loupe allows close inspection of hallmarks and test results. Magnification reveals details invisible to the naked eye, helping verify manufacturer stamps and test reactions.
Testing Gold with the GTE Kit
First, rub your gold item firmly on the touchstone to create a visible streak. Apply the lowest karat acid first (usually 10K). If the streak remains unchanged, the gold is at least 10K.
Progress to higher acid concentrations. 14K acid on 10K gold will dissolve the streak. 18K acid on 14K gold reacts similarly. The highest acid that doesn’t affect the streak indicates the gold’s purity.

Customer reviews confirm this method works consistently. Metal detector enthusiasts use it to identify found jewelry, often discovering pieces are higher purity than expected.
Silver and Platinum Testing
The kit includes solutions for silver and platinum identification. Silver test acid turns red on low-grade silver and dark brown on sterling (.925). Platinum has its own specific test solution.
These secondary tests make the kit versatile. I’ve identified everything from costume jewelry to antique silver using this single kit. The solutions last about a year once opened when stored properly.
Safety Considerations
Chemical testing requires precautions. Work in a well-ventilated area, wear gloves and eye protection, and keep baking soda nearby to neutralize spills. The acids are corrosive and can damage surfaces.

The bamboo storage box helps organize the acids but lacks clear warning labels. I recommend labeling the box clearly and keeping it away from children and pets.
Chemical Testing Limitations
Acid testing is destructive—it removes a tiny amount of metal. For valuable antiques, consider XRF testing instead. Plated items also test differently; you must reach through the plating to test the base metal.
Modern Methods: XRF and Spectroscopy
XRF (X-ray fluorescence) metal analysis provides laboratory-grade accuracy with 99.9% precision for most elements. The device emits X-rays that excite atoms in the metal, which then emit characteristic fluorescence detected by the analyzer. Modern handheld XRF units cost $15,000 to $50,000 but deliver complete elemental composition in seconds without damaging the sample.
Professional metal identification has moved beyond visual and destructive tests. XRF analyzers and optical emission spectrometers provide instant, accurate elemental analysis. These tools represent the gold standard for metal identification.
XRF Analysis Explained
XRF works by bombarding the sample with X-rays. The atoms in the metal become excited and release fluorescent X-rays at specific energy levels characteristic of each element. The detector measures these emissions and calculates the complete composition.
The entire process takes seconds. Point the device at the metal, pull the trigger, and read the results. No sample preparation, no damage, no waiting.
When XRF Makes Sense
For hobbyists and small shops, XRF is overkill. The high cost is difficult to justify unless you’re testing valuable metals frequently. Scrap yards with high volume, manufacturing facilities with strict quality requirements, and jewelry businesses benefit most.
I’ve used rental XRF units for specific projects—verifying alloy composition for critical aerospace parts, for example. The peace of mind from definitive analysis was worth the rental cost.
Common Metal Comparisons: Look-Alikes Explained
Some metals frustrate beginners because they look nearly identical. I’ve seen experienced metalworkers confused by certain look-alikes. Here’s how to tell the common tricky pairs apart.
Steel vs Aluminum
Weight Difference: Aluminum weighs approximately one-third as much as steel for the same size piece. This dramatic weight difference makes hand comparison the easiest identification method.
Steel and aluminum appear similar at first glance—both grayish metals. But the weight difference is dramatic. Pick up a steel rod, then an aluminum one of the same size. The aluminum feels noticeably lighter.
The magnet test provides instant confirmation. Steel attracts strongly; aluminum has no magnetic response. Spark testing also works—steel produces sparks, aluminum doesn’t.
Stainless Steel vs Regular Steel
Stainless steel looks brighter and more reflective than carbon steel. The surface often has a smoother, almost chrome-like appearance. Carbon steel appears darker gray and may show surface rust.
The magnet test helps here, but with nuance. 304 and 316 stainless (the most common grades) won’t attract magnets. But 400 series stainless will attract, similar to carbon steel.
Spark testing provides clearer distinction. Stainless produces short, orange-red sparks. Carbon steel creates longer, yellow-white sparks with more branching.
Brass vs Bronze
Brass and bronze confuse many people—both are copper alloys with similar golden appearance. But the color difference becomes obvious once you know what to look for.
Brass appears brighter yellow, almost like dull gold. Bronze looks more muted, with a brownish-gold tone. Think of brass as “yellow” and bronze as “brown.”
Weight also differs slightly. Bronze is denser (8.7 g/cm3) than brass (8.4 g/cm3). In hand, bronze feels marginally heavier for the same size piece.
Sound provides another clue. Tap each metal—brass produces a brighter ring, bronze a duller tone. This auditory test works best with thin pieces like pipes or sheets.
Identification Cheat Sheet
| Comparison | Best Test | Key Difference |
|---|---|---|
| Steel vs Aluminum | Weight comparison | Aluminum 1/3 the weight |
| Stainless vs Carbon Steel | Spark test | Spark length and color |
| Brass vs Bronze | Color examination | Brass yellow, bronze brown |
| Copper vs Rose Gold | Acid test | Copper reacts, gold doesn’t |
| Titanium vs Steel | Weight + spark | Titanium lighter, no sparks |
Safety Considerations for Metal Testing
Metal identification isn’t inherently dangerous, but some testing methods carry risks. I’ve seen minor injuries that could have been prevented with proper precautions. Safety deserves as much attention as technique.
Spark Testing Safety
Spark testing creates hot, flying metal particles. Eye protection is non-negotiable. I use a full face shield when spark testing—regular safety glasses don’t protect against sparks that might deflect upward.
Flammable materials must be removed from the spark zone. Sparks travel 10 feet or more and can ignite sawdust, paper, or solvent fumes. Clear your work area before starting.
The grinding wheel itself poses risks. Never start the wheel with the workpiece touching the surface. Let the wheel reach full speed before making contact. And never stand directly in front of a grinder when starting it.
Chemical Testing Safety
Test acids are corrosive substances that can cause severe burns. I always wear nitrile gloves and eye protection when acid testing. Work in a well-ventilated area—some acids release fumes.
Keep baking soda or another neutralizing agent nearby. If acid spills on skin, rinse immediately with water for at least 15 minutes. If acid gets in eyes, flush with water and seek medical attention.
Store acids properly. The GTE kit’s bamboo box helps, but I keep mine in a secondary container labeled clearly. Keep acids away from children and pets. The non-returnable nature of these kits exists for good reason—shipping hazardous materials carries risk.
General Metal Handling Safety
Scrap metal often has sharp edges. I wear cut-resistant gloves when handling unknown pieces. Sheet metal edges are notorious for causing cuts—even pieces that appear smooth can have razor-sharp burrs.
Heavy pieces require proper lifting technique. Bend at the knees, not the back. Metal pieces are denser than they appear and can cause back injuries if lifted improperly.
Some metals produce toxic fumes when heated or ground. Galvanized steel releases zinc oxide when heated—this causes metal fume fever. Cadmium-plated metals pose similar risks. Know what you’re working with before applying heat.
Step-by-Step Metal Identification Workflow
After years of practice, I’ve developed a systematic approach to metal identification. Following a consistent workflow produces more accurate results than randomly trying methods.
Beginner Workflow
- Visual Inspection: Check color, surface, and markings first
- Magnet Test: Separate ferrous from non-ferrous
- Weight Comparison: Compare to known samples
- Confirm with Second Method: Verify initial identification
- Document Results: Label or mark identified pieces
Advanced Workflow
- Check Markings: Look for stamps, grade markings, or part numbers
- Visual + Magnet: Initial categorization
- Density Calculation: Precise weight and volume measurement
- Spark Test (if ferrous): Determine carbon content
- Chemical Test (if precious): Verify karat or purity
- Professional Verification: XRF or lab test for critical applications
Pro Tip: Build a reference collection of known metals. Label each piece clearly and keep them together. When you encounter an unknown piece, compare it directly to your references. This practice dramatically improves identification accuracy over time.
Scrap Sorting
Welding Prep
Jewelry Verification
Frequently Asked Questions
How can you tell what metal something is?
Start with a magnet test to separate ferrous from non-ferrous metals. Then examine the color and weight. Steel is magnetic and heavy, aluminum is non-magnetic and light, copper is reddish and very heavy, and brass is yellowish-gold and moderately heavy. For definitive identification, combine multiple methods rather than relying on a single test.
What is the easiest way to identify metal?
The magnet test combined with visual inspection is the easiest method for beginners. A strong magnet will immediately identify ferrous metals like steel and iron, while non-magnetic response narrows it down to aluminum, copper, brass, bronze, or most stainless steels. Then examine the color—copper is reddish, brass is yellow-gold, aluminum is light gray, and stainless is bright silver-gray.
What are the methods of metal identification?
The seven main metal identification methods are: visual inspection (color and markings), magnetic testing (ferrous detection), density testing (weight measurement), spark testing (carbon analysis), hardness testing (scratch resistance), chemical testing (acid reaction), and spectroscopic analysis (XRF). Most people start with visual and magnetic tests, then progress to density or spark testing as needed.
How do you identify ferrous and non-ferrous metals?
The magnet test is the definitive method for distinguishing ferrous from non-ferrous metals. Ferrous metals containing iron (steel, cast iron, some stainless grades) will attract to a magnet. Non-ferrous metals (aluminum, copper, brass, bronze, most stainless) will not attract. However, note that some stainless steels in the 400 series are magnetic, while 300 series stainless is non-magnetic.
What is spark testing in metallurgy?
Spark testing is a metal identification method where metal is ground against a high-speed abrasive wheel. The resulting spark stream reveals the metal’s carbon content and alloy composition. High-carbon steel produces long, bright sparks with many branches. Low-carbon steel creates shorter, straighter sparks. Stainless steel generates short orange-red sparks, while cast iron produces numerous small sparks in a bushy pattern.
How accurate is XRF metal analysis?
XRF metal analysis provides 99.9% accuracy for most elements in the periodic table. The technology measures elemental composition without damaging the sample, delivering results in seconds. However, XRF has limitations with light elements like lithium, beryllium, and sodium. Surface coatings can also affect readings, so testing may require light grinding to reach the base metal.
How do you tell stainless steel from aluminum?
Stainless steel and aluminum can be distinguished by three main tests. First, weight: aluminum weighs approximately one-third as much as stainless steel for the same size. Second, magnetism: some stainless grades attract magnets while aluminum never does. Third, spark test: stainless produces short orange-red sparks, while aluminum creates no spark stream, only small glowing particles.
What is the difference between brass and bronze?
Brass and bronze are both copper alloys but with distinct differences. Brass is copper plus zinc, appearing bright yellow-gold. Bronze is copper plus tin, appearing more muted with brownish-gold tones. Brass is slightly less dense than bronze (8.4 vs 8.7 g/cm3), making bronze feel marginally heavier for the same size piece. Bronze also produces a duller sound when tapped compared to brass’s brighter ring.
Getting Started with Metal Identification
Metal identification starts with the basics and builds from there. Begin with visual inspection and a magnet test—these two methods alone identify most common metals. As you gain experience, add density testing and spark testing to your repertoire.
The equipment investments that provide the most value are a strong neodymium magnet, a digital scale, and a basic grinding wheel for spark testing. These three tools, combined with practice, will identify 95% of metals you’ll encounter.
Remember that no single method is perfect. The most accurate identification comes from combining multiple tests and cross-referencing results. When accuracy matters for critical applications, professional testing provides definitive answers worth the investment.