When you’ve set your sights on a project involving solar power systems, the last thing you want is to hit a snag because of weak links—literally. The importance of crimping MC4 solar connectors correctly couldn’t be overstated, as these little components hold the power to make your eco-friendly dream either flourish or fizzle out. So, here’s my take – stick around, and I’ll guide you through the puzzle of pins and wires.
If someone asked me to lay it out plain and simple, I’d say secure connections are key for a seamless solar setup. It’s about more than just plugging things together; proper crimping ensures that each electron generated by your sun-soaked panels reaches its destination without loss or disruption. It keeps the energy flowing, the lights shining, and your green conscience clean.
What You’re Going To Gain From This Read:
- Turn confusion into clarity with step-by-step instructions.
- Discover tips to avoid common pitfalls during installation.
- Grasp why each move matters for long-term energy efficiency.
- Build confidence in handling those crucial connection points.
- Unlock the full potential of your solar panels with perfect crimps!
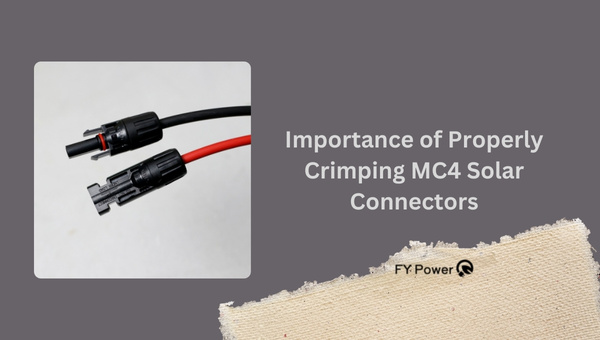
Importance of Properly Crimping MC4 Solar Connectors
When I’m setting up solar panels, I know that every small detail can have a big effect on how well things work. One tiny but super important part is getting the MC4 solar connectors just right. These connectors are like the handshakes between your cables—they need to be good and firm.

- Ensure Electrical Safety: Crimping MC4 connectors properly minimizes the risk of loose connections, which could potentially lead to arcing and electrical fires.
- Maintain High Performance: Tight and secure connections ensure minimal resistance and maximum conductivity, helping the solar system to operate at its highest efficiency.
- Prevent Power Loss: A poor crimp can lead to increased electrical resistance, which can cause power loss and reduce the overall energy yield of the solar array.
- Avoid Corrosion: Good crimping seals the connection, protecting it from moisture and environmental exposure that can lead to corrosion and degrade the connection over time.
- Long-term Reliability: Properly crimped connections are more reliable and require less maintenance, reducing the need for inspections and repairs in the future.
- Compatible Impedance: Correct crimping ensures that the connectors’ impedance matches with that of the cables, which is critical for AC systems to prevent energy losses.
- Mitigate Vibration Issues: Solar panels can be exposed to wind and other mechanical vibrations, which can loosen connections over time. Proper crimping helps to keep the connectors securely fastened.
- Fulfill Warranty Requirements: Many solar system components come with a warranty that may be voided if the connectors are not installed according to the manufacturer’s specifications, which include proper crimping.
- Comply With Standards: Adhering to industry standards and regulations—like those set by the National Electrical Code (NEC) in the U.S.—is necessary, and these typically include the requirement for proper connector crimping.
Also Read: What appliances can a 6000-watt generator run?
The Complete 7-Step Guide to Crimping MC4 Solar Connectors
To start, let me share what you’ll need to properly crimp MC4 solar connectors. Doing this job requires some specific tools, and each one plays a crucial part in the process. Here’s what you’ll need:
- MC4 Crimping Tool: This is specialized for crimping the metal pins of your solar connectors tightly.
- Wire Stripper: You’ll use this tool to remove the insulation from your cables without damaging them.
- Cable Cutter: It’s important to have a sharp cutter for clean cuts on your wire ends.
- MC4 Connectors: These come with male and female parts that join together after you’ve attached them to wires.
Keep these tools handy as I walk you through each step. Every step is important for ensuring a secure connection in your solar system.
Step 1. Preparing Your Wire
The first thing I do is get my wire ready. This means cutting it to length. A good cable cutter is key here—you want a clean cut so your wires are neat and even.
Next up is stripping the insulation off the ends where you’ll attach the connector pins. For this, use a wire stripper and make sure not to nick the metal inside—the copper part of your wire should be shiny and intact when done.
Step 2. Male Pin Connection Process
With our wires prepped, it’s time to connect! Take hold of your male connector pin—it looks like a tiny metal barrel—and position it carefully at the end of one of your stripped wires.
Now grab your crimping tool; put the pin and wire inside its jaws correctly aligned with indications on it if available, then press down hard! This step squeezes them together so they won’t ever come apart easily.
Step 3. Assembling Male Pin with Female Connector
Once that male pin feels solidly attached, we move on to hooking him up with his partner—the female connector! She’s got an opening just waiting for Mr. Male Pin right there.
Gently push him into her until he clicks home securely—this means he’s nestled snug inside there like two puzzle pieces fitting together just right!
Step 4. Female Pin Connection Process
Connecting a female pin takes patience and precision. You want that connection secure, so here’s how it works:
- Strip the end of your cable with your wire stripper—about 1/8 inch should do.
- Take your female pin and check its shape; it’s like a tiny cup waiting for that stripped wire.
- Slide that stripped piece right into this tiny cup on the pin.
- Now take up that crimping tool, fit the pin with the cable into its jaws, and squeeze! Do this with care so you don’t squash anything out of shape.
You’ll feel when it’s done—the handle won’t go further and shouldn’t require Hulk strength.
Step 5. Assembling Female Pin with Male Connector
So we’ve got our female pin connected—neat! Next:
- Take that male connector part (it’s usually marked) and find its opening at one end.
- Gently push in our just-crimped female pin in there till you hear or feel a ‘click.’ Sometimes, there is no sound; trust your fingers here if they tell you it can’t go further without forcing it.
That ‘click’ or stop-feeling means she’s home, nicely seated inside her mate.
Step 6. Ensuring Connections are Tight
We really don’t want any loosey-goosey connections here! So, after each side is assembled:
- Give a gentle tug on each cable—that feeling needs to be solid unyielding.
- Your connection must stay rooted when put under this small test—if not, revisit that crimp or push-in job.
Step 7. Connecting & Disconnecting the Crimped MC4 Solar Connectors
Last up is learning how to connect and disconnect these beauties safely:
To connect:
1. Click together—you’ll feel them lock snugly if all steps before were done correctly.
Disconnect by reaching for those spanner-like assembly/disassembly tools gained from step one because pulling apart by sheer hand strength alone makes no sense—and isn’t safe!
So secure those spanners around both ends—you’re gripping both sides together—and gently turn opposite ways till they say, “We’re free!”
And hey presto! You’ve completed crimping MC4 solar connectors. It might seem like quite some steps, but break these down into their simple actions, and get settled in doing each carefully—it becomes second nature soon enough!
Each step demands attention, though—cut precisely; strip the right amount off using basic English can help folks remember better: strip little hats off wires, snug pins into place, check those werewolf-strong connections click’n’lock, then spanner off again using opposites—it sounds fun now, doesn’t it? Get busy practicing, then!
Also Read: DIY Portable Solar Panel Stand: An Easy Guide
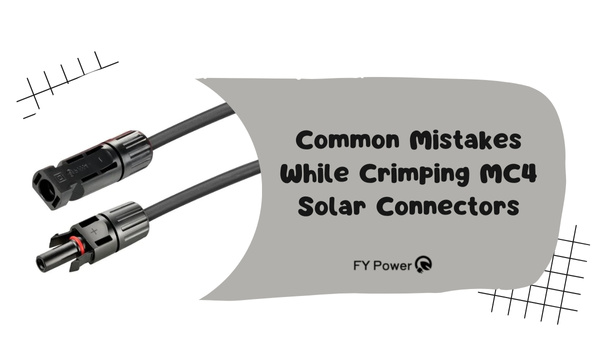
Common Mistakes While Crimping MC4 Solar Connectors
Crimping MC4 solar connectors is a crucial step in setting up solar panel systems. But even simple mistakes can cause big problems. Here, I’ll share common mistakes and how to avoid them.

Avoidable Errors During Wire Preparation
When preparing wires for crimping, some common slip-ups happen more often than they should. Let’s go through them:
- Cutting Wires Incorrectly: A crooked or frayed cut can lead to poor connections. Always use a sharp wire cutter and cut straight across.
- Stripping Too Much Insulation: If you strip too much of the wire’s end, it might not hold firm in the connector. Only remove enough to fit the metal barrel of the pin.
- Not Stripping Enough: The opposite problem—too little insulation removed—means the wire won’t make proper contact with the pin. Make sure to strip just right, matching the length of the metal barrel.
- Damaging The Wire: Be gentle when stripping. If you nick or cut into the actual wire strands, this weakens their strength and your connection quality drops.
- Using Wrong Tools: Using a dull blade or wrong-sized stripper can make these issues worse. Invest in good quality tools for this job.
By paying attention to these details, your solar connector crimping will be on point every time.
Incorrect Assembly of Pins
Putting together pins might seem easy, but mixing up male and female parts or not securing them well is surprisingly common:
- Mixing Up Pins: Male and female pins are different; make sure you’re using each one correctly with its matching connector part.
- Forcing Pins In Wrongly: Pins should slide smoothly into connectors—if they don’t, check if you’re inserting them right side up, and don’t force them.
- Incomplete Insertion: A pin that isn’t fully clicked into place will give you an unreliable connection that may fail later on under stress or movement.
Take your time during assembly; rushing leads to mistakes here.
Inadequate Connection Firmness
Loose connections mean power loss or even component damage over time. Here’s how to avoid loosey-goosey situations:
- Insufficient Crimp Force: If you don’t apply enough pressure while crimping, your connection won’t be snug. Apply firm pressure until the tool completes its ratchet cycle fully.
- Uneven Crimping Pressure: This can give an uneven shape, causing connectivity issues later on; always apply even force when squeezing that crimp tool handle.
Keeping connections tight makes all the difference between a system that runs smoothly and one that acts up because of power issues caused by simple human error in setup.
By being thorough at every step — from careful wire preparation to correct pin assembly, all with deliberate practice — one ensures reliable energy flow for their solar setup through proper crimping MC4 solar connectors process mastery!
Also Read: Which generator is required to run a refrigerator?
FAQs
How do you know if MC4 connectors are crimped correctly?
You can tell if MC4 connectors are crimped right by giving the wires a gentle tug. If they stay put without moving, that means the crimp is solid. Also, check there’s good insulation and no exposed wires.
Is there any risk involved in disconnecting solar panel MC4 connectors by hand?
Yes, pulling apart MC4 connectors with your hands might hurt them if not done carefully. Always use proper tools and switch off the system to keep things safe.
How do you identify a poor-quality MC4 connector?
A bad MC4 connector might look off with weak locks or thin plastic that gets damaged easily. Real good ones feel sturdy and have a smooth snap when connecting.
Conclusion
I hope this guide has shed some light on the importance of Crimping MC4 Solar Connectors. It’s more than just plugging parts together. It’s about securing a safe and effective energy system that will stand the test of time and weather.
Remember, electricity needs precision, and your solar setup deserves the best. By carefully following these steps, you safeguard not only the function of your solar array but also its longevity and output efficiency.

