Category: Spark Plug Gap & Socket Size

  • Guide To All Pulsar Generators Spark Plug Gap & Socket Size

    Maintaining the correct spark plug gap and socket size on your pulsar generator is essential for optimal engine performance. Whether you’re a DIY enthusiast or a professional mechanic, it’s important to understand the basics of how these components work together to ensure that your engine runs smoothly and safely.

    In this article, we will provide an overview of the Pulsar generators spark plug gap and socket size and their importance.

    We will also provide some tips on how to measure them properly so you can make sure your Pulsar generator is running at its best. With this information, you’ll be able to keep your generator performing optimally for years to come!

    What Are The Spark Plug Gap And Socket Sizes?

    Pulsar Generators Spark Plug Gap & Socket Size

    It is essential to select the right spark plug gap and socket size in order to ensure the proper operation of the generator.

    Spark plug gap

    Pulsar Generators Spark Plug Gap & Socket Size

    The spark plug gap is the distance between the two electrodes of a spark plug. This gap must be correctly set for the engine to run efficiently and correctly, as it affects both fuel efficiency and power output.

    Socket size

    Socket size refers to the size of the socket used to remove and replace the spark plug in a generator. It is important to use the correct socket size, as using an incorrectly sized one can cause damage to the spark plug or even the generator itself.

    List Of All Pulsar Generators Spark Plug Gap and Socket Sizes

    Pulsar 15000 Watt V-Twin Generator PG15KVTW

    • Type – F7TC (BOSCH) / BP6ES (NGK) / N9YC (CHAMPION)
    • Gap – 0.030″-0.031″
    • Socket size – 13/16″ (21mm

    Pulsar 12000 Watt Dual Fuel Generator PG12000B

    • Type – F7TC (BOSCH) / BP6ES (NGK) / N9YC (CHAMPION)
    • Gap – 0.028″-0.031″
    • Socket size – 13/16″ (21mm)

    Pulsar 10000 Watt Dual-Fuel Generator PG10000B16

    • Type – F7TC (NHSP)
    • Gap – Not available
    • Socket size – 13/16″ (21mm)

    Pulsar 10000 Watt Gas Generator PG10000

    • Type – F7TC (NHSP)
    • Gap – Not available
    • Socket size – 13/16″ (21mm)

    Pulsar 7750 Watt Dual-Fuel Generator PG7750B

    • Type – F7TC (NHSP)
    • Gap – Not available
    • Socket size – 13/16″ (21mm

    Pulsar 6580 Watt Dual Fuel Generator HD6580B

    • Type – F7TC (BOSCH) / BP6ES (NGK) / N9YC (CHAMPION)
    • Gap – 0.028″-0.031″
    • Socket size – 13/16″ (21mm)

    Pulsar 6580 Watt Gasoline Generator PG6580E

    • Type – F7TC (BOSCH) / BP6ES (NGK) / N9YC (CHAMPION)
    • Gap – 0.027″-0.031″
    • Socket size – 13/16″ (21mm)

    Pulsar 5250 Watt Dual-Fuel Generator PG5250B

    • Type – F7TC (NHSP)
    • Gap – Not available
    • Socket size – 13/16″ (21mm)

    Pulsar 5250 Watt Portable Generator PG5250

    • Type – F7TC (BOSCH) / BP6ES (NGK) / N9YC (CHAMPION)
    • Gap – 0.030″-0.031″
    • Socket size – 13/16″ (21mm)

    Pulsar 4500 Watt Inverter Generator PG4500iSR

    • Type – F7TC (Brands not specified) / BP6ES (NGK) / N9YC (CHAMPION)
    • Gap – 0.024″-0.028″
    • Socket size – 13/16″ (21mm)

    Pulsar 2300 Watt Gas-Powered Inverter Generator PG2300iS

    • Type – E6TC / E6RTC / BPR6HS (Brands not specified)
    • Gap – 0.024″-0.028″
    • Socket size – 13/16″ (21mm)

    Pulsar 2200 Watt Dual Fuel Inverter Generator PG2200BiS

    • Type – E6TC / E6RTC / BPR6HS (Brands are not specified)
    • Gap – 0.024″-0.028″
    • Socket size – 13/16″ (21mm)

    Pulsar 2200 Watt Gas Generator PG2200

    • Type – F7TC (NHSP)
    • Gap – Not available
    • Socket size – 13/16″ (21mm)

    Pulsar 1200 Watt 2-Stroke Generator PG1202S

    • Type – F7TC (BOSCH) / BP6ES (NGK) / N9YC (CHAMPION)
    • Gap – 0.028″– 0.031″
    • Socket size – 13/16″ (21mm)

    Types of Spark Plugs Usde In Pulsar Generators

    The spark plug gap and socket size of Pulsar Generators are important factors to consider when using the generator.

    Pulsar Generators Spark Plug Gap & Socket Size: Most Common Spark Plugs and Socket Sizes Used in Pulsar Generator

    Several types of spark plugs are used with the type of Pulsar Generator, each series has a different gap size. Here are some models included.

    Bosch Platinum
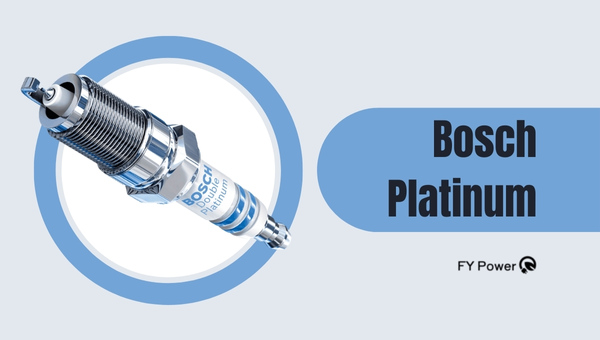
    Pulsar Generators Spark Plug Gap & Socket Size

    The Bosch Platinum spark plug is a type of spark plug used in Pulsar Generators. It has several features that make it an ideal choice for optimal engine performance.

    The Bosch platinum spark plugs feature a special alloy center electrode which helps extend the life and reduce wear on the unit. This makes it more durable and reliable than other types of spark plugs.

    Features Of Boscsh Platinum Spark plug

    • Long life – The Bosch platinum spark plugs feature a special alloy center electrode which helps extend the life and reduce wear on the unit. This makes it more durable and reliable than other types of spark plugs.
    • Efficient combustion – The design of the Bosch Platinum Spark Plug allows for efficient combustion, meaning that less fuel is wasted during operation, resulting in improved efficiency and economy for your generator’s engine over time.
    • Easy installation – These plugs are designed to be easy to install into most generators without any complicated tools or setup procedures required, taking much of the hassle out of maintenance work on your generator system.

    NGK Copper

    NGK Copper is a non-platinum, copper-core spark plug designed with an upper electrode that increases the surface contact area between the plug and the combustion chamber, providing better heat transfer and improved hot spark power output.

    Features of NGK Copper

    • Non-platinum, copper-core spark plug design.
    • An upper electrode increases the surface contact area between the plug and the combustion chamber, providing better heat transfer and improved hot spark power output.
    • Durable and reliable for long service life.

    Champion Gold

    Champion Gold Series features a gold-plated center electrode designed to offer superior conductivity and ensure maximum energy transfer from the ignition system to the engine’s combustion chambers during ignition events.

    Features of Champion Gold

    • Superior Conductivity
    • Long Life
    • Improved Ignition

    Tips For Selecting The Correct Spark Plug & Socket Size for Pulsar Generators

    Spark Plug Selecting the right spark plug for your Pulsar generator is crucial for optimal performance. Here are some easy steps to follow to ensure you choose the right spark plug and Socket Size.

    Tips For Spark Plug

    • Consult the owner’s manual: The owner’s manual will contain information about the type of spark plug and socket size required for your Pulsar generator. Make sure to refer to it before purchasing a new spark plug.
    • Consider manufacturer recommendations: Pulsar Generators may have specific manufacturer recommendations regarding spark plugs, so it’s always best to check with the manufacturer before making a purchase. These recommendations may include specific gap sizes and socket sizes.
    • Choose the right type of spark plug: Different types of spark plugs offer varying benefits, so it’s important to choose the right one for your needs. For instance, the Bosch Platinum spark plug is durable and reliable, while the Denso Iridium spark plug is ideal for use in hotter temperatures.
    • Determine the correct gap size and socket size: Use a feeler gauge to measure the gap between the two electrodes of the spark plug. Make sure the gap size matches the recommendations in the owner’s manual. Additionally, check the socket size of your Pulsar generator’s spark plug to ensure it will fit correctly.
    • Consider environmental factors: If you plan on using your Pulsar generator in a damp environment, consider choosing a spark plug that is resistant to corrosion to ensure optimal performance.

    By following these easy steps, you can select the perfect spark plug for your Pulsar generator, ensuring it runs optimally for years to come.

    Tips For Socket Size

    Choosing the right socket size for your Pulsar generator’s spark plug is essential for a proper fit, which ensures optimal performance. Here are some easy steps to help you select the right socket size.

    • Consult the owner’s manual: The owner’s manual will provide information regarding the specific socket size required for your Pulsar generator’s spark plug. Make sure to refer to it before purchasing a new spark plug.
    • Determine the thread size: Thread size refers to the diameter of the screw that screws into the engine. Use a thread gauge or consult the owner’s manual to determine the correct thread size.
    • Check the depth of the socket: The depth of the socket refers to how far the spark plug sits inside the socket. Ensure that the socket is deep enough to properly fit the spark plug.
    • Consider the insulation material: The insulation material is the protective material that surrounds the spark plug’s metal body. Some sockets are made of rubber, while others are made of ceramic. Ensure that the socket insulation material is compatible with your Pulsar generator’s spark plug.
    • Check the drive size: The drive size represents the size of the socket’s connector or square drive, which fits the ratchet or extension. Pulsar generators typically require a 5/8″ (16mm) or 13/16″ (21mm) drive size.

    By following these easy steps, you can choose the right socket size for your Pulsar generator’s spark plug, ensuring optimal performance and durability.

    How To Check And Adjust Spark Plug Gaps In Pulsar Generators

    Checking and adjusting spark plug gaps in Pulsar Generators is a simple process that can help ensure your generator runs efficiently. Here are the steps to follow.

    • Disconnect the spark plug wire from the generator.
    • Measure the gap between the electrodes of the spark plug with a feeler gauge or ruler.
    • If necessary, adjust the gap using a flathead screwdriver or pliers.
    • Reattach the spark plug wire to the generator and check for proper connection.
    • Check that the spark plug washer is in good condition and tighten it with a spark plug wrench if necessary.
    • Start up your generator and check for proper operation before use.

    By following these easy steps, you can ensure that your Pulsar generator’s spark plug is set to the correct gap size and functioning properly.

    Why checking the spark plug gap and socket size are important?

    Checking the spark plug gap and socket size is important for ensuring that your vehicle is running at its optimal performance. The gap between the spark plug electrodes and the contact must be set correctly to ensure that the spark plugs are firing correctly.

    If the gap is too wide, it can cause misfires, which can lead to a decrease in fuel efficiency and engine power. Additionally, using the wrong size socket for your spark plugs can damage them, leading to further issues with your vehicle’s performance.

    It’s important to use the correct tools when checking your spark plug gap and socket size to ensure that you get an accurate reading.

    How To Remove And Install The Pulsar Generators Spark Plug 

    Removing and installing the spark plug on a Pulsar Generator is a simple process that can be done with basic tools. Here are the steps to follow.

    • Disconnect the spark plug wire from the generator.
    • Use a spark plug wrench to remove the old spark plug.
    • Visually inspect the spark plug area for any damage or wear.
    • Clean the spark plug area with a rag or brush.
    • Install a new spark plug, ensuring that it is properly gapped according to the manufacturer’s specifications.
    • Reconnect the spark plug wire to the generator and secure it in place.

    Following these steps will help ensure that your generator is running properly and efficiently. Additionally, make sure to check the spark plug gap and socket size regularly and replace any worn or damaged parts as necessary.

    The Benefits Of Using Properly Gapped Spark Plug And Socket Size For A Pulsar Generator

    The proper gap size and socket size for a Pulsar generator’s spark plug are essential for ensuring that the generator runs at its optimal performance. Here are some benefits of using a properly gapped spark plug and socket size for a Pulsar generator.

    • Improved Fuel Efficiency: Using the correct spark plug gap and socket size can significantly improve the fuel efficiency of a Pulsar generator.
    • Extended Generator Life: By using the proper spark plug gap and socket size, you can extend the life of your Pulsar generator. By using the correct tools, you can ensure that your generator is running smoothly and that it lasts for years to come.
    • Consistent Performance: By using the proper spark plug gap and socket size, you can ensure consistent performance from your Pulsar generator. This means that the generator will start up easily and run smoothly every time, without any hiccups or issues.
    • Reduced Emissions: Using the correct spark plug gap and socket size can also reduce emissions from your Pulsar generator. When the spark plugs are firing correctly, the combustion process is more efficient, which leads to fewer emissions being released into the atmosphere.

    Overall, using the correct spark plug gap and socket size for your Pulsar generator can lead to improved fuel efficiency, extended generator life, consistent performance, and reduced emissions. It’s important to regularly check and maintain your spark plugs to ensure that your generator is running at its best.

    Tips to Ensure Proper Installation of New Spark Plugs in Your Generator 

    When installing new spark plugs in your Pulsar generator, it is important to ensure that the process is done properly and safely. Here are some tips to help you with a successful installation.

    • Make sure the cylinder head is cool to the touch before beginning installation.
    • Start by hand-tightening the spark plug to reduce the risk of damage.
    • Use a torque wrench with extension and spark plug socket to ensure proper tightening of the spark plug.
    • Gently insert and thread the spark plug into the cylinder by hand without power tools.
    • Check that the gasket ring is in place before inserting the spark plug into its socket.
    • Hold the spark plug vertically when inserting it into its socket, and lightly tighten it by hand or using a plug wrench if necessary.
    • Refer to the manufacturer’s instructions for recommended torque and tightening angle for your specific generator model and the type of spark plugs used.

    Step By Step Guide To Keep Your Generator In Good Condition

    Keeping your generator in good condition is essential to ensure it runs reliably when you need it. Here are some tips to help you maintain your generator.

    1. Perform regular maintenance and inspections on your generator, including checking the oil level, spark plugs, air filter, fuel lines, belts, and battery connections.
    2. Make sure you have enough fuel in storage to run the generator for at least 48 hours during an emergency situation.
    3. Keep your generator clean by wiping down its surfaces with a rag or brush regularly.
    4. Store your generator in a dry place away from water sources such as rain or snow to avoid corrosion of any components.
    5. Ensure that all safety features are working properly before starting up the generator each time it is used (e.g., switch off the fuel valve when not in use).
    6. Create a routine schedule for running your generator so that it does not sit unused for extended periods of time without being started up periodically this will help keep all parts functioning optimally over time .

    Given above tips should help you to keep your generator in good condition. With proper maintenance and care, your generator should provide reliable power for many years to come.

    Conclusion

    It is important to make sure that the correct spark plug gap and socket size are used when installing a Pulsar Generator. This will ensure that your generator functions properly, providing you with power for home and recreational use. Taking the time to check these specifications can help save you energy, money, and effort in the long run.

    Follow the tips and tricks provided in this article to ensure a successful installation and extended life for your generator. Proper maintenance and care of your generator can help prevent unexpected disasters from occurring. With reliable power, you can be sure that you are ready for any emergency situation that may arise.

  • Honda GX120 Spark Plug Gap, Number & Socket Size Guide

    Honda GX120 Spark Plug Gap, Number & Socket Size Guide

    Imagine the thrill of perfecting your Honda GX120 engine performance, and the satisfaction in knowing you’ve done it yourself.

    This article is your comprehensive guide to understanding every detail about the Honda GX120 spark plug gap, number, and socket size for your. With meticulous attention to detail and precise specifications, you can maximize engine efficiency and ensure long-lasting performance.

    You’ll have access to technical insights drawn from extensive hands-on experience and research-based knowledge. So whether you’re a seasoned mechanic or an enthusiastic beginner eager to roll up your sleeves, this guide will equip you with all the know-how needed.

    By doing this together as a community of Honda GX120 aficionados, we foster a sense of belonging while empowering each other with practical skills.

    Brace yourself for an enriching journey into the world of engine maintenance that’s not just about fixing things but more about mastering them.

    Guide To Honda GX120 Spark Plug Gap, Number & Socket Size Guide

    Key Takeaways

    • NGK BPR6ES or DENSO W20EPR-U spark plugs are recommended for the Honda GX120 engine.
    • The spark plugs are designed to withstand the heat range and compression ratio of the engine.
    • They offer excellent resistance against fouling and have anti-corrosion characteristics.
    • It is recommended to use a 13/16′ (21mm) socket size for changing the spark plug.
    • Owner´s manual – https://cdn.powerequipment.honda.com

    HONDA GX120 SPARK PLUG GAP & NUMBER

    You’ll need the BPR6ES (NGK) 98079-56846 or W20EPR-U (DENSO) 98079-56855 spark plug for your Honda GX120, and make sure you’ve got that gap set just right between 0.028″– 0.031″—it’s crucial for optimal performance!

    It’s not just about picking up any old spark plug; this is about choosing a component that’s compatible with your engine. As every proud Honda GX120 owner knows, each part needs to work harmoniously to ensure smooth operation.

    The specified gap between the center electrode and ground electrode of your spark plug plays a key role in the ignition process. This precise distance controls the electric discharge for igniting the air-fuel mixture within the engine cylinders. If you don’t get this right, it could lead to less efficient combustion, potentially reducing power output and fuel economy.

    Furthermore, using either NGK BPR6ES or DENSO W20EPR-U ensures perfect compatibility with your Honda GX120 engine. These plugs are specifically designed to withstand its heat range and compression ratio. They also offer excellent resistance against fouling while providing superior anti-corrosion characteristics.

    So remember, you’re making an investment in quality parts that’ll help maintain the integrity of your beloved Honda GX120, keeping it running efficiently for years to come.

    HONDA GX120 SPARK PLUG SOCKET SIZE

    When it comes to changing your engine’s life force, you’re essentially cracking open a knight’s helmet with a 13/16′ (21mm) tool – the perfect fit for this job. This is no random choice; Honda engineers have meticulously calculated that this dimension will securely grip and maneuver your spark plug without causing undue stress or damage.

    Understanding the right socket size is crucial in maintaining your Honda GX120 engine. This isn’t just about replacing an old spark plug, but nurturing an essential component of your machine. The 13/16′ (21mm) socket size ensures that you can properly install or remove the BPR6ES (NGK) 98079-56846 / W20EPR-U (DENSO) 98079-56855 spark plug or its equivalent.

    Imagine yourself as part of a community of dedicated Honda enthusiasts who appreciate precision and accuracy as much as speed and performance. You aren’t just executing a routine maintenance task but engaging in an intricate mechanical dance that contributes to keeping your beloved engine humming smoothly.

    Remember, using the right tool for this delicate operation allows you to respect and preserve the integrity of your machine. So, when it’s time to service your Honda GX120 engine again, don’t forget: wield that 13/16′ (21mm) socket like a knight wielding his trusty sword!

    Frequently Asked Questions

    What is the average lifespan of a spark plug in a Honda GX120?

    While it’s not set in stone, your Honda GX120 spark plug should typically last around 2 years. However, this can vary based on usage and maintenance practices. Regular checks are always a good idea.

    How does the performance of the Honda GX120 get affected if the spark plug gap is incorrect?

    Imagine trying to start a fire with wet kindling; that’s what it feels like when your GX120’s spark plug gap is off. The engine may misfire, run rough, decrease fuel efficiency, or even fail to start.

    What are the signs of a faulty spark plug in a Honda GX120?

    You might notice a decrease in your GX120’s performance, with symptoms like rough idling, difficulty starting, high fuel consumption or misfires. These are common signs of a faulty spark plug that needs replacement.

    Are there any specific brands of spark plugs recommended for use in a Honda GX120?

    Navigating the sea of spark plug brands can be challenging. For your Honda GX120, it’s best to stick with NGK or Bosch plugs. They’re top-notch, ensuring optimal performance and longevity for your engine’s needs.

    How frequently should the spark plug be replaced in a Honda GX120?

    For optimal engine performance in your Honda GX120, it’s recommended to replace the spark plug every 100 hours of use or annually, whichever comes first. Regular maintenance ensures your machine performs efficiently and reliably.

    Conclusion

    Just like a key is to a lock, the right spark plug gap and number are crucial for your Honda GX120. Ensure you’re using a 0.7-0.8 mm gap with an NGK BPR6ES or equivalent. Your socket size should be 13/16′.

    With this guide, you’ll have your engine purring like a well-fed cat in no time! Always remember, accuracy is paramount when dealing with technical specs, it’s your ticket to peak performance.

  • A Guide To Honda GX25 Spark Plug Gap, Number & Socket Size

    A Guide To Honda GX25 Spark Plug Gap, Number & Socket Size

    Just as a key is essential for unlocking a door, the right spark plug is crucial to ignite your Honda GX25 engine. That’s why understanding the specifications of your spark plug, including its gap, number, and socket size can be so beneficial.

    This guide will serve as your ‘key’ to that knowledge. You’ll discover not only what these terms mean but also how they impact the performance of your machine. Armed with this information, you’ll feel more connected with your equipment and confident in its maintenance.

    We’ll provide all the necessary details about Honda GX25 spark plug gap dimensions, part numbers, and appropriate socket sizes. Plus, we’ll even walk you through how to change out this vital component yourself if needed.

    Welcome to an insider’s look at ensuring optimal performance from your Honda GX25 engine – let’s turn that key together!

    A Guide To Honda Gx25 Spark Plug Gap, Number & Socket Size

    Key Takeaways

    • The spark plug gap for the Honda GX25 engine should be set between 0.024″ and 0.028″.
    • The recommended spark plug types for the Honda GX25 engine are CM5H (NGK) or CMR5H (NGK).
    • Regular check-ups are necessary to ensure peak performance of the spark plug.
    • When replacing the spark plug, it is recommended to use NGK models CM5H or CMR5H with a gap setting of 0.024″ to 0.028″.
    • Owner´s manual – https://cdn.powerequipment.honda.com

    HONDA GX25 SPARK PLUG GAP & NUMBER

    You’ll be relieved to know that the spark plug gap for your HONDA GX25 engine is a mere 0.024′-0.028′, and the recommended type is either CM5H (NGK) or CMR5H (NGK), making maintenance a breeze!

    This specific gap size ensures optimal performance, fuel efficiency, and longevity of your engine.

    When replacing your spark plugs, it’s crucial to use the correct specifications as stated in the Owner’s Manual. Using an incorrect spark plug can lead to poor engine performance and potentially serious damage over time.

    The right number for your model is either CM5H or its equivalent CMR5H by NGK – trusted names in spark plug technology.

    Understanding these numbers may seem daunting at first, but don’t worry, you’re not alone! We understand that everyone wants their Honda engines running smoothly without any fuss. That’s why we provide detailed guides and professional advice based on accurate data from official Honda manuals.

    Remember, regular check-ups on your spark plugs are essential for maintaining peak performance of your HONDA GX25 engine. So when it comes time to replace them, reach confidently for NGK models CM5H or CMR5H with a precise gap setting between 0.024’– 0.028′.

    You’re part of a community that values quality and precision – embrace it!

    HONDA GX25 SPARK PLUG SOCKET SIZE

    To ensure a perfect fit when changing your engine’s spark plug, you’ll find that a 5/8′ (16mm) wrench is just what you need. This size of socket is explicitly recommended by Honda for the GX25 engine model. It provides the exact fit needed to remove and replace the spark plug without damaging it or the surrounding parts.

    Here are three key reasons why using this specific socket size matters:

    1. Prevention of Damage: Utilizing an incorrect socket size can lead to improper fitting, which could damage your spark plug or engine.
    2. Efficient Removal and Installation: A 5/8′ (16mm) socket ensures easy removal and installation process, saving time during maintenance.
    3. Ensuring Engine Performance: Correctly installing spark plugs with a suitable tool helps maintain optimal engine performance.

    By adhering strictly to these guidelines, you’re not only prolonging the life of your Honda GX25 engine but also ensuring its peak performance. Remember, investing in quality tools like a 5/8′ (16mm) wrench for your spark plug changes is part of taking pride in owning and maintaining such an excellent piece of machinery as your Honda GX25 engine.

    How To Change Spark Plug?

    Changing your engine’s spark plug isn’t as daunting as it might seem, and we’re here to walk you through every step of the way. With just a few tools and a bit of time, you can efficiently perform this essential maintenance task on your Honda GX25.

    Here are the key steps:

    StepDescription
    Step 1Disconnect the spark plug wire. Be sure to do this gently to avoid damaging any parts.
    Step 2Use a spark plug socket to remove the old spark plug. Remember, lefty loosey!
    Step 3Gap your new spark plug properly. The gap should be set at 0.7-0.8mm for your Honda GX25 engine.
    Step 4Install the new spark plug with your hands first, then tighten it using a torque wrench for precision fitment.

    Remember that practice makes perfect so don’t feel discouraged if it doesn’t go perfectly smooth the first time around; soon enough you’ll be changing these like second nature! You’re part of our community now, and we believe in empowering each other with knowledge and guidance – one step at a time.

    Frequently Asked Questions

    What are the signs that indicate a need for Honda GX25 spark plug replacement?

    Did you know 75% of engine problems are spark plug related? If your Honda GX25 is struggling to start, misfiring or has reduced fuel economy, it’s likely time for a spark plug replacement.

    Can I use a different brand of spark plug for my Honda GX25?

    Absolutely, you can use a different brand of spark plug for your Honda GX25. However, ensure it’s compatible and meets the required specifications. Incorrect plugs can lead to poor performance or even engine damage.

    How often should I inspect the spark plug on my Honda GX25?

    You should inspect your Honda GX25’s spark plug every 25 hours of operation or once a year, whichever comes first. Regular checks help maintain engine efficiency and prevent potential ignition problems.

    Is it safe to clean and reuse a spark plug in a Honda GX25?

    Yes, it’s safe to clean and reuse a spark plug in your Honda GX25. However, ensure it’s properly gapped. If excessively worn or damaged, replace it. Remember, a well-maintained spark plug optimizes engine performance.

    What are the potential issues if the spark plug gap in my Honda GX25 is incorrect?

    Even if you think it’s minor, an incorrect spark plug gap can cause engine misfires, power loss, poor fuel economy and even damage in your Honda GX25. So ensure it’s set correctly for smooth performance.

    Conclusion

    In the world of spark plugs, knowing your Honda GX25’s specifics is like holding the keys to the kingdom. It’s not just important, it’s essential! You’ve mastered the art of identifying the correct gap and number, and even deciphered that elusive socket size.

    Now, you’re ready to tackle any spark plug change with gusto! You didn’t just learn something new today; you became a bona fide GX25 guru!

    Bravo on this monumental achievement!

  • Honda GCV170 Spark Plug Gap, Number & Socket Size Guide

    Honda GCV170 Spark Plug Gap, Number & Socket Size Guide

    Ever wondered about the specifics of tuning up your Honda GCV170 engine? You’re in the right place.

    In this guide, we’ve got all the technical details you need to know about Honda GCV170 spark plug gap, number, and socket size. We’ll be delving into accurate data representation to ensure you get every detail correctly for optimal performance. Trust us; it’s not as complicated as it may sound.

    With our help, you’ll feel like a part of this community of do-it-yourself enthusiasts who take pride in taking care of their machines.

    So let’s dive right in and learn more about what makes your Honda GCV170 run at its best!

    A Guide To Honda GCV170 Spark Plug Gap, Number & Socket Size Guide

    Key Takeaways

    • NGK BPR6ES (98079-56846) or equivalent spark plug is recommended for the Honda GCV170 engine.
    • The spark plug gap should be set between 0.028′ – 0.030′ for optimal engine performance.
    • The socket size required for the spark plug installation or removal is 13/16′ or 21mm.
    • Using the correct spark plug, gap, and socket size is crucial to prevent damage, ensure proper fit, and maintain engine efficiency and longevity.
    • Owner´s manual – https://cdn.powerequipment.honda.com

    HONDA GCV170 SPARK PLUG GAP & NUMBER

    For your Honda GCV170, you’ll need a BPR6ES (NGK) 98079-56846 spark plug or equivalent. The spark plug gap should be set at 0.028″– 0.030″. This is the manufacturer’s recommendation, and it’s crucial to adhere to this specification for optimal engine performance.

    The right spark plug type ensures that your engine runs smoothly, boosting its efficiency and longevity.

    Let’s delve into some details about what these numbers mean. BPR6ES is the model number by NGK – one of the most reputable spark plug manufacturers in the industry. The digits following, 98079-56846, are specific to this model and indicate its unique design features and specifications pertinent to pressure washer applications.

    The gap refers to the distance between the center electrode and ground electrode on your spark plug. You want this gap set correctly at 0.028′ – 0.030′ because it directly influences how well your Honda GCV170 will function – too wide or narrow could lead to misfires or reduced power output respectively.

    Remember, using an incorrect spark plug or improper gap can affect not only performance but also fuel consumption levels and emission rates from your engine. Hence, it emphasizes why adherence to these guidelines is so essential within our community of Honda owners who value quality performance and environmental responsibility alike.

    HONDA GCV170 SPARK PLUG SOCKET SIZE

    You’ll need a 13/16′ (or 21mm) socket to properly install or remove your engine’s spark plug. This specific size is recommended for the Honda GCV170 engine, as indicated in the official Honda manuals. Having the correct tool not only ensures a proper fit but also reduces the risk of damaging the spark plug during installation or removal.

    Here are some key points to remember:

    1. The right socket size is crucial: Using a socket that’s too big or small could damage your spark plug or even strip its threads, causing it to become stuck in your engine.
    2. Use quality tools: Low-quality tools may deform over time and give an incorrect fit. So invest in good-quality sockets and wrenches.
    3. Safety first: Always make sure the engine is cool before attempting to change the spark plug, as hot parts could cause burns.

    Remember, knowing how to maintain your Honda GCV170 engine can save you from unnecessary expenses down the road and will ensure that it runs optimally for many years. Using a 13/16′ (or 21mm) socket for changing spark plugs is one such maintenance task that requires attention to detail and careful handling. It’s part of what makes owning these engines truly rewarding.

    Frequently Asked Questions

    What is the average lifespan of a spark plug in a Honda GCV170?

    Imagine your Honda GCV170 humming smoothly, thanks to its spark plug. On average, this little engine powerhouse lasts about 100 hours of operation. Yet, it’s always wise to check regularly for optimal performance.

    How do I know when the spark plug of my Honda GCV170 needs to be replaced?

    You’ll know your Honda GCV170’s spark plug needs replacing when it misfires, experiences trouble starting, or runs unevenly. Regular visual inspections for wear and deposits also aid in timely replacement to maintain optimal performance.

    What are the signs of a faulty spark plug in a Honda GCV170?

    You’ll notice signs of a faulty spark plug in your Honda GCV170 if it’s hard to start, lacks power, consumes more fuel than usual or the engine misfires. Regular checks are key to optimal performance.

    Can using a spark plug with the wrong gap size damage my Honda GCV170 engine?

    Absolutely, using a spark plug with the incorrect gap can damage your Honda GCV170 engine. It can disrupt the ignition timing, cause misfires, and ultimately lead to costly engine repairs or even failure.

    Are there any specific brands of spark plugs that are recommended or compatible with the Honda GCV170 engine?

    Yes, for your Honda GCV170 engine, I recommend NGK spark plugs. They’re specifically designed for Honda engines and ensure optimal performance. Always remember to check the correct model number before purchase.

    Conclusion

    You’ve learned the specifics of your Honda GCV170’s spark plug gap, number, and socket size. This knowledge isn’t just a simple tune-up fact, it’s the key to maintaining your engine’s health.

    So don’t just store this data away; apply it and let it empower you in safeguarding your machine’s performance. Remember, knowing the right specs isn’t just about details, it’s about longevity and efficiency too.

  • Guide To Honda Eu2200i Spark Plug Gap, Number & Socket Size

    Guide To Honda Eu2200i Spark Plug Gap, Number & Socket Size

    You might think that the spark plug gap in your Honda EU2200i isn’t all that important, right? Well, you’d be mistaken.

    The truth is, this small detail can have a big impact on the performance of your generator. Whether you’re a seasoned mechanic or a DIY enthusiast, understanding how to properly measure and adjust the spark plug gap is crucial.

    And don’t worry about finding the correct socket size for your spark plug; we’ve got you covered there too.

    In this guide, we’ll provide comprehensive details about the Honda EU2200i spark plug gap, number and socket size. We’ll also walk you through the process of adjusting the spark plug gap if it doesn’t meet specifications.

    So grab your tools and let’s dive into those nitty-gritty details together – because in our community of car enthusiasts and mechanics, every little detail matters.

    A Guide To Honda Eu2200i Spark Plug Gap, Number & Socket Size

    Key Takeaways

    HONDA EU2200I SPARK PLUG GAP & NUMBER

    You’ll feel a real sense of accomplishment when you correctly set your Honda EU2200i spark plug gap to the recommended 0.024″– 0.028″ (0.6-0.7mm), using the specific number CR5HSB (NGK) 98056-55777 or its equivalent. This ensures your generator runs smoothly and efficiently.

    Setting the spark plug gap is more than just routine maintenance; it’s like fine-tuning a musical instrument. Every small adjustment contributes to the overall performance.

    The spark plug chosen for your Honda EU2200i isn’t arbitrary. It’s based on extensive testing by engineers who understand the nuances of internal combustion engines. This specific model requires a NGK CR5HSB with part number 98056-55777. An equivalent would also work if it closely matches these specifications.

    Precision matters when setting the gap. The gap refers to the distance between the center and ground electrode within the spark plug. It influences how well your engine fires during operation. Too large or too small of a gap can lead to poor engine performance. Stick within the sweet spot of 0.024′- 0.028′ (or 0.6-0.7mm).

    By accurately performing this simple yet critical procedure, you’re not just maintaining your generator – you’re becoming part of a community where attention to detail and technical knowledge are valued assets in preserving machine longevity and ensuring optimal performance.

    HONDA EU2200I SPARK PLUG SOCKET SIZE

    When it’s time to change the spark plug on your generator, you’re gonna need a 13/16′ (21mm) socket for the job. This isn’t just any ordinary tool; it’s specifically designed for this task and it’ll ensure that your generator continues to function efficiently.

    The 13/16′ (21mm) socket size isn’t arbitrary, but rather, a perfect fit for the type of spark plug recommended by Honda.

    Using a different size could lead to complications during installation or removal. A misfit could damage the spark plug or even the engine.

    This specific socket size offers an ideal grip, ensuring that you can remove and replace the spark plug without causing unnecessary stress on other parts of the generator.

    You’re part of a larger community of Honda EU2200i owners who understand that taking care of their equipment is key. Using a 13/16′ (21mm) socket when changing your spark plug shows respect for these detailed specifications.

    Remember, using the correct tools not only extends the lifespan of your generator but also enhances its performance over time. It may seem like just another mundane detail, but details like these separate those who merely own generators from true connoisseurs like yourself.

    So next time you’re changing your spark plug, remember: precision matters as much as power!

    How To Change Spark Plug Gap?

    Navigating the intricacies of adjusting your generator’s spark plug gap might seem like threading a needle in a haystack, but don’t worry, it’s a task you can master with patience and precision.

    Essentially, altering the spark plug gap changes the ignition point of your Honda EU2200i generator. This fine-tuning allows for better combustion and improved performance.

    Firstly, you’ll need to know the correct gap size for your specific model. For instance, the recommended spark plug gap for Honda EU2200i is 0.7-0.8mm or approximately .028-.031 inches. You’ll also need a gauge tool to measure this gap accurately.

    To adjust the gap, gently bend the ground electrode (the curved metal piece that arcs over the center electrode) either closer or further from the center electrode until you achieve the desired measurement on your gauge tool. It’s crucial not to touch or damage the center electrode during this process as it’s delicate.

    Remember, never force adjustments too quickly; make small movements for precise tuning. If you feel resistance when bending, stop immediately to avoid breaking off any parts.

    Pat yourself on the back! You’ve now adjusted your generator’s spark plug gap like an expert mechanic would do – all by yourself! Your dedication to understanding and maintaining your machine speaks volumes about your commitment to excellence.

    Frequently Asked Questions

    What are the signs of a worn-out spark plug in a Honda EU2200i?

    You’ll notice misfires, hard starts, or a decrease in fuel efficiency as signs of a worn-out spark plug in your Honda EU2200i. Also, the generator may run erratically or have decreased power output.

    How often should I replace the spark plug in my Honda EU2200i?

    For optimal performance, you should replace the spark plug in your Honda EU2200i every 100 hours of use. However, if it’s frequently used under heavy load, consider changing it more often to maintain efficiency.

    How does the spark plug gap affect the performance of Honda EU2200i?

    The spark plug gap in your Honda EU2200i can significantly impact its performance. If the gap’s too wide, it may cause misfiring; too narrow, and you’ll get a weak spark, reducing your generator’s efficiency.

    What are the safety precautions to take when changing the spark plug of Honda EU2200i?

    Before changing the spark plug on your Honda EU2200i, ensure it’s cool to avoid burns. Disconnect the spark plug lead for safety. Wear eye protection and use insulated tools to prevent electrical shocks. Always follow manufacturer’s guidelines.

    Can I use a different brand of spark plug in my Honda EU2200i?

    Sure, you can dance with another partner, but your Honda EU2200i was designed to tango best with NGK spark plugs. Straying from the original could lead to performance issues or even damage over time. Stick with what works.

    Conclusion

    So, you thought swapping out your Honda EU2200i spark plug was a Herculean task? Well, ironically, it’s as easy as pie once you’ve mastered the gap and number game. With the right socket size in hand, even changing the spark plug gap feels like child’s play.

    Now that you’re armed with this technical know-how, there’s nothing stopping you from keeping your generator running smoothly!

  • All Generac Portable Generators Spark Plug Gap & Socket Size

    Generac portable generators are great for providing power during outages, but if you don’t maintain them properly, they won’t work when you need them. One of the most important maintenance tasks is to make sure that the Spark Plug gap & Socket Size are correctly gapped and seated in their sockets.

    In this guide, we will discuss all Generac portable generators spark plug gap and socket size. We will also provide some helpful tips on maintaining your generator, so it delivers reliable power when you need it most.

    Overview of Generac Portable Generators Spark Plug Gap & Socket Size

    The spark plug gap is a space between electrodes that helps regulate the amount of electricity flowing into the spark plug. The gap must be set correctly so that it doesn’t impede proper ignition performance or cause too much compression in the cylinder, leading to damage or an inefficient combustion process.

    Generac Portable Generators Spark Plug Gap & Socket Size

    It is generally recommended to check and adjust your spark plug gap at least once yearly as part of routine maintenance.

    Socket sizes are essential for ensuring that the spark plugs are properly secured in position while running. Most Generac portable generators use 21 mm metric-size sleeves, but again, it’s important to consult your owner’s manual before replacing any parts with incorrect specifications, as this can lead to damage and poor performance over time.

    List Of All Generac Generators Spark Plug Gap & Socket Size

    Generac GP17500E Generator

    • Type – RC14YC (Champion) or equivalent
    • Official part number – 0E7585A
    • Gap – 0.040″
    • Socket size – 5/8″ (16mm)

    Generac GP15000E Generator

    • Type – RC14YC (Champion) or equivalent
    • Official part number – 0E7585A
    • Gap – 0.040″
    • Socket size – 5/8″ (16mm)

    Generac XT8500EFI Generator

    • Type – F7RTC (Brand not specified) or equivalent
    • Official part number – 0K20670117
    • Gap – 0.028″ – 0.031″
    • Socket size – 13/16″ (21mm)

    Generac XT8000EFI Generator

    • Type – F7RTC (Brand not specified) or equivalent
    • Official part number – 0K20670117
    • Gap – 0.028″ – 0.031″
    • Socket size – 13/16″ (21mm)

    Generac XT8000E Generator

    • Type – N9YC (Champion) or equivalent
    • Official part number – 0J00620106
    • Gap – 0.028″ – 0.031″
    • Socket size – 13/16″ (21mm)

    Generac XG8000E Generator

    • Type – RC14YC (Champion) or equivalent
    • Official part number – 0E7585
    • Gap – 0.030″
    • Socket size – 5/8″ (16mm)

    Generac XC8000E (49ST/CSA & CARB) Generator

    • Type – RC12YC (Champion) or equivalent
    • Official part number – 0G0767B
    • Gap – 0.020″
    • Socket size – 5/8″ (16mm)

    Generac GP8000E (49ST/CSA & 50ST) Generator

    • Type – F7TC (Bosch)
    • Official part number – 0J00620106
    • Gap – 0.028″−0.031″
    • Socket size – 13/16″ (21mm)

    Generac GP7500E Generator

    • Type – N9YC (Champion) or equivalent
    • Official part number – 0J00620106
    • Gap – 0.028″−0.031″
    • Socket size – 13/16″ (21mm)

    Generac XC6500E Generator

    • Type – RC12YC (Champion) or equivalent
    • Official part number – 0G0767B
    • Gap – 0.020″
    • Socket size – 5/8″ (16mm)

    Generac XC6500 (49ST/CSA & CARB) Generator

    • Type – RC12YC (Champion) or equivalent
    • Official part number – 0G0767B
    • Gap – 0.020″
    • Socket size – 5/8″ (16mm)

    Generac GP6500E (49ST/CSA) Generator

    • Type – F7TC (Bosch) or equivalent
    • Official part number – 0J00620106
    • Gap – 0.028″−0.031″
    • Socket size – 13/16″ (21mm)

    Generac GP6500 (49ST & 50ST) Generator

    • Type – LD F7TC (NHSP) / N9YC (Champion) or equivalent
    • Official part number – 0G84420101
    • Gap – 0.028″−0.031″
    • Socket size – 13/16″ (21mm)

    Generac RS5500 Generator

    • Type – Champion N9YC
    • Official part number – 0J00620106
    • Gap – 0.028″−0.031″
    • Socket size – 13/16″ (21mm)

    Generac GP5500 Generator

    • Type – LD F7TC (NHSP) / N9YC (Champion) or equivalent
    • Official part number – 0G84420101
    • Gap – 0.028″−0.031″
    • Socket size – 13/16″ (21mm)

    Generac GP3600 (49ST/CSA & 50ST) Generator

    • Type – F7TC (Brand not specified)
    • Official part number – 0J00620106
    • Gap – 0.030″
    • Socket size – 13/16″ (21mm)

    Generac GP3500iO Inverter Generator

    • Type – F7TC / F7RTC / BPR6ES (Brands not specified)
    • Official part number – 0J00620106
    • Gap – 0.024″ – 0.028″
    • Socket size – 13/16″ (21mm)

    Generac IQ3500 Inverter Generator

    • Type – F7TC / F7RTC / BPR6ES (Brands not specified)
    • Official part number – 0J00620106
    • Gap – 0.024″ – 0.028″
    • Socket size – 13/16″ (21mm)

    Generac GP3300 Generator

    • Type – F6TC (Torch) / BP6IS (NGK) / RN11YC (Champion) or equivalent
    • Official part number – 0H33750169
    • Gap – 0.030″ (0.76mm)
    • Socket size – 13/16″ (21mm)

    Generac GP3300i Inverter Generator

    • Type – F7TC (Brand not specified) or equivalent
    • Official part number – 0K95530157
    • Gap – 0.024″-0.028″ (0.6-0.7mm)
    • Socket size – 13/16″ (21mm)

    Generac GP3250 Generator

    • Type – F6TC (Torch) / BP6IS (NGK) / RN11YC (Champion) or equivalent
    • Official part number – 0H33750169
    • Gap – 0.030″ (0.76mm)
    • Socket size – 13/16″ (21mm)

    Generac GP3000i Inverter Generator

    • Type – E6TC / E6RTC (Brands not specified)
    • Official part number – 0K95530157
    • Gap – 0.024″-0.028″ (0.6-0.7mm)
    • Socket size – 13/16″ (21mm)

    Generac GP2500i Inverter Generator

    • Type – E6TC / E6RTC / BPR6HS (Brands not specified)
    • Official part number – 0K95530157
    • Gap – 0.024″-0.028″ (0.6-0.7mm)
    • Socket size – 13/16″ (21mm)

    Generac GP2200i Inverter Generator

    • Type – E6TC / E6RTC / BPR6HS (Brands not specified)
    • Official part number – 0K95530157
    • Gap – 0.024″-0.028″ (0.6-0.7mm)
    • Socket size – 13/16″ (21mm)

    Generac IX2000 Inverter Generator

    • Type – BPR6ES (NGK) or equivalent
    • Official part number – 0H8096
    • Gap – 0.030″ (0.76mm)
    • Socket size – 13/16″ (21mm)

    Generac IQ2000 Inverter Generator

    • Generac IQ2000 Inverter Generator
    • Type – LD E6RTC (NHSP) or equivalent
    • Official part number – 0K91470141
    • Gap – 0.023″ – 0.027″ (0.6-0.7mm)
    • Socket size – 13/16″ (21mm)

    By choosing high-quality spark plugs from trusted brands and scheduling regular maintenance checks, you can help to extend the lifespan of your generator and ensure that it continues to provide reliable power during outages and emergencies.

    Choosing the right Spark Plug Gap & Socket Size  For Generac Generator

    If you want to ensure that your Generac portable generator stays in good working condition, it’s essential to select the correct spark plug gap and socket size.

    Generac Portable Generators Spark Plug Gap & Socket Size: Choosing the right Spark Plug Gap & Socket Size  For Generac Generator

    Here are the steps to take to get the right size.

    1. Consult your owner’s manual: Every Generac portable generator model has its specific spark plug gap and socket size requirements. The owner’s manual contains all the information you need, so make sure to read it thoroughly before purchasing any replacement parts.
    2. Measure the spark plug gap: Using a feeler gauge, measure the current spark plug gap and compare it to the recommended values in your owner’s manual. If the gap is too small or large, make sure to adjust it before replacing the spark plug.
    3. Select the correct socket size: The spark plug must fit into the engine block securely, so make sure to select a socket size that is compatible with your Generac portable generator. If you’re unsure, consult your owner’s manual or contact a Generac representative for further assistance.

    Spark Plug Gap

    First, you’ll need to find out what type of spark plug your generator uses. Generac typically uses LD E6RTC (NHSP) or equivalent spark plugs.

    The spark plug gap depends on your Generac generator model Commonly Generac uses the gap 0.023” – 0.027”.

    Once you know this, you can look up the official part number for that type of plug – in this case, it is 0K91470141.

    Socket Size Gap

    Next, you’ll need to check the gap and socket size for the spark plug. The gap for a common spark plug gap is 13/16″ (21 mm) and depending on your model.

    Different Types of Spark Plugs For Generac Portable Generator

    Different Types of Spark Plugs For Generac Portable Generator

    Generac portable generators are a reliable source of power for your home and business. But in order to keep it running smoothly, you need to replace the spark plugs as needed.

    Here are some of the different types of Generac portable generator spark plugs you should know about. Generac portable generators use several different types of sparks on the model and engine type.

    1. NHSP

    If you own a Generac portable generator, it’s important to use the right type of spark plug to ensure optimal performance and longevity. NHSP spark plugs are an excellent choice for those seeking superior quality and reliability.

    Generac Model And NHSP Spark Plug Type

    • Generac GP6500 (49ST & 50ST) Generator
    • NHSP – LD F7TC Gap – 0.028″−0.031″ Socket size – 13/16″ (21mm)

    2. NGK

    Generac uses the spark plug in their generators one of the most common types is the NGK spark plug, which is a high-quality, durable component designed specifically for small engines.

    This type of spark plug features a copper core and a nickel alloy shell, which provides superior thermal conductivity and resistance to wear and erosion over time.

    Generac Models And NGK Spark Plug Types

    • Generac IX2000 Inverter Generator
    • NGK – BPR6ES Gap – 0.030″ (0.76mm) Socket size – 13/16″ (21mm)
    • Generac GP3250 Generator
    • NGK – BP6IS   Gap – 0.030″ (0.76mm) Socket size – 13/16″ (21mm)

    3. Champion Spark Plugs

    Another popular type of spark plug brand for Generac portable generators is the Champion Spark Plugs, which is designed to deliver reliable ignition performance in a variety of conditions.

    This type of spark plug features a unique copper core and patented SAC-9 semi-conductor resistor that helps to reduce radio frequency interference and prevent misfires.

    Generac Models And Champion Spark Plugs & Sochet Size Types

    • Generac GP3250 Generator
    • Champion – RN11YC Gap – 0.030″ (0.76mm) Socket size – 13/16″ (21mm)
    • Generac GP7500E Generator
    • Champion – N9YC Gap – 0.028″−0.031″ Socket size – 13/16″ (21mm)
    • Generac XC6500 (49ST/CSA & CARB) Generator
    • Champion – RC12YC Gap – 0.020″ Socket size – 5/8″ (16mm)
    • Generac XC6500 (49ST/CSA & CARB) Generator
    • Champion– RC12YC (Champion) Gap – 0.020″ Socket size – 5/8″ (16mm)
    • Generac XG8000E Generator
    • Champion – RC14YC Gap – 0.030″ Socket size – 5/8″ (16mm)

    4. Bosch

    Bosch spark plugs are designed to withstand extreme temperatures and conditions, making them ideal for use in a variety of environments. When replacing spark plugs in your Generac portable generator, be sure to consult your owner’s manual to ensure that you choose the correct socket size and gap measurement for your specific model.

    Bosch Spark Plug Type

    • Generac GP6500E (49ST/CSA) Generator
    • Bosch – F7TC Gap – 0.028″−0.031″ Socket size – 13/16″ (21mm)

    Tips on Installing A New Spark Plug On Your Generac Portable Generators

    Here are some tips to help you properly install and replace your Generac portable generator spark plugs.

    1. Check your owner’s manual for the correct spark plug socket size and gap measurement
    2. Determine the type of spark plug you need (e.g., NHSP, NGK, Champion, etc.)
    3. Gently remove the old spark plug with a ratchet or wrench
    4. Clean any dirt or debris from around the spark plug area
    5. Insert the new spark plug in its place and secure it
    6. Connect any wires that may have been disconnected
    7. Start your generator to ensure proper installation
    8. Adjust according to manufacturer instructions if necessary
    9. Schedule regular maintenance checks on your Generac portable generator

    To help keep it running smoothly. These simple steps can help ensure that your Generac portable generator continues to provide reliable power.

    Common Problems Associated With Improperly Gapped Spark Plugs

    Generac portable generators are a great source of power for home standby units and recreational activities. However, if the spark plugs become worn out or improperly gapped, it can cause problems with the generator’s performance.

    • Reduced engine power
    • Poor fuel economy
    • Difficulty starting the engine
    • Excessive vibration
    • Unusual noises coming from the engine

    If you’re experiencing any of these issues, it may be time to replace your spark plug.

    How to Properly Maintain Your Generac Portable Generator?

    Maintaining your Generac portable generator’s spark plugs is an important part of keeping your generator running smoothly. Here are some tips on how to clean and maintain your spark plugs.

    Maintaining your Generac portable generator and the spark plug is crucial to ensure optimal performance and longevity. Here are some essential tips to help you maintain your generator and spark plug effectively:

    1. Regularly Change Spark Plugs When Required: Your Generac generator’s spark plug needs to be changed every 100 hours of operation. When changing spark plugs, be sure to consult your owner’s manual for the correct gap measurement and socket size.

    2. Keep Air Filters Clean: Dirty air filters can cause your generator’s engine to run poorly or not start at all. Be sure to clean or replace air filters regularly in accordance with your owner’s manual.

    3. Check Oil Regularly: Checking oil levels is key to the longevity and performance of your generator. Oil levels should be checked regularly and changed when necessary.

    4. Check for Corrosion: Look over your Generac generator for any signs of corrosion. Inspect wiring and other components to ensure that everything is in good working order.

    By following this maintenance checklist and regularly inspecting your generator, you can keep it running optimally and help extend its lifespan. We recommend scheduling a professional inspection every couple of years to ensure that all components are in good working order.

    Recommended Tools for Working on a Generac portable generator’s spark plugs

    When it comes to working on your Generac portable generator’s spark plugs, having the right tools is essential to ensure accurate and safe installation.

    The recommended tools for working on a Generac portable generator’s spark plugs include a spark plug socket, a torque wrench, and a spark plug gapping tool.

    • Spark Plug Socket: A spark plug socket is specifically designed to fit around the spark plug and allow for easy removal and installation. It’s important to use the correct size socket to avoid damaging the spark plug or the surrounding components.
    • Torque Wrench: A torque wrench is also important to ensure that the spark plug is tightened to the manufacturer’s specifications. Over-tightening or under-tightening can cause damage to the spark plug threads, which can lead to costly repairs.
    • Feeler Gauge: A spark plug gapping tool or a (Feeler Gauge) is used to measure the gap between the center and ground electrodes of the spark plug. This gap is critical to ensure proper ignition and engine performance.
    • Pliers Or A Wrench: It’s also recommended to have a set of pliers or a wrench handy to remove any wires or connectors that may be in the way. It’s important to disconnect the spark plug wires before removing the old spark plug to avoid accidental shock.

    By having these recommended tools on hand and following proper installation procedures, you can help ensure that your Generac portable generator continues to provide reliable power during outages and emergencies. 

    Safety Precautions When Working On Generator’s spark plugs

    When working with AGenerator’s spark plugs, it is important to take safety precautions. Spark plugs can be dangerous and cause serious injury if not handled properly. Here are some tips for staying safe when working with generator spark plugs:

    1. Make sure the generator is off and unplugged before attempting to change or inspect any spark plugs.
    2. Wear protective gear such as gloves, goggles, and a face mask when handling spark plugs.
    3. Use the correct size wrench to remove the old spark plug and install the new one.
    4. Check your owner’s manual for the proper gap size of your specific model of the generator before installing a new spark plug.
    5. Clean any dirt or debris from around the spark plug before installation to ensure proper operation of the generator.
    6. Inspect all wiring connections for signs of wear or damage before reinstalling them onto the generator after changing out a spark plug.
    7. After installation, test runs your generator to make sure it is running correctly and safely before using it again.

    By following these safety precautions, you can help ensure that you stay safe while working with your Generac generator’s spark plugs.

    Conclusion

    Maintaining your GENERAC portable generator is essential if you want dependable power in an emergency situation.

    When it comes time to replace or service your generator’s spark plugs, make sure that you select the right type, gap them correctly according to the specs provided by GENERAC, and use only approved sockets for installation/removal purposes.

    Remember the tips and safety precautions outlined in this article to ensure that the job is done safely and correctly.

    Regular maintenance of your generator’s spark plugs and other components, coupled with a professional inspection every couple of years, will help keep your portable generator running smoothly and efficiently.

  • A Guide To Honda Gx35 Spark Plug Gap, Number & Socket Size

    A Guide To Honda Gx35 Spark Plug Gap, Number & Socket Size

    ‘A stitch in time saves nine,’ so goes the old saying, and it couldn’t be more applicable to maintaining your Honda GX35’s spark plug.

    You’re no stranger to the importance of a well-gapped and properly fitted spark plug for optimal engine performance.

    This guide provides you with detailed information on the Honda GX35 spark plug gap, number, and socket size.

    It’ll assist you through any maintenance checks or replacements needed, ensuring your machine runs just as smoothly as ever.

    If you’re unsure about how to change your own spark plug or just need a refresher, don’t worry! We’ll cover that too in easy-to-follow steps.

    As part of this unique community of Honda GX35 owners who take pride in doing their own maintenance work, it’s crucial knowledge like this that keeps us all moving forward together.

    So let’s roll up our sleeves and dive right into it!

    Guide To Honda Gx35 Spark Plug Gap, Number & Socket Size

    Key Takeaways

    • The spark plug gap for the Honda GX35 should be between 0.024’– 0.028′.
    • The recommended spark plug for the Honda GX35 is the CM5H (NGK) / CMR5H (NGK) or equivalent.
    • The spark plug socket size for the Honda GX35 is 16mm or 5/8′.
    • Proper maintenance and regular spark plug changes are crucial for optimal engine performance and longevity.

    HONDA GX35 SPARK PLUG GAP & NUMBER

    You’re probably wondering what the spark plug gap and number for your Honda GX35 engine is, right? Well, you’re in luck because it’s recommended to use a CM5H (NGK) / CMR5H (NGK) or an equivalent type of spark plug with a gap of 0.024’– 0.028′.

    This isn’t just some random number; it’s critical information from the official Honda manuals that ensures optimal performance of your engine.

    Let’s delve deeper into why this specific spark plug type and gap range matters. Spark plugs are essential components that ignite the fuel-air mixture in your engine to generate power.

    The appropriate spark plug number signifies its heat range and design features, which match specifically to your Honda GX35 engine. Using the correct type maintains efficient combustion, prevents overheating, and extends engine life.

    Now onto the gap — this small but crucial distance between the center and ground electrode affects how efficiently your spark plug fires. A precise 0.024’– 0.028′ gap allows for accurate ignition timing, smoother idling, reduced fuel consumption, and improved emissions control.

    And remember: belonging to a community of informed Honda owners means understanding these specifics because they contribute significantly towards maintaining our engines at their peak performance levels!

    Also Read: Guide To All Honda Lawn Mowers Spark Plug Gap & Socket Size

    HONDA GX35 SPARK PLUG SOCKET SIZE

    Diving straight into the nitty-gritty, it’s essential to know that a 16mm or a 5/8″ wrench is what you’ll need when dealing with this engine’s plug; an understated detail often overlooked yet crucial in maintaining your motor’s peak performance.

    The correct socket size ensures that you can securely fasten or remove the spark plug without damaging it or the threads in the cylinder head.

    Let’s take a look at some vital aspects of this process:

    Accurate tools play a significant role in preserving the condition and improving the longevity of your Honda GX35 engine. A mismatched socket could lead to cross-threading, stripping, or even cracking – all potentially expensive repairs.

    Remember, every part of your engine has its requirements and specifications. Knowing these details helps keep everything running smoothly. So next time you’re tuning up your Honda GX35, remember to grab your trusty 16mm or 5/8″ wrench for those spark plugs – an integral piece in ensuring optimal engine performance.

    How To Change Spark Plug?

    Feeling the thrill of your hands getting dirty as you tackle the task of changing that crucial component in your engine? Let’s dive right into it, ensuring every step is done correctly and safely to keep your machine purring like a kitten.

    Here’s a simple four-step guide on how to change the spark plug in your Honda GX35:

    1. Disconnect the Spark Plug Wire: Always start by disconnecting the spark plug wire. This will prevent any accidental ignition during the process.
    2. Remove the Old Spark Plug: Using a proper size socket wrench (for Honda GX35, use a 5/8′ or 16mm deep socket), loosen and remove the old spark plug.
    3. Check & Adjust New Spark Plug Gap: Check the gap on your new spark plug (0.024-0.028 inch for Honda GX35). Use a gapping tool if necessary to adjust it accurately.
    4. Install New Spark Plug: Thread in your new spark plug by hand first, then tighten with a wrench but don’t overdo it.

    Remember, fellow road warriors: while this may seem daunting at first, with patience and practice you’ll be swapping out those plugs with ease – keeping everything running smoothly under that hood!

    Owner´s manual – https://cdn.powerequipment.honda.com

    Frequently Asked Questions

    What are some common issues that can arise with the Honda GX35 spark plug?

    You may encounter issues like misfires, poor fuel economy, or difficulty starting your GX35. These problems often stem from a worn-out spark plug or an incorrect gap size. Regular maintenance can prevent such complications.

    How often should the spark plug in a Honda GX35 be replaced?

    You should replace the spark plug in your Honda GX35 every 100 hours of use or once a year, whichever comes first. Regular replacement ensures optimal engine performance and longevity. Don’t overlook this essential maintenance task.

    Can a faulty spark plug affect the performance of the Honda GX35?

    Absolutely, a faulty spark plug can throw a wrench in the works of your Honda GX35’s performance. It can cause misfires, reduce fuel efficiency, and even impair your engine’s power output. So keep it in top condition!

    What are some signs that the spark plug in a Honda GX35 needs to be changed?

    If your Honda GX35’s performance drops, it might be time to check the spark plug. Signs include difficulty starting, poor fuel economy, or engine misfiring. Always remember, a well-maintained spark plug ensures optimal performance.

    Can I use a spark plug from another brand in my Honda GX35?

    Just like a key must fit its lock, your Honda GX35 needs the right spark plug. While other brands might work, it’s best to stick with Honda-approved plugs for optimal performance and engine health.

    Conclusion

    You’ve gained valuable knowledge on the Honda GX35 spark plug gap, number, and socket size. Now you’ll be able to maintain your engine better with this info.

    Interestingly, did you know that a misaligned spark plug gap can reduce your engine’s efficiency by up to 30%. Remember, taking care of these small details can make a big difference in your vehicle’s performance.

  • Guide To All Honda Lawn Mowers Spark Plug Gap & Socket Size

    Are you looking for the Honda lawn mowers spark plug gap and socket size guide? If so, then you’ve come to the right place.

    In this article, we will cover all of the information you need to know about spark plugs in Honda lawn mowers, including what type of spark plug is best for your machine, how to set the proper gap, and what socket size is required.

    We’ll also provide an overview of basic maintenance tips that can help keep your engine running smoothly. So if you’re ready to get started, let’s dive into our Honda lawn mowers spark plug gap & socket size guide.

    Overview of Honda Lawn mowers Models and Their Spark Plug Requirements

    Honda lawn mowers are known for their durability, quality, and performance. They come in a variety of models, each with its own specific spark plug requirements.

    Honda Lawn Mowers Spark Plug Gap & Socket Size

    Knowing the correct spark plug for your lawnmower model is essential to keeping it running smoothly and safely. Here we will give an overview of the different Honda lawnmower models and their unique spark plug requirements.

    Owner´s manual – https://cdn.powerequipment.honda.com

    HRX Series

    Honda Lawn Mowers Spark Plug Gap & Socket Size

    The HRX series includes the HRX217HYA and HRX217VYA models.

    • These mowers require a BPR5ES (NGK) or equivalent spark plug.
    • Gap – 0.028″– 0.031″ (0.7 mm – 0.8 mm)
    • Socket size – 13/16″ (21mm)

    HRX217HZA

    • Type – BPR5ES (NGK) or equivalent
    • Gap – 0.028″– 0.031″ (0.7 mm – 0.8 mm)
    • Socket size – 13/16″ (21mm)
    • Engine: GCV200

    HRX217HYA

    • Type – BPR5ES (NGK) or equivalent
    • Gap – 0.028″– 0.031″ (0.7 mm – 0.8 mm)
    • Socket size – 13/16″ (21mm)
    • Engine: GCV200

    HRX217VYA

    • Type – BPR5ES (NGK) or equivalent
    • Gap – 0.028″– 0.031″ (0.7 mm – 0.8 mm)
    • Socket size – 13/16″ (21mm)
    • Engine: GCV200

    HRX217VLA

    • Type – BPR5ES (NGK) or equivalent
    • Gap – 0.028″– 0.031″ (0.7 mm – 0.8 mm)
    • Socket size – 13/16″ (21mm)
    • Engine: GCV200

    HRX217VKA

    • Type – BP6ES (NGK) / W20EP-U (DENSO) or equivalent
    • Gap – 0.028″– 0.031″ (0.7 mm – 0.8 mm)
    • Socket size – 13/16″ (21mm)
    • Engine: GCV200

    HRN Series

    Honda Lawn Mowers Spark Plug Gap & Socket Size

    The HRR series includes the HRN216PKA, HRN216VYA, and HRN216VKA models of a lawnmower.

    • It takes an NGK BPR5ES to spark the plug, depending on the version of the engine used in them (standard or OHV).
    • Gap – 0.028″– 0.031″ (0.7 mm – 0.8 mm)
    • Socket size – 13/16″ (21mm)

    HRN216VLA

    • Type – BPR5ES (NGK) or equivalent
    • Gap – 0.028″– 0.031″ (0.7 mm – 0.8 mm)
    • Socket size – 13/16″ (21mm)
    • Engine: GCV170

    HRN216VYA

    • Type – BPR5ES (NGK) or equivalent
    • Gap – 0.028″– 0.031″ (0.7 mm – 0.8 mm)
    • Socket size – 13/16″ (21mm)
    • Engine: GCV170

    HRN216VKA

    • Type – BPR5ES (NGK) or equivalent
    • Gap – 0.028″– 0.031″ (0.7 mm – 0.8 mm)
    • Socket size – 13/16″ (21mm)
    • Engine: GCV170

    HRN216PKA

    • Type – BPR5ES (NGK) or equivalent
    • Gap – 0.028″– 0.031″ (0.7 mm – 0.8 mm)
    • Socket size – 13/16″ (21mm)
    • Engine: GCV170

    HRS Series

    Honda Lawn Mowers Spark Plug Gap & Socket Size

    HRS216VKA

    • Type – BPR5ES (NGK) or equivalent
    • Gap – 0.028″– 0.031″ (0.7 mm – 0.8 mm)
    • Socket size – 13/16″ (21mm)
    • Engine: GCV160

    HRS216PKA

    • Type – BPR5ES (NGK) or equivalent
    • Gap – 0.028″– 0.031″ (0.7 mm – 0.8 mm)
    • Socket size – 13/16″ (21mm)
    • Engine: GCV160

    HRC Series

    Honda Lawn Mowers Spark Plug Gap & Socket Size: HRC Series

    HRC216HXA

    • Type – BPR5ES (NGK) or equivalent
    • Gap – 0.028″– 0.031″ (0.7 mm – 0.8 mm)
    • Socket size – 13/16″ (21mm)
    • Engine: GXV160

    HRC216HDA

    • Type – BPR5ES (NGK) or equivalent
    • Gap – 0.028″– 0.031″ (0.7 mm – 0.8 mm)
    • Socket size – 13/16″ (21mm)
    • Engine: GXV160

    HRC216PDA

    • Type – BPR5ES (NGK) or equivalent
    • Gap – 0.028″– 0.031″ (0.7 mm – 0.8 mm)
    • Socket size – 13/16″ (21mm)
    • Engine: GCV160

    Having knowledge about what kind of Honda lawnmower you have and what type of spark plug it needs specifically for your model will ensure better performance of your Honda lawnmower by providing proper maintenance over time.

    How to measure a spark plug’s gap?

    Measuring the spark plug gap is an essential part of maintaining your Honda lawnmower. Here are the steps you can take to measure the spark plug gap.

    1. Clean the spark plug well: Use a wire brush or a soft cloth to clean any dirt, debris, or oil that may have accumulated on the spark plug’s tip. This ensures that you get accurate measurements during the gap-testing step.

    2. Get a gap tool: You need to have a gap measuring tool to measure the spark plug gap accurately. You can purchase a gap tool in any auto parts or hardware store.

    3. Choose the correct tool wire: Different spark plugs may require different-sized gap tools. To ensure you have the right measurement, choose the wire that corresponds with the gap size of your spark plug.

    4. Place the gap tool between the electrodes: Place the thin end of the gap tool’s wire between the ground electrode and the center electrode on the spark plug’s tip.

    5. Adjust the gap: If the wire feels too tight or too loose, adjust it until you have the right gap size. If the gap tool feels too tight, use the tool’s thin end to push the ground electrode up gently. If the gap tool feels too loose, use the tool’s flat end to push the electrode down gently.

    6. Check the gap size: After adjusting the gap, pull out the gap tool and check the gap size. The gap size should match the specification suggested by Honda in the user’s manual for your Honda lawnmower model.

    7. Repeat: Repeat the measuring and setting process until the gap tool displays the correct gap size.

    By following these simple steps, you can ensure accurate gap measurements and maintain your Honda lawnmower for optimal performance.

    What are the Socket Sizes for a Honda Lawn Mowers Spark Plug?

    The socket size for a Honda lawnmower spark plug is 13/16″ (21mm). The spark plug type is BP6ES (NGK) / W20EP-U (DENSO) or equivalent, and the gap should be set at 0.028”– 0.031” (0.7 mm – 0.8 mm).

    This information applies to the Honda GCV200 engine.

    For the exact spark plug size and socket size, check once your manual guide for knowing your model and its type before you start changing the spark plug.

    Benefits of using the right spark plug for your Honda lawn mower

    Maintaining your Honda lawnmower with the right spark plug is essential for keeping it running smoothly. The spark plug is responsible for igniting the fuel in the engine, so it’s important to ensure you have the right one installed.

    Using the correct spark plug can help improve performance, reduce emissions, and extend the life of your mower. Here are some of the benefits of using the right spark plug for your Honda lawnmower:

    1. Improved Performance: A properly functioning spark plug will ensure that your engine runs at optimal levels. This means that you’ll get more power from your mower, allowing you to tackle tougher tasks with ease.
    2. Reduced Emissions: Using a high-quality spark plug can help reduce emissions from your mower, making it more environmentally friendly. This is especially important if you live in an area where air quality is a concern.
    3. Extended Life: Installing a new spark plug can help extend the life of your mower by reducing wear and tear on its components. This means that you won’t have to replace parts as often, saving you money in the long run.

    Using the right spark plug for your Honda lawnmower is essential to ensure it runs smoothly and efficiently.

    Step-by-step guide on replacing and installing a new spark plug in a Honda lawn mower

    Replacing and installing a new spark plug in your Honda lawnmower is an easy task that can be done in just a few steps. Here’s how to do it:

    1. Turn off the engine of your lawnmower and let it cool down.
    2. Locate the spark plug cap, which is usually located on the upper front-hand portion of the mower.
    3. Carefully put your index finger in between the engine and the cap to remove it. Grasp the cap firmly, pulling and twisting simultaneously to remove it from its socket.
    4. Remove the old spark plug using a spark plug socket wrench, taking care not to damage any other parts of your mower while doing so.
    5. Clean any light deposits from the plug with a wire brush or spray-on cleaner before installing the new one.
    6. Install the new spark plug into its socket, making sure that it’s tight enough so that it won’t come loose during operation but not too tight as to cause damage to other parts of your mower or to itself.
    7. Reattach the spark plug cap by pushing it onto its socket until you hear a click indicating that it’s securely in place.

    Start up your mower again and check for proper operation before continuing use as normal.

    Tips for maintaining your mower’s spark plugs

    Maintaining your mower’s spark plugs is an important part of keeping your mower running smoothly. Here are some tips to help you keep your spark plugs in good condition:

    1. Check the spark plug gap regularly. The gap should be set according to the manufacturer’s instructions and should be checked every time you replace the spark plug.
    2. Clean the area around the spark plug before replacing it. This will help ensure that no debris gets into the engine when you install a new spark plug.
    3. Replace old or worn-out spark plugs with new ones as soon as possible. Old or worn-out spark plugs can cause misfires, which can lead to poor performance and damage to other parts of the engine.
    4. Use a high-quality, brand-name spark plug for optimal performance and longevity. Using a generic or lower-quality spark plug may result in poor performance and a shorter life span for your mower’s engine.
    5. Make sure that all connections are tight when installing a new spark plug, as loose connections can cause misfires and poor performance from your mower’s engine.

    Conclusion

    Changing a spark plug on your Honda Lawnmower is an easy job that can be done in just a few minutes with the right tools.

    With this guide, you now have all the information needed to find out what socket size and gap are required for your particular model of mower.

    We hope this article has been helpful in ensuring that you get the best performance from your lawnmower by using properly gapped and sized plugs.

    Remember, taking care of regular maintenance may help prevent bigger problems down the road!

  • All Honda Generators Spark Plug Gap And Socket Size Guide

    Are you seeking the Honda Generators Spark Plug Gap and Socket Size Guide? If so, then you’ve come to the right place.

    This guide will provide all of the information that you need to ensure your generator is running at its best and most efficient performance.

    We’ll cover what spark plug gaps and socket sizes are important for proper operation, how to measure them properly, and which specific parts are needed for different models of Honda generators.

    With this knowledge in hand, you can be sure that your generator is running as it should. So let’s get started!

    What are the spark plug gap and socket sizes of Honda Generators?

    Honda Generators Spark Plug Gap And Socket Size

    The spark plug gap and socket sizes of Honda Generators vary based on the model. Generally, most of the Honda Generators require a 0.028 inch (0.71 mm) gap setting and a 14mm or 16mm socket size for installation.

    Spark plug gap

    The spark plug gap is the distance between the two electrodes of a spark plug. It is important to set the gap correctly so that it can ignite the fuel and air mixture in your generator. Generally, most Honda Generators use a 0.028-inch (0.71 mm) gap setting; however, some models may require a different size.

    This measurement should match that of the socket used to install it for it to fit properly in your generator’s combustion chamber. Generally, most Honda Generators require either a 14mm or 16mm socket size.

    Socket size

    The socket size of a spark plug is the diameter of its threads. This measurement should match that of the socket installed for it to fit properly in your generator’s combustion chamber.

    Generally, most Honda Generators require either a 14mm or 16mm socket size. However, your engine label or user manual should provide the exact socket size required for your specific model.

    Related Post: All Ryobi Generators Spark Plug Gap and Socket Size Guide

    List Of All Honda Generators Spark Plug Gap And Socket Size

    Given Below are some of the Honda generators and their spark plugs and socket sizes

    Honda EB10000

    • Type – ZFR5F (NGK) or equivalent
    • Gap – 0.028″– 0.031″
    • Socket size – 5/8″ (16mm)

    Honda EB6500X

    • Type – BPR5ES (NGK) or equivalent
    • Gap – 0.028″– 0.031″
    • Socket size – 13/16″ (21mm)

    Honda EB5000X

    • Type – BPR5ES (NGK) / W16EPR-U (DENSO) or equivalent
    • Gap – 0.028″– 0.031″
    • Socket size – 13/16″ (21mm)

    Honda EB2800i

    • Type – BPR6ES (NGK) or equivalent
    • Gap – 0.028″– 0.031″
    • Socket size – 13/16″ (21mm)

    Honda EB2200i

    • Type – CR5HSB (NGK) or equivalent
    • Gap – 0.024″– 0.028″
    • Socket size – 5/8″ (16mm)

    Honda EG4000

    • Type – BPR5ES (NGK) or equivalent
    • Gap – 0.028″– 0.031″
    • Socket size – 13/16″ (21mm)

    Honda EG2800i

    • Type – BPR6ES (NGK) or equivalent
    • Gap – 0.028″– 0.031″
    • Socket size – 13/16″ (21mm)

    Honda EG2200X

    • Type – BPR6ES (NGK) or equivalent
    • Gap – 0.028″– 0.031″
    • Socket size – 13/16″ (21mm)

    Honda EG1400X

    • Type – BPR6ES (NGK) or equivalent
    • Gap – 0.028″– 0.031″
    • Socket size – 13/16″ (21mm)

    Honda EM6500SX

    • Type – BPR5ES (NGK) / W16EPR-U (DENSO) or equivalent
    • Gap – 0.028″– 0.031″
    • Socket size – 13/16″ (21mm)

    Honda EM5000SX

    • Type – BPR5ES (NGK) / W16EPR-U (DENSO) or equivalent
    • Gap – 0.028″– 0.031″
    • Socket size – 13/16″ (21mm)

    Honda EM3500X

    • Type – BPR5ES (NGK) / W16EPR-U (DENSO) or equivalent
    • Gap – 0.028″– 0.031″
    • Socket size – 13/16″ (21mm)

    Honda EM2500X

    • Type – BPR6ES (NGK) or equivalent
    • Gap – 0.028″– 0.031″
    • Socket size – 13/16″ (21mm)

    Honda EM1800X

    • Type – BPR6ES (NGK) or equivalent
    • Gap – 0.028″– 0.031″
    • Socket size – 13/16″ (21mm)

    Honda EU7000iSNAG

    • Type – BPR6ES (NGK) or equivalent
    • Gap – 0.028″– 0.031″
    • Socket size – 13/16″ (21mm)

    Honda EU7000is

    • Type – BPR6ES (NGK) or equivalent
    • Official part number – 98079-56846
    • Gap – 0.028″– 0.031″ (0.7-0.8mm)
    • Socket size – 13/16″ (21mm)

    Honda EU6500is

    • Type – BPR5ES (NGK) / W16EPR-U (DENSO) or equivalent
    • Official part number – 98079-55846
    • Gap – 0.028″– 0.031″ (0.7-0.8mm)
    • Socket size – 13/16″ (21mm)

    Honda EU3000S1AG

    • Type – BPR6ES (NGK) / W20EPR-U (DENSO) or equivalent
    • Official part number – 98079-56846
    • Gap – 0.028″– 0.031″ (0.7-0.8 mm)
    • Socket size – 13/16″ (21mm)

    Honda EU3000is

    • Type – BPR5ES (NGK) / W16EPR-U (DENSO) or equivalent
    • Official part number – 98079-55846
    • Gap – 0.028″– 0.031″ (0.7-0.8mm)
    • Socket size – 13/16″ (21mm)

    Honda EU3000i Handi

    • Type – BPR5ES (NGK) / W20EPR-U (DENSO) or equivalent
    • Gap – 0.028″– 0.031″
    • Socket size – 13/16″ (21mm)

    Honda EU2200iTAG1

    • Type – CR5HSB (NGK) or equivalent
    • Official part number – 98056-55777
    • Gap – 0.024″– 0.028″ (0.6-0.7mm)
    • Socket size – 5/8″ (16mm)

    Honda EU2200i Companion

    • Type – CR5HSB (NGK) or equivalent
    • Official part number – 98056-55777
    • Gap – 0.024″– 0.028″ (0.6-0.7mm)
    • Socket size – 5/8″ (16mm)

    Honda EU2200iTAG3

    • Type – CR5HSB (NGK) or equivalent
    • Official part number – 98056-55777
    • Gap – 0.024″– 0.028″ (0.6-0.7mm)
    • Socket size – 5/8″ (16mm)

    Honda EU2200i Camo

    • Type – CR5HSB (NGK) or equivalent
    • Official part number – 98056-55777
    • Gap – 0.024″– 0.028″ (0.6-0.7mm)
    • Socket size – 5/8″ (16mm)

    Honda EU2200iTAG

    • Type – CR5HSB (NGK) or equivalent
    • Official part number – 98056-55777
    • Gap – 0.024″– 0.028″ (0.6-0.7mm)
    • Socket size – 5/8″ (16mm)

    Honda EU2200i

    • Type – CR5HSB (NGK) or equivalent
    • Official part number – 98056-55777
    • Gap – 0.024″– 0.028″ (0.6-0.7mm)
    • Socket size – 5/8″ (16mm)

    Honda EU2000i Companion

    • Type – CR5HSB (NGK) or equivalent
    • Official part number – 98056-55777
    • Gap – 0.024″– 0.028″ (0.6-0.7mm)
    • Socket size – 5/8″ (16mm)

    Honda EU2000i Camo

    • Type – CR5HSB (NGK) or equivalent
    • Official part number – 98056-55777
    • Gap – 0.024″– 0.028″ (0.6-0.7mm)
    • Socket size – 5/8″ (16mm)

    Honda EU2000i

    • Type – CR5HSB (NGK) or equivalent
    • Official part number – 98056-55777
    • Gap – 0.024″– 0.028″ (0.6-0.7mm)
    • Socket size – 5/8″ (16mm)

    Honda EU1000T1AG

    • Type – LR4C-E (NGK) or equivalent
    • Gap – 0.024″– 0.028″
    • Socket size – 5/8″ (16mm)

    Honda EU1000i

    • Type – LR4C-E (NGK) or equivalent
    • Gap – 0.024″– 0.028″
    • Socket size – 5/8″ (16mm)

    Types of Spark Plugs and their Gaps 

    Honda Generators Spark Plug Gap And Socket Size

    Honda Generators typically require a 14mm or 16mm socket size and a 0.028 inch (0.71 mm) gap setting when installing spark plugs; however, there are several types of spark plugs available in the market that may have different gap settings.

    The most common types of spark plugs are Conventional Spark Plugs, Platinum Spark Plugs, and Iridium Spark Plugs.

    Conventional Spark Plugs

    Conventional spark plugs are the most widely used in Honda generators. They feature a traditional nickel alloy center electrode with a copper core and an outer shell made from steel or nickel-iron.

    Platinum Spark Plugs

    Platinum spark plugs are designed for high-performance engines and are known for their durability. They feature a platinum-coated center electrode which is resistant to wear and tear, allowing them to last longer than conventional spark plugs.

    Iridium Spark Plugs

    Iridium spark plugs are a highly advanced type of spark plug designed for high-performance engines. They feature an iridium alloy center electrode that is extremely resistant to wear and tear, allowing them to last much longer than conventional or platinum spark plugs.

    Selecting the Right Gap and Socket Size for Your Generator 

    Here are some steps to help you select the right gap and socket size for your generator

    1. Identify the type of spark plug your generator uses. This information can usually be found in the owner’s manual or the manufacturer’s website.
    2. Determine the size of the spark plug socket needed for your generator. Common sizes are 5/8 inch (16mm) and 13/16 inch (21mm).
    3. Check the gap between the electrodes on your spark plug using a feeler gauge, which should match the specifications provided by the manufacturer.
    4. If necessary, adjust the gap using a spark plug gapping tool to ensure that it is within specification.
    5. Use a ratchet and appropriate-sized socket to remove and replace your spark plug if necessary.
    6. Once all adjustments have been made, reinstall your spark plug into its designated location on your generator and tighten securely with a ratchet or wrench as specified by the manufacturer’s instructions.
    7. Test run your generator to ensure that it is running properly before use.

    By following these steps, you can ensure that you have selected the correct gap and socket size for your generator, allowing it to run smoothly and efficiently.

    How to check and adjust spark plug gaps in Honda Generators?

    Honda Generators Spark Plug Gap And Socket Size

    Steps for how to check and adjust spark plug gaps in Honda Generator

    1. Find out what type of spark plug is recommended for your Honda Generator model. You can find this information in the Owner’s Manual.
    2. Measure the spark plug electrode gap with a wire-type feeler gauge.
    3. If necessary, correct the gap by carefully bending the side electrode with a pair of pliers until it reaches the desired size.
    4. Once you have adjusted the gap, re-check it with a feeler gauge to make sure it is correct before installing it into your generator engine.

    Why checking the spark plug gap and socket size are important?

    Checking the spark plug gap and socket size is important for several reasons. Here are some of the main ones

    1. Ensuring Proper Fit: The right spark plug socket size is necessary to ensure the spark plugs fit correctly into the engine block and don’t cause any damage.
    2. Preventing Damage: Using the wrong size socket can lead to damage to both the spark plugs and the engine, so it’s important to make sure you have the correct size before attempting any repairs or maintenance.
    3. Maintaining Efficiency: A correctly gapped spark plug will help your engine run more efficiently, as it will ignite fuel more effectively and produce more power with less fuel consumption.
    4. Avoiding Overheating: If your spark plugs are not gapped correctly, they can cause your engine to overheat due to an inefficient combustion process, leading to costly repairs.

    Tips for keeping your  generator in good condition

    Here are some tips to help you maintain your generator.

    1. Check The Oil Regularly – Most new generators need their first oil change after just 25 hours, and then the interval increases.
    2. Empty The Gas Or Stabilize It – Never leave the tank even a little bit full of gas when not in use.
    3. Keep It Clean And Covered – Make sure to keep your generator clean and covered when not in use.
    4. Purchase Backup Fuel and Filters – Having backup fuel and filters on hand will help you be prepared for any unexpected maintenance needs.
    5. Run It Every 30 days – Start your generator every 30 days and allow it to run for a few minutes to ensure everything is running properly.

    The Benefits of Using a Honda Generator with Properly Gapped Plug and Socket Size 

    Here are some of the advantages of using a Honda generator with a properly gapped plug and socket size

    1. Power Output: A properly fitted and gapped spark plug will help to ensure optimal performance from your generator and reduce the risk of it overheating or causing damage
    2. Durability: Having the correct socket size and spark plug gap will help ensure your generator is more durable, as it will be less prone to damage caused by incorrect installation or incorrect parts.
    3. Safety: Having the right spark plug gap and socket size will help to ensure your generator is working safely, reducing the risk of any accidents or malfunctions.
    4. Plug & Socket Size: By doing so, you can ensure that your generator is getting the right amount of power without risking damage or overloading the system.
    5. Cost Efficiency: With proper maintenance and care, a Honda generator can save you money in the long run by providing reliable power at an affordable price point.

    Conclusion

    It is important to understand the spark plug gap and socket size of your Honda Generator in order to ensure optimal performance. Without this knowledge, you may have an inefficient engine that could cost you more money in repairs.

    Keeping track of these specs shown in this guide can help keep your Honda generator running smoothly for years to come.

    Thank you for taking the time to learn more about the Honda generator spark plug gap and socket size. With these tips in mind, you can be sure to keep your generator running at peak performance while avoiding any costly repairs or maintenance down the road.

  • All Ryobi Generators Spark Plug Gap and Socket Size Guide

    Maintaining your Ryobi generator is essential to ensure it performs optimally when you need it the most. One key aspect of generator maintenance is ensuring your spark plug is in good working condition. In this guide, we’ll discuss the importance of the Ryobi Generators spark plug gap and socket size.

    The spark plug gap plays a crucial role in the performance of your generator. A gap that’s too small may lead to poor fuel combustion, while a gap that’s too large could cause ignition problems or even damage the spark plug.

    To avoid these issues, it’s essential you set the correct spark plug gap for your Ryobi generator. Additionally, using the proper socket size will make spark plug removal and installation a breeze.

    What is a spark plug gap & why is it important?

    A spark plug gap refers to the distance between the center electrode and the ground electrode of a spark plug. This gap plays a crucial role in an engine’s combustion process, as it allows the electric charge to jump from one electrode to another, sparking the fuel-air mixture.

    Ryobi Generators Spark Plug Gap and Socket Size

    An incorrect gap can lead to various engine problems, such as hard starting, misfires, poor fuel economy, and even engine damage.

    There are a couple of factors to consider when setting the spark plug gap:

    • Manufacturer recommendations: Ryobi provides specific gap settings for their generators, which you should follow for the best results.
    • Engine conditions: The spark plug gap may need to be adjusted based on engine modification, age, wear, and other factors.
    Ryobi Generators Spark Plug Gap and Socket Size

    Importance of Correct Spark Plug Gap

    • Improved Engine Performance
      • Smoother engine performance
      • Improved fuel combustion
      • Enhanced power output
    • Better Fuel Efficiency
      • Less fuel consumption
      • Reduced emissions
      • Extended engine life
    • Longer Spark Plug Lifespan

    How to measure & Adjust the spark plug gap on your Ryobi generator?

    This section will guide you on how to adjust the gap on your Ryobi generator spark plug.

    Ryobi Generators Spark Plug Gap and Socket Size

    Step 1: Gather the Necessary Tools

    Before starting, gather the necessary tools for this task. Here’s what you’ll need:

    • Spark plug gap tool (commonly a wire-type gap gauge or feeler gauge)
    • Spark plug socket (usually between 5/8 to 13/16 inches)
    • Ratchet wrench
    • Protective gloves

    Step 2: Locate the Spark Plug and Remove It

    First, ensure that your Ryobi generator is turned off and cooled down. Then, locate the generator’s spark plug. It’s typically located on the side of the engine, between the recoil starter and the engine block. Use the spark plug socket and ratchet wrench to remove the spark plug carefully. Always wear protective gloves to avoid injuries.

    Step 3: Measure and Adjust the Spark Plug Gap

    Before adjusting the gap, refer to your Ryobi generator’s user manual to find the correct gap specification. Most Ryobi generators require a spark plug gap between 0.024 to 0.030 inches (0.06 to 0.076 cm), although some models may have slightly different requirements.

    Now, use the spark plug gap tool to measure the gap between the center and ground electrodes on the spark plug. To adjust the gap, gently bend the ground electrode (the curved one) closer to or away from the center electrode until you reach the specified gap size. Be cautious not to apply too much force, as this can damage the spark plug.

    Step 4: Reinstall the Spark Plug

    Once you’ve adjusted the gap, carefully reinstall the spark plug into your Ryobi generator. Use your spark plug socket and ratchet wrench to tighten the plug but avoid over-tightening, as this can cause damage to the cylinder head or spark plug itself.

    With the correct spark plug gap and a clean, well-functioning spark plug, your Ryobi generator should now run efficiently and reliably. It’s always a good idea to check the spark plug gap as part of your regular maintenance routine to ensure optimal generator performance.

    Read Also, Guide To Champion Generators Spark Plug Gap and Socket Size

    Different types of spark plugs for Ryobi generators

    Here are some of the different types of spark plugs available for Ryobi generators:

    Ryobi Generators Spark Plug Gap and Socket Size

    Standard Spark Plugs

    Standard spark plugs are commonly used with small engines and are designed to provide efficient combustion between the electrodes. They are typically made from nickel alloy and copper core materials.

    Resistor Spark Plugs

    Resistor spark plugs feature an internal resistor to reduce electrical interference from other components in the generator or the environment. This type of plug is ideal for reducing noise levels within the generator system.

    Platinum Spark Plugs

    Platinum spark plugs offer improved longevity by contributing extra runaway heat resistance due to their platinum center electrode tip. These plugs also promote better fuel efficiency as they ignite fuel more quickly than standard spark plugs.

    Iridium Spark Plugs

    Iridium spark plugs are designed with an ultra-fine tip that offers enhanced performance due to their highly durable structure and low voltage requirements.

    These plugs can handle higher temperatures making them a good choice for those seeking increased performance from their generator engine.

    The socket size needed for different models of Ryobi generators

    The socket size needed for different models of Ryobi generators depends on the type and gap of the spark plug. For example,

    RYOBI 900 Watt Inverter Generator (RYI911LP)

    Spark Plug

    • Type – CMR6A (TORCH) or equivalent
    • Gap – 0.024″– 0.028″ (0.6-0.7mm)
    • Socket size – 5/8″ (16mm)

    RYOBI 1000 Watt Inverter Generator (RYI1000)

    Spark Plug 

    • Type – A7RTC (NHSP LD) or equivalent
    • Gap – 0.024″– 0.028″ (0.6-0.7mm)
    • Socket size – 5/8″ (16mm)

    RYOBI 2050 Watt Inverter Generator (RYI2022VNM)

    Spark Plug

    • Type – BPR7HS (NGK) or equivalent
    • Gap – 0.024″– 0.028″ (0.6-0.7mm)
    • Socket size – 13/16″ (21mm)

    RYOBI 2300 Watt Inverter Generator (RYI2322)

    Spark Plug 

    • Type – BPR7HS (NGK) or equivalent
    • Gap – 0.024″– 0.028″ (0.6-0.7mm)
    • Socket size – 13/16″ (21mm)

    RYOBI 2200 Watt Inverter Generator (RYI2200GR)

    Spark Plug 

    • Type – BPR7HS (NGK) or equivalent
    • Gap – 0.024″– 0.028″ (0.6-0.7mm)
    • Socket size – 13/16″ (21mm)

    Read, All Predator Generators Spark Plug Gap and Socket Size Guide

    Recognizing the Signs of a Bad Spark Plug

    Knowing when it’s time to replace your Ryobi generator spark plug is crucial in ensuring the proper functioning of your generator. A bad spark plug can prevent your generator from starting, cause it to run poorly, or even damage the engine.

    Here are some telltale signs that your spark plug may need to be replaced:

    1. Hard starting or not starting at all: If your generator is having trouble starting or won’t start up, it may be due to a faulty spark plug. The spark plug might be fouled or worn, preventing it from igniting the fuel properly.

    2. Rough idle and poor performance: When your generator is idling or running at a lower RPM, a bad spark plug can cause the engine to run rough and vibrate excessively. Additionally, you might notice a drop in performance, such as reduced power, fuel efficiency, or inconsistent operation.

    3. Engine misfires: Misfires can be caused by worn or damaged spark plugs, which result in incomplete combustion. This will usually be accompanied by a check engine light or an audible misfire from your generator’s exhaust.

    4. Carbon deposits or fouling: Inspect your spark plug for carbon deposits or fouling, which can occur when the plug is exposed to oil, fuel, or even dirt. A fouled spark plug will struggle to ignite the fuel properly, leading to reduced output and efficiency.

    Replacing your spark plug at the recommended intervals is essential to guarantee the best performance and longevity. Check your Ryobi generator’s owner’s manual for the suggested maintenance schedule, specific spark plug gap, and socket size information.

    How to Replace a Ryobi Generator Spark Plug?

    Maintaining your Ryobi generator’s spark plug is crucial for its performance and longevity. If you’re facing difficulties in starting the generator or experiencing a decrease in efficiency, it might be time to replace the spark plug. In this section, we’ll walk you through the steps to easily replace your Ryobi generator spark plug.

    Step 1: Gather the Necessary Tools and Spark Plug

    Before you begin, it’s essential to have the required tools and a compatible spark plug on hand. You’ll need the following:

    • A spark plug socket: typically 13/16 inch (20.6 mm) or 3/4 inch (19.1 mm), depending on the model
    • A socket wrench
    • A spark plug gap tool
    • A compatible spark plug for your Ryobi generator

    Step 2: Turn Off and Disconnect the Generator

    Safety comes first! Make sure your generator is turned off and disconnected from any power source before proceeding. Allow the engine to cool down to avoid burning yourself.

    Step 3: Locate the Spark Plug

    On your Ryobi generator, the spark plug is usually situated near the engine’s exhaust. Consult your owner’s manual for the exact location of your specific model.

    Step 4: Remove the Spark Plug Boot

    Gently grasp the boot (the protective rubber cover) and pull it straight off the spark plug. Be careful not to tug on it too forcefully, as there’s a risk of damaging the wire.

    Step 5: Unscrew the Old Spark Plug

    Using the spark plug socket and wrench, turn the old spark plug counterclockwise to unscrew and remove it from the engine.

    Step 6: Check and Set the Gap on the New Spark Plug

    Refer to your owner’s manual for the correct spark plug gap specification, and use the gap tool to measure and adjust the gap on the new spark plug accordingly.

    Step 7: Install the New Spark Plug

    Thread the new spark plug into the engine by hand, ensuring it’s properly seated. After that, use the socket wrench to tighten it, but don’t overtighten it, as it may cause damage. A good rule of thumb is turning an extra 1/2 turn once the gasket touches the engine.

    Step 8: Reattach the Spark Plug Boot

    Carefully slide the boot back onto the new spark plug, making sure it’s securely seated.

    There you have it! You’ve successfully replaced your Ryobi generator spark plug by following these steps. Regular maintenance and timely spark plug replacement will help ensure your Ryobi generator’s optimal performance and longevity.

    Check, A Guide To Yamaha Generators Spark Plug Gap and Socket Size

    Safety considerations when working with a spark plug from a generator engine

    Here are some tips for staying safe when working with a spark plug from a generator engine.

    1. Make sure the area around the generator is clear of combustible materials such as gasoline, oil, or wood.
    2. Wear protective clothing such as gloves and goggles when handling the generator engine.
    3. Keep your hands away from the spark plug while the engine is running.
    4. Check all connections regularly to ensure they are secure and free of corrosion or debris that could create sparks.
    5. Inspect the spark plug regularly for signs of wear or dirt accumulation that could cause sparking.
    6. If you notice any sparking, shut off the engine immediately and inspect it for any problems before restarting it again.
    7. Have a fire extinguisher nearby in case of an emergency situation involving sparks from the generator engine.

    By following these safety tips, you can help ensure that your work with a generator engine is safe and successful!

    Conclusion

    Changing the spark plugs in your generator is an easy process that can be done with just a few tools. You should have no trouble replacing old spark plugs with new ones with the proper socket, ratchet or wrench, extension bar, and anti-seize lubricant.

    Additionally, it’s important to take safety precautions when working around sparks from a generator engine, as they could potentially start a fire if not handled properly.

    Following these tips shown in this guide will help you ensure that you are able to safely and successfully measure spark plug and socket size and change out the spark plug on your generator!

    We have provided all the information you need to know about the spark plug gap and socket size, and we hope that you have found your answer in this guide.

  • A Guide To Yamaha Generators Spark Plug Gap and Socket Size

    Are you looking for reliable power solutions? Yamaha generators are a great choice when it comes to providing the necessary power in remote locations or during emergencies.

    But before you can use your generator, there are some important details that you’ll need to know about, like spark plug gaps and socket size.

    This article provides an easy-to-understand guide to determining Yamaha generators spark plug gap and socket size. We also provide helpful tips and advice on common mistakes to avoid when setting up your generator.

    With this information, you can confidently set up your generator to run smoothly and efficiently every time!

    What is the correct spark plug gap for a Yamaha Generator?

    A Yamaha Generator’s correct spark plug gap depends on the specific model. Generally, the spark plug gap should be between 0.6-0.7 mm (0.024″-0.028″ inches).

    Yamaha Generators Spark Plug Gap and Socket Size Guide

    For example, for the EF2000iS Inverter Generator, the standard spark plug is BPR6HS (NGK) with a gap of 0.6–0.7 mm (0.024″–0.028″). Additionally, some models may require a resistor spark plug with a gap of 0.030”.

    What is the correct socket size for a Yamaha Generator?

    When selecting a Yamaha Generator, it is important to know the correct socket size for your needs. The socket size of a Yamaha Generator varies depending on the model.

    Yamaha Generators Spark Plug Gap and Socket Size Guide

    For example, the EF2000IS model has a 13/16″ (21mm) socket size, while the EF2200iS model also has a 13/16″ (21mm) socket size.

    It is important to check the specifications of each generator before purchasing it in order to ensure that you have the correct socket size for your needs. Additionally, some models may require an adapter in order to use certain types of plugs.

    List Of All Yamaha Generators Gap & Socket Size

    1. Yamaha EF12000DE 12000 Watt Generator

    • Type – BPR5ES (NGK) or equivalent
    • Gap – 0.028″– 0.031″
    • Socket size – 13/16″ (21mm)
    • Owner’s manual – https://library.ymcapps.net

    2. Yamaha EF7200DE 7200 Watt Generator

    • Type – BPR4ES (NGK) or equivalent
    • Gap – 0.028″ – 0.031″
    • Socket size – 13/16″ (21mm)
    • Owner’s manual – https://library.ymcapps.net

    3. Yamaha EF7200D 7200 Watt Generator

    • Type – BPR4ES (NGK) or equivalent
    • Gap – 0.028″ – 0.031″
    • Socket size – 13/16″ (21mm)
    • Owner’s manual – https://library.ymcapps.net

    4. Yamaha EF6600D 6600 Watt Generator

    • Type – BPR4ES (NGK) or equivalent
    • Gap – 0.028″ – 0.031″
    • Socket size – 13/16″ (21mm)
    • Owner’s manual – https://library.ymcapps.net

    5. Yamaha EF6600DE 6600 Watt Generator

    • Type – BPR4ES (NGK) or equivalent
    • Gap – 0.028″ – 0.031″
    • Socket size – 13/16″ (21mm)
    • Owner´s manual – https://library.ymcapps.net

    6. Yamaha EF6300iSDE 6300 Watt Generator

    • Type – BPR4ES (NGK) or equivalent
    • Gap – 0.028″ – 0.031″
    • Socket size – 13/16″ (21mm)
    • Owner’s manual – https://library.ymcapps.net

    7. Yamaha EF5500DE 5500 Watt Generator

    • Type – BPR4ES (NGK) or equivalent
    • Gap – 0.028″ – 0.031″
    • Socket size – 13/16″ (21mm)
    • Owner’s manual – https://library.ymcapps.net

    8. Yamaha EF5500D 5500 Watt Generator

    • Type – BPR4ES (NGK) or equivalent
    • Gap – 0.028″ – 0.031″
    • Socket size – 13/16″ (21mm)
    • Owner’s manual – https://library.ymcapps.net

    9. Yamaha EF5200DE 5200 Watt Generator

    • Type – BPR4ES (NGK) or equivalent
    • Gap – 0.028″ – 0.031″
    • Socket size – 13/16″ (21mm)
    • Owner’s manual – https://library.ymcapps.net

    10. Yamaha EF5200D 5200 Watt Generator

    • Type – BPR4ES (NGK) or equivalent
    • Gap – 0.028″ – 0.031″
    • Socket size – 13/16″ (21mm)
    • Owner’s manual – https://library.ymcapps.net

    11. Yamaha EF4600A 4600 Watt Generator

    • Type – BPR4ES (NGK) or equivalent
    • Gap – 0.028″ – 0.031″
    • Socket size – 13/16″ (21mm)
    • Owner’s manual – https://library.ymcapps.net

    12. Yamaha EF4500iSE 4500 Watt Inverter Generator

    • Type – BPR4ES (NGK) or equivalent
    • Gap – 0.028″ – 0.031″
    • Socket size – 13/16″ (21mm)
    • Owner’s manual – https://library.ymcapps.net

    13. Yamaha EF4000DE 4000 Watt Inverter Generator

    • Type – BPR4ES (NGK) or equivalent
    • Gap – 0.028″ – 0.031″
    • Socket size – 13/16″ (21mm)
    • Owner’s manual – https://library.ymcapps.net

    14. Yamaha EF3000iSEB 3000 Watt Inverter Generator

    • Type – BPR4ES (NGK) or equivalent
    • Gap – 0.028″ – 0.031″
    • Socket size – 13/16″ (21mm)
    • Owner’s manual – https://library.ymcapps.net

    15. Yamaha EF2800i 2800 Watt Inverter Generator

    • Type – BPR4ES (NGK) or equivalent
    • Gap – 0.028″ – 0.031″
    • Socket size – 13/16″ (21mm)
    • Owner’s manual – https://library.ymcapps.net

    16. Yamaha EF2600J 2600 Watt Inverter Generator

    • Type – BPR4ES (NGK) or equivalent
    • Gap – 0.028″ – 0.031″
    • Socket size – 13/16″ (21mm)
    • Owner’s manual – https://library.ymcapps.net

    17. Yamaha EF2400iSHC 2400 Watt Inverter Generator

    • Type – BPR4ES (NGK) or equivalent
    • Gap – 0.028″ – 0.031″
    • Socket size – 13/16″ (21mm)
    • Owner’s manual – https://library.ymcapps.net

    18. Yamaha EF2400iSJ 2400 Watt Inverter Generator

    • Type – BPR4ES (NGK) or equivalent
    • Gap – 0.028″ – 0.031″
    • Socket size – 13/16″ (21mm)
    • Owner’s manual – https://library.ymcapps.net

    19. Yamaha EF2200iS 2200 Watt Inverter Generator

    • Type – BPR6HS (NGK) or equivalent
    • Gap – 0.024″– 0.028″
    • Socket size – 13/16″ (21mm)
    • Owner’s manual – https://library.ymcapps.net

    20. Yamaha EF2000iSv2 2000 Watt Inverter Generator

    • Type – BPR6HS (NGK) or equivalent
    • Gap – 0.024″– 0.028″
    • Socket size – 13/16″ (21mm)
    • Owner’s manual – https://library.ymcapps.net

    21. Yamaha EF2000iS 2000 Watt Inverter Generator

    • Type – BPR6HS (NGK) or equivalent
    • Gap – 0.024″– 0.028″
    • Socket size – 13/16″ (21mm)
    • Owner’s manual – https://www.yamahamotorsports.com

    22. Yamaha EF1000iS 1000 Watt Inverter Generator

    • Type – CR4HSB (NGK) or equivalent
    • Gap – 0.024″– 0.028″
    • Socket size – 13/16″ (21mm)
    • Owner’s manual – https://library.ymcapps.net

    How to check the spark plug gap on a Yamaha Generator

    Checking the spark plug gap on a Yamaha generator is an important part of regular maintenance. Here are the steps to follow

    Yamaha Generators Spark Plug Gap and Socket Size Guide
    1. Determine the type of spark plug your generator uses. You can find this information in the owner’s manual or by consulting a Yamaha consumer generator dealer.
    2. Use a spark plug gap tool to measure the gap between the electrodes on the spark plug. The gap should be set to the manufacturer’s recommended size, which can also be found in your owner’s manual or from a Yamaha consumer generator dealer.
    3. If necessary, adjust the gap with a feeler gauge and then re-check it with your spark plug gap tool to make sure it is correct.
    4. Once you have confirmed that the gap is set correctly, reinstall your spark plug into your generator, and you are ready to go.

    How to adjust the spark plug gap on a Yamaha Generator

    Adjusting the spark plug gap on a Yamaha Generator is a relatively simple process. Here are the steps to follow

    1. Locate the spark plug on your generator and remove it from the engine. Mostly, the spark plug is located on the upper side of the engine.
    2. Measure the gap between the two electrodes of the spark plug using a feeler gauge or wire thickness gauge.
    3. If necessary, adjust the gap by bending one of the electrodes with a pair of pliers until it reaches the desired size.
    4. Re-install the spark plug into your generator and tighten it securely with a wrench or socket set.
    5. Start up your generator and check that it is running properly before use.

    Tips for maintaining your Yamaha Generator spark plugs

    Maintaining your Yamaha generator’s spark plugs is essential for keeping it running smoothly. Here are some tips to help you keep your spark plugs in good condition.

    1. Check the gap size of the spark plug regularly. If it’s too wide or too narrow, replace the spark plug with one with the correct gap size.
    2. Clean the spark plug periodically to remove any dirt or debris that may have accumulated on it over time. Use a wire brush and compressed air to remove any buildup on the spark plug’s electrodes.
    3. Inspect the spark plug for signs of wear and tear, such as cracks, chips, or discoloration on its surface, every few months. If you notice any damage, replace it with a new one immediately to ensure the optimal performance of your generator engine.
    4. Replace your spark plugs at least once a year to ensure they work efficiently and provide maximum power output from your generator engine.

    By following these simple tips, you can make sure that your Yamaha generator’s spark plugs are always in top condition and provide reliable performance for years to come.

    Common problems with spark plugs on Yamaha Generators, and how to fix them?

    Spark plugs are an essential part of Yamaha generators, and it is important to keep them in good condition in order to ensure reliable performance. Here are some common problems with spark plugs on Yamaha generators and how to fix them.

    • Fouled Spark Plugs: Fouled spark plugs can be caused by oil or fuel contamination, which can lead to poor engine performance. To fix this problem, the spark plugs should be cleaned or replaced.
    • Worn Spark Plugs: Worn spark plugs can cause misfires and reduce engine performance. To fix this problem, the spark plugs should be replaced with new ones.
    • Incorrect Gap Settings: Incorrect gap settings can cause misfires and reduce engine performance. To fix this problem, the gap settings should be adjusted according to the manufacturer’s specifications.
    • Damaged Spark Plug Wires: Damaged spark plug wires can cause misfires and reduce engine performance. To fix this problem, the spark plug wires should be inspected for damage and replaced if necessary.

    Conclusion

    Maintaining the right spark plug gap and socket size for your Yamaha Generator is essential to ensure its optimal performance.

    The correct spark plug type, gap size, and alternatives can vary depending on your generator model.

    It is important to check the spark plug type and gap according to the manufacturer’s manual or a reliable source.

    Following these steps can help you maintain your generator’s spark plugs so that it continues to run smoothly and efficiently.

  • All Predator Generators Spark Plug Gap and Socket Size Guide

    Are you looking for an easy way to determine the Predator generators spark plug gap and socket size? If so, then this guide is just what you need.

    In this guide, we will provide all the information you need in order to get the correct spark plug gap and socket size for your Predator generator.

    We’ll also explain how to set up a gap gauge correctly so that you can ensure an accurate reading every time. So whether you’re replacing worn-out plugs or simply checking existing ones, this guide has everything you need to know!

    Overview of Spark Plug Gap & Socket Size

    If you own a Predator Generator, it’s important to know the spark plug gap and socket size for your model. Knowing this information can help you maintain your generator and keep it running smoothly.

    Predator Generators Spark Plug Gap and Socket Size

    The type of spark plug used in Predator Generators is the F6TC (Torch) type. The gap should be set at 0.028″ – 0.031″ (0.7-0.8 mm). The socket size is 13/16″ (21mm).

    We recommend you, use an NGK-BPR6EIX Spark Plug for Predator 3500 Inverter Generator as a quick and easy upgrade from the stock spark plug, which is designed to operate over a much wider heat range than ordinary plugs and resists carbon buildup.

    Top Predator Generators Spark Plug Gap And Socket Size

    Predator Generators Spark Plug Gap and Socket Size

    Given below are some of the top models of predator generators and their park plug and socket sizes.

    Predator 3500 Watt Inverter Generator (SN 56720 / 59137 /63584)

    Gap: 0.027″– 0.031″ (0.7-0.8 mm) | Socket size: 13/16″ (21mm)

    Spark Plug Gap

    The Spark Plug Gap of the Predator 3500 Watt Inverter Generator (SN 56720 / 59137 / 63584) is an important feature as it helps to ensure that the engine functions properly.

    The gap size determines how much electricity is transferred from the ignition coil to the engine. This particular model has a quite typical gap size, with a range of 0.027″–0.031″ (0.7-0.8 mm)

    Socket Size

    The socket size of the Predator 3500 Watt Inverter Generator (SN 56720 / 59137/ 63584) is an important component of the overall spark plug design.

    This allows for the appropriate level of electricity to be transferred from the ignition coil to the engine. The socket size is typically 13/16″ (21mm).

    Predator 1800 Watt Inverter Generator (SN 57064)

    Predator Generators Spark Plug Gap and Socket Size

    Gap: 0.028″−0.031″ (0.7-0.8 mm) | Socket size: 13/16″ (21mm)

    Spark Plug Gap

    The spark plug gap in the Predator 1800 Watt Inverter Generator should be set at 0.028″−0.031″ (0.7-0.8 mm). This ensures that the engine receives enough voltage to create a hot, powerful spark and efficient combustion of the air/fuel mixture.

    Socket Size

    The socket size of the Predator 1800 Watt Inverter Generator (SN 57064) is an essential component of its design. It acts as a conduit for transferring electricity from the ignition coil to the engine.

    Which is crucial for proper spark plug operation and engine performance. The socket size recommended for this generator is 13/16″ (21mm).

    Predator 2000 Watt Inverter Generator (SN 59135 /62523)

    Gap: 0.023″– 0.027″ (0.6-0.7 mm) | Socket size:5/8″ (16mm)

    Spark Plug Gap

    The Spark Plug Gap of the Predator 2000 Watt Inverter Generator (SN 59135 /62523) is an essential feature that helps ensure the proper functioning of the engine.

    The gap size determines how much electricity is transferred from the ignition coil to the engine and should be set between 0.023″–0.027″ (0.6-0.7mm).

    Socket Size

    It determines how effectively power is transferred from the generator to your appliances, tools, and other devices. The socket size of this particular model is 5/8″ (16mm).

    Predator 4000 Watt Generator (CARB / EPA III)

    Gap: 0.027″– 0.031″ (0.7-0.8 mm) | Socket size:13/16″ (21mm)

    Spark Plug Gap

    The Predator 4000 Watt Generator (CARB / EPA III) is equipped with a spark plug gap of 0.027-0.031 inches (0.7-0.8 mm).

    This spacing is important for the efficient operation of the generator engine and must be maintained for optimal performance.

    Socket Size

    The Socket Size of the Predator 4000 Watt Generator (CARB / EPA III) is an important factor that must be taken into consideration to ensure proper operation.

    The socket size of this generator is 13/16″ (21mm). This socket size is necessary for the efficient functioning of all electrical components within the generator, such as spark plugs and other connections.

    List Of All Predator Generators Spark Plug Gap And Socket Size

    Predator 9500 Watt Inverter Generator (SN 57080)

    • Type – BPR6ES (NGK) or equivalent
    • Upgrade – BPR6EIX – NGK Iridium Spark Plug
    • Gap – 0.028″– 0.031″ (0.7-0.8 mm)
    • Socket size – 13/16″ (21mm)

    Predator 9000 Watt Generator (CARB / EPA III)

    • Type – F6TC (Torch)
    • Gap – 0.028″ – 0.031″ (0.7-0.8 mm)
    • Socket size – 13/16″ (21mm)

    Predator 8750 Watt Inverter Generator (SN 57480)

    • Type – F6RTC (Torch) or equivalent
    • Gap – 0.028″ – 0.031″ (0.7-0.8 mm)
    • Socket size – 13/16″ (21mm)

    Predator 8750 Watt Generator (EPA III)

    • Type – F6TC (Torch) or equivalent
    • Gap – 0.028″ – 0.031″ (0.7-0.8 mm)
    • Socket size – 13/16″ (21mm)

    Predator 6500 Watt Generator (CARB / EPA III)

    • Type – F6TC (Torch) or equivalent
    • Gap – 0.028″– 0.031″ (0.7-0.8 mm)
    • Socket size – 13/16″ (21mm)

    Predator 4550 Watt Inverter Generator (SN 59303)

    • Type – F6RTC (Torch) or equivalent
    • Gap – 0.028″ – 0.031″ (0.7-0.8 mm)
    • Socket size – 13/16″ (21mm)

    Predator 4400 Watt Inverter Generator (SN 57509)

    • Type – F6RTC (Torch) or equivalent
    • Gap – 0.028″ – 0.031″ (0.7-0.8 mm)
    • Socket size – 13/16″ (21mm)

    Predator 4375 Watt Generator (CARB / EPA III)

    • Type – F6TC (Torch) or equivalent
    • Gap – 0.027″– 0.031″ (0.7-0.8 mm)
    • Socket size – 13/16″ (21mm)

    Predator 4000 Watt Generator (CARB / EPA III)

    • Type – F6TC (Torch) or equivalent
    • Gap – 0.027″– 0.031″ (0.7-0.8 mm)
    • Socket size – 13/16″ (21mm)

    Predator 3500 Watt Inverter Generator (SN 56720 / 63584)

    • Type – F7RTC (Torch) or equivalent
    • Upgrade – BPR6EIX – NGK Iridium Spark Plug
    • Gap – 0.027″– 0.031″ (0.7-0.8 mm)
    • Socket size – 13/16″ (21mm)

    Predator 2000 Watt Inverter Generator (SN 62523)

    • Type – A5RTC (Torch) or equivalent
    • Gap – 0.023″– 0.027″ (0.6-0.7 mm)
    • Socket size – 5/8″ (16mm)

    Predator 1800 Watt Inverter Generator (SN 57064)

    • Type – E6RTC (LG)
    • Gap – 0.028″−0.031″ (0.7-0.8 mm)
    • Socket size – 13/16″ (21mm)

    Predator 1400 Watt Inverter Generator (SN 57063)

    • Type – A5RTC (Torch) or equivalent
    • Gap – 0.024″– 0.028″ (0.6-0.7 mm)
    • Socket size – 5/8″ (16mm)

    Benefits of Setting the Correct Spark Plug Gap & Socket Size

    When it comes to spark plugs, setting the correct gap and socket size is essential for optimal engine performance. Here are some of the benefits of using the right spark plug gap and socket size.

    • Improved fuel efficiency: Setting the correct spark plug gap and socket size helps ensure that your engine is running at its most efficient level, which can help you save on fuel costs.
    • Increased power output: When your engine is running at its peak efficiency, it will be able to generate more power than if it was running with an incorrect spark plug gap or socket size.
    • Reduced emissions: A properly tuned engine will produce fewer emissions than one that is not correctly tuned. This can help reduce air pollution and improve overall air quality.
    • Longer life span: By ensuring that your engine is running at its peak efficiency, you can extend its life span significantly. This means that you won’t have to replace your spark plugs as often and can save money in the long run.

    Overall, setting the correct spark plug gap and socket size for your Predator generator is essential for ensuring optimal performance. Not only will you save on fuel costs and emissions, but you’ll also be extending the life of your engine. So, take the time to make sure that your spark plugs are set up correctly and that your socket size matches

    How to Install a New Spark Plug in Predator Generator?

    Installing a new spark plug in your Predator Generator is an easy task that can be done in just a few steps.

    First, you will need to determine the type of spark plug that is compatible with your generator. The most common type for Predator Generators is the BPR6ES (NGK) or equivalent. You may also want to consider upgrading to an NGK Iridium Spark Plug (BPR6EIX).

    Once you have determined the correct type of spark plug, you will need to adjust the gap between the electrodes. This should be set at 0.028”-0.031” (0.7-0.8 mm). If necessary, use a feeler gauge to measure and adjust the gap accordingly.

    Next, remove the old spark plug from its socket using a ratchet and socket wrench and replace it with the new one. Make sure that it is firmly seated before tightening it securely with your wrench.

    Finally, check all connections and ensure that everything is properly tightened before starting up your generator again.

    Tips on Maintaining your Predator Generator’s Spark Plug

    Maintaining your Predator Generator’s spark plug is an important part of keeping it in good working order. Here are some tips to help you keep your generator running smoothly.

    1. Disconnect the spark plug cap from the end of the plug and clean out any debris that has accumulated around it.
    2. Using a spark plug wrench, remove the old spark plug and replace it with a new one.
    3. Make sure to check the gap between the electrodes on the new spark plug and adjust it if necessary.
    4. Reattach the spark plug cap securely and make sure all connections are tight before starting up your generator.

    These simple steps can help ensure that your Predator Generator runs smoothly and efficiently.

    Conclusion

    The Predator Generator Spark Plug Gap & Socket Size Guide is a helpful resource for anyone looking to replace the spark plug in their Predator generator.

    This guide provided you with information on the type of spark plug, gap size, socket size, and other important details needed to ensure a successful installation.

    It also includes cross-reference charts and links to manuals for specific models. Follow the steps outlined in this guide, and you’ll have a generator that runs smoothly for years to come!