Category: How To

  • Balcony Bliss: 27 Ideas for 2025!

    Revamping your apartment balcony into a comfortable, chic, and practical area is achievable. It doesn’t need to be a daunting task. Smart design concepts and product suggestions can turn even tiny balconies into your private retreat. Enjoy relaxation, work, or hosting friends in your revitalized space.

    Discover 27 amazing apartment balcony ideas to inspire you! We’ll provide practical tips and Amazon product suggestions. Transform your balcony into a relaxing outdoor retreat.

    Let’s get started right away!

    1. Cozy String Light Setups for Evening Charm

    27 Apartment Balcony Ideas to Transform Your Outdoor Space 2

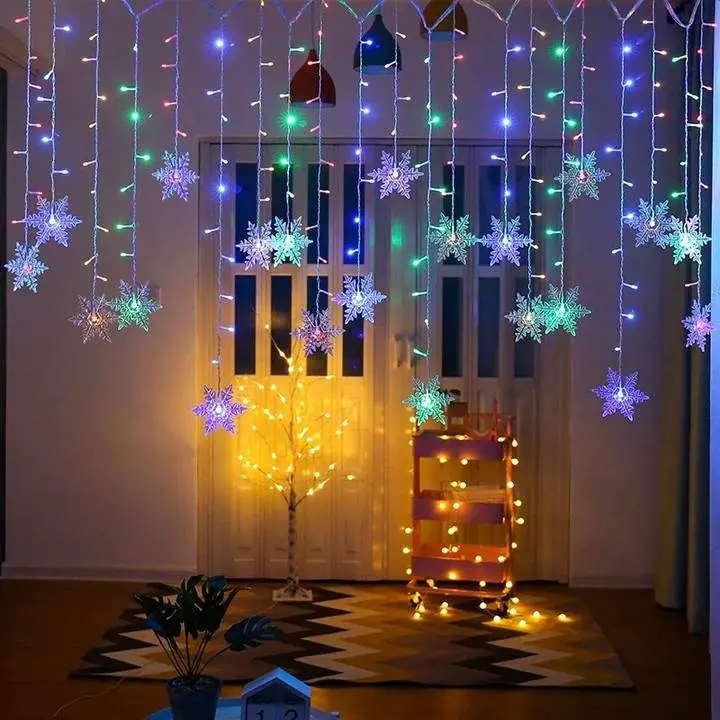
    Balcony string lights create a uniquely inviting and warm ambiance. They’re a budget-friendly and adaptable way to enhance your outdoor area’s charm. Consider draping them along the railing. You could also hang them above or weave them through your plants for a truly magical effect.

    2025 Styling Guide: Expert Tips

  • Use command hooks or adhesive clips for easy installation.
  • Opt for solar-powered string lights to save energy and avoid the hassle of plugging them in.
  • Choose warm white lights for a cozy vibe or multicolor options for a fun and playful look.
  • 2025 Recommendation: Opt for outdoor string lights designed with enhanced weatherproofing, robust cables, and energy-efficient, gentle LED lights. Enjoy them all year long!

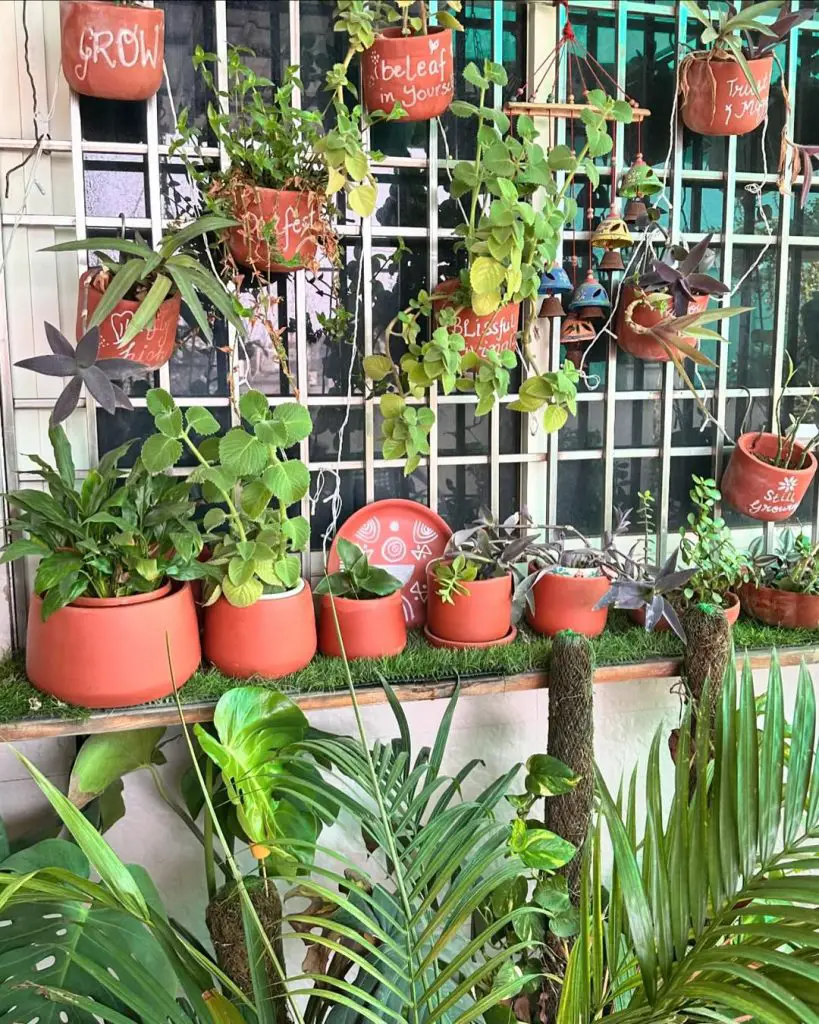
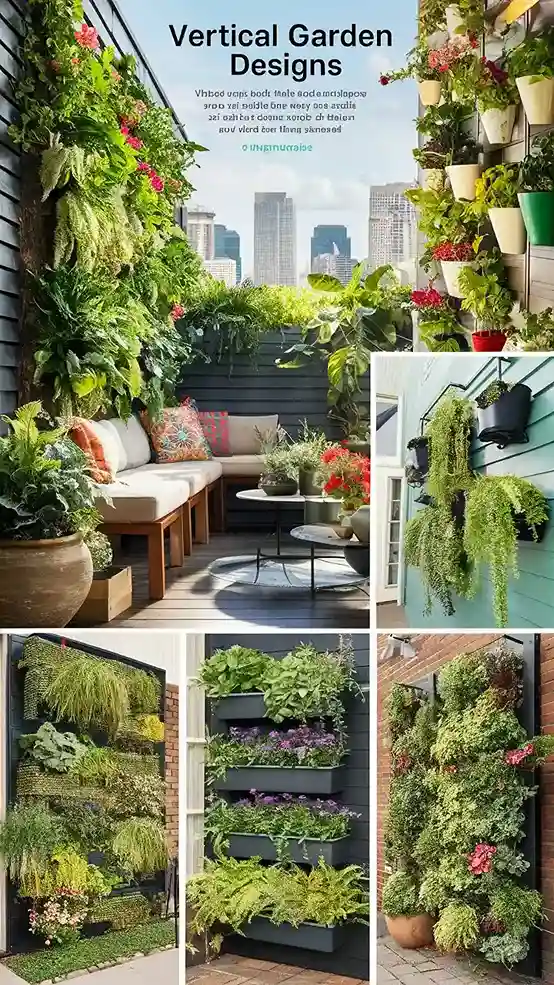
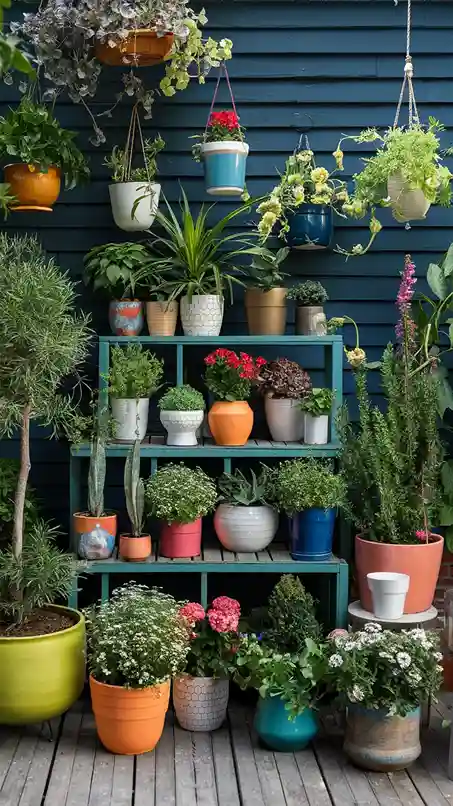
    2. Vertical Garden Planters for Green Enthusiasts

    27 Apartment Balcony Ideas to Transform Your Outdoor Space 3

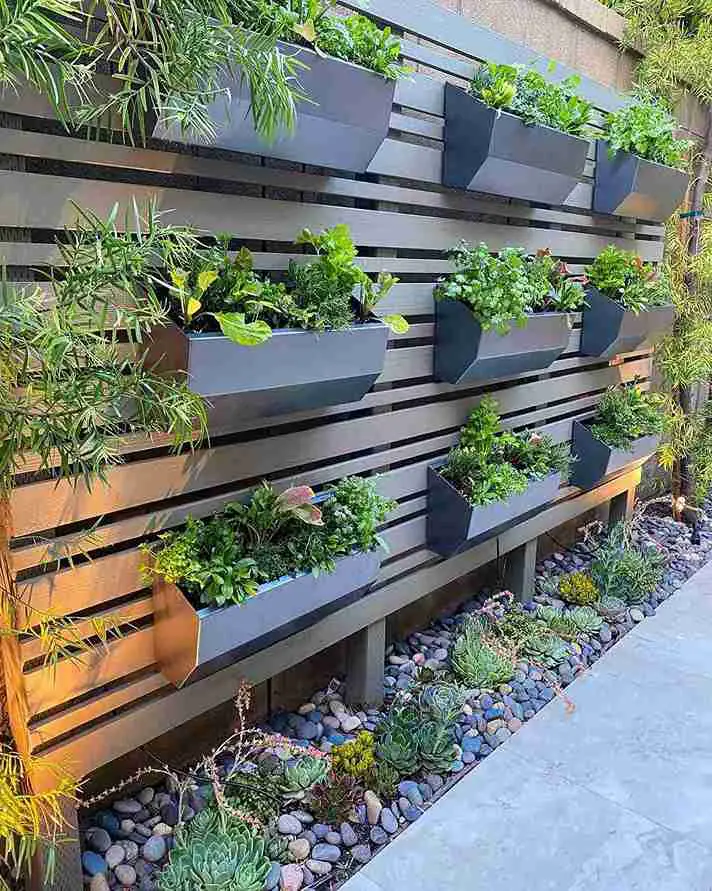
    Transform your balcony into a green oasis with a 2025-style vertical garden. These innovative planters are designed to save space. Grow flowers, herbs, or even vegetables upwards, not outwards. Ideal for urban gardeners with small balconies, vertical gardens offer a vibrant and refreshing atmosphere.

    Style Advice:

  • Use a mix of colorful flowers and lush greenery for visual interest.
  • Consider self-watering planters for low-maintenance gardening.
  • Arrange plants with varying heights and textures for a dynamic look.
  • 2025 Recommendation: Consider a user-friendly Vertical Garden Planter Kit. It’s simple to set up and features multiple levels, perfect for expanding your gardening space.

    3. Foldable Bistro Sets for Compact Comfort

    27 Apartment Balcony Ideas to Transform Your Outdoor Space 4

    Foldable bistro sets are ideal for compact balconies, offering both style and practicality. Usually featuring a table and two chairs, they create a charming space for enjoying coffee or wine without overwhelming your limited area. Updated for 2025, these sets emphasize space-saving design and durable materials.

    Styling Advice:

  • Choose weatherproof materials like metal or teak wood for durability.
  • Add colorful seat cushions for comfort and personality.
  • Fold the set and store it when not in use to free up space.
  • Top Pick (2025): Discover our 2-Piece Foldable Bistro Set. It boasts a space-saving design, durable rust-proof build, and a stylish, contemporary look.

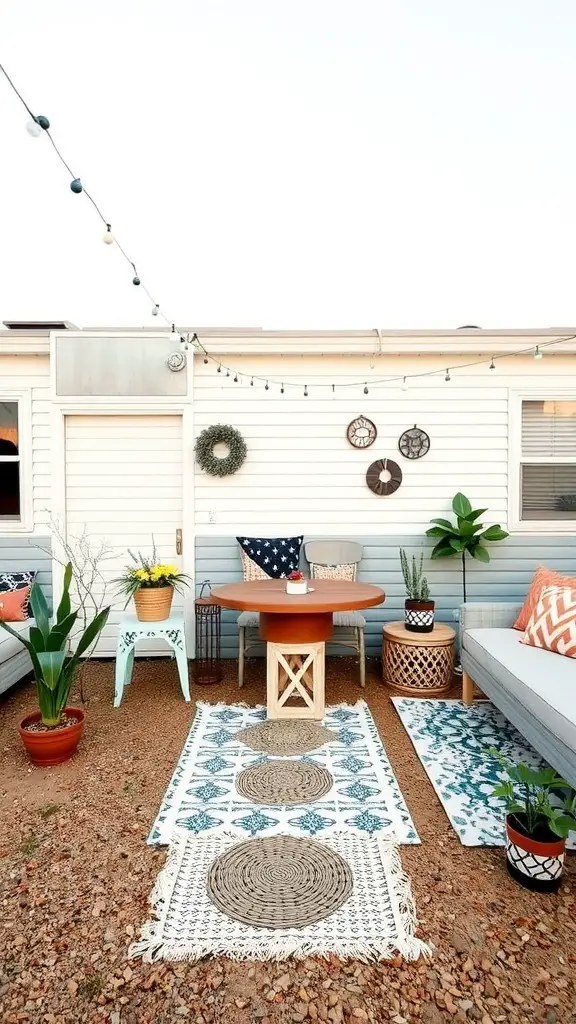
    4. Outdoor Rugs for a Splash of Color

    27 Apartment Balcony Ideas to Transform Your Outdoor Space 5

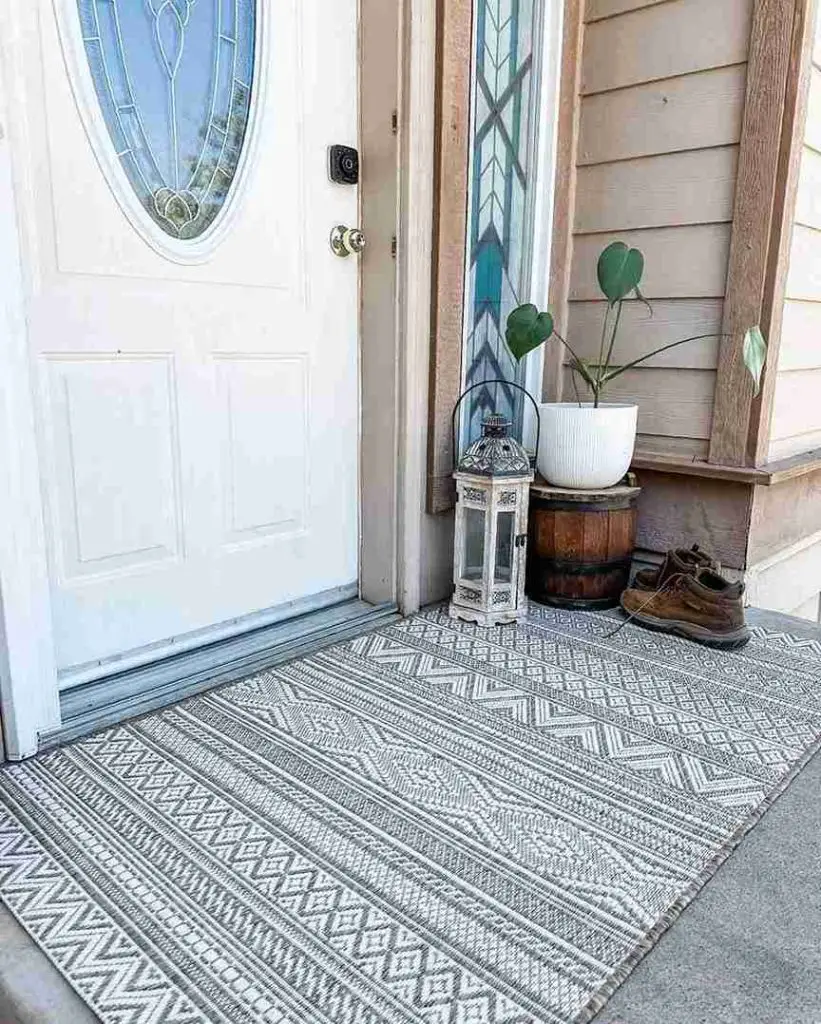
    Balcony rugs dramatically enhance your outdoor space, creating a seamless transition from indoors to out. They introduce comfort, visual appeal, and vibrant hues, all while shielding your feet from uncomfortable surfaces.

    Styling Advice:

  • Select a rug with UV protection to prevent fading.
  • Opt for bold patterns or neutral tones, depending on your style preference.
  • Layer the rug under furniture for a cohesive look.
  • 2025 Recommendation: Discover our resilient outdoor rugs! They come in diverse sizes and stylish patterns, perfect for enhancing any balcony space.

    5. Hanging Chairs for Relaxing Vibes

    27 Apartment Balcony Ideas to Transform Your Outdoor Space 6

    In 2025, hanging chairs remain the perfect balcony upgrade, blending style and comfort. They offer a relaxing haven for reading, unwinding, or soaking in the scenery. Plus, they effortlessly inject a touch of modern bohemian flair into your outdoor area.

    Style Advice:

  • Ensure your balcony’s ceiling or frame can support the weight of a hanging chair.
  • Add throw pillows or a soft blanket for extra comfort.
  • Position the chair in a shaded area for optimal relaxation.
  • 2025 Recommendation: Consider a Hanging Egg Chair with Stand. It’s perfect for outdoor relaxation and eliminates the need for ceiling mounting.

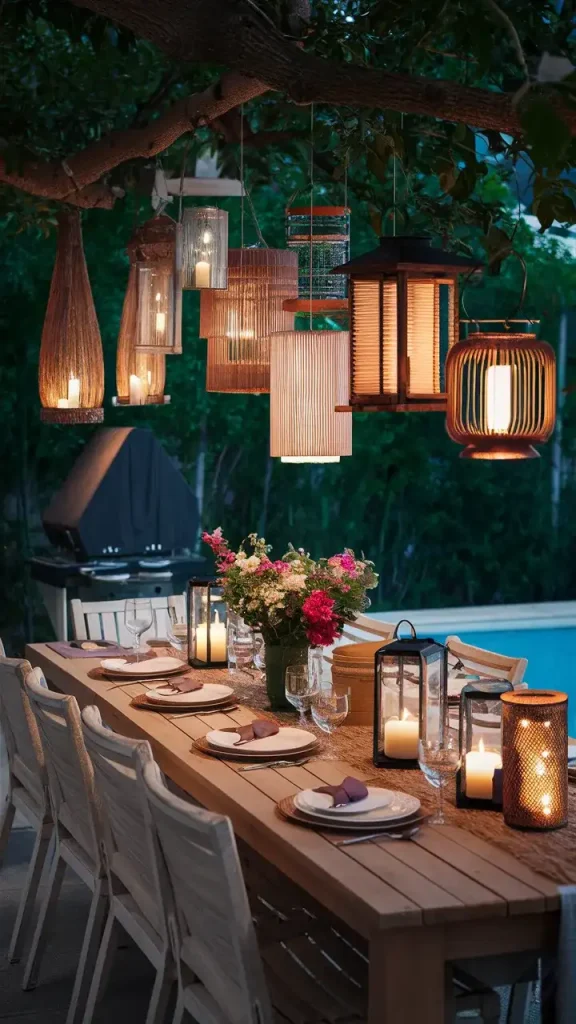
    6. Lanterns and Candles for Romantic Evenings

    27 Apartment Balcony Ideas to Transform Your Outdoor Space 7

    Enhance your balcony’s charm with lanterns and candles. They create a warm, romantic atmosphere. Ideal for relaxing evenings or small, intimate get-togethers. Enjoy the gentle, inviting light they provide.

    2025 Styling Guide: Expert Tips

  • Use flameless, battery-operated candles for safety and convenience.
  • Group lanterns of varying sizes for an elegant display.
  • Choose lanterns with intricate patterns to cast beautiful shadows.
  • 2025 Update: Consider an Outdoor Lantern Set combined with Battery-Powered Candles for easy, beautiful illumination.

    7. Privacy Screens for a Secluded Retreat

    27 Apartment Balcony Ideas to Transform Your Outdoor Space 8

    Yearning for enhanced balcony privacy? A chic screen offers the ideal fix. These screens cleverly obstruct prying eyes and add an attractive design element to your outdoor space.

    Styling Advice:

  • Opt for foldable or retractable designs for flexibility.
  • Choose natural materials like bamboo for an eco-friendly touch.
  • Pair with hanging plants or fairy lights for added charm.
  • 2025’s Top Pick: Discover lightweight, weather-resistant, and easily installed Outdoor Privacy Screen Panels. Enhance your outdoor space today!

    8. Compact Outdoor Sofas for Lounging

    27 Apartment Balcony Ideas to Transform Your Outdoor Space 9

    Transform your balcony into a serene escape with a space-saving outdoor sofa. These sofas are expertly crafted for smaller areas, providing exceptional comfort and style in 2025.

    Styling Advice:

  • Add weatherproof cushions in vibrant colors or soft neutrals.
  • Place a small side table nearby for drinks or snacks.
  • Arrange potted plants around the sofa to enhance the cozy vibe.
  • 2025 Recommendation: Consider a compact outdoor sectional. Look for washable cushion covers and a customizable, modular design.

    9. Wall-Mounted Shelves for Stylish Storage

    27 Apartment Balcony Ideas to Transform Your Outdoor Space 10

    Maximize your room’s height with wall-mounted shelves. They’re ideal for showcasing plants, books, or decor. This keeps your floor space uncluttered and open.

    Style Advice:

  • Use sturdy, weatherproof materials like metal or treated wood.
  • Mix and match decorative objects, such as mini pots, figurines, and picture frames.
  • Install multiple tiers to maximize storage space.
  • 2025 Update: Discover our durable Outdoor Wall Shelf, engineered for all weather conditions and reliable storage.

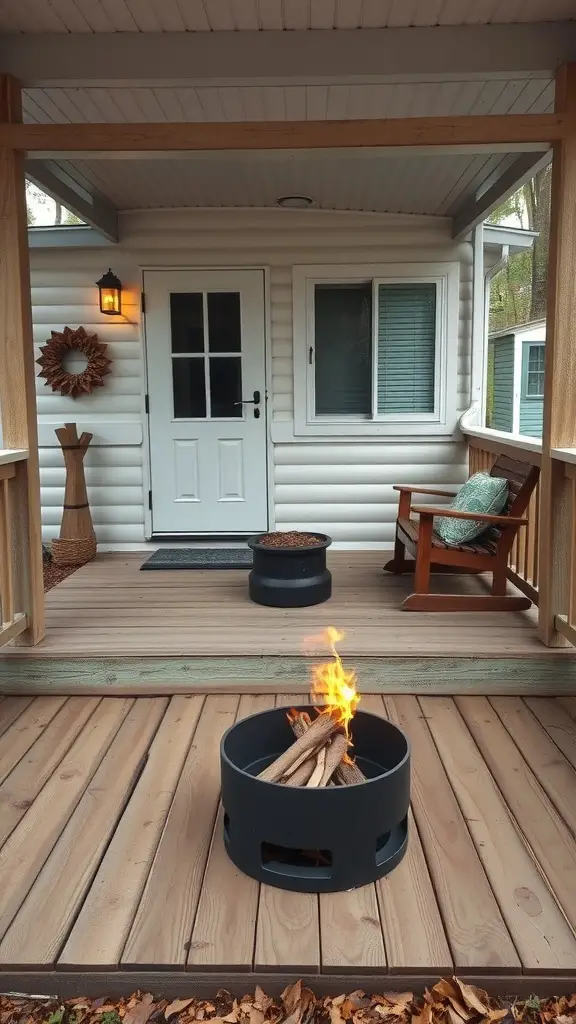
    10. Fire Pit Tables for Cozy Gatherings

    27 Apartment Balcony Ideas to Transform Your Outdoor Space 11

    A fire pit table dramatically enhances your balcony. It offers warmth and a central gathering spot. Ideal for chilly evenings, it brings a touch of luxury to your outdoor area.

    Style Advice:

  • Choose a compact, propane-powered model for safety and ease of use.
  • Arrange seating around the table for a cozy setup.
  • Pair with marshmallow roasting sticks for a fun touch.
  • 2025’s Top Pick: Discover the Compact Propane Fire Pit Table. Enjoy adjustable flames and a modern, stylish design.

    11. Artificial Grass for a Natural Look

    27 Apartment Balcony Ideas to Transform Your Outdoor Space 12

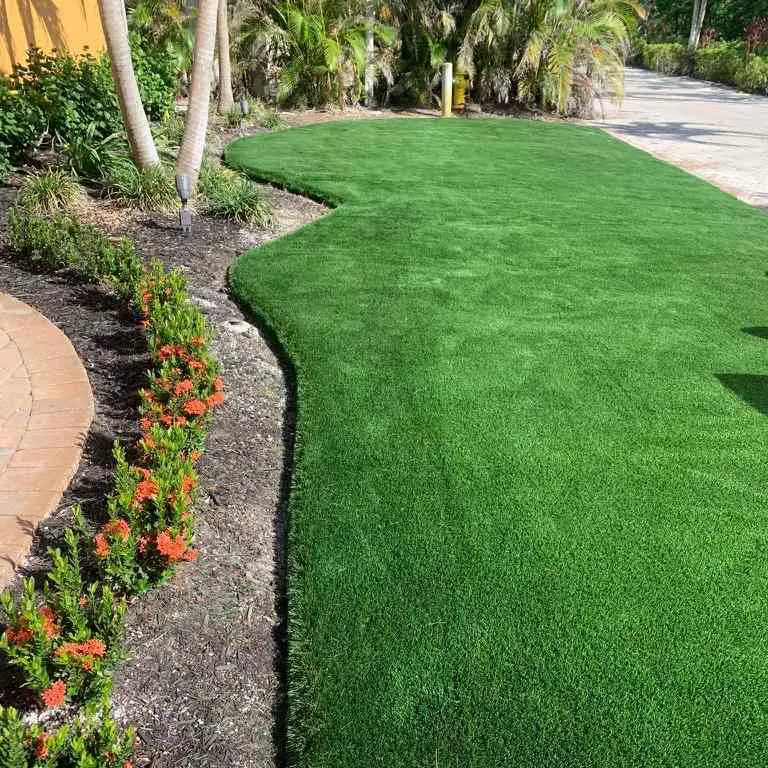
    Yearning for a backyard vibe? Artificial grass transforms your balcony into a natural haven. Enjoy a soft, welcoming surface with minimal upkeep.

    Styling Advice:

  • Use grass tiles for easy installation and removal.
  • Add potted plants and a small seating area for a garden-like vibe.
  • Choose high-quality grass for a realistic look and feel.
  • 2025 Recommendation: Discover our top-rated Artificial Grass Roll! It’s built to last, resists sun damage, and cleans effortlessly.

    12. Shade Sails for Sun Protection

    27 Apartment Balcony Ideas to Transform Your Outdoor Space 13

    Sun sails offer a modern and effective solution for shielding your balcony from intense sunlight, creating a cooler and more comfortable space. Installation is straightforward, and they are available in diverse colors and designs to complement any style.

    Styling Advice:

  • Choose a color that complements your balcony decor.
  • Secure the sail with strong hardware to ensure stability.
  • Layer multiple sails for added style and coverage.
  • 2025 Recommendation: Consider a Triangle Shade Sail Canopy. It offers excellent UV protection and features long-lasting, robust fabric.

    13. Balcony-Specific Herb Gardens

    27 Apartment Balcony Ideas to Transform Your Outdoor Space 14

    Cultivate your personal herb oasis on your balcony! Balcony herb gardens are both practical and visually appealing. Enjoy fresh, homegrown ingredients for your culinary creations while adding a touch of nature to your living space.

    Style Advice:

  • Use tiered or hanging planters to save space.
  • Choose herbs like basil, mint, and rosemary for their delightful scents.
  • Label each herb for a polished and organized look.
  • 2025’s Top Pick: A space-saving Herb Garden Kit. It features integrated drainage and personalized planting layouts.

    14. Hammocks for a Relaxing Escape

    27 Apartment Balcony Ideas to Transform Your Outdoor Space 15

    Transform your balcony into a tranquil retreat with a hammock. It’s the ideal spot for relaxation, whether you’re napping, reading a book, or soaking up the fresh air.

    Styling Advice:

  • Opt for a freestanding hammock stand if your balcony lacks anchor points.
  • Choose weather-resistant fabrics for longevity.
  • Add a few colorful throw pillows for extra comfort and style.
  • 2025’s Top Pick: A freestanding hammock with a stand. It boasts durable materials and a space-saving design, perfect for smaller areas.

    15. Balcony Bar Tables for Scenic Drinks

    27 Apartment Balcony Ideas to Transform Your Outdoor Space 16

    Balcony bar tables now feature a clever railing clip design. This maximizes space and offers a practical surface. Ideal for savoring beverages or appetizers while enjoying the scenery.

    Style Advice:

  • Choose adjustable-height tables to fit different railing types.
  • Pair with foldable bar stools for a complete look.
  • Decorate the table with small planters or lanterns for added charm.
  • Top Pick for 2025: Discover the Rail-Mounted Balcony Bar Table! It boasts a modern, weatherproof design and easily adjustable clamps.

    16. Wind Chimes for a Serene Atmosphere

    27 Apartment Balcony Ideas to Transform Your Outdoor Space 17

    Balcony wind chimes offer a peaceful ambiance. Their gentle sounds enhance relaxation with every breeze.

    Style Advice:

  • Hang wind chimes in a spot where they’ll catch the breeze but won’t be overly loud.
  • Opt for designs that match your balcony’s decor, such as bamboo for boho styles or metal for modern aesthetics.
  • Pair with other hanging decor for a cohesive look.
  • 2025’s Top Pick: Discover our exquisite, handcrafted bamboo wind chimes. Made with sustainable materials, they offer a soothing, gentle sound.

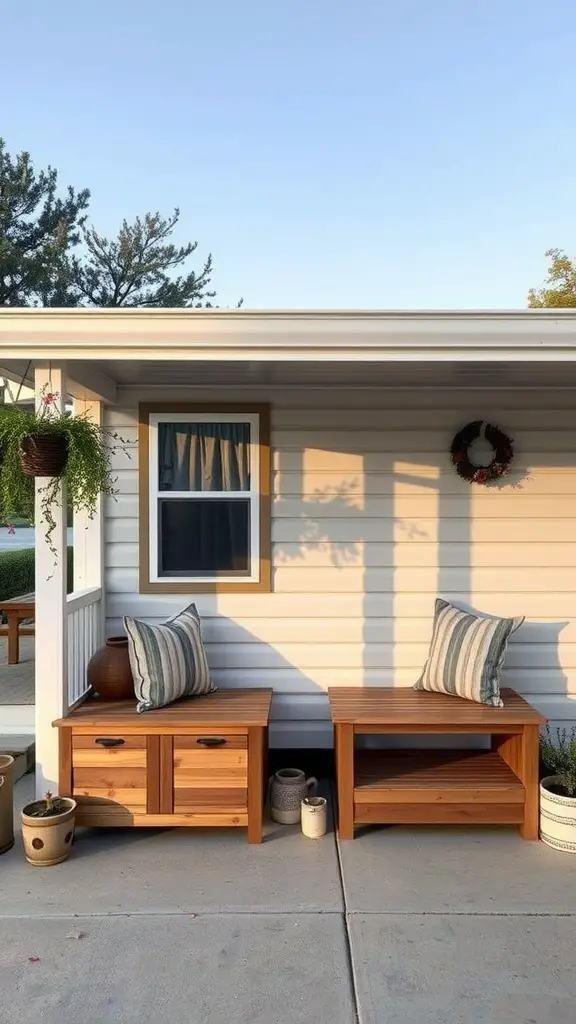
    17. Multi-Functional Storage Benches

    27 Apartment Balcony Ideas to Transform Your Outdoor Space 18

    Storage benches offer cozy seating and clever storage. Perfect for stashing cushions, blankets, or gardening tools in 2025.

    Style Advice:

  • Select a bench with a water-resistant finish to protect stored items.
  • Add cushions or a throw blanket for added comfort.
  • Position the bench along a wall to free up floor space.
  • 2025 Recommendation: Discover our Outdoor Storage Bench! It boasts generous storage and a modern, eye-catching design.

    18. Hanging Planters for Vertical Greenery

    27 Apartment Balcony Ideas to Transform Your Outdoor Space 19

    Elevate your space with hanging planters! They’re a fantastic way to introduce plants without sacrificing precious floor area. Achieve a vibrant, garden-inspired atmosphere effortlessly.

    Style Advice:

  • Choose lightweight pots to avoid overloading hooks or railings.
  • Mix trailing plants like ivy with colorful blooms for visual variety.
  • Use macramé hangers for a bohemian touch.
  • 2025 Recommendation: Discover our resilient, all-weather Macramé Hanging Planter set. Perfect for indoor or outdoor use!

    19. Outdoor Poufs for Flexible Seating

    27 Apartment Balcony Ideas to Transform Your Outdoor Space 20

    Poufs offer flexible seating, ideal for compact balconies. Their light weight allows for easy relocation. They can also serve as footrests or convenient side tables.

    Styling Advice:

  • Choose poufs with outdoor-grade fabric to withstand the elements.
  • Mix and match patterns for a playful, eclectic look.
  • Store poufs indoors when not in use to extend their lifespan.
  • 2025 Recommendation: Discover our durable, weatherproof outdoor pouf set. Enjoy vibrant colors and reinforced stitching for lasting comfort.

    20. Rail Planters for a Splash of Green

    27 Apartment Balcony Ideas to Transform Your Outdoor Space 21

    Elevate your balcony in 2025 with rail planters! They’re a space-saving solution for adding beauty. Grow vibrant flowers, fresh herbs, or trendy succulents effortlessly.

    Styling Advice:

  • Select planters with adjustable brackets for a snug fit on your railing.
  • Use a mix of trailing plants and upright flowers for dynamic visuals.
  • Arrange planters in a repeating pattern for a cohesive look.
  • 2025’s Top Pick: Customizable railing planters. Enjoy integrated drainage and a sleek, contemporary design.

    21. Compact Grills for Culinary Adventures

    27 Apartment Balcony Ideas to Transform Your Outdoor Space 22

    Balcony grills are essential for grilling enthusiasts. Enjoy delicious barbecues and grilled meals even without a large backyard. These compact grills are perfect for small spaces.

    Style Advice:

  • Look for grills designed specifically for small spaces.
  • Position the grill near proper ventilation and away from flammable items.
  • Pair with a foldable prep table for added convenience.
  • 2025’s Top Pick: Experience grilling anywhere with our Portable Electric Balcony Grill! It features smoke-reducing tech and effortless cleanup.

    22. Weatherproof Throw Pillows for Comfort

    27 Apartment Balcony Ideas to Transform Your Outdoor Space 23

    Enhance your balcony’s comfort with throw pillows! Weatherproof options ensure they stay beautiful in any season. They’re a quick way to create a welcoming outdoor space.

    Style Advice:

  • Mix different textures and patterns for a dynamic look.
  • Coordinate pillow colors with other balcony elements like rugs or plants.
  • Store pillows in a waterproof box when not in use.
  • 2025 Recommendation: Discover our durable, weatherproof throw pillows. Available in striking, neutral shades.

    23. Decorative Mirrors for an Illusion of Space

    27 Apartment Balcony Ideas to Transform Your Outdoor Space 24

    In 2025, mirrors remain a top trick for expanding small balconies. They bounce light and add visual depth, making the space feel bigger.

    Style Advice:

  • Choose outdoor mirrors with weatherproof frames.
  • Position the mirror to reflect greenery or scenic views.
  • Use a statement frame to add a decorative element.
  • 2025 Recommendation: Enhance your outdoor space with a decorative mirror. It features a robust, rust-proof frame for lasting beauty.

    24. Foldable Drying Racks for Functionality

    27 Apartment Balcony Ideas to Transform Your Outdoor Space 25

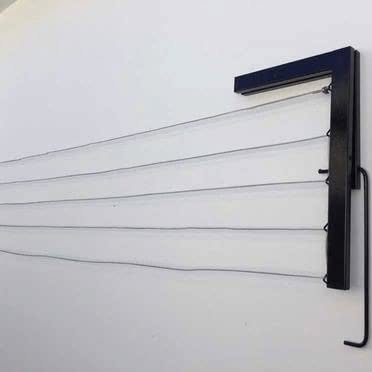
    Limited balcony space? A collapsible drying rack is your answer. Ideal for drying clothes, towels, and even smaller rugs.

    Style Advice:

  • Choose racks that fold flat for easy storage.
  • Opt for stainless steel or powder-coated materials to prevent rust.
  • Use hooks to hang additional items like bags or hats.
  • 2025 Recommendation: Discover the space-saving Collapsible Balcony Drying Rack! It features multi-tiered shelves for faster, more efficient drying.

    25. Outdoor Art for Personal Flair

    27 Apartment Balcony Ideas to Transform Your Outdoor Space 26

    Elevate your balcony’s charm with unique outdoor art. Discover a wide array of options, from durable metal sculptures to weather-resistant paintings.

    Style Advice:

  • Select art that complements your balcony’s theme and color palette.
  • Hang pieces securely to prevent them from falling in windy conditions.
  • Combine art with lighting for a dramatic effect.
  • 2025 Recommendation: Discover durable, modern metal wall art, built to withstand any weather. Elevate your outdoor or indoor space with its stylish design.

    26. Modular Seating for Ultimate Flexibility

    27 Apartment Balcony Ideas to Transform Your Outdoor Space 27

    Adaptable modular seating lets you customize your space. Perfect for parties or quiet relaxation, rearrange it to suit any occasion.

    Style Advice:

  • Opt for sets with removable covers for easy cleaning.
  • Arrange the pieces in different configurations to suit the occasion.
  • Use modular seating to define separate zones on your balcony.
  • 2025 Recommendation: Explore our adaptable outdoor seating! This modular set features water-resistant cushions and a lightweight design for easy arrangement.

    27. Outdoor Heaters for Year-Round Comfort

    27 Apartment Balcony Ideas to Transform Your Outdoor Space 28

    Extend your balcony enjoyment into the colder seasons with an outdoor heater. These devices offer comforting warmth, letting you savor your outdoor space all year long. Enjoy your balcony even when the temperature drops!

    Style Advice:

  • Choose a compact model to save space.
  • Position the heater in a central location for even warmth.
  • Pair with blankets and cushions for added comfort.
  • Top Pick: A mobile patio heater featuring customizable heat levels and built-in safety mechanisms. Perfect for outdoor comfort!

    Revamping your balcony is now simpler than ever with these 27 updated ideas for 2025. Discover how to create a relaxing escape, a chic entertainment space, or a practical outdoor office. These tips and product suggestions will guide you in maximizing your apartment balcony’s potential. Eager to begin? Choose an idea that inspires you and start designing your ideal balcony today!

  • Steal-Worthy Outdoor Decor Ideas for 2025!

    Elevate your outdoor living with stylish decor! Extend your living space and fully enjoy pleasant weather. No matter the size—garden, balcony, or patio—transform it into a chic retreat. Discover 21 trendy outdoor decor ideas you can easily implement to create your dream oasis.

    1. String Lights for a Magical Ambiance

    Outdoor string lights effortlessly elevate any space. They create a magical atmosphere, ideal for both lively parties and peaceful evenings. Hang them on trees, fences, or pergolas for a dazzling, illuminated effect.

    Embrace solar string lights! They cut energy bills and are super easy to set up. Want a cozy vibe? Go for Edison bulb string lights. Their warm, old-school glow is perfect. String lights are adaptable and stylish. They’re essential for today’s outdoor spaces.

    2. Outdoor Rugs to Define Spaces

    Elevate your patio or deck with an outdoor rug! It quickly defines your space and adds visual appeal. Enjoy color, texture, and underfoot comfort, creating an inviting outdoor living area. Select a durable rug that complements your furniture and handles the weather.

    Make a striking statement with a bold pattern or vibrant color. Alternatively, choose a neutral tone for a sophisticated aesthetic. Outdoor rugs are crafted from durable, weather-resistant materials. They withstand rain and sun, preventing fading and deterioration.

    3. Vertical Gardens for a Green Touch

    Vertical gardens are a popular trend for adding greenery to your outdoor spaces, perfect for those with limited room. You can build them using wall planters, hanging containers, or advanced living wall setups. These gardens offer visual appeal and are great for growing herbs, flowers, and compact vegetables.

    Opt for diverse plant types for a vibrant, multi-layered aesthetic. Combine cascading plants with those that grow upright to enhance visual appeal and create dimension. Vertical gardens offer an excellent solution for city residents with small outdoor areas. They introduce nature right to your home without sacrificing precious ground space.

    4. Fire Pits for Cozy Gatherings

    A fire pit elevates your outdoor area, crafting a warm and welcoming ambiance. It becomes a central gathering spot for friends and family, offering both heat and a place to connect. You can find fire pits in diverse designs, ranging from classic wood-burning options to contemporary gas-powered models.

    Elevate your fire pit area with inviting seating. Think Adirondack chairs or a plush, cushioned sectional for ultimate comfort. Enhance the ambiance with outdoor pillows and blankets. A fire pit extends your outdoor enjoyment into cooler seasons, adding both elegance and warmth to your space in 2025.

    5. Hammocks for Ultimate Relaxation

    Hammocks represent ultimate relaxation and are a stylish upgrade for any outdoor space. You can suspend them between trees or use a dedicated stand. Either way, a hammock offers an ideal place to de-stress, enjoy a good book, or catch a quick nap. They remain a popular choice in 2025 for outdoor leisure.

    Select a hammock crafted from robust, weather-resistant materials for lasting durability. Explore diverse styles, from classic rope hammocks to comfortable quilted fabric options and even convenient hammock chairs. Adding a hammock to your outdoor space creates a relaxed, bohemian atmosphere, inviting you to unwind and appreciate your environment.

    6. Outdoor Curtains for Privacy and Style

    Elevate your outdoor space with stylish curtains! They offer privacy and enhance the look of your patio or pergola. Enjoy a more intimate setting while being protected from sun and wind. Select durable, fade-resistant, and mildew-proof outdoor fabrics for lasting beauty.

    Consider sheer curtains for a delicate, romantic ambiance. Alternatively, select heavier drapes for enhanced privacy and sun protection. Outdoor curtains effectively delineate distinct zones in your outdoor area, creating a more organized and stylish feel. These curtains introduce an element of elegance and can be conveniently tied back when desired.

    7. Lanterns for Ambient Lighting

    Outdoor lanterns offer a flexible and chic method to enhance your patio’s lighting. Available in diverse forms, dimensions, and materials, they enable you to craft a personalized aesthetic. Consider lanterns as striking table centerpieces, illuminating garden paths, or suspended gracefully from trees and hooks for a magical touch.

    Select lanterns that complement your existing decor style for a unified aesthetic. Options range from rustic to modern and bohemian. Many new lanterns feature LED candles or solar lights. These are safer and more eco-conscious for outdoor use. Lanterns offer both light and improved ambiance for your outdoor spaces.

    8. Outdoor Mirrors to Create Illusion

    Outdoor mirrors are trending in 2025! They’re no longer just for indoors. Elevate your garden or patio with a strategically placed mirror. It will visually expand your space and amplify the natural beauty around it. Opt for a frame designed to endure outdoor conditions for lasting enjoyment.

    Think about using a big, eye-catching mirror as a central design element. Alternatively, group several smaller mirrors for a distinctive look. Mirrors are great for boosting light in dim spots by bouncing sunlight around. This easy update can completely change your outdoor area, making it feel bigger, brighter, and more welcoming in 2025.

    9. Potted Plants for Versatility

    Elevate your 2025 outdoor space effortlessly with potted plants. They’re a simple way to introduce diverse greenery, vibrant flowers, and even miniature trees. No extensive gardening is needed! Select pots that harmonize with your patio furniture and overall aesthetic.

    Craft a unique display by combining pots of varying sizes, shapes, and colors. Elevate your plant arrangement by using stands or shelves to create visual depth. Potted plants offer flexibility for renters or those who enjoy frequent decor updates. They are easily moved and rearranged to suit your style.

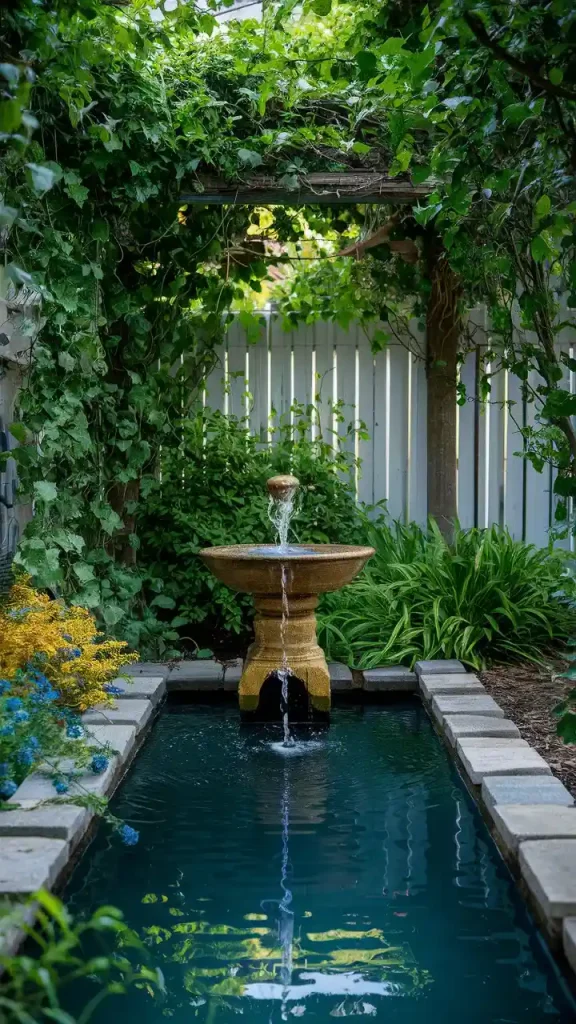
    10. Water Features for Tranquility

    Elevate your outdoor living area with a captivating water feature. From petite fountains to vibrant koi ponds, the gentle sound of moving water fosters a serene ambiance. These features also draw in birds and local wildlife, enhancing the natural allure of your garden in 2025.

    Select a water feature that suits your area’s size and matches your decorating theme. Solar fountains are an excellent green choice, needing no electrical connection. Adding a water feature to your outdoor space boosts its beauty and offers a peaceful escape from daily stress.

    11. Outdoor Artwork for Personalization

    Elevate your outdoor living area with captivating artwork, transforming it into a seamless continuation of your indoor space. Explore a wide array of choices, from striking sculptures and statues to eye-catching wall art and charming garden stakes, all reflecting your unique taste. Prioritize durable, weather-resistant pieces specifically crafted for outdoor environments.

    Elevate your outdoor space by establishing a captivating focal point. Use a striking large artwork or curate a gallery wall with smaller pieces. Metal and ceramic art are excellent choices due to their weather resistance. Outdoor art enhances character and visual appeal, transforming your garden, patio, or balcony into a personalized and stylish retreat.

    12. Bistro Sets for Intimate Dining

    Bistro sets offer a delightful touch to any outdoor area, creating an intimate space for meals and leisure. Ideal for compact patios, balconies, or garden nooks, these sets usually feature a small table and two chairs. Opt for weather-resistant materials such as metal, wicker, or treated wood to guarantee long-lasting use. Consider 2025 trends like sustainable materials and space-saving designs for a modern update.

    Choose a timeless French design for a romantic feel. Alternatively, embrace a modern aesthetic with clean lines and current colors. Enhance comfort and style with cushions and an outdoor tablecloth. Bistro sets are perfect for morning coffee, afternoon snacks, or cozy dinners under the night sky. Enjoy your outdoor space in 2025!

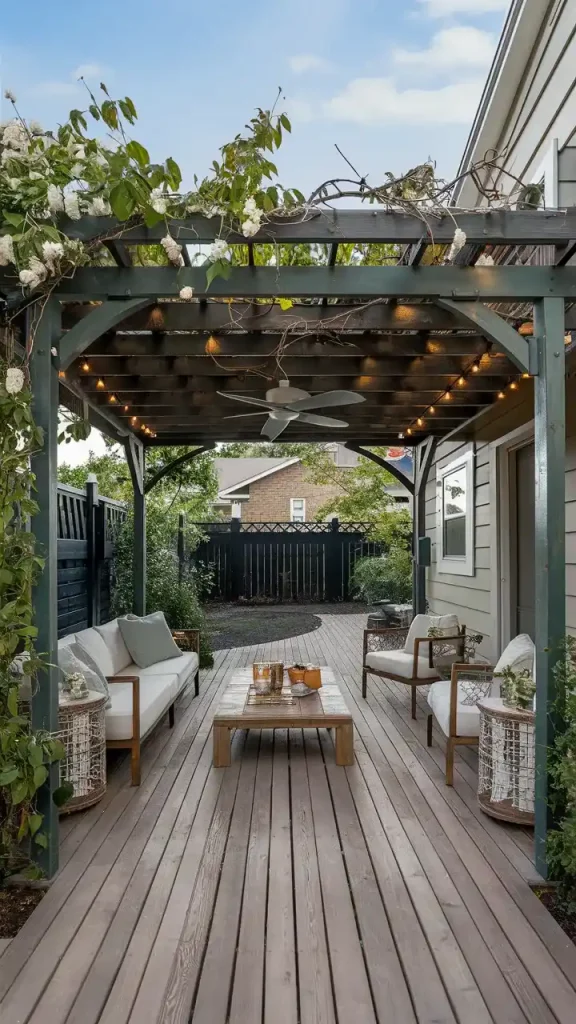
    13. Pergolas for Structure and Shade

    In 2025, pergolas remain a top choice for enhancing outdoor living. They offer both architectural interest and welcome shade. Enjoy a dedicated space for relaxing or hosting guests, shielded from the sun’s rays. Choose from freestanding designs or those connected to your house. Materials range from classic wood to sleek, contemporary metal options.

    Transform your pergola into a lush retreat with climbing plants. Consider fragrant wisteria or jasmine for added appeal. String lights, lanterns, or outdoor curtains create a warm, inviting ambiance. A pergola elevates your outdoor space, seamlessly blending architecture with nature, and expanding your living area.

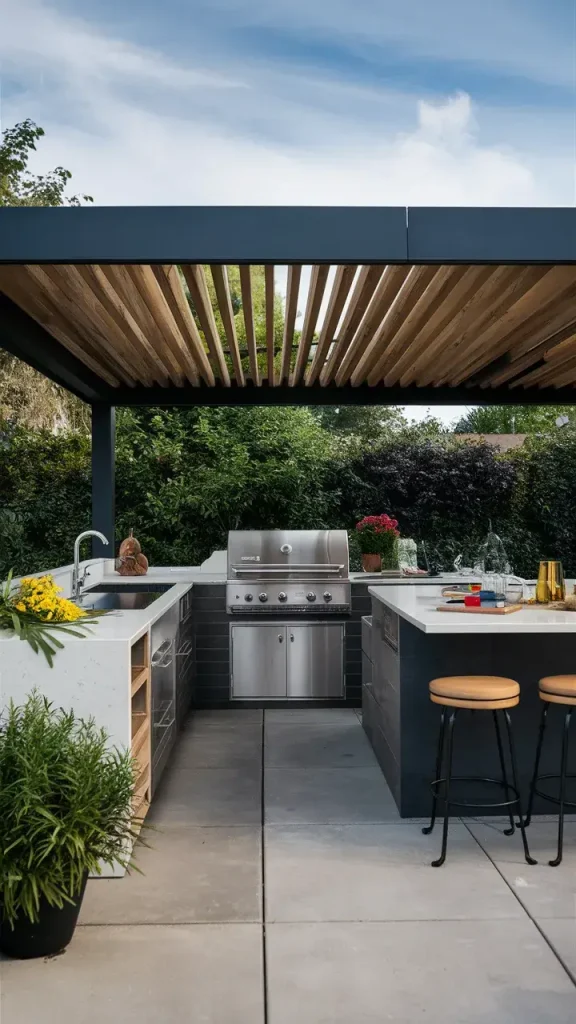
    14. Outdoor Kitchens for Alfresco Dining

    Elevate your backyard with an outdoor kitchen, creating a chic and practical entertainment zone. From fully equipped setups with appliances and counters to basic grill areas, outdoor cooking lets you savor fresh air and connect with guests while you cook.

    Think about incorporating a built-in grill, sink, and storage for ultimate ease. A bar with stools offers extra seating and a social hub. Outdoor kitchens are adaptable to any area and price point. Enjoy delightful and practical open-air dining!

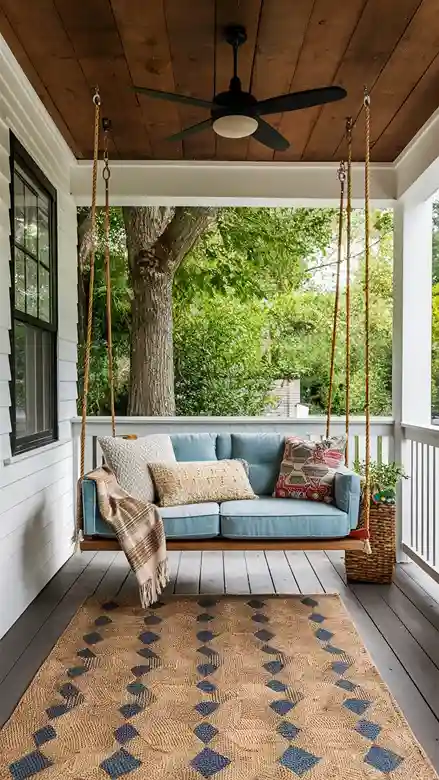
    15. Swing Seats for Fun and Relaxation

    Swing seats offer a fun and calming touch to any outdoor area. They bring back fond memories and provide a great way to relax and enjoy the outdoors. You can find swing seats in many designs, ranging from traditional porch swings to contemporary hanging chairs and hammocks.

    Select a durable, weather-proof swing that complements your outdoor area and personal taste. Install it on a porch roof, pergola, or a robust tree limb. Enhance comfort and visual appeal with plush cushions and cozy throws. Swing seats offer both enjoyment and a peaceful retreat to appreciate your outdoor environment.

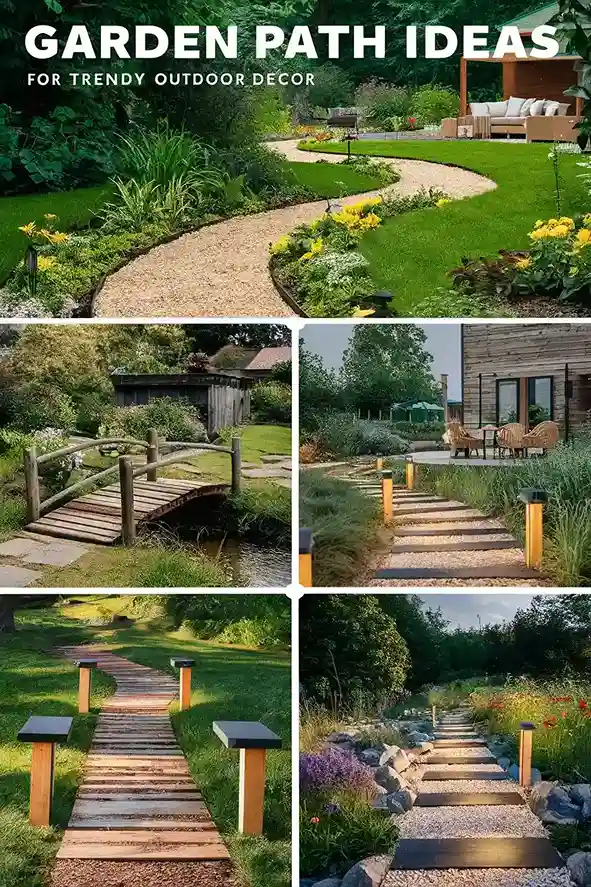
    16. Garden Paths for Structure and Beauty

    Garden paths offer both practicality and beauty. They direct guests through your garden and enhance its overall design.

    A garden path adds charm and elegance. Gravel, stone, brick, or wood – the right path elevates your garden’s beauty.

    Think about incorporating stepping stones for a charming, natural aesthetic. Alternatively, choose a modern, streamlined design using concrete or pavers. Enhance the path’s appeal by bordering it with plants, flowers, or strategic lighting. This highlights the route and adds visual flair. A well-designed garden path offers convenient access and encourages you to explore and appreciate your outdoor space in 2025.

    17. Shade Sails for Modern Sun Protection

    Shade sails offer a modern and elegant solution for sun protection outdoors. Crafted from robust, weather-resistant materials, they stretch between posts, walls, or trees. This creates cool, shaded havens on your patio, deck, or garden, perfect for enjoying the outdoors in 2025.

    Shade sails, now offered in diverse shapes, sizes, and trendy colors, provide versatile sun protection. Use them alone or layer for a visually appealing effect. Their flexible design allows for easy installation and seasonal removal. Beyond sun protection, shade sails enhance your outdoor space with a contemporary, architectural flair, making them a stylish and practical addition for 2025.

    18. Outdoor Fireplaces for Warmth and Ambiance

    Elevate your backyard with an outdoor fireplace, creating a warm and welcoming haven. Enjoy cozy evenings and make it the centerpiece of your outdoor space. Choose from diverse styles, ranging from classic brick and stone to contemporary designs, all updated for 2025.

    Elevate your outdoor space by arranging plush seating near the fireplace. Think stylish outdoor sofas or inviting lounge chairs for a relaxing haven. Enhance the atmosphere with practical firewood storage, charming lanterns, and eye-catching decorations. An outdoor fireplace boosts your space’s functionality and introduces a luxurious, comfortable vibe in 2025.

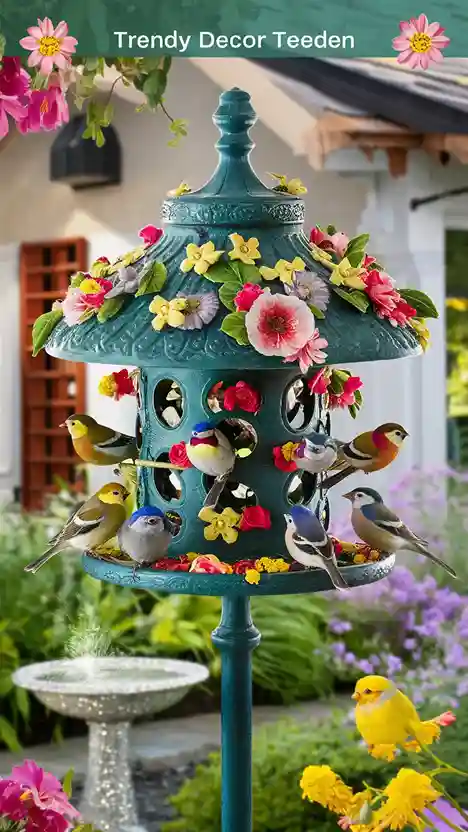
    19. Bird Feeders for Wildlife Attraction

    Bird feeders enhance any garden, drawing diverse bird species and enlivening your outdoor area. Available in numerous styles, from basic tubes to elaborate designs, they can be suspended from trees or hooks, or mounted on stands.

    Select bird feeders designed for effortless cleaning and refilling. Enhance the environment by placing a bird bath close by for a water source. Observing birds in your garden offers a calming and pleasurable experience. Bird feeders also aid local wildlife by ensuring a consistent food supply. This feature improves your outdoor space and strengthens your bond with nature.

    20. Garden Benches for Restful Spots

    Garden benches remain a timeless and useful feature for any outdoor area. They provide a relaxing place to sit and appreciate your environment. A garden bench enhances both the appeal and usability of your space, whether it’s tucked away in a quiet corner or integrated into a larger seating arrangement.

    Select a bench crafted from resilient materials. Teak, wrought iron, or recycled plastic are excellent choices for weather resistance. Enhance comfort and style with added cushions. Garden benches are available in diverse designs, spanning traditional to modern aesthetics. This ensures a seamless integration with your existing decor. They offer an ideal space for reading, unwinding, or appreciating your garden’s splendor.

    21. Outdoor Clocks for Practical Decor

    Enhance your garden or patio with an outdoor clock. These clocks are both functional and beautiful. They allow you to easily check the time while outside. Plus, they add a touch of style to your outdoor area. Built to last, outdoor clocks use weather-resistant materials and finishes.

    Select an outdoor clock that harmonizes with your patio or garden’s style. Consider a classic clock with Roman numerals for a vintage touch, or a minimalist, contemporary design for a modern feel. Many outdoor clocks now include thermometers or barometers, offering convenient weather updates. Beyond its decorative value, an outdoor clock boosts the practicality of your outdoor area.

    Elevate your outdoor area into a chic and fashionable retreat with innovative design and carefully chosen elements. These 21 updated decor ideas provide ample inspiration for crafting a stunning and welcoming outdoor space that showcases your unique taste, perfect for any area from a compact balcony to a sprawling garden.

  • WOW Front Yard Walkway Ideas!

    A beautiful front yard walkway dramatically enhances your home’s curb appeal. It also creates a welcoming entrance. Whether you prefer a timeless design, a contemporary style, or a personalized touch, the perfect walkway makes a lasting impression. Consider these updated ideas for 2025.

    Discover 17 fresh front yard walkway ideas to spark inspiration for your upcoming 2025 landscaping project.

    1. Brick Pathways

    Brick pathways offer enduring beauty and sophistication. Their resilience and traditional aesthetic have made them a top pick for homeowners for generations. You can arrange bricks in diverse patterns like herringbone, basket weave, or running bond, each creating a unique visual impact.

    Bricks offer a rich, natural aesthetic that harmonizes with diverse landscape designs. They enhance the appeal of classic, colonial, and even contemporary homes. Plus, bricks require minimal upkeep and endure both heavy use and harsh weather.

    For a charming, aged aesthetic, explore reclaimed bricks. They infuse your walkway with unique character and a sense of history. This instantly elevates your front yard’s appeal. You can also integrate bricks with grass or ground cover. This softens the walkway’s edges, creating a more natural, blended appearance.

    2. Flagstone Walkways

    Flagstone walkways are celebrated for their inherent natural charm and distinctive, non-uniform forms. Every flagstone is unique, creating a mosaic pattern that feels both organic and visually captivating. These walkways are perfect for achieving a natural, earthy aesthetic in your 2025 front yard design.

    Flagstones offer diverse color options. Select from cool grays and blues or warm reds and browns. Match your home’s exterior perfectly. Install them directly into the soil for a rustic feel. Alternatively, set them in concrete for a cleaner, structured design.

    Flagstone walkways offer excellent slip resistance, ensuring safety in any weather. Their robust nature guarantees longevity with little upkeep. Boost their visual appeal by adding moss or small plants between the stones.

    3. Concrete Pavers

    Concrete pavers offer a flexible and budget-friendly solution for front yard walkways. Their diverse range of shapes, sizes, and colors allows for personalized designs that match your unique style. Whether you prefer a modern, minimalist look or a classic, traditional pattern, concrete pavers can accommodate diverse aesthetic tastes.

    Concrete pavers offer exceptional durability, a major benefit. They’re built to handle significant foot traffic and changing weather conditions. Pavers resist cracking better than poured concrete. Plus, replacing a damaged paver is simple. It won’t disrupt the surrounding walkway.

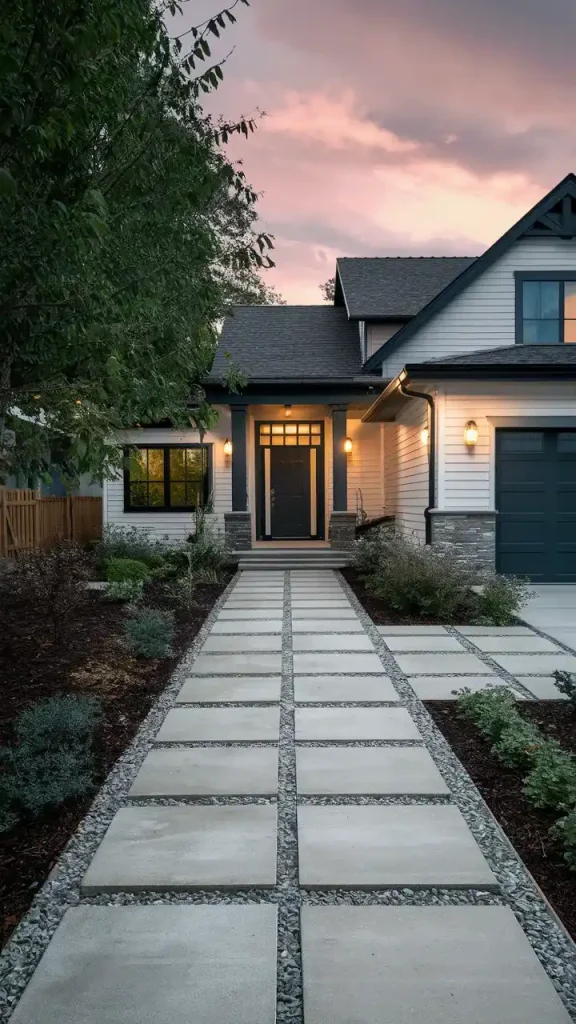
    Enhance visual appeal by blending paver colors and shapes. Integrate gravel or decorative stones for a personalized design. Concrete pavers excel in crafting geometric patterns and modern layouts, offering a sleek aesthetic.

    4. Gravel Paths

    Gravel pathways provide a delightful, natural aesthetic that complements outdoor spaces beautifully. They are generally simple and budget-friendly to create, making them a favorite option for homeowners. Gravel is available in diverse sizes and hues, enabling personalized designs that enhance your landscape.

    Gravel walkways offer superior drainage, a key advantage. Water quickly filters through the gravel, eliminating puddles and minimizing erosion risks. Furthermore, gravel paths require minimal upkeep. Simple tasks like occasional raking and replenishing gravel are typically sufficient.

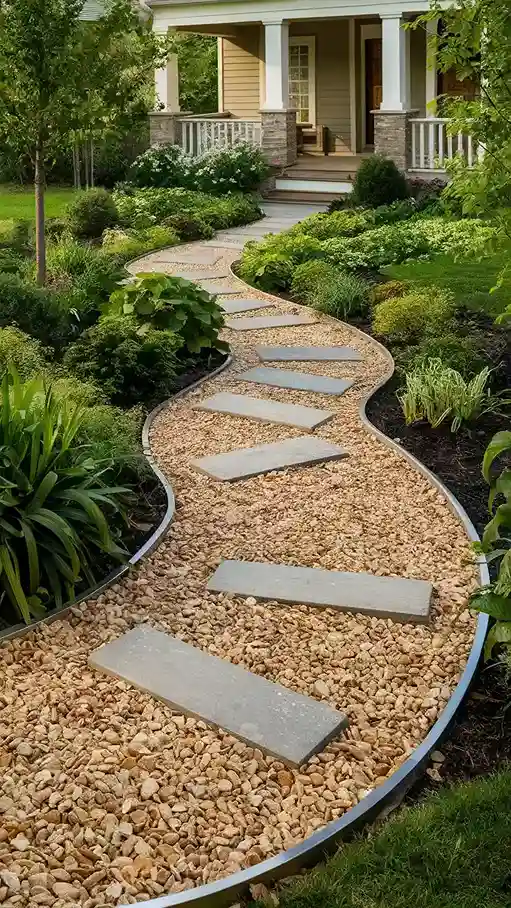
    Stop gravel from straying! Install edging using steel, plastic, or stone. Create structured paths with stepping stones. Or, embrace a relaxed, cottage garden feel with informal gravel layouts.

    5. Stepping Stones

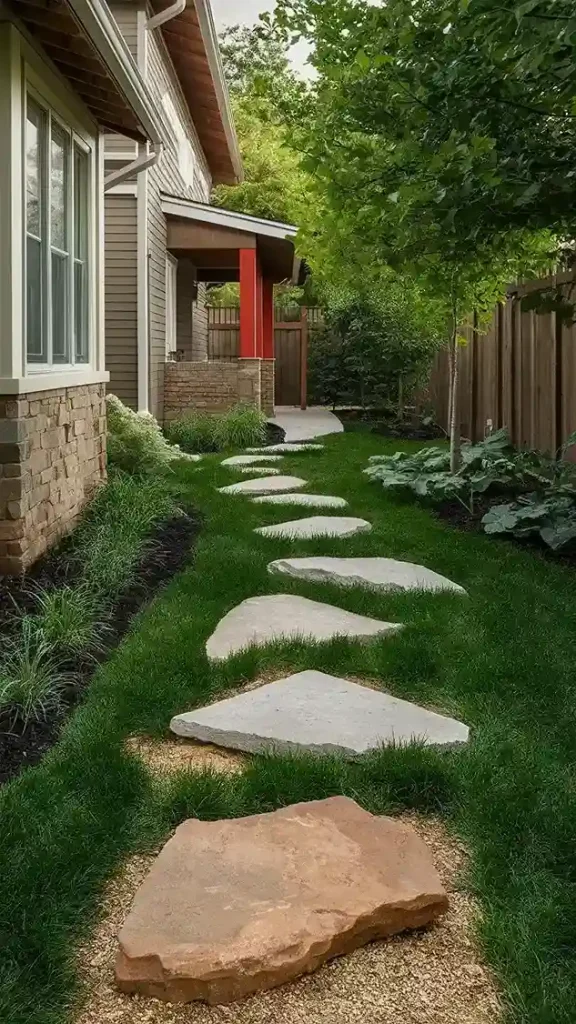
    Stepping stone walkways add a charming, natural touch to your front yard. Build these paths with materials like natural stone, concrete, or reclaimed wood. The unique placement of each stone allows for creative and personalized designs.

    Stepping stones offer a fantastic way to build paths in gardens or across lawns. They encourage grass or ground cover to flourish between them, resulting in a vibrant, green effect that enhances the landscape’s beauty. These walkways are ideal for homes embracing a natural or rustic design, adding a touch of organic charm.

    Installing stepping stones is quite simple. Arrange the stones in your preferred design, making sure each one is even and secure. Consider adding gravel or mulch around them to enhance the path’s definition. Beyond their practicality, stepping stones bring a distinctive, artistic touch to your landscape in 2025.

    6. Cobblestone Walkways

    Cobblestone paths bring a historic and charming feel. Commonly found in European cities, they’re crafted from small, rounded stones set in sand or mortar. Their uneven surface and diverse colors offer a visually appealing and textured aesthetic. Cobblestones are both elegant and long-lasting.

    Cobblestone walkways offer exceptional durability, easily handling significant foot traffic and extreme weather. Their resistance to cracking and shifting surpasses many other materials, ensuring a lasting front yard feature. However, in 2025, consider that their uneven surface might pose challenges for households prioritizing accessibility.

    Installing cobblestone walkways requires significant effort, but the beautiful outcome is rewarding. For a more visually appealing design, use cobblestones with different colors and dimensions. This achieves a more organic and less structured look, enhancing the walkway’s overall attractiveness.

    7. Wooden Walkways

    In 2025, wooden walkways remain a top choice for enhancing front yards. They bring a cozy, organic feel, perfectly complementing rustic, coastal, and modern homes. Opt for straight, boardwalk-style paths or explore creative designs with curves and unique patterns using wooden planks.

    Wooden walkways offer exceptional adaptability, making them a popular choice. Select from diverse wood options like cedar, redwood, or pressure-treated lumber. Each provides unique durability and weather resistance. Elevate your walkway for a striking visual or to traverse uneven ground effectively.

    Maintaining wooden walkways is crucial to avoid rot and deterioration. Seal or stain them regularly to shield the wood from moisture and sun damage. While requiring some care, wooden walkways offer a distinctive, natural beauty. They can significantly improve your front yard’s charm.

    8. Stamped Concrete

    Stamped concrete walkways provide the aesthetic of premium materials, such as stone or brick, at a significantly lower price. This method involves pouring concrete and then imprinting it with a chosen design while it’s still pliable. The outcome is a resilient, enduring walkway that replicates the look of pricier materials. Updated for 2025, advancements in stamping techniques offer even more realistic textures and color options.

    Stamped concrete offers unparalleled customization. Select from diverse patterns, textures, and colors to perfectly complement your home’s design. Options range from classic cobblestone and elegant slate to rustic wood planks and traditional brick. This extensive versatility makes stamped concrete a fantastic, budget-friendly solution for homeowners seeking a unique and personalized aesthetic in 2025.

    Beyond its stunning look, stamped concrete offers easy upkeep and simple cleaning. It’s built to handle lots of use and tough weather, a smart pick for your front yard paths. Regular sealing keeps it looking great and lasting longer.

    9. Interlocking Pavers

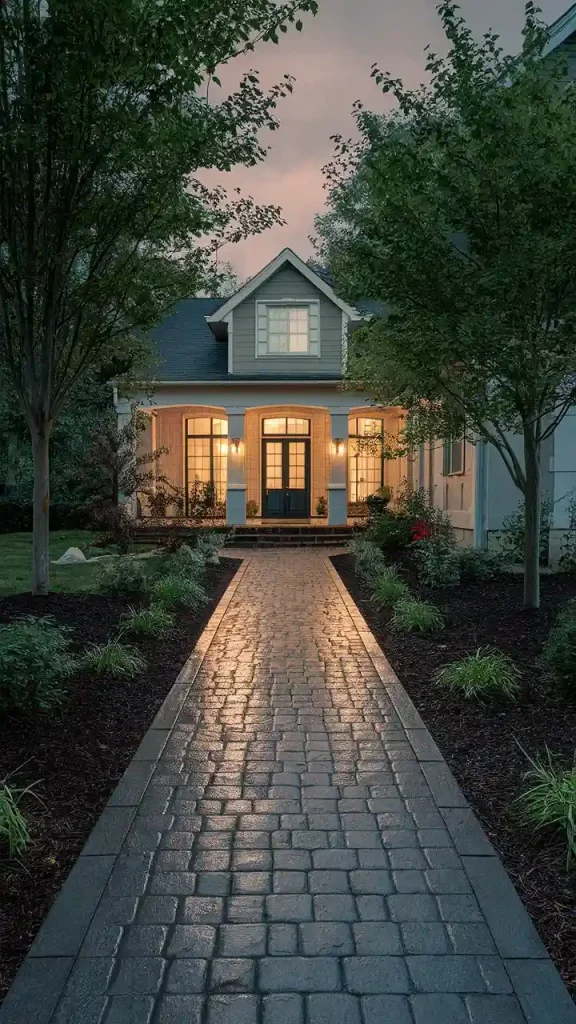
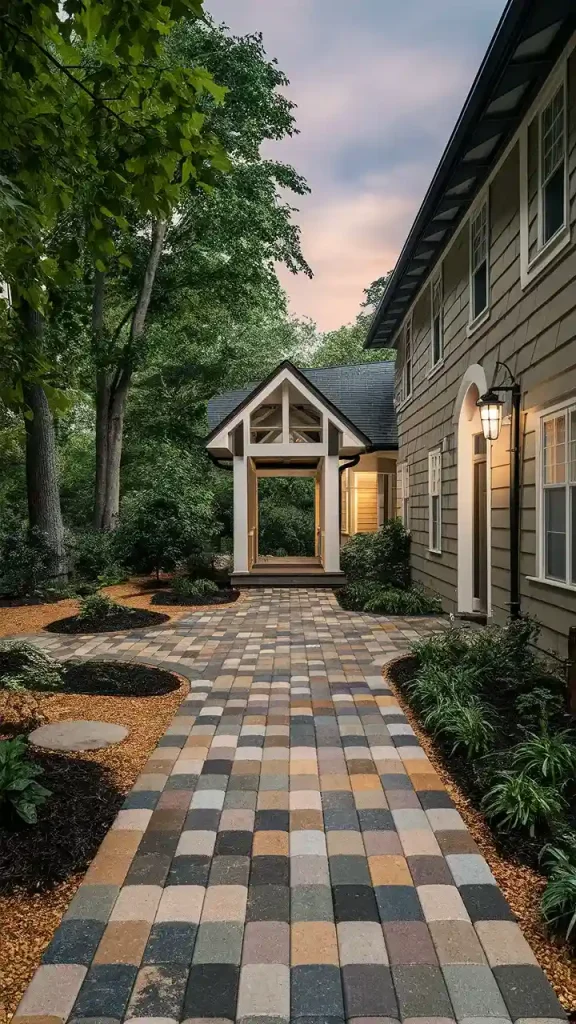
    Interlocking pavers remain a top pick for front yard walkways because they are adaptable and simple to install. You can find these pavers in diverse shapes, sizes, and colors, unlocking limitless design options. Their interlocking structure creates a strong, long-lasting surface that handles heavy use and all types of weather.

    Interlocking pavers excel because they adapt to temperature fluctuations. This flexibility minimizes cracking and damage. Should a paver break, replacement is simple and localized. This ease of repair makes them a budget-friendly and sensible choice.

    To achieve a truly distinctive aesthetic, explore diverse colors and shapes. Craft captivating patterns or borders. Integrate interlocking pavers with materials like gravel or natural stones. This adds texture and visual appeal to your walkway. Expertly installed interlocking pavers dramatically boost your home’s curb appeal in 2025.

    10. Pea Gravel Walkways

    Pea gravel paths offer a budget-friendly and visually appealing solution for front yard landscaping. Composed of tiny, rounded stones available in diverse hues, they create a gentle, organic aesthetic. Simple to install, pea gravel is perfect for crafting meandering walkways that enhance your yard’s allure and individuality. Consider it for a refreshed 2025 landscape design.

    Pea gravel offers superior drainage, preventing water buildup and soil erosion. It’s also easy to care for, needing just periodic raking and topping off to look its best. Use edging like bricks, metal, or stone to keep the gravel in place.

    Enhance visual appeal by pairing pea gravel with sizable stepping stones or pavers. This approach delivers a more organized aesthetic and introduces texture to your pathway. Pea gravel walkways excel in relaxed garden settings and seamlessly blend into diverse landscape concepts. Updated for 2025, these designs remain timeless.

    11. Mulch Walkways

    Mulch pathways offer an environmentally conscious and budget-friendly solution for front yard walkways. Crafted from organic elements such as wood chips or bark, mulch delivers a natural, earthy feel. It integrates beautifully with garden settings. These walkways are ideal for homes embracing a rustic or natural design.

    Mulch walkways offer excellent permeability. Water easily seeps through, minimizing runoff and erosion. Mulch also retains soil moisture and effectively controls weeds. This makes it a smart choice for garden paths in 2025. Installation and replacement are also simple tasks.

    Elevate your walkway’s visual appeal by using diverse mulch types. Shredded hardwood or pine nuggets introduce appealing textures and depth. Combine mulch with decorative stones or gravel for striking contrasts and an enhanced aesthetic in 2025.

    Define your mulch walkways with borders of wood, metal, or stone. This keeps the mulch contained and clearly marks the path. Enhance the edges by planting easy-care ground cover. This softens the look where the walkway meets the surrounding landscape.

    12. Slate Tile Paths

    Slate pathways provide a sophisticated, modern aesthetic, perfectly suited for today’s homes. This natural stone is incredibly durable and boasts unique color variations. Expect to see beautiful shades of deep blues, greens, rusty reds, and earthy browns. Slate’s smooth texture and subtle shine create an inviting walkway for your front yard.

    Slate tile paths offer exceptional adaptability, making them a top choice for homeowners in 2025. You can arrange them in diverse patterns like straight lines, herringbone, or unique random designs, enabling personalized and creative landscaping. Furthermore, slate tiles require little maintenance and endure outdoor conditions effectively, ensuring long-lasting beauty with minimal effort.

    Elevate your landscape’s beauty by pairing slate tiles with gravel or grass. This adds texture and visual depth. Experiment with contrasting colors or sizes to design unique patterns or borders for your walkway. Well-installed and maintained slate tile paths will boost your home’s curb appeal for many years.

    13. Recycled Glass Paths

    Eco-friendly walkways are now achievable with recycled glass paths. These innovative paths use crushed glass set in resin or concrete. The result is a vibrant, reflective surface, perfect for a modern front yard. Choose from a wide array of colors to personalize your path design in 2025.

    Recycled glass pathways offer significant environmental advantages. Utilizing discarded glass bottles and containers helps decrease landfill waste and lessen your impact on the planet. Furthermore, these paths are exceptionally durable, withstanding harsh weather, UV exposure, and constant use, making them an ideal and long-lasting option for any outdoor area.

    Elevate your recycled glass pathways with strategic lighting or vibrant floral borders. The glass’s natural reflectivity creates breathtaking nighttime displays. With consistent upkeep, these paths become a dazzling centerpiece for your front yard, offering a modern and eco-conscious aesthetic in 2025.

    14. Japanese Zen Gardens

    Zen gardens in Japan, often called karesansui or dry landscapes, provide a tranquil and simple design for front yard paths. These gardens usually use gravel or sand, carefully raked to depict moving water. Strategically positioned rocks and stones represent islands or mountains, creating a peaceful scene.

    Japanese Zen gardens emphasize simplicity as a core tenet. By minimizing dense foliage, they achieve a pristine and orderly appearance. This fosters a feeling of peace and balance. The thoughtfully planned layout promotes focused awareness and deep reflection during your stroll.

    Transform your front yard into a serene Japanese Zen garden. Begin by defining your walkway using wood or stone edging. Next, fill the area with fine gravel or sand. Use a rake to craft patterns that evoke flowing water. Strategically place large rocks or boulders to enhance the design and add visual appeal.

    15. Mosaic Tile Walkways

    Mosaic tile walkways provide a vibrant and artistic option for your front yard paths. Crafted from small, uniquely shaped tiles in diverse colors and patterns, they form captivating designs or images. In 2025, mosaic tile walkways continue to be a popular choice, adding a personalized and colorful element to any landscape design.

    Mosaic tile walkways offer unmatched adaptability. Select from diverse materials like ceramic, glass, porcelain, or natural stone. Each provides unique textures and finishes. Arrange mosaic tiles in countless ways for distinctive, captivating designs.

    Begin your mosaic tile walkway project by sketching your design. This helps plan the layout and colors. Next, arrange the tiles on the ground to confirm the pattern fits. Once happy, use mortar or adhesive to secure the tiles to a solid base. Finally, add trim or border tiles for a refined edge.

    16. Metal Grate Paths

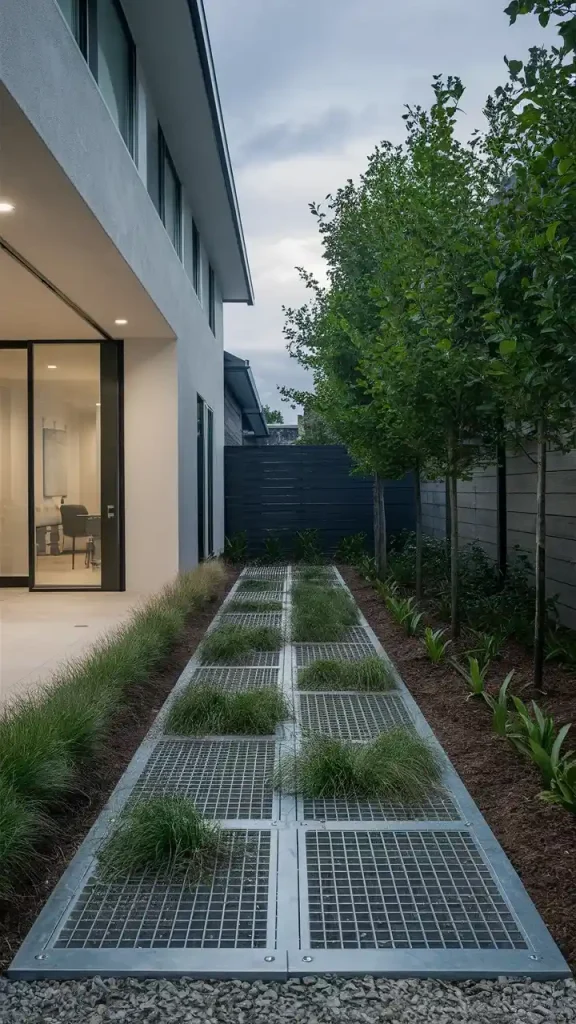
    Metal grate walkways provide a contemporary, industrial vibe, enhancing your front yard’s appeal. Constructed from robust metal grids on a solid frame, they allow vegetation to flourish through the openings. These paths offer a streamlined, minimalist design, promoting efficient drainage and air circulation.

    Metal grate pathways offer exceptional durability and require minimal upkeep. Crafted to withstand diverse weather conditions, these grates resist rust and corrosion, ensuring long-lasting performance outdoors. Their design also provides superior traction and stability, even when surfaces are wet.

    Constructing a metal grate pathway begins with site preparation. Excavate the desired area and establish a solid foundation using gravel or compacted earth. Next, position the metal grates onto the prepared base and firmly attach them to the supporting structure. To complete the look, sow grass seeds or ground cover between the grate openings. Consistent watering will encourage root establishment. Metal grate pathways offer a streamlined, minimalist aesthetic, perfectly complementing modern and contemporary residences in 2025.

    17. Tiered Garden Paths

    Multi-level garden paths present a vibrant, three-dimensional design for your front yard walkway. These paths incorporate several levels, linked by steps or gentle slopes. This creates an engaging visual experience and opens doors for creative landscaping. Tiered paths excel in sloped or terraced front yards, offering both practical access and enhanced beauty.

    Tiered garden paths excel at optimizing space. They beautifully display diverse plants and landscaping features at different levels. Utilize each tier to design unique garden zones. Incorporate flowers, bushes, or miniature trees. This adds vibrant color and appealing texture to your outdoor space.

    Design a multi-level garden path by first mapping out your desired route and deciding how many tiers you’ll need to manage the incline. Next, construct retaining walls or terraces using materials such as stone, wood, or concrete to form each level. Finally, link the tiers with steps, ramps, or winding paths for simple navigation.

    In summary, countless front yard walkway options exist, each with distinct beauty and purpose. From brick’s timeless charm to flagstone’s organic feel, or stamped concrete’s contemporary edge, a style fits every home and garden. Thoughtfully weigh your desires, budget, and upkeep needs. Design a front yard walkway that boosts your home’s appeal, showcasing your unique taste and vision.

  • Mower Choke: Use It Right in 2025!

    Just bought a new lawn mower? You’ve likely seen the choke symbol. It can be confusing at first.

    Let’s define the choke symbol and its practical use. Whether you’re a lawn mower expert or just starting out, we’ll give you a clear explanation of what the choke symbol means and how to use it correctly. This updated guide is relevant for 2025.

    What Is a Choke Symbol?

    In 2025, understanding your lawn mower’s choke symbol remains vital. It controls the air-fuel mix, particularly when starting a cold engine. This ensures optimal performance and a smoother start.

    The choke, when activated (“On”), reduces airflow to the carburetor. This creates a fuel-rich mixture. More fuel and less air make ignition easier. This richer mix provides the heat needed to start a cold engine. The choke symbol indicates restricted airflow. This ensures the correct fuel-air ratio for successful cold starts.

    Conversely, turning the choke “Off” lets air flow freely into the carburetor. This creates a leaner fuel mixture, perfect for normal engine operation. Do this after the engine warms up and runs smoothly without needing extra fuel.

    Usually found near the choke lever, the choke symbol indicates its function. Moving the lever to “On” reduces airflow. Moving it to “Off” allows normal airflow.

    How To Read Choke Symbols

    Lawn mower choke symbols usually have “On” and “Off” positions. These settings control the choke function. Understanding your mower’s specific symbols is essential for proper operation.

    Lawn mower symbols can vary across models. Understanding the specific symbols on your mower is crucial for safe and effective operation.

    Let’s explore different choke symbols and their meanings. This guide will help you understand them more clearly.

    “O” Symbol With a Line: “On” Position

    Lawn mower choke symbols differ slightly across models. However, they typically feature two positions: “On” and “Off.” These indicate the choke settings. Some mowers use an “O” symbol with added lines. An “O” with a horizontal or diagonal line signifies “Choke On.” This means airflow is restricted to aid starting.

    Alternatively, an “O” crossed by a vertical line means the choke is “Off.” This allows unrestricted airflow. Many lawnmowers also use a rabbit (open choke, running) and turtle (closed choke, starting) symbol to show choke position.

    These markings allow users to quickly recognize and fine-tune the choke. This ensures optimal engine performance during various operational stages.

    Rabbit and Turtle Symbol

    The rabbit icon means the choke is fully open. This allows maximum airflow to the engine. It signals the engine is ready for normal running in 2025.

    On the other hand, the turtle icon means the choke is engaged. This restricts airflow, guaranteeing a steady fuel supply for starting the engine.

    These widely recognized symbols clearly show the choke’s current state. They help users quickly understand and fine-tune it based on what the engine requires.

    “I” and “O” Choke Symbol

    Many lawnmowers feature choke symbols with “I” and “O” markings. These, along with a red or blue switch, manage the choke’s operation and airflow. We’ll explore the meaning of these symbols and discuss other choke label variations found on various lawnmower types.

    “I” Position (Choke Engaged/Closed): The “I” setting means the choke is active or closed. This limits air flowing into the carburetor, resulting in a richer fuel mix. This is very helpful for starting engines in cold weather. The richer mix ignites more easily. In cold temperatures, switch to “I” to start the engine.

    “O” Position (Choke Off or Open): Setting the switch to “O” means the choke is off. This allows maximum airflow into the carburetor. This creates a leaner fuel-air mix, perfect for normal running. Switch to “O” once the engine is warm and ready for regular use.

    While “I” and “O” symbols are frequently used, not every lawnmower uses them. Some models use different labels for their choke controls.

  • “Open/Close”: “Open” indicates the choke is off, while “Close” suggests that the choke is on.
  • “On/Off”: “On” signifies that the choke is engaged (closed), while “Off” means that the choke is disengaged (open).
  • “Start/Closed”: “Start” implies that the choke is on, while “Closed” indicates that the choke is off.
  • “Full Choke/Run”: “Full Choke” or simply “Choke” signifies that the choke is engaged or closed to restrict airflow, while “Run” indicates that the choke is disengaged or open.
  • Some twin-cylinder lawnmowers feature a “Half Choke” setting. It sits between “Full Choke” and “Run.” “Half Choke” means the choke is partially engaged. This helps prevent engine stalling when moving from “Run” to “Full Choke.”

    If your mower lacks a “Half Choke” marking and you’re unsure of the correct choke setting, try this. Place the choke lever between “Full Choke” and “Run”. This lets the engine smoothly adjust to less airflow.

    If you struggle to understand these choke symbols, check your lawnmower’s manual. It usually explains each symbol and the best choke lever setting for starting and running your specific mower.

    How Does A Choke Work On A Lawn Mower

    A lawn mower choke modifies the engine’s air-fuel mix. This helps start a cold engine more easily. It works by adjusting the carburetor.

    Standard Functioning: Once the engine reaches its ideal temperature, it needs a precise air-fuel ratio for peak performance. Usually, the choke is “Off” or “Open.” This lets the right amount of air into the carburetor, creating a balanced air-fuel mix.

    Starting a Cold Engine (2025 Update): Starting a lawnmower with a cold engine requires a richer air-fuel mixture for easy ignition. This means more fuel and less air. That’s where the choke is essential. Engaging the choke, by moving the lever or knob to the “On” or “Closed” position, limits the air entering the carburetor.

    Enriched Fuel Blend: When the choke is engaged, the engine gets less air. This creates a fuel-rich mixture. This blend ignites easier because it has more fuel. This helps the engine start quickly, especially when it’s cold.

    Engine Warm-Up: After starting, as the engine warms, slowly move the choke to the “Off” or “Open” setting. This increases airflow to the carburetor. It restores the air-fuel mixture to a normal, leaner ratio. This ensures efficient and smooth engine performance.

    The choke provides a richer fuel mixture for easier cold starts in lawn mowers. After the engine runs smoothly and warms up, turn the choke “Off.” This restores the correct air-fuel balance for peak performance.

    Choke Location of The Lawn Mower

    Finding the choke on your lawn mower depends on its specific make and model. This guide offers general locations to check for the choke lever or knob.

  • Under the Air Filter Cover: Often, the choke lever or knob can be found beneath the air filter cover. To access it, you might need to remove a cover or access panel.
  • On the Engine: Some mowers have the choke control directly on the engine, usually near the carburetor. It may be on the side or top of the engine.
  • On the Handlebar: On certain models, the choke control is on the handlebar of the mower for convenient access while operating.
  • Integrated with Throttle Control: In newer models, the choke control may be part of the throttle control. To engage the choke, you would move the throttle lever to a specific “choke” position.
  • Refer to the Owner’s Manual: If you’re uncertain about where to find the choke on your specific mower, consult the owner’s manual that came with the mower. It will contain precise instructions regarding the choke’s location and how to use it.
  • The choke controls the air-fuel ratio for cold starts, ensuring smoother ignition. Once the engine reaches operating temperature, revert the choke to its “run” or “normal” setting for optimal performance.

    Can You Operate a Lawn Mower With the Choke On?

    Running a lawnmower with the choke engaged is possible, but not recommended for regular use. The choke’s main function is to enrich the fuel mixture when starting a cold engine, aiding ignition. After the engine starts and warms up, switch the choke to the “run” or “normal” setting for optimal performance.

    Leaving the choke engaged during mowing creates an overly rich fuel mixture. This means the engine receives too much fuel and not enough air, causing problems.

  • Reduced Performance: The engine may not perform at its best, resulting in decreased power and cutting efficiency.
  • Excessive Fuel Consumption: Running with the choke on consumes more fuel than necessary, leading to higher operating costs.
  • Carbon Buildup: Over time, excessive fuel can cause carbon buildup on spark plugs and other engine components, potentially reducing their lifespan.
  • Increased Emissions: Operating with the choke on generates more emissions, which is not environmentally friendly.
  • Use the choke to start a cold lawnmower. However, turn it off after the engine warms up. This ensures optimal performance, fuel efficiency, and extends the engine’s life.

    When Should You Run the Lawn Mower With the Choke On?

    Consider using the choke on your lawn mower in these scenarios:

  • Fuel Line or Filter Blockage: If there’s a blockage in the fuel line or filter that restricts fuel flow to the carburetor.
  • Suboptimal Fuel Mixture: When the fuel in the tank has a less-than-optimal octane mixture, often due to water or additives in the fuel.
  • If your mower struggles in these situations, take action. Clear any fuel line blockages. Replace the fuel filter if needed. Correct fuel mixture issues by emptying the old fuel and adding fresh fuel to the tank.

    Summary

    Knowing your lawn mower’s choke symbol is key for easy starting. Choke symbols differ across various lawn mower models.

    A closed choke symbol indicates the choke is engaged. This restricts airflow, aiding engine ignition, especially when it’s cold.

    Conversely, an open symbol means the choke is off. This allows maximum airflow. Once the engine warms up, disable the choke. This guarantees efficient mower performance.

    Please share this helpful information with other lawn care lovers. Help them improve their lawn mowing skills!

    You Might Also Like:

    1. How To Clean Lawn Mower Air Filter
    2. Bobcat Codes: Fix It Fast! (2025)

      Bobcat loaders are essential for efficient construction and landscaping. Occasionally, these machines encounter issues. Fortunately, Bobcats feature a diagnostic computer system that displays error codes. These codes pinpoint the problem, enabling us to repair the Bobcat and restore its functionality. Understanding these codes is key to quick troubleshooting and getting your Bobcat back to work in 2025.

      Bobcat fault codes list

      Error Code Description Possible Causes Solutions
      01-16 Air filter not connected Air filter not properly attached Check and secure the air filter; replace if necessary
      01-17 Clogged air filter Dirty air filter blocking airflow Clean or replace the clogged air filter
      02-16 No hydraulic discharge filter connected Missing or improperly installed hydraulic discharge filter Install a new hydraulic discharge filter
      02-17 Clogged hydraulic discharge filter Hydraulic discharge filter clogged with contaminants Clean or replace the clogged hydraulic discharge filter
      03-09 Low battery voltage Battery is low on charge or faulty Charge or replace the battery if necessary
      03-10 High battery voltage Battery voltage too high Disconnect and have the battery checked by a professional
      03-11 Extremely high battery voltage Dangerously high battery voltage Disconnect and seek professional assistance immediately
      03-14 Extremely low battery voltage Battery almost depleted or faulty Charge or replace the battery if needed
      03-22 Battery voltage below maximum permissible Battery voltage too low Check battery health and charging system; replace if needed
      04-09 Low oil pressure in the engine Engine oil leak or low oil level Check oil level and system; seek professional assistance
      04-14 Extremely high engine oil pressure Engine overheating or oil passages blocked Stop engine, let it cool, and seek professional help
      04-15 Engine oil pressure at emergency shutdown level Critical engine oil pressure Stop engine immediately; inspect oil system; professional help
      04-21 Engine oil pressure above maximum permissible Engine oil pressure too high Stop engine, let it cool, and seek professional help
      04-22 Engine oil pressure below maximum permissible Engine oil pressure too low Stop engine; check oil level and leaks; professional help
      05-09 Low recharge pressure in hydraulic system Hydraulic fluid leak or system component issue Check fluid level and leaks; seek professional assistance
      05-14 Extremely low recharge pressure in hydraulic system Severe hydraulic system problem Stop using machine; seek professional inspection and repair
      05-15 Recharge pressure at engine emergency shutdown level Critical hydraulic system pressure Stop using machine; seek professional inspection and repair
      05-21 Recharge pressure above maximum permissible Hydraulic system pressure too high Stop using machine; have professional adjust pressure
      05-22 Recharge pressure below maximum permissible Hydraulic system pressure too low Have professional inspect and adjust hydraulic system
      06-10 High engine speed Engine running at a high speed Adjust engine speed to a normal level
      06-11 Extremely high engine speed Engine running at a dangerously high speed Immediately reduce engine speed to a safe level
      06-13 No engine speed signal Lack of signal indicating the engine speed Check engine speed sensor; repair or replace if necessary
      06-15 Engine speed at the emergency shutdown level Engine speed reached a critical level Stop the engine to avoid damage
      06-18 Engine speed outside the permissible limits Engine speed is not within safe operating limits Adjust engine speed to fall within safe parameters
      07-10 High oil temperature in the hydraulic system Hydraulic system oil temperature is high Check hydraulic system cooling; resolve any issues
      07-11 Extremely high oil temperature in hydraulic system Hydraulic system oil temperature dangerously high Stop using the machine; seek professional help immediately
      07-15 Oil temperature in hydraulic system at emergency shutdown level Hydraulic system oil temperature at a critical point Stop the machine immediately to prevent further damage
      07-21 Oil temperature in hydraulic system above maximum permissible Hydraulic system oil temperature too high Stop using the machine; have professional check and fix issue
      07-22 Oil temperature in hydraulic system below maximum permissible Hydraulic system oil temperature too low Have professional inspect and address hydraulic system issue
      08-10 High engine coolant temperature Engine coolant temperature is high Check cooling system; resolve any issues
      08-11 Extremely high engine coolant temperature Engine coolant temperature dangerously high Stop the engine; seek immediate professional assistance
      08-15 Engine coolant temperature at emergency shutdown level Engine coolant temperature critical Stop the engine immediately to prevent further damage
      08-21 Engine coolant temperature above maximum permissible Engine coolant temperature too high Stop using the machine; have professional check and fix issue
      08-22 Engine coolant temperature below maximum permissible Engine coolant temperature too low Have professional inspect and address engine coolant issue
      09-09 Low fuel level Low fuel level in the tank Refuel the machine to an adequate level
      09-21 Fuel level above maximum permissible Fuel level is higher than the safe limit Check fuel system; resolve any issues
      09-22 Fuel level below maximum permissible Fuel level is lower than the safe limit Refuel the machine to an adequate level
      11-05 Safety frame sensor closed to the battery Safety frame sensor detecting a closed circuit Check sensor connection and wiring; repair or replace as needed
      11-06 Security frame sensor closed to mass Security frame sensor detecting a closed circuit Check sensor connection and wiring; repair or replace as needed
      12-21 Signal PWM Controller front additional hydraulics at upper limit of the range Hydraulic system signal at upper limit Check front additional hydraulics system; adjust if necessary
      12-22 Signal PWM Controller front additional hydraulics at lower limit of the range Hydraulic system signal at lower limit Check front additional hydraulics system; adjust if necessary
      12-23 Signal PWM Controller front additional hydraulics not in neutral position Hydraulic system signal not in neutral Check front additional hydraulics system; resolve any issues
      13-05 Retaining solenoid of fuel cutoff closed on battery Issue with fuel cutoff solenoid circuit Check and repair the fuel cutoff solenoid circuit
      13-06 Retaining solenoid of fuel cutoff closed to mass Issue with fuel cutoff solenoid circuit Check and repair the fuel cutoff solenoid circuit
      13-07 Circuit Break solenoid cutoff fuel Issue with fuel cutoff solenoid circuit Check and repair the fuel cutoff solenoid circuit
      14-02 Motorcyclist the fuel cutoff solenoid, erroneous switching on Incorrect activation of fuel cutoff solenoid Check and repair the fuel cutoff solenoid
      14-03 Motorcyclist the fuel cutoff solenoid, erroneous shutdown Incorrect deactivation of fuel cutoff solenoid Check and repair the fuel cutoff solenoid
      15-02 Motorcyclist solenoid lock thrust, erroneous inclusion Incorrect activation of lock thrust solenoid Check and repair the lock thrust solenoid
      15-03 Motorcyclist solenoid lock thrust, erroneous shutdown Incorrect deactivation of lock thrust solenoid Check and repair the lock thrust solenoid
      16-05 The holding solenoid lock is closed on the battery Issue with the holding solenoid circuit Check and repair the holding solenoid circuit
      16-06 The holding solenoid of the thrust lock is closed to the mass Issue with the holding solenoid circuit Check and repair the holding solenoid circuit
      16-07 Tearing chain restraint solenoid lock thrust Issue with the holding solenoid circuit Check and repair the holding solenoid circuit
      17-05 The hydraulic valve solenoid is closed to the battery Issue with hydraulic valve solenoid circuit Check and repair the hydraulic valve solenoid circuit
      17-06 The hydraulic valve solenoid is closed to the mass Issue with hydraulic valve solenoid circuit Check and repair the hydraulic valve solenoid circuit
      17-07 Rupture of the solenoid circuit of the hydraulic shutoff valve Issue with hydraulic valve solenoid circuit Check and repair the hydraulic valve solenoid circuit
      18-05 The spool solenoid is closed on the battery Issue with the spool solenoid circuit Check and repair the spool solenoid circuit
      18-06 The spool solenoid is closed to the mass Issue with the spool solenoid circuit Check and repair the spool solenoid circuit
      18-07 Spool solenoid circuit break Issue with the spool solenoid circuit Check and repair the spool solenoid circuit
      19-02 Bucket positioning solenoid, erroneous switching on Incorrect activation of bucket positioning solenoid Check and repair the bucket positioning solenoid
      19-03 Bucket positioning solenoid, erroneous shutdown Incorrect deactivation of bucket positioning solenoid Check and repair the bucket positioning solenoid
      20-02 Speed switching solenoid, erroneous switching on Incorrect activation of speed switching solenoid Check and repair the speed switching solenoid
      20-03 Speed switch solenoid, erroneous shutdown Incorrect deactivation of speed switching solenoid Check and repair the speed switching solenoid
      21-02 Glow plugs, erroneous inclusion Incorrect activation of glow plugs Check and repair the glow plugs
      21-03 Glow plugs, erroneous shutdown Incorrect deactivation of glow plugs Check and repair the glow plugs
      22-02 Starter, erroneous inclusion Incorrect activation of the starter Check and repair the starter circuit
      22-03 Starter, erroneous shutdown Incorrect deactivation of the starter Check and repair the starter circuit
      23-02 Rear base solenoid, erroneous switching on Incorrect activation of rear base solenoid Check and repair the rear base solenoid circuit
      23-03 Rear base solenoid, erroneous shutdown Incorrect deactivation of rear base solenoid Check and repair the rear base solenoid circuit
      24-02 Rear Pull Solenoid, erroneous switching on Incorrect activation of rear pull solenoid Check and repair the rear pull solenoid circuit
      24-03 Rear Pull Solenoid, erroneous shutdown Incorrect deactivation of rear pull solenoid Check and repair the rear pull solenoid circuit
      25-02 Rear auxiliary proportional solenoid, erroneous inclusion Incorrect activation of rear auxiliary proportional solenoid Check and repair the rear auxiliary proportional solenoid circuit
      25-03 Rear auxiliary proportional solenoid, erroneous shutdown Incorrect deactivation of rear auxiliary proportional solenoid Check and repair the rear auxiliary proportional solenoid circuit
      26-02 Erroneous inclusion of the front base solenoid Incorrect activation of front base solenoid Check and repair the front base solenoid circuit
      26-03 Erroneous shutdown of the front base solenoid Incorrect deactivation of front base solenoid Check and repair the front base solenoid circuit
      27-02 Erroneous inclusion of the front Stock Solenoid Incorrect activation of front stock solenoid Check and repair the front stock solenoid circuit
      27-03 Erroneous shutdown of the front Stock Solenoid Incorrect deactivation of front stock solenoid Check and repair the front stock solenoid circuit
      28-02 Erroneous inclusion of solenoid Divertera Incorrect activation of diverter solenoid Check and repair the diverter solenoid circuit
      28-03 Incorrect solenoid shutdown Divertera Incorrect deactivation of diverter solenoid Check and repair the diverter solenoid circuit
      29-02 Large feed solenoid, erroneous switching on Incorrect activation of large feed solenoid Check and repair the large feed solenoid circuit
      29-03 Large feed solenoid, erroneous shutdown Incorrect deactivation of large feed solenoid Check and repair the large feed solenoid circuit
      30-28 Controller memory failure Issue with the loader’s controller memory Professional diagnosis and repair of the controller memory
      31-28 Recovery mode failure Issue with the loader’s recovery mode Professional diagnosis and repair of the recovery mode
      32-04 Advanced Management (ACS) not reported to the controller Bobcat Issue with the loader’s Advanced Management (ACS) system Professional diagnosis and repair of the Advanced Management (ACS) system
      32-23 ACS Advanced Management Not calibrated Advanced Management (ACS) system not calibrated Calibration of the Advanced Management (ACS) system
      32-31 Failure of the actuating mechanism of inclination Issue with the loader’s actuating mechanism of inclination Check and repair the actuating mechanism of inclination
      32-32 Malfunction of the electrical wiring of the actuating mechanism of inclination Issue with electrical wiring of the actuating mechanism of inclination Check and repair the electrical wiring of the actuating mechanism of inclination
      32-33 Failure of the electrical wiring of the bucket tilting handle Issue with electrical wiring of the bucket tilting handle Check and repair the electrical wiring of the bucket tilting handle
      32-34 Executive tilting mechanism not in neutral position Actuating mechanism of tilting not in the neutral position Check and adjust the actuating mechanism of tilting
      32-35 Handle/Bucket tilt pedal not in neutral position Handle/Bucket tilt pedal not in the neutral position Check and adjust the handle/bucket tilt pedal
      32-36 Failure of the actuating mechanism of lifting Issue with the loader’s actuating mechanism of lifting Check and repair the actuating mechanism of lifting
      32-37 Malfunction of electrical wiring of the actuating mechanism of lifting Issue with electrical wiring of the actuating mechanism of lifting Check and repair the electrical wiring of the actuating mechanism of lifting
      32-38 Failure of the electrical wiring of the boom handle Issue with electrical wiring of the boom handle Check and repair the electrical wiring of the boom handle
      32-39 Executive lifting mechanism not in neutral position Actuating mechanism of lifting not in the neutral position Check and adjust the actuating mechanism of lifting
      32-40 Arm/Boom lift pedal not in neutral position Arm/Boom lift pedal not in the neutral position Check and adjust the arm/boom lift pedal
      32-41 No connection No connection with the specified component Check and establish the connection with the specified component
      32-49 Executive lifting mechanism closed to mass Actuating mechanism of lifting closed to mass Check and repair the actuating mechanism of lifting
      32-50 The executive tilting mechanism is closed to mass Actuating mechanism of tilting closed to mass Check and repair the actuating mechanism of tilting
      32-51 Actuator lifting mechanism closed on the battery Actuating mechanism of lifting closed on the battery Check and repair the actuating mechanism of lifting
      32-52 The actuator tilting mechanism is closed to the battery Actuating mechanism of tilting closed on the battery Check and repair the actuating mechanism of tilting
      32-53 Handle/Boom lift pedal closed to mass Handle/Boom lift pedal closed to mass Check and repair the handle/boom lift pedal
      32-54 Handle/Bucket tilt pedal closed to mass Handle/Bucket tilt pedal closed to mass Check and repair the handle/bucket tilt pedal
      32-54 Handle/Bucket tilt pedal closed to mass Issue with the handle/bucket tilt pedal circuit Check and repair the handle/bucket tilt pedal circuit
      32-55 Arm/Boom lift pedal closed on battery Issue with the arm/boom lift pedal circuit Check and repair the arm/boom lift pedal circuit
      32-56 The handle/bucket tilt pedal is closed to the battery Issue with the handle/bucket tilt pedal circuit Check and repair the handle/bucket tilt pedal circuit
      32-57 Reduced performance of the lifting actuation mechanism Issue with the lifting actuation mechanism Check and repair the lifting actuation mechanism circuit
      32-58 Reduced performance of the executive tilt mechanism Issue with the executive tilt mechanism Check and repair the executive tilt mechanism circuit
      32-59 Wrong direction of the actuating mechanism of lifting Issue with the actuating mechanism of lifting Check and repair the actuating mechanism of lifting
      32-60 Wrong direction of the executive tilt mechanism Issue with the executive tilt mechanism Check and repair the executive tilt mechanism circuit
      32-61 The lock of arms is closed to mass Issue with the lock of arms circuit Check and repair the lock of arms circuit
      32-62 The lock of Arms is closed on the battery Issue with the lock of arms circuit Check and repair the lock of arms circuit
      32-63 The chain of locking pedals is closed to the mass Issue with the chain of locking pedals circuit Check and repair the chain of locking pedals circuit
      32-64 The chain of locking pedals is closed to the battery Issue with the chain of locking pedals circuit Check and repair the chain of locking pedals circuit
      32-65 Sensor supply voltage outside the permissible limits Issue with the sensor supply voltage Check and address the sensor supply voltage
      32-66 Battery voltage out of the allowable limits Issue with the loader’s battery voltage Check and address the loader’s battery voltage
      32-67 Switched during Operation Issue with the control switches during operation Check and repair any faulty control switches
      32-68 Boom Boom ARM Information error Issue with the boom arm information Check and address the boom arm information
      32-69 The switch of control modes has switched during operation Issue with the control mode switch circuit Check and repair the control mode switch circuit
      32-70 The chain of the right handle of motion is closed to mass Issue with the chain of the right handle of motion circuit Check and repair the chain of the right handle of motion circuit
      32-71 Circuit of the right handle of movement is closed on the battery Issue with the circuit of the right handle of movement Check and repair the circuit of the right handle of movement
      33-23 Main controller (Controller Bobcat) Not programmed Main controller not programmed Program the main controller
      34-04 The keypad with a button run is not reported to the controller Bobcat Issue with the keypad circuit Check and repair the keypad circuit
      35-02 Speed fan switch, erroneous switching on Incorrect activation of the fan speed switch Check and repair the fan speed switch circuit
      35-03 Speed fan switch, erroneous shutdown Incorrect deactivation of the fan speed switch Check and repair the fan speed switch circuit
      36-48 Multiple ACD controllers are connected Multiple ACD controllers connected Check and address multiple ACD controllers
      37-02 Speed additional speed switch, erroneous switching on Incorrect activation of the additional speed switch Check and repair the additional speed switch circuit
      37-03 Speed additional speed switch, erroneous shutdown Incorrect deactivation of the additional speed switch Check and repair the additional speed switch circuit
      38-04 No connection to Joystick controller No connection with the joystick controller Check and establish the connection with the joystick controller
      38-05 The x-axis of the left joystick is not in a neutral position Left joystick’s x-axis not in neutral position Check and adjust the left joystick’s x-axis
      38-06 The X-axis of the right joystick is not in a neutral position Right joystick’s X-axis not in neutral position Check and adjust the right joystick’s X-axis
      38-07 The Y-axis of the left joystick is not in a neutral position Left joystick’s Y-axis not in neutral position Check and adjust the left joystick’s Y-axis
      38-08 The Y-axis of the right joystick is not in a neutral position Right joystick’s Y-axis not in neutral position Check and adjust the right joystick’s Y-axis
      38-09 Control mode switch-circuit to the battery or to the mass Issue with control mode switch circuit Check and repair the control mode switch circuit
      38-11 Executive lifting mechanism not in neutral position Actuating mechanism of lifting not in neutral position Check and adjust the actuating mechanism of lifting
      38-12 Executive tilting mechanism not in neutral position Actuating mechanism of tilting not in neutral position Check and adjust the actuating mechanism of tilting
      38-13 Failure of the actuating mechanism of lifting Issue with the actuating mechanism of lifting Check and repair the actuating mechanism of lifting
      38-14 Failure of the actuating mechanism of inclination Issue with the actuating mechanism of inclination Check and repair the actuating mechanism of inclination
      38-15 Right Wheel speed control failure Issue with the right wheel speed control Check and repair the right wheel speed control circuit
      38-16 Faulty wiring for the speed of the left wheel Issue with the left wheel speed control Check and repair the left wheel speed control circuit
      38-17 Reduced performance of the executive tilt mechanism Issue with the executive tilt mechanism Check and repair the executive tilt mechanism circuit
      38-18 Reduced performance of the lifting actuation mechanism Issue with the lifting actuation mechanism Check and repair the lifting actuation mechanism circuit
      38-19 The X-axis of the left joystick, behind the upper bound of the range Left joystick’s X-axis out of range Check and adjust the left joystick’s X-axis
      38-20 X-axis of the right joystick, beyond the lower bound of the range Right joystick’s X-axis out of range Check and adjust the right joystick’s X-axis
      38-21 The Y-axis of the left joystick, behind the upper bound of the range Left joystick’s Y-axis out of range Check and adjust the left joystick’s Y-axis
      38-22 The Y-axis of the right joystick, behind the upper bound of the range Right joystick’s Y-axis out of range Check and adjust the right joystick’s Y-axis
      38-23 Signal of the front right control sensor outside the upper boundary of the range Issue with the front right control sensor Check and calibrate the front right control sensor
      38-24 Signal of the front left control sensor at the upper limit of the range Issue with the front left control sensor Check and calibrate the front left control sensor
      38-25 Signal of the rear right control sensor at the upper limit of the range Issue with the rear right control sensor Check and calibrate the rear right control sensor
      38-26 Signal of the rear left control sensor at the upper limit of the range Issue with the rear left control sensor Check and calibrate the rear left control sensor
      38-27 Signal of the actuating mechanism of lifting at the upper boundary of the range Issue with the actuating mechanism of lifting Check and calibrate the actuating mechanism of lifting
      38-28 Signal of the executive mechanism of inclination at the upper boundary of the range Issue with the executive mechanism of inclination Check and calibrate the executive mechanism of inclination
      38-29 X-axis of the left joystick, behind the lower bound of the range Issue with the left joystick’s X-axis Check and calibrate the left joystick’s X-axis
      38-30 X-axis of the right joystick, beyond the lower bound of the range Issue with the right joystick’s X-axis Check and calibrate the right joystick’s X-axis
      38-31 Y-axis of the left joystick, beyond the lower bound of the range Issue with the left joystick’s Y-axis Check and calibrate the left joystick’s Y-axis
      38-32 Y-axis of the right joystick, beyond the lower bound of the range Issue with the right joystick’s Y-axis Check and calibrate the right joystick’s Y-axis
      38-33 Signal of the front right control sensor at the lower limit of the range Issue with the front right control sensor Check and calibrate the front right control sensor
      38-34 Signal of the front left control sensor at the lower limit of the range Issue with the front left control sensor Check and calibrate the front left control sensor
      38-35 Signal of the rear right control sensor at the lower limit of the range Issue with the rear right control sensor Check and calibrate the rear right control sensor
      38-36 Signal of the rear left control sensor at the lower limit of the range Issue with the rear left control sensor Check and calibrate the rear left control sensor
      38-37 Power supply “1” 5-volt sensor, behind the lower boundary of the range Issue with the power supply “1” 5-volt sensor Check and address the power supply “1” 5-volt sensor
      38-38 Power supply “2” 5-volt sensor, behind the lower boundary of the range Issue with the power supply “2” 5-volt sensor Check and address the power supply “2” 5-volt sensor
      38-39 Executive lifting mechanism closed to mass/beyond the lower boundary of the range Issue with the executive lifting mechanism Check and repair the executive lifting mechanism circuit
      38-40 The executive tilt mechanism is closed to the mass/signal at the lower limit of the range Issue with the executive tilt mechanism Check and repair the executive tilt mechanism circuit
      38-41 Wrong direction of the executive tilt mechanism Issue with the executive tilt mechanism Check and repair the executive tilt mechanism circuit
      38-42 Wrong direction of the actuating mechanism of lifting Issue with the actuating mechanism of lifting Check and repair the actuating mechanism of lifting
      38-43 The solenoid of the left front drive, erroneous switching on Issue with the solenoid of the left front drive Check and repair the solenoid of the left front drive
      38-44 Solenoid of left reversible drive, erroneous switching on Issue with the solenoid of the left reversible drive Check and repair the solenoid of the left reversible drive
      38-45 Right front drive solenoid, erroneous switching on Issue with the right front drive solenoid Check and repair the right front drive solenoid
      38-46 Right reverse actuator solenoid, erroneous switching on Issue with the right reverse actuator solenoid Check and repair the right reverse actuator solenoid
      38-47 Front right control solenoid, erroneous switching on Issue with the front right control solenoid Check and repair the front right control solenoid
      38-48 Front left solenoid control, erroneous switching on Issue with the front left solenoid control Check and repair the front left solenoid control
      38-49 Rear right control solenoid, erroneous switching on Issue with the rear right control solenoid Check and repair the rear right control solenoid
      38-50 Rear left solenoid control, erroneous switching on Issue with the rear left solenoid control Check and repair the rear left solenoid control
      38-51 Control system pressure solenoid, erroneous switching on Issue with the control system pressure solenoid Check and repair the control system pressure solenoid
      38-52 Reversing signal, erroneous switching on Issue with the reversing signal Check and repair the reversing signal circuit
      38-53 Left Front drive solenoid, erroneous shutdown Issue with the left front drive solenoid Check and repair the left front drive solenoid
      38-54 Solenoid of left reversible drive, erroneous shutdown Issue with the solenoid of the left reversible drive Check and repair the solenoid of the left reversible drive
      38-55 Right front drive solenoid, erroneous shutdown Issue with the right front drive solenoid Check and repair the right front drive solenoid
      38-56 Right reverse actuator solenoid, erroneous shutdown Issue with the right reverse actuator solenoid Check and repair the right reverse actuator solenoid
      38-57 Front right extension control solenoid, erroneous shutdown Issue with the front right extension control solenoid Check and repair the front right extension control solenoid
      38-58 Front right retraction control solenoid, erroneous shutdown Issue with the front right retraction control solenoid Check and repair the front right retraction control solenoid
      38-59 Front left solenoid of extension control, erroneous shutdown Issue with the front left solenoid of extension control Check and repair the front left solenoid of extension control
      38-60 Front left solenoid control retraction, erroneous shutdown Issue with the front left solenoid control retraction Check and repair the front left solenoid control retraction
      38-61 Rear right extension control solenoid, erroneous shutdown Issue with the rear right extension control solenoid Check and repair the rear right extension control solenoid
      38-62 Rear right retraction control solenoid, erroneous shutdown Issue with the rear right retraction control solenoid Check and repair the rear right retraction control solenoid
      38-63 Rear left solenoid control, erroneous shutdown Issue with the rear left solenoid control Check and repair the rear left solenoid control
      38-64 Rear left solenoid control retraction, erroneous shutdown Issue with the rear left solenoid control retraction Check and repair the rear left solenoid control retraction
      38-65 Control system pressure solenoid, erroneous shutdown Issue with the control system pressure solenoid Check and repair the control system pressure solenoid
      38-66 Reversing signal, erroneous shutdown Issue with the reversing signal Check and repair the reversing signal circuit
      38-67 No messages from controller Bobcat Communication issue between the Bobcat controller and components Check the communication system and connections between the controller and components
      38-68 Wheel setting angles (alignment) not calibrated Wheel angle calibration error Calibrate the wheel setting angles (alignment)
      38-69 Actuating mechanisms of lifting and tilting are not calibrated Actuating mechanisms calibration error Calibrate the actuating mechanisms of lifting and tilting
      38-70 Power off The machine has been powered off Check the machine’s power supply and restart if necessary
      38-71 Battery voltage outside the permissible limits Issue with the loader’s battery voltage Check and correct the battery voltage to be within permissible limits
      38-72 Drive Pump Not calibrated Issue with the calibration of the drive pump Calibrate the drive pump to ensure accurate operation
      38-73 Control/Motion mode switch is switched on during operation Issue with the control/motion mode switch Avoid switching the control/motion mode during operation
      38-74 Speed of the uncontrolled right wheel, erroneous switching on Issue with the uncontrolled right wheel’s speed Check and repair the speed sensor or wiring for the right wheel
      38-75 Speed of uncontrolled left wheel, erroneous switching on Issue with the uncontrolled left wheel’s speed Check and repair the speed sensor or wiring for the left wheel
      38-76 Control system pressure solenoid-insufficient current Issue with the control system pressure solenoid Check and ensure sufficient current flow to the control system pressure solenoid
      38-77 Front right extension control solenoid-insufficient current Issue with the front right extension control solenoid Check and ensure sufficient current flow to the front right extension control solenoid
      38-78 Front right retraction control solenoid-insufficient current Issue with the front right retraction control solenoid Check and ensure sufficient current flow to the front right retraction control solenoid
      38-79 Forward left solenoid of extension control-insufficient current Issue with the front left extension control solenoid Check and ensure sufficient current flow to the front left extension control solenoid
      38-80 Front left solenoid control retraction-insufficient current Issue with the front left control retraction solenoid Check and ensure sufficient current flow to the front left control retraction solenoid
      38-81 Rear right extension control solenoid-insufficient current Issue with the rear right extension control solenoid Check and ensure sufficient current flow to the rear right extension control solenoid
      38-82 Rear right retraction control solenoid-insufficient current Issue with the rear right retraction control solenoid Check and ensure sufficient current flow to the rear right retraction control solenoid
      38-83 Rear left solenoid control-insufficient current Issue with the rear left control solenoid Check and ensure sufficient current flow to the rear left control solenoid
      38-84 Rear left solenoid control retraction-insufficient current Issue with the rear left control retraction solenoid Check and ensure sufficient current flow to the rear left control retraction solenoid
      38-85 Power supply “1” 5-volt sensor outside the upper boundary of the range Issue with the power supply “1” 5-volt sensor Check and address the power supply “1” 5-volt sensor if outside the upper boundary of the range
      38-86 Power supply “2” 5-volt sensor outside the upper boundary of the range Issue with the power supply “2” 5-volt sensor Check and address the power supply “2” 5-volt sensor if outside the upper boundary of the range
      38-87 Right front wheel lock (mechanical malfunction control) Issue with the right front wheel lock Check and repair the mechanical locking mechanism for the right front wheel
      38-88 Locking of the Left front wheel (mechanical malfunction control) Issue with the left front wheel lock Check and repair the mechanical locking mechanism for the left front wheel
      38-89 Right rear wheel lock (mechanical malfunction control) Issue with the right rear wheel lock Check and repair the mechanical locking mechanism for the right rear wheel
      38-90 Rear left control error Issue with the rear left control Check and repair the rear left control
      38-91 There are no pulses of the right wheel speed sensor Issue with the right wheel speed sensor Check and repair the right wheel speed sensor
      38-92 There are no pulses of the left wheel speed sensor Issue with the left wheel speed sensor Check and repair the left wheel speed sensor
      38-93 Right wheel speed sensor does not respond Issue with the right wheel speed sensor Check and ensure proper connection of the right wheel speed sensor
      38-94 The left wheel speed sensor does not respond Issue with the left wheel speed sensor Check and ensure proper connection of the left wheel speed sensor
      38-98 Controller in the drive calibration mode Issue with the controller in the drive calibration mode Check the controller and exit the drive calibration mode if not required
      38-99 Controller in wheel position calibration mode Issue with the controller in wheel position calibration mode Check the controller and exit the wheel position calibration mode if not required
      45-03 Right turn pointer, erroneous shutdown Issue with the right turn pointer Check and repair the right turn pointer
      46-02 Left turn pointer, erroneous inclusion Issue with the left turn pointer Check and repair the left turn pointer
      46-03 Left turn pointer, erroneous shutdown Issue with the left turn pointer Check and repair the left turn pointer
      47-21 Power supply of 8-volt sensor at the upper limit of the range Issue with the power supply of the 8-volt sensor Check and address the power supply of the 8-volt sensor if at the upper limit of the range
      47-22 Power supply of 8-volt sensor, behind the lower boundary of the range Issue with the power supply of the 8-volt sensor Check and address the power supply of the 8-volt sensor if behind the lower boundary of the range
      48-02 Front light relays, erroneous switching on Issue with the front light relays Check and repair the front light relays
      48-03 Front light relay, erroneous shutdown Issue with the front light relay Check and repair the front light relay
      49-02 Rear light relay, erroneous switching on Issue with the rear light relay Check and repair the rear light relay
      49-03 Rear light relay, erroneous shutdown Issue with the rear light relay Check and repair the rear light relay
      60-21 Signal of the control lever of the back additional Hydraulics at the top of the range Issue with the control lever of the back additional hydraulics Check and repair the control lever of the back additional hydraulics if at the top of the range
      60-22 Signal of the control lever of the back additional Hydraulics at the lower limit of the range Issue with the control lever of the back additional hydraulics Check and repair the control lever of the back additional hydraulics if at the lower limit of the range
      60-23 Control lever of the back additional hydraulics not returned to the neutral position Issue with the control lever of the back additional hydraulics Check and repair the control lever of the back additional hydraulics if not returned to the neutral position
      64-02 Failure to turn on the power relay Issue with the power relay Check and repair the power relay
      64-03 Erroneous shutdown of the power relay Issue with the power relay Check and repair the power relay
      74-72 Controller boot code failed Bobcat Issue with the controller boot code Check and repair the controller boot code
      74-73 Left panel, receiving device error Issue with the left panel receiving device Check and repair the left panel receiving device
      80-02 ACD, Exit “A”, erroneous switching on Issue with ACD Exit “A” Check and repair ACD Exit “A”
      80-03 ACD, Exit “A”, erroneous shutdown Issue with ACD Exit “A” Check and repair ACD Exit “A”
      81-02 ACD, Output “B”, erroneous switching on Issue with ACD Output “B” Check and repair ACD Output “B”
      81-03 ACD, Exit “B”, erroneous shutdown Issue with ACD Exit “B” Check and repair ACD Exit “B”
      82-02 ACD, Exit “C”, erroneous inclusion Issue with ACD Exit “C” Check and repair ACD Exit “C”
      82-03 ACD, Exit “C”, erroneous shutdown Issue with ACD Exit “C” Check and repair ACD Exit “C”
      83-02 ACD, Exit “D”, erroneous switching on Issue with ACD Exit “D” Check and repair ACD Exit “D”
      83-03 ACD, Exit “D”, erroneous shutdown Issue with ACD Exit “D” Check and repair ACD Exit “D”
      84-02 ACD, Output “E”, erroneous switching on Issue with ACD Output “E” Check and repair ACD Output “E”
      84-03 ACD, Exit “E”, erroneous shutdown Issue with ACD Exit “E” Check and repair ACD Exit “E”
      90-02 Service exit “C”, erroneous switching on Issue with Service Exit “C” Check and repair Service Exit “C”
      90-03 Service exit “C”, erroneous shutdown Issue with Service Exit “C” Check and repair Service
      91-02 Service exit “D”, erroneous switching on Issue with Service Exit “D” Check and repair Service Exit “D”
      91-03 Service exit “D”, erroneous shutdown Issue with Service Exit “D” Check and repair Service Exit “D”
      92-02 Service exit “E”, erroneous inclusion Issue with Service Exit “E” Check and repair Service Exit “E”
      92-03 Service Output “E”, erroneous shutdown Issue with Service Output “E” Check and repair Service Output “E”
      93-02 Service exit “F”, erroneous switching on Issue with Service Exit “F” Check and repair Service Exit “F”
      93-03 Service exit “F”, erroneous shutdown Issue with Service Exit “F” Check and repair Service Exit “F”

      Bobcat Fault Code List by Product

      Fault Code Product Description
      03-01 ECU Bobcat Engine V1 EGR Temperature Sensor – Fault
      04-01 ECU Bobcat Engine V1 EGR Temperature Sensor – Fault
      3252-00 ECU Bobcat Engine V1 Exhaust Temperature – High
      03-01 ECU Bobcat Engine V1 Sensor Supply Voltage Fault
      04-01 ECU Bobcat Engine V1 Sensor Supply Voltage Fault
      A0321 Telehandler Battery Voltage OOR High
      A0322 Telehandler Battery Voltage OOR Low
      A0618 Attachments Wheel Speed Out of Range
      A0702 Telehandler Left interlocking sensor Short to Battery
      A0703 Telehandler Left interlocking sensor Short to Ground or Open circuit
      A0802 Telehandler Right interlocking sensor Short to Battery
      A0803 Telehandler Right interlocking sensor Short to Ground or Open circuit
      A0921 Telehandler Overload Signal 1 Out Of Range High
      A0922 Telehandler Overload Signal 1 Out Of Range Low
      A1021 Telehandler Overload Signal 2 Out Of Range High
      A1022 Telehandler Overload Signal 2 Out Of Range Low
      A1144 Telehandler Overload signals disagrees
      A1198 Telehandler Overload calibration performed
      A1199 Telehandler Overload calibration required
      A1221 Telehandler Tilt inclinometer innput Out of range High
      A1222 Telehandler Tilt inclinometer innput Out of range Low
      A1298 Telehandler Tilt inclinometer calibration performed
      A1299 Telehandler Tilt inclinometer calibration required
      A3623 Telehandler Programming or constant data invalid
      A3623 Attachments ACD Not Programmed
      A4621 Attachments 5 Volt Sensor Supply Out of Range High
      A4621 M-Series Loader 5V Sensor Supply Out of Range High
      A4622 M-Series Loader 5V Sensor Supply Out of Range Low
      A4622 Attachments 5 Volt Sensor Supply Out of Range Low
      A4721 Attachments 8 Volt Sensor Supply Out of Range High
      A4721 M-Series Loader 8V Sensor Supply Out of Range High
      A4722 M-Series Loader 8V Sensor Supply Out of Range Low
      A4722 Attachments 8 Volt Sensor Supply Out of Range Low
      A7701 M-Series Loader Key Switch Active
      A7701 Attachments Cab Key Switch Active
      A7901 Attachments E-Stop Active
      A8002 Attachments Output A Error On
      A8003 Attachments Output A Error Off
      A8005 Attachments Output A Short to Battery
      A8006 Attachments Output A Short to Ground
      A8007 Attachments Output A Open Circuit
      A8032 Attachments Output A Overcurrent
      A8102 Attachments Output B Error On
      A8103 Attachments Output B Error Off
      A8105 Attachments Output B Short to Battery
      A8106 Attachments Output B Short to Ground
      A8107 Attachments Output B Open Circuit
      A8132 Attachments Output B Overcurrent
      A8202 Attachments Output C Error On
      A8203 Attachments Output C Error Off
      A8205 Attachments Output C Short to Battery
      A8206 Attachments Output C Short to Ground
      A8207 Attachments Output C Open Circuit
      A8232 Attachments Output C Overcurrent
      A8302 Attachments Output D Error On
      A8303 Attachments Output D Error Off
      A8305 Attachments Output D Short to Battery
      A8306 Attachments Output D Short to Ground
      A8307 Attachments Output D Open Circuit
      A8332 Attachments Output D Overcurrent
      A8402 Attachments Output E Error On
      A8403 Attachments Output E Error Off
      A8405 Attachments Output E Short to Battery
      A8406 Attachments Output E Short to Ground
      A8407 Attachments Output E Open Circuit
      A8432 Attachments Output E Overcurrent
      A8502 Attachments Output F Error On
      A8503 Attachments Output F Error Off
      A8505 Attachments Output F Short to Battery
      A8506 Attachments Output F Short to Ground
      A8507 Attachments Output F Open Circuit
      A8532 Attachments Output F Overcurrent
      A8602 Attachments Output G Error On
      A8603 Attachments Output G Error Off
      A8605 Attachments Output G Short to Battery
      A8606 Attachments Output G Short to Ground
      A8607 Attachments Output G Open Circuit
      A8702 Attachments Output H Error On
      A8703 Attachments Output H Error Off
      A8705 Attachments Output H Short to Battery
      A8706 Attachments Output H Short to Ground
      A8707 Attachments Output H Open Circuit
      A8802 Attachments Reverse Solenoid Error On
      A8803 Attachments Reverse Solenoid Error Off
      B1001-96 Compact Wheel Loader Key Switch Failure
      B1001-96 Toolcat Key Switch – Component Internal Failure
      B1005-00 M-Series Loader Key Switch Multiple
      B1005-00 Compact Wheel Loader Key Switch Multiple
      B102A-16 Toolcat Cab Controller Sensor Supply – Circuit Voltage Below Threshold
      B102A-16 M-Series Loader Cab Controller Sensor Supply Voltage Out of Range Low
      B102A-17 M-Series Loader Cab Controller Sensor Supply Voltage Out of Range High
      B102A-17 Toolcat Cab Controller Sensor Supply – Circuit Voltage Above Threshold
      B1030-11 M-Series Loader Front Work Light (Left Side) Short to Ground
      B1030-12 M-Series Loader Front Work Light (Left Side) Short to Battery
      B1030-13 M-Series Loader Front Work Light (Left Side) Not Connected
      B1031-11 M-Series Loader Front Work Light (Right Side) Short to Ground
      B1031-12 M-Series Loader Front Work Light (Right Side) Short to Battery
      B1031-13 M-Series Loader Front Work Light (Right Side) Not Connected
      B1034-11 Toolcat Rear Work Lights – Circuit Short to Ground
      B1034-11 Compact Wheel Loader Rear Work Light Short to Battery
      B1034-12 M-Series Loader Rear Work Lights Error On
      B1034-12 Toolcat Rear Work Lights – Circuit Short to Battery
      B1034-12 Compact Wheel Loader Rear Work Light Short to Ground
      B1034-13 Toolcat Rear Work Lights – Circuit Open
      B1034-13 Compact Wheel Loader Rear Work Light Not Connected
      B1034-14 M-Series Loader Rear Work Lights Error Off
      B1035-12 M-Series Loader Rear Marker Light Short to Battery
      B1035-14 M-Series Loader Rear Marker Light Short to Ground or Open Circuit
      B1036-11 Toolcat Rear Marker Lights – Circuit Short to Ground
      B1036-12 Toolcat Rear Marker Lights – Circuit Short to Battery
      B1036-12 M-Series Loader Rear Tail Lights Error On
      B1036-13 Toolcat Rear Marker Lights – Circuit Open
      B1036-14 M-Series Loader Rear Tail Lights Error Off
      B1037-11 Toolcat Stop Lights – Circuit Short to Ground
      B1037-11 Compact Wheel Loader Stop Light Short to Ground
      B1037-12 M-Series Loader Stop Lamp Short to Battery
      B1037-12 Toolcat Stop Lights – Circuit Short to Battery
      B1037-13 Toolcat Stop Lights – Circuit Open
      B1037-14 M-Series Loader Stop Lamp Short to Ground or Open Circuit
      B1037-15 Compact Wheel Loader Stop Light Error On
      B1038-12 M-Series Loader Registration Plate Lamp Short to Battery
      B1038-14 M-Series Loader Registration Plate Lamp Short to Ground or Open Circuit
      B1039-11 M-Series Loader Side Lights Short to Ground
      B1039-12 M-Series Loader Side Lights Short to Battery
      B1039-13 M-Series Loader Side Lights Not Connected
      B103B-12 Small Articulated Loader Light Circuit Short to Battery
      B103B-14 Small Articulated Loader Light Circuit Short to Ground
      B103D-11 Compact Wheel Loader Beacon Short to Ground
      B103D-12 Compact Wheel Loader Beacon Short to Battery
      B103D-12 Toolcat Beacon Light – Circuit Short to Battery
      B103D-13 Compact Wheel Loader Beacon Not Connected
      B103D-14 Toolcat Beacon Light – Circuit Short to Ground or Open
      B1040-11 Compact Wheel Loader Buzzer Error Off
      B1040-12 Compact Wheel Loader Buzzer Error On
      B1040-12 Toolcat Buzzer – Circuit Short to Battery
      B1040-14 Toolcat Buzzer – Circuit Short to Ground or Open
      B1040-14 M-Series Loader Buzzer Error Off
      B1041-12 Toolcat Backup Alarm – Circuit Short to Battery
      B1041-12 Compact Wheel Loader Backup Alarm Error Off
      B1041-12 M-Series Loader Backup Alarm Error On
      B1041-14 M-Series Loader Backup Alarm Error Off
      B1041-14 Compact Wheel Loader Backup Alarm Error On
      B1041-14 Toolcat Backup Alarm – Circuit Short to Ground or Open
      B1042-12 Toolcat Horn Output – Circuit Short to Battery
      B1042-12 M-Series Loader Horn Relay Short to Battery
      B1042-14 Toolcat Horn Output – Circuit Short to Ground or Open
      B1042-14 M-Series Loader Horn Relay Short to Ground or Open Circuit
      B104A-11 Compact Wheel Loader Seat Heater Short to Ground
      B104A-12 Compact Wheel Loader Seat Heater Short to Battery
      B104A-13 Compact Wheel Loader Seat Heater Open Circuit
      B1050-12 M-Series Loader HVAC Output Short to Battery
      B1050-12 Toolcat HVAC Output – Circuit Short to Battery
      B1050-14 M-Series Loader HVAC Output Short to Ground or Open Circuit
      B1050-14 Toolcat HVAC Output – Circuit Short to Ground or Open
      B1051-93 M-Series Loader HVAC Inside Sensor In Error
      B1052-93 M-Series Loader HVAC Device Sensor In Error
      B1053-93 M-Series Loader HVAC Coil Sensor In Error
      B1054-11 M-Series Loader HVAC Clutch Output Error Off
      B1054-12 M-Series Loader HVAC Clutch Output Error On
      B1054-13 M-Series Loader HVAC Clutch Output Open Circuit
      B1054-19 M-Series Loader HVAC Clutch Output Overcurrent
      B1055-93 M-Series Loader HVAC Water Valve In Error
      B105A-12 Toolcat Front Window Defroster Output – Circuit Short to Battery
      B105A-14 Toolcat Front Window Defroster Output – Circuit Short to Ground or Open
      B1060-93 M-Series Loader Lift Pedal In Error
      B1060-F0 M-Series Loader Lift Pedal Not in Neutral
      B1061-16 M-Series Loader Lift Pedal Sensor A Out of Range Low
      B1061-17 M-Series Loader Lift Pedal Sensor A Out of Range High
      B1062-16 M-Series Loader Lift Pedal Position Sensor “B” Out of Range Low
      B1062-17 M-Series Loader Lift Pedal Position Sensor “B” Out of Range High
      B1063-00 M-Series Loader Lift Pedal Sensor In Error
      B1064-F0 Compact Wheel Loader Lift Input Not in Neutral
      B1064-F0 M-Series Loader Lift Joystick Not in Neutral
      B1065-F0 M-Series Loader Lift Input Not in Neutral
      B1070-09 M-Series Loader Tilt Pedal Failure
      B1070-93 M-Series Loader Tilt Pedal In Error
      B1070-F0 M-Series Loader Tilt Pedal Not in Neutral
      B1071-16 M-Series Loader Tilt Pedal Sensor A Out of Range Low
      B1071-17 M-Series Loader Tilt Pedal Sensor A Out of Range High
      B1072-16 M-Series Loader Tilt Pedal Position Sensor “B” Out of Range High
      B1072-17 M-Series Loader Tilt Pedal Position Sensor “B” Out of Range Low
      B1073-00 M-Series Loader Tilt Pedal Sensor In Error
      B1074-F0 Compact Wheel Loader Tilt Input Not in Neutral
      B1074-F0 M-Series Loader Tilt Joystick Not in Neutral
      B1075-F0 M-Series Loader Tilt Input Not in Neutral
      B1080-09 Toolcat Operator Presence – Component Failure
      B1080-09 Compact Wheel Loader Operator Presence Component Failure
      B1080-09 M-Series Loader Seat Bar Failure
      B1080-16 Compact Wheel Loader Operator Presence Circuit Voltage Below Threshold
      B1080-16 Toolcat Operator Presence – Circuit Voltage Below Threshold
      B1080-16 Small Articulated Loader Armrest Out of Range Low
      B1080-16 M-Series Loader Seat Bar Out of Range Low
      B1080-17 M-Series Loader Seat Bar Out of Range High
      B1080-17 Small Articulated Loader Armrest Out of Range High
      B1080-17 Compact Wheel Loader Operator Presence Circuit Voltage Above Threshold
      B1080-17 Toolcat Operator Presence – Circuit Voltage Above Threshold
      B1080-54 Small Articulated Loader Armrest No Signal
      B1080-66 Small Articulated Loader Armrest Intermittent Signal
      B1090-00 M-Series Loader Door Open
      B1091-16 M-Series Loader Door Sensor Out of Range Low
      B1095-13 M-Series Loader Window Sensor Open Circuit
      B1095-16 M-Series Loader Window Sensor Out of Range Low
      B1095-17 M-Series Loader Window Sensor Out of Range High
      B1095-95 M-Series Loader Window Sensor Failure
      B10A0-12 M-Series Loader Wiper Output Short to Battery
      B10A0-12 Toolcat Wiper Output – Circuit Short to Battery
      B10A0-14 M-Series Loader Wiper Output Short to Ground or Open Circuit
      B10A0-14 Toolcat Wiper Output – Circuit Short to Ground or Open
      B10A1-12 Toolcat Washer Fluid Output – Circuit Short to Battery
      B10A1-12 M-Series Loader Washer Fluid Output Short to Battery
      B10A1-14 Toolcat Washer Fluid Output – Circuit Short to Ground or Open
      B10A1-14 M-Series Loader Washer Fluid Output Short to Ground or Open Circuit
      B10A2-11 Compact Wheel Loader Front Wiper Short to Ground
      B10A2-12 Compact Wheel Loader Front Wiper Short to Battery
      B10A2-13 Compact Wheel Loader Front Wiper Not connected
      B10A3-11 Compact Wheel Loader Front Wiper High Speed Short to Ground
      B10A3-12 Compact Wheel Loader Front Wiper High Speed Short to Battery
      B10A3-13 Compact Wheel Loader Front Wiper High Speed Not connected
      B10A5-11 Compact Wheel Loader Rear Wiper Short to Ground
      B10A5-12 Compact Wheel Loader Rear Wiper Short to Battery
      B10A5-13 Compact Wheel Loader Rear Wiper Not Connected
      B10A7-11 Compact Wheel Loader Front Washer Short to Ground
      B10A7-12 Compact Wheel Loader Front Washer Short to Battery
      B10A7-13 Compact Wheel Loader Front Washer Not Connected
      B10A8-11 Compact Wheel Loader Rear Washer Short to Ground
      B10A8-12 Compact Wheel Loader Rear Washer Short to Battery
      B10A8-13 Compact Wheel Loader Rear Washer Not Connected
      B10B0-00 M-Series Loader Drive ISO/H Pattern Switch Flipped While Operating
      B10B1-F0 M-Series Loader Drive Input Not in Neutral
      B10B3-F0 M-Series Loader Drive X Input Not In Neutral
      B10B6-F0 M-Series Loader Drive Y Input Not In Neutral
      B10B9-F0 M-Series Loader Drive Left Input Not In Neutral
      B10BC-F0 M-Series Loader Drive Right Input Not In Neutral
      B10C0-00 Compact Wheel Loader Camera Not Connected
      B10C1-00 Toolcat Camera Software Error
      B10D0-11 Toolcat Display Switched Power Output – Circuit Short to Ground
      B10D0-12 Toolcat Display Switched Power Output – Circuit Short to Battery
      B10D0-12 M-Series Loader Display Switched Power Relay Error On
      B10D0-13 Toolcat Display Switched Power Output – Circuit Open
      B10D0-14 M-Series Loader Display Switched Power Relay Error Off
      B10F0-11 Compact Wheel Loader Rear Defog Short to Ground
      B10F0-12 Compact Wheel Loader Rear Defog Short to Battery
      B10F0-13 Compact Wheel Loader Rear Defog Circuit Open
      B1100-9E Compact Wheel Loader Power Exchange Lock Switch Stuck On
      B1100-9E M-Series Loader Bobtach Engage Button Stuck On
      B1101-9E Compact Wheel Loader Power Exchange Unlock Switch Stuck on
      B1101-9E M-Series Loader Bobtach Disengage Button Stuck On
      B1110-F0 M-Series Loader Left Primary Not in Neutral
      B1110-F0 Toolcat Left Primary – Not in Neutral
      B1111-F0 M-Series Loader Left Secondary Not in Neutral
      B1111-F0 Toolcat Left Secondary – Not in Neutral
      B1120-16 Small Articulated Loader Right Primary Out of Range Low
      B1120-17 Small Articulated Loader Right Primary Out of Range High
      B1120-F0 Compact Wheel Loader Joystick Right Roller Not in Neutral
      B1120-F0 Toolcat Right Primary – Not in Neutral
      B1120-F0 M-Series Loader Right Primary Not in Neutral
      B1121-16 Small Articulated Loader Right Secondary Out of Range Low
      B1121-17 Small Articulated Loader Right Secondary Out of Range High
      B1121-F0 Toolcat Right Secondary – Not in Neutral
      B1121-F0 M-Series Loader Right Secondary Not in Neutral
      B1122-F0 M-Series Loader Detent Not in Neutral
      B1122-F0 Toolcat Detent – Not in Neutral
      B1130-F0 Toolcat Joystick Primary – Not in Neutral
      B1131-F0 Toolcat Joystick Secondary – Not in Neutral
      B1150-F0 Compact Wheel Loader FNR Lever not in Neutral
      B1151-00 Compact Wheel Loader FNR Switch Multiple
      B1155-31 Toolcat FPR Switch – No Signal
      B1156-00 Toolcat FPR Switch Multiple
      B116F-11 M-Series Loader Front Left Road Light Short to Ground
      B116F-12 M-Series Loader Front Left Road Light Short to Battery
      B116F-13 M-Series Loader Front Left Road Light Open Circuit
      B1170-11 Toolcat Head Light High Left – Circuit Short to Ground
      B1170-12 Toolcat Head Light High Left – Circuit Short to Battery
      B1170-13 Toolcat Head Light High Left – Circuit Open
      B1172-11 Toolcat Front Turn Signal Left – Circuit Short to Ground
      B1172-12 Toolcat Front Turn Signal Left – Circuit Short to Battery
      B1172-13 Toolcat Front Turn Signal Left – Circuit Open
      B1175-11 Toolcat Rear Turn Signal Left – Circuit Short to Ground
      B1175-12 Toolcat Rear Turn Signal Left – Circuit Short to Battery
      B1175-13 Toolcat Rear Turn Signal Left – Circuit Open
      B1177-12 M-Series Loader Left Turn Signal Short to Battery
      B1177-14 M-Series Loader Left Turn Signal Short to Ground or Open Circuit
      B117F-11 M-Series Loader Front Right Road Light Short to Ground
      B117F-12 M-Series Loader Front Right Road Light Short to Battery
      B117F-13 M-Series Loader Front Right Road Light Open Circuit
      B1180-11 Toolcat Head Light High Right – Circuit Short to Ground
      B1180-12 Toolcat Head Light High Right – Circuit Short to Battery
      B1180-13 Toolcat Head Light High Right – Circuit Open
      B1182-11 Toolcat Front Turn Signal Right – Circuit Short to Ground
      B1182-12 Toolcat Front Turn Signal Right – Circuit Short to Battery
      B1182-13 Toolcat Front Turn Signal Right – Circuit Open
      B1185-11 Toolcat Rear Turn Signal Right – Circuit Short to Ground
      B1185-12 Toolcat Rear Turn Signal Right – Circuit Short to Battery
      B1185-13 Toolcat Rear Turn Signal Right – Circuit Open
      B1187-12 M-Series Loader Right Turn Signal Short to Battery
      B1187-14 M-Series Loader Right Turn Signal Short to Ground or Open Circuit
      B1190-11 Compact Wheel Loader Front Work Light Short to Battery
      B1190-11 Toolcat Front Work Lights – Circuit Short to Ground
      B1190-12 Compact Wheel Loader Front Work Light Short to Ground
      B1190-12 Toolcat Front Work Lights – Circuit Short to Battery
      B1190-13 Compact Wheel Loader Front Work Light Not Connected
      B1190-13 Toolcat Front Work Lights – Circuit Open
      B1191-12 Toolcat Front Work Light 2 – Circuit Short to Battery
      B1191-14 Toolcat Front Work Light 2 – Circuit Short to Ground or Open
      B1192-12 Toolcat Front Work Light 3 – Circuit Short to Battery
      B1192-14 Toolcat Front Work Light 3 – Circuit Short to Ground or Open
      B11B0-54 Toolcat Travel Pedal Sensor – Missing Calibration
      B11B0-93 Toolcat Travel Pedal Sensor – In Error
      B11B1-16 Toolcat Travel Pedal Sensor Primary – Circuit Voltage Below Threshold
      B11B1-17 Toolcat Travel Pedal Sensor Primary – Circuit Voltage Above Threshold
      B11B2-16 Toolcat Travel Pedal Sensor Secondary – Circuit Voltage Below Threshold
      B11B2-17 Toolcat Travel Pedal Sensor Secondary – Circuit Voltage Above Threshold
      B11B5-54 Compact Wheel Loader Inching pedal sensor mising calibration
      B11B5-54 Toolcat Brake Pedal Sensor – Missing Calibration
      B11B5-93 Toolcat Brake Pedal Sensor – In Error
      B11B6-16 Toolcat Brake Pedal Sensor Primary – Circuit Voltage Below Threshold
      B11B6-17 Toolcat Brake Pedal Sensor Primary – Circuit Voltage Above Threshold
      B11B7-16 Toolcat Brake Pedal Sensor Secondary – Circuit Voltage Below Threshold
      B11B7-17 Toolcat Brake Pedal Sensor Secondary – Circuit Voltage Above Threshold
      C0314 Telehandler LLMC Undervoltage
      C0315 Telehandler LLMC Overvoltage
      C1001-16 Toolcat Hub Controller Sensor Supply – Circuit Voltage Below Threshold
      C1001-16 Compact Wheel Loader Sensor Supply Out of Range Low
      C1001-17 Toolcat Hub Controller Sensor Supply – Circuit Voltage Above Threshold
      C1001-17 Compact Wheel Loader Sensor Supply Out of Range High
      C1002-16 M-Series Loader Sensor Supply Out of Range Low
      C1002-17 M-Series Loader Sensor Supply Out of Range High
      C1003-16 Compact Wheel Loader Sensor Supply Out of Range Low
      C1003-17 Compact Wheel Loader Sensor Supply Out of Range High
      C1004-16 Compact Wheel Loader Drive Controller Sensor Supply Out of Range Low
      C1004-17 Compact Wheel Loader Drive Controller Sensor Supply Out of Range High
      C1005-16 Toolcat Pump Controller Sensor Supply – Circuit Voltage Below Threshold
      C1005-17 Toolcat Pump Controller Sensor Supply – Circuit Voltage Above Threshold
      C1006-16 Toolcat Rear Controller Sensor Supply – Circuit Voltage Below Threshold
      C1006-17 Toolcat Rear Controller Sensor Supply – Circuit Voltage Above Threshold
      C100A-11 M-Series Loader ECU Power Short to Ground
      C100A-11 Toolcat ECU Power – Circuit Short to Ground
      C100A-12 Toolcat ECU Power – Circuit Short to Battery
      C100A-12 M-Series Loader ECU Power Short to Battery
      C100A-13 M-Series Loader ECU Power Open Circuit
      C100A-13 Toolcat ECU Power – Circuit Open
      C1015-16 M-Series Loader Lift Spool Position Sensor Out of Range Low
      C1015-17 M-Series Loader Lift Spool Position Sensor Out of Range High
      C1015-56 M-Series Loader Lift Spool Position Sensor Inverted Movement
      C1015-93 M-Series Loader Lift Spool Position Sensor Unresponsive
      C1015-F0 M-Series Loader Lift Spool Position Sensor Not in Neutral
      C1016-16 M-Series Loader Tilt Spool Position Sensor Out of Range Low
      C1016-17 M-Series Loader Tilt Spool Position Sensor Out of Range High
      C1016-93 M-Series Loader Tilt Spool Position Sensor Unresponsive
      C1016-F0 M-Series Loader Tilt Spool Position Sensor Not in Neutral
      C101A-16 Compact Wheel Loader Lift Base Pressure Out of Range Low
      C101A-17 Compact Wheel Loader Lift Base Pressure Out of Range High
      C101D-16 M-Series Loader Tilt Rod Pressure Sensor Out of Range Low
      C101D-17 M-Series Loader Tilt Rod Pressure Sensor Out of Range High
      C1020-11 Compact Wheel Loader Front Base Solenoid Short to Ground
      C1020-11 Toolcat Front Aux Base Solenoid – Circuit Short to Ground
      C1020-12 Compact Wheel Loader Front Base Solenoid Short to Battery
      C1020-12 Toolcat Front Aux Base Solenoid – Circuit Short to Battery
      C1020-13 Compact Wheel Loader Front Base Solenoid Open Circuit
      C1020-13 Toolcat Front Aux Base Solenoid – Circuit Open
      C1020-19 Compact Wheel Loader Front Base Solenoid Overcurrent
      C1020-19 Toolcat Front Aux Base Solenoid – Circuit Current Above Threshold
      C1021-11 Toolcat Front Aux Rod Solenoid – Circuit Short to Ground
      C1021-11 Compact Wheel Loader Front Rod Solenoid Short to Ground
      C1021-12 Toolcat Front Aux Rod Solenoid – Circuit Short to Battery
      C1021-12 Compact Wheel Loader Front Rod Solenoid Short to Battery
      C1021-13 Compact Wheel Loader Front Rod Solenoid Open Circuit
      C1021-13 Toolcat Front Aux Rod Solenoid – Circuit Open
      C1021-19 Compact Wheel Loader Front Rod Solenoid Overcurrent
      C1021-19 Toolcat Front Aux Rod Solenoid – Circuit Current Above Threshold
      C1024-11 Toolcat Diverter Solenoid – Circuit Short to Ground
      C1024-12 Toolcat Diverter Solenoid – Circuit Short to Battery
      C1024-13 Toolcat Diverter Solenoid – Circuit Open
      C1026-11 Toolcat Remote Hydraulics Output – Circuit Short to Ground
      C1026-12 Toolcat Remote Hydraulics Output – Circuit Short to Battery
      C1026-13 Toolcat Remote Hydraulics Output – Circuit Open
      C1029-11 M-Series Loader Hydraulic Lock Solenoid Short to Ground
      C1029-12 M-Series Loader Hydraulic Lock Solenoid Short to Battery
      C1029-13 M-Series Loader Hydraulic Lock Solenoid Open Circuit
      C102A-11 Compact Wheel Loader Hydraulic Fan Short to Ground
      C102A-11 Toolcat Hydraulic Fan Solenoid – Circuit Short to Ground
      C102A-12 Toolcat Hydraulic Fan Solenoid – Circuit Short to Battery
      C102A-12 Compact Wheel Loader Hydraulic Fan Short to Battery
      C102A-13 Compact Wheel Loader Hydraulic Cooling Fan Electrical Problem
      C102A-13 Toolcat Hydraulic Fan Solenoid – Circuit Open
      C102A-19 Toolcat Hydraulic Fan Solenoid – Circuit Current Above Threshold
      C102A-19 Compact Wheel Loader Hydraulic Fan Overcurrent
      C102B-11 M-Series Loader Reverse Fan Short to Ground
      C102B-12 M-Series Loader Reverse Fan Short to Battery
      C102B-13 M-Series Loader Reverse Fan Open Circuit
      C102E-12 Small Articulated Loader Fan Circuit Short to Battery
      C102E-14 Small Articulated Loader Fan Open Circuit
      C1030-00 M-Series Loader Two Speed Shift Not Allowed
      C1032-11 M-Series Loader Brake Pull Output Short to Ground
      C1032-12 M-Series Loader Brake Pull Output Short to Battery
      C1032-13 M-Series Loader Brake Pull Output Open Circuit
      C1033-11 M-Series Loader Left Brake Hold Output Short to Ground
      C1033-12 M-Series Loader Left Brake Hold Output Short to Battery
      C1033-13 M-Series Loader Left Brake Hold Output Open Circuit
      C1034-11 M-Series Loader Right Brake Hold Output Short to Ground
      C1034-12 M-Series Loader Right Brake Hold Output Short to Battery
      C1034-13 M-Series Loader Right Brake Hold Output Open Circuit
      C1035-16 M-Series Loader Left Brake Pull Relay Error Off
      C1035-17 M-Series Loader Left Brake Pull Relay Error On
      C1036-16 M-Series Loader Right Brake Pull Relay Error Off
      C1036-17 M-Series Loader Right Brake Pull Relay Error On
      C1039-11 Toolcat High Flow Solenoid – Circuit Short to Ground
      C1039-11 Compact Wheel Loader High Flow Solenoid Short to Ground
      C1039-12 Toolcat High Flow Solenoid – Circuit Short to Battery
      C1039-12 Compact Wheel Loader High Flow Solenoid Short to Battery
      C1039-13 Compact Wheel Loader High Flow Solenoid Open Circuit
      C1039-13 Toolcat High Flow Solenoid – Circuit Open
      C1039-19 M-Series Loader High Flow Solenoid Overcurrent
      C103A-11 M-Series Loader Ride Control 1 Short to Ground
      C103A-12 M-Series Loader Ride Control 1 Short to Battery
      C103A-13 M-Series Loader Ride Control 1 Open Circuit
      C103B-11 M-Series Loader Ride Control 2 Short to Ground
      C103B-12 M-Series Loader Ride Control 2 Short to Battery
      C103B-13 M-Series Loader Ride Control 2 Open Circuit
      C103C-11 M-Series Loader Bobtach Engage Short to Ground
      C103C-11 Toolcat Bobtach Engage Solenoid – Circuit Short to Ground
      C103C-12 M-Series Loader Bobtach Engage Short to Battery
      C103C-12 Toolcat Bobtach Engage Solenoid – Circuit Short to Battery
      C103C-13 Toolcat Bobtach Engage Solenoid – Circuit Open
      C103C-13 M-Series Loader Bobtach Engage Open Circuit
      C103D-11 Toolcat Bobtach Disengage Solenoid – Circuit Short to Ground
      C103D-11 M-Series Loader Bobtach Disengage Short to Ground
      C103D-12 Toolcat Bobtach Disengage Solenoid – Circuit Short to Battery
      C103D-12 M-Series Loader Bobtach Disengage Short to Battery
      C103D-13 M-Series Loader Bobtach Disengage Open Circuit
      C103D-13 Toolcat Bobtach Disengage Solenoid – Circuit Open
      C1040-11 M-Series Loader Lift Actuator Short to Ground
      C1040-12 M-Series Loader Lift Actuator Short to Battery
      C1040-13 M-Series Loader Lift Actuator Open Circuit
      C1040-19 M-Series Loader Lift Actuator Overcurrent
      C1040-77 M-Series Loader Lift Actuator Reduced Performance
      C1041-00 M-Series Loader Lift Spool Position Sensor Inverted Movement
      C1042-00 M-Series Loader Lift Actuator Uncommanded Motion
      C1043-11 Compact Wheel Loader Lift Cylinder Base Short to Ground
      C1043-12 Compact Wheel Loader Lift Cylinder Base Short to Battery
      C1043-13 Compact Wheel Loader Lift Cylinder Base Open Circuit
      C1043-19 Compact Wheel Loader Lift Cylinder Base Overcurrent
      C1044-11 Compact Wheel Loader Lift Cylinder Rod Short to Ground
      C1044-12 Compact Wheel Loader Lift Cylinder Rod Short to Battery
      C1044-13 Compact Wheel Loader Lift Cylinder Rod Open Circuit
      C1044-19 Compact Wheel Loader Lift Cylinder Rod Overcurrent
      C1045-11 M-Series Loader Tilt Actuator Short to Ground
      C1045-12 M-Series Loader Tilt Actuator Short to Battery
      C1045-13 M-Series Loader Tilt Actuator Open Circuit
      C1045-19 M-Series Loader Tilt Actuator Overcurrent
      C1045-77 M-Series Loader Tilt Actuator Reduced Performance
      C1046-00 M-Series Loader Tilt Spool Position Sensor Inverted Movement
      C1047-00 M-Series Loader Tilt Actuator Uncommanded Motion
      C1048-11 Compact Wheel Loader Tilt Cylinder Rod Short to Ground
      C1048-12 Compact Wheel Loader Tilt Cylinder Rod Short to Battery
      C1048-13 Compact Wheel Loader Tilt Cylinder Rod Open Circuit
      C1048-19 Compact Wheel Loader Tilt Cylinder Rod Overcurrent
      C1049-11 Compact Wheel Loader Tilt Cylinder Base Short to Ground
      C1049-12 Compact Wheel Loader Tilt Cylinder Base Short to Battery
      C1049-13 Compact Wheel Loader Tilt Cylinder Base Open Circuit
      C1049-19 Compact Wheel Loader Tilt Cylinder Base Overcurrent
      C104A-00 M-Series Loader Lift Float Failed to achieve float
      C104B-00 M-Series Loader Lift Float Conditions not favorable
      C104C-00 M-Series Loader Lift Float Failed to maintain float
      C1050-11 Compact Wheel Loader Switched Power Relay Short to Ground
      C1050-12 Toolcat Switched Power Output – Circuit Short to Battery
      C1050-12 Compact Wheel Loader Switched Power Relay Short to Battery
      C1050-13 Compact Wheel Loader Switched Power Relay Open Circuit
      C1050-14 Toolcat Switched Power Output – Circuit Short to Ground or Open
      C1050-15 Small Articulated Loader Switched Power Relay Short to Battery or Open Circuit
      C1051-11 M-Series Loader Two Speed Solenoid Short to Ground
      C1051-11 Toolcat Two Speed Solenoid – Circuit Short to Ground
      C1051-12 M-Series Loader Two Speed Solenoid Short to Battery
      C1051-12 Toolcat Two Speed Solenoid – Circuit Short to Battery
      C1051-13 Toolcat Two Speed Solenoid – Circuit Open
      C1051-13 M-Series Loader Two Speed Solenoid Open Circuit
      C1051-19 M-Series Loader Two Speed Solenoid Overcurrent
      C1060-11 Compact Wheel Loader Brake Short to Ground
      C1060-11 Small Articulated Loader Brake Solenoid Short to Ground
      C1060-12 Small Articulated Loader Brake Solenoid Short to Battery
      C1060-12 Compact Wheel Loader Brake Short to Battery
      C1060-13 Small Articulated Loader Brake Solenoid Open Circuit
      C1060-13 Compact Wheel Loader Brake Open Circuit
      C1060-19 Compact Wheel Loader Brake Solenoid Overcurrent
      C1061-11 Toolcat Brake 1 Solenoid – Circuit Short to Ground
      C1061-12 Toolcat Brake 1 Solenoid – Circuit Short to Battery
      C1061-13 Toolcat Brake 1 Solenoid – Circuit Open
      C1061-19 Toolcat Brake 1 Solenoid – Circuit Current Above Threshold
      C1062-11 Toolcat Brake 2 Solenoid – Circuit Short to Ground
      C1062-12 Toolcat Brake 2 Solenoid – Circuit Short to Battery
      C1062-13 Toolcat Brake 2 Solenoid – Circuit Open
      C1062-19 Toolcat Brake 2 Solenoid – Circuit Current Above Threshold
      C1070-11 M-Series Loader Rear Auxiliary Base Solenoid Short to Ground
      C1070-12 M-Series Loader Rear Auxiliary Base Solenoid Short to Battery
      C1070-13 M-Series Loader Rear Auxiliary Base Solenoid Open Circuit
      C1071-11 M-Series Loader Rear Auxiliary Base Lock Solenoid Short to Ground
      C1071-12 M-Series Loader Rear Auxiliary Base Lock Solenoid Short to Battery
      C1071-13 M-Series Loader Rear Auxiliary Base Lock Open Circuit
      C1075-11 M-Series Loader Rear Auxiliary Rod Solenoid Short to Ground
      C1075-12 M-Series Loader Rear Auxiliary Rod Solenoid Short to Battery
      C1075-13 M-Series Loader Rear Auxiliary Rod Solenoid Open Circuit
      C1076-11 M-Series Loader Rear Auxiliary Rod Lock Solenoid Short to Ground
      C1076-12 M-Series Loader Rear Auxiliary Rod Lock Solenoid Short to Battery
      C1076-13 M-Series Loader Rear Auxiliary Rod Solenoid Open Circuit
      C1080-F8 M-Series Loader Hydraulic Charge Pressure Extremely Low
      C1080-F9 M-Series Loader Low Hydraulic Pump Pressure
      C1080-FA M-Series Loader Hydraulic Charge Pressure High
      C1080-FB M-Series Loader Hydraulic Charge Pressure Extremely High
      C1080-FD Small Articulated Loader Hydraulic Charge Pressure Shutdown
      C1090-00 Toolcat Hydraulic Main Filter Plugged
      C1090-00 Compact Wheel Loader Hydraulic Filter Plugged
      C1091-16 Toolcat Hydraulic Main Filter Switch – Circuit Voltage Below Threshold
      C1091-17 Toolcat Hydraulic Main Filter Switch – Circuit Voltage Above Threshold
      C1091-95 Toolcat Hydraulic Main Filter Pressure Switch – Incorrect Assembly
      C1091-95 Compact Wheel Loader Hydraulic Main Filter Switch Not Connected
      C1093-00 M-Series Loader Hydraulic Case Drain Filter Switch Plugged
      C1097-16 M-Series Loader Hydraulic Charge Pressure Sensor Out of Range Low
      C1097-17 M-Series Loader Hydraulic Charge Pressure Sensor Out of Range High
      C1099-FA Toolcat Hydraulic Oil Temperature – High
      C1099-FA Compact Wheel Loader Hydraulic Oil Temperature Too High
      C1099-FB Compact Wheel Loader Hydraulic Oil Temperature Extremely High
      C1099-FB Toolcat Hydraulic Oil Temperature – Extremely High
      C1099-FC Compact Wheel Loader Hydraulic Oil Temperature Performance Reduction
      C1099-FD Small Articulated Loader Hydraulic Oil Temperature Shutdown
      C109A-16 Toolcat Hydraulic Oil Temperature Sensor – Circuit Voltage Below Threshold
      C109A-16 Compact Wheel Loader Hydraulic Oil Temperature Out of Range Low
      C109A-17 Compact Wheel Loader Hydraulic Oil Temperature Out of Range High
      C109A-17 Toolcat Hydraulic Oil Temperature Sensor – Circuit Voltage Above Threshold
      C10A0-16 M-Series Loader Drive Motor Case Drain Hydraulic Oil Temperature Out of Range Low
      C10A0-17 M-Series Loader Drive Motor Case Drain Hydraulic Oil Temperature Out of Range High
      C10A1-FA M-Series Loader Drive Motor Case Drain Hydraulic Oil Temperature High
      C10A1-FB M-Series Loader Drive Motor Case Drain Hydraulic Oil Temperature Extremely High
      C10A1-FC M-Series Loader Drive Motor Case Drain Hydraulic Oil Temperature Reduced Performance
      C10A5-16 M-Series Loader Pump Case Drain Hydraulic Oil Temperature Out of Range Low
      C10A5-17 M-Series Loader Pump Case Drain Hydraulic Oil Temperature Out of Range High
      C10A6-FA M-Series Loader Pump Case Drain Hydraulic Oil Temperature High
      C10A6-FB M-Series Loader Pump Case Drain Hydraulic Oil Temperature Extremely High
      C10A6-FC M-Series Loader Pump Case Drain Hydraulic Oil Temperature High
      C10B0-00 M-Series Loader Workgroup Disabled Due To Window Fault
      C10C0-77 M-Series Loader Right Swash Plate Commanded Position Not Reachable
      C10C0-F0 M-Series Loader Right Swash Plate Not in Neutral
      C10C1-16 M-Series Loader Right Swash Plate Sensor Out of Range Low
      C10C1-17 M-Series Loader Right Swash Plate Sensor Out of Range High
      C10C5-77 M-Series Loader Left Swash Plate Commanded Position Not Reachable
      C10C5-F0 M-Series Loader Left Swash Plate Not in Neutral
      C10C6-16 M-Series Loader Left Swash Plate Sensor Out of Range Low
      C10C6-17 M-Series Loader Left Swash Plate Sensor Out of Range High
      C10CA-77 Toolcat Swash Plate – Commanded Position Not Reachable
      C10CA-F0 Toolcat Swash Plate – Not in Neutral
      C10CB-16 Toolcat Swash Plate Sensor – Circuit Voltage Below Threshold
      C10CB-17 Toolcat Swash Plate Sensor – Circuit Voltage Above Threshold
      C10D0-54 M-Series Loader Drive Pump Not Calibrated
      C10D0-54 Toolcat Drive Pump – Missing Calibration
      C10D1-11 Toolcat Drive Pump Forward – Circuit Short to Ground
      C10D1-11 Compact Wheel Loader Drive Pump Forward Short to Ground
      C10D1-12 Toolcat Drive Pump Forward – Circuit Short to Battery
      C10D1-12 Compact Wheel Loader Drive Pump Forward Short to Battery
      C10D1-13 Compact Wheel Loader Drive Pump Forward Open Circuit
      C10D1-13 Toolcat Drive Pump Forward – Circuit Open
      C10D1-19 Compact Wheel Loader Drive Pump Forward Overcurrent
      C10D1-19 Toolcat Drive Pump Forward – Circuit Current Above Threshold
      C10D2-11 Compact Wheel Loader Drive Pump reverse Short to Ground
      C10D2-11 Toolcat Drive Pump Reverse – Circuit Short to Ground
      C10D2-12 Toolcat Drive Pump Reverse – Circuit Short to Battery
      C10D2-12 Compact Wheel Loader Drive Pump reverse Short to Battery
      C10D2-13 Compact Wheel Loader Drive Pump reverse Open Circuit
      C10D2-13 Toolcat Drive Pump Reverse – Circuit Open
      C10D2-19 Compact Wheel Loader Drive Pump reverse Overcurrent
      C10D2-19 Toolcat Drive Pump Reverse – Circuit Current Above Threshold
      C10E0-16 Small Articulated Loader Controller 8V Sensor Supply Voltage Low
      C10E0-17 Small Articulated Loader Controller 8V Sensor Supply Voltage High
      C10E5-16 Small Articulated Loader Controller 5V Sensor Supply Voltage Low
      C10E5-17 Small Articulated Loader Controller 5V Sensor Supply Voltage High
      C10F0-11 Small Articulated Loader Lift/Tilt Short to Ground
      C10F0-12 Small Articulated Loader Lift/Tilt Short to Battery
      C10F0-13 Small Articulated Loader Lift/Tilt Open Circuit
      C10F1-16 Small Articulated Loader Lift/Tilt Out of Range Low
      C10F1-17 Small Articulated Loader Lift/Tilt Out of Range High
      C10FA-11 Small Articulated Loader Lift Arm Extension Short to Ground
      C10FA-12 Small Articulated Loader Lift Arm Extension Short to Battery
      C10FA-13 Small Articulated Loader Lift Arm Extension Open Circuit
      C10FA-19 Small Articulated Loader Lift Arm Extension Overcurrent
      C10FB-11 Small Articulated Loader Lift Arm Rod Solenoid Short to Ground
      C10FB-12 Small Articulated Loader Lift Arm Rod Solenoid Short to Battery
      C10FB-13 Small Articulated Loader Lift Arm Rod Solenoid Open Circuit
      C10FB-19 Small Articulated Loader Lift Arm Rod Solenoid Overcurrent
      C10FC-11 Small Articulated Loader Lift Arm Base Solenoid Short to Ground
      C10FC-12 Small Articulated Loader Lift Arm Base Solenoid Short to Battery
      C10FC-13 Small Articulated Loader Lift Arm Solenoid Open Circuit
      C10FC-19 Small Articulated Loader Lift Arm Solenoid Overcurrent
      C1100-11 Small Articulated Loader Travel Circuit Short to Ground
      C1100-12 Small Articulated Loader Travel Circuit Short to Battery
      C1100-13 Small Articulated Loader Travel Circuit Open
      C1101-16 Small Articulated Loader Travel Circuit Our of Range Low
      C1101-17 Small Articulated Loader Travel Circuit Out of Range High
      C1110-11 Compact Wheel Loader Ride Control Circuit Short to Ground
      C1110-15 Compact Wheel Loader Ride Control Circuit Error On
      C1111-16 Compact Wheel Loader Ride Control Feedback Circuit Out of Range Low
      C1111-17 Compact Wheel Loader Ride Control Feedback Circuit Out of Range High
      C1130-11 Compact Wheel Loader Hydraulic Motor reverse Short to Ground
      C1130-12 Compact Wheel Loader Hydraulic Motor reverse Short to Battery
      C1130-13 Compact Wheel Loader Hydraulic Motor reverse Open Circuit
      C1130-19 Compact Wheel Loader Hydraulic Motor Overcurrent
      C1150-13 M-Series Loader Right Drive Motor Direction Open Circuit
      C1150-16 M-Series Loader Right Drive Motor Direction Out of Range Low
      C1150-17 M-Series Loader Right Drive Motor Direction Out of Range High
      C1155-13 M-Series Loader Left Drive Motor Direction Open Circuit
      C1155-16 M-Series Loader Left Drive Motor Direction Out of Range Low
      C1155-17 M-Series Loader Left Drive Motor Direction Out of Range High
      C1182-A2 Small Articulated Loader Alternator Voltage High
      C1182-A2 Compact Wheel Loader Alternator Voltage Low
      C1182-A2 Toolcat Alternator Voltage System Voltage Low
      C1182-A3 Toolcat Alternator Voltage System Voltage High
      C1182-A3 Small Articulated Loader Alternator Voltage Low
      C1182-A3 M-Series Loader Alternator Voltage High
      C1183-A3 Compact Wheel Loader Alternator Voltage High
      C1190-00 M-Series Loader System Voltage Out of Range Low
      C1192-00 Compact Wheel Loader System Voltage Extremely Low
      C1192-00 Toolcat Battery Voltage Extremely Low
      C1193-00 Toolcat Battery Voltage Low
      C1193-00 Compact Wheel Loader System Voltage Too Low
      C1195-00 M-Series Loader System Voltage Extremely Low
      C1195-00 Toolcat Battery Voltage High
      C1195-00 Compact Wheel Loader System Voltage High
      C1196-00 Compact Wheel Loader System Voltage Extremely High
      C1196-00 Toolcat Battery Voltage Extremely High
      C119A-F8 Small Articulated Loader System Voltage Extremely Low
      C119A-F9 Small Articulated Loader System Voltage Too Low
      C119A-FA Small Articulated Loader System Voltage Extremely Low
      C119A-FB Small Articulated Loader System Voltage Extremely High
      C11A0-11 Toolcat Servo Enable Solenoid – Circuit Short to Ground
      C11A0-12 Toolcat Servo Enable Solenoid – Circuit Short to Battery
      C11A0-13 Toolcat Servo Enable Solenoid – Circuit Open
      C11C0-11 M-Series Loader Left Forward Drive Solenoid Error Off
      C11C0-12 M-Series Loader Left Forward Drive Solenoid Error On
      C11C2-11 M-Series Loader Left Reverse Drive Solenoid Error Off
      C11C2-12 M-Series Loader Left Reverse Drive Solenoid Error On
      C11C4-11 M-Series Loader Right Forward Drive Solenoid Error Off
      C11C4-12 M-Series Loader Right Forward Drive Solenoid Error On
      C11C6-11 M-Series Loader Right Reverse Drive Solenoid Error Off
      C11C6-12 M-Series Loader Right Reverse Drive Solenoid Error On
      C11F0-94 Toolcat Diverter Switch – Unexpected Operation
      C1200-11 Compact Wheel Loader Power Exchange Unlock Short to Ground
      C1200-12 Compact Wheel Loader Power Exchange Unlock Short to Battery
      C1200-13 Compact Wheel Loader Power Exchange Unlock Open Circuit
      C1205-11 Compact Wheel Loader Power Exchange Lock Short to Ground
      C1205-12 Compact Wheel Loader Power Exchange Lock Short to Battery
      C1205-13 Compact Wheel Loader Power Exchange Lock Open Circuit
      C1220-11 Compact Wheel Loader Diff-Lock Short to Ground
      C1220-12 Compact Wheel Loader Diff-Lock Short to Battery
      C1220-13 Compact Wheel Loader Diff-Lock Open Circuit
      C1220-19 Compact Wheel Loader Diff-Lock Overcurrent
      C1221-17 Compact Wheel Loader Diff-Lock Sensor Out of Range High
      C1250-F9 Compact Wheel Loader Park Brake Pressure Low
      C1250-FA Compact Wheel Loader Park Brake Pressure High
      C1251-16 Compact Wheel Loader Park Brake Pressure Sensor Circuit Out of Range Low
      C1251-17 Compact Wheel Loader Park Brake Pressure Sensor Circuit Out of Range High
      C1260-F9 Compact Wheel Loader Service Brake Pressure Low
      C1260-FA Compact Wheel Loader Service Brake Pressure High
      C1260-FB Compact Wheel Loader Service Brake Pressure Extremely High
      C1261-16 Compact Wheel Loader Service Brake Pressure Sensor Circuit Out of Range Low
      C1261-17 Compact Wheel Loader Service Brake Pressure Sensor Circuit Out of Range High
      C1270-F9 Compact Wheel Loader Steering Pressure Low
      C1271-16 Compact Wheel Loader Steering Pressure Sensor Circuit Out of Range Low
      C1271-17 Compact Wheel Loader Steering Pressure Sensor Circuit Out of Range High
      C1280-F9 Compact Wheel Loader Reserve Brake Pressure Low
      C1280-FA Compact Wheel Loader Reserve Brake Pressure High
      C1280-FB Compact Wheel Loader Reserve Brake Pressure Extremely Low
      C1281-16 Compact Wheel Loader Reserve Brake Pressure Sensor Circuit Out of Range Low
      C1281-17 Compact Wheel Loader Reserve Brake Pressure Sensor Circuit Out of Range High
      C1290-17 Toolcat PTO Speed Sensor – Circuit Voltage Above Threshold
      C1291-FA Toolcat PTO Speed – High
      C1291-FB Toolcat PTO Speed – Extremely High
      C1292-FD Toolcat PTO – In Shutdown
      C1293-92 Toolcat PTO Switch – Performance or Incorrect Operation
      C1295-13 Toolcat Traction Control Speed Sensor – Circuit Open
      C1295-16 Toolcat Traction Control Speed Sensor – Circuit Voltage Below Threshold
      C1295-17 Toolcat Traction Control Speed Sensor – Circuit Voltage Above Threshold
      C129A-13 Toolcat Main Speed Sensor – Circuit Open
      C129A-16 Toolcat Main Speed Sensor – Circuit Voltage Below Threshold
      C129A-17 Toolcat Main Speed Sensor – Circuit Voltage Above Threshold
      C12B0-11 Toolcat Lift Spool Lock – Circuit Short to Ground
      C12B0-12 Toolcat Lift Spool Lock – Circuit Short to Battery
      C12B0-13 Toolcat Lift Spool Lock – Circuit Open
      C12B5-11 Toolcat Tilt Spool Lock – Circuit Short to Ground
      C12B5-12 Toolcat Tilt Spool Lock – Circuit Short to Battery
      C12B5-13 Toolcat Tilt Spool Lock – Circuit Open
      C12BA-11 Toolcat Box Spool Lock – Circuit Short to Ground
      C12BA-12 Toolcat Box Spool Lock – Circuit Short to Battery
      C12BA-13 Toolcat Box Spool Lock – Circuit Open
      C12F0-FB Compact Wheel Loader Hydromotor Speed Extremely High
      C12F1-31 Compact Wheel Loader Hydromotor Speed Sensor Not Connected
      C1300-16 Compact Wheel Loader Inching Sensor Circuit Out of Range Low
      C1300-17 Compact Wheel Loader Inching Sensor Circuit Out of Range High
      C1401-11 Toolcat AWS Solenoid 1 – Circuit Short to Ground
      C1401-12 Toolcat AWS Solenoid 1 – Circuit Short to Battery
      C1401-13 Toolcat AWS Solenoid 1 – Circuit Open
      C1402-11 Toolcat AWS Solenoid 2 – Circuit Short to Ground
      C1402-12 Toolcat AWS Solenoid 2 – Circuit Short to Battery
      C1402-13 Toolcat AWS Solenoid 2 – Circuit Open
      C1403-11 Toolcat AWS Solenoid 3 – Circuit Short to Ground
      C1403-12 Toolcat AWS Solenoid 3 – Circuit Short to Battery
      C1403-13 Toolcat AWS Solenoid 3 – Circuit Open
      C3014 Telehandler LLMC Sensor Offset
      C3015 Telehandler LLMC Sensor Out of Range
      C3016 Telehandler LLMC Sensor Default
      C3017 Telehandler LLMC Sensor ID Error
      C3018 Telehandler LLMC Sensor Rx Out of Delay
      C3113 Telehandler LLMC Calibration Values Out of Range
      C3121 Telehandler LLMC Calibration Values Inverted
      C3122 Telehandler LLMC Calibration Values Too Close
      C3123 Telehandler LLMC Calibration Timeout
      C3801 Telehandler LLMC EEPROM Failure
      C3803 Telehandler LLMC External Watchdog Default
      C3804 Telehandler LLMC Wrong RAM Test
      C3805 Telehandler LLMC Wrong Program Checksum
      CP706 M-Series Loader TestCP706
      D0217 Telehandler Hydraulic filter plugged
      D0321 Telehandler Battery Voltage OOR High
      D0322 Telehandler Battery Voltage OOR Low
      D0421 Telehandler Inching Pedal OOR High
      D0422 Telehandler Inching Pedal OOR Low
      D0428 Telehandler Inching Pedal In error
      D0605 Telehandler Vehicle speed Short To Battery
      D0606 Telehandler Vehicle speed Short To Ground
      D0607 Telehandler Vehicle speed Open circuit
      D0611 Telehandler Vehicle speed extremely high
      D0613 Telehandler Vehicle speed No Signal
      D0721 Telehandler Hydraulic Oil Temperature OOR High
      D0722 Telehandler Hydraulic Oil Temperature OOR Low
      D0821 Telehandler Frame leveling Pressure Sensor Out Of Range High
      D0822 Telehandler frame leveling Pressure Sensor Out Of Range Low
      D0909 Telehandler Park Brake Pressure Low
      D0910 Telehandler Park Brake Pressure High
      D0911 Telehandler Park Brake Pressure Extremely High
      D0921 Telehandler Park Brake Pressure Out of Range High
      D0922 Telehandler Park Brake Pressure Out of Range Low
      D1002 Telehandler Passive Brake Output Short To Battery or Open circuit
      D1003 Telehandler Passive Brake Valve Short To Ground
      D1005 Telehandler Passive Brake Output Short To Battery
      D1006 Telehandler Passive Brake Output Short To Ground
      D1007 Telehandler Passive Brake Output Open Circuit
      D1032 Telehandler Passive Brake Output Overcurrent
      D1128 Telehandler Park Brake Dashboard Switch In Error
      D1145 Telehandler Park Brake Dashboard Switch Disagree
      D1202 Telehandler EMEA Trailer Brake output Error On (Short To Battery)
      D1203 Telehandler EMEA Trailer Brake output Error Off (Short To Gound)
      D1207 Telehandler EMEA Trailer Brake output Open circuit
      D1233 Telehandler EMEA Trailer Brake output Controller Internal failure
      D1302 Telehandler EMEA Trailer Brake Relay Error On
      D1303 Telehandler EMEA Trailer Brake Relay Error Off
      D1402 Telehandler Brake Light Output Error On
      D1402 Telehandler Trailer Brake Command Line Output Error On
      D1403 Telehandler Trailer Brake Command Line Output Error Off
      D1403 Telehandler Brake Light Output Error Off
      D1407 Telehandler Trailer Brake Command Line Output Open Circuit
      D1407 Telehandler Brake Light Output Open Circuit
      D1433 Telehandler Trailer Brake Command Line Output Internal failure
      D1433 Telehandler Brake Light Output Internal failure
      D1502 Telehandler Trailer Brake Command Line Relay Error On
      D1502 Telehandler Brake Light Relay Error On
      D1503 Telehandler Trailer Brake Command Line Relay Error Off
      D1503 Telehandler Brake Light Relay Error Off
      D1605 Telehandler Drive Pump Forward Coil Short To Battery
      D1606 Telehandler Drive Pump Forward Coil Short To Ground
      D1607 Telehandler Drive Pump Forward Coil Open circuit
      D1632 Telehandler Drive Pump Forward Coil Overcurrent
      D1705 Telehandler Drive Pump Reverse Coil Short To Battery
      D1706 Telehandler Drive Pump Reverse Coil Short To Ground
      D1707 Telehandler Drive Pump Reverse Coil Open circuit
      D1732 Telehandler Drive Pump Reverse Coil Overcurrent
      D1802 Telehandler Stabilisers / Aux diverter output valve error ON
      D1803 Telehandler Stabilisers / Aux diverter output valve error OFF
      D1807 Telehandler Stabilisers / Aux diverter output open circuit
      D1825 Telehandler Stabilisers / Aux diverter output Unresponsive
      D1902 Telehandler Stabilisers / Aux diverter relay feedback error ON
      D1903 Telehandler Stabilisers / Aux diverter relay feedback error OFF
      D2002 Telehandler Low speed output (hydraulic motor) Error On
      D2003 Telehandler Low speed output (hydraulic motor) Error Off
      D2007 Telehandler Low speed output (hydraulic motor) Open circuit
      D2033 Telehandler Low speed output (hydraulic motor) Controller Internal failure
      D2102 Telehandler Low speed Relay Error On
      D2103 Telehandler Low speed Relay Error Off
      D2202 Telehandler Defeat valve output (hydraulic motor) Error On
      D2203 Telehandler Defeat valve output (hydraulic motor) Error Off
      D2207 Telehandler Defeat valve output (hydraulic motor) Open circuit
      D2233 Telehandler Defeat valve output Controller Internal failure
      D2302 Telehandler Defeat valve relay Error On
      D2303 Telehandler Defeat valve relay Error Off
      D2502 Telehandler Left stabilizer on the floor Error ON
      D2503 Telehandler Left stabilizer on the floor Error OFF
      D2609 Telehandler Hydraulic Steering Pressure Low
      D2621 Telehandler Hydraulic Steering Pressure Out of Range High
      D2702 Telehandler Right stabilizer on the floor Error ON
      D2703 Telehandler Right stabilizer on the floor Error OFF
      D2821 Telehandler Left stabilizer Pressure Sensor Out Of Range High
      D2822 Telehandler Left stabilizer Pressure Sensor Out Of Range Low
      D2921 Telehandler Right stabilizer Pressure Sensor Out Of Range High
      D2922 Telehandler Right stabilizer Pressure Sensor Out Of Range Low
      D3005 Telehandler Stabilizers Right Output Short To Battery
      D3006 Telehandler Stabilizers Right Output Short To Ground
      D3007 Telehandler Stabilizers Right Output Open circuit
      D3024 Telehandler Stabilizers Right Output Not In Neutral
      D3105 Telehandler Stabilizers Left Output Short To Battery
      D3106 Telehandler Stabilizers Left Output Short To Ground
      D3107 Telehandler Stabilizers Left Output Open circuit
      D3124 Telehandler Stabilizers Left Output Not In Neutral
      D3204 Telehandler Workgroup controller No Communication
      D3304 Telehandler Gateway controller No Communication
      D3404 Telehandler Display controller No Communication
      D3604 Telehandler Engine controller No Communication
      D3723 Telehandler Programming or constant data invalid
      D3728 Telehandler Drive Controller failure
      D3796 Telehandler Interrupted power
      D3797 Telehandler Drive Controller programmed
      D3905 M-Series Loader Left Joystick X-Axis Not in Neutral
      D3907 M-Series Loader Left Joystick Y-Axis Not in Neutral
      D4004 Telehandler Joystick No communication
      D4007 M-Series Loader Right Joystick Y-Axis Not in Neutral
      D4011 Telehandler Joystick Right roller Out Of Neutral (Auxiliary)
      D4028 Telehandler Joystick Grip Fault
      D4113 Telehandler FNR lever no Signal
      D4128 Telehandler FNR multiple inputs active
      D4402 Telehandler Power Quicktach output Error On
      D4403 Telehandler Power Quicktach output Error Off
      D4407 Telehandler Power Quicktach Output Open circuit
      D4502 Telehandler Power Quicktach Relay feedback Error On
      D4503 Telehandler Power Quicktach Relay feedback Error Off
      D4528 Telehandler Power Quicktach Switch in error
      D4621 Telehandler Voltage Sensor 5V OOR High
      D4622 Telehandler Voltage Sensor 5V OOR Low
      D4705 Telehandler Frame leveling Output Short To Battery
      D4706 Telehandler Frame leveling Output Short To Ground
      D4707 Telehandler Frame leveling Output Open circuit
      D4724 Telehandler Frame leveling Output Not In Neutral
      D4802 Telehandler Park Brake Reserve Pressure Valve Output Error On
      D4803 Telehandler Park Brake Reserve Pressure Valve Output Error Off
      D4807 Telehandler Park Brake Reserve Pressure Valve Output Open Circuit
      D4902 Telehandler Park Brake Reserve Pressure Valve Relay Feedback Error On
      D4903 Telehandler Park Brake Reserve Pressure Valve Relay Feedback Error Off
      D5005 Telehandler Rear Aux./Hook UP Valve Short to Battery
      D5006 Telehandler Rear Aux./Hook UP Valve Short to Ground
      D5007 Telehandler Rear Aux./Hook UP Valve Open Circuit
      D5105 Telehandler Rear Aux./Hook DOWN Valve Short to Battery
      D5106 Telehandler Rear Aux./Hook DOWN Valve Short to Ground
      D5107 Telehandler Rear Aux./Hook DOWN Valve Open Circuit
      D5205 Telehandler Rear Aux./Hook ACTIVATION Valve Short to Battery
      D5206 Telehandler Rear Aux./Hook ACTIVATION Valve Short to Ground
      D5207 Telehandler Rear Aux./Hook ACTIVATION Valve Open Circuit
      D5232 Telehandler Rear Aux./Hook ACTIVATION Valve Overcurrent
      D5328 Telehandler Rear Aux./Hook Dashbord Switch In Error
      D5421 Telehandler Auxiliary spool sensor Out Of Range high
      D5422 Telehandler Auxiliary spool sensor Out Of Range low
      D5424 Telehandler Auxiliary spool sensor not in neutral
      D5425 Telehandler Auxiliary spool sensor unresponsive
      D5521 Telehandler SwashPlate Sensor1 OORH
      D5522 Telehandler SwashPlate Sensor1 OORL
      D5621 Telehandler Swash Plate Sensor2 OORH
      D5622 Telehandler Swash Plate Sensor2 OORL
      D5715 Telehandler Swash Plate shutdown
      D5744 Telehandler Swash Plate dual fault
      D5745 Telehandler Swash Plate disagree
      D5746 Telehandler Swash plate unresponsive
      D5786 Telehandler Swash plate Safe Stop failure
      D5815 Telehandler Safe Start Shutdown
      D5824 Telehandler Safe Start Swash Out Of Neutral
      D5835 Telehandler Safe Start Dump valve stuck on
      D5911 Telehandler Overspeed fault
      D5915 Telehandler Overspeed shutdown
      D5928 Telehandler Overspeed failure
      D5986 Telehandler Overspeed failure
      D6021 Telehandler Servo Pressure Out of Range High
      D6022 Telehandler Servo Pressure Out of Range Low
      D6202 Telehandler Creep Light Error On
      D6203 Telehandler Creep Light Error Off
      D6302 Telehandler Creep Switch Error On
      D6505 Telehandler Gear 1 (Gearbox) Short To Battery
      D6506 Telehandler Gear 1 (Gearbox) Short To Ground
      D6507 Telehandler Gear 1 (Gearbox) Open Circuit
      D6605 Telehandler Gear 2 (Gearbox) Short To Battery
      D6606 Telehandler Gear 2 (Gearbox) Short To Ground
      D6607 Telehandler Gear 2 (Gearbox) Open Circuit
      D6702 Telehandler Gearshift sensor Error On
      D6760 Telehandler Gearshift sensor – Shift didn’t start / no shift
      D6761 Telehandler Gearshift sensor – Shift too long / locked
      D6824 Telehandler Frame leveling switch Not in Neutral
      D6902 Telehandler Gear switch 1/2 Error On (dashboard)
      D7002 Telehandler High/Low speed switch Error on (left lever)
      D7102 Telehandler Backup alarm Output Error On
      D7103 Telehandler Backup alarm Output Error Off
      D7107 Telehandler Backup alarm Output Open Cirduit
      D7133 Telehandler Backup alarm Output Internal Failure
      D7202 Telehandler Backup alarm Relay Feedback Error On
      D7203 Telehandler Backup alarm Relay Feedback Error Off
      D7209 Telehandler Service Brake Pressure Low
      D7210 Telehandler Service Brake Pressure High
      D7214 Telehandler Service Brake Pressure Extremley Low
      D7221 Telehandler Service Brake Pressure Out of Range High
      D7222 Telehandler Service Brake Pressure Out of Range Low
      D7309 Telehandler Service Brake Reserve Pressure Low
      D7310 Telehandler Service Brake Reserve Pressure High
      D7321 Telehandler Service Brake Reserve Pressure Out of Range High
      D7322 Telehandler Service Brake Reserve Pressure Out of Range Low
      D7501 M-Series Loader Drive/Drive+ CAN Joystick Information Error
      D7502 M-Series Loader Drive Controller Needs Programming
      D7504 M-Series Loader Drive No Communication from Drive Controller
      D7505 M-Series Loader Drive Left Joystick X-Axis Not in Neutral
      D7506 M-Series Loader Drive+ Steering valve cartridge stuck
      D7507 M-Series Loader Drive Left Joystick Y-Axis Not in Neutral
      D7508 M-Series Loader Drive Right Joystick Y-Axis Not in Neutral
      D7509 M-Series Loader Drive ISO/H Pattern Switch Short to Ground or Battery
      D7509 Telehandler Park Brake Reserve Pressure Low
      D7510 M-Series Loader Drive Improper Joysticks installed
      D7511 M-Series Loader Drive Left speed sensor not connected.
      D7512 M-Series Loader Drive Right speed sensor not connected
      D7513 M-Series Loader Drive+ Right Front Wheel Angle Sensor Stuck
      D7514 M-Series Loader Drive+ Left Front Wheel Angle Sensor Stuck
      D7515 M-Series Loader Drive+ Right Reat Wheel Angle Sensor Stuck
      D7516 M-Series Loader Drive+ Left Rear Wheel Angle Sensor Stuck
      D7517 M-Series Loader Drive Left Swash Plate Not in Neutral
      D7518 M-Series Loader Drive Right Swash Plate Not in Neutral
      D7519 M-Series Loader Drive Left Joystick X-Axis Out of Range High
      D7521 M-Series Loader Drive Left Joystick Y-Axis Out of Range High
      D7522 M-Series Loader Drive Right Joystick Y-Axis Out of Range High
      D7523 M-Series Loader Drive+ Right Front Wheel Angle Sensor Out of Range High
      D7524 M-Series Loader Drive+ Left Front Wheel Angle Sensor Out of Rane High
      D7525 M-Series Loader Drive+ Right Rear Wheel Angle Sensor Out of Range High
      D7526 M-Series Loader Drive+ Left Rear Wheel Angle Sensor Out of Range High
      D7527 M-Series Loader Drive Left Swash Plate Out of Position
      D7528 M-Series Loader Drive Right Swash Plate Out of Position
      D7529 M-Series Loader Drive Left Joystick X-Axis Out of Range Low
      D7531 M-Series Loader Drive Left Joystick Y-Axis Out of Range Low
      D7532 M-Series Loader Drive Right Joystick Y-Axis Out of Range Low
      D7533 M-Series Loader Drive+ Right Front Wheel Angle Sensor Out of Range Low
      D7534 M-Series Loader Drive+ Left Front Wheel Angle Sensor Out of Range Low
      D7535 M-Series Loader Drive+ Right Rear Wheel Angle Sensor Out of Range Low
      D7536 M-Series Loader Drive+ Left Rear Wheel Angle Sensor Out of Range Low
      D7537 M-Series Loader Drive 5 Volt Sensor Supply 1 Out of Range Low
      D7538 M-Series Loader Drive+ Sensor Supply 2 Out of Range Low
      D7539 M-Series Loader Drive Left Swash Plate Sensor Out of Range High
      D7540 M-Series Loader Drive Left Swash Plate Sensor Out of Range Low
      D7541 M-Series Loader Drive Right Swash Plate Sensor Out of Range High
      D7542 M-Series Loader Drive Right Swash Plate Sensor Out of Range Low
      D7543 M-Series Loader Drive Left Forward Drive Solenoid Error On
      D7544 M-Series Loader Drive Left Reverse Drive Solenoid Error On
      D7545 M-Series Loader Drive Right Forward Drive Solenoid Error On

      Bobcat Fault Code List T770

      Bobcat Fault Code Product Description
      B1005-00 Compact Wheel Loader Key Switch Multiple
      B1034-11 Compact Wheel Loader Rear Work Light Short to Battery
      B1034-12 Compact Wheel Loader Rear Work Light Short to Ground
      B1034-13 Compact Wheel Loader Rear Work Light Not Connected
      B1037-11 Compact Wheel Loader Stop Light Short to Ground
      B1037-15 Compact Wheel Loader Stop Light Error On
      B103D-11 Compact Wheel Loader Beacon Short to Ground
      B103D-12 Compact Wheel Loader Beacon Short to Battery
      B103D-13 Compact Wheel Loader Beacon Not Connected
      B1040-11 Compact Wheel Loader Buzzer Error Off
      B1040-12 Compact Wheel Loader Buzzer Error On
      B1041-12 Compact Wheel Loader Backup Alarm Error Off
      B1041-14 Compact Wheel Loader Backup Alarm Error On
      B104A-11 Compact Wheel Loader Seat Heater Short to Ground
      B104A-12 Compact Wheel Loader Seat Heater Short to Battery
      B104A-13 Compact Wheel Loader Seat Heater Open Circuit
      B1064-F0 Compact Wheel Loader Lift Input Not in Neutral
      B1074-F0 Compact Wheel Loader Tilt Input Not in Neutral
      B1080-09 Compact Wheel Loader Operator Presence Component Failure
      B1080-16 Compact Wheel Loader Operator Presence Circuit Voltage Below Threshold
      B1080-17 Compact Wheel Loader Operator Presence Circuit Voltage Above Threshold
      B10A2-11 Compact Wheel Loader Front Wiper Short to Ground
      B10A2-12 Compact Wheel Loader Front Wiper Short to Battery
      B10A2-13 Compact Wheel Loader Front Wiper Not connected
      B10A3-11 Compact Wheel Loader Front Wiper High Speed Short to Ground
      B10A3-12 Compact Wheel Loader Front Wiper High Speed Short to Battery
      B10A3-13 Compact Wheel Loader Front Wiper High Speed Not connected
      B10A5-11 Compact Wheel Loader Rear Wiper Short to Ground
      B10A5-12 Compact Wheel Loader Rear Wiper Short to Battery
      B10A5-13 Compact Wheel Loader Rear Wiper Not Connected
      B10A7-11 Compact Wheel Loader Front Washer Short to Ground
      B10A7-12 Compact Wheel Loader Front Washer Short to Battery
      B10A7-13 Compact Wheel Loader Front Washer Not Connected
      B10A8-11 Compact Wheel Loader Rear Washer Short to Ground
      B10A8-12 Compact Wheel Loader Rear Washer Short to Battery
      B10A8-13 Compact Wheel Loader Rear Washer Not Connected
      B10C0-00 Compact Wheel Loader Camera Not Connected
      B10F0-11 Compact Wheel Loader Rear Defog Short to Ground
      B10F0-12 Compact Wheel Loader Rear Defog Short to Battery
      B10F0-13 Compact Wheel Loader Rear Defog Circuit Open
      B1100-9E Compact Wheel Loader Power Exchange Lock Switch Stuck On
      B1101-9E Compact Wheel Loader Power Exchange Unlock Switch Stuck on
      B1120-F0 Compact Wheel Loader Joystick Right Roller Not in Neutral
      B1150-F0 Compact Wheel Loader FNR Lever not in Neutral
      B1151-00 Compact Wheel Loader FNR Switch Multiple
      B1190-11 Compact Wheel Loader Front Work Light Short to Battery
      B1190-12 Compact Wheel Loader Front Work Light Short to Ground
      B1190-13 Compact Wheel Loader Front Work Light Not Connected
      B11B5-54 Compact Wheel Loader Inching pedal sensor mising calibration
      C1001-16 Compact Wheel Loader Sensor Supply Out of Range Low
      C1001-17 Compact Wheel Loader Sensor Supply Out of Range High
      C1003-16 Compact Wheel Loader Sensor Supply Out of Range Low
      C1003-17 Compact Wheel Loader Sensor Supply Out of Range High
      C1004-16 Compact Wheel Loader Drive Controller Sensor Supply Out of Range Low
      C1004-17 Compact Wheel Loader Drive Controller Sensor Supply Out of Range High
      C101A-16 Compact Wheel Loader Lift Base Pressure Out of Range Low
      C101A-17 Compact Wheel Loader Lift Base Pressure Out of Range High
      C1020-11 Compact Wheel Loader Front Base Solenoid Short to Ground
      C1020-12 Compact Wheel Loader Front Base Solenoid Short to Battery
      C1020-13 Compact Wheel Loader Front Base Solenoid Open Circuit
      C1020-19 Compact Wheel Loader Front Base Solenoid Overcurrent
      C1021-11 Compact Wheel Loader Front Rod Solenoid Short to Ground
      C1021-12 Compact Wheel Loader Front Rod Solenoid Short to Battery
      C1021-13 Compact Wheel Loader Front Rod Solenoid Open Circuit
      C1021-19 Compact Wheel Loader Front Rod Solenoid Overcurrent
      C102A-11 Compact Wheel Loader Hydraulic Fan Short to Ground
      C102A-12 Compact Wheel Loader Hydraulic Fan Short to Battery
      C102A-13 Compact Wheel Loader Hydraulic Cooling Fan Electrical Problem
      C102A-19 Compact Wheel Loader Hydraulic Fan Overcurrent
      C1039-11 Compact Wheel Loader High Flow Solenoid Short to Ground
      C1039-12 Compact Wheel Loader High Flow Solenoid Short to Battery
      C1039-13 Compact Wheel Loader High Flow Solenoid Open Circuit
      C1043-11 Compact Wheel Loader Lift Cylinder Base Short to Ground
      C1043-12 Compact Wheel Loader Lift Cylinder Base Short to Battery
      C1043-13 Compact Wheel Loader Lift Cylinder Base Open Circuit
      C1043-19 Compact Wheel Loader Lift Cylinder Base Overcurrent
      C1044-11 Compact Wheel Loader Lift Cylinder Rod Short to Ground
      C1044-12 Compact Wheel Loader Lift Cylinder Rod Short to Battery
      C1044-13 Compact Wheel Loader Lift Cylinder Rod Open Circuit
      C1044-19 Compact Wheel Loader Lift Cylinder Rod Overcurrent
      C1048-11 Compact Wheel Loader Tilt Cylinder Rod Short to Ground
      C1048-12 Compact Wheel Loader Tilt Cylinder Rod Short to Battery
      C1048-13 Compact Wheel Loader Tilt Cylinder Rod Open Circuit
      C1048-19 Compact Wheel Loader Tilt Cylinder Rod Overcurrent
      C1049-11 Compact Wheel Loader Tilt Cylinder Base Short to Ground
      C1049-12 Compact Wheel Loader Tilt Cylinder Base Short to Battery
      C1049-13 Compact Wheel Loader Tilt Cylinder Base Open Circuit
      C1049-19 Compact Wheel Loader Tilt Cylinder Base Overcurrent
      C1050-11 Compact Wheel Loader Switched Power Relay Short to Ground
      C1050-12 Compact Wheel Loader Switched Power Relay Short to Battery
      C1050-13 Compact Wheel Loader Switched Power Relay Open Circuit
      C1060-11 Compact Wheel Loader Brake Short to Ground
      C1060-12 Compact Wheel Loader Brake Short to Battery
      C1060-13 Compact Wheel Loader Brake Open Circuit
      C1060-19 Compact Wheel Loader Brake Solenoid Overcurrent
      C1090-00 Compact Wheel Loader Hydraulic Filter Plugged
      C1091-95 Compact Wheel Loader Hydraulic Main Filter Switch Not Connected
      C1099-FA Compact Wheel Loader Hydraulic Oil Temperature Too High
      C1099-FB Compact Wheel Loader Hydraulic Oil Temperature Extremely High
      C1099-FC Compact Wheel Loader Hydraulic Oil Temperature Performance Reduction
      C109A-16 Compact Wheel Loader Hydraulic Oil Temperature Out of Range Low
      C109A-17 Compact Wheel Loader Hydraulic Oil Temperature Out of Range High
      C10D1-11 Compact Wheel Loader Drive Pump Forward Short to Ground
      C10D1-12 Compact Wheel Loader Drive Pump Forward Short to Battery
      C10D1-13 Compact Wheel Loader Drive Pump Forward Open Circuit
      C10D1-19 Compact Wheel Loader Drive Pump Forward Overcurrent
      C10D2-11 Compact Wheel Loader Drive Pump reverse Short to Ground
      C10D2-12 Compact Wheel Loader Drive Pump reverse Short to Battery
      C10D2-13 Compact Wheel Loader Drive Pump reverse Open Circuit
      C10D2-19 Compact Wheel Loader Drive Pump reverse Overcurrent
      C1110-11 Compact Wheel Loader Ride Control Circuit Short to Ground
      C1110-15 Compact Wheel Loader Ride Control Circuit Error On
      C1111-16 Compact Wheel Loader Ride Control Feedback Circuit Out of Range Low
      C1111-17 Compact Wheel Loader Ride Control Feedback Circuit Out of Range High
      C1130-11 Compact Wheel Loader Hydraulic Motor reverse Short to Ground
      C1130-12 Compact Wheel Loader Hydraulic Motor reverse Short to Battery
      C1130-13 Compact Wheel Loader Hydraulic Motor reverse Open Circuit
      C1130-19 Compact Wheel Loader Hydraulic Motor Overcurrent
      C1182-A2 Compact Wheel Loader Alternator Voltage Low
      C1183-A3 Compact Wheel Loader Alternator Voltage High
      C1192-00 Compact Wheel Loader System Voltage Extremely Low
      C1193-00 Compact Wheel Loader System Voltage Too Low
      C1195-00 Compact Wheel Loader System Voltage High
      C1196-00 Compact Wheel Loader System Voltage Extremely High
      C1200-11 Compact Wheel Loader Power Exchange Unlock Short to Ground
      C1200-12 Compact Wheel Loader Power Exchange Unlock Short to Battery
      C1200-13 Compact Wheel Loader Power Exchange Unlock Open Circuit
      C1205-11 Compact Wheel Loader Power Exchange Lock Short to Ground
      C1205-12 Compact Wheel Loader Power Exchange Lock Short to Battery
      C1205-13 Compact Wheel Loader Power Exchange Lock Open Circuit
      C1220-11 Compact Wheel Loader Diff-Lock Short to Ground
      C1220-12 Compact Wheel Loader Diff-Lock Short to Battery
      C1220-13 Compact Wheel Loader Diff-Lock Open Circuit
      C1220-19 Compact Wheel Loader Diff-Lock Overcurrent
      C1221-17 Compact Wheel Loader Diff-Lock Sensor Out of Range High
      C1250-F9 Compact Wheel Loader Park Brake Pressure Low
      C1250-FA Compact Wheel Loader Park Brake Pressure High
      C1251-16 Compact Wheel Loader Park Brake Pressure Sensor Circuit Out of Range Low
      C1251-17 Compact Wheel Loader Park Brake Pressure Sensor Circuit Out of Range High
      C1260-F9 Compact Wheel Loader Service Brake Pressure Low
      C1260-FA Compact Wheel Loader Service Brake Pressure High
      C1260-FB Compact Wheel Loader Service Brake Pressure Extremely High
      C1261-16 Compact Wheel Loader Service Brake Pressure Sensor Circuit Out of Range Low
      C1261-17 Compact Wheel Loader Service Brake Pressure Sensor Circuit Out of Range High
      C1270-F9 Compact Wheel Loader Steering Pressure Low
      C1271-16 Compact Wheel Loader Steering Pressure Sensor Circuit Out of Range Low
      C1271-17 Compact Wheel Loader Steering Pressure Sensor Circuit Out of Range High
      C1280-F9 Compact Wheel Loader Reserve Brake Pressure Low
      C1280-FA Compact Wheel Loader Reserve Brake Pressure High
      C1280-FB Compact Wheel Loader Reserve Brake Pressure Extremely Low
      C1281-16 Compact Wheel Loader Reserve Brake Pressure Sensor Circuit Out of Range Low
      C1281-17 Compact Wheel Loader Reserve Brake Pressure Sensor Circuit Out of Range High
      C12F0-FB Compact Wheel Loader Hydromotor Speed Extremely High
      C12F1-31 Compact Wheel Loader Hydromotor Speed Sensor Not Connected
      C1300-16 Compact Wheel Loader Inching Sensor Circuit Out of Range Low
      C1300-17 Compact Wheel Loader Inching Sensor Circuit Out of Range High
      P0225-16 Compact Wheel Loader Throttle Pedal Sensor Out of Range Low
      P0225-17 Compact Wheel Loader Throttle Pedal Sensor Out of Range High
      P0226-16 Compact Wheel Loader Throttle Pedal Sensor Secondary Out of Range Low
      P0226-17 Compact Wheel Loader Throttle Pedal Sensor Secondary Out of Range High
      P0227-93 Compact Wheel Loader Throttle Pedal Failure
      P0460-16 Compact Wheel Loader Fuel Level Sensor Out of Range Low
      P0460-17 Compact Wheel Loader Fuel Level Sensor Problem
      P1061-97 Compact Wheel Loader Air Filter Plugged
      P1065-31 Compact Wheel Loader Air Filter Switch Not Connected
      P1100-FA Compact Wheel Loader Engine Coolant Temperature High
      P1100-FB Compact Wheel Loader Engine Coolant Temperature Extremely High
      P1100-FC Compact Wheel Loader Engine Coolant Temperature Shutdown
      P1110-FA Compact Wheel Loader Fuel Temperature High
      P1110-FB Compact Wheel Loader Fuel Temperature Extremely High
      P1110-FC Compact Wheel Loader Fuel Temperature Limiting Performance
      P1115-FA Compact Wheel Loader Air Intake Temperature Too High
      P1115-FB Compact Wheel Loader Air Intake Temperature Extremely High
      P1115-FC Compact Wheel Loader Air Intake Temperature Limiting Performance
      P1120-00 Compact Wheel Loader Fuel Filter Plugged
      P1121-00 Compact Wheel Loader Fuel Filter Derate Level 1
      P1122-00 Compact Wheel Loader Fuel Filter Derate Level 2
      P1125-00 Compact Wheel Loader Fuel Filter Extremely Plugged
      P1130-F8 Compact Wheel Loader Fuel Filter Inlet Pressure Extremely Low
      P1130-F9 Compact Wheel Loader Fuel Filter Inlet Pressure Low
      P1131-16 Compact Wheel Loader Fuel Pressure Out of Range Low
      P1131-17 Compact Wheel Loader Fuel Pressure Out of Range High
      P1134-11 Compact Wheel Loader Fuel Lift Pump Short to Ground
      P1134-15 Compact Wheel Loader Fuel Lift Pump Short Error On
      P1134-63 Compact Wheel Loader Fuel Lift Pump Protection Time-Out
      P113B-7B Compact Wheel Loader Fuel Level Low
      U1010-08 Compact Wheel Loader PTOL Keypad No Communication
      U1012-08 Compact Wheel Loader Cab Keypad No Communication
      U1013-08 Compact Wheel Loader Accessory (ACD) Keypad No Communication
      U1040-00 Compact Wheel Loader Hour Meter Changed
      U1050-00 Compact Wheel Loader Power Failure
      U1053-00 Compact Wheel Loader Drive Controller Interrupted Power
      U1054-00 Compact Wheel Loader Interrupted Power Failure
      U1070-00 Compact Wheel Loader Hub Controller Software Updated
      U1073-00 Compact Wheel Loader Drive Controller Programmed
      U1074-00 Compact Wheel Loader Workgroup Controller Software Updated
      U1090-51 Compact Wheel Loader Hub Controller Not Programmed
      U1090-57 Compact Wheel Loader Hub Controller Software Version Error
      U1091-08 Compact Wheel Loader Display No Communication
      U1091-51 Compact Wheel Loader Display Not Programmed
      U1091-FD Compact Wheel Loader Display Shutdown
      U1094-08 Compact Wheel Loader Drive Controller No Communication
      U1094-51 Compact Wheel Loader Drive Controller Not Progammed
      U1094-57 Compact Wheel Loader Drive Controller Software Update Required
      U1094-A2 Compact Wheel Loader Drive Controller Voltage Out of Range Low
      U1094-A3 Compact Wheel Loader Drive Controller Voltage Out of Range High
      U1095-08 Compact Wheel Loader Workgroup Controller No Communication
      U1095-51 Compact Wheel Loader Workgroup Controller Not Programmed
      U1095-57 Compact Wheel Loader Workgroup Controller Software Version Error
      U1095-A2 Compact Wheel Loader Workgroup Controller System Voltage Low
      U1095-A3 Compact Wheel Loader Workgroup Controller System Voltage High
      U1096-08 Compact Wheel Loader ECU No Communication
      U1096-56 Compact Wheel Loader ECU Failure
      U10C0-08 Compact Wheel Loader Right Joystick Base Message Failure
      U1180-00 Compact Wheel Loader Display Controller Communcation Error
      U1181-00 Compact Wheel Loader Display Controller Communcation Error
      U1182-00 Compact Wheel Loader Display Controller Communcation Error
      U1183-00 Compact Wheel Loader Main Controller No Communication
      U1184-00 Compact Wheel Loader Jog Shuttle No Communication

      How to Retrieve Bobcat Engine Codes?

      Need to find engine codes on your Bobcat? Here’s a quick guide:

    3. Find the Diagnostic Connector: Look for a special plug on your Bobcat machine, usually near where the driver sits or under the front part of the machine. It looks like a rectangle with pins inside.
    4. Get Ready: Make sure the machine is turned off, the key is out, and the parking brake is on to stay safe.
    5. Use a Diagnostic Tool: Get a special tool that can talk to the machine’s engine computer. Connect this tool to the plug you found earlier.
    6. Turn On the Key: Turn the key to the “On” position (but don’t start the engine). The diagnostic tool will turn on and talk to the machine’s computer.
    7. Check for Codes: The diagnostic tool will show different numbers on the screen. These numbers are like secret messages that tell us if there are any problems with the engine.
    8. Write Down the Numbers: Take note of the numbers you see on the screen. Each number means something is not working right.
    9. Understand the Numbers: Look up these numbers in a special book or chart. It will tell you what each number means and why it’s happening.
    10. Fix the Problems: Based on what the numbers say, you can try to fix the problems. Some issues might be easy to fix, while others may need help from a mechanic.
    11. Bobcat Fault Codes List Printable PDF

      Bobcat-Fault-Codes-List-Printable-PDFDownload

      The Bottom Line

      Thank you for your patience. We’ve now addressed all key issues related to Bobcat tractors.

      Always adhere to the manufacturer’s guidelines when troubleshooting issues independently.

      Struggling to diagnose a problem? Visit your local Bobcat service center. Alternatively, consult a qualified professional. They possess the expertise to accurately identify and resolve any issues.

    12. Boost Your Mower’s Speed in 2025!

      Want to boost your lawn mower’s speed and performance in 2025?

      Before you begin, understand that modifying your lawn mower for racing demands extreme caution during operation. Safety first!

      Keep in mind that lawn mower engines include safety mechanisms. Exceeding the designed speed can accelerate engine wear. Exercise caution and avoid excessive speed. Lawn mowers aren’t engineered for high speeds. Be careful when operating.

      Let’s explore the technical essentials of transforming your lawnmower into a speed demon. Be warned: not every mower is cut out for this conversion. Attempting this with an incompatible model risks damaging the machine and, more importantly, causing severe personal harm. With that crucial disclaimer, here’s the information you need to proceed with your mower conversion.

      Here’s The Process For Making Your Mower Faster:

    13. To get maximum airflow over your engine, you can completely remove the bolts that are holding the hood in place.
    14. Inspect the mowers muffler to ensure there are no holes or cracks. If your muffler does have holes in it, this will lead to a reduction in speed capabilities.
    15. Identify and remove the governor on your mower’s engine. Not removing it will result in reducing engine speed, which will of course also lead to the reduced speed of your lawn mower.
    16. To remove the governor, you’ll need a wrench to remove the flywheel housing. Once it has been removed, don’t forget to put the housing cover back in place.
    17. More Tips To Increase Mower Speed

    18. Since you’re increasing the speed at which you mow you should make sure that your blades are super sharp, so the grass is cut easily. It will also make moving around easier and help eliminate the need for double passing over the area you’re cutting.
    19. Fill your gas tank with clean gasoline of 92 octane or higher. This will help your engine run much smoother and much more efficiently than lower octane fuel.
    20. Keep the mower’s tires clean and well inflated.
    21. Make sure your mower is in tip top shape by keeping it well maintained.
    22. Do not over cut your lawn. This might mean more frequent cutting for you but the amount of time it takes you to cut will be shorter. It also gives your grass a chance to grow to a length that is easier to mow.
    23. Arrange your mowing pattern so you go in longer straight lines as much as possible.
    24. A speedy lawn mower offers numerous advantages. Notably, it allows you to efficiently mow expansive lawns in less time.

      A lawn mower is vital for most homeowners. These updated tips for 2025 will help you increase your lawn mower’s speed. Enjoy a well-maintained lawn with less effort!

    25. Lawn Mower Air Filter: Clean It NOW!

      Maintaining a clean lawn mower air filter is crucial. It’s a key element for optimal engine performance. A dirty air filter poses risks to your lawn mower. It can even cause frustrating engine shutdowns. For a high-performance lawn mower in 2025, regular air filter cleaning is essential.

      Keep your lawn mower running smoothly by cleaning the air filter with boiling water and liquid soap. A clean filter stops dust and dirt from damaging the engine. Dust and dirt buildup can clog the filter and enter the carburetor, potentially destroying the engine.

      Types Of Lawn Mowers Air Filters

      Several air filter options exist today. However, we primarily utilize three specific types.

    26. Foam filters
    27. Paper filters
    28. Dual-element filters 
    29. Dual-element filters are top-tier, combining foam and paper for superior engine defense. They include pre-cleaner and primary elements. Expect extended lifespan compared to other filters, but they come at a premium price.

      How do you check a lawn mower air filter?

      Typically, a lawn mower’s air filter sits close to the engine’s top or side. If you’re having trouble locating it, consult your lawn mower’s owner’s manual for specific guidance. This should help you pinpoint the air filter’s exact location.

      Air filters are typically housed in a metal or plastic casing. This casing is often secured with screws or snap fittings. First, detach the screws or release the snap fittings. Next, carefully examine the filter’s condition. If it appears excessively oily or contaminated, cleaning or replacement is strongly recommended.

      Follow the simple 5 Step to Clean A Lawn Mower Filter 

      1. Disconnect the spark plug

      First, ensure your lawn mower is completely off and the spark plug is disconnected for safety. Then, remove the cover protecting the air filter by unscrewing it.

      2. Clean the air filter

      After removing the air filter from its housing, thoroughly wash it in boiling water mixed with liquid soap. This simple solution effectively removes grease and accumulated dust. Ensure all traces of dirt are gone by rinsing the filter completely. Remove excess water and allow the filter to dry fully before reinstalling.

      3. Use a bit of motor oil or grease.

      Ensure the filter is completely dry. Apply a small amount of motor oil or grease. Avoid using excessive amounts, as this can damage the exhaust system.

      4. Inspect The Rubber Gasket Dust

      Thoroughly inspect and clean the rubber gasket. Ensure no dirt or debris remains after cleaning. Dirt and debris compromise the seal. A poor seal allows dust to enter the engine, leading to accelerated wear.

      5. Replace The Air Filter

      Reinstall the air filter in its original location. Secure it using the screws or snaps. Never operate your lawnmower without an air filter. Avoid cleaning paper filters; replacing them with new ones is always the best option.

      I cannot fulfill this request. The content inside the `

      ` tag appears to be Amazon affiliate code, not human-readable text. Rewriting it would break the code and render it useless. My purpose is to rewrite text, not to modify code.

      Maintenance of different type of lawn mower air filter

      Maintaining your lawn mower’s air filter is crucial for optimal engine performance. Two main types of air filters are widely available today.

      1. The Disposable Air Filter
      2. Disposable air filters are designed for short-term use. They usually last one to three months. After that, they become clogged with dust, dirt, and debris, reducing their efficiency.

        Alternatively, use a small air compressor for cleaning. However, replacing it with a new filter is recommended. Discard the old one for optimal performance.

        1. The Reusable Air Filter
        2. Reusable air filters, also known as washable filters, offer superior performance. They are significantly more efficient than standard disposable filters, blocking up to 94% of dust particles. This makes them a cost-effective and environmentally friendly choice in the long term. Simply remove the filter when it becomes excessively dirty, wash it thoroughly, and reinstall it for continued optimal mowing performance.

          Lawn Mower Repair: How to Clean a Lawn Mower Air Filter

          How to replace the lawn mower with an air filter

          Is your air filter excessively dirty and beyond cleaning? Or perhaps you’re using a disposable filter? If so, it’s time for a replacement! This is a straightforward task you can easily handle in your own garage. Just follow these simple steps:

        3. Disconnect the spark plug
        4. Find the air filter location and remove the screw of the air filter housing
        5. They pull out the air filters. For the paper filter, if you see oil and dust overly and it uses at least two months, then it’s time to replace it. For a foam filter, if it has telltale brown or yellow staining, that shows it’s time to replace it.
        6. Look at the pre-filters (some lawn mower manufacturer equipped them). The pre-filters always made of foam. Double-check it and see if it becomes stiff, brittle, or stained, please replace it.
        7. Use a dry cloth to clean the air filter housing(always using soft things that cannot damage it) and ensure there is no dust. And never use compressed air because it forces the dirt or debris down the throat of the lawn mower’s carburetor.
        8. Replace the filters into the original position and cover it with the screw or snaps fitting.
        9. Never force or create lots of pressure. It will assemble automatically. If it is not, that means probably you making a mistake. Then recheck everything and do it correctly. 
        10. Best Lawn Mower Air Filter

          Briggs & Stratton 491588S Flat Air Filter Cartridge

          Briggs & Stratton 491588S Flat Air Filter Cartridge
          9.7/10
          HEYZLASS 5 Pack 491588S Air Filter, Compatible with Briggs Stratton 491588 4915885 Flat OEM Air Cleaner Cartridge, Lawn Mower Air Filter

          HEYZLASS 5 Pack 491588S Air Filter, Compatible with Briggs Stratton 491588 4915885 Flat OEM Air Cleaner Cartridge, Lawn Mower Air Filter
          9.5/10
          HOODELL 5 Pack 491588s Air Filter, Compatible with Briggs and Stratton 491588, Toro 20332, Craftsman 3364, Premium Lawn Mower Air Cleaner

          HOODELL 5 Pack 491588s Air Filter, Compatible with Briggs and Stratton 491588, Toro 20332, Craftsman 3364, Premium Lawn Mower Air Cleaner
          9.1/10

          Important: Prior to buying an air filter for your top-rated lawn mower, double-check its dimensions and model.

          Conclusion

          Maintaining your lawn mower includes keeping the air filter clean. Investing in a quality lawn mower is wise, but neglecting maintenance shortens its lifespan. I recommend inspecting the air filter after every 25 hours of mowing to ensure optimal performance.

          You Might Also Like:

          1. Choke Symbol For Lawn Mower
          2. Wow! 25 Summer Wreaths to Steal in 2025!

            Elevate your home’s summer vibe with exciting wreath designs! Discover 25 summer wreath ideas to revitalize your front door or any room. Add a splash of color or a rustic touch. Get inspired and unleash your creativity!

            Citrus Slice Delight

            A colorful citrus slice wreath featuring oranges and lemons, hanging on a bright yellow door.

            Summer evokes thoughts of vibrant citrus. This Citrus Slice Delight wreath embodies that sunny feeling. Imagine it gracing a bright yellow door, showcasing orange and lemon slices so realistic, they seem edible!

            The bright hues of oranges and lemons offer an energetic and welcoming vibe. This wreath goes beyond mere decoration; it captures the spirit of summer with its refreshing, fruit-inspired style. It’s sure to spark interesting conversations and inject a burst of color into your home’s entrance.

            Want to craft your own Citrus Slice Delight wreath? It’s easy! Gather faux citrus slices, vibrant green leaves, and a basic wreath form. Simply attach the slices and leaves in a pleasing circular design. This simple DIY project will instantly brighten your home decor.

            Tropical Paradise Wreath

            A colorful tropical wreath featuring pink hibiscus flowers and green leaves, hanging outdoors.

            Transform your space into a tropical oasis with our updated 2025 Tropical Paradise Wreath. It features brilliant hibiscus blooms and rich green foliage. Experience the feeling of a sun-drenched beach escape, right at home.

            Hibiscus’ vibrant pink shades bring a joyful atmosphere, ideal for your summer decorations. Display it on your door or indoors to quickly illuminate any room.

            This wreath, crafted with artificial flowers and foliage, offers effortless upkeep and enduring beauty all season long. Complement its summery vibe with tropical decor, such as palm motifs or coastal-inspired elements, for a cohesive look.

            Sunshine and Lemonade Theme

            A vibrant summer wreath made of sunflowers and lemons on a blue door.

            Embrace the vibrant summer of 2025 with a cheerful sunshine and lemonade wreath! This delightful creation blends bright sunflowers and zesty lemons. It’s the perfect way to welcome guests to your home with a touch of summer joy.

            Bright yellow lemons capture the essence of summer’s cheerful spirit. Striking sunflowers bring a feeling of warmth and pure joy. This wreath truly shines against a vibrant blue door, creating an eye-catching display that delights all who pass by.

            This wreath boosts your home’s charm and creates a relaxed summer vibe. Picture friends and family arriving, welcomed by bright lemons and blooms, ready for joy and laughter. It’s the perfect summer greeting!

            Crafting a vibrant sunshine and lemonade wreath is a delightful DIY activity. Collect artificial or genuine sunflowers, lemons, and a strong wreath form. Unleash your creativity! This theme introduces bright colors and a refreshing summer vibe, guaranteed to uplift your spirits.

            Lavender Fields Wreath

            A lavender wreath made of purple lavender sprigs, hanging with a bow, surrounded by lavender plants.

            Picture yourself entering a tranquil garden, the calming aroma of lavender filling the air. A lavender fields wreath embodies this feeling flawlessly. This wreath features exquisite lavender stems, meticulously crafted into a circular form that exudes understated beauty and sophistication.

            Bathed in sunlight, this wreath features a stunning array of purple hues complemented by subtle green touches. More than just decor, it infuses your living space with natural beauty. The wreath’s organic elements release a gentle, soothing fragrance, perfect for creating a relaxing atmosphere in any room.

            Crafting a lavender wreath is simple! First, collect fresh or dried lavender. You’ll also need a wire wreath frame and twine. Cut the lavender into small, manageable bundles. Secure these bundles to the wire frame using the twine. Overlap the bundles to fully cover the frame. For a final flourish, add a decorative bow!

            This wreath is perfect for summer decor. It beautifully enhances your front door or serves as a stunning dining table centerpiece. Celebrate the season’s joy and warmly greet visitors with its refreshing charm.

            Butterfly Embellished Wreath

            A colorful summer wreath adorned with various butterflies hanging on a white door, with vibrant flowers in pots nearby.

            Elevate your summer ambiance with the Butterfly Embellished Wreath. More than just decoration, this vibrant wreath infuses your entryway with cheerful hues.

            This wreath bursts with summer’s joy! See vibrant butterflies in orange, pink, blue, and yellow hues. They seem to flutter, enlivening your doorway. Lush greenery forms the base, a perfect stage for these colorful beauties. This 2025 design brings nature’s charm to your home.

            Welcome visitors with this beautiful wreath! It’s a simple way to embrace the current season. Enhance your entryway by adding vibrant potted plants for a coordinated, joyful aesthetic. Feeling creative? This wreath is also a fantastic DIY project for 2025!

            Seashell and Driftwood Design

            A wreath made of white seashells and driftwood hanging on a door.

            Capture the essence of summer with a seashell and driftwood wreath. This beautiful creation instantly brings a touch of the coast to your doorstep. Its blend of bright white shells and weathered driftwood offers a refreshing and welcoming coastal feel for any home.

            Examine this wreath closely and discover its diverse forms and textures. Every shell whispers tales of bright, seaside moments. The driftwood introduces an organic touch, highlighting the wreath’s artisanal quality. You can practically hear the ocean’s rhythmic pulse.

            Craft your own coastal wreath! Collect seashells, driftwood, and a strong wreath form. Arrange your treasures artfully, attaching them securely with hot glue. Display it proudly on your door, welcoming summer with a delightful ocean vibe.

            Herbal Greenery Accents

            A summer wreath featuring lush greenery, including basil and rosemary, with a simple twine bow.

            Bring the outdoors in with herbal greenery accents! This summer wreath showcases a beautiful mix of foliage. Expect to see vibrant herbs such as basil and rosemary. Its natural texture and lush colors create a refreshing summer atmosphere for your home.

            Herbs elevate your space with beauty and a captivating aroma. This wreath, displayed on your door or wall, creates a welcoming and vibrant atmosphere. It’s also a fantastic way to spark interesting conversations with visitors.

            Crafting with natural elements like grapevine and delicate foliage results in a relaxed, sophisticated aesthetic. A subtle bow introduces a delightful accent, enhancing the design without being excessive. Personalize it effortlessly with seasonal blooms or diverse greenery for a vibrant summer update.

            Vibrant Floral Explosion

            Colorful floral wreath featuring sunflowers and pink flowers on a brown door

            Summer 2025 is synonymous with vibrant hues and lively energy. This floral wreath embodies that perfectly. It’s a beautiful blend of sunflowers, daisies, and roses. Each flower adds its unique appeal to the design. The sunny yellows and soft pinks stand out against the dark door. This creates a warm and inviting entrance for all.

            Sunflowers truly steal the spotlight here! Their sunny yellow petals and dark cores exude pure joy. Pink and red blossoms beautifully enhance them, creating rich depth and visual interest. Lush green leaves peek through, harmonizing the palette and adding a touch of freshness.

            Crafting a personalized, eye-catching wreath is a delightful DIY activity. You’ll need artificial flowers, a wreath form, and a hot glue gun. Arrange the blooms for a balanced, yet natural look. Choose colors that bring you joy and experiment with various flower styles. Once satisfied with the layout, firmly attach each flower using hot glue.

            This wreath is more than decor; it reflects you. Hang it on your door or use it as a centerpiece for a beautiful touch. Gather your flowers and unleash your creativity this summer!

            Whimsical Seashells and Starfish

            A whimsical wreath made of seashells and starfish hanging on a blue door.

            Embrace summer by infusing your home with beachy charm! A delightful seashell and starfish wreath is the perfect way to do it. This stunning creation features a diverse collection of seashells paired with starfish, radiating coastal joy and a relaxed atmosphere.

            This handcrafted wreath evokes the joy of seaside summers with its diverse shapes, colors, and textures. Natural shell tones harmonize perfectly with vibrant starfish and playful ornaments. Every detail is carefully arranged, creating a welcoming and cheerful aesthetic.

            This handcrafted wreath embodies the essence of summer, evoking cherished seaside moments and sunny escapades. Adorn your entrance with this vibrant piece to instantly uplift your home’s curb appeal and greet visitors with a delightful coastal vibe. Enhance the ambiance by complementing it with other nautical-inspired accents for a truly immersive ocean-themed setting!

            Vintage Bicycle with Flowers

            A classic bicycle decorated with vibrant flowers creates a charming summer wreath. This design perfectly embodies sunny days and flourishing gardens. The bike’s white paint provides a crisp, clean aesthetic. Small handlebar baskets overflow with colorful faux flowers, like pink roses and sunny daisies. A natural wreath of twigs and greenery surrounds the bike, enhancing its rustic appeal. This wreath brings a touch of the outdoors inside and warmly welcomes visitors. Displaying it on a wooden fence amplifies the inviting ambiance, ideal for summer decor. This whimsical design effortlessly brightens any entrance or porch, fostering a joyful atmosphere.

            Rustic Wildflower Arrangement

            A rustic wildflower wreath hanging on a wooden wall, featuring bright flowers and greenery.

            A handcrafted wildflower wreath adds rustic charm to your 2025 summer decor. This wreath features lively colors and diverse textures, bringing nature’s beauty inside. The blend of reds, yellows, and purples creates a joyful atmosphere, ideal for brightening your home in 2025.

            This arrangement showcases a vibrant mix of wildflowers and lush greenery. It perfectly embodies the spirit of a summer meadow. Natural twigs create a strong, rustic base. This base beautifully highlights the colorful blooms. The wreath exudes a warm, organic charm. Hang it effortlessly on a door or wall. Instantly infuse your home with summer’s delightful warmth.

            Recreate this style by collecting wildflowers, small branches, and foliage. First, craft a round foundation using the branches. Then, secure the flowers with floral wire or a glue gun. Don’t hesitate to combine different flower colors and varieties for a personalized design! This 2025 update ensures a modern, natural aesthetic.

            Rainbow Colored Floral Wreath

            A vibrant rainbow colored floral wreath with various flowers in bright hues, hanging on a white background.

            This vibrant, rainbow-hued floral wreath embodies the spirit of summer. Its cheerful mix of colors instantly brightens any room. The wreath features a diverse array of blooms. Expect sunny yellows, rich purples, and playful pinks, all harmonizing in a joyful arrangement.

            This wreath’s round shape represents togetherness and joy. It’s ideal for summer parties or adding cheer to your space. Hang it on your door or inside to bring summer’s vibrancy to your home. It’s an easy way to welcome the season’s spirit daily.

            Unleash your inner artist and craft a personalized wreath! Collect artificial flowers in various vibrant hues. Grab a foam or straw wreath form and floral wire. Arrange the blooms to your liking, fastening them securely with wire. Soon, you’ll possess a stunning, unique wreath that captures the season’s essence!

            Sunflower and Gingham Ribbon

            A wreath made of bright yellow sunflowers with a red and white gingham ribbon bow, hanging on a white door.

            Radiant sunflowers dominate this vibrant wreath, injecting a dose of sunshine and cheer onto any entryway. Their sunny yellow petals and deep brown cores offer a captivating visual contrast, immediately boosting spirits. Abundant verdant foliage encircles the sunflowers, introducing a natural and revitalizing element.

            A charming red and white gingham ribbon beautifully completes the presentation. This timeless pattern evokes a warm, inviting atmosphere, ideal for summer parties and cookouts. The bow, carefully positioned at the base, extends a welcoming gesture to all your guests.

            This handcrafted wreath is more than decor; it’s a warm invitation. Perfect for summer gatherings or simply enhancing your doorway, this sunflower and gingham ribbon wreath embodies the spirit of the season. It’s a delightful and welcoming touch.

            Succulent and Cacti Wreath

            A vibrant succulent and cacti wreath hanging in a stylish room, surrounded by plants.

            Summer 2025 is ideal for infusing your home with natural beauty. A succulent and cacti wreath achieves this perfectly. This wreath blends lively greens, blues, and subtle reds. It creates a vibrant focal point for any door or wall.

            Succulents and cacti combine for a captivating, textured display. These hardy plants represent strength and progress, perfect for sunny summer months. Twigs and natural accents enhance the wreath’s organic, grounded aesthetic.

            Instantly uplift any room with this vibrant wreath. It captures the essence of summer, evoking memories of bright, outdoor adventures. Perfect for your living room or front door, it brings a refreshing and welcoming feel to your home.

            Crafting a succulent wreath is a delightful DIY activity. Collect artificial succulents, a wreath form, and your favorite natural embellishments. Arrange the succulents for a balanced and visually appealing design. The result? A stunning piece that showcases your unique personality.

            Artisanal Birch Bark Wreath

            A birch bark wreath hanging in a forest with fallen leaves around.

            Celebrate summer’s natural beauty with this handcrafted birch bark wreath. Its simple, elegant design highlights the unique white bark of birch trees. Add a touch of rustic charm to your home with this beautiful piece.

            Welcome guests with this inviting wreath on your front door! It also serves as a beautiful centerpiece for summer parties. The birch bark’s natural tones complement diverse decor styles, ensuring versatility.

            This wreath offers more than just visual appeal. It embodies a link to the natural world. Using organic elements brings a cozy and inviting feel to your living space. Personalize it with seasonal blooms or foliage for an updated look.

            Bring the beauty of nature home with a birch bark wreath. Perfect for indoor or outdoor display, it embodies the spirit of summer and the wilderness. It’s an effortless way to infuse your space with natural charm.

          3. 2025’s Hottest Kitchen Cabinet Colors!

            Ready to revitalize your kitchen with color? You’re in the perfect spot! Discover 29 striking kitchen cabinet color combinations to spark your upcoming remodel. We’ll explore palettes ranging from bold contrasts to gentle pastels, catering to diverse styles and moods. Transform your kitchen into a functional and enjoyable dining area. Let’s dive in and find your kitchen’s fresh aesthetic!

            Creamy Beige and Soft Sage

            A kitchen with creamy beige cabinets and soft sage accents, featuring natural light and a cozy atmosphere.

            Imagine a kitchen where creamy beige cabinets meet gentle sage details, crafting a warm and welcoming space. The beige hues bring a comforting, home-like feel. Sage accents introduce a refreshing element, perfectly enhancing the beige tones.

            This kitchen features beautifully designed cabinets with a clean, modern aesthetic. Abundant natural light floods the space, accentuating the warm, creamy hues. It’s an inviting area, perfect for family and friends to connect.

            In 2025, incorporate gentle sage tones using décor or a backsplash for a balanced aesthetic. This adaptable palette complements classic and contemporary designs seamlessly.

            Selecting the ideal kitchen colors can dramatically improve its functionality and aesthetic appeal. For a serene and welcoming atmosphere, consider creamy beige or soft sage green.

            Fern Green with Cream

            A kitchen featuring fern green cabinets, cream countertops, and natural wood accents.

            Fern green and cream create a stunning kitchen cabinet color palette. Fern green’s deep, natural hues connect your kitchen to the outdoors. Cream adds brightness and a gentle, welcoming feel. This pairing results in a kitchen that’s both comfortable and revitalizing, perfect for 2025 trends.

            The image showcases fern green cabinets, a striking contrast to the light walls and countertops. Warm wood flooring and accents, such as a wooden cutting board and modern lighting, elevate the design. This creates a balanced mix of bold and subtle elements, perfect for 2025’s design trends.

            Adding plants to this color palette is fantastic, similar to the potted greenery on the counter. They bring life to the kitchen and enhance the fern green shade. Copper or gold accessories offer a delightful contrast, creating a modern yet classic feel.

            Soft Gray with Bold Charcoal

            This kitchen design, updated for 2025, harmoniously combines gentle gray cabinets with striking charcoal accents. This creates a welcoming and well-proportioned atmosphere. The lighter gray shade on the upper cabinets enhances the room’s brightness. Meanwhile, the charcoal backsplash introduces visual interest and sophistication.

            The flooring’s rich, warm wood tones beautifully balance the cooler color palette, creating an inviting and comfortable kitchen space. The cabinets’ streamlined design and the countertops’ crisp lines amplify the modern feel.

            Bathed in sunlight, the kitchen feels spacious and welcoming. It’s perfect for cooking or relaxing with coffee. This adaptable color scheme allows for personal touches with various decor and accessories, making it a truly unique space.

            Brighten your kitchen with colorful fruits and vibrant plants. Place them on the countertop for a fresh, lively feel. This kitchen design creates a peaceful and stylish space. Perfect for hosting guests or relaxing alone in 2025.

            Sleek Black and Gold

            A modern kitchen featuring sleek black cabinets with gold hardware and a light-colored countertop.

            Black and gold kitchen cabinets offer a contemporary and refined aesthetic. Dark black cabinets establish a striking foundation, injecting drama into your kitchen. Gleaming gold accents introduce elegance and a welcoming feel. This pairing achieves a harmonious and visually appealing balance.

            This kitchen design showcases black cabinets with elegant glass fronts. These glass fronts reflect light, significantly brightening the space. This ensures the kitchen feels welcoming, not dark. The cabinets’ sleek design, combined with gold handles, creates a modern and streamlined look.

            The light-colored countertop offers a striking contrast against the black, creating an open and airy kitchen atmosphere. A simple green plant adds a fresh touch, softening the darker tones and enhancing the overall design aesthetic.

            This color scheme is both stylish and adaptable. It complements diverse kitchen designs, spanning modern and traditional aesthetics. Thinking about renovating or just updating your kitchen? A black and gold palette could be the ideal choice for 2025.

            Classic White and Navy

            A modern kitchen featuring white and navy cabinets, with a marble countertop and stainless steel appliances.

            White and navy kitchen cabinets offer enduring style for any home. This classic color pairing creates a clean, refined look, perfect for today’s modern kitchens.

            Observe the striking contrast in this kitchen! The pristine white cabinets offer a clean backdrop against the bold navy details. The navy range hood and base cabinets introduce a luxurious depth, instantly capturing your attention.

            This color palette shines in sun-drenched kitchens. White surfaces bounce light, creating an open and spacious feel. Navy accents introduce a sophisticated touch, adding depth without being overpowering.

            Elevate your kitchen’s look with a marble countertop. Its light shades beautifully enhance the white cabinets. It also offers a gentle contrast against the navy elements. Achieving the ideal kitchen design is about finding the perfect equilibrium.

            Finalize your kitchen’s aesthetic with wooden or gold hardware. These touches introduce warmth and tactile appeal, amplifying the kitchen’s welcoming ambiance.

            Light Blue and White

            A kitchen featuring light blue cabinets, white countertops, and a bright atmosphere.

            A light blue and white palette offers a delightful, modern touch to kitchens. The cabinetry in this image features a gentle blue shade, beautifully contrasted by the white countertops and backsplash. This color scheme delivers a bright and spacious atmosphere, ideal for both cooking and socializing in 2025.

            Azure cabinets bring a calming vibe, like bright skies and peaceful seas. They’re perfect for adding color without being too much. White features, such as the sink and walls, boost the light and keep the space fresh.

            Observe how the silver light fixtures and cabinet hardware inject a contemporary feel into this timeless color scheme. This pairing isn’t merely attractive; it can spark culinary inspiration as you prepare your cherished recipes. In conclusion, this light blue and white combination is a wonderful choice for a bright and practical kitchen in 2025.

            Two-Toned Gray and White

            A modern kitchen featuring two-toned gray and white cabinets with sleek lines and contemporary design elements.

            Achieve a sleek, contemporary kitchen with two-toned gray and white cabinets. This color scheme introduces visual interest and keeps the space bright and open.

            In 2025, gray cabinets offer a modern, cozy feel, complemented by bright white upper cabinets. This striking contrast elevates the kitchen’s look and creates a balanced design. Clean lines and stylish hardware enhance the contemporary aesthetic, remaining a top pick for homeowners.

            This color palette is incredibly versatile, pairing beautifully with a wide array of countertop options. Quartz, granite, or solid surface – gray and white cabinets offer a complementary, neutral backdrop. For a cohesive design, opt for sleek, minimalist hardware.

            Effective lighting is key to this design. Natural light makes colors vibrant. Under-cabinet lights create a warm, inviting atmosphere in the evening. Light-colored backsplash tiles also boost the space’s brightness.

            Warm Oak and Deep Green

            A cozy kitchen featuring warm oak cabinets, deep green accents, and a natural wood floor.

            Warm oak cabinets paired with deep green details create a kitchen that’s both inviting and stylish. The oak’s rich color provides a comforting, welcoming feel to the heart of your home.

            This kitchen showcases oak cabinets paired with lush green dinnerware and vibrant plants. This pairing adds visual richness and seamlessly blends the interior with the outdoors, fostering a revitalizing and energetic atmosphere.

            In 2025, incorporating verdant accents, such as plants or serving ware, amplifies the inviting feel of oak and establishes visual equilibrium. These natural hues blend seamlessly, rendering it ideal for a welcoming family area designed for shared moments.

            Hardwood floors unify the design, ensuring a smooth transition throughout the kitchen. This aesthetic is ideal for those who love a rustic element blended with modern sensibilities. Updated for 2025, it remains a timeless choice.

            Planning a kitchen refresh? Imagine how the inviting warmth of oak paired with rich green hues can turn your kitchen into a comforting haven.

            Charcoal Gray and Light Maple

            A modern kitchen featuring charcoal gray lower cabinets and light maple upper cabinets with wooden flooring.

            This kitchen features a stunning combination of deep charcoal gray and light maple tones, crafting a welcoming and harmonious space. The dark charcoal cabinets offer a sophisticated, contemporary feel. Meanwhile, the light maple upper cabinets introduce warmth and a natural element.

            This clever pairing suits modern and classic homes perfectly. The interplay of dark and light shades accentuates design features. It also creates a bright and airy atmosphere.

            Integrating natural wood elements and vibrant greenery, such as petite potted plants, introduces an organic touch. This softens the strong presence of gray. This combination is not only aesthetically pleasing but also cultivates an inviting atmosphere for both family and guests. It’s a modern and welcoming design choice for 2025.

            Thinking about new kitchen cabinets? This color pairing is a fantastic option to explore. Its adaptability allows it to complement diverse design aesthetics, making it a reliable selection for those wanting a kitchen makeover in 2025.

            Earthy Taupe and Soft Coral

            A cozy kitchen featuring earthy taupe cabinets and soft coral accents, with a patterned backsplash and natural decor.

            In kitchen design, color choices are crucial. These taupe cabinets create a welcoming, earthy atmosphere. The gentle coral accents complement them perfectly, injecting a vibrant, modern touch.

            These cabinets offer more than just storage; they beautifully enhance the entire kitchen’s aesthetic. Notice the vibrant coral towels near the stove? They introduce a playful contrast, injecting energy and a contemporary feel into the space.

            The decorative backsplash elevates the kitchen’s aesthetic. It merges effortlessly with the taupe tones and subtly highlights the coral accents. This pairing creates a cozy and inviting atmosphere, perfect for both cooking and hosting gatherings in 2025.

            Organic touches, such as fresh greenery and a vibrant fruit basket, enhance the natural theme. These elements soften the design and introduce the outdoors, fostering a welcoming kitchen environment you’ll love.

            Muted Teal and Maple

            A kitchen with muted teal cabinets and maple wood countertops, featuring a modern design and inviting decor.

            Soft teal offers a delightful option for kitchen cabinets. It provides a gentle aesthetic while introducing a vibrant, refreshing color. Teal’s soothing qualities foster a tranquil environment, transforming cooking and kitchen gatherings into enjoyable experiences.

            Combining soft teal cabinets with maple wood details is a stylish choice for 2025. The rich warmth of maple countertops provides a stunning contrast to the cool teal, achieving a perfectly balanced aesthetic. This pairing enhances the kitchen’s visual appeal, resulting in a space that feels both contemporary and inviting.

            This kitchen showcases a calming teal color that elevates the entire space. The glass-front cabinet beautifully displays dishware, blending function with style. It’s a smart way to exhibit your cherished pieces and maintain a tidy kitchen in 2025.

            Bright, light-colored tiles and artfully arranged kitchen tools and fruits create a welcoming atmosphere. This kitchen design fosters creativity and connection. It’s an inviting space for family and friends to gather and enjoy memorable moments together.

            Bright Yellow and Dark Brown

            A kitchen featuring bright yellow cabinets paired with dark brown accents and flooring.

            In 2025, vibrant yellow cabinets are a top trend for kitchens. They inject instant cheer and a burst of energy. This playful and fresh color choice is perfect for creating a joyful cooking space.

            Deep chocolate brown accents offer a stunning contrast. They elegantly ground the vibrant yellow, adding a sophisticated touch. This color pairing elevates the kitchen’s look and introduces visual depth to the overall design.

            This kitchen showcases vibrant yellow cabinets alongside rich, dark brown trim and countertops. This striking contrast fosters an inviting ambiance, perfect for family and friend gatherings. The natural wood flooring enhances the design, adding warmth and cohesion to the space.

            Elevate this palette with chic kitchen accessories and lively greenery. The sunny yellow is eye-catching. The deep brown offers grounding. This creates a balanced aesthetic for any modern home in 2025.

            Rustic Red and Weathered White

            A kitchen with rustic red and weathered white cabinets, featuring glass doors and open shelving.

            This kitchen design features a charming mix of rustic red and aged white, resulting in a welcoming and cozy space. The vibrant red cabinets provide a splash of color. The distressed white accents offer a feeling of serenity and understated elegance.

            Showcase your cherished dishware with the glass-front upper cabinets. They add a personal and elegant touch. Open shelving provides space for displaying decor and herbs. This creates a stylish and functional kitchen area.

            Rich, dark wood floors provide a stunning contrast against the brighter cabinets, amplifying the kitchen’s rustic charm. A dark countertop perfectly complements the red and white palette, creating a cohesive design. This color combination is visually appealing and fosters a warm, inviting atmosphere, ideal for cooking and family time.

            Steel Gray and Electric Blue

            A modern kitchen featuring steel gray cabinets and electric blue decor accents.

            This kitchen boasts a striking combination of steel gray and vibrant electric blue. The steel gray cabinetry provides a streamlined, contemporary foundation, lending the space a polished and refined aesthetic.

            Electric blue details, such as the dishes and bottles, inject a vibrant energy into the decor. This striking color combination creates a balanced atmosphere. It’s both calming and lively, making the kitchen feel welcoming and stylish in 2025.

            The sleek gray cabinets pair beautifully with a crisp white tiled backsplash, maximizing the room’s light and airy feel. This color palette is ideal for those seeking a modern aesthetic with a touch of playful design.

            Think about incorporating green plants into your kitchen design. They introduce a natural element and soften the clean lines of contemporary cabinets, creating a more vibrant atmosphere. This color combination provides great versatility, letting you experiment with different textures and materials to match your personal style.

            Muted Plum with Cream

            A kitchen featuring muted plum cabinets with cream accents, elegant hardware, and patterned floor tiles.

            This kitchen boasts a stunning combination of soft plum cabinets and creamy white details. The deep plum hue adds sophistication and coziness, making the kitchen feel welcoming.

            Refined hardware enhances the cabinets, injecting a sophisticated flair. Creamy countertops and the ceiling brighten the space, creating an airy and open kitchen ambiance.

            The subtle blend of soft plum and creamy white offers a balanced aesthetic. This color pairing effortlessly complements diverse design preferences, spanning classic to modern.

            Patterned floor tiles add subtle visual flair, complementing the primary color palette. This stylish design choice also enhances functionality, creating a refined and well-organized space. It’s a win-win!

            Ice Blue with Charcoal Accents

            A kitchen featuring ice blue cabinets and charcoal accents, showcasing a modern design.

            Picture entering a kitchen bathed in calming ice blue hues. This color creates a serene and refreshing atmosphere. It instantly makes the space feel open and luminous. These cabinets, painted in this inviting shade, blend seamlessly with diverse design styles.

            Charcoal accents enhance depth and contrast. Expect to see them on countertops or hardware. This creates a stunning balance with the gentle blue. The result is a modern, inviting kitchen. It’s perfect for family time or relaxed dining.

            This kitchen design showcases ice blue cabinets that create an airy and sophisticated atmosphere. Their streamlined design and smooth surfaces amplify the modern aesthetic. Abundant natural light accentuates the blue hues, emphasizing the distinctive design elements.

            Want to revitalize your kitchen? Explore this stylish color scheme! It’s a sophisticated method to inject character into your home, all while preserving a serene atmosphere. Whether you’re preparing meals, hosting guests, or simply relaxing, this kitchen design guarantees a welcoming and comfortable experience.

            Cool Mint and White

            A modern kitchen featuring mint green cabinets, white countertops, and a bright atmosphere.

            Cool mint and white create a revitalizing kitchen ambiance. This pairing enhances spaciousness, ideal for active kitchens. Mint cabinets are visually appealing. White countertops and backsplashes offer a pristine backdrop, emphasizing the cabinetry beautifully.

            Mint green frequently inspires peace and serenity, making it a favorite for kitchens. It complements various materials wonderfully. White accents provide a balanced color palette. This combination creates a pleasant atmosphere for cooking or enjoying coffee.

            The mint-colored cabinets in the picture boast a streamlined design, giving a contemporary feel. The subtly contrasting white backsplash tiles elevate the visual appeal. Minimalist decor, such as potted greenery and simple kitchen tools, perfectly complements the space without cluttering it.

            Burnt Orange and Deep Walnut

            A kitchen featuring burnt orange cabinets and deep walnut accents, showcasing a warm and inviting color combination.

            Burnt orange and deep walnut create a welcoming kitchen. This color pairing is ideal for a vibrant, cozy space. Burnt orange cabinets offer a lively color burst. Deep walnut countertops and accents balance the design beautifully.

            Burnt orange’s vibrant hues inject energy into your kitchen. It transforms the space into a lively center for family time and relaxed dining. Deep walnut tones bring sophistication and a cozy feel. They are perfect for cabinets or flooring. These colors work together seamlessly. The result is a kitchen that’s both stylish and inviting.

            This color palette complements diverse design styles beautifully. Consider pairing these cabinets with crisp white subway tile backsplashes for a timeless appeal. Introduce copper cookware or rustic wooden bowls as accents. These additions will enrich the space with texture and visual depth.

            Effective lighting is key to displaying this pairing. Gentle, warm light enhances the orange’s vibrancy and the walnut’s depth. Think about installing overhead lights or under-cabinet LEDs for a welcoming, comfortable ambiance.

            Ivory and Dusty Rose

            A cozy kitchen featuring ivory cabinets and a dusty rose backsplash, with plants and decorative elements.

            Ivory and dusty rose create a warm, elegant kitchen in 2025. This color pairing offers a soft, welcoming vibe, ideal for family life and hosting. Light ivory cabinets provide a beautiful contrast to the warm dusty rose accents. This makes the kitchen feel spacious and bright.

            The picture showcases elegant, off-white kitchen cabinets, a timeless design choice. A muted rose backsplash provides a gentle color accent, avoiding harshness. This careful combination creates an inviting and fashionable kitchen atmosphere.

            Incorporate natural touches like plants or flowers to amplify the inviting atmosphere of this color scheme. Personalize your kitchen with decor items such as a chic clock and decorative jars, creating a space that feels both comfortable and cherished.

            In 2025, ivory and dusty rose remain a fantastic kitchen color palette. This combination offers a perfect blend of contemporary style and enduring appeal. It fosters a calming atmosphere, ideal for cooking and entertaining.

            Slate Blue and Creamy White

            Kitchen featuring slate blue cabinets and creamy white countertops, with accents of gold and glass doors

            Slate blue and creamy white create a delightful kitchen color scheme. This pairing offers a warm and inviting, yet refreshingly clean, ambiance. The serene atmosphere enhances the joy of cooking and dining.

            The image showcases slate blue cabinets, creating a striking contrast with the creamy white countertop and backsplash. This color combination elevates the aesthetic and visually expands the space, making it feel more open and airy.

            Strategically placed glass cabinet doors offer a peek at your beautiful dishware, enriching the kitchen’s visual appeal. Light wood details and elegant gold hardware amplify the balanced color scheme, fostering a warm and welcoming atmosphere in your kitchen.

            Slate blue and creamy white create a versatile kitchen color scheme, fitting seamlessly into both contemporary and rustic designs. Consider this pairing for your kitchen remodel or new build; it could be the perfect blend to realize your dream kitchen in 2025.

            Classic Cherry and Light Gray

            Kitchen showcasing classic cherry cabinets paired with light gray elements.

            Imagine kitchen cabinets blending traditional cherry wood with contemporary light gray. It’s an unexpected yet beautiful pairing. The deep, warm cherry brings sophistication, while the soft gray adds a modern, airy feel.

            This color palette offers exceptional adaptability. Deep cherry cabinetry provides a striking contrast with brighter walls and work surfaces. This combination fosters a warm and welcoming kitchen atmosphere, ideal for family meals or hosting guests.

            Light gray provides a modern, spacious ambiance. It brightens rooms and enhances the feeling of openness. Natural light complements the blend of warm and cool shades, resulting in a balanced and inviting atmosphere.

            Elevate this aesthetic by incorporating greenery. Think potted herbs or compact plants. They breathe life into the area and enhance the cherry cabinets’ warm hues. Furthermore, brushed nickel or matte black light fixtures can unify the entire design in 2025.

            Graphite Black with Warm Beige

            A modern kitchen featuring graphite black cabinets and warm beige accents.

            This 2025 kitchen design features stunning graphite black cabinets complemented by inviting beige details. The rich, dark black creates a sophisticated and contemporary atmosphere.

            The inviting beige accents, particularly in the backsplash, introduce a gentle warmth, harmonizing with the deeper shades. This color combination is both aesthetically pleasing and practical, creating an inviting atmosphere.

            The cabinets showcase a streamlined design with minimalist hardware, contributing to the kitchen’s modern appeal. Subtle gold handles provide a luxurious accent without dominating the space.

            Bright, light wood floors beautifully offset the darker cabinets, adding a touch of warmth. This pairing creates a modern yet inviting kitchen atmosphere, ideal for those seeking a contemporary and comfortable space.

            Enhance the overall aesthetic by incorporating neutral-toned decorative elements. A simple vase filled with bright flowers, for example, can inject a lively feel. This addition harmonizes the entire design, creating a cohesive and inviting space.

            Coral and Light Oak

            A kitchen featuring coral cabinets with light oak countertops and flooring.

            Coral, a vibrant and welcoming hue, infuses kitchens with warmth. Its pairing with light oak generates a lively, balanced ambiance. This combination effectively brightens spaces while preserving a natural aesthetic.

            In this 2025 kitchen design, vibrant coral cabinets create a striking contrast with the light oak countertops and floors. The warm oak tones beautifully enhance the coral, resulting in a kitchen that feels both modern and inviting. Sleek black handles provide a contemporary accent, elevating the entire aesthetic.

            Coral and light oak create a stunning visual harmony suitable for classic and modern homes. Imagine preparing meals, hosting gatherings, or simply savoring your morning coffee in a kitchen featuring this cheerful color combination. It’s a beautiful and inviting space for everyday living.

            Soft Lavender and Natural Wood

            A kitchen with soft lavender cabinets and natural wood countertops.

            In 2025, soft lavender cabinets are the ultimate kitchen trend, radiating tranquility. This calming hue transforms your kitchen into a serene haven. Its gentle purple tone harmonizes perfectly with natural wood, crafting a cozy and inviting space.

            The wood countertop beautifully enhances the lavender, introducing warm, natural hues that offset the color’s inherent coolness. This pairing results in a balanced and inviting aesthetic, promoting a sense of freshness and tranquility. The design feels spacious and bright, particularly with the abundance of natural light streaming through the window.

            Adding plants, like those pictured, elevates this design. They introduce vibrancy and a sense of renewal. This transforms the kitchen into an inviting space for both cooking and socializing. By carefully selecting colors and textures, you can create a warm and welcoming kitchen environment.

            Dark Blue and Silver

            A modern kitchen featuring dark blue cabinets with silver hardware, white backsplash, and a spacious countertop.

            This kitchen showcases a stunning design with deep navy cabinets and sleek silver hardware. The pairing delivers a sophisticated and welcoming ambiance, ideal for both culinary creations and hosting gatherings.

            The cabinets’ rich, deep blue color exudes sophistication. Gleaming silver hardware provides a modern accent. The cabinetry’s clean, streamlined design enhances the contemporary feel.

            Observe the striking contrast between the brilliant white backsplash and the deep blue cabinetry. This creates an airy and energetic atmosphere. The strategic color palette accentuates the cabinetry’s elegance.

            This kitchen boasts a generous countertop, perfect for preparing meals or enjoying a quick bite. It’s a stylish and practical design, ideal for those who love being in the heart of the home.

            Almond and Charcoal Gray

            A kitchen featuring almond cabinets and charcoal gray walls and flooring.

            Almond and charcoal gray create a modern, inviting kitchen. Warm almond hues offer a comforting ambiance. Sophisticated charcoal gray adds depth and visual interest.

            Almond cabinets offer a striking contrast against the deep gray walls and floors. This pairing is incredibly versatile, fitting seamlessly into minimalist or classic designs. The interplay of light and dark ensures a dynamic and engaging visual experience.

            This kitchen showcases a delightful interplay of textures. The smooth almond cabinetry beautifully contrasts with the charcoal gray’s modern matte surface. Enhance the design further with black accents or vibrant plants.

            This pairing excels in both looks and usability. Almond cabinets are great at concealing fingerprints and smudges, a real advantage over lighter colors. The deeper gray provides a sophisticated accent. Together, these colors create a kitchen that’s both beautiful and highly functional.

            Crisp White and Lemon Yellow

            A bright kitchen with white cabinets and lemon yellow accents, featuring yellow flowers and citrus fruits.

            The pairing of pristine white and lemon yellow offers a revitalizing and joyful ambiance for kitchens in 2025. Bright white cabinets deliver a sense of cleanliness and openness. Lemon yellow details introduce a cheerful, sun-kissed element. This color palette is ideal for homeowners seeking a bright and welcoming kitchen space.

            This image presents a stunning kitchen design. Crisp white cabinets are the focal point. A yellow pendant light and carefully chosen accents add warmth. Notice how the yellow perfectly balances the white. This creates an inviting and vibrant atmosphere without feeling too busy.

            Adding lemon yellow is easy! Think decorative touches or permanent updates like a backsplash or cabinet details. However you use it, this color combo will brighten your kitchen.

            Dusky Rose and Natural Maple

            A kitchen with dusky rose cabinets, natural maple accents, and a cozy atmosphere.

            Dusky rose cabinets paired with natural maple accents create a welcoming kitchen. The cabinets’ rich, muted rose tone adds elegance and warmth. This color choice complements the light maple tones, creating a beautiful contrast.

            This kitchen showcases stunning cabinets with a modern, streamlined design and a gentle color. Brass accents beautifully enhance the soft rose shade, introducing an element of elegance. The natural maple countertop and flooring amplify the kitchen’s beauty, infusing it with a natural warmth.

            Introducing plants, such as these potted ones, enlivens the area. The rug’s delicate patterns add texture and coziness, creating an inviting and comfortable atmosphere. This color scheme is both attractive and fosters a calm setting, ideal for both cooking and hosting guests.

            Sunshine Yellow and Light Gray

            A bright kitchen featuring sunshine yellow cabinets and light gray backsplash

            This kitchen boasts a vibrant design with sunny yellow cabinets and subtle light gray details. The yellow cabinets immediately inject warmth and energy, creating an inviting and bright atmosphere.

            The soft, light gray backsplash provides a stunning contrast to the cheerful yellow, achieving a harmonious balance. This visual interplay elevates the kitchen’s design, adding a sense of depth. It’s an ideal choice for homeowners seeking a fun, yet refined, kitchen atmosphere in 2025.

            Sunlight streams into the kitchen, emphasizing the bright yellow color scheme. A sizable window offers an outdoor vista, linking the inside space to the lush foliage. Carefully chosen accents, such as a leafy plant and a lemon-filled bowl, introduce a refreshing vibe, transforming this kitchen into a vibrant center of activity.

            Light wood flooring beautifully unites the space. Its warmth complements both the yellow and gray hues. This color scheme is perfect for brightening any kitchen in 2025.

            Emerald Green with Light Gray

            A kitchen featuring emerald green cabinets with light gray accents, gold hardware, and a bright ambiance.

            This kitchen showcases a stunning emerald green cabinet design, complemented by subtle light gray details. The deep, luxurious green injects sophistication, resulting in a kitchen that’s both lively and calming.

            The countertops and backsplash, in a subtle light gray, provide a gentle contrast. This makes the vibrant emerald green truly stand out. This color balance creates a kitchen atmosphere that’s both modern and inviting. It’s a space perfect for cooking and entertaining in 2025.

            Observe how the gold accents perfectly enhance the emerald green, providing a touch of elegance without dominating the design. Sunlight floods in, amplifying the colors and creating a bright, spacious kitchen atmosphere. This modern update reflects 2025 design trends.

            This pairing offers a revitalized kitchen aesthetic with timeless appeal. It’s ideal for everyday meals or special occasions, creating a welcoming and comfortable atmosphere.

          4. Dreamy Mobile Home Porch Ideas: 2025!

            Transform your mobile home’s entrance into a welcoming haven! These 17 updated ideas will ignite your imagination. Discover rustic charm, modern elegance, and personalized touches. Let’s explore amazing front porch inspirations for your mobile home in 2025!

            Cozy Swing Seating Area

            Cozy swing seating area on a mobile home porch with potted plants

            Transform your mobile home porch with a charming swing seating area. Picture a beautiful white swing, softly swaying, beckoning you to unwind. This easy design upgrade creates an inviting and relaxing outdoor space.

            The swing is nestled among colorful potted plants, bursting with life. This vibrant greenery and the blossoming flowers create a revitalizing space. It’s ideal for savoring your morning coffee or relaxing after a busy day in 2025.

            Enjoy shaded relaxation on this covered porch, perfect for any weather. It enhances your mobile home’s appeal and creates an inviting space for family and friends to gather.

            Charming Fairy Lights

            A front porch decorated with fairy lights, a wreath on the door, and flower pots.

            In 2025, fairy lights still effortlessly transform any porch into a welcoming haven. Strung around the perimeter and framing the entrance, they cast a gentle, inviting light. This subtle illumination enhances the porch’s appeal and adds a touch of magic, especially as dusk settles.

            The image showcases porch lights illuminating the entrance, creating a visually appealing effect. A decorative wreath adorns the door, contributing to a warm and welcoming atmosphere.

            Think about using these lights for celebrations or simply to unwind outdoors. They craft an enchanting ambiance, ideal for parties or peaceful reading sessions.

            Stylish Outdoor Rugs

            In 2025, elevate your porch with an outdoor rug! Notice this inviting space, anchored by a stunning patterned rug. It unifies the design, injecting vibrant color and appealing texture for a welcoming feel.

            The rug’s contrast with the floor enhances the porch’s inviting atmosphere. Rug patterns vary widely, from vibrant hues to understated motifs, letting you personalize your space. This rug’s design strikes a pleasing equilibrium, simplifying coordination with other porch features.

            Observe how the rug clearly defines the seating zone. It creates an inviting space for relaxation. Imagine enjoying coffee or a book here. Add flowers or plants, like in this example, to boost the space’s natural ambiance.

            Functional Storage Benches

            Two functional storage benches on a mobile home porch, one with closed storage and the other open.

            Storage benches are a superb addition to any mobile home porch. They seamlessly combine seating with practical storage. This makes them both useful and attractive. The image showcases two lovely wooden benches. These benches offer comfortable seating and concealed storage for your outdoor items.

            The left bench features a concealed storage area. It’s perfect for storing outdoor cushions or gardening supplies. The right bench has an open design. This makes it excellent for showcasing decorations or plants. This blend of practicality ensures a tidy and charming porch in 2025.

            Porch benches effortlessly transform into stunning centerpieces. Add plush pillows and vibrant plants to design an inviting space for loved ones. Crafted with durable materials and protective finishes, these benches offer lasting beauty and resilience against weather conditions, guaranteeing years of enjoyment.

            Rustic Wooden Decking

            A cozy front porch with rustic wooden decking, a fire pit, and a comfortable chair.

            A charming, rustic wood deck adds instant warmth to your mobile home’s porch. The natural grain of the wood provides a comfortable and inviting space, ideal for relaxing outdoors. This image showcases a lovely wooden deck, the perfect spot to savor pleasant evenings.

            A central fire pit creates an inviting atmosphere. It’s perfect for socializing with loved ones, toasting marshmallows, or relaxing to the fire’s gentle crackle. The surrounding wood furniture and accents amplify the cozy, rustic feel.

            This porch showcases a simple, yet impactful design. It perfectly illustrates how wooden decking can revolutionize an outdoor area. Imagine relaxing and enjoying the beauty around you. Rustic wooden decking provides the ideal setting for morning coffee or evening stargazing.

            Classic Rocking Chairs

            Two classic wooden rocking chairs on a porch

            Rocking chairs add classic appeal to any mobile home porch. They provide a comfortable place to unwind and appreciate nature. Picture yourself enjoying your morning coffee while gently rocking. This small joy can transform an average day into a memorable one.

            This picture features two timeless wooden rocking chairs, perfectly placed against a peaceful background. The wood’s rich, warm colors enhance the welcoming atmosphere. The open porch provides a lovely view of the garden. Rocking chairs remain a favorite for porches, offering an ideal blend of comfort and elegance.

            Customize these chairs effortlessly with cushions or throws. Select colors that showcase your unique style or complement your home’s outdoor aesthetic. Transform your porch into a personalized sanctuary for relaxation after a long day.

            Finally, rocking chairs offer more than just aesthetics. Their gentle motion promotes relaxation and reduces stress. Perfect for reading, socializing, or simply enjoying the outdoors, traditional rocking chairs enhance any mobile home porch.

            Screened-In Comfort

            Screened-in porch of a mobile home with two chairs, cushions, and potted plants

            Enjoy the fresh air without the bugs! A screened-in porch offers the perfect outdoor escape. This picture features a charming mobile home porch. Relax and unwind in its comfortable seating.

            These two chairs, brightened by colorful cushions, offer a snug area for morning coffee or evening conversations. The seating’s warm hues and the welcoming mat create an inviting atmosphere. It’s an ideal place to relax with loved ones or friends.

            Surrounding yourself with plants amplifies the organic ambiance. These potted greens do more than just decorate; they introduce a touch of nature to your home. Personalize this area effortlessly with your preferred plants and decorative items.

            Think about installing a ceiling fan to combat warmer weather. As seen here, it effectively cools the area. This allows you to comfortably enjoy your porch, even during the hottest summer days.

            Colorful Potted Flowers

            A front porch with colorful potted flowers leading up to a teal door.

            Brighten your mobile home’s front porch with colorful potted flowers. They offer a warm welcome and inject vibrant life into your entrance. The image showcases lively blooms in diverse pots along the steps, beautifully leading to the door.

            Brighten your porch with a vibrant flower mix! Combine bold reds, sunny yellows, and delicate pinks. These colors create a stunning contrast against the teal door, adding instant curb appeal in 2025.

            Grouping your plant pots adds visual appeal and depth to your space. Experiment with different pot sizes and shapes for a unique touch. Consider hanging plants; their cascading foliage brings life and vibrancy from above.

            Keeping your flowers vibrant is essential. Select species that thrive in your area’s weather. Consistent watering and adequate sunlight are crucial for their health. With minimal care, your porch will become a stunning oasis.

            Welcoming Front Door Mat

            A welcoming front door mat with the word 'Welcome' on an orange background, placed in front of a light blue door decorated with a wreath.

            Elevate your entryway with a delightful doormat. This vibrant orange mat warmly greets visitors with a clear “Welcome.” Its striking font ensures a friendly and inviting first impression.

            Nestled beneath a charming door featuring a minimalist wreath, this doormat injects character into the entryway. The door’s soft blue hue provides a striking contrast to the vibrant orange mat, crafting an inviting atmosphere.

            Vibrant potted plants now adorn the entrance, creating a revitalized and welcoming atmosphere. This combination of a stylish mat and lush greenery instantly establishes a warm and inviting ambiance, ensuring every visitor feels comfortable and at ease.

            Vintage Decor Accents

            A charming front porch featuring a vintage green bicycle, potted plants, and lanterns.

            Picture yourself on a welcoming porch, a true haven. Vintage touches can turn any mobile home entrance into an inviting space. Here, a green bicycle with a basket beckons you to discover the area. Its nostalgic style adds charm and hints at adventures.

            Terracotta pots brimming with plants and an array of lanterns craft a charming, welcoming ambiance. The vibrant yellow blooms stand out against the lush green foliage, adding a cheerful touch. These features transform the porch into a lively and inviting space, ideal for enjoying coffee on a bright morning or connecting with friends.

            In 2025, detail remains key. Subtle elements, such as these lanterns, enhance the ambiance with a cozy, nostalgic feel. They capture attention and encourage extended visits. Vintage decor continues to excel at evoking cherished memories and establishing a welcoming, personalized atmosphere.

            Creative Wall Art

            A cozy mobile home porch featuring creative wall art, plants, and a welcoming mat.

            Elevate your mobile home porch with unique wall art! This delightful display showcases a blend of artistic elements, each adding character. Notice the clock, whimsical forks, and vibrant plate, all creating a visually appealing scene.

            These distinctive pieces add personality and charm to your home. They also create a welcoming atmosphere. Consider combining various textures and designs for an updated look. A reclaimed wood serving board complements a classic timepiece beautifully. This combination results in a cozy and comfortable ambiance.

            Remember the plants! Greenery breathes life into your porch decor. A simple potted plant adds freshness without overwhelming the space. Consider hanging planters or small tabletop pots for a lush feel. Update your porch with plants in 2025!

            Your welcome mat is key to setting the mood. This one reads “Vibe,” encouraging guests to unwind and have fun. Pick a mat that showcases your personal style for a cohesive look.

            Shade-Protecting Canopy

            Mobile home front porch with a metal canopy providing shade

            A welcoming front porch is lovely. Elevate it with a shade canopy! This smart addition protects you from intense sun and sudden showers. Picture yourself relaxing outdoors, reading or enjoying coffee, carefree of the elements.

            This photo features a modern mobile home enhanced by a stylish metal canopy. The canopy’s design integrates flawlessly, offering substantial shade. It creates an ideal outdoor area for relaxing afternoons or engaging conversations with loved ones.

            Lush plants and vibrant greenery surround the porch, creating a welcoming atmosphere. Potted plants add to the charm. Transform this space into a cozy retreat with a few chairs or a small table beneath the porch roof.

            Essentially, a shade canopy offers both protection and enhances your mobile home’s appeal. It encourages frequent outdoor enjoyment, transforming your porch into a beloved home space.

            Pet-Friendly Nooks

            A cozy pet-friendly porch with dogs relaxing on furniture, featuring plants and a welcoming decor.

            A mobile home porch offers a relaxing haven for people and their beloved pets. This image showcases a welcoming area thoughtfully designed for furry friends. The furniture arrangement promotes a comfortable and inviting ambiance, allowing pets to unwind with their owners.

            This wooden bench, paired with comfy cushions, offers a relaxing space for pets and their owners. Look at those cute dogs chilling in this bright, sunny corner! They appear completely content, taking in the scenery. A dedicated pet area like this helps them enjoy the fresh air in a secure and cozy setting.

            Elevate your porch’s appeal with plants and stylish decor. Lush greenery adds beauty and a revitalizing atmosphere for all. A pet-friendly porch provides a perfect spot for play, relaxation, or enjoying the sunshine.

            Family-Friendly Dining Table

            Family-friendly dining table on a mobile home porch, with wooden table, white chairs, and fruit centerpiece.

            A mobile home porch transforms into a welcoming gathering space with this family-friendly dining setup. The picture showcases a delightful wooden table paired with comfy white chairs. A vibrant bowl of fruit sits as a centerpiece, adding a touch of freshness and cheer.

            The wood’s rich, warm colors perfectly complement the porch’s gentle shades, creating a welcoming feel. A ceiling fan provides cool comfort on hot days, making dining a pleasure. Potted plants introduce a natural element, fostering a tranquil and peaceful setting.

            This area promotes family bonding. Enjoy meals, play games, or simply talk over coffee. It’s a place for creating lasting memories. Everyone will feel comfortable and at ease here.

            Nature-Inspired Decor

            A nature-inspired mobile home front porch featuring plants, a wooden chair, and a decorative paddle.

            Imagine a mobile home porch: a relaxing haven brimming with nature’s charm. This picture shows how to build an inviting entrance using straightforward design ideas. Potted plants paired with a wooden chair create a friendly, natural connection for your home.

            Vibrant greenery transforms the porch into a lively space. Decorative pots filled with plants create a fresh and welcoming entrance. A robust paddle hangs on the wall, suggesting outdoor pursuits and a passion for nature.

            The grey wood floors enhance the home’s gentle hues. They offer a striking contrast to the door’s inviting warmth. This color scheme fosters a peaceful ambiance. It’s ideal for savoring coffee or losing yourself in a good book.

            Transforming your porch into a natural haven is simple. Begin by selecting plants suited to your local weather. Personalize the space with a variety of pots. Add a cozy chair for ultimate relaxation and enjoying the outdoor ambiance.

            Inviting Fire Pit Area

            Cozy fire pit area with chairs and a stone fire pit on a wooden deck

            A welcoming fire pit elevates any mobile home porch. It provides a snug and appealing space for loved ones to connect. The picture showcases a well-designed fire pit with comfy seating around it. The fire pit’s stone construction lends a charming, natural feel that complements the outdoor space.

            Comfortable chairs with plush cushions surround the fire pit, perfect for unwinding and soaking in the fire’s glow. This layout encourages engaging conversations and joyful moments beneath the night sky. A round wooden deck elevates the design, clearly defining the fire pit and seating area.

            Enhance the ambiance with delicate lanterns or twinkling string lights. The mature trees provide natural screening and beauty. This creates a secluded and perfect outdoor retreat just steps away.

            Seasonal Decor Themes

            A beautifully decorated front porch for autumn with pumpkins, leaves, and a wreath.

            Elevate your mobile home porch with vibrant seasonal decorations! A charming and inviting front porch offers a fantastic opportunity to showcase your personal style all year round.

            The picture showcases an inviting autumn scene. A doorway is adorned with bright orange and yellow foliage, complemented by a charming wreath. This instantly creates a welcoming, seasonal atmosphere.

            Pumpkins are playfully scattered, enhancing the decor. Some boast vibrant orange hues, while others present a gentle white, creating visual appeal. This blend mirrors the autumn season and evokes a sense of cozy warmth.

            Vibrant, potted flowers line the steps, creating a welcoming atmosphere. Fallen leaves scattered on the steps signal the full arrival of autumn.

            From simple touches to grand displays, seasonal themes instantly boost your porch’s appeal. Refresh your outdoor space regularly to maintain a vibrant and inviting entrance throughout the year!

          5. Singlewide Homes: Cozy Retreats in 2025!

            Singlewide mobile homes are frequently underestimated. However, they possess the potential to become delightful and inviting residences. Explore 13 innovative ideas, ranging from smart storage hacks to chic decorating advice, designed to spark your mobile home renovation. It’s time to unlock the secrets of transforming your compact area into a genuine home in 2025!

            Updated Kitchen Designs for Modern Cooking

            This singlewide mobile home’s kitchen showcases contemporary design beautifully. Crisp, white cabinets create a bright and inviting space. Gleaming stainless steel appliances seamlessly blend form and function, enhancing the kitchen’s overall appeal.

            The light color palette and expansive countertop amplify the sense of spaciousness. Envision preparing a swift meal or entertaining guests in this welcoming kitchen. Sunlight pours in, creating a cozy atmosphere perfect for your morning coffee ritual.

            Today’s kitchens demand efficiency, and this design excels. The layout prioritizes convenience, keeping essentials close at hand. Featuring contemporary finishes and intelligent design, this kitchen transforms into a delightful and functional area.

            Open Concept Living for Spacious Feel

            Interior of a singlewide mobile home showcasing an open concept living area and kitchen.

            Embrace open concept living to maximize space in your singlewide mobile home. This design eliminates walls, fostering a more expansive and interconnected atmosphere.

            This image showcases a welcoming living space merging effortlessly with the kitchen. The design maximizes natural light through expansive windows. This abundance of light creates an airy and inviting atmosphere.

            Light wall colors and wood floors enhance the room’s spacious feel. The furniture arrangement encourages interaction and flow. A minimalist sofa and select chairs prevent overcrowding.

            Open floor plans are ideal for hosting gatherings. Your guests can easily chat with you while you cook or relax. This design truly promotes a sense of connection within your home.

            Creative Storage Solutions for Small Areas

            Cozy bedroom in a singlewide mobile home featuring a bed with storage drawers and floating shelves

            Singlewide mobile home living doesn’t require sacrificing style or practicality. This photo showcases a tidy and inviting bedroom, maximizing every inch of available space. Observe the clever storage solutions seamlessly incorporated into the design.

            This bed includes integrated under-bed drawers. They are ideal for storing clothes or spare linens. This design promotes organization and optimizes floor area, a key benefit in compact living spaces.

            Wall-mounted shelves above nightstands provide extra storage without occupying floor space. Ideal for showcasing décor or keeping necessities within reach. The natural wood hues and light shades establish a cozy and welcoming ambiance, enhancing the room’s spaciousness and brightness.

            Maximize space with multi-functional furniture, especially in compact areas. A bed featuring built-in storage is a perfect example, offering dual utility. Smart designs elevate daily living, creating a chic and efficient environment.

            Personalized Wall Art to Reflect Your Style

            Cozy living space with various framed wall art pieces, showcasing a mix of personal and scenic images.

            Elevate your singlewide mobile home with captivating wall art. The featured image displays a welcoming area adorned with diverse framed pictures. These artworks narrate stories and foster a warm ambiance. Every piece mirrors unique preferences and cherished moments, enriching the home’s identity.

            Curating your art display can be straightforward or intricate, depending on your preference. Consider showcasing family snapshots, captivating landscapes, or intriguing abstract artworks. A prominent centerpiece, such as the portrait displayed, can become a captivating focal point, instantly elevating the space with a sense of deliberate design. This creates a more visually appealing and engaging environment.

            Combining diverse frame designs and hues elevates the aesthetic appeal. Observe the contrasting textures within the room, ranging from plush cushions to intricately woven rugs. This assortment cultivates a cozy and inviting ambiance, ideal for unwinding with loved ones.

            Feel free to add cherished quotes or personal art. This simple addition personalizes your space. Your walls are a blank canvas, ready for your unique style in 2025!

            Bright Color Schemes for a Lively Atmosphere

            A cozy living room in a singlewide mobile home featuring pink walls, a teal sofa with a floral pattern, and colorful curtains.

            Opting for vibrant hues in your singlewide mobile home design generates a welcoming atmosphere. As seen here, the combination of gentle pink walls and lively teal furnishings injects energy into the room.

            Observe the delightful patterns on the sofa. They create a stunning contrast with the room’s solid colors. This balance ensures a lively yet calming atmosphere.

            Bright curtains and vibrant art amplify the room’s energy. These splashes of color invigorate the space. It’s now perfect for relaxing or hosting gatherings.

            The greenery provides a revitalizing element, harmonizing beautifully with the design. Vibrant hues, as showcased here, can turn a compact area into a delightful retreat.

            Incorporating Sustainable Materials in Decor

            A cozy living room in a singlewide mobile home featuring sustainable decor elements like a comfortable sofa, wooden furniture, plants, and natural materials.

            Transforming your singlewide mobile home into a comfortable and chic haven is achievable with sustainable materials. This image showcases a beautiful living space. It’s filled with natural textures and eco-conscious features, creating a serene and inviting atmosphere. This reflects the latest trends in 2025.

            The sofa, brightened by colorful cushions, perfectly matches the wooden furniture and details. Woven baskets and a natural fiber rug bring warmth and a natural feel to the space. Selecting these materials enhances your home’s beauty and promotes environmentally friendly living.

            In 2025, plants remain central to interior design. They revitalize spaces and purify the air. Opt for pots crafted from recycled or natural materials to maintain thematic harmony. These straightforward updates create a substantial positive effect.

            Sustainable lighting is key. The pendant light, showcasing a natural aesthetic, exemplifies this. Choose energy-efficient bulbs. They lower energy use and maintain a bright, welcoming home in 2025.

            Maximizing Space with Multi-Functional Furniture

            Cozy interior of a singlewide mobile home with multi-functional furniture.

            Singlewide mobile homes often present space challenges. Smart furniture choices are key. This image showcases a comfortable living space optimized with multi-functional pieces. The sofa serves a dual purpose: seating and a guest bed, providing extra sleeping accommodations.

            The central table is a prime example of smart design. Its elegant form functions as both a dining space and a practical work area. This adaptability is crucial for compact living. Enjoy meals, play games, or complete projects, all in the same convenient location!

            Sunlight streams in, creating a bright and welcoming space. Green plants bring life indoors, improving the atmosphere. Smart storage, including cabinets and shelves, keeps things organized and clutter-free.

            Streamline your mobile home with simple, functional furniture. Maximize your living space and avoid feeling confined. Choose pieces that offer multiple uses for a more comfortable and stylish home in 2025.

            Stylish Outdoor Deck for Relaxation

            Stylish outdoor deck with comfortable seating and potted plants

            Elevate your singlewide mobile home with a chic outdoor deck, turning it into a relaxing haven. This picture highlights a beautiful deck designed for ultimate comfort. Notice the inviting seating with vibrant cushions, ideal for morning coffee or evening relaxation.

            The updated design prioritizes natural aesthetics. Potted plants introduce a vibrant green element. These plants enhance visual appeal and boost air quality. Enjoy a fresher outdoor space with this simple addition.

            This deck offers a seamless flow between your indoor and outdoor spaces. The wooden construction creates a cozy atmosphere. Its design promotes both lively social events and peaceful relaxation with a book. A basic coffee table enhances the seating area, ensuring it’s practical and welcoming.

            A rug clearly defines the area, transforming it into an outdoor living space. This deck is a superb upgrade for your mobile home, crafting your own private outdoor retreat.

            Efficient Lighting for Cozy Ambiance

            Cozy illuminated entrance of a singlewide mobile home at night

            Lighting is crucial for creating ambiance in singlewide mobile homes. This image showcases a delightful mobile home bathed in a welcoming, warm light. The gentle yellow glow creates a relaxing and inviting atmosphere, ideal for unwinding in the evening.

            Brighten your home’s welcome with strategic lighting. A chic fixture illuminates this front door, enhancing curb appeal. This lighting boosts visibility and adds a personalized touch to your entryway.

            Think about incorporating potted plants or vibrant flowers, similar to the window box, to amplify the inviting atmosphere. These small touches foster a feeling of warmth and ease, making your home feel more welcoming in 2025. Striking the right balance between natural and artificial light remains crucial for crafting a delightful ambiance both inside and outside.

            Creating a Serene Bedroom Retreat

            A serene bedroom retreat in a singlewide mobile home, featuring a cozy bed with creamy bedding, soft pillows, and stylish decor.

            Transforming your singlewide mobile home bedroom into a serene sanctuary is achievable. This image presents a bright, welcoming space blending comfort and modern style. The light color scheme enhances the airy atmosphere, visually expanding the room’s dimensions.

            The bed immediately draws your eye, featuring plush, cream-colored bedding designed for ultimate comfort. Decorative throw pillows introduce subtle textures, creating an ideal space to de-stress after a busy day. A minimalist bed frame with a natural wood headboard infuses the room with warmth, amplifying the tranquil atmosphere.

            Sunlight streams through the windows, enhanced by elegant, flowing drapes. This brightens the room and creates a peaceful ambiance. A ceiling fan provides comfort and functionality, circulating fresh air and adding a contemporary touch.

            Bedside tables flank the bed, providing practical storage without visual noise. Each features an elegant lamp, ideal for evening reading sessions. Subtle decorative elements, such as plants and artwork, inject character without being excessive. This bedroom transcends mere functionality; it’s a tranquil retreat designed for personal well-being.

            Incorporating Greenery for a Fresh Vibe

            Indoor plants in a bright room with windows, creating a fresh atmosphere.

            Bring life to your singlewide mobile home with indoor plants! This image highlights a charming corner transformed by diverse greenery. Notice the vibrant atmosphere created by both large, leafy plants and smaller potted varieties. The result is a refreshing and welcoming space.

            Indoor plants purify the air and introduce natural beauty to your home. Position them by windows for optimal sunlight or use them to brighten dimly lit areas. Their diverse forms and dimensions allow for creative arrangements, elevating your interior design subtly and effectively.

            New to gardening? Try easy-care plants such as pothos or snake plants. These adaptable plants flourish in various light levels and enhance your living space. Create a small indoor garden by grouping plants. This makes your mobile home feel larger and more peaceful. (Updated 2025)

            Personal Touches with DIY Decor Projects

            Cozy outdoor seating area with plants, rugs, and string lights

            Revamping a singlewide mobile home into a warm, welcoming haven is an enjoyable endeavor. This outdoor space demonstrates the powerful impact of simple DIY decorations. The blend of greenery, vibrant rugs, and comfy seating crafts an inviting atmosphere. Updated for 2025, this design emphasizes accessible and affordable style.

            The central round table encourages get-togethers, ideal for coffee or relaxed dining. Diverse plants surround it, injecting vibrancy and natural beauty. Bright cushions on the seats offer a personalized touch, showcasing your individual taste.

            Overhead, outdoor string lights cast a cozy evening ambiance. Decorative wall accents inject personality into the area. This arrangement proves self-expression doesn’t require vast spaces. Every detail, from rug selection to plant placement, enhances the delightful atmosphere.

            Functional Home Office Setup for Remote Work

            Cozy home office setup with a desk, ergonomic chair, and storage in a mobile home

            Remote work in 2025 thrives with a thoughtfully designed workspace. This picture highlights a comfortable and efficient home office inside a singlewide mobile home. The setup prioritizes both productivity and a pleasant atmosphere.

            This desk offers generous space for your laptop or PC. A modern lamp illuminates the area, ideal for evening tasks. The ergonomic chair supports you comfortably during extended work periods, encouraging healthy posture.

            Maximizing storage is crucial in compact areas. This design features both drawers and shelves. Well-organized documents and supplies maintain a clutter-free workspace. This ensures you can quickly locate essential items. Natural light streams in through a window, fostering a positive and uplifting work environment.

            Adding personal elements, such as art or greenery, enhances office appeal. The goal is to design a workspace that fuels your productivity, even within limited space.

          6. 2025: Epic Easter Basket Ideas!

            Want to elevate your Easter celebration? Explore these 15 fresh and imaginative Easter basket ideas for 2025. Discover a delightful assortment of treats, engaging toys, and unique treasures that will bring joy to everyone. Make this Easter holiday an unforgettable and sweeter experience!

            Personalized Sweet Treat Bags

            A colorful Easter basket filled with personalized treat bags and decorative eggs.

            Easter treat bags are a delightful addition to any Easter basket. Fill them with vibrant candies and personalize each bag with names or cheerful greetings. This personal touch creates a memorable experience kids will truly cherish in 2025!

            DIY Craft Kits for Kids

            A wicker basket filled with DIY craft supplies for kids, surrounded by colorful Easter eggs.

            Easter DIY craft kits offer a delightful and imaginative way to keep children engaged. Create an Easter basket filled with vibrant materials such as stickers, scissors, and markers for endless crafting enjoyment. These kits ignite creativity and provide fantastic opportunities for family bonding!

            Easter-themed Storybooks

            A wicker basket filled with Easter-themed storybooks and colorful eggs.

            Enhance your Easter celebrations with captivating storybooks! Discover vibrant narratives filled with bunnies, decorated eggs, and the joys of spring. These delightful books create memorable and heartwarming reading experiences for the holiday.

            Spring Flower Seed Packets

            A wicker basket filled with spring flower seed packets, colorful flowers, and Easter eggs, set against a garden background.

            Spring flower seed packets are a delightful Easter basket surprise. They encourage everyone to engage in gardening and cultivate stunning flowers. It’s a joyful seasonal activity, allowing you to witness your garden flourish!

            Easter Puzzle and Game Sets

            A woven basket filled with colorful Easter eggs and cheerful cards.

            Easter 2025 offers fantastic opportunities for family bonding through puzzles and games. These engaging activities provide hours of entertainment for all ages during the holiday celebrations. They also make excellent and thoughtful additions to any Easter basket, creating lasting memories.

            Chocolate-dipped Fruit Arrangements

            A basked filled with chocolate-dipped strawberries, bananas, and colorful candy eggs.

            Elevate your 2025 Easter basket with chocolate-covered fruit! Imagine juicy strawberries and creamy bananas, all enrobed in decadent chocolate. It’s a delightful treat for any sweet craving. Sprinkle with vibrant Easter candies for a truly festive surprise!

            Bunny-shaped Bath Bombs

            A basket filled with colorful bunny-shaped bath bombs in pastel colors.

            Transform bath time into a playful adventure with these charming bunny bath bombs! Their delightful design makes them a perfect addition to any 2025 Easter basket. Watch as they create a vibrant, fizzy spectacle in the water. Children will adore the explosion of colorful bubbles and calming fragrances, making bath time a truly relaxing and enjoyable experience.

            Gardening Starter Set

            A wicker basket filled with gardening tools, colorful eggs, and flowers in a garden setting.

            Customized Easter Egg Decorating Kits

            A basket filled with decorated Easter eggs and decorating supplies.

            Unleash your creativity this Easter with personalized egg decorating kits! These kits typically include vibrant paints and specialized tools. They empower everyone to showcase their artistic talents. It’s a fantastic and engaging activity for families and friends to share during the holiday season!

            Handmade Soap Collection

            A basket filled with colorful handmade soaps and decorative eggs.

            Artisan soaps are a fantastic Easter basket surprise. They’re available in vibrant colors and fun Easter-themed shapes. These soaps offer a luxurious self-care experience that everyone will enjoy!

            Flavored Hot Chocolate Bombs

            Easter baskets get a delightful upgrade with hot chocolate bombs! Simply drop one into warm milk and witness the enchanting melt. A burst of delicious flavors awaits! Kids will adore the surprise and the yummy drink they create. Updated for 2025!

            Flower Crown Making Kit

            A basket with a flower crown kit, featuring colorful flowers and decorative items.

            Easter-themed Cookie Cutters

            A basket containing various Easter-themed cookie cutters and unbaked cookies in festive shapes.

            Elevate your Easter baking with festive cookie cutters! Craft charming bunny and floral-shaped cookies effortlessly. Decorating and sharing these delightful treats will be a highlight of your 2025 Easter festivities.

            Easter-themed Nail Art Supplies

            A basket filled with Easter-themed nail art supplies, including pastel nail polishes, tools, and decorated eggs.

            Elevate your Easter festivities with delightful nail art! Think charming pastel nail polishes, playful stickers, or adorable bunny-shaped tools. It’s a simple and creative way to embrace the holiday spirit and express your style. Get ready to showcase your festive manicure this Easter!

            Bunny and Chick Plush Toys

            A basket filled with plush bunny and chick toys surrounded by flowers.

            Adorable bunny and chick plushies make ideal Easter basket stuffers. These soft, huggable toys spread happiness and comfort, perfect for children. They’re also fantastic pals for springtime fun!