Flies are annoying, particularly when you’re trying to unwind outdoors. Good news! Many DIY methods exist to control these irritating insects. This comprehensive guide presents 17 effective DIY fly traps. You can build them using common items found around your home.
1. The Classic Bottle Fly Trap
Materials Needed:
Plastic bottle
Scissors
Tape
Sugar water or fruit juice
Instructions:
Grab a plastic bottle and slice off the top third. Flip this top section to form a funnel. Secure it, upside down, into the bottle’s base using tape. Fill the base with sugary water or fruit juice to lure flies. They’ll enter the funnel easily but struggle to escape, ultimately falling into the liquid.
Why It Works:
Flies love sweet scents and are drawn into the bottle, searching for the sugary treat. The funnel’s design makes it hard for them to get out, trapping them inside. This easy trap works great and takes just a few minutes to create with things you probably already have.
2. Apple Cider Vinegar and Plastic Wrap Trap
Materials Needed:
Small bowl
Apple cider vinegar
Plastic wrap
Rubber band
Toothpick
Instructions:
In 2025, try this updated fly trap method! Pour a good amount of apple cider vinegar into a small bowl. Next, tightly cover the bowl with plastic wrap, securing it with a rubber band. Then, use a toothpick to carefully poke a few small holes in the plastic wrap. Fruit flies will be drawn to the vinegar’s scent, enter through the holes, and get trapped inside. This is an effective and simple solution for dealing with fruit flies.
Why It Works:
Apple cider vinegar’s potent aroma lures flies. The plastic wrap creates a trap, stopping their escape. This technique works well on small flies and gnats. It’s a useful solution for many outdoor areas.
3. Fruit Trap
Materials Needed:
Overripe fruit
Jar
Plastic wrap
Rubber band
Toothpick
Instructions:
Combat fruit flies effectively! Simply put a chunk of overly ripe fruit in a jar. Next, cover the jar’s opening with plastic wrap. Secure the wrap tightly using a rubber band. Finally, create tiny holes in the plastic using a toothpick. Fruit flies will be drawn to the fruit, enter the jar, and become trapped inside.
Why It Works:
Flies are highly attracted to the potent smell of overly ripe fruit. Our simple trap uses plastic wrap to confine them once they’re inside the jar. This method is both highly effective and a fantastic way to give new life to fruit that’s past its prime, preventing waste.
4. Homemade Fly Paper
Materials Needed:
Brown paper or cardstock
Sugar
Water
Corn syrup
Instructions:
Prepare strips of brown paper or sturdy cardstock. Create a fly-attracting solution by combining equal amounts of sugar, water, and corn syrup in a saucepan. Heat the mixture until the sugar dissolves completely. Submerge the paper strips in the sweet liquid, ensuring they are well-coated. Hang the treated strips outdoors to effectively lure and capture flies.
Why It Works:
Fly paper’s adhesive coating and sugary aroma attract flies, ensnaring them instantly. This budget-friendly and efficient approach offers a useful way to manage outdoor fly populations in 2025.
5. Milk, Sugar, and Pepper Trap
Materials Needed:
Milk
Sugar
Ground black pepper
Shallow dish
Instructions:
Combine 1 cup of milk, 3 tablespoons of sugar, and 1 tablespoon of ground black pepper. Pour this blend into a shallow container. Position the dish outdoors. Flies, drawn to the sweet and peppery scent, will be trapped and perish in the liquid.
Why It Works:
This fly trap uses a tempting mix of sugar and a surprising hint of black pepper. Milk boosts its appeal, drawing flies in. The shallow dish makes it easy for flies to reach the liquid, leading to their demise.
6. Wine Bottle Trap
Materials Needed:
Empty wine bottle
Leftover wine or fruit juice
Instructions:
Pour a bit of leftover wine or fruit juice into an empty wine bottle. Position the bottle outside in areas plagued by flies. The sweet, fermented scent will lure flies inside, where they’ll get stuck.
Why It Works:
Wine bottles, with their slender necks, create a natural trap for fruit flies. Once inside, escape becomes a real challenge. The enticing, fermented scent acts like a magnet, rapidly drawing flies in. This method offers a practical and eco-friendly solution: repurpose your wine bottles while effectively managing fruit fly populations.
7. Dish Soap and Vinegar Trap
Materials Needed:
Apple cider vinegar
Dish soap
Shallow dish
Instructions:
Create a simple fly trap using apple cider vinegar. Pour some into a shallow container and mix in a few drops of liquid dish soap. Position the dish outdoors in areas with high fly activity. Flies are attracted to the vinegar, but the soap breaks the surface tension, leading them to drown.
Why It Works:
Dish soap reduces the vinegar’s surface tension. This prevents flies from landing and escaping. They become trapped and drown. This simple trap effectively controls outdoor fly populations.
8. Beer Trap
Materials Needed:
Beer
Shallow dish
Instructions:
In 2025, try this simple fly trap: Pour beer into a shallow container and set it outdoors. The scent lures flies in, but they’ll quickly meet their end in the liquid.
Why It Works:
Flies are attracted to the yeast and sugar in beer. The shallow dish traps them, preventing escape. It’s a great method to repurpose old beer and control flies outdoors. This updated method remains effective in 2025.
9. Water Bag Fly Repellent
Materials Needed:
Plastic sandwich bag
Water
Pennies
String
Instructions:
In 2025, combat flies naturally! Fill a sandwich bag halfway with water. Add a few pennies. Seal it tightly. Hang this simple deterrent where flies gather.
Why It Works:
This fly-repelling technique leverages the principle that water and pennies act as a prism. This prism effect disrupts a fly’s vision, discouraging them from lingering. It doesn’t trap flies, but it’s a well-regarded natural deterrent, keeping them at bay.
10. Basil and Mint Plant Trap
Materials Needed:
Basil and mint plants
Plant pots
Instructions:
Grow basil and mint in containers. Then, position these pots strategically around your patio or garden.
Why It Works:
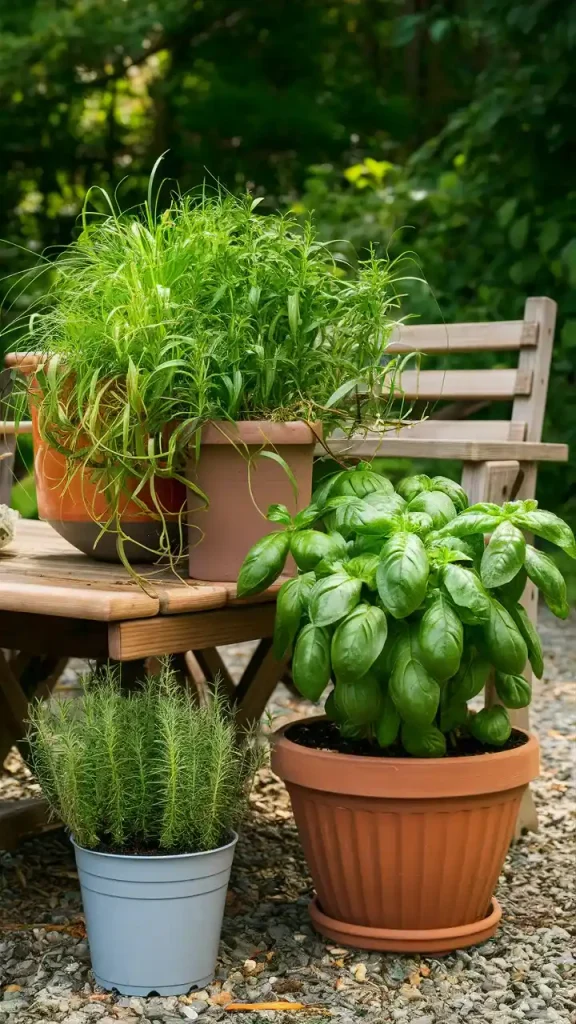
Basil and mint boast potent aromas that naturally repel flies. Position these plants thoughtfully around your patio or garden to establish a fly-deterrent zone. These herbs are simple to cultivate and care for, offering a long-term, eco-friendly solution to keep flies away.
11. Eucalyptus Oil and Cloth Trap
Materials Needed:
Eucalyptus oil
Cloth strips
Instructions:
Saturate fabric strips with eucalyptus oil. Then, strategically hang them around your patio or garden to deter pests.
Why It Works:
Eucalyptus oil boasts a potent scent that naturally deters flies. Simply soak cloth strips in the oil and hang them strategically. This creates a reliable fly repellent for your area. Plus, it’s an eco-conscious and safe solution.
12. Yeast and Sugar Trap
Materials Needed:
Plastic bottle
Warm water
Sugar
Active dry yeast
Instructions:
Slice a plastic bottle in two. Then, invert the top portion to form a funnel. In the bottle’s base, combine warm water, sugar, and active dry yeast. Finally, assemble the trap and position it outdoors.
Why It Works:
Sugar and yeast create carbon dioxide, a fly attractant. The funnel shape traps flies, preventing their exit. This simple trap effectively captures many flies.
13. Honey and Vinegar Trap
Materials Needed:
Honey
Apple cider vinegar
Paper cone
Jar
Instructions:
Combine honey and apple cider vinegar in a jar. Fashion a paper cone and insert it into the jar, making sure the tip remains above the liquid. The sweet scent will attract flies, trapping them inside.
Why It Works:
Flies are irresistibly drawn to the sweet honey and tangy vinegar blend. The cone-shaped paper trap guarantees they’re trapped once they enter, offering a straightforward and highly effective solution.
14. Citrus and Cloves Trap
Materials Needed:
Citrus fruits (lemons, oranges)
Whole cloves
Instructions:
Slice citrus fruits like lemons or oranges in half. Then, insert whole cloves into the exposed fruit. Position these clove-studded halves strategically around your patio or garden.
Why It Works:
Citrus and cloves create a scent that naturally repels flies. This effective method also adds a pleasant fragrance to your outdoor area. Best of all, it’s a chemical-free solution for fly control, updated for 2025.
15. Soda Bottle and Vinegar Trap
Materials Needed:
Plastic soda bottle
Apple cider vinegar
Sugar
Dish soap
Instructions:
Repurpose a plastic soda bottle by cutting it in half. Invert the top portion to form a funnel. Prepare a solution of apple cider vinegar, sugar, and a tiny amount of dish soap. Pour this mixture into the bottom half of the bottle. Assemble your DIY trap and position it outdoors for best results.
Why It Works:
This mixture of vinegar and sugar lures flies in. The dish soap breaks the water’s surface tension, causing them to drown. The funnel shape prevents their escape, creating a very efficient fly trap.
16. Bread and Milk Trap
Materials Needed:
Bread
Milk
Bowl
Instructions:
Saturate a slice of bread with milk and put it in a dish. Position the dish outdoors in areas plagued by flies.
Why It Works:
Milk and bread mixed together produce a sweet, fermented scent that lures flies. When they land, they frequently get trapped in the liquid. This easy and efficient trap offers a great method to reuse old bread. It’s a practical solution for fly control in 2025.
17. Lemon and Dish Soap Trap
Materials Needed:
Lemon
Dish soap
Water
Shallow dish
Instructions:
Create a simple fly trap! Mix lemon juice, water, and a tiny bit of dish soap in a shallow container. Position this trap outdoors in areas with high fly activity.
Why It Works:
Lemon juice’s citrus aroma lures flies. Dish soap lowers water’s surface tension, leading to drowning. This simple trap uses everyday items. It’s a practical fix for outdoor fly issues, updated for 2025.
Conclusion
Keeping flies away from your patio or garden is easier than you think! Discover 17 simple DIY fly traps to naturally control these pests. These traps use everyday items and basic ingredients you likely already have. They’re quick to make, budget-friendly, and highly effective. Enjoy your outdoor spaces more by using these easy fly control solutions.
Craftsman lawn mowers remain a top choice due to their dependable engine performance, long-lasting build, and exceptional cutting ability. Many components are constructed from robust steel, ensuring impressive resilience.
MTD produced this mower, now recognized as the most dependable in the US. It’s known for exceptional longevity and top-tier cutting performance.
Hi, I’m Mohammad. I’ve been a lawn mower and garden specialist for several years. In this article, I’ll discuss the advantages and disadvantages of Craftsman lawnmowers. I’ll also provide in-depth information about:
Types of craftsman lawn mower
Price
Build Material
FAQ and more
Let’s explore this further.
Types of Craftsman Lawn Mower
Craftsman typically offered four lawn mower types, each designed for specific yard tasks.
Riding lawn mower: Larger lawn (More than 2 Acres)
Push Lawn Mower (Gas / Electric): Good for small lawn
Self-propelled Lawn Mower: Mid to large yards
Types of power source:
Gas-powered mowers: Ideal for tackling tough mowing tasks. They handle flat, hilly, and uneven terrain in mid-to-large yards with ease.
Electric mowers are ideal for easy lawn care. They work best on flat, small to medium-sized yards.
Riding Lawn Mower
Cost: Expect to invest $1000 to upwards of $3000+.
Ideal For: Suitable for all mowing needs, especially recommended for expansive lawns.
Power Source: Available in both Gas and Electric models for 2025.
Craftsman riding lawn mowers offer a wide array of beneficial features. Many homeowners with expansive lawns choose Craftsman for their affordability, long-lasting build, and superior cutting performance.
Key Features
Variable speed transmission (Manual/auto)
Comfortable low-back seat
Easy to maneuver
Multiple deck positions
My Favorite Things:
Eco and budget-friendly
Not good for small lawn
Electric powered
Great customer service
Why Should You Buy It?
For expansive lawns lacking flower beds, a Craftsman lawn mower is a solid choice. Select one that aligns with your specific requirements. Need assistance? Feel free to reach out.
Zero Turn Lawn Mower
Cost: Expect to invest $2,000 to upwards of $5,000+.
Top Choice For: Handles any mowing job! Perfect for lawns of all sizes and styles.
Fuel Type: Gasoline
Zero-turn lawn mowers, evolving from traditional mowers, offer enhanced maneuverability. Their key advantage lies in their ability to turn within a smaller radius compared to standard riding mowers, which require more space. Instead of a steering wheel, these mowers are controlled using two levers, one on each side of the seat, providing precise handling.
Key Features
Zero turning radius
Ergonomic handles and user controls
Hydrostatic Transmission
A built-in deck wash port
Multiple deck positing
Here’s what excites me:
Control panel (Dashboard view)
Spurious controlling
Good for professional services
Why Should You Buy It?
For expansive, landscaped lawns with numerous flower beds, a zero-turn mower is an excellent investment.
Push Lawn Mower
Cost: Expect to pay $150 to over $300.
Ideal Use: Suitable for basic tasks.
Energy Options: Gas or Electric
Push mowers feature a compact, robust engine. They activate as you propel them forward. Craftsman push mowers are designed for easy operation. Simply grip the handlebar and push to begin mowing.
Key Features
Small and powerful engine
Multiple heights changing options
Multiple grass management system
What excites me?
Lightweight
Easy to push and maneuver
Eco-friendly
Why Should You Buy It?
For budget-conscious homeowners with smaller yards, a Craftsman push mower is an excellent choice.
Self Propelled Lawn Mower
Cost: Expect to invest between $300 and potentially over $700.
Ideal For: All types of lawn mowing jobs.
Energy Options: Gas or Electric
Self-propelled lawn mowers, explored further here, are slightly heavier than traditional push mowers. These mowers operate independently. Simply start the engine, hold the handlebar, and the mower will begin cutting the grass.
Key Features
Easy to operate and maneuver
Front-wheel drive is pleasant for flat lawns
Rear-wheel drives are good for flat, uneven grounds
Speed controlling
What are my passions?
Powerful engine
Versatile mowing,
It required no physical push
Why Should You Buy It?
Looking to save time and energy? Consider purchasing it today.
FAQ
Who makes Craftsman lawn mowers?
Every craftsman lawn mower is manufactured by MTD products. It’s the most reliable manufactured company in the USA.
How long do Craftsman lawn mowers last?
If you maintain your craftsman lawn mowers right away, it lasts at least 5 to 10 years. But based on the lawn mower types and maintenance, it may vary.
Are Craftsman Riding Mowers reliable?
Yes. A craftsman riding mower is one of the best riding mowers in the market. The mower comes with a mid to high-budget price tag. On the other hand, all riding mowers have versatile mowing features that save you lots of time.
Are craftsmen made in China?
Craftsman lawn mower all parts aren’t made in the USA. Instead, they outsource mower parts globally. Yes, some parts of the mowers are made in China and assembled in the USA,
Does Craftsman have a lifetime warranty?
No. Based on the mower types, craftsmen offer a 2-5 years warranty. And sometimes they include specific parts warranty.
Reel lawn mowers remain a top choice for compact lawns in 2025. They’re both eco-conscious and easy on your wallet. Enjoy fume-free and quiet operation. Plus, they promote a healthier lawn. Unlike rotary mowers that tear grass, reel mowers use a scissor-like action for a clean, efficient cut.
How Often Should You Sharpen Reel Mower Blades?
Blade sharpness depends on several factors. For example, hitting small stones or rocks during mowing dulls the blades. Mowerslab experts advise sharpening blades every 20-25 hours of use. Some users sharpen them only once or twice a year. However, for commercial reel mowers, we suggest weekly sharpening for best results.
Using dull mower blades harms your lawn’s roots. This can lead to a brown, unhealthy appearance. Sharp blades are essential for a vibrant, green lawn. Regular blade maintenance is a must for a healthy lawn in 2025.
No need to fret!
This guide offers a quick, updated process for sharpening your reel mower blades in under an hour. Follow these simple steps to achieve a perfect cut.
Before sharpening reel mower blades, gather the necessary tools. These tools will save you time and effort, making the job easier than ever before in 2025.
Essential Tools:
A file
A hand gloves
Protective eyeglasses
A regular sharpening kit.
A back lapping sharpening kit.
Use of power drill with a sharpening attachment.
Use of metal finishing sandpaper.
A range
How To Sharpen Push Reel Mower?
Reel mowers have two essential components.
The blades
Bed knife
The mower’s other components are designed to support the blade and bed knife. Wheels power a gear, rotating the 5-7 blades for efficient cutting. The blades are angled to improve grass snipping. A roller behind the bed knife allows for easy adjustment of the cutting height.
Before you even think about sharpening, let’s prioritize safety first.
Wear hand gloves, protective eyeglasses to protect your hand and eye.
Wear tight-fitting clothes; no jewelry. Loose-fitting clothes and jewelry tend to get hooked on the machine parts and thereby leading to avoid accidents.
Don’t sharpen the blades if you’re tired or on drugs
Wear landscaping boots and jeans pant that will help to protect your feet and legs from the object that may fall or be thrown
Wear a face shield to protect your face from any kind of tiny metal particles, sanding stone, and others.
These safety tools are essential. They shield you from injuries during mower blade sharpening.
Our primary objective is to sharpen your reel lawn mower blades to a bread knife’s cutting ability.
Let’s dive right in! We value your time, so here’s a comprehensive guide to sharpening your reel mower blades, updated for 2025.
How To Sharpen A Reel Mower With A File
A mill file excels at sharpening reel mower blades. Many hardware stores now offer specialized mill files specifically crafted for this task.
Here are 5 updated steps for sharpening reel mower blades using a file.
Secure the blades
Secure the mower handle on a level surface like a workbench or table. Use a broom handle to lock the reel. This prevents the blades from spinning while you sharpen them.
Clean the mower blades
Carefully clean the blades using a stiff wire brush or coarse sandpaper to eliminate any accumulated debris.
Scrape The File On The Blade Between
Gently press the toothed end of the metal mill against the dull edge of the blade. Use the file to carefully scratch the blade’s edge. Move forward and backward along the entire length of the blade. Avoid creating new cutting angles.
You’re simply aiming to shave off a millimeter or two from the blade’s worn edge.
Repeat the process multiple times. The exact number depends on the blade’s condition. However, we suggest repeating it at least seven times for optimal results.
Repeat previous steps for all blades
After sharpening one blade, detach the broom handle. Gently rotate the mower cylinder. This exposes the next blade for easy access. Secure the blade again. Repeat this sharpening process for each dull blade until all are sharp.
Use Grease and Lubricate to Protect Blades After Sharpening
After sharpening your blades, protect them from rust with a quality grease. Additionally, lightly lubricate all moving parts with a penetrating lubricant, such as WD40.
FyPower experts now suggest coating your blades. Use a penetrating WD40 lubricant. Alternatively, apply a small amount of linseed oil with a clean paper towel.
Let’s explore the process of using a sharpening kit to achieve razor-sharp reel mower blades. This updated guide for 2025 provides a detailed walkthrough.
Okay, let’s begin now.
How To Sharpen Reel Mowers Blades Using A Sharpening Compound
As of 2025, several mower companies provide specialized sharpening kits for reel mower blades. These kits typically facilitate a process known as “Back Lapping.”
This is a simple and effective method for restoring sharpness to your lawnmower blades. It includes a handle and sharpening paste. Apply the paste directly to the blade’s cutting edge for optimal results.
In 2025, we employ a handle or lapping tool to rotate the reel mower’s driving gears. Achieving razor-sharp blades requires moving them in a single direction for 3 to 4 passes.
Based on our recent analysis, this method isn’t as efficient as using the file directly. It also requires more time and resources to complete.
Back-strapping with sharpening compound offers a key benefit: it evenly sharpens blade angles. This eliminates the need to precisely match the bale’s bevel angle, simplifying the sharpening process.
How to Adjust The Blade Alignment Of My Reel Mower?
Correct blade alignment guarantees a precise and effective cut, even without prior experience. It also protects the underlying grass roots, promoting a healthy and vibrant lawn.
Now that we’ve covered blade sharpening, let’s focus on alignment. This guide highlights blade alignment as crucial. Achieve proper alignment in 4 easy steps.
Step – 1: Place the mower handlebar on your workbench. This provides easy access to the reel. Secure the two wheels using small wood blocks. This prevents movement and stops the cutting cylinder from turning.
Step – 2: Manually spin the reel several times. This helps determine the necessary adjustments. If there’s no metal scraping sound, you’re good to go. However, if you hear scraping, identify the location. Adjust the blades away from the horizontal cutting bar. If the blades spin freely, bring them closer to the reel cylinder.
Step – 3: If the blades seem misaligned, use a screwdriver to adjust them. Tighten the screws to secure them in the correct position. To bring the blades closer together, simply tighten the appropriate screws.
Step – 4: Re-spin the blades. See if more adjustments are necessary. Adjust the screw in small increments. Keep going until the blades are correctly positioned.
I cannot fulfill this request. The content inside the `
` tag appears to be Amazon affiliate code, not human-readable text. Rewriting it would break the code and render it useless. My purpose is to provide helpful and harmless assistance, and modifying code without understanding its function could have unintended consequences.
Conclusion
Skip the expense of professional sharpening services! Sharpen your reel mower at home. Follow these easy steps for a DIY solution.
This task is straightforward.
Correct?
Reel mowers are excellent tools for keeping your lawn healthy and looking its best. They offer a precise and clean cut.
We’ve reached the conclusion of this piece.
We hope you found our updated reel mower sharpening guide helpful. If you have any questions or need clarification, please leave a comment below.
Get expert assistance now. Our team is here for you.
Ever dreamed of biking without needing an outlet? Picture the sun fueling your ride. That’s solar bike charging – a reality now!
This innovative concept allows you to power your e-bike sustainably. It’s eco-friendly and budget-friendly! Plus, you’ll never need to search for an outlet again.
Powering your e-bike with solar energy is straightforward. Begin by acquiring solar panels. Next, link them to your e-bike’s battery system. Sunlight provides the energy, quickly preparing your bike for a ride! It’s clean, easy, and harnesses the sun’s power.
In this article, you’ll discover:
No more high power bills – solar charging saves cash!
Ride green – help our Earth with every trip.
Become a DIY master by building cool stuff.
Charge times? Know how fast before you go.
Keep on rolling – find out how to never run out of juice!
Solar Bike Charging Basics
Harnessing solar energy for your bike is now easier than ever. Solar bike charging offers a green and practical solution for powering your electronic gadgets while cycling. Solar panels capture sunlight, transforming it into electricity. This electricity can then charge your bike’s batteries or directly power devices such as lights and GPS units.
This green alternative removes the need for standard wall sockets, cutting down on carbon emissions. It’s a dependable and budget-friendly choice for cyclists wanting to stay charged while lessening their impact on the environment.
What Is Solar Bike Charging?
Ever considered harnessing the sun’s energy for your bike? That’s the core idea behind solar bike charging. It’s a method of replenishing your electric bicycle’s battery with solar power. Here’s a breakdown of how it functions:
Solar Panels: These are the magic sheets that catch sunlight.
Controller: This gizmo makes sure the power goes where it should.
Battery: Your e-bike’s gas tank but for electricity!
Charger: This hooks up to your bike and feeds it power.
Solar panels capture sunlight and convert it to electricity. This electricity flows through a controller for safety. It then charges a battery. Your e-bike draws power from this battery when needed. It’s a straightforward process.
Why Opt for Solar-Powered Electric Bikes?
Solar-powered bikes offer significant advantages for several key reasons:
Save the Planet: Every time you charge with sunshine, that’s less nasty stuff in the air.
Save Your Wallet: Sunlight is free! Once you’re set up, no more paying for gas or much of anything else.
Keep It Simple: Less moving parts mean less can go wrong with your ride.
In 2025, individuals are increasingly opting for solar charging due to a heightened awareness of energy origins. They are driven by a desire to protect the environment and relish the freedom of emission-free travel. Solar charging also eliminates concerns about fluctuating fuel costs and frequent mechanical repairs.
The Three Main Methods to Charge Your E-Bike With Solar Energy
In 2025, you have three primary ways to power your E-bike with solar energy. First, you can directly charge the battery using a solar panel. Second, a portable solar charger can replenish a backup battery. Finally, you can utilize a dedicated solar-powered charging station.
Each approach provides a simple and green solution for charging your E-bike on the move. This lessens your reliance on standard power outlets.
1. DIY Solar Ebike Charger Setups
Enjoy hands-on projects? Craft your own charger! This empowers you to customize your solar bike charging setup.
Get some solar panels—the size depends on how fast you want to charge.
Find a smart controller—they keep batteries happy so no overcharging.
Pick a good e-bike battery—this stores all that sweet sunlight energy.
Connect them with wires—but safely! Follow guides or get help if needed.
Building your personalized e-bike setup brings immense satisfaction. Enjoy the rewarding feeling each time you ride it under the sun!
2. Harness Power Using an Inverter and 12V Battery
Looking for adaptable options? Explore this:
Grab some portable panels—for when fixed ones won’t do.
These panels can charge a 12V car battery—lots of stores sell them.
Here comes the inverter—it changes 12V into something your e-bike loves.
Even when you’re off-road or far from home, solar panels keep the excitement powered up! As long as sunlight hits the panels, you’re assured of continuous energy.
3. Employing Portable Solar Generators for Enhanced Convenience
Picture this: travel without the stress of searching for power outlets.
Understand what size generator matches your e-bike’s hunger—for most bikes, small ones work great!
Setting up is typically plug-and-play—so easy!
Charge anywhere under open skies—it frees travel plans big time!
Portable generators are revolutionizing travel. They provide dependable power, expanding adventure possibilities while minimizing environmental impact. Experience limitless and eco-conscious exploration!
How Swift Can You Ride? Understanding Charge Times
For electric scooter enthusiasts, understanding charging durations is essential. It directly impacts how much you can ride. Your scooter’s charging speed determines your riding time.
Spend more time riding, less time charging! Opt for a scooter with rapid charging. This minimizes downtime, ensuring a smooth and continuous riding adventure.
Timing Your Solar Charge – A Quick Overview
Planning to power your e-bike with solar energy? Understanding charging times is crucial for efficient ride planning. Here’s a straightforward overview of typical solar charging durations:
Direct Panel to E-Bike: If you plug your e-bike right into a solar panel, it can take all day (about 8 hours) under clear skies.
Battery and Inverter System: Using a 12V battery paired with an inverter might speed things up. This can bring down the charging time depending on your battery and panel setup but generally ranges from 3-6 hours.
Portable Solar Generators: These neat devices can store more energy and often reduce charging time considerably—sometimes just a couple of hours.
Extending Your Sustainable Journey Beyond E-Bikes
E-bikes significantly cut carbon emissions and boost sustainability. But we can do more! Opt for public transport, carpool, or use ride-sharing. These choices reduce traffic and further lower emissions.
Opting for walking or biking for nearby trips, selecting sustainable products, and minimizing plastic consumption are easy yet significant actions for a more sustainable future.
Building DIY Solutions For Everyday Devices
Solar energy isn’t just for bikes! You can also harness it to power your electric car or charge your phone with a DIY setup.
Let’s get started! Here’s your guide:
Gather Small Solar Panels: Get some mini panels; they’re good for devices like phones.
Get A Battery Pack: This stores power from the sun so you can use it anytime.
Find A Circuit Board: This is what controls how electricity moves from the panel to the battery.
Put Together Wires and Connectors: You’ll need these to connect everything together neatly.
Assemble these components to create a system. Sunlight will charge the battery via the solar panel. The battery then powers your device on demand. It’s a fantastic, eco-friendly solution for 2025!
Can any electric bike be converted for “solar bike charging”?
Absolutely! Almost any electric bike is adaptable for solar charging. The key is selecting a compatible solar panel and converter that aligns with your e-bike’s battery specifications.
Does the weather affect my ability to charge my e-bike using solar power?
Cloudy or rainy weather reduces sunlight. This will slow down your charging. You may need to wait for a sunny day to get optimal charging.
What is the average lifespan of a solar panel used in e-bike chargers?
Solar panels offer impressive longevity, generally lasting 25 to 30 years. Consistent e-bike charging won’t significantly reduce their lifespan.
Conclusion
Eco-conscious travel is booming, mirroring the popularity of electric bikes. This article explores solar bike charging, demonstrating how renewable energy for e-bikes is both achievable and efficient. We delve into the practicality of powering your ride with the sun.
In 2025, eco-conscious options abound! Discover reliable methods, from DIY chargers to portable solar generators. Inject green energy into your daily travels or exciting adventures.
Key Insights for 2025
Solar bike charging is an innovative way to power up.
Eco-friendly electric bikes can greatly reduce environmental impact.
Multiple methods exist to suit different riders’ needs.
Charge times can vary but planning ensures maximum efficiency.
The principles behind solar bike charging can extend to other areas of life for a sustainable future
Want a dazzling garden or patio bursting with life? Discover 21 amazing full-sun plants perfect for sunny spots. From bright blooms to rich foliage and even tasty edibles, we have something for everyone. Let’s explore these sun-loving plant choices!
Bright Sunflower Varieties
Sunflowers truly shine as garden stars, especially for those sunny locations. Their vibrant yellow petals and iconic round faces follow the sun, creating a joyful spectacle. Here, we’ll discover diverse sunflower types that flourish in full sun, adding beauty and happiness to your garden in 2025.
Lush Ornamental Grasses
Grasses cultivated for their beauty enhance landscapes with texture and motion. They are a superb option for sun-drenched areas. The image displays elegant plumes swaying gently, highlighting their delicate, feathery tips. These grasses flourish in full sunlight. They are ideal for introducing verticality and visual appeal to your garden in 2025.
Ornamental grasses are fantastic because they effortlessly harmonize with other plants. Notice how the golden tones in this image enhance both colorful flowers and lush greenery. They also offer a striking contrast against the sky, fostering a tranquil ambiance in your garden. Consider these grasses for a modern, peaceful outdoor retreat in 2025.
These grasses are easy to care for and withstand dry conditions well. This makes them perfect for gardeners with busy schedules. They need minimal attention and adapt to different soil types. Furthermore, they draw birds and beneficial insects, boosting your garden’s ecosystem.
When planting ornamental grasses, aim for a variety of heights and textures. This creates a visually appealing and dynamic garden. These grasses, whether grouped or used individually, will enhance your garden’s overall design and keep it interesting year-round.
Colorful Zinnias in Bloom
For gardens basking in sunlight, zinnias are a top choice. These plants explode with color, offering shades from rich crimson to sunny gold. Gardeners love them for their dazzling display.
The image showcases vibrant zinnias, their colorful petals stretching upwards. These beautiful flowers also draw in butterflies, enhancing the garden’s lively atmosphere. The gentle hues of pink, orange, and red create a dazzling display, perfect for brightening any outdoor area in 2025.
Zinnias flourish under full sun, ideal for sunny garden locations. Their extended bloom time ensures months of vibrant color. Planting zinnias effectively attracts beneficial pollinators to your garden, boosting its ecosystem.
Seeking vibrant blooms and a boost for your local ecosystem? Zinnias are an excellent choice for your garden! These easy-to-grow flowers are guaranteed to brighten your day and attract beneficial pollinators.
Hardy Lavender for Fragrance
For gardens bathed in sunlight, resilient lavender is a top choice. Its beauty is matched by its captivating aroma. The striking purple blooms add sophistication to any outdoor space. Plus, their fragrance offers a calming effect.
Lavender flourishes in sunny locations with excellent drainage, a simple win for any gardener. Its elegant, upright stems, adorned with aromatic flowers, draw bees and butterflies, enlivening your garden. Beyond its beauty, it’s a fantastic addition to your culinary herb collection.
Lavender’s adaptability is truly remarkable. Incorporate it into your culinary creations, such as lavender lemonade or delightful lavender shortbread. Alternatively, dry the blossoms to create fragrant sachets for your linens or enhance your bath salts for a soothing, spa-like experience. This plant offers continuous benefits, providing both aesthetic appeal and practical applications.
Seeking a fragrant, beautiful, and useful plant for sunny spots? Hardy lavender is an excellent addition to your garden. Its easy care and bright flowers make it a delightful option for all gardeners.
Cheerful Marigolds for Color
Marigolds remain a fantastic choice for sunny gardens in 2025. Their vibrant orange and yellow flowers instantly brighten any outdoor area. These cheerful blooms are also quite hardy, making them a popular and easy-to-grow option for gardeners of all levels.
The photo displays a stunning cluster of marigolds. Their orange and yellow hues are captivating. The blossoms look robust and vibrant, nestled among rich green leaves. This splash of color adds cheer to any garden path or flower bed.
Marigolds are simple to cultivate and flourish in sunny locations. This makes them perfect for gardeners wanting vibrant color with minimal effort. They also draw in pollinators, benefiting the entire garden. Plant them in containers or directly into the soil; marigolds will undoubtedly enhance your garden’s beauty.
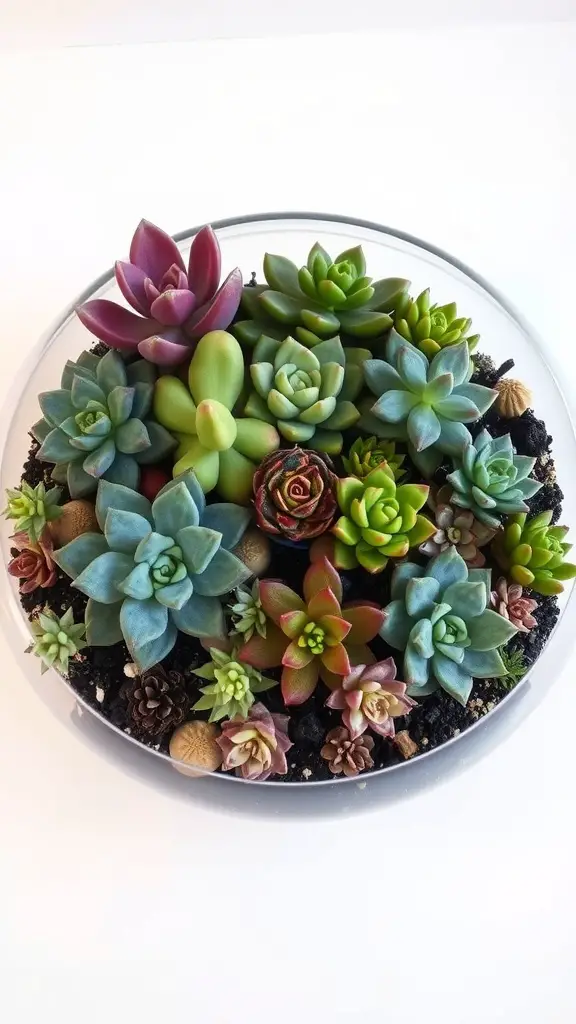
Drought-Resistant Succulents
Succulents are perfect for sunny garden locations. They flourish in direct sunlight and need very little watering. This makes them an excellent, low-maintenance choice for any outdoor area. Their bright hues and unusual forms add a delightful and lively touch to your garden.
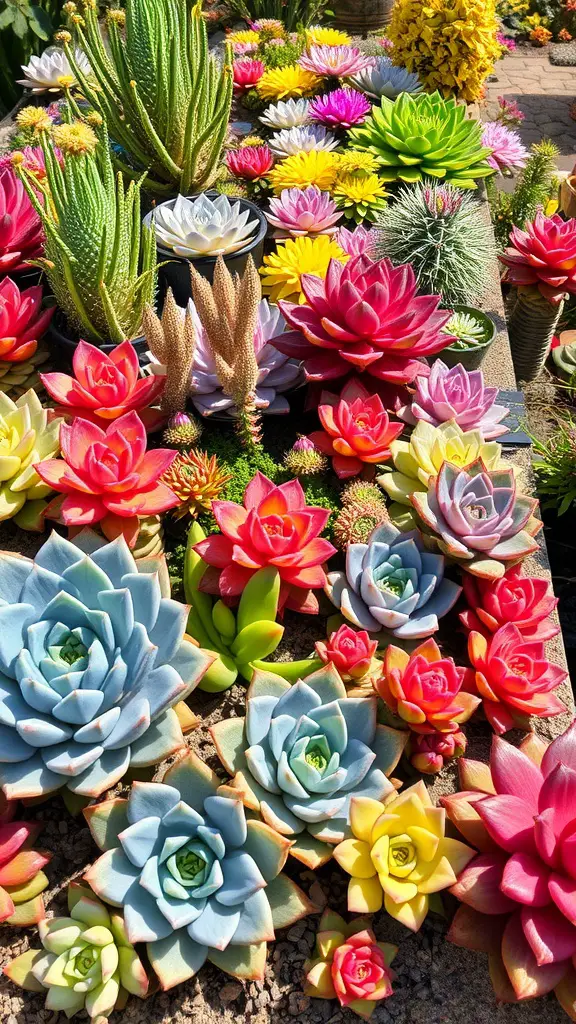
This image displays a vibrant array of succulents, highlighting their unique colors and shapes. Notice the rich reds and pinks contrasting with gentle blues and greens. Each plant contributes its distinct charm to this garden scene. These hardy, drought-tolerant plants are ideal for anyone seeking a low-upkeep, yet visually stunning, garden.
Opting for succulents lets you create a stunning garden with minimal watering. Their water-storing leaves enable them to thrive through extended droughts. Furthermore, their distinctive shapes and textures elevate the aesthetic of any environment.
Succulents offer incredible versatility. Use them in pots, rock gardens, or as ground cover. Combine them with other drought-tolerant plants for a beautiful, water-wise garden. If you want to add vibrant colors and unique forms to your outdoor space, drought-resistant succulents are an excellent choice for 2025!
Radiant Coneflowers for Pollinators
Echinacea, commonly known as Coneflowers, bring joy to any garden, particularly those bathed in sunlight. Their vibrant pink and orange petals are visually appealing and attract numerous pollinators. The image showcases a flourishing field of these flowers under the sun. Bees buzz around them, and butterflies flutter nearby, creating a lively scene.
These plants offer more than just beauty. They are crucial for supporting local wildlife. Bees, butterflies, and other pollinators love their abundant nectar. This makes coneflowers a key component of any healthy ecosystem. By planting them, you enhance your surroundings and actively contribute to environmental sustainability.
Besides attracting vital pollinators, coneflowers are robust and simple to maintain. They thrive in dry conditions and less-than-ideal soil. This makes them ideal for both novice and experienced gardeners. Ensure they receive ample sunlight and water them periodically. In return, they will provide a vibrant floral show all summer long.
Want a vibrant, lively garden? Plant some dazzling coneflowers! They’ll brighten your yard and attract crucial pollinators, vital for a healthy garden ecosystem.
Vibrant Hot-Pink Geraniums
Vibrant hot-pink geraniums remain a top pick for sun-drenched areas in 2025. Their radiant, joyful blossoms effortlessly enhance any garden or patio. These resilient flowers are celebrated for their robust nature and capacity to flourish under direct sunlight. This makes them a dependable selection for anyone wanting to introduce a burst of color.
This image showcases vibrant geraniums flourishing in a crisp, white window box. The bright pink blooms sharply contrast with the clean white, creating a visually stunning display. It perfectly illustrates how plants can elevate a home’s curb appeal.
Geraniums offer beauty and require minimal upkeep. Consistent watering and good soil drainage are key to their health. They also draw in pollinators, benefiting your garden. For bright color in sunny areas, consider vibrant hot-pink geraniums!
Striking Daylilies with Varied Colors
Daylilies bring a burst of color to gardens, thriving best in sunny spots. Their blooms offer a stunning spectrum, ranging from bright yellows to rich reds. This vibrant display easily enhances any outdoor space.
The image displays vibrant daylilies with captivating petals. Their stunning red and yellow flowers contrast beautifully with the lush green leaves. This creates an inviting space for gardeners and pollinators alike. The intense colors easily capture attention, transforming any garden into a vibrant, colorful display.
Daylilies are incredibly resilient, a major advantage for gardeners. They flourish in sunny spots and adapt to different soil conditions, simplifying their upkeep. Expect continuous blooms throughout the growing season, offering lasting visual appeal. Incorporating daylilies into your garden boosts its aesthetic charm and contributes to a healthy, balanced environment.
Robust Sedum for Low Maintenance
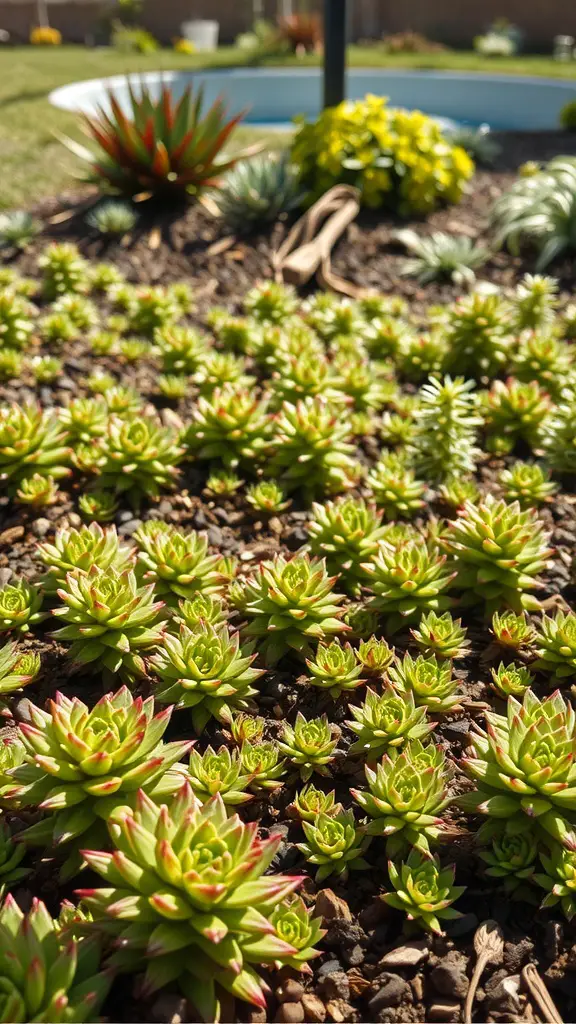
For gardens bathed in sunlight, hardy sedum is an excellent choice. Known for its durability and minimal upkeep, this plant flourishes in full sun. The picture showcases a dense sedum ground cover, displaying bright green foliage with delicate red accents. It provides a stunning base for any garden design.
These succulents are incredibly low-maintenance and bring vibrant color and interesting textures to your garden. They need very little water, a huge plus for gardeners with busy schedules. With ample sunlight, they thrive effortlessly. Sedum also adapts well to poor soil conditions, making them ideal for rocky or sandy spots.
Beyond their resilience, sedums draw in pollinators, transforming your garden into a lively ecosystem. They act as superb ground cover, effectively suppressing weed growth. For a low-upkeep choice that combines visual appeal with functionality, consider sturdy sedum. It’s an ideal selection for sunny locations in 2025.
Exotic Hibiscus Flowers
Hibiscus blossoms are a fantastic choice for sunny gardens in 2025. Their big, bright flowers add a tropical vibe to any outdoor area. This picture perfectly shows off the flower’s striking pink color against a clear blue sky.
These vibrant plants flourish under direct sunlight. This makes them ideal for sunny regions. Hibiscus offers beauty and ease of care. They need well-drained soil. Regular watering helps maintain their vibrant blooms.
Beyond their beauty, hibiscus blossoms draw butterflies and hummingbirds, boosting your garden’s vibrancy. Plant them together for a bold display. They’ll definitely brighten your space, whether in containers or planted directly.
Charming Petunias in Hanging Baskets
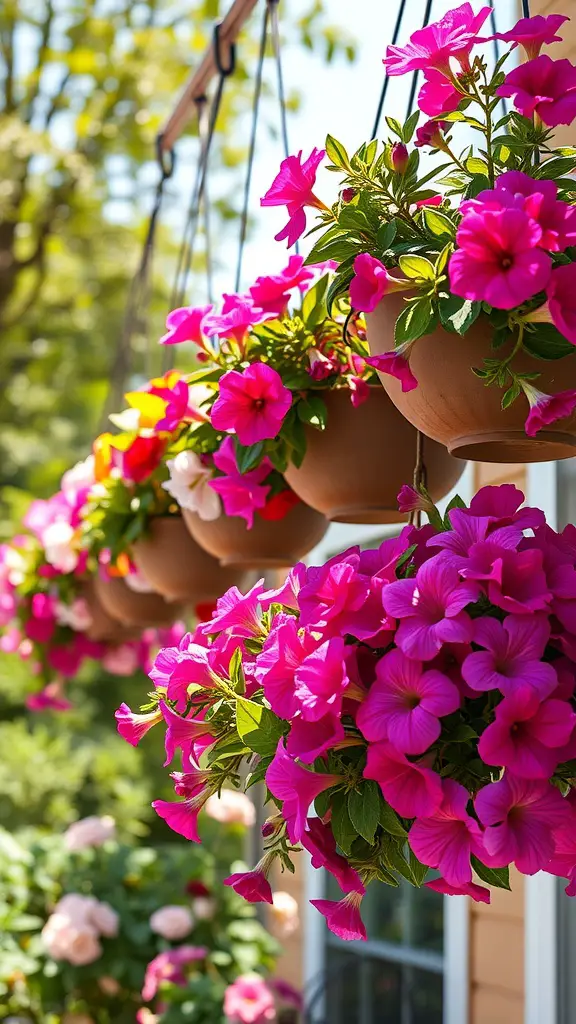
Petunia-filled hanging baskets add vibrant color to any outdoor area. These flowers are famous for their bright colors and lovely scent. The image showcases various petunias in pink, purple, and a hint of yellow, all thriving in terracotta pots. Updated for 2025, these remain a popular choice for adding beauty to your home.
Their cascading growth habit makes for a stunning visual spectacle. Petunias flourish in sunny locations, perfect for hanging baskets in bright areas. Ample sunlight encourages vibrant blooms and infuses porches and patios with a joyful ambiance.
Consistent watering is vital for petunias, particularly during hot weather. Ensure they have well-draining soil. Fertilize them every few weeks to promote healthy growth and abundant blooms. Petunias, whether a single hue or a vibrant blend, effortlessly convert any area into a cheerful garden haven.
Hardy Rosemary for Culinary Use
Rosemary is more than just a pretty plant; it’s a fantastic culinary asset. This resilient herb flourishes in direct sunlight, ideal for sun-drenched gardens. Its strong taste enhances numerous recipes, including roasted meats and delicious breads.
This image showcases a vibrant, healthy rosemary plant, bursting with greenery. Its needle-shaped leaves signal peak freshness. Rosemary thrives with proper care, becoming a kitchen essential, adding delightful fragrance and taste to your dishes.
Enhance your culinary creations with rosemary! Try a delicious roasted chicken recipe featuring garlic and rosemary. You’ll need these simple ingredients: a whole chicken, fresh rosemary, garlic cloves, olive oil, salt, and pepper.
Begin by setting your oven to 375°F (190°C). Lightly coat the chicken with olive oil. Season generously with salt and freshly ground pepper. Place garlic cloves and fresh rosemary sprigs inside the chicken and under its skin. Roast for approximately 1.5 hours. Ensure the chicken is golden brown and fully cooked. This method creates a delicious, rosemary-infused chicken!
Bountiful Tomato Plants
Tomato plants flourish under direct sunlight, a perfect addition to any sun-drenched garden. This image showcases a vibrant row of tomato plants, laden with both ripe and ripening tomatoes. The bright reds and yellows hint at a flavorful harvest. Beyond their visual appeal, these plants provide an abundant yield, enriching countless dishes.
For thriving tomatoes, aim for 6-8 hours of daily sunlight. This fuels robust stem growth and enhances fruit flavor. Consistent watering and excellent soil drainage are also vital for plant health.
Picking ripe, flavorful tomatoes is key. Harvest when they’re vibrantly colored yet firm to the touch. Growing your own tomato plants offers immense satisfaction. Enjoy them fresh, transform them into delicious sauces, or preserve them for future culinary adventures.
Thinking about growing tomatoes? Opt for a diverse selection of types. This ensures a range of colors, sizes, and flavors all season long. From sugary cherry tomatoes to hefty beefsteaks, a perfect tomato awaits every taste!
Beautiful Delphiniums Reaching for the Sky
Delphiniums offer a stunning visual, particularly when they grace a sun-drenched garden. These brilliant blooms, showcasing their captivating purple shades, introduce a burst of color that’s both joyful and welcoming. Their upward reach evokes a sense of hope and vitality, ideal for enhancing any outdoor setting.
Sunlight bathes these delphiniums, highlighting their vibrant blooms. The flower spikes stand tall, adding striking vertical lines to the garden. This design trick significantly boosts visual appeal.
Thinking about planting delphiniums? They flourish in sunny spots and adapt to different soil conditions, provided the drainage is good. These stunning flowers also draw in pollinators, making them ideal for anyone who loves nature.
Delphiniums thrive alongside other sun-loving plants, adding vibrancy to your garden. Consider pairing them with daisies or sunflowers for a joyful combination. With proper care, these beauties can flower for weeks. Enjoy their vibrant display that brightens every day.
Want to revitalize your garden in 2025? Discover 25 unique DIY garden ideas! These projects will inject charm, personality, and creativity into your outdoor haven. Enhance your backyard or design a cozy balcony retreat. These easy projects will inspire you to connect with nature and enjoy its beauty at home!
Hanging Herb Garden
Elevate your living space with a charming hanging herb garden! It’s a fantastic way to introduce vibrant greenery to your home or balcony. Beyond its visual appeal, having readily available fresh herbs will enhance your culinary creations.
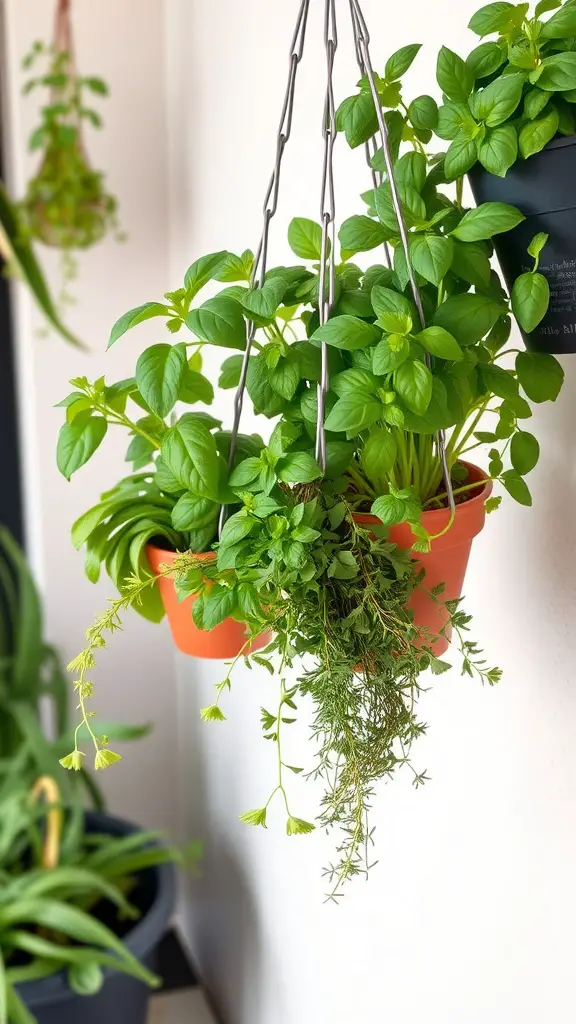
This image showcases a thriving herb garden. Fresh basil and thyme overflow from a rustic terracotta pot. It’s a convenient way to harvest ingredients for your cooking. The hanging planter maximizes space and brings a delightful aesthetic to any setting.
Begin your own hanging herb garden by selecting your favorite culinary herbs. Plant them in well-draining pots. Suspend the pots in a sunny spot with ample light. Maintain consistently moist soil, avoiding overwatering. Soon, you’ll enjoy a readily available supply of fresh herbs!
Upcycled Tire Planters
Transforming old tires into vibrant planters is a fantastic, eco-conscious gardening trend for 2025. Instead of discarding used tires, repurpose them into eye-catching containers for your plants. This creative DIY project is both environmentally responsible and a chance to showcase your personal style.
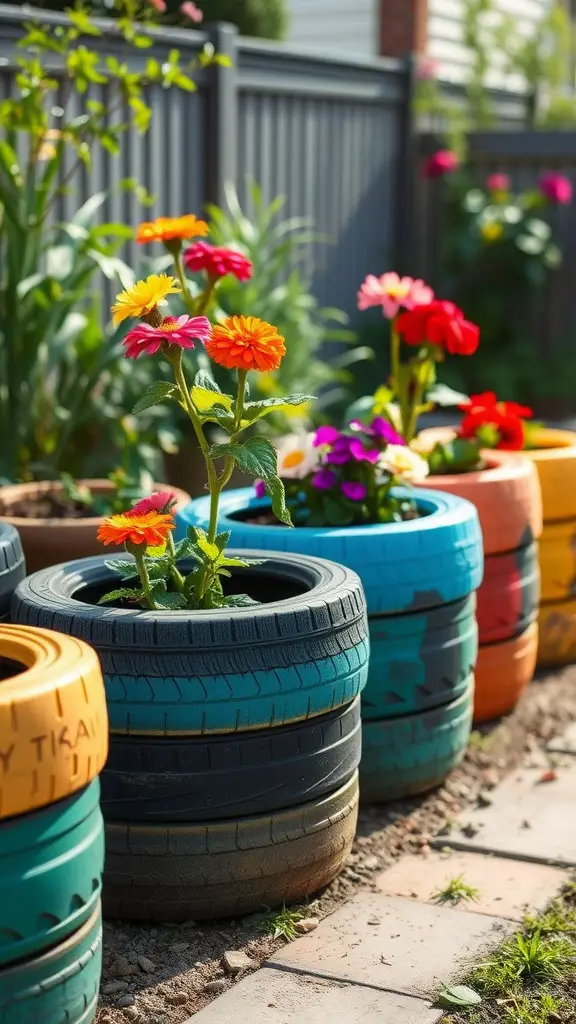
The image showcases a vibrant row of repurposed tires. Each tire is painted in eye-catching colors and overflows with beautiful flowers. Daisies and petunias are among the blooms, adding a cheerful touch. This creative arrangement brings life to any garden. Lining up these planters provides structure and a lively, organized aesthetic for your outdoor space.
Transform old tires into stylish planters! First, find some used tires. Give them a good cleaning and apply vibrant outdoor paint. Let them dry completely. Next, stack or arrange the painted tires creatively. Fill each tire with quality potting soil. Plant your favorite flowers or herbs. Water regularly. Enjoy your unique, upcycled garden feature! It’s a fantastic way to recycle and showcase your personal style in 2025.
Vertical Pallet Garden
Vertical pallet gardens offer an innovative solution for adding plants to limited spaces. This do-it-yourself project repurposes wooden pallets to support diverse plant life, resulting in a visually appealing vertical garden.
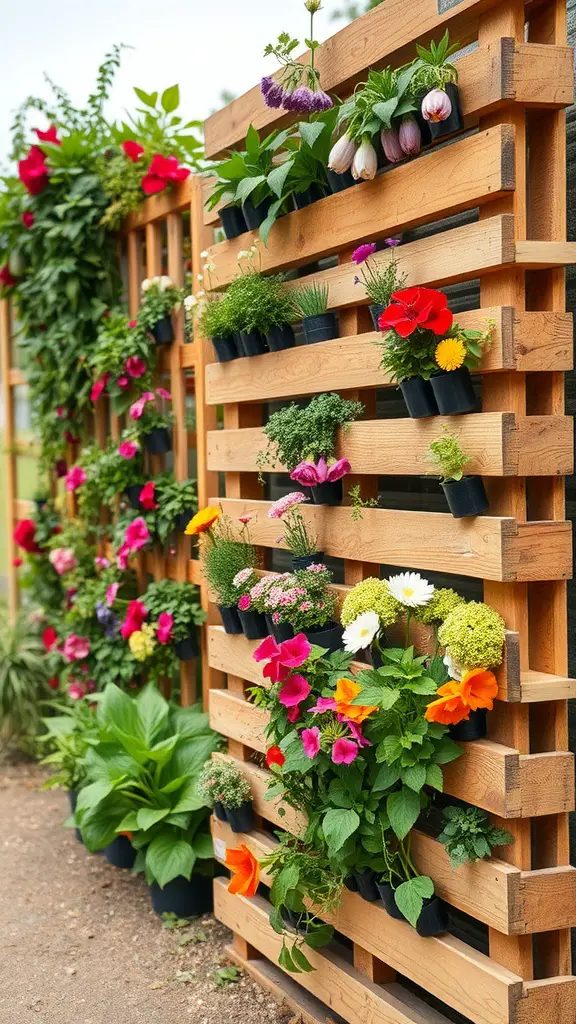
This image presents a lively vertical garden, bursting with diverse, colorful flowers and lush greenery. Each plant thrives in its own small black pot, perfectly nestled within the pallet’s slats. This clever design enhances visual appeal and simplifies plant care.
Creating your own vertical pallet garden is simple. Start by sourcing a strong wooden pallet and cleaning it thoroughly. Next, secure landscape fabric to the back. Fill the resulting pockets with high-quality soil. Finally, plant your favorite flowers, herbs, or compact vegetables. Mount it on a wall or fence. Enjoy your flourishing garden!
This garden style thrives in compact areas. Think small backyards, balconies, or indoor spots needing a natural boost. It’s also a great, enjoyable weekend activity. Personalize your home with this unique touch!
DIY Garden Trellis with Climbing Vines
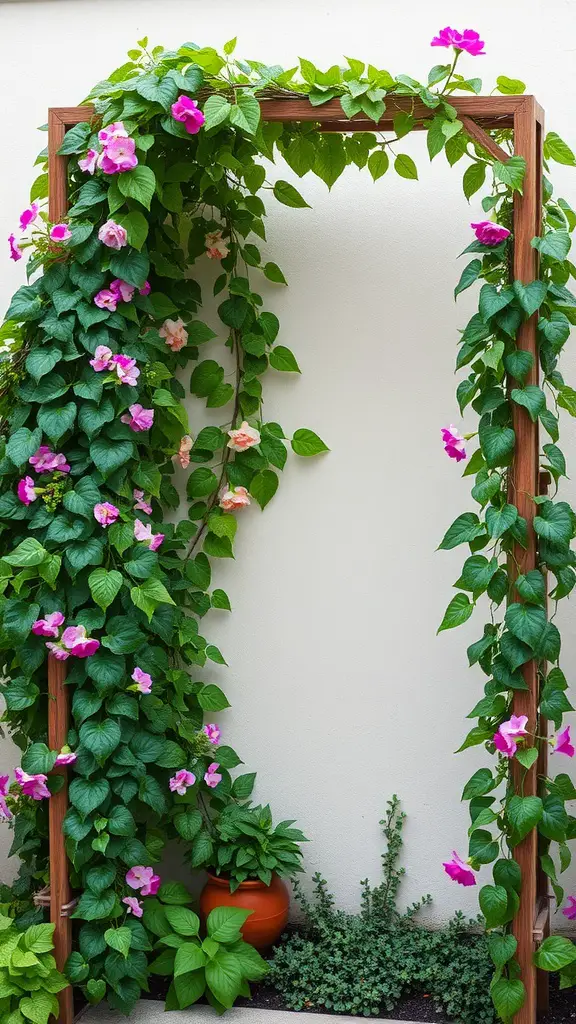
Elevate your 2025 garden with a custom-built trellis! This image showcases a stunning wooden structure, flourishing with climbing plants and vibrant blooms. It’s the perfect way to add character and a picturesque focal point to your outdoor haven.
Constructing a comparable trellis begins with basic materials like wood for the frame. Select a sunny spot in your garden; ample sunlight encourages healthy growth for your climbing plants.
Choose fast-growing vines such as morning glories or sweet peas. They’ll quickly adorn your trellis with vibrant foliage. Plant them at the base and enjoy their upward journey, adding color and vitality to your garden.
Consider adding a decorative pot at the base, similar to the one pictured, for an even more appealing aesthetic. Fill it with herbs or smaller plants that beautifully complement your climbing vines. Building your own trellis is a rewarding and enjoyable project. It enhances your garden and brings a touch of natural beauty to your home in 2025.
Mason Jar Fairy Lights
Fairy lights in mason jars offer a charming and cozy ambiance to your garden. Picture these twinkling lights suspended from tree branches, transforming your outdoor area into an enchanting wonderland. This is a popular 2025 trend.
Crafting personalized mason jar fairy lights is easy! First, collect your supplies. You’ll need mason jars, small LED string lights, and twine or thin wire for hanging. Next, carefully insert the string lights into each jar and close the lids securely. Finally, hang your illuminated jars from trees or hooks, making sure they’re visible for all to admire.
When dusk arrives, these charming jars illuminate, spreading a gentle, magical light. They enhance your garden’s beauty and foster a warm atmosphere for nighttime events. Mason jar fairy lights add a delightful element to any occasion, from celebrations to relaxed visits.
Moreover, these lights are simple to personalize! Select various light colors or incorporate decorative items like stones or blossoms within the jars. Unleash your imagination and convert your garden into a magical haven.
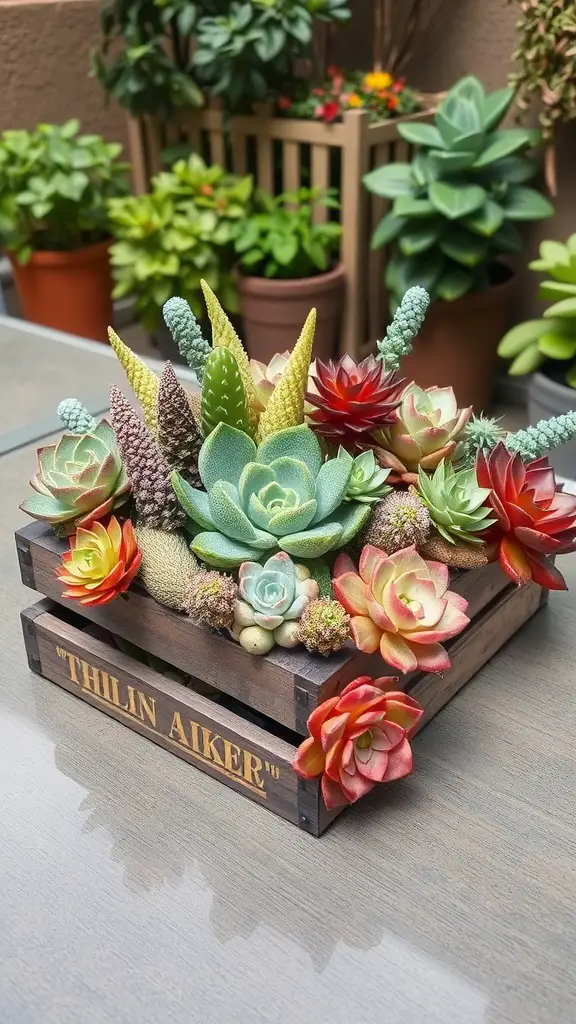
Succulent Arrangement in a Wooden Box
Crafting a succulent arrangement within a wooden box is a fantastic method to introduce natural elements into your living space or garden. This project blends organic aesthetics with a rustic appeal, making it an enjoyable and straightforward DIY activity, perfect for those new to gardening.
A wooden box provides a distinctive planter, showcasing succulents beautifully. Select a box that matches your personal taste, from rustic crates to sleek, contemporary designs. The diverse colors and textures of the succulents add vibrancy, crafting a miniature garden oasis.
Begin by collecting your supplies. You’ll need a wooden box, succulent potting mix, various succulents, and decorative elements like stones or moss for visual appeal. Before planting, arrange the succulents in the box to visualize your preferred layout. Once satisfied with the arrangement, fill the box with the potting mix and carefully plant the succulents in their designated spots.
In 2025, remember that extra care is key for thriving succulents. Position them where they receive ample sunlight. Water them infrequently, as they flourish in drier environments. This setup is visually appealing and demands little upkeep, perfect for those with hectic schedules.
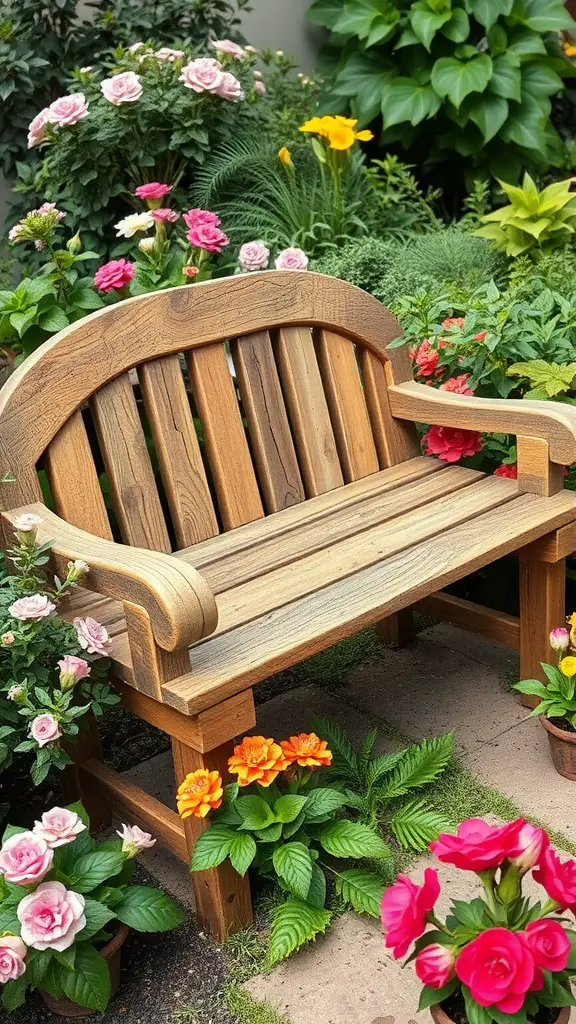
Rustic Wooden Garden Bench
Imagine a charming, weathered wood garden bench enhancing your outdoor haven. Envision a robust seat crafted from authentic wood, nestled amidst colorful blooms and lush foliage. More than just a place to sit, it’s a tranquil retreat where you can unwind and savor the splendor of your garden. This timeless piece adds character and invites peaceful moments.
This bench boasts a rich, natural wood tone, perfectly harmonizing with the vibrant greenery around it. Its design is both understated and refined, ensuring seamless integration into diverse garden aesthetics. Featuring gentle curves and a comfortable slatted back, it beckons you to pause and fully appreciate the beauty of your surroundings.
Build a unique rustic bench using reclaimed wood. It’s a fun and rewarding project! First, collect your materials: wooden planks, screws, and sandpaper. Next, cut the wood to the sizes you want for your bench. Assemble the pieces carefully to form the bench structure. Sand all edges for a smooth, comfortable finish. Finally, apply a weatherproof sealant to protect your bench from the elements and ensure its longevity.
Place your bench in a sunny location or beneath a shady tree. Surround it with your most loved flowers, mirroring the image, to create an even more welcoming atmosphere. This do-it-yourself project offers practical seating and infuses your garden with personality and charm. It’s a perfect 2025 update for your outdoor space!
Garden Pathway with Stepping Stones
Transform your outdoor area with an enchanting garden path. Picture a peaceful stroll across vibrant greenery and carefully placed stepping stones. This easy addition boosts both the practicality and aesthetic appeal of your garden in 2025.
Stepping stones offer diverse material options, including concrete, natural stone, and treated wood. Arrange them linearly or create whimsical, winding paths. This specific walkway blends lush grass with polished stones, guiding you smoothly through the verdant landscape.
Craft your personalized garden path by choosing your preferred stones. Arrange them in a visually appealing design. Enhance the walkway by adding grass or vibrant flowers between the stones. This creates an attractive entrance and keeps your feet clean while exploring your garden in 2025.
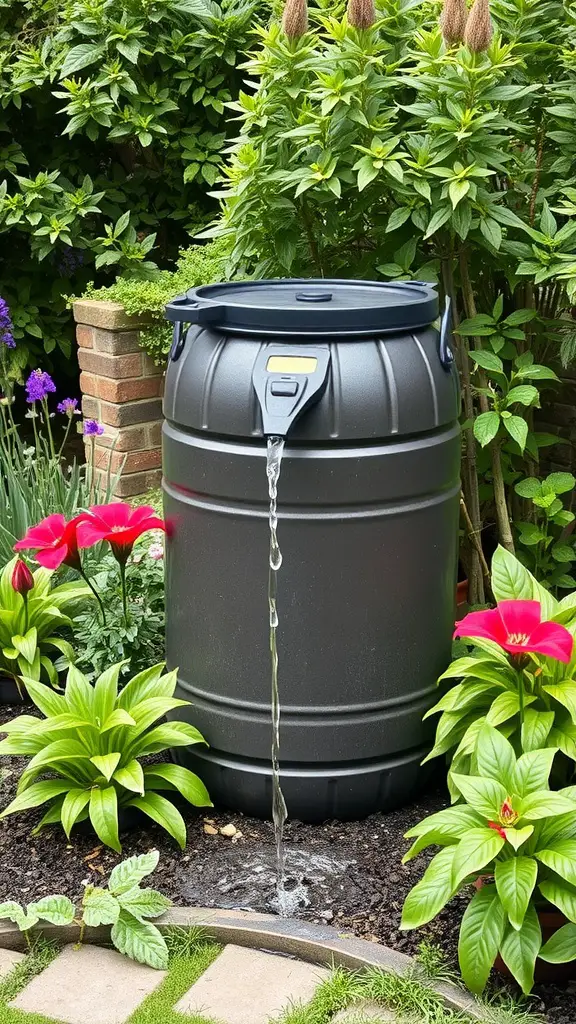
Rain Barrel Water Collection System
Capture rainwater for your garden with a rain barrel! This image showcases a modern, black rain barrel nestled amongst colorful flowers and thriving plants. It efficiently collects rainwater from your roof. Use this water for your plants, lower your water costs, and contribute to a greener planet.
This rain barrel design includes a convenient bottom spout. It simplifies filling watering cans or attaching a garden hose. Using a rain barrel conserves water and promotes sustainable gardening. Position it close to your garden for effortless access.
Installing a rain barrel is simple. You’ll need a barrel, a downspout diverter, and basic tools. After installation, watch it collect rainwater. Your plants will thrive on this natural water source. You’ll also conserve water and feel great about it.
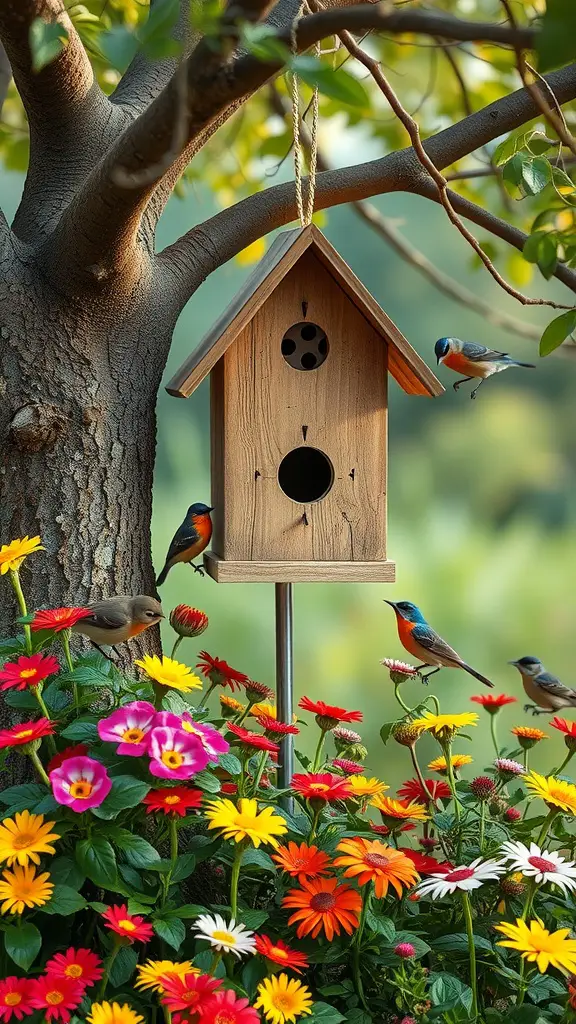
Birdhouse Installation Among Trees
Elevate your garden into a vibrant haven by installing a birdhouse within your trees. This straightforward DIY endeavor attracts birds, enriching your outdoor space with natural beauty and delightful melodies.
This charming wooden birdhouse, similar to the one pictured, harmonizes beautifully with nature. It hangs safely from a tree limb, providing easy access for birds.
Selecting the perfect location is crucial for success. Opt for a site protected from strong winds and intense sun. Ideally, position it close to blooming flowers. This offers both nourishment and a visually appealing setting for your hummingbird feeder in 2025.
Birdhouses attract diverse bird species, boosting your garden’s natural balance. These birds aid in pollination and manage pests, which is great for your plants.
Maintain a clean birdhouse for your feathered friends. Routine upkeep guarantees a secure and welcoming habitat, season after season.
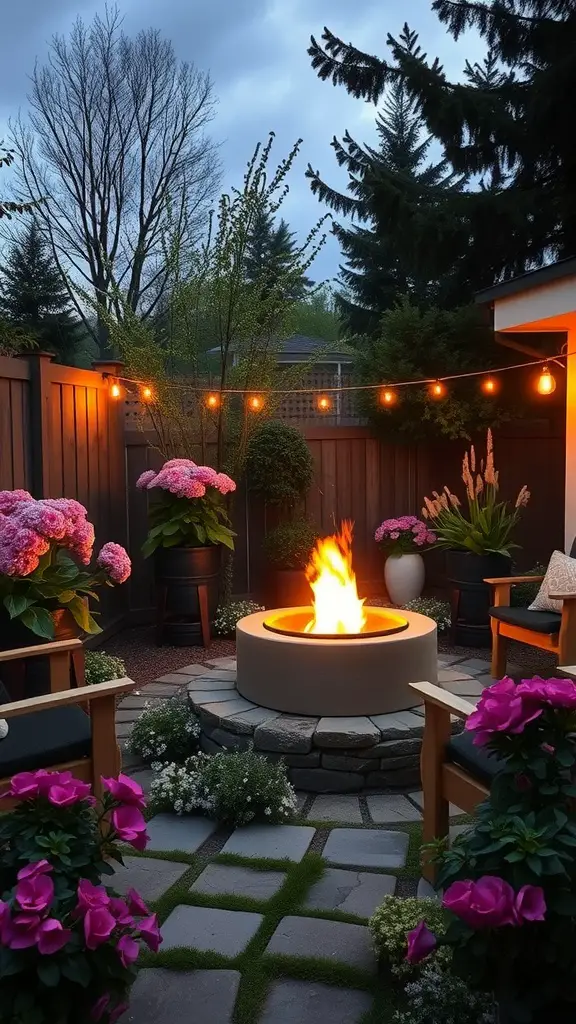
Garden Fire Pit Area
A backyard fire pit creates a welcoming outdoor haven. Picture a spot for loved ones to connect, swap tales, and bask in the comforting glow of a fire.
The picture showcases a stunning fire pit with cozy seating around it. This circular fire pit offers ideal warmth and illumination. Natural stones encircle it, creating a seamless blend with the garden’s aesthetic.
Potted flowers bring a burst of color to this inviting space. String lights cast a warm, gentle glow overhead. It’s perfect for evening get-togethers. More than just a fire pit, it’s a delightful outdoor living area, updated for 2025.
Design your dream fire pit space by first selecting a secure spot, far from anything that could catch fire. Build the pit using stones or bricks. Then, arrange comfortable seating around it. Finally, enhance the ambiance with plants and lighting for a truly enchanting retreat.
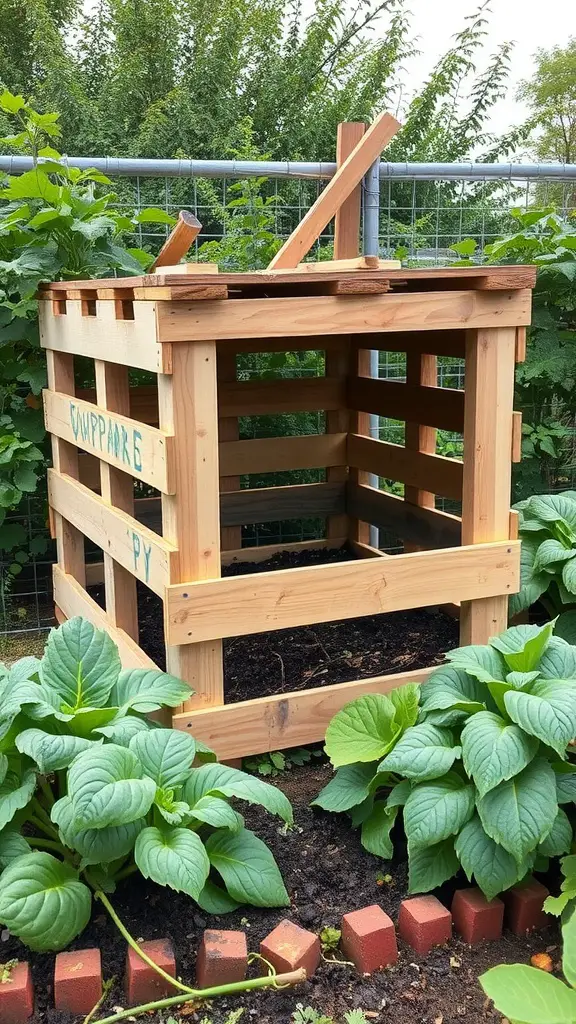
Compost Bin Made from Pallets
Building a compost bin using wooden pallets offers an easy and eco-friendly solution for recycling kitchen and yard waste. This method also significantly improves your garden soil quality. The picture displays a robust, open-style compost bin constructed from pallet slats. This design promotes excellent airflow and provides convenient access to the composting material within.
Pallet composting is a fantastic DIY solution for eco-conscious gardeners. It’s perfect for handling kitchen scraps and garden waste. The pallet’s open structure ensures excellent airflow, vital for efficient composting. Easily compost vegetable peels, grass clippings, and other organic materials.
Positioning your compost bin in a sunny location accelerates decomposition. Think about your garden’s design when choosing the ideal spot. Adding colorful plants around the bin, like in the picture, enhances its appearance and supports a healthy composting environment.
Constructing this type of compost bin is generally budget-friendly, particularly if you can obtain pallets without cost. Ensure they are firmly fastened to maintain their structure and operate efficiently for many years.
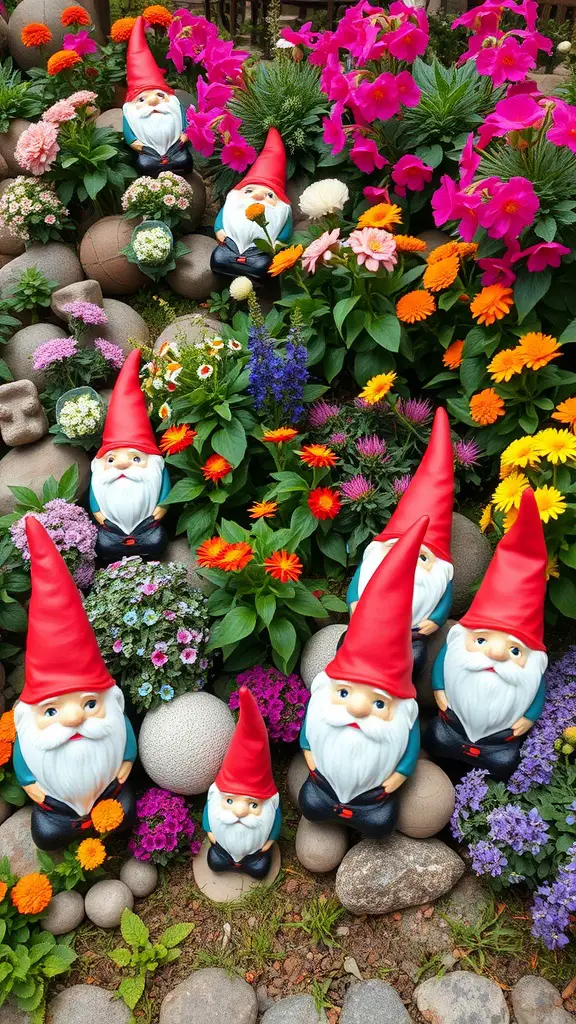
Gnome Garden Decor
Garden gnomes inject fun and fantasy into your 2025 outdoor haven. These delightful characters, known for their iconic red hats and happy faces, instantly liven up your garden. They create a warm and inviting ambiance for all to enjoy.
The image showcases charming gnomes surrounded by colorful blossoms. The flowers, with hues of pink and yellow, create a joyful and vibrant setting. This delightful combination enhances the garden’s appeal and makes it feel welcoming.
Garden gnomes offer versatile placement options. Consider positioning them by vibrant flower beds. They also work well along garden paths, offering a cheerful welcome. Gnomes can become engaging focal points, sparking conversations with guests in your outdoor space.
Crafting personalized gnome garden decorations is a breeze! Begin by picking out gnomes that you adore. Next, select vibrant plants and blossoms to complement them. Think about incorporating pebbles or ornamental containers to enrich the visual appeal. With minimal effort, you can design an enchanting gnome garden that showcases your unique style and enhances your outdoor area.
Repurposed Glass Bottle Edging
Transform your garden with repurposed glass bottles as unique edging! The image showcases colorful bottles nestled amongst lush greenery. This adds vibrant color and defines your garden beds with a creative border.
Begin by collecting diverse, empty glass bottles. Consider using soda, wine, or any visually appealing glass bottle. Ensure they are thoroughly cleaned and all labels are removed.
Begin by creating a shallow trench where you plan to install your edging. Position the bottles in the trench, necks pointing up. For a fun, vibrant aesthetic, mix and match bottle colors. Alternatively, use a consistent color scheme for a unified appearance. Firmly pack the soil around the bottles to ensure they remain secure and upright.
Transform your garden with this unique, eco-friendly DIY project! It repurposes materials and adds a personal touch. It’s sure to spark conversations with guests. The sunlight reflecting off the glass creates a beautiful, welcoming ambiance. Enjoy the warm, inviting atmosphere!
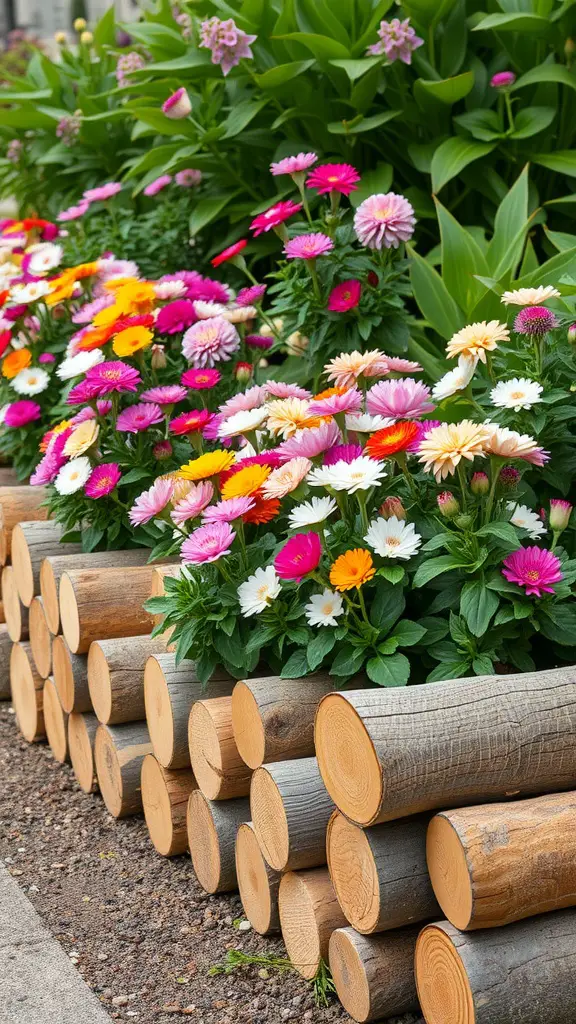
Flower Bed Edging with Logs
Log edging offers a delightful, rustic touch to your flower beds. In 2025, this natural wood look remains a popular choice. It complements colorful blooms perfectly, adding a cozy and welcoming feel to any garden.
This vibrant image showcases a neat row of colorful flowers in full bloom. Logs create a beautiful border, effectively containing the soil. This rustic touch enhances your garden’s charm. The blend of natural textures and vibrant blooms revitalizes any garden space.
Crafting your own log edging begins with choosing logs of comparable dimensions. Position them next to each other, partially embedding them in the ground for added steadiness. This straightforward DIY project elevates the aesthetic appeal of your garden beds and maintains a neat appearance.
Elevate your garden’s appeal by combining diverse flower varieties. The rustic charm of logs beautifully contrasts with vibrant blossoms, accentuating each flower’s unique allure. This engaging DIY endeavor injects character into your outdoor haven, creating a personalized and visually stunning display.
Yearning for that perfect cup of coffee in the comfort of your own home? You’re in luck! Discover 19 updated home cafe ideas to transform your space into a cozy haven. Explore DIY decorations and easy drink recipes. These tips will inspire you to create a delightful cafe experience, all without stepping outside your door.
Bright and Airy Sunlit Coffee Space
Picture yourself entering a bright and welcoming coffee shop. Expansive windows flood the space with natural light, crafting a cheerful ambiance. This design elevates every coffee experience, perfect for solo moments or gatherings with friends.
This open space is ideal for unwinding or focusing on tasks. Natural wood furniture brings the outdoors in. A few indoor plants add vibrancy. Imagine enjoying your coffee surrounded by greenery. It’s a mood booster and a refreshing break.
Think about adding a small table close to your windows. This creates the perfect place to savor your coffee or tea while enjoying the scenery. The blend of natural light and a delicious beverage can transform any day into something special.
This space is ideal for hosting gatherings. A wooden table provides a central point for guests to connect and share moments over coffee. The cheerful atmosphere fosters engaging conversations and joyful laughter, creating the perfect social hub.
Colorful Coffee Cart on Wheels
A vibrant, wheeled coffee cart injects fun into your home cafe setup. It transforms your coffee routine into a delightful experience, creating a warm and welcoming ambiance.
This vibrant cart, featuring a bright orange top and colorful mugs, simplifies coffee storage and display. Envision having all your preferred brewing tools and ingredients readily accessible!
This versatile cart brings convenience to any space. Easily move it between rooms, ideal for hosting or enjoying a peaceful coffee break. Personalize your coffee setup while maintaining a tidy and organized area.
Personalize your coffee cart with a small plant or unique decor. This adds warmth and charm. More than just practical, this cart elevates your kitchen. It also transforms your daily coffee routine into a delightful experience.
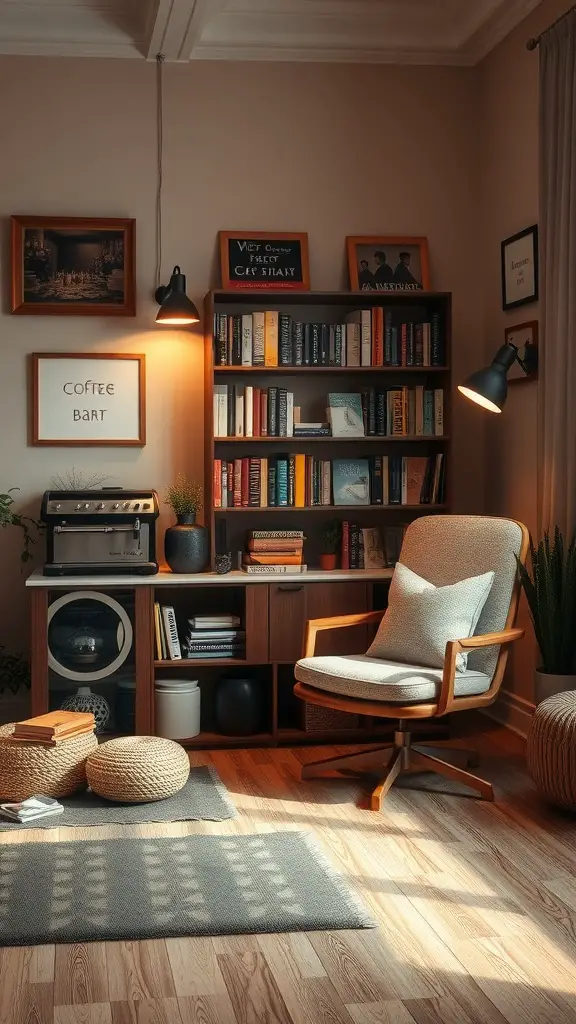
Cozy Reading Nook with Coffee Bar
Picture a haven where relaxation sparks innovation. Envision a snug reading corner paired with a custom coffee station. This arrangement encourages you to relax with a captivating book, all while enjoying your preferred coffee.
This room includes a comfortable chair. It’s perfect for relaxing with a good book. Gentle lighting creates a cozy ambiance. This makes it a great place for evening reading. A convenient coffee bar is close by. It’s ready to prepare tasty beverages. It has all the essentials for your perfect morning routine.
Walls are adorned with bookshelves, brimming with untold narratives. Carefully chosen ornaments inject character, fostering an inviting ambiance. Sunlight pours in, accentuating the comforting textures of plush rugs and welcoming cushions. More than just a place to read, this corner offers a personal retreat.
Transform your reading nook with a dedicated coffee bar for an enhanced experience. Enjoy easy access to your preferred beverages, be it a rich espresso, a creamy cappuccino, or a comforting tea. With snacks nearby and a cozy blanket, you can fully unwind in this delightful space, leaving your stress behind.
Vintage Tea and Coffee Display
Elevate your home’s ambiance with a vintage tea and coffee display. Imagine a rustic wooden table. It’s decorated with vibrant, assorted tins. Each tin holds unique teas and coffees. This charming setup is visually appealing. It also provides a lovely reminder of life’s simple joys.
Picture perfectly organized canisters, each with a stylish label. Some stand upright, others lean casually, creating a welcoming atmosphere. Vintage designs bring back fond memories. They remind us of a time when coffee and tea were made with attention and shared with affection.
Brighten your space with a few fresh flowers near this charming setup. This adds natural beauty and a welcoming feel. The tins’ rustic colors paired with the flowers’ lively hues create a comforting vibe. It’s ideal for savoring your favorite tea or coffee.
Adding vintage pieces to your home café showcases your passion for coffee and tea. It also creates engaging conversations. Your guests will appreciate the unique collection and might ask about your preferred brews. This simple approach enhances your home’s warmth and celebrates the charm of vintage design.
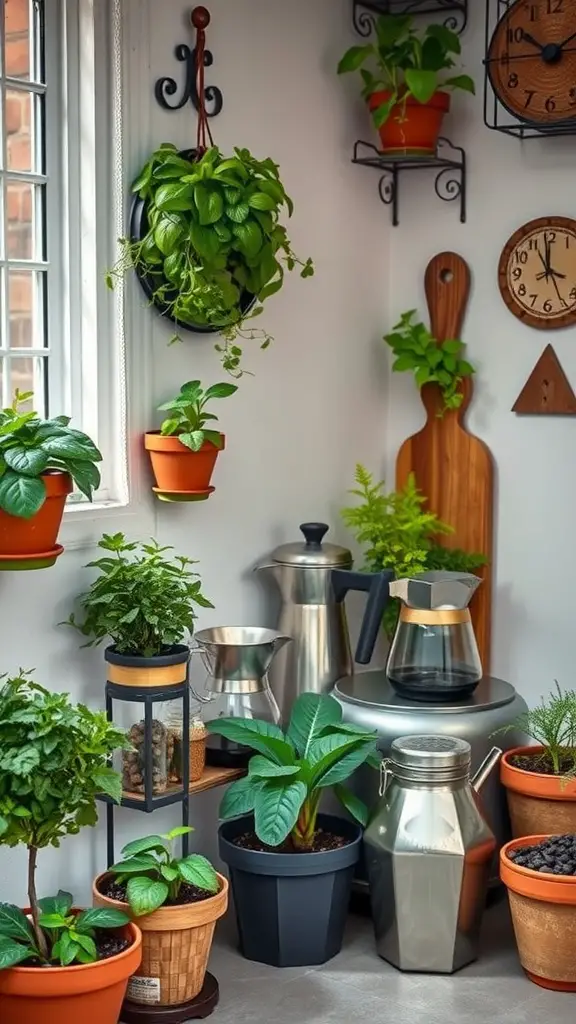
Herb-Infused Coffee Corner
Imagine a revitalized coffee corner, now a haven of herbal infusions. This inviting space offers unique coffee blends crafted with the freshest herbs. Picture yourself entering a cozy nook, alive with vibrant plants. These plants not only brighten the area but also enhance your coffee journey in 2025.
This image presents an inviting scene. Potted herbs, including mint and basil, are carefully displayed in diverse containers. Their vibrant green foliage brings a revitalizing element, transforming your coffee area into a small indoor oasis. A stylish stovetop brewer and a glass carafe suggest the delicious coffee you can prepare.
Infuse your daily coffee with exciting herbal notes! Select your preferred herbs and steep them in hot water. Then, blend this infusion with your freshly brewed coffee. Discover your ideal flavor combination through experimentation. This is a delightful method to customize your coffee experience and appreciate nature’s essence within your living space.
Rustic Coffee Station with Open Shelves
Picture this: you walk through your door and are immediately welcomed by a cozy, rustic coffee station. This design prioritizes both practicality and visual appeal. Open shelving displays a curated selection of white mugs, creating a crisp, clean aesthetic against the backdrop of rich, warm wood.
Coffee beans in glass jars line the shelves, prepared for your perfect brew. These jars maintain freshness and add a stylish look. Think about adding labels for a customized feel!
Below, two coffee carafes sit neatly on the counter. They offer effortless coffee service for guests or loved ones. This simple design is welcoming. It inspires you to relax and savor the coffee-making experience.
Embrace the rustic charm with natural elements like wooden shelves and hand-woven baskets. Overhead lighting casts a warm glow, creating a cozy atmosphere. More than just a spot for coffee, this station is a personal retreat to unwind and enjoy every moment.
Artisanal Coffee Tasting Bar
Crafting a bespoke coffee tasting experience in your own home is a delightful journey into the world of coffee. Envision a comfortable space where you can brew and savor a range of unique coffee varieties. Recreate the ambiance of your favorite café, all within the familiar setting of your kitchen.
This photo presents an inviting coffee bar setup. Notice the diverse coffee cups, all prepared for sampling delicious, fragrant coffees. Above, chalkboard menus detail coffee origins and flavor profiles. Enjoy learning about coffee as you savor each sip.
Begin your coffee journey by hand-picking select beans from diverse regions. Consider a bright, floral Ethiopian light roast or a robust Brazilian blend. Grind your chosen beans right before brewing to maximize freshness. Employ a pour-over or French press to unlock the full flavor profile. Precision is key, so keep a scale nearby for accurate measurements.
Savor each coffee, noting its unique flavors and aromas. Create tasting sheets for loved ones, inviting them to share their thoughts. This is a fantastic way to spend an afternoon, connecting through your mutual passion for coffee.
Elevate your coffee enjoyment by creating a curated tasting bar. This transforms your daily ritual into a special event. It’s ideal for weekend relaxation or any time you desire a premium coffee experience at home.
Minimalist Espresso Setup
Elevate your home coffee ritual with a minimalist espresso setup. Picture a stylish espresso machine, where form meets function seamlessly. This setup boasts refined lines and a metallic sheen, enhancing your kitchen’s contemporary vibe.
This machine boasts an intuitive design, ensuring effortless operation. No barista skills are required to create exceptional espresso. Simple, quick-adjust buttons streamline the process. Its uncluttered aesthetic highlights the equipment’s elegance, making it a stunning addition to your kitchen in 2025.
Next to the espresso machine, you’ll find a sleek kettle and a coffee grounds container. These additions amplify the minimalist aesthetic. The kettle’s design complements the machine beautifully. The container ensures your coffee stays fresh and accessible. This arrangement is both visually appealing and streamlines your coffee preparation.
Transform your home cafe with a minimalist espresso setup and enjoy exceptional coffee every day. Embrace simplicity and elegance to focus on the pure pleasure of your favorite brews. Whether you’re a seasoned coffee lover or new to the world of espresso, this streamlined approach will enhance your coffee ritual.
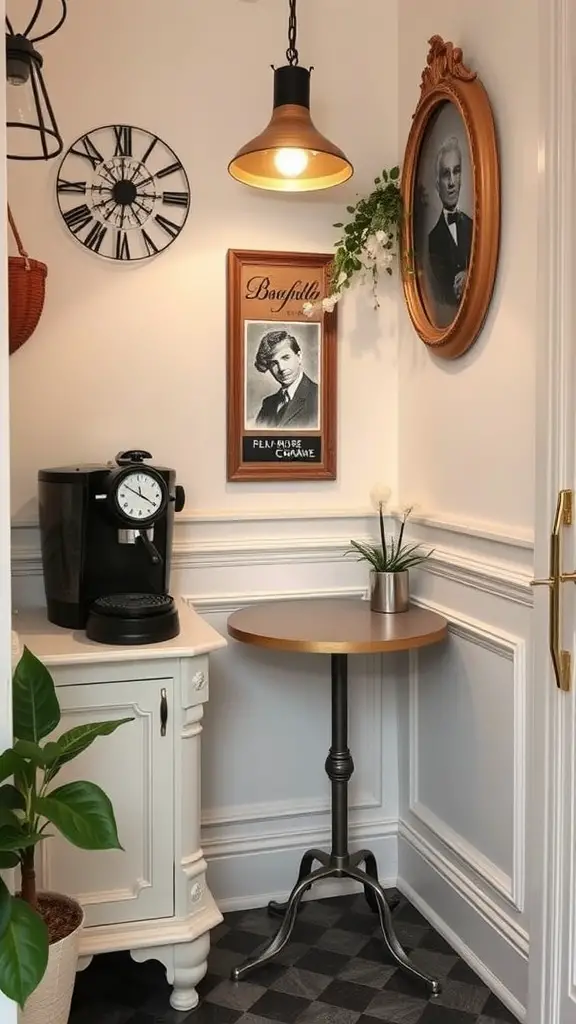
Chic Parisian Café Feel
Picture yourself entering a warm, inviting space. It feels like a quaint Parisian café. Vintage touches meet minimalist design. This creates a relaxing atmosphere. It’s perfect for savoring a delicious coffee.
The classic black and white palette, paired with inviting warm wood accents, establishes a cozy ambiance. A modern espresso machine takes center stage on a side table, prepared to craft your daily coffee. This arrangement is both practical and undeniably chic, offering a seamless blend of form and function.
Observe the wall décor. Portraits and a vintage clock whisper tales of the past. These details inject personality and allure, transporting you to a quaint Parisian café. A small plant graces the table, adding a touch of nature and vitality to the setting.
This cozy nook is ideal for savoring a delicious treat while diving into a good book or connecting with loved ones. Its blend of sophistication and ease offers a delightful space to unwind, transforming it into your personal sanctuary at home.
DIY Coffee Mug Wall Display
Crafting a personalized coffee mug wall display offers a delightful method to exhibit your cherished mugs. It also injects personality into your home coffee area. The picture vividly presents a wall adorned with diverse mugs, each boasting unique colors and patterns. This vibrant arrangement provides functional storage and elevates your room’s aesthetic appeal.
Begin by collecting your favorite coffee mugs. These could be travel mementos, cherished presents, or simply mugs that bring you joy. Then, acquire robust wall hooks or a grid panel to ensure secure mounting. Arrange the mugs in a visually pleasing manner. Consider mixing colors or grouping them by design for an appealing display.
With your display ready, it transforms your cafe into a vibrant hub. Picture yourself savoring your morning coffee, captivated by this delightful setup. It sparks engaging conversations and inspires you to explore diverse drink options. Furthermore, this easy project allows for personalization, perfectly matching your unique taste and available area.
Personalized Coffee Recipe Board
Craft a unique coffee recipe board to elevate your home café experience. More than just a menu, it showcases your passion for coffee. Share personalized recipes with loved ones and guests in a delightful way.
The chalkboard displays unique coffee names with fun descriptions. Each drink has its own personality, inspiring customers to explore new flavors. Playful names like “Bake a Claffe” and “Spinl and Pofee” spark curiosity and smiles.
Craft your personalized recipe board using a sizable chalkboard and vibrant chalk. Document your go-to coffee recipes or invent amusing names. Incorporate ingredients and brewing instructions. This creates a convenient reference for anyone visiting your café.
Personalize your coffee station with unique elements. Think doodles or inspiring coffee quotes! This transforms it into a functional art piece. The frame’s warm wood enhances the cozy atmosphere. It creates an inviting coffee corner for all enthusiasts.
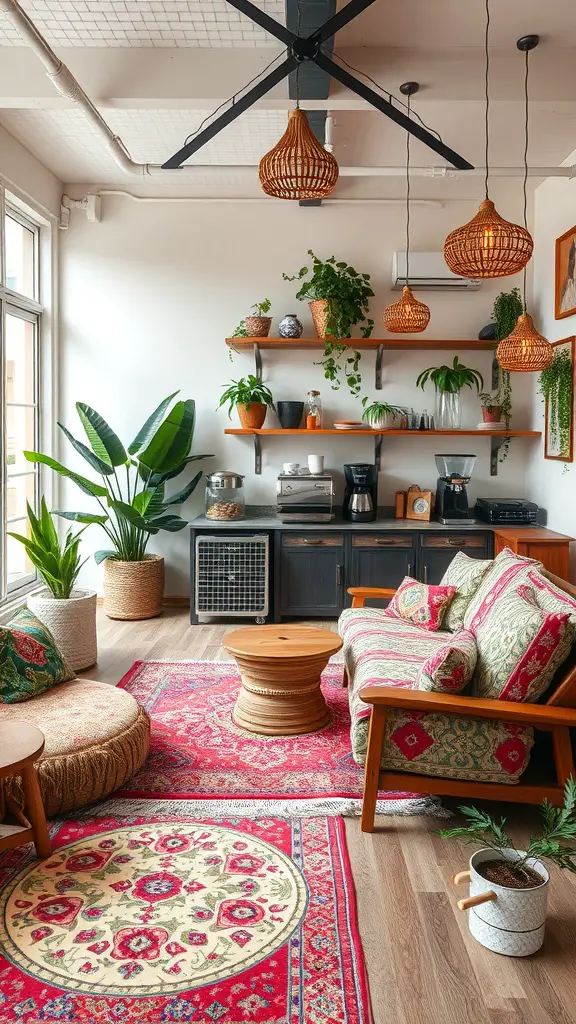
Bohemian Coffee Lounge
Transforming your space into a Bohemian coffee haven is about blending comfort and unique style. The image presents a welcoming area, rich with lively colors and organic textures, perfect for unwinding. This setting is designed to enhance your coffee experience, allowing you to savor each sip in a relaxed and inspiring environment.
Begin with a cozy seating arrangement. The circular cushions and vibrant rugs pictured provide an ideal space for relaxation. Seek out comfortable furniture that showcases your unique style, whether it’s retro treasures or contemporary designs. Combining diverse textures and hues will establish a welcoming and snug atmosphere.
Introduce plants to revitalize your space. The vibrant greenery enhances the room’s aesthetic and purifies the air. Opt for low-maintenance options such as snake plants or pothos for lasting freshness.
Infuse your personality with art and decor. Showcase cherished mugs or books on shelves. A chic coffee station enhances aesthetics and organization. The goal is a uniquely personal space. Let every corner reflect your story in 2025.
Smart Coffee Brewing Station
Elevate your home cafe with a smart coffee brewing station. Envision waking up to freshly brewed coffee with a simple touch. The stylish machine pictured makes this dream a reality, updated for 2025.
This coffee maker boasts a sleek, contemporary design and a user-friendly interface. It provides multiple features to streamline your coffee preparation. The touchscreen lets you select various coffee styles and customize settings to your liking. Schedule brewing for a specific time, ideal for hectic mornings.
This configuration frequently features extra compartments for coffee beans and milk. This design streamlines your coffee preparation by keeping all essentials readily available. The glass carafe elegantly displays the freshly brewed coffee, enhancing your kitchen’s aesthetic. Furthermore, a designated area for coffee accessories promotes a tidy and efficient workspace.
If you love to experiment, a smart brewing station offers diverse brewing options. Enjoy drip, pour-over, or espresso with the right tools. Easily explore your coffee journey!
Outdoor Coffee Patio Setup
Picture yourself enjoying your preferred coffee in a comfortable outdoor setting. An outdoor coffee patio offers a personal haven of peace. A carefully planned design transforms it into a welcoming spot for relaxation and chats.
This arrangement showcases a minimalist wooden table paired with chic chairs. The natural materials create a seamless connection with the outdoors. It’s an ideal place to soak up the sun or relax in the shade. Several potted plants introduce a refreshing green element, elevating the ambiance.
Suspended plants above the table infuse vibrant energy. They form a leafy ceiling, gently softening the room’s ambiance. These additions beautify the area and foster a revitalizing setting for your coffee breaks.
This patio is your ideal spot for a relaxing weekend brunch or a peaceful afternoon break. Enhance it with comfy cushions and a stylish vase to reflect your personal taste. And remember to bring your preferred coffee to savor in this welcoming outdoor haven!
Coffee Art Gallery Wall
Elevate your space with a coffee-themed gallery wall! Display framed prints boasting witty coffee quotes and delightful artwork. This easy decor update instantly turns your home coffee bar into a warm, welcoming haven.
This image showcases a chic display of coffee-inspired art. Each framed piece features a distinct design, ranging from fun sayings to creative coffee cup illustrations. This diverse collection injects personality and coziness into the space, creating an eye-catching wall feature.
Crafting a personalized coffee-themed art wall is a fun project. Begin by collecting prints that resonate with your taste. Discover complimentary downloadable art online, or support local artists by buying their original works. Arrange your chosen pieces to create a balanced and attractive display. Feel free to combine various art styles and print sizes!
Enhance the visual appeal by installing LED strips or spotlights above your frames. This will accentuate your coffee-themed artwork and establish a warm, inviting atmosphere in the evenings. With these easy additions, your gallery wall will undoubtedly spark engaging conversations with guests.
Want to bring nature indoors? Discover 17 inspiring terrarium ideas to design your own tiny green paradise. Explore classic styles and unique themes. Find the perfect fit for your taste and home. Get started and enjoy these engaging, imaginative terrarium projects!
Desert Landscape Terrarium
Bring the stark beauty of the desert indoors with a captivating terrarium. Imagine a glass vessel showcasing layered sand, small stones, and miniature rocks. This arrangement replicates the natural habitat for succulents and cacti. It’s a beautiful and informative display, perfect for any home in 2025.
This terrarium showcases diverse succulents, perfectly adapted to arid environments. Their vibrant green colors pop against the sand’s natural, earthy shades. This striking contrast delivers a visually appealing and dynamic display.
Desert terrariums offer a key advantage: low maintenance. Succulents excel at water storage, reducing the need for frequent watering. Simply provide sunlight, and your terrarium thrives. This makes them ideal for beginners or those with demanding schedules.
Crafting your personal desert terrarium is easy! You’ll need a glass container, layers of sand and pebbles for drainage, and a variety of small succulent plants. Arrange these elements to achieve a balanced and visually appealing design. Consider adding decorative rocks for an enhanced aesthetic touch.
Hanging Glass Orb Terrarium
Elevate your indoor garden with a hanging glass orb terrarium. This captivating design showcases a clear, spherical container, offering a full view of its miniature world. Ideal for displaying petite plants or decorative pebbles, it adds a touch of elegance and tranquility to any space. It’s a modern and stylish way to bring nature indoors.
The terrarium, showcased in the picture, hangs gracefully, highlighting its intricate design. Trailing vines spill from the glass sphere, amplifying its organic charm and creating a captivating centerpiece for any space. Beyond aesthetics, these plants promote a fresher, healthier atmosphere indoors.
Creating a hanging glass orb terrarium is easy! First, add a layer of small pebbles for drainage. Next, use activated charcoal to maintain fresh air. Then, incorporate potting soil and select your plants. Tiny ferns or succulents are excellent choices. Finally, enhance the look with decorative stones or moss. After assembly, hang your terrarium in a spot with indirect sunlight.
Open terrariums are fantastic conversation pieces, bringing a slice of nature indoors. They’re also incredibly easy to care for, perfect for today’s fast-paced lives. Enjoy observing your plants flourish in their miniature glass ecosystem!
Miniature Fairy Garden Terrarium
Imagine a miniature fairy garden terrarium – a portal to an enchanting, tiny realm. This delightful scene showcases charming little homes nestled amongst lush green moss and vibrant blooms. Playful details, like miniature figures and a meandering pathway, inject a whimsical spirit that ignites creativity.
Observe closely! You’ll discover miniature fairies and charming animals living their lives. Vibrant hues, such as the pink flowers and joyful butterflies, craft a captivating vista. It’s sure to brighten any room. These terrariums are ideal for desks or shelves. They bring a hint of the outdoors inside.
Crafting a miniature fairy garden terrarium is an enjoyable and personalized activity. Select your preferred figurines, plants, and embellishments to create a truly unique display. It’s an excellent avenue for creative expression and offers a tranquil experience while connecting with nature in 2025.
Aquatic Plant Terrarium
Building an aquatic plant terrarium is a rewarding experience. It blends lively plants with a hint of underwater charm. The picture showcases a stunning terrarium. It features bright, artificial plants and a happy goldfish swimming within.
Vibrant pink and orange flora inject a burst of energy, enlivening the terrarium. Diverse textures, ranging from sleek stones to plush moss, craft a captivating visual panorama. These features emulate a tranquil aquatic setting, fostering a sense of peace and relaxation.
Creating your own aquatic plant terrarium is easy! Begin with a clear glass container. First, add a layer of pebbles for good drainage. Next, put in your soil. Select a variety of aquatic plants that love moisture. You can even add a small fish for added life. Remember to keep the water clean. Also, ensure the plants get enough light to grow well.
Mossy Forest Terrarium
A moss terrarium brings the beauty of a vibrant forest indoors. This tiny, self-contained world uses lush moss and natural materials. It creates a peaceful and refreshing ambiance in your living space.
Observe a lush moss carpet in this image. It forms the base of this miniature scene. Its vibrant green shades evoke a forest floor, bringing a refreshing touch of nature inside.
Fragile twigs are artfully arranged amidst the moss, enhancing the terrarium’s height and form. These branches mirror actual forest trees, creating a sense of profound depth and unique personality. Tiny leaves emerge from the branches, symbolizing fresh beginnings and ongoing development.
Creating a moss terrarium is now even easier! You’ll need a glass container, small drainage pebbles, potting soil, moss, and natural decorations like twigs or tiny plants. First, create a drainage layer with pebbles. Next, add soil to plant your moss and other plants. Finally, add branches for a realistic forest look. Regular misting keeps your moss hydrated and flourishing.
Air Plant Terrarium
Crafting an air plant terrarium offers a simple, enjoyable method to introduce verdant life into your home. These plants need minimal upkeep. Air plants, scientifically known as Tillandsia, stand out because they thrive without soil. They efficiently gather hydration and nourishment via their foliage, rendering them ideal for terrarium environments.
This image presents a stunning air plant terrarium. Its transparent glass offers a clear view of the plants within. The driftwood accent introduces a natural element. The diverse textures – sleek glass, rugged wood, and sharp greenery – deliver captivating visual interest.
Crafting your own air plant terrarium is easy! Begin with a transparent glass container. Add decorative touches like stones or driftwood. Arrange your air plants attractively. Consider mixing different air plant types for visual interest. Position your terrarium in a location with bright, indirect light.
Hydrating air plants is straightforward. Submerge them in water for 20-30 minutes weekly. Post-soaking, gently remove excess water. Allow them to dry inverted to avoid decay. This simple process makes air plants ideal for novices or those wanting to add greenery to their living space.
Cactus Garden Terrarium
Bring the beauty of the desert indoors with a cactus garden terrarium! These delightful miniature ecosystems are simple to maintain and add a touch of charm to any space. This image features a diverse collection of cacti, artfully arranged with colorful sand and decorative stones.
This terrarium showcases a captivating arrangement. Tall, spiky cacti stand beside shorter, round varieties, offering a striking contrast. This diverse mix of forms enhances the visual interest and brings the terrarium to life. The vibrant sand colors—pink, yellow, and orange—create a joyful and eye-catching landscape.
Cactus terrariums are incredibly easy to care for, which is a major plus. Cacti flourish in arid environments, meaning you rarely need to water them. Simply provide some sunlight and check on them periodically to ensure their well-being.
Personalize your terrarium with decorative touches like stones or vibrant beads. Let your creativity shine! Experiment with various sizes and colors to complement your environment. The charming decorations in the picture, including small round beads and distinctive stones, illustrate how to create a truly unique terrarium.
Zen Garden Terrarium
Embrace serenity with a Zen garden terrarium. This 2025 design trend emphasizes simplicity and peace. Its clean lines and natural components create a calming atmosphere, perfect for any modern home or office.
This image showcases a tranquil scene with fine sand, polished stones, and delicate plants. Each component is thoughtfully arranged, creating a soothing visual experience. The sandy expanse evokes images of tranquil shores, and the strategically positioned stones form a subtle pathway, directing your gaze across the composition.
Adding plants, such as small ferns and succulents, breathes life into the terrarium. These green additions beautify the display and amplify its calming presence. The soothing energy is almost palpable.
Crafting your personal Zen garden terrarium is now even easier! Begin by choosing the perfect container. Next, create a base layer using fine sand. Arrange stones to design serene pathways. Finally, add miniature plants that inspire tranquility. This enjoyable and calming project brings the beauty of nature right into your home.
Tropical Paradise Terrarium
Imagine a mini rainforest in your living space! A Tropical Paradise Terrarium offers exactly that. It’s a lively display of vibrant greenery and bright flowers. This setup beautifully recreates the charm of tropical environments.
Lush, oversized leaves form a vibrant green background in this image. Bold flowers burst forth in red, yellow, and pink hues, adding pops of color. This plant combination is visually striking and fosters a tranquil, relaxing environment.
Building your personal Tropical Paradise Terrarium is easier than you think! Begin with a transparent glass container. This showcases the distinct soil and plant layers beautifully. First, create a drainage base to manage extra water. Then, add a layer of quality potting soil. Select tropical plants such as peace lilies, bromeliads, and colorful flowering varieties to complete the scene. Position taller plants in the back and smaller ones up front for a visually appealing arrangement.
Gently water the plants. Position your terrarium in diffused sunlight for optimal growth. This miniature tropical ecosystem enhances any space. It’s also a fantastic conversation piece for visitors.
Seasonal Holiday Terrarium
Crafting a holiday terrarium is a delightful way to embrace the season. This terrarium bursts with festive joy and appeal. It showcases diverse ornaments, including shimmering baubles and a candy cane, all resting on faux snow. A miniature house is included, lending a warm, inviting feel to the display.
The vibrant hues of the ornaments – red, gold, and silver – create a striking contrast against the pristine white snow. This makes the display incredibly eye-catching. The ‘CRAM’ lettering adds a fun, festive touch, evoking the happiness of the holidays. The clear glass container beautifully displays the decorations and offers a perfect view from every direction.
Crafting your own holiday terrarium in 2025? Add unique personal elements! Think family photos or tiny, meaningful gifts. Combine diverse textures. Use faux snow and various greens for added depth. This fun project is perfect solo or with loved ones. Create lasting memories while crafting together!
Repurposed Container Terrarium
Upcycled container terrariums offer a delightful and innovative approach to reusing old materials. The terrarium pictured features a beautiful glass dome resting on a minimalist metal base, giving discarded items a fresh purpose.
This glass dome functions as a miniature greenhouse. It maintains a humid atmosphere, perfect for succulents and tiny ferns. Observe the stunning blend of verdant plants and decorative stones within, introducing a natural element. The subtle accents, such as the twine and pinecone, infuse personality into the display.
Repurposing items for terrariums is a fantastic way to be eco-friendly! Look around your home for potential containers. Jars, bowls, and even discarded lightbulbs can be transformed into stunning miniature gardens. Make sure your chosen container allows light to reach your plants and offers sufficient drainage.
Gather your supplies: select your plants, incorporate potting mix, and top with decorative pebbles. Position the plants carefully for visual harmony. This straightforward method allows you to express your style while supporting sustainability.
Layered Soil Terrarium
Crafting a layered soil terrarium offers a charming method to cultivate a miniature garden within a glass vessel. This image presents a stunning illustration, displaying diverse strata of soil and stones harmoniously uniting to nurture flourishing plants. Each layer fulfills a specific function, collectively enhancing the terrarium’s well-being and visual appeal.
The base layer usually contains larger stones or gravel. This ensures proper water drainage. A layer of activated carbon can then be added. This prevents unpleasant smells and keeps the terrarium fresh. The soil layer is next, providing a place for plant roots to grow. This blend of textures and colors is visually appealing and promotes healthy plant development.
Observe a diverse collection of plants within this terrarium. Each plant adds unique charm to the display. They are strategically arranged to flourish collectively, creating a balanced ecosystem. This design enhances visual appeal and simplifies plant care.
Select suitable plants for your layered terrarium. Succulents and small ferns are excellent choices. They flourish in enclosed environments and need little care. Building a layered soil terrarium is enjoyable and fulfilling for all skill levels, from novice to expert.
Vintage Jar Terrarium
Seeking a delightful method to infuse natural beauty into your living space? Consider a vintage jar terrarium. These terrariums offer a unique opportunity to cultivate a miniature garden, ideal for display on shelves or tables. The featured image presents a beautifully crafted terrarium within a timeless glass jar, adding a nostalgic charm to your interior design in 2025.
This terrarium showcases a curated collection of miniature plants, like succulents, carefully arranged within layers of soil and decorative pebbles. This design enhances visual appeal and ensures proper water drainage. The natural hues of the earth and stones beautifully contrast with the lively green plants, resulting in a harmonious and visually pleasing aesthetic.
Creating a vintage jar terrarium is easy! You’ll need a clean glass jar, small stones, potting mix, and tiny plants. First, put a pebble layer at the jar’s base for drainage. Then, add potting mix, ensuring it’s deep enough for your plants’ roots. Lastly, plant your succulents and decorate with stones for a polished look.
After assembly, position your terrarium where it receives filtered sunlight. Water infrequently; succulents prefer drier environments. This low-maintenance setup enhances your decor and showcases your unique aesthetic.
Botanical Succulent Terrarium
Want to infuse your living space with natural beauty? A succulent terrarium offers a trendy and low-maintenance solution. These arrangements showcase diverse succulents, celebrated for their easy care and captivating forms. The image displays a lively assortment of succulents, each contributing unique textures and colors. The blend of greens, pinks, and blues results in an eye-catching and welcoming display.
Begin your succulent terrarium journey by choosing a clear glass container. This allows for optimal viewing of your miniature garden. Create a drainage layer with small rocks at the base. Then, add a suitable potting mix. Select succulents with appealing colors and shapes. Plant them carefully, ensuring adequate spacing. Enhance the terrarium with decorative elements like pebbles or pinecones for added visual interest.
Position your terrarium in a bright location with indirect sunlight. Watering is easy! Simply water your succulents when the soil is dry to the touch. With minimal effort, your succulent terrarium will flourish, bringing a touch of nature to your home in 2025.
Themed Character Terrarium
Character-themed terrariums offer a fantastic outlet for your imagination. They blend tiny figurines and greenery, crafting vibrant narratives in miniature. This particular terrarium showcases characters on an exciting quest. They seem to be on an exploration, perhaps unearthing a hidden treasure. Each character infuses the scene with unique personality and delightful charm.
Tiny plants, such as moss and succulents, build a lively miniature scene. They’re simple to maintain and flourish inside a sealed space. The green foliage enhances the figures, giving the terrarium a complete, small-world atmosphere.
Crafting a character terrarium? Envision the narrative you want to showcase. Perhaps a cozy campsite, an exciting treasure quest, or a magical fantasy world. The options are limitless! Collect miniature figurines, select your preferred plants, and unleash your creativity.
Have spare cinder blocks and need inspiration? You’re in luck! This curated list features 25 updated cinder block project ideas for 2025. Discover practical and fun ways to use them, ranging from garden enhancements to stylish home decor. Get ready to transform your living spaces with these versatile and creative solutions!
DIY Fire Pit Design
Building your own fire pit is a fantastic project to elevate your outdoor living area. The picture showcases an inviting arrangement featuring a cinder block fire pit and comfortable seating. This design offers both practicality and a delightful, cozy atmosphere for your backyard in 2025.
Concrete blocks are ideal for this project. They offer durability and are simple to handle. Arrange them in a circle to create the fire pit’s walls. This setup ensures safety, contains the fire, and lets you fully appreciate the warmth and light.
Enhance your fire pit by adding gravel for better drainage and airflow. Personalize the space with decorative stones around the base. String lights can create a warm, inviting ambiance, ideal for memorable gatherings with loved ones in 2025.
Cinder Block Bookshelves
Concrete block bookshelves offer a simple and trendy solution for showcasing your book collection. This image presents a contemporary design, blending concrete blocks with greenery and books. The result is a cozy and welcoming ambiance.
Cinder blocks offer robust and reliable support for your book collection. Their modular nature allows for unique and personalized arrangements. Stack them creatively to perfectly fit your available space. The open design ensures your favorite reads are always within easy reach.
Incorporating greenery, similar to what’s shown, elevates the aesthetic. Plants introduce a natural element, breathing life into the bookshelf. Opting for compact pots and diverse plant sizes achieves a captivating visual harmony.
Looking for a bookshelf that’s both practical and eye-catching? This design is a fantastic way to spark conversations! Guests will admire its distinctive appearance. Customize it with your preferred colors and design elements. If you want to enhance your reading space in 2025, a cinder block bookshelf is an excellent choice!
Unique Pet Houses
Concrete blocks offer more than just building foundations. They can become amazing pet shelters! Envision a snug haven for your beloved animal, crafted from these adaptable blocks. The picture displays an adorable dog house made of concrete blocks. It’s a strong and secure space for your pet.
This pet house boasts a welcoming entrance, ensuring effortless access for your furry friends. Its extended roof offers excellent protection from both rain and harsh sunlight. Durable cinder block walls provide superior insulation, keeping your pet comfortable. This design is both functional and customizable, easily complementing your outdoor space.
Personalize the colors and add unique decorations to match your taste. A small pathway to the house, like the one pictured, enhances its charm. It’s an easy and affordable way to build a special haven for your pet.
Garden Pathway Ideas
Elevate your garden with a charming pathway! Cinder blocks offer a modern and functional solution for creating stepping stones. The featured image showcases a gracefully curved path, bordered by cinder blocks, adding a contemporary flair to any garden design.
Lush plants and diverse greenery border the path, enhancing its natural charm. Small pebbles fill the spaces between blocks, improving both the look and drainage. This design offers an easy garden walk, protecting the soil and minimizing mud in 2025.
Arrange your cinder blocks to mirror your garden’s natural contours. This creates an organic path that complements the landscape. Enhance its appeal by adding plants or garden art along the edges.
Design your garden path to be an inviting space for exploration. Try various layouts and materials to match your personal style. A thoughtfully designed path enhances your garden and makes it a more pleasant place to relax and enjoy.
Outdoor Bar Concept
Creating a welcoming outdoor bar is now easier than ever! This image showcases a modern outdoor bar built with durable cinder blocks. A stylish countertop completes the look. See how cinder blocks can be both practical and beautiful in 2025’s outdoor designs.
Two sleek black bar stools beckon guests to relax and savor a beverage. The bar’s design is functional, offering ample room for a grill and other necessities. This arrangement fosters easy socializing and backyard entertainment.
Nestled amidst lush foliage and a charming wooden fence, this bar seamlessly integrates with its natural surroundings. It’s an ideal setting for summer parties or relaxed weekend cookouts. Consider adding personalized elements such as vibrant plants or ambient outdoor lighting to elevate the overall ambiance.
Outdoor Seating Solutions
Crafting a welcoming outdoor retreat? Cinder blocks offer an excellent solution. Their durability and adaptability make them ideal for constructing stylish and functional seating arrangements.
This picture presents an inviting backyard scene with creative cinder block seating. The blocks are carefully arranged, creating a cozy, couch-like area perfect for outdoor relaxation. Vibrant cushions inject color, enhancing the space’s welcoming and cheerful atmosphere.
Picture yourself savoring coffee or diving into a captivating book on this distinctive seat. The included wooden table provides added convenience, ideal for holding beverages or treats. Lush greenery surrounds you, transforming the space into your private sanctuary.
Cinder block seating offers both practicality and a chance to express your style. Customize them with paint or decorations to complement your patio. Their simple assembly makes for an enjoyable weekend DIY project.
Creative Garden Planters
Cinder blocks make fantastic, budget-friendly garden planters! This image showcases a row of these blocks, each painted a unique pastel color. The result is a cheerful and welcoming outdoor display.
Concrete blocks offer robust and distinctive planters for your garden in 2025. Their hollow spaces are perfect for filling with soil and planting diverse flowers. This creates stunning floral displays with a unique architectural flair.
Explore using various cinder block sizes to achieve different heights in your garden. This adds depth and visual appeal, making your garden more engaging. Stack them creatively or arrange them in unique patterns for a playful garden element. Consider this updated approach for 2025 garden designs.
Vibrant blooms, such as daisies and zinnias, create a delightful contrast against the subtle shades of the cinder blocks, injecting joy into the garden. Furthermore, cinder blocks offer exceptional durability and weather resistance, ensuring a lasting solution for every gardener in 2025.
Raised Vegetable Beds
Elevated garden beds are an excellent choice for cultivating your own produce. They also enhance your garden’s aesthetic appeal. Constructing these beds with concrete blocks offers a durable framework. This design promotes optimal drainage and airflow for your plants.
This photo features a thriving raised garden bed bursting with lush green plants. Leafy greens flourish, demonstrating a robust and healthy ecosystem. The setup is both functional and visually pleasing, harmonizing seamlessly with the natural landscape.
Creating a cinder block raised garden bed is straightforward. First, choose a sunny location in your yard. Next, arrange the blocks into a rectangle, allowing space for walkways if needed. Then, fill the center with a good mix of soil and compost to feed your plants. This approach simplifies weed and pest control, while also maintaining consistent soil temperature.
Elevate your gardening game with raised beds! They bring order and style to any outdoor area. Tailor them to cultivate your favorite herbs, veggies, or vibrant blooms. Consistent watering and care promise a thriving garden and abundant yields in 2025!
Artistic Garden Sculptures
Concrete blocks are now being reimagined as vibrant garden art! Check out this creative display: painted blocks spelling out words. It’s a fun, artistic touch for any garden in 2025.
These blocks boast a gentle pastel palette, offering a visually appealing contrast against your lawn. This adds a touch of joy to your outdoor space. Experiment with different arrangements to express your unique style and design.
Incorporating floral backdrops, such as the vibrant yellow blooms shown, amplifies the vibrant ambiance. This arrangement encourages guests to stop and admire the fusion of nature and creativity. Explore diverse hues and designs to reflect your unique taste or garden concept.
Cinder block garden art is a fantastic way to inject personality into your outdoor space. These sculptures are eye-catching, unique, and sure to spark conversations. Plus, they’re easily customizable to perfectly complement your garden’s style.
Outdoor Workout Stations
Cinder blocks offer a unique and effective way to boost your outdoor fitness. This photo showcases a modern outdoor gym with diverse workout areas. The design promotes varied exercises, including both strength and cardiovascular training options.
This image showcases a workout structure featuring pull-up bars and a versatile exercise grid. It’s an innovative approach to leveraging cinder blocks for building strength. Integrate them into your routine for squats, step-ups, or as stable supports for diverse exercises. This setup is perfect for a 2025 fitness upgrade.
Elevate your 2025 fitness routine with cinder blocks! These robust and readily available tools inject fresh creativity into your workouts. Their versatility shines, offering diverse exercise options for your home gym or outdoor fitness area.
Cinder Block Fencing
Concrete block fencing remains a popular and practical option for property owners in 2025. It’s known for its strength and ability to enhance the look of any yard. The picture showcases a well-crafted concrete block fence. Its color scheme adds a touch of elegance.
This fence stands out with its blend of concrete blocks and decorative wrought iron. The sleek, black iron spikes at the top enhance its visual appeal while boosting security and seclusion. The robust block construction creates a strong perimeter, perfect for homes and businesses alike.
Cinder block fences are a smart choice because they stand up to tough weather. They avoid warping, rotting, and rusting, leading to easy upkeep. You can also paint them or keep their original look, tailoring them to your yard’s style.
Cinder block fences offer excellent value compared to conventional options. Their versatility allows for diverse designs, boosting your property’s curb appeal while providing security.
Vertical Garden Structures
Unleash your creativity with cinder blocks! Construct stunning vertical gardens that maximize space and enhance your surroundings. This image showcases a beautifully crafted cinder block vertical garden. Each block functions as an individual planter, enabling diverse plant life to thrive in a small footprint.
This setup is very attractive, showcasing lush greenery and colorful blooms. Notice how well each plant grows in its designated space, maximizing sunlight and adding visual interest. These vertical gardens are ideal for compact backyards or even apartment balconies.
Ready to build a cinder block vertical garden? First, pick a sun-drenched wall. Stack the blocks carefully, making sure they’re steady. Next, fill each opening with quality potting soil. Select plants that look great together. Think herbs, succulents, or vibrant small flowers to brighten your space.
Caring for this garden style is simple. Water the plants consistently and inspect them for pests. With minimal effort, your vertical garden will thrive. It will also become a beautiful highlight in your outdoor area.
Modern Retaining Walls
Cinder block retaining walls are a smart and attractive choice for your yard. They provide essential support for uneven terrain and bring a contemporary feel to your outdoor design. This picture highlights a well-built retaining wall that effectively manages soil and enhances the beauty of the adjacent garden. Updated for 2025, these walls remain a popular landscaping solution.
The crisp, modern lines of the concrete blocks offer a sophisticated aesthetic. This design enhances your outdoor space while ensuring structural integrity. Carefully selected plants, positioned along the wall, soften its rigid form, blending it seamlessly with the natural environment.
Cinder blocks offer diverse design options. Paint or stain them to match your taste. Alternatively, keep their raw look for a rustic feel. This wall makes a great garden backdrop. Adjust its height to perfectly fit your space.
Adding plants, such as vibrant grasses and flowers, injects life into your space. This blend of materials and greenery results in an appealing and lively landscape. Planning a cinder block retaining wall? Consider merging structural elements with natural beauty for a unified design.
Childrens’ Play Area
Transform your backyard into a dynamic kids’ zone with cinder blocks! Picture vibrant, playfully arranged blocks. These colorful structures spark imagination and encourage active fun.
This setup sparks children’s creativity. They can construct forts, design challenging obstacle courses, or use the blocks as seats for storytelling and group games. Cinder blocks offer limitless possibilities, ensuring kids stay engaged and entertained for hours.
Cinder blocks offer exceptional durability and safety for kids. Children can freely climb, jump, and play without fear of damaging them. This makes them a highly practical choice, easily enduring the boundless energy of active children. Consider adding soft mats around the blocks to further improve safety and comfort during playtime.
In 2025, a cinder block play area offers more than just fun for kids. It’s a dynamic space where they can unleash their creativity. This type of play fosters crucial social skills, boosts imagination, and enhances physical development.
Workshop Storage Solutions
Organize your 2025 workshop with ease using cinder blocks! The image showcases a robust shelving system built from these blocks. It’s perfect for storing your tools and materials efficiently.
This setup uses horizontally stacked blocks. These create open storage spaces. They are ideal for paint cans and tools. The design maximizes vertical space. It also provides easy access to your project essentials.
Above the concrete blocks, shelves overflow with containers and tools. This highlights the system’s adaptability. Use vibrant bins for small items. Find what you need quickly, avoiding clutter.
This affordable storage solution adapts to any workshop, big or small. Simply add plywood on top of the cinder blocks for a sturdy, organized surface. Maximize your space and maintain a clutter-free environment with this simple trick!
Mosaic walkways offer a fantastic way to inject creativity into your outdoor areas. Looking to enhance your garden path or design a distinctive entrance? Explore 29 inspiring ideas to ignite your imagination. Discover vibrant designs and understated patterns, ensuring something for every taste. Get inspired for your next DIY project!
Rustic Pebble Pathway
Imagine a charming rustic pebble path. It likely features smooth stones arranged for a natural look. This specific pathway displays a lovely collection of gray pebbles. Their diverse sizes and shapes bring unique character to the outdoor area. This design is trending in 2025.
This relaxed, yet organized design welcomes leisurely walks, perfect for gardens and yards. The stones’ gentle curves ensure comfortable footing. Furthermore, glimpses of dark soil add a delightful earthiness, boosting the rustic charm.
Pebble walkways offer an attractive and well-draining surface. Say goodbye to muddy footprints after it rains! When planning your path, consider how the pebbles will enhance your garden’s overall aesthetic. Think about coordinating with your existing plants and flowers for a cohesive look.
Crafting a charming pebble pathway is a rewarding DIY endeavor. Begin by preparing the ground and establishing a solid foundation. Next, arrange the pebbles in a pattern that resonates with your personal style. The finished pathway will be a distinctive addition, perfectly suited to your outdoor area.
Contemporary Minimalist Design
Minimalist design is a powerful trend for today’s outdoor areas. The walkway shown exemplifies this approach perfectly. Its crisp lines and understated color scheme create a serene and uncluttered atmosphere.
The strategic use of diverse white and gray tile tones crafts a subtle, yet distinctive pattern. This design promotes effortless wayfinding while adding a touch of artistic sophistication. Minimalist design, at its core, blends practicality with visual appeal, a principle perfectly embodied by this walkway.
Furthermore, the smooth surfaces bounce light, creating depth and visual interest. This enhances the aesthetic appeal and fosters a tranquil ambiance. Integrating these features into your outdoor living areas can convert them into welcoming and fashionable retreats.
Nature-Inspired Floral Designs
Mosaic pathways offer a natural aesthetic directly to your home’s entrance. This design exemplifies that concept perfectly. The walkway features vibrant floral motifs, mirroring the charm of real gardens. Every flower and leaf is meticulously constructed from diverse stones. This creates a lively and textured surface to walk upon.
Wander through the garden on this inviting, winding path. Discover the beauty of the outdoors as you explore. The vibrant, contrasting colors bring the walkway to life. It’s a stunning focal point in the landscape, updated for 2025.
Integrating these designs elevates ordinary walkways into stunning features. Think about mirroring the shapes of your garden’s flowers and foliage in your paving. This approach boosts visual appeal and establishes a unified garden design.
Classic Roman Mosaic Style
Timeless Roman mosaics offer a captivating glimpse into ancient artistry. This image features a breathtaking mosaic walkway, embodying classic Roman design principles. Its complex patterns and vivid hues encourage viewers to admire the artistry up close. This enduring style remains relevant and inspiring in 2025.
Walking along this delightful path, observe the swirling patterns that form a fluid design. The blend of subtle shades and vibrant colors enhances its depth and personality, transforming the walkway into a captivating centerpiece. Every tile is precisely positioned, echoing the dedicated craftsmanship of ancient Roman artists. This updated design reflects modern aesthetics while honoring timeless artistry.
The enduring appeal of this style is clear. A mosaic walkway instantly elevates a simple path into a stunning visual experience. It’s both practical and a beautiful addition to any outdoor area.
Think about adding similar designs to your outdoor spaces. A mosaic, whether in a garden path or patio, adds historical charm and elegance. It’s also a great way to spark conversations! Why not explore classical Roman mosaic designs to enhance your own outdoor area in 2025?
Zen Garden Mosaic Path
Elevate your backyard into a tranquil sanctuary with a Zen garden mosaic pathway. This picture highlights a stunning walkway crafted from diverse mosaic pieces. It forms a calming route, encouraging a relaxing walk in your personal oasis. Updated for 2025, this design trend brings peace to your doorstep.
In 2025, tile designs use diverse shapes and colors to create engaging visuals. This approach still promotes a serene atmosphere. Natural elements, such as rocks and plants, amplify the garden’s organic ambiance.
Strolling down the path, notice the meticulous placement of every tile. This deliberate design fosters tranquility and focus, perfectly complementing any Zen garden in 2025.
Enhance your mosaic path with small plants or decorative stones. This creates a warm and inviting ambiance. It makes your garden feel more welcoming and cozy.
Artistic Abstract Shapes
Strolling along this lively mosaic path is like entering a living artwork. The walkway is a captivating mix of hues and forms, instantly grabbing your attention with its whimsical layout. Every tile adds to a unique, abstract creation that encourages discovery.
The walkway’s walls are just as stunning. They showcase large geometric forms in diverse colors. Circles, triangles, and vibrant shades combine to create an energetic vibe. This makes walking here fun and interesting.
This artistic walkway design transcends mere aesthetics. It elevates ordinary paths into extraordinary experiences. Each step becomes a creative journey, sparking joy and curiosity with every walk.
Ocean-Themed Mosaic Walkway
This stunning ocean mosaic pathway embodies the spirit of the sea. Its lively blues and greens mirror ocean waves, fostering a serene and tranquil walking experience. Updated for 2025 with enhanced color vibrancy and durable materials.
The mosaic’s swirling patterns create a dynamic feel, like water gently flowing. Every tile enhances the design, offering captivating views from any spot.
Strolling along this path offers a truly inspiring experience. It beckons you to delve deeper and admire the artistry in landscape design. This type of walkway makes a breathtaking enhancement to any garden or outdoor area, particularly appealing to enthusiasts of coastal-themed aesthetics.
Envision incorporating this unique element into your living space. It’s a beautiful method to infuse a coastal vibe into your everyday routine, regardless of your proximity to the sea. Furthermore, crafting your personalized mosaic design with colors that inspire you can be an enjoyable endeavor.
Geometric Patterns with Colored Stones
Walkways can be revolutionized with geometric patterns. This image showcases a stunning mosaic crafted from colored stones, producing a captivating visual impact. Every shape and hue merges to create a distinctive design, guiding your gaze along the path. This 2025 update highlights the enduring appeal of such artistic paving.
Adding colored stones injects vibrancy into your walkway. Notice how blues, reds, oranges, and blacks harmonize, creating a fun and elegant feel. This design welcomes exploration and elevates the space’s visual appeal. Consider this updated trend for 2025!
Transform your walkway with geometric designs! Use tiles or stones in shapes like triangles and squares. This adds unique character to your outdoor space and creates a striking visual impact.
Celtic Knot Patterns
Celtic knot designs offer a stunning visual upgrade for any garden path. This image highlights a meandering walkway enhanced with elaborate patterns, reflecting the deep heritage of Celtic artistry. These iconic knots, with their looping and endless lines, represent the eternal cycle of life and its interwoven connections.
Walking on this mosaic path, you’ll feel instantly at ease thanks to its intricate knots. The diverse colors merge beautifully, making every step a pleasure. Bright, modern tiles enhance the visual appeal, capturing your attention and encouraging you to explore further in 2025.
Celtic designs elevate any outdoor area, from private gardens to bustling public spaces. These patterns add a distinctive flair, transforming ordinary walkways into captivating paths. Integrate art seamlessly into daily routines, turning simple walks into truly enjoyable moments.
Sun and Moon Motif
Imagine a walkway that captures your attention with a sun and moon design. This playful theme brings a sense of whimsy and celebrates the harmony of day and night. The vibrant colors and striking forms are visually appealing, inviting you to stroll along this lively path. It’s a delightful experience!
The mosaic walkway features a vibrant mix of colors. Sunny yellows, reds, deep blues, and earthy tones combine beautifully. This creates a joyful and inviting ambiance. Walking here feels like a journey through light and shadow. The design perfectly balances warmth and coolness, offering a unique experience with every step.
Embracing a sun and moon motif goes beyond mere decoration. It fosters a deeper connection with the natural world. Each stroll along this path becomes an opportunity to admire the daily rhythm. It serves as a constant reminder of the captivating allure of both daylight and the night sky.
Planning a fresh garden design or giving your current outdoor area a makeover? A sun and moon mosaic is a fantastic choice. It draws visitors in, sparking curiosity and exploration. Moreover, it’s an excellent way to begin interesting conversations!
Whimsical Animal Figures
Mosaic pathways are a fantastic way to showcase your artistic flair. Adding fun animal shapes injects a playful vibe into your garden or patio. Picture yourself walking along a path decorated with vibrant colors and animal figures. These designs will surely spark joy and a sense of wonder.
The picture showcases a colorful path adorned with geometric tiles. Notice the delightful animal shapes, including bright yellow birds and happy dogs. These elements enhance the walkway’s visual charm and bring joy to those who stroll along it.
Adding animal shapes to your mosaic art goes beyond mere decoration. It stirs feelings of nostalgia and comfort. People feel closer to nature, recalling happy times with pets or wild animals.
Animal-themed walkways are ideal for parks, gardens, and home paths. They spark curiosity and appreciation for art in daily life. When planning your next path, consider adding charming animal figures. Create a welcoming and engaging environment for everyone!
Vintage Tile Mosaic
This image presents a delightful walkway featuring classic tile mosaics. They infuse the area with a nostalgic and unique charm. The tiles are arranged in a whimsical design, blending diverse hues of red, beige, and gray. These colors elevate the visual appeal and bring a cozy feel to the walkway.
Nestled among lush greenery and charming architecture, this mosaic walkway offers a warm welcome. Its retro design, complete with text and picture tiles, provides a distinctive flair. This mosaic style is perfect for homeowners wanting to showcase their individuality outdoors.
Vintage tiles elevate ordinary walkways into stunning artistic displays. Every tile whispers a tale, recalling bygone eras while harmonizing beautifully with contemporary designs. A vintage tile mosaic enhances every moment, from your daily walk to greeting visitors, offering a truly captivating experience.
Rainbow Color Spectrum
Mosaic pathways elevate any outdoor area. A rainbow of colors offers a lively and cheerful aesthetic. Picture yourself strolling along a walkway where each tile radiates a different hue. This photo features a stunning mosaic path. It’s adorned with tiles in a wide array of colors, spanning from vivid reds to rich blues.
The vibrant color scheme delivers an amazing visual impact. It’s not just a path; it’s an immersive art experience. The lively colors encourage visitors to pause and admire, creating perfect photo opportunities and lasting memories.
Using a rainbow of colors in your walkway design goes beyond just looks. It can create a happy and uplifting environment. Vibrant colors naturally boost moods and inspire feelings of happiness. Furthermore, these designs easily enhance different outdoor areas, including gardens, parks, and city spaces.
Selecting the perfect colors and patterns for your 2025 mosaic project should be enjoyable. Think about incorporating tiles with varied textures and finishes to enhance visual depth. Experiment with blending similar colors uniquely to achieve a stunning gradient effect.
Stained Glass Effect Pathway
Picture yourself strolling along a dazzling mosaic path. It’s like walking on a stained glass artwork. The vibrant colors sparkle and shift, crafting a truly magical experience.
This vibrant walkway features a spectrum of striking colors. Expect deep blues, lush greens, and intense reds and yellows. The diverse tile shapes and sizes create a captivating visual experience. Each step feels like exploring a unique art installation.
This design functions as more than just a walkway; it enhances the entire area. It turns an ordinary path into a striking element, encouraging discovery and appreciation.
Every tile appears to capture and reflect light uniquely. This reflection shifts throughout the day. This creates a vibrant and dynamic pathway. It always feels fresh and alive.
Transform your walkway with a vibrant stained glass design! This engaging DIY project lets you express your creativity. Select tiles that match your personal taste. Build a one-of-a-kind path that showcases your individual style.
Mosaic Kitchen Garden Path
Elevate your kitchen garden with a mosaic walkway! This stunning path, as pictured, enhances your outdoor area. Vibrant, colorful tiles craft a playful and welcoming ambiance. Enjoy a delightful stroll through your flourishing garden.
This pathway offers both functionality and beauty to your garden space. The mosaic’s diverse shapes and vibrant colors create an engaging visual experience as you stroll. It’s an excellent method to inject your unique personality into the garden, all while maintaining its practicality.
Crafting your mosaic walkway? Choose materials that enhance your garden’s beauty. Explore diverse patterns for a unique path design. Whether complex or minimalist, enjoy creating your personal garden sanctuary.
A mosaic path enhances garden exploration. Imagine strolling to your herbs or vegetables, captivated by the path’s beauty. These small details elevate your gardening experience.
Personalized Monogram Design
In 2025, personalize your walkway with a custom monogram. This image highlights a beautiful mosaic path, centered around the letter “M”. This distinctive detail adds personality and creates a more welcoming entrance.
These vibrant tiles merge seamlessly, offering an eye-catching visual appeal. The mix of diverse shapes and colors sparks creativity, ensuring a unified aesthetic. This design is ideal for homeowners seeking to add a unique, personal touch to their outdoor areas in 2025.
Personalizing your walkway with a monogram is a fantastic way to showcase your unique style. It’s an effortless upgrade that instantly elevates your home’s curb appeal. A monogrammed walkway, whether leading to your front door or winding through your garden, offers a warm and inviting welcome to all who visit.
Interlocking Tile Patterns
Mosaic walkways offer a fantastic way to enhance outdoor spaces. Interlocking tile patterns, as seen here, significantly boost visual appeal. This image showcases a stunning mix of colors and forms, resulting in an attractive pathway. The interplay of dark and light tiles, coupled with diverse designs, ensures this walkway is truly remarkable.
The interlocking tile design isn’t just visually appealing; it significantly boosts durability. This pattern withstands heavy use, retaining its beauty for years. It’s an excellent option for homes and businesses alike.
Interlocking tiles offer diverse design options. Choose from various colors and textures to seamlessly integrate with nearby structures and landscapes. As seen here, the tiles enhance the buildings’ gentle tones and the lush greenery, resulting in a harmonious setting.
In 2025, tile design embraces bold experimentation. Don’t hesitate to mix shapes and sizes for a unique look. Combining square and circular tiles, for example, creates visual interest. Alternating patterns can guide people through a space while adding a playful touch to the overall design.
Cobbled Stone Mosaic
Cobblestone mosaics provide a captivating and enduring aesthetic for any pathway. This image highlights a gracefully designed path, meandering through vibrant greenery and sophisticated architecture. The stone arrangement forms an attractive pattern. This enhances visual appeal and ensures a robust surface for pedestrians.
The interplay of light and dark stones creates an engaging visual effect, enhancing the walkway’s appeal. Lush trees and verdant shrubs foster a tranquil ambiance, ideal for relaxed walks. This design is aesthetically pleasing and harmonizes with the natural environment, resulting in a seamless integration.
Cobblestone walkways are an excellent choice for enhancing your outdoor area with charm. The diverse sizes and forms of these stones offer design flexibility, enabling you to create a personalized landscape. Whether you prefer a direct path or a meandering trail, cobblestone mosaics seamlessly integrate into your desired aesthetic.
Inspirational Quote Path
Picture yourself strolling along a delightful path. It’s decorated with vibrant mosaic tiles. Each step encourages thoughtful reflection. This walkway boasts a stunning range of colors. It forms a lively setting for uplifting quotes.
These quotes are carefully integrated into the design. They serve as both decoration and inspiration. As you walk, phrases such as “Where nature thrives, winter’s challenges fade” will grab your attention. They promote deeper reflection.
This walkway is more than just practical. It turns a simple walk into an inspiring experience. Every tile adds to a positive vibe, perfect for relaxing and thinking.
Elevate your outdoor area with a mosaic walkway showcasing inspiring quotes. Perfect for adding joy or tranquility, it encourages reflection and appreciation of art. Take a moment to pause, read, and discover the beauty beneath your feet.
Pathway with Seasonal Themes
Picture yourself on a path that honors the unique charm of every season. The photo showcases a stunning mosaic walkway, framed by trees displaying their fall splendor. As you proceed, the inviting shades of orange and red from the foliage generate a comforting ambiance, perfectly enhancing the ground’s artistic design.
This mosaic showcases diverse shapes and vibrant colors, ranging from calming blues to deep reds. The playful design immediately captures attention. This thoughtful addition elevates a basic walkway into an engaging experience. Visitors are encouraged to enjoy the seamless blend of nature and artistic expression.
Transform your outdoor areas with captivating seasonal themes. Embrace vibrant, cheerful hues during the warmer seasons, mirroring the energy of spring and summer. As autumn arrives, incorporate earthy tones that resonate with the beauty of falling leaves. This mosaic pathway beautifully illustrates the harmonious blend of art and nature, enriching our environment.
Mosaic Steps Leading to a Garden
Mosaic stairways bring vibrant artistry to your garden. They lead guests through your outdoor haven. These decorative steps are practical and visually captivating.
The path features vibrant, colorful tiles that enhance the beauty of the flowers lining each side. Every step encourages exploration of the lush greenery and radiant blooms ahead. This design transforms the walk to your garden into a delightful adventure.
Mosaic patterns beautifully showcase your personality or garden theme. Combine colors and shapes for a distinctive, eye-catching design. This method lets you add personal elements, making your garden uniquely yours in 2025.
Climbing the steps, vibrant flowers in pots and lining the path amplify the beauty. The mosaic design paired with colorful plants creates a warm welcome. It invites you to stop and savor nature’s sights and aromas.
Art Deco Inspired Walkway
Art Deco, known for its striking designs and lively hues, is ideal for adding personality to walkways. This image presents a beautiful illustration of the style. Notice how each tile and pattern harmonizes to form a captivating visual experience.
Walking along the path, Art Deco’s geometric forms and detailed patterns become clear. Vibrant colors like deep blues, bright reds, and sunny yellows bring energy to the space. This color palette is visually appealing and makes you feel welcome.
Transform your outdoor walkway with Art Deco flair! Adding these design elements instantly enhances your garden path or porch. Consider incorporating similar patterns and vibrant colors into your 2025 tile or paver selections for a striking, modern statement.
Also, consider the environment! Incorporating plants, such as those in pots, enhances striking designs and softens the aesthetic. The key is achieving spatial equilibrium and visual appeal.
Want to elevate your walkway? Explore the dynamic and distinctive appeal of Art Deco. It masterfully blends aesthetics with practicality. Your path becomes more than just a route; it transforms into a captivating journey.
Mediterranean Style Pathway
This image presents a charming Mediterranean pathway, beckoning exploration. The terracotta tiles’ warm hues establish a welcoming ambiance, delivering a Mediterranean essence to your surroundings.
Every tile showcases detailed patterns and floral motifs, transforming the walkway into a stunning visual experience. The color palette enhances the vibrancy, maintaining an elegant and peaceful ambiance.
This walkway beautifully enhances the vibrant greenery surrounding it. Potted plants and palm trees amplify the Mediterranean atmosphere, creating a refreshing and inviting space.
Picture yourself walking here, enjoying the cool shade. This is the perfect place for coffee or reading. It’s more than just a path; it’s a lovely outdoor space.
Mosaic Walkway with LED Lighting
In 2025, elevate your outdoor areas with an LED-lit mosaic walkway. This modern design enhances visibility and creates a captivating nighttime atmosphere. Vibrant tiles, arranged in stunning patterns, offer a visually appealing experience.
Embedded LED lights amplify the mosaic’s visual appeal, highlighting its complex patterns. This ensures a pleasant and secure evening stroll. The soft, warm light enhances the mosaic’s vibrant hues, fostering a welcoming ambiance.
Think about positioning your walkway near trees or lush gardens. This blends natural elements with your design, creating a vibrant atmosphere. Furthermore, illuminating a few trees can significantly enhance the ambiance, offering a warm and inviting feel.
Imagine a stunning LED mosaic walkway enhancing homes, parks, or public areas. This innovative design warmly greets guests, leading them along a visually captivating path. Ideal for leisurely walks or vibrant celebrations, this walkway concept adds a radiant touch to any environment.
Herringbone Pattern Walkway
The herringbone design remains a timeless walkway option, instantly elevating the aesthetic of any garden or outdoor area. This image highlights a stunning walkway featuring precisely arranged rectangular pavers. Their zigzag layout generates a captivating and energetic visual rhythm.
This design is visually attractive and incredibly durable. Its interlocking structure ensures even weight distribution. This makes it ideal for high-traffic zones, offering long-lasting performance.
The gentle color palette of these tiles elevates the visual appeal. The walkway merges effortlessly with the environment. It’s a welcoming route that sparks curiosity and enhances any outdoor space.
Planning a herringbone walkway? Consider its harmony with your garden or home’s aesthetic. Enhance the ambiance with lush plants or stylish outdoor lights. It’s an easy upgrade for your outdoor spaces, adding instant charm and value in 2025.
Cultural Heritage Inspired Designs
Mosaic walkways are powerful storytellers of cultural heritage. This image perfectly illustrates this concept. The vibrant patterns and designs on the walkway showcase a fusion of traditions and artistic styles. Each tile appears to embody a fragment of history. It encourages visitors to discover and value the culture woven into the pavement below.
This scenic route is lined with delightful buildings, enhancing the neighborhood’s charm. The bright tile colors beautifully complement the lush greenery and artfully placed flowers. This creates an inviting and energetic ambiance, encouraging visitors to pause and appreciate the scenery. Updated for 2025, this pathway remains a beloved local treasure.
Integrating cultural motifs into walkway designs elevates visual appeal and strengthens community bonds. This approach underscores the value of safeguarding cultural heritage while ensuring spaces are welcoming and accessible. Planning a mosaic walkway? Explore incorporating elements that reflect your local culture and history.
Vintage Bicycle Pathway
Imagine a leisurely walk along a picturesque path, bursting with lively colors and lush plants. This classic bicycle route beautifully combines art and functionality. The mosaic tiles offer a breathtaking visual experience, encouraging everyone to admire the detailed designs up close.
The walkway features vibrant potted plants and blossoms, bringing nature into the city. Classic bicycles lean against the walls, creating a nostalgic atmosphere. Bike lovers will find this a delightful and picturesque route.
Stroll along and admire the artistry of this mosaic. Floral and geometric patterns weave a tale of creativity and dedication. This pathway is more than just a route; it’s an immersive experience that elevates the neighborhood’s appeal. Updated for 2025, it remains a testament to timeless design.
Mosaic Art Gallery Path
Picture yourself strolling along a path. With each step, a burst of color and design unfolds beneath you. This mosaic walkway transcends mere functionality; it’s a captivating outdoor art exhibit. Complex patterns, including circles, triangles, and diverse geometric forms, foster a cheerful ambiance, beckoning you to discover more.
Vibrant murals line both sides of the path, enhancing the artistic atmosphere. This space is ideal for those who love creative expression. The blend of mosaics and artwork creates a memorable experience, ensuring each visit is fresh and inspiring.
Remember to look up and appreciate the lush hanging plants. They add a natural, calming element to the area. Walking here feels like escaping to a peaceful garden, a welcome break from the daily grind.
Garden Pathway of Curves and Swirls
Picture yourself walking along a path that feels like a graceful waltz. This garden pathway is a charming mix of curves and spirals, beckoning you to discover its secrets. Every bend and turn unveils fresh hues and designs, ensuring your walk is captivating and enjoyable.
The dazzling mosaic tiles spark joy and energy. Hues of blue, green, and touches of red unite in a spirited pattern. More than just a path, it’s a visual delight. It enhances the charm of any garden or outdoor area.
These charming pathways are ideal for diverse environments, spanning from seaside escapes to city gardens. They create a playful atmosphere, perfect for family adventures or peaceful contemplation. Picture yourself walking your dog or basking in the sun on a beautiful afternoon, immersed in nature’s embrace.
Unleash your creativity by adding mosaics to your garden! Play with vibrant colors and unique shapes to reflect your personal style. From bold statements to subtle accents, mosaics will elevate your garden’s charm in 2025.
Mosaic Water Feature Walkway
Imagine a tranquil outdoor escape created by a mosaic water feature walkway. This picture highlights a stunning path, nestled among vibrant plants and attractive buildings.
The vibrant walkway features multicolored paving stones, offering a captivating visual experience as it winds around. The soft sound of water cascading from the central fountain creates a calming atmosphere, encouraging visitors to pause and appreciate the scenery.
As you stroll along the walkway, admire the meticulously maintained flora. The colorful mosaic tiles adorning the water feature enhance the natural surroundings, creating a harmonious blend.
Ideal for gardens, patios, or business areas, this walkway promotes tranquility. It’s a beautiful setting for events or peaceful reflection, updated for 2025 trends.
In 2025, mosaic water feature walkways remain a top trend for landscape design. They elevate outdoor spaces and create a serene atmosphere. Think about incorporating this stunning feature into your property to experience its captivating charm.
Thinking about adding some life to your home? Growing indoor plants is a fantastic and fulfilling hobby. Whether you’re an experienced gardener or a beginner, many plants flourish indoors. From tiny succulents to vibrant ferns, this guide offers insights into indoor gardening. Learn how to help your plants thrive beautifully in your home.
Humidity Levels and Indoor Plant Health
Maintaining proper humidity is key for healthy indoor plants. This image features a hygrometer next to several potted plants. The hygrometer accurately measures air moisture, helping you determine if your home’s environment is ideal for your plants’ well-being.
Plant humidity needs vary significantly. Tropical varieties, such as ferns and peace lilies, thrive in high humidity. Succulents, conversely, prefer drier conditions. A hygrometer is essential for monitoring humidity levels. Adjust your plant care based on these readings. Consistent monitoring prevents problems like leaf browning and wilting.
Increase humidity for your plants by misting them regularly. A humidifier is another excellent option. Alternatively, place a water tray nearby. Grouping plants fosters a naturally humid environment. Aim for a balanced humidity level to ensure thriving, healthy plants.
Essential Light Requirements for Indoor Plants
Indoor plant growth hinges significantly on light. This image highlights a thriving indoor garden. Notice how various light sources combine to form a perfect plant-growing atmosphere.
The arrangement boasts diverse lighting solutions. A central overhead fixture and adjustable spotlights ensure abundant light. This bright environment is ideal for plants needing strong light to flourish. Every plant on the shelves appears vibrant, indicating optimal light exposure for healthy growth.
Plant light requirements vary significantly. Some thrive in direct sunlight, while others flourish in dimmer environments. This setup accommodates diverse plant needs, simplifying optimal care. Adjustable lights offer precise control over intensity and direction, crucial for healthy plant development in 2025.
Remember, light exposure duration is key. Most indoor plants thrive with 12-16 hours of daily light. Use a timer to guarantee consistent light, even when it’s cloudy outside. This ensures optimal growth.
Fertilizing Indoor Plants for Optimal Growth
Bring your indoor spaces to life with vibrant, colorful plants! Proper fertilization is essential for maintaining their health and beauty. This image displays a selection of fertilizers alongside thriving green plants. It highlights the essential tools for your plant care regimen, ensuring your plants flourish.
This image showcases three distinct fertilizer types. Each boasts a specialized formula, crafted to nourish your plants in unique ways. Notice the variations in color and packaging, yet all aim to boost the vitality of your indoor plants. Always carefully read the labels to select the ideal fertilizer for your plant’s specific needs.
Tailor your fertilization strategy to each plant’s specific needs. Some thrive with extra nitrogen, while others prefer more phosphorus or potassium. Consistent feeding throughout the growing season significantly boosts growth and enhances their visual appeal.
For optimal fertilizer use, always read the package directions carefully. Usually, you’ll dilute the fertilizer in water. Apply this mixture when you normally water your plants. Avoid over-fertilizing, which can damage them.
Using organic choices, such as compost, is highly recommended. Compost slowly releases vital nutrients and boosts soil quality. Healthier plants are naturally stronger. This resilience ensures your indoor garden thrives for many years.
Watering Techniques for Indoor Plants
Here, a hand gently waters vibrant indoor plants with a modern watering can. Sunlight streams through the window, illuminating the lush green leaves. This scene perfectly embodies the care and attention required for successful indoor gardening in 2025.
Proper watering is essential for thriving plants. Don’t just pour water; learn each plant’s specific needs. Overwatering is as damaging as underwatering. Check the top inch of soil before watering. If it feels dry, then water.
Watering cans, such as the one shown, offer superior control. Position the spout near the soil to reduce splashing and ensure root hydration. Letting water stand before use allows chlorine to evaporate, benefiting delicate plants. This is especially important in 2025 as water quality concerns increase.
Plant watering varies greatly. Succulents and cacti need less water. Tropical plants flourish with more moisture. Use soil or pebble jars as visual reminders. This helps you remember each plant’s specific needs in your indoor garden.
Finally, check your plants frequently. Their leaves often signal when they need more or less water. Happy gardening!
Choosing the Right Indoor Plants for Your Space
Choosing the perfect indoor plants can completely revitalize your living area. Observe this image showcasing vibrant indoor foliage. Notice the diverse plant selection, each adding vitality and comfort to the room. From towering, verdant palms to smaller, vibrant species, there’s an ideal plant for every location.
Start by assessing the natural light in your space. Tall palms flourish in sunny rooms, ideal for bright areas. For dimmer spaces, snake plants or pothos are excellent choices. They are known for their adaptability to low light.
Consider your available space. For bigger rooms, use tall plants as eye-catching centerpieces. Smaller rooms are better suited for small potted plants. These fit nicely on shelves or tables without making the space feel cramped.
Elevate your plant game by combining diverse plant species. This strategy enhances visual appeal and fosters a harmonious environment. Consider pairing a towering plant with several smaller companions for a captivating and balanced arrangement.
Elevate your indoor garden with stylish pots! Select vibrant or textured options to inject personality. These choices should also beautifully complement your home’s interior design.
Soil Selection for Potted Plants
Selecting the ideal soil is crucial for thriving indoor plants. This image showcases a well-equipped workspace with diverse tools and soil types, emphasizing the importance of preparation. The assortment of pots suggests that each plant has unique soil requirements.
Choose soil based on your plants’ needs. Some need fast-draining soil. Others flourish in soil that holds moisture. The soil pictured looks loose and crumbly. This is excellent for good drainage.
Remember plant nutrition! Choose a potting mix with organic matter or fertilizer. This provides essential vitamins for healthy plant growth. Pre-mixed soil bags are often available, simplifying the process for new gardeners.
Furthermore, the available tools indicate that re-potting is an enjoyable activity. Spending time on quality soil preparation ensures healthy and vibrant plants!
Understanding the Benefits of Indoor Gardening
Growing plants indoors is now a favorite pastime for many. It’s a comforting way to stay connected to nature, right within your home. Observe the picture showcasing a vibrant indoor garden bursting with healthy plants. Every pot brings vitality and vibrancy to the area, creating a welcoming and comfortable atmosphere.
Indoor plants significantly boost air quality. They naturally remove harmful pollutants and increase oxygen levels. This creates a healthier and more refreshing home atmosphere. Picture yourself relaxing in a personal indoor garden, breathing clean, revitalized air. It’s a small change that greatly improves your everyday well-being.
Growing plants indoors offers a real sense of achievement. Seeing your plants grow strong boosts your self-esteem. Nurturing life and watching it thrive is truly rewarding. Also, indoor greenery can lower stress and create a peaceful environment.
Growing your own herbs and vegetables offers another great advantage. Imagine having fresh ingredients readily available for all your culinary creations. From adding freshly cut basil to your favorite pasta to harvesting peppers for a vibrant salad, using homegrown produce is incredibly rewarding.
Finally, indoor gardening offers a delightful shared experience for families and friends. It strengthens bonds through collaborative planting and the exchange of valuable gardening insights. Ultimately, welcoming plants into your living space cultivates happiness, well-being, and meaningful connections.
Repotting Plants: When and How
Transplanting your houseplants is key to their continued health and growth. The photo shows someone gently caring for a small plant, ready for its new pot. Sunlight floods in, illuminating the bright leaves and emphasizing the charm of indoor plants.
Understanding the right time for repotting is key. Repot when roots emerge from drainage holes. Also, repot if the plant appears too large for its current container. Annually inspect your plants during their active growing period.
Ready to repot? Get these items ready: a bigger pot, new potting mix, and your plant. Carefully take the plant out of its old pot. If the roots are tangled, gently loosen them. Put the plant in the new pot. Add soil, keeping the plant at the same depth. Water well to help the soil settle.
Repotting revitalizes your plants and you! It gives roots room to grow, promoting new, healthy development. Fresh soil provides essential nutrients, helping your indoor plants thrive. Give your plants the space and care they deserve for optimal growth!
Designing a Functional Indoor Garden Space
Crafting a welcoming indoor garden in 2025 means blending beauty with practicality. The picture showcases a sunlit, spacious area brimming with diverse plants. Expansive windows flood the room with natural light, crucial for robust plant development. The setting appears inviting, featuring comfortable seating and a minimalist coffee table, ideal for unwinding or connecting with others.
Crafting your 2025 indoor oasis? Blend hanging and potted plants for visual appeal. Notice how the greenery in the image elevates the space and creates dimension. Select plants suited to your room’s light to ensure robust growth and vibrant color.
Consider the layout carefully! The image showcases a furniture and plant arrangement that ensures easy movement. Play with varying plant heights and textures to add visual appeal. Include comfortable seating to fully enjoy your green space, perfect for reading or relaxing with a drink.
Using Grow Lights for Indoor Gardening
This image showcases a vibrant indoor garden. A diverse collection of plants thrives under powerful grow lights. These lights ensure optimal growth, supplying the necessary energy for photosynthesis.
Grow lights are available in various forms: LEDs, fluorescents, and HID. Each type caters to specific needs. Selecting the ideal light hinges on your plants. Leafy greens usually flourish under cooler light. Flowering plants often need warmer light tones.
Creating your indoor garden is simple. Begin by positioning your plant pots to ensure they all get equal light exposure. Place grow lights approximately 12 to 24 inches above your plants. This provides sufficient light without overheating them.
Timing is crucial! Most plants thrive with 12 to 16 hours of daily light. A timer ensures a consistent light schedule. This promotes strong and healthy plant growth. Consider using smart timers for automated adjustments based on sunrise and sunset times in 2025.
Indoor gardening is incredibly rewarding. With the correct setup, create a vibrant green oasis inside your home. Get your grow lights ready and begin your indoor garden journey!
Temperature Control for Indoor Plants
Maintaining optimal temperature is key for successful indoor plant cultivation. The picture features a thermometer nestled within vibrant green foliage. This illustrates the significance of carefully observing the environmental conditions essential for healthy plant growth.
Indoor plants thrive in temperatures between 65°F and 75°F (18°C to 24°C). Use a thermometer, similar to the one shown, to monitor the temperature. Maintaining this ideal range is crucial for healthy plant growth. Extreme temperatures can hinder their development.
Beyond using a thermometer, plant location matters. Window areas offer ample sunlight but can get cold overnight. Finding the right balance between light and temperature is key. This ensures your plants thrive without any stress.
Consistent temperature monitoring allows for proactive adjustments to your heating and cooling. If your thermostat seems inaccurate, minor adjustments, such as relocating plants or modifying vent positions, can significantly improve performance.
Propagation Techniques for Indoor Plants
Plant propagation offers an exciting and budget-friendly method to grow your indoor garden. The image showcases cuttings in water, a straightforward and successful technique for cultivating new plants. This method remains popular in 2025.
Water propagation is a simple method. Place plant cuttings in a clear water-filled container. Witness root development firsthand – it’s rewarding! These cuttings boast vibrant green leaves, signaling their readiness for propagation.
Begin by selecting a vibrant, healthy plant. Take a cutting approximately 4 to 6 inches in length. Ensure your cut is made just beneath a leaf node; this is crucial for root development. Place the cutting in water, being careful to keep leaves above the waterline to avoid rotting.
Refresh the water every few days. This keeps it clean and boosts root development. Expect roots to appear within weeks. Once they reach a few inches, transplant your new plant into soil.
This plant propagation method is cost-effective for expanding your indoor garden. It’s also a fulfilling way to engage with the natural world within your home.
Seasonal Care Tips for Indoor Plants
Nurturing indoor plants involves adapting to their changing seasonal requirements. This image showcases a welcoming indoor space brimming with vibrant greenery, flourishing in gentle light. It highlights the importance of providing tailored care for our plants year-round.
Spring 2025 is ideal for repotting your plants with fresh soil. This season encourages new growth, so water them more often. In summer 2025, ensure they get enough sunlight. Also, monitor humidity. Misting can help some plants on hot days.
With autumn just around the corner, gradually decrease watering. Plants are now entering a period of slower growth. It’s also a great opportunity to inspect for pests that may have infested your plants. Winter presents unique challenges, as indoor heating can create dry air. To combat this, think about using a humidifier or placing a water tray close to your plants to maintain adequate humidity.
In 2025, understanding seasonal shifts is key to keeping your indoor plants thriving. Use this updated seasonal care guide for a year-round approach to plant health.
Herbs You Can Grow Indoors
Cultivating herbs inside your home is a fantastic method to elevate both your living space and culinary creations. The picture showcases a welcoming kitchen scene featuring thriving herbs nestled in terracotta pots and a stylish metal container. Each plant introduces a vibrant touch of greenery, instantly revitalizing the atmosphere.
Basil, a common and beloved herb, is showcased in the gleaming metal pot. It’s simple to cultivate indoors, flourishing on a bright windowsill. Remember to maintain consistently moist soil, avoiding overwatering. This ensures a steady supply of fresh leaves for your culinary creations.
Other containers showcase fragrant herbs such as rosemary and mint. Rosemary thrives in sunny spots and can become quite large, infusing your kitchen with its delightful scent. Mint, known for its rapid growth, is ideal for flavoring teas and cocktails. Be sure to keep mint contained in a separate pot to prevent it from overtaking other plants.
Growing herbs indoors enhances your cooking and purifies the air. Enjoy fresh flavors all year long with an indoor herb garden. Why not start today? You might discover the pleasure of harvesting your own fresh herbs.
Common Pests and Diseases in Indoor Plants
Houseplants enhance our living spaces, yet they can sometimes invite unwelcome visitors. The picture highlights common plant pests on a leaf, enlarged for clear identification. These tiny organisms can create significant issues if not addressed promptly.
Spider mites are a frequent garden nuisance. These minuscule pests are easily missed until major damage occurs. Look for telltale yellow spots on leaves; this signals a need for careful plant inspection.
Aphids are common garden pests. They gather under leaves and drain plant fluids. This can slow down growth. Quick action is key to stopping large infestations.
Beyond pests, indoor plants can suffer from diseases such as powdery mildew. This fungus manifests as a white, powdery coating on leaves. Ensure good air circulation around your plants to prevent its occurrence.
Consistent plant monitoring is crucial for early problem detection. Spotting pests or diseases? Try insecticidal soap or neem oil. Proactive care is the secret to thriving plants!
Indoor Plant Styles: From Minimalist to Lush
Indoor plant decor offers options for every taste. This image displays a beautiful collection of plants suitable for diverse design styles. Select from minimalist pots to ornate ceramic vases. The possibilities are vast.
Check out the top shelf! It showcases diverse textures and forms. Each plant brings a special element, simplifying minimalist design. This style emphasizes fewer objects, highlighting clean lines and soft colors. The open atmosphere feels welcoming and revitalizing.
Next, explore the lower shelves. The atmosphere changes subtly here. Abundant greenery adds warmth and comfort to the space. Larger, leafy plants can become striking centerpieces. They excel in areas designed with a natural and energetic aesthetic.
Combining various plant sizes and pot designs unlocks your creative potential. Experiment with colors and textures to reflect your style and complement your interior design. Whether you favor a simple or vibrant aesthetic, indoor plants will undoubtedly enhance your living area.
Caring for Succulents Indoors
Succulents are fantastic for indoor gardening. They require little care and boast diverse forms and hues, mirroring the image. Notice the assorted pots brimming with vibrant green plants, each enhancing the sunny windowsill with unique appeal.
Light is key when nurturing succulents. They flourish in bright conditions. A sunny windowsill, as pictured, is perfect. Aim for at least six hours of daily sunlight to ensure robust health and vibrant color.
Proper watering is key for succulents. Unlike many houseplants, they thrive when the soil dries completely between waterings. Check the soil moisture by inserting your finger about an inch deep. Water only if the soil feels dry. Overwatering is a common mistake that can cause root rot, so be cautious.
Opt for a succulent-specific, well-draining soil mix. This prevents waterlogged roots. The pictured pots are stylish, but drainage holes are crucial for excess water runoff.
Finally, watch for pests. Succulents are resilient, but mealybugs and aphids can still appear. Check your plants often. If you spot any pests, treat them right away.
Creating a Plant Care Schedule
Successful indoor gardening requires a well-defined strategy. The picture showcases a useful plant care calendar. This tool promotes organization and prevents you from overlooking crucial maintenance.
The image displays a calendar designed for plant care. It highlights daily tasks like watering and fertilizing. A red circle marks a day needing special attention, perhaps for pest control or deep watering.
Next to the calendar, essential tools await: pruning shears and trowels. Keep these tools nearby for effortless plant care. Quickly access what you need to maintain thriving, healthy plants.
Finally, remember that young plants need regular care to flourish. A consistent schedule will help them thrive, bringing life to your home. Get your calendar ready and plan your plant care now!
Choosing the Right Containers for Indoor Plants
Choosing the perfect container is crucial for indoor plant success. The image displays a selection of stylish pots, enhancing your home’s aesthetic and nurturing your plants. Materials range from ceramic to terracotta, each offering distinct advantages.
Select pots that match your plants’ size and requirements. Bigger plants usually need wider pots for healthy root development. Smaller plants flourish in charming, smaller pots. The image showcases a variety of shapes and designs. These can add a unique, personal element to your indoor garden in 2025.
Effective drainage is crucial for plant health! Choose pots featuring bottom drainage holes. These holes prevent overwatering and the development of root rot. The image showcases various pot styles, including those with drainage and decorative outer pots designed to hold inner planters.
Elevate your space with aesthetics! The perfect container boosts your room’s style. Consider mixing container styles, as shown. This creates a visually stunning display, highlighting your plants’ beauty.
Creating a Zen Space with Indoor Plants
Bring the tranquility of nature indoors with houseplants. Imagine a serene corner brimming with diverse plants, each enhancing your home’s ambiance. The scene captures a beautiful display of greenery, bathed in sunlight streaming through the window, creating soft shadows on the floor.
These plants not only add vibrancy to your space, but they also purify the air, crucial for a tranquil setting. Observe towering, verdant plants stretching for sunlight, complemented by petite species that introduce varied textures and visual interest.
Selecting the perfect plant pots elevates your home’s aesthetic. Here, white pots paired with woven baskets achieve a balanced, stylish look. They enhance the lush greenery while maintaining a calm and peaceful atmosphere.
Transform your space into a tranquil haven by incorporating indoor plants. Peace lilies, snake plants, and pothos are excellent choices. They’re low-maintenance and adapt well to different lighting, making them perfect for creating a zen atmosphere.
Use varying plant heights and species to boost visual appeal. Feel free to experiment with combinations! A comfortable rug and ample sunlight will finalize your peaceful setting.
Indoor Gardening: A Family Activity
Indoor gardening is more than a pastime. It’s a delightful family experience that unites everyone. The image showcases a heartwarming scene. A mother lovingly guides her children in potting small plants. This moment beautifully illustrates the joy and collaborative spirit fostered by indoor gardening in 2025.
Indoor gardening teaches children responsibility through plant care. Witnessing seed germination into sprouts offers a captivating learning experience. Parents can also use this opportunity to instill the importance of nurturing living organisms in their kids.
This kitchen scene creates a warm, welcoming atmosphere, enhancing the planting experience. The artfully displayed pots on the table encourage everyone to participate. It’s an opportunity to connect, exchange stories, and relish each other’s presence while gardening together!
Managing Indoor Plant Growth and Trimming
Maintaining vibrant indoor plants requires consistent care, and pruning is essential. The image depicts a person meticulously trimming a plant, a fantastic method to stimulate fresh growth. Beyond aesthetics, pruning aids the plant in conserving energy by prioritizing robust branches.
Spotting a plant overgrown or with dead foliage? Grab your pruning shears! Use clean, sharp tools to avoid harm and infection. Trimming shapes the plant and boosts healthy growth. This allows sunlight to reach every part.
Here, someone tends to a plant boasting lush, green foliage. This indicates robust health. Routine pruning can further prevent pests and diseases. Like people, plants benefit from regular care!
Prune your plants at the optimal time. Spring or early summer is ideal for most indoor plants. This is when they’re actively growing, ensuring faster healing and renewed growth.
Common Mistakes to Avoid in Indoor Gardening
Indoor gardening is a delightful and fulfilling pastime. However, missteps can easily occur. The image showcases a beautiful array of indoor plants in diverse pots, injecting life into the room. To ensure these plants flourish, remember these crucial tips.
A frequent error is excessive watering. Novice gardeners often believe that increased water leads to thriving plants. However, overwatering can cause root rot. Always verify that the topsoil is dry before re-watering.
Insufficient light is a common problem. Plants require proper light levels for healthy development. If your plants are leaning towards the window, they likely need more sunlight. Rotate them frequently to promote balanced growth.
Selecting the correct pots is crucial. Pots that are too small hinder root development. Conversely, oversized pots can cause waterlogged soil. Ensure you choose the appropriate size pot for each plant’s needs.
Finally, be vigilant about pests. They can often infiltrate your garden undetected. Consistent plant inspections are key to early problem detection. This allows for timely treatment, preventing widespread infestation.
Using Indoor Plants for Home Decor
Bring the outdoors in! Indoor plants beautifully elevate your home’s style. They inject vibrancy and a natural touch into any space. This image showcases a welcoming living room, brimming with plants that foster a comfortable and lively ambiance.
A sizable potted plant graces the area next to a cozy couch. Smaller plants adorn the coffee table. This setup enhances the room’s beauty and introduces nature inside. The blend of green plants and neutral furniture tones creates a balanced and peaceful atmosphere.
Introducing plants boosts indoor air quality and fosters a serene atmosphere. Natural sunlight amplifies their beauty, highlighting their vivid hues. You don’t need a jungle; a few well-chosen plants can revitalize your living space.
Experiment with diverse plant species to create captivating textures and heights. Select planters that harmonize with your existing furniture. Remember, nurturing indoor plants is more than decoration; it’s an engaging and rewarding pastime!
Incorporating Indoor Plants in Small Spaces
Indoor greenery revitalizes compact living areas. This image highlights a snug corner brimming with diverse plants. It demonstrates how even small spaces can become verdant and welcoming. Several towering plants thrive by the window, absorbing sunlight. Smaller potted plants are carefully displayed on stands.
Selecting plants for compact areas requires careful attention to their light requirements and growth habits. The featured plants, such as the Monstera and Peace Lily, flourish indoors and tolerate low-light conditions effectively. This allows you to introduce greenery into your space without needing intense direct sunlight, as of 2025.
Combining various pot sizes and designs enhances visual appeal. Observe the blend of terracotta, ceramic, and metal containers in the picture. This diversity fosters a relaxed ambiance, lending a cozy feel to the area. Personalize your plant arrangements effortlessly by choosing pots that complement your interior design.
Maximize your space by thinking vertically! Wall planters and hanging pots are fantastic for displaying plants without taking up floor area. Notice the plants near the window in the picture. They get plenty of sunlight and beautifully utilize the wall space.
Exploring Vertical Gardening Indoors
Indoor vertical gardens offer a fantastic solution for plant lovers with limited space. This image showcases a chic vertical garden wall, bursting with vibrant greenery and diverse plant life.
Brighten your home and purify the air with this vibrant setup! These plants are perfect for indoor environments. They flourish with bright, indirect sunlight.
This design maximizes your vertical space. Layering plants adds visual appeal and introduces nature indoors.
Thinking about an indoor garden? Consider growing herbs or compact veggies. Imagine having fresh ingredients readily available in your home! Key care steps involve good drainage and consistent watering. These practices ensure your plants thrive.
Vertical gardens offer a fantastic family activity. Children enjoy watering and watching plants thrive. This gardening method is practical and delightful. It enlivens your indoor environment.
Plants that Purify Indoor Air
Indoor plants offer more than just aesthetic appeal. They significantly enhance indoor air quality. This image features a beautiful collection of plants. These plants are well-known for their natural air-purifying capabilities.
Observe the lively foliage of these plants, each enhancing your home’s well-being. The Peace Lily and Snake Plant are famous for removing prevalent toxins such as formaldehyde and benzene.
These plants actively combat indoor pollutants, creating a fresher and healthier home environment. They also introduce natural beauty and a sense of tranquility to any space. Envision breathing purified air while surrounded by the soothing influence of living greenery!
Indoor plants flourish with consistent care. Water them regularly and ensure they get enough light. Start your indoor garden today! It’s an easy way to improve your home and boost your mood.
Want to build a comfortable and affordable home for your chickens? You’re in the perfect spot! Discover 19 easy DIY chicken coop ideas. These projects will guide you in creating a practical and delightful space for your flock. Building a coop can be simple and enjoyable!
Adding Nesting Boxes for Egg Laying
Nesting boxes are key for a productive chicken coop, particularly for hens laying eggs. These comfortable, private spots encourage chickens to lay. The image showcases well-built nesting boxes, offering each hen a perfect, cozy space.
Easy-to-use containers, similar to those pictured, simplify nesting box setup. Ensure they are clean and stocked with fresh straw or hay. This keeps the boxes comfortable and aids in maintaining clean eggs.
Position nesting boxes at a comfortable height for your hens. Each box should accommodate a single hen. Ensure you have enough boxes to prevent overcrowding. A good rule of thumb is one box for every three to four hens.
Inspect nesting boxes frequently. Collect eggs and keep them clean. Happy hens mean fresh eggs for you!
Creating Ventilation for Fresh Air
Proper coop ventilation is essential for healthy chickens. It controls humidity and ensures fresh air, directly impacting their well-being.
This coop boasts excellent ventilation through multiple openings. These vents ensure fresh airflow, protecting your chickens from harmful drafts.
Think about adding adjustable vents to your coop. These let you manage airflow based on the season. Maximize ventilation during hot weather to keep your chickens comfortable. Reduce airflow in colder months to help them stay warm.
Install vents near the coop’s ceiling. Hot air naturally ascends, so this placement effectively vents heat. This ensures a more comfortable and healthy space for your chickens.
Building your own chicken coop? Gathering the correct supplies is essential. This image showcases various tools and materials vital for your coop construction project in 2025.
Initially, you’ll see wooden planks and dowels. These components create the coop’s core structure. Opting for high-quality wood guarantees long-lasting protection for your chickens against weather conditions.
You’ll also need key tools such as a hammer and clamps. These will be invaluable during coop assembly. Quality tools streamline the building process and make it more satisfying.
Screws and nails are essential for a secure coop. A robust structure is vital, particularly in areas prone to high winds or predators.
Finally, remember the mesh or wire. It’s crucial for good airflow and chicken safety. Choose the correct gauge to keep predators out.
Choosing the Right Location for Your Chicken Coop
Choosing the right spot for your chicken coop is crucial. Observe the red coop in the picture, perfectly situated in a tidy backyard. This location offers a good mix of sun and shade, vital for healthy chickens.
Firstly, think about sunlight. Chickens thrive with some sun exposure daily. However, they also require shaded spots to escape the heat. The big tree provides ideal shade, ensuring a pleasant space for the chickens.
Consider accessibility next. Aim for effortless coop access for daily tasks like feeding and cleaning. The design shown prioritizes easy access while ensuring chicken safety. Also, confirm the absence of disturbances, such as busy roads, that could stress your flock.
Also, monitor the drainage carefully. Chickens prefer dry areas, avoiding mud. This well-maintained lawn indicates excellent drainage, making it a perfect location for them.
Finally, think about how close the coop is to your house. A nearby coop simplifies daily tasks and keeps your hens safe. Careful planning lets you create a great chicken space, similar to the beautiful one shown here!
Designing a Functional Coop Layout
In 2025, smart chicken coop design prioritizes efficient space utilization. This image showcases a streamlined layout, optimizing both chicken movement and overall cleanliness. It offers chickens plenty of room to move around while maintaining a well-organized environment.
Our coop’s layout features specific zones for nesting, feeding, and ample roaming. This setup prioritizes your chickens’ comfort and well-being. Notice the well-defined walkways? They provide effortless access to all areas of the coop.
Improve your coop’s atmosphere with good airflow and sunlight. This design shows a great balance of these needs, ensuring your chickens are safe and comfortable. A smart layout simplifies daily tasks, letting you better enjoy caring for your flock.
Planning your DIY chicken coop? Consider how your flock will use the space. A well-designed coop boosts their health and your enjoyment of raising chickens. Smart planning is key to success!
Installing Durable Flooring
Constructing a chicken coop? Prioritize the flooring! This image showcases a charming coop featuring wooden beams and natural sunlight. The floor is currently being built, with boards in place and wood shavings spread about. Remember, a durable floor is key to your chickens’ well-being and comfort.
Selecting the appropriate material is key for your chicken coop. Treated plywood or concrete are excellent choices. They offer easy cleaning and resist moisture effectively. A robust floor stops mud and water from entering, keeping your chickens dry and healthy. Enhance their comfort and waste control by adding a layer of straw or wood shavings.
This image showcases the initial stages of a wooden floor, destined to be ideal for your chickens. Ensure each board is firmly secured. Chickens are inquisitive and may peck at any unsecured edges. A properly installed floor enhances the coop’s appearance and guarantees a secure space for your flock in 2025.
If your coop is outside, drainage is key. A slightly sloped floor directing water away will maintain cleanliness. Thoughtful flooring choices significantly improve your coop’s upkeep!
Building the Coop Frame
Constructing your chicken coop’s frame marks a significant milestone in your DIY journey. This image showcases a robust frame featuring upright wooden supports and a durable roof. The open layout promotes ample ventilation, crucial for maintaining your chickens’ well-being in 2025.
The frame utilizes unfinished wood, a cost-effective and bird-safe option. Precise measurements and cuts are crucial for a snug fit. Eliminate gaps to keep predators out!
A grid sits at the coop’s heart, directly on the ground. It likely serves as a foundation for coop flooring or a designated run space. This grid design aids in maintaining cleanliness and facilitates drainage. Selecting the right flooring is crucial. It helps prevent pests and ensures a hygienic environment for your chickens.
Building your chicken coop frame is manageable. Follow each step carefully, and you’ll quickly create a comfortable space for your chickens.
Constructing Roosting Perches for Comfort
Roosting perches are a must-have in any chicken coop. They offer your chickens a comfortable place to sleep at night. This image displays strong, well-designed perches, perfect for chickens to relax. Crafted from durable wood, these perches are spaced correctly. This ensures each bird has ample space.
Consider height and width when constructing roosting perches. Chickens typically like higher roosts. Position perches at a comfortable height for them to reach. The perch width should allow them to fully grip it for security, without being excessively wide.
Notice the slight slant of the perches in the picture. This angled design stops chickens from slipping at night. Smooth, splinter-free wood adds to their comfort. It’s a simple upgrade that greatly improves their living space.
Ensure ample space between roosting bars to minimize conflicts. Chickens establish a pecking order, and sufficient room promotes flock harmony. A comfortable roosting setup contributes significantly to their overall health and contentment.
Implementing a Feeding System
A well-designed feeding setup is crucial for healthy, happy chickens. The image showcases multiple feeding bowls filled with a grain mix, vital for their nutrition. These bowls are carefully positioned, allowing easy access for your flock to eat comfortably.
Optimize your chicken feeding setup with elevated feeders, as pictured. These feeders minimize feed waste and maintain cleanliness. This design also deters pests from accessing the food. Regularly inspect and refill the bowls, ensuring they are clean. This practice keeps your chickens eager for feeding time.
Offering a diverse grain mix ensures your chickens receive a well-rounded diet. Consider incorporating corn, oats, and protein-rich pellets. Each component contributes uniquely to their overall health. A little variety significantly boosts their well-being. Consequently, your chickens will be healthier and more productive in 2025!
Creating an Outdoor Run for Chickens
Creating an outdoor chicken run is both enjoyable and beneficial for your flock. The picture showcases happy chickens in their expansive enclosure. They have ample space to forage and explore on the grassy ground. Comfortable shelters are also provided, offering respite from the elements.
Think about size and materials when designing your chicken run. Aim for a minimum of 10 square feet per chicken. This gives them ample room to flourish. Strong fencing is crucial for protecting them from predators.
The image highlights the enclosure’s secure fencing. Its height prevents unwanted animal intrusions. A roof offers extra protection from birds of prey. Enhance the space with perches, dust bathing areas, and shaded spots under trees for an enriching environment.
An engaging outdoor space is key to happy and active chickens. Observing their natural behaviors as they explore and interact is a joy. A thoughtfully planned run is essential for a thriving chicken coop in 2025!
Using Waterproof Roofing Materials
Selecting the ideal roofing for your chicken coop is crucial. A weatherproof roof ensures your chickens stay dry and comfortable, particularly when it rains.
This image showcases a sturdy chicken coop featuring a slanted roof. Dark shingles cover the roof, offering both an appealing aesthetic and superior weather resistance.
Opting for durable materials such as asphalt shingles or metal roofing guarantees a watertight structure. This proactive measure prevents water damage, minimizing future repair costs and extending the lifespan of your chicken coop.
Also, think about adding a small overhang. This will guide rainwater away from the coop’s sides. This keeps it drier and boosts its lifespan.
Ventilation is key! Ensure your 2025 roof design prioritizes proper airflow. This prevents moisture buildup without sacrificing essential waterproofing.
Installing a Chicken Door for Easy Access
Imagine a snug chicken coop featuring a perfectly sized door for your flock. This is where a chicken door shines. It grants chickens the freedom to move in and out as they please, simplifying their daily routines. A thoughtfully crafted chicken door is a straightforward, yet valuable, enhancement to any DIY chicken coop endeavor.
The photo showcases a chicken curiously looking out from a miniature door. This clever design provides chickens with effortless outdoor access. It also enhances the coop’s aesthetic appeal. Constructing this door involves readily available materials. Installation is surprisingly straightforward, despite initial impressions.
Design your chicken door with size and location in mind. Ensure it’s adequately sized for easy chicken passage. A secure latch is crucial for nighttime safety. This provides assurance knowing your chickens are protected.
Adding a chicken door to your coop is a great idea. It lets your chickens roam outside, boosting their well-being. It also simplifies feeding and care.
Securing the Coop from Predators
Protecting your chickens from predators is crucial when designing a coop. The photo showcases a secure coop featuring robust wire mesh. This design effectively prevents predators from entering, while allowing your chickens to safely roam outside.
Wire mesh creates a strong barrier against most animals. Select a durable, rust-resistant material to handle weather conditions. Consider covering the top for added protection against jumping or flying predators. The coop in the picture includes a covered roof, a wise safety measure.
Also, examine the area surrounding your chicken coop. Predators such as raccoons and foxes might try to dig under the walls. To stop them, bury wire mesh about 12 inches deep around the coop’s edge. This simple measure offers added security and protects your chickens.
Always secure your chicken coop! Use strong locks on all doors and windows. The coop pictured has a door lock, a simple but effective safety feature. Check these areas often to keep your chickens safe, both day and night.
Providing Fresh Water Sources
Providing fresh water is essential for healthy chickens. This image showcases an organized watering system for your flock. Multiple water containers are neatly arranged, guaranteeing ample hydration all day long. These containers are designed for optimal water storage.
Ensure your chickens always have fresh, clean water, particularly during hot weather. The elevated water containers shown help maintain water purity by preventing dirt and debris contamination. This user-friendly design simplifies refilling and upkeep.
Opt for sizable, robust water containers. This reduces how often you need to refill them. If you have many chickens, provide several water sources. This prevents overcrowding. Fresh water is vital. Change it regularly to keep your chickens healthy.
Beyond using containers, consider a water heater during winter. This prevents freezing, guaranteeing your chickens always have access to water. These methods simplify providing essential hydration for healthy, thriving chickens.
Incorporating a Cleanout System
A crucial element when constructing a chicken coop in 2025 is a well-designed cleanout system. This greatly simplifies maintaining a hygienic space for your chickens. The image showcases a straightforward and efficient cleanout solution. A white container serves as a receptacle for used bedding and droppings, promoting cleanliness and ease of management.
Providing a specific waste area is a great idea. The chickens can roam freely, keeping their living space tidy. Regular waste removal reduces smells and creates a healthier environment for your chickens.
The image also features a convenient scoop. It hangs close by for easy access. This tool simplifies waste collection and speeds up cleaning. Proper tools and a well-planned setup minimize cleaning time. This allows you to dedicate more time to enjoying your chickens in 2025.
Decorating the Coop for Style
In 2025, chicken coop design balances aesthetics and practicality. The coop in the picture exemplifies this with its lively colors and delightful accents, fostering an inviting space. Its sunny yellow and vibrant orange paint scheme is visually appealing and injects a joyful ambiance into any backyard setting.
Adding decorative touches, like the “Buckeen Rous” sign, personalizes your coop. This small detail showcases the joy of chicken keeping and makes the space uniquely yours. Naming your coop is a fun way to express your personality and add character to your backyard.
Adding plants and flowers elevates your chicken coop’s look. Potted arrangements beautify the area and create a natural habitat for your hens. Think about planting petunias or other vibrant flowers that flourish locally. This adds color and can attract helpful insects, improving the coop’s ecosystem.
Remember to include functional decorations! A door wreath perfectly blends style and practicality. It’s an easy way to create a welcoming coop atmosphere, ensuring your chickens feel at home. A comfortable and inviting coop can lead to healthier, happier chickens.
Lastly, think about adding fun details, such as rooster decorations on the roof. These whimsical touches showcase your passion for chickens and boost the coop’s charm. With some imaginative ideas, you can turn a simple chicken coop into a charming haven that both you and your flock will adore.
Monitoring Chicken Health and Behavior
Monitoring your chickens is vital for their health. The picture displays a caretaker carefully watching his chickens. This close observation helps in detecting potential health problems quickly.
Chickens use body language to express emotions. A chicken isolating itself might be sick. Regularly monitor your flock for signs like low energy or altered appetite. This helps ensure a healthy coop.
Spending time with your chickens lets you learn about their individual personalities. Each bird has unique traits. Noticing these quirks helps you spot changes in behavior. These changes might signal stress or illness.
Boost your flock’s well-being with easy monitoring methods. Track their behavior and health in a journal for long-term insights. Ensure your chickens flourish, not just lay eggs, in their coop. This proactive approach helps maintain a healthy and productive flock.
Building a Chicken Coop on a Budget
Building a chicken coop doesn’t require a fortune. This picture highlights a comfortable chicken coop. It’s constructed from budget-friendly and practical materials.
This design boasts a delightful wooden exterior. It includes a sloped roof and secure mesh windows. These features enhance the aesthetic appeal and ensure the safety of your birds. Using recycled wood or pallets can dramatically reduce building expenses.
Up front, two chickens seem content in their surroundings. This shows how a good coop boosts their well-being. Forget elaborate designs; practical features create a happy home for your flock.
Explore local suppliers and repurposed items for cost-effective solutions. Check out nearby hardware stores or community marketplaces for unique finds. With a bit of imagination and effort, you can construct a functional and budget-friendly chicken coop.
Choosing the Right Chicken Breeds for Your Coop
Choosing the right chickens for your backyard coop requires careful consideration. What are your goals? Are you primarily interested in egg production, meat, or simply enjoying the company of these feathered friends? Different chicken breeds possess unique characteristics that can guide your selection process in 2025.
This image showcases a diverse array of chickens. Their striking feather patterns and vibrant colors make them both practical and visually appealing. The Rhode Island Red breed is celebrated for its exceptional egg-laying capabilities. Conversely, Orpingtons are known for their gentle nature and suitability as family pets, especially around children.
Think about your local climate. Certain chicken breeds excel in cold conditions. Others are ideal for warmer areas. Leghorns, for instance, flourish in hot weather. This makes them a great option for warmer regions.
Consider space when planning your coop. Determine how many chickens it can comfortably house. A compact coop suits a few Bantam chickens well. These smaller breeds need less space. If you have ample room, larger breeds will flourish. They’ll also provide you with a generous supply of eggs.
In conclusion, thoroughly research various chicken breeds. Consider their specific requirements, temperament, and compatibility with your daily life. Selecting the perfect breed ensures your chicken coop becomes a joyful and enriching part of your home in 2025.