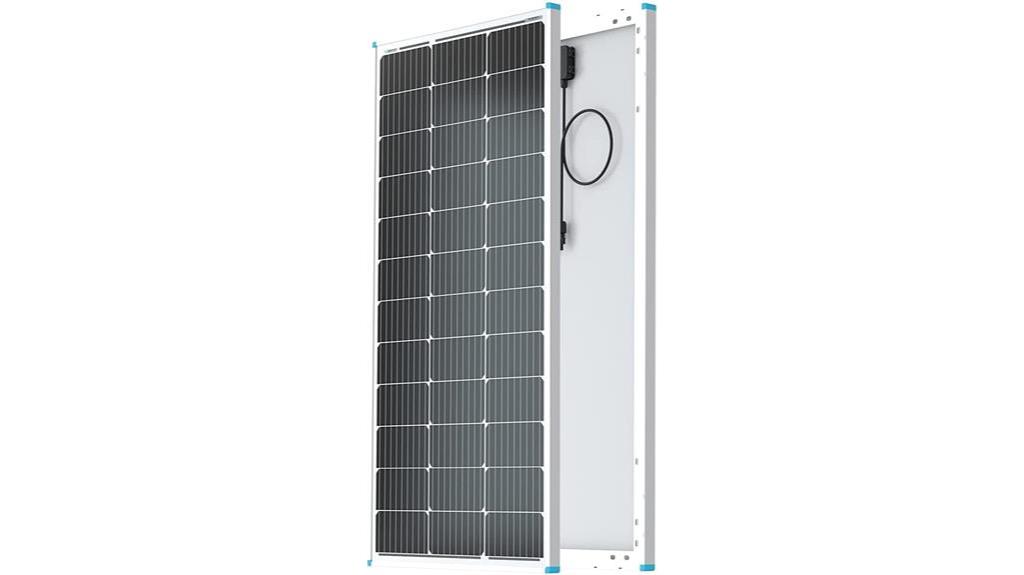
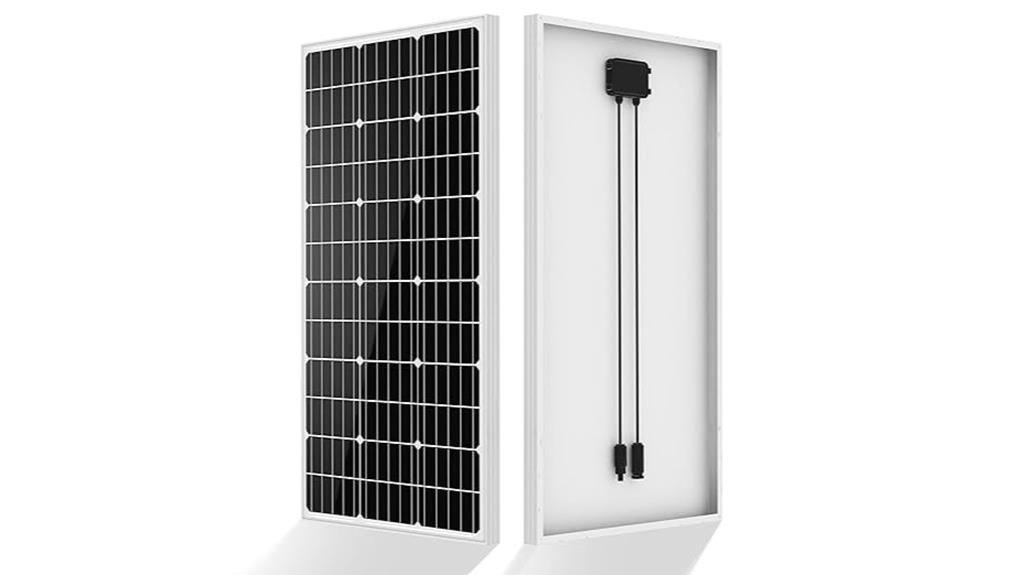
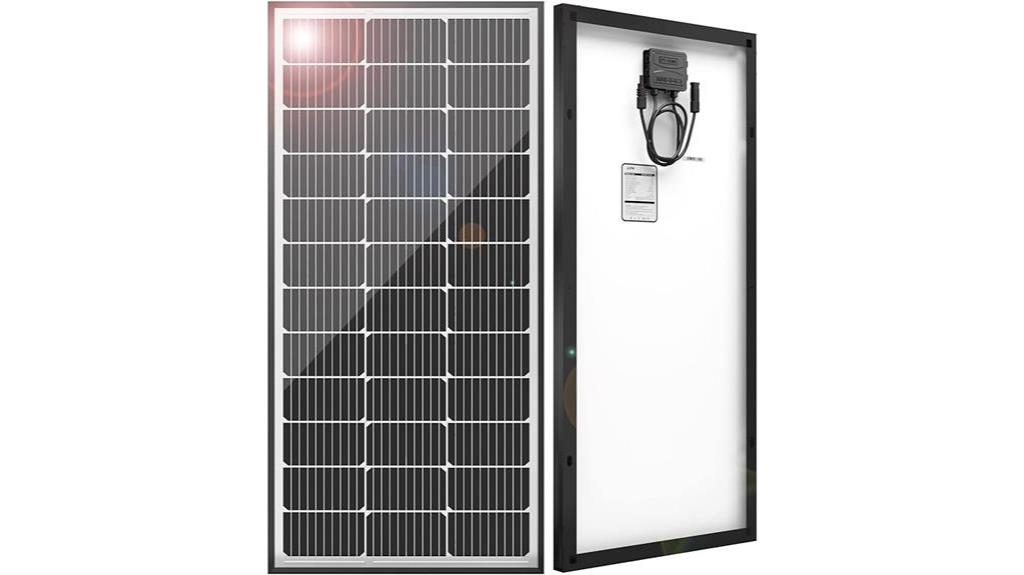
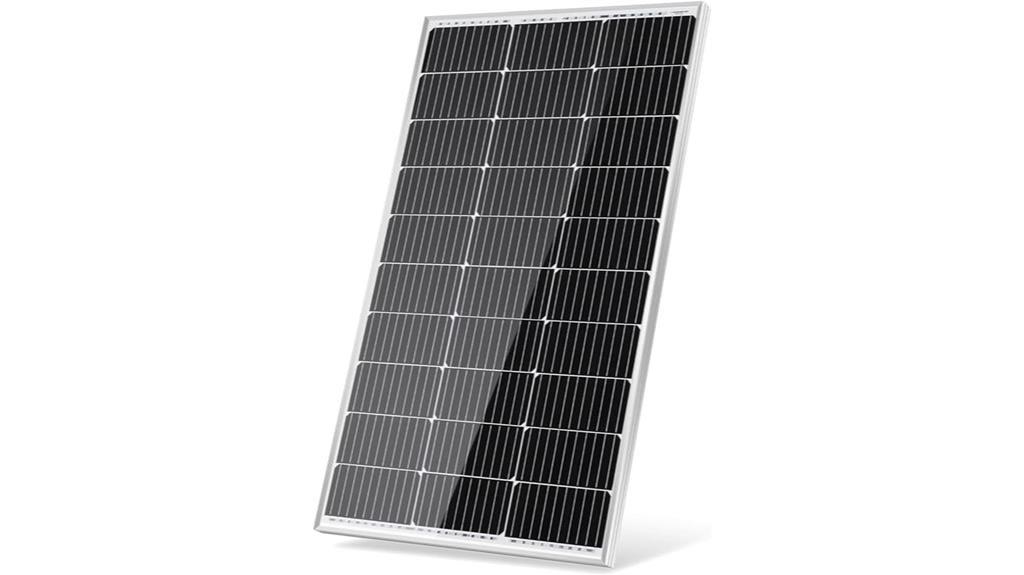
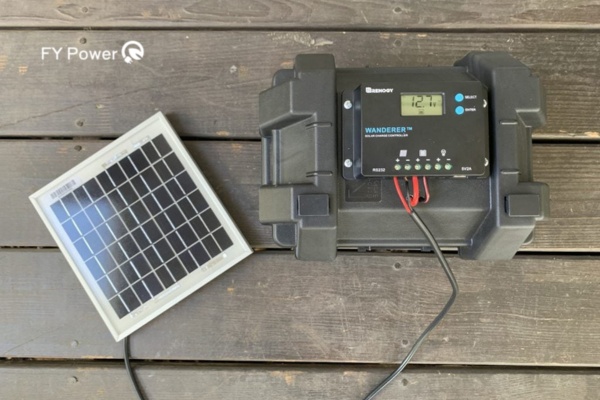
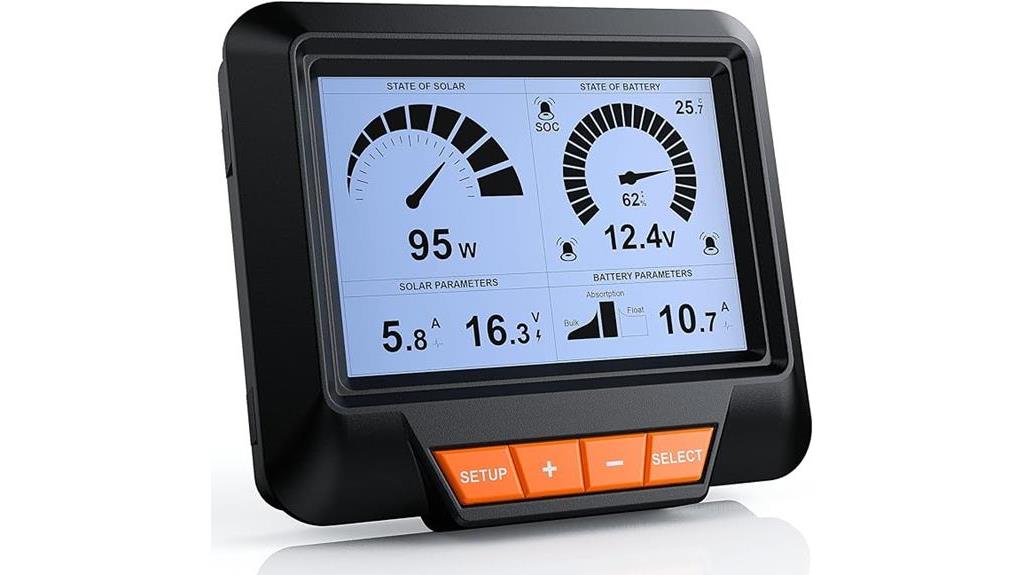
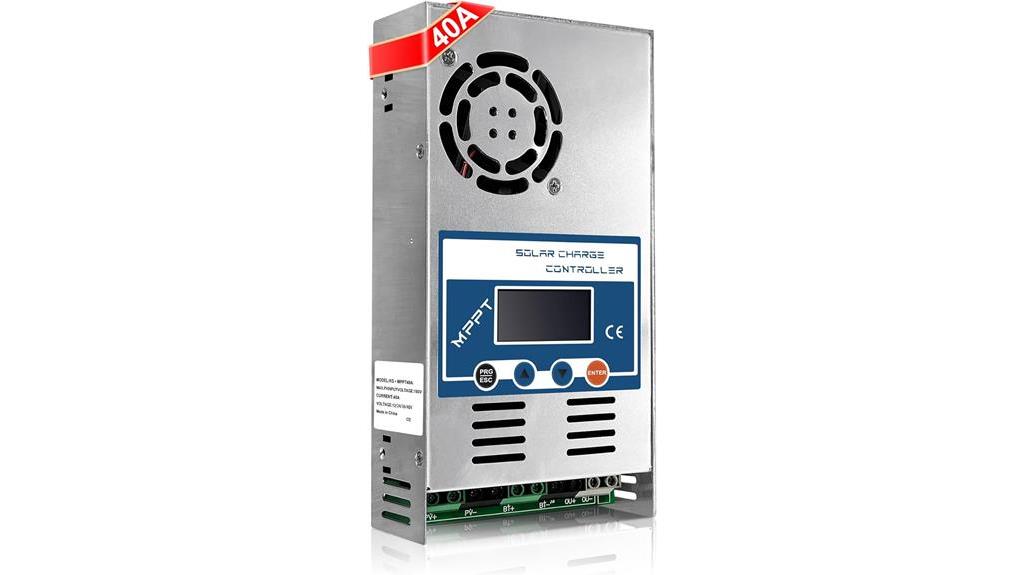
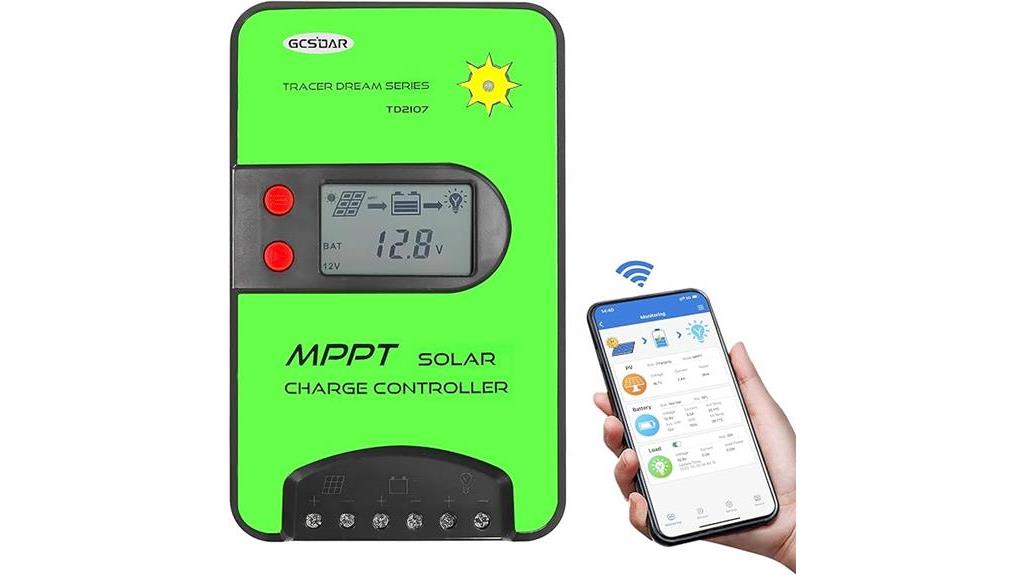
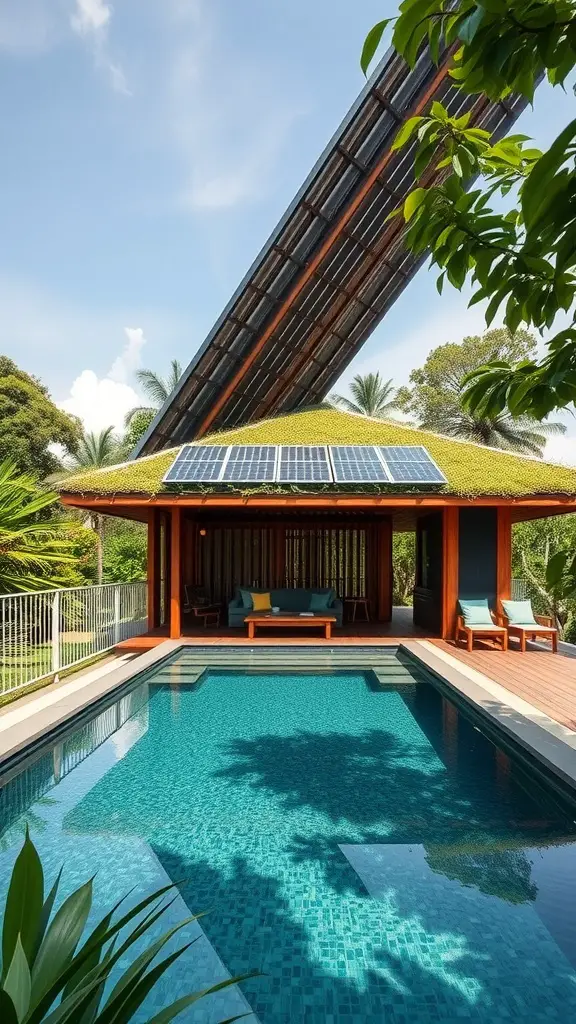
Author: Walter McGuire

  • Solar Panel Installation: Your First-Time DIY Setup Guide

    Setting up your first solar panel system can feel like you’re stepping into a future filled with bright, sun-powered possibilities! It’s a move that can shrink your energy bills and grow your home’s green credentials in one fell swoop.

    But diving into the world of solar energy for beginners might seem a bit daunting – wires, panels, inverters – oh my! Don’t worry; I’m here to walk you through every step with simple terms and big-time energy savings.

    So, how do you set up your first solar panel system? You’ll want to start by understanding the basics: choosing the right location, selecting suitable panels, and getting familiar with all necessary gear.

    From there, it’s all about safely securing your panels in place and hooking them up to harness that glorious sunshine. With my guide, you’ll learn not just to install but also how to get every ounce of power from each ray of light.

    What You Love Finding Out Here

    • Clear-cut steps are simplified for any beginner
    • Money-saving tips on DIY solar panel installation
    • Pointers on ensuring peak performance from your new solar setup
    • Stay-out-of-trouble tricks during your first-time setup

    Solar Panel Installation Basics

    Installing solar panels typically begins with an assessment to determine the best location, angle, and size system for your property. Professional installers then mount panels onto the roof or ground, ensuring they are securely attached and properly aligned.

    Solar Panel Installation Basics

    Wiring connects the panels to an inverter, transforming the generated DC electricity into AC power for home or grid use. Installations must comply with local regulations, safety standards, and electrical codes.

    Understanding How Solar Panels Work?

    Let me tell you how solar panels can take sunshine and make power for your house or any place. It really is quite cool. Panels are made up of many little parts called photovoltaic cells – think of them like bits that love sunlight. They grab light from the sun and use it to make electricity.

    Here’s what happens step by step:

    1. Sunlight hits the solar panel: The bright light from the sun comes down and lands on your solar panels up on the roof.
    2. Photovoltaic cells get busy: These tiny cells are like magic – they take in the sunlight and turn it into direct current (DC) electricity.
    3. Electricity gets transformed: Our houses need a different kind of electricity called alternating current (AC), so a gadget named an inverter changes the DC into AC.
    4. Power flows to your home: Now that the electricity is right, it goes straight into your home, feeding your lights, fridge, TV, and all that stuff with power!

    It’s a smart way to make power right on top of your house without hurting our planet.

    Preparing for Your First Installation

    Before you bring home those shiny panels, here’s what you have to do first.

    1. Check out where to put them:
      • Look around for a good spot where they can see lots of sun – usually up high on your roof works great.
      • You want them facing just right so they catch as much sun as they can throughout the day.
    2. Take a good look at your roof:
      • Make sure it’s strong enough to hold up those solar panels – they aren’t light as feathers!
      • The roof should be in tip-top shape; no wobbly tiles or leaks because once those panels go up, fixing stuff underneath is going to be really hard.
    3. Know what rules to follow:
      • Some places have special rules for putting up solar panels, so you’ve got to know these before starting.
      • You might need to ask someone official if it’s okay (get a permit) or check with others living near you if they don’t mind.
    4. Figure out if you can spend less money:
      • Sometimes there are sweet deals or help from governments when you choose clean energy like solar; worth looking for that!

    Doing this prep work means no nasty surprises later on when you’re all set to make clean energy at home with those awesome sunshine-loving panels.

    Also Read: LiFePO4 Batteries: Solar Panel Charging Simplified

    Step-by-step Guide to Installing Solar Panels

    When you’re ready to dive into the world of solar energy, the first big task is setting up your very own solar power system. Let’s break down each step one by one, so you know exactly what tools you need and how to make your solar panel installation a success.

    Step 1: Assembling Necessary Materials & Tools

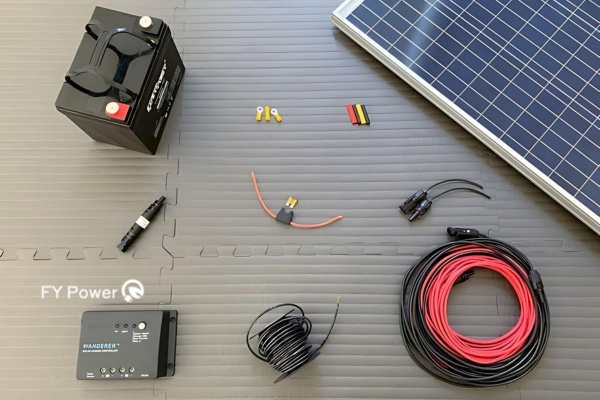
    Before we start banging on rooftops or digging in the dirt, I need to gather all my gear for this solar panel adventure. You wouldn’t bake a cake without flour or eggs, right? So here’s what I need for this recipe:

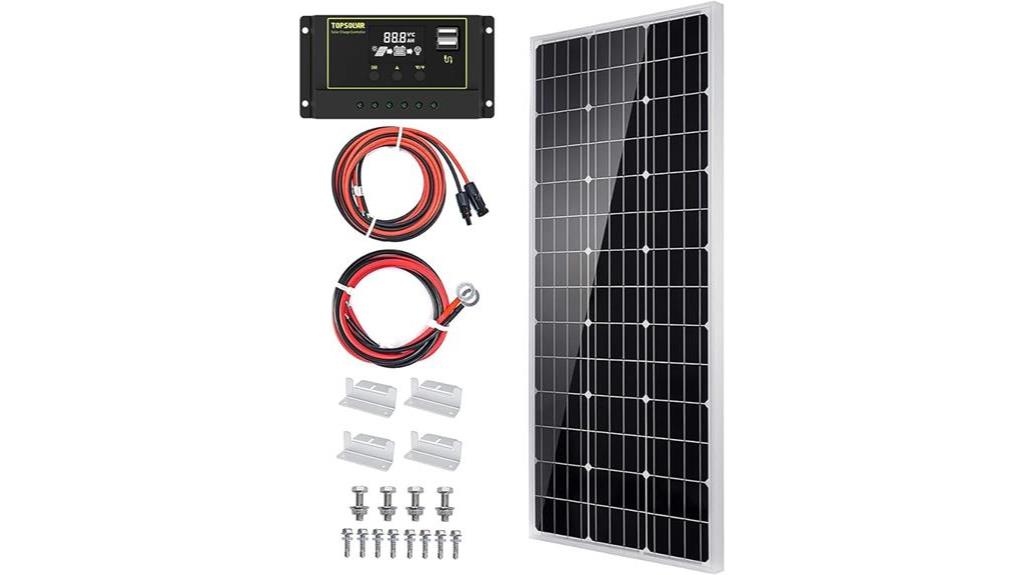
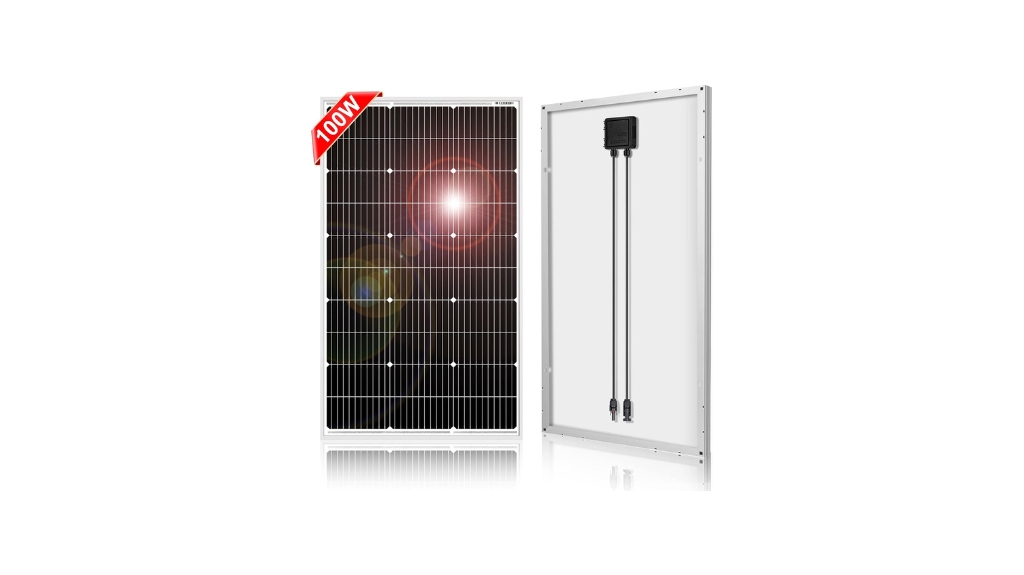
    • Solar Panels: These are the stars of the show; they catch sunlight and turn it into power.
    • Inverters: This widget takes the power from the sun that’s all wild and turns it into electricity that plays nice with our home appliances.
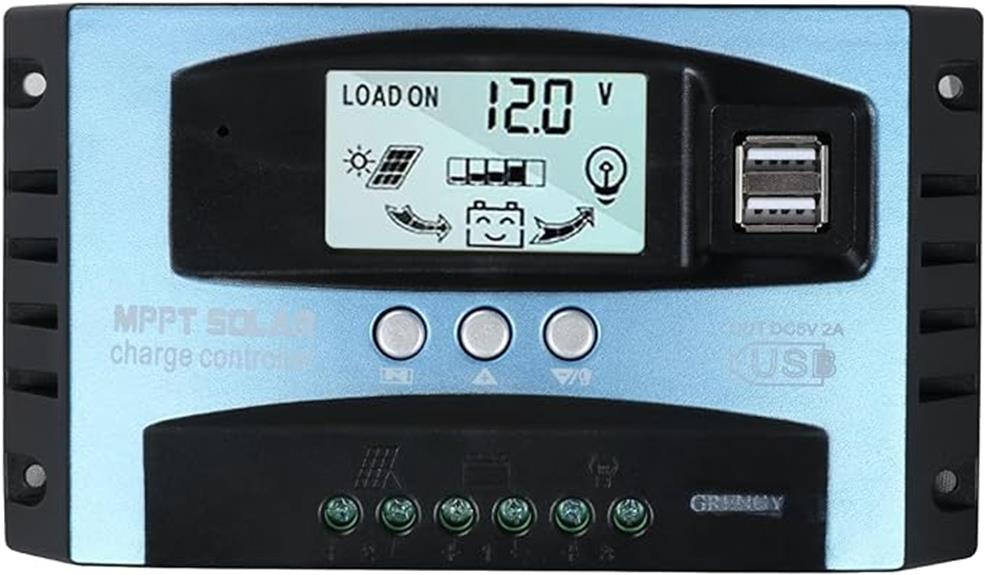
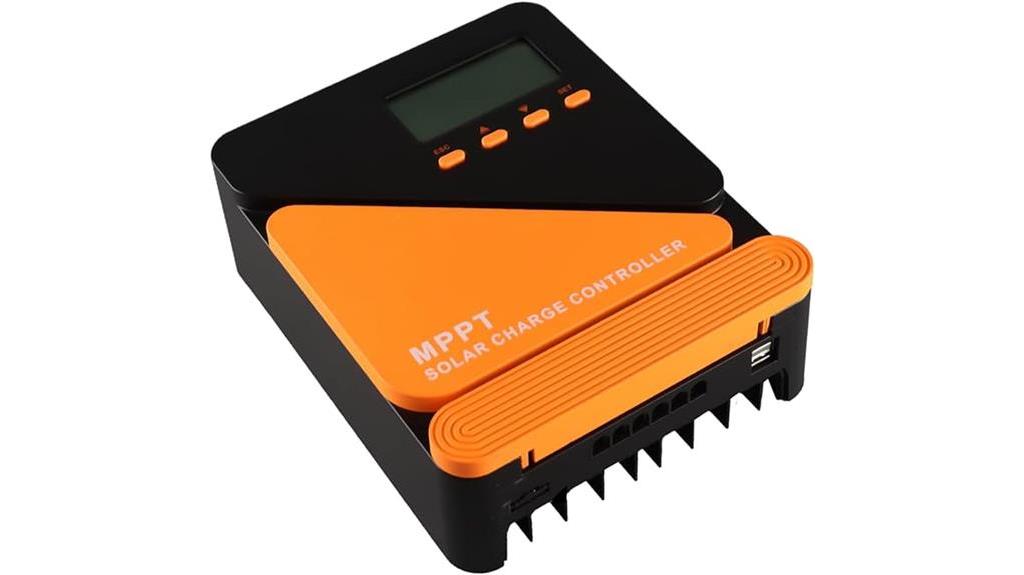
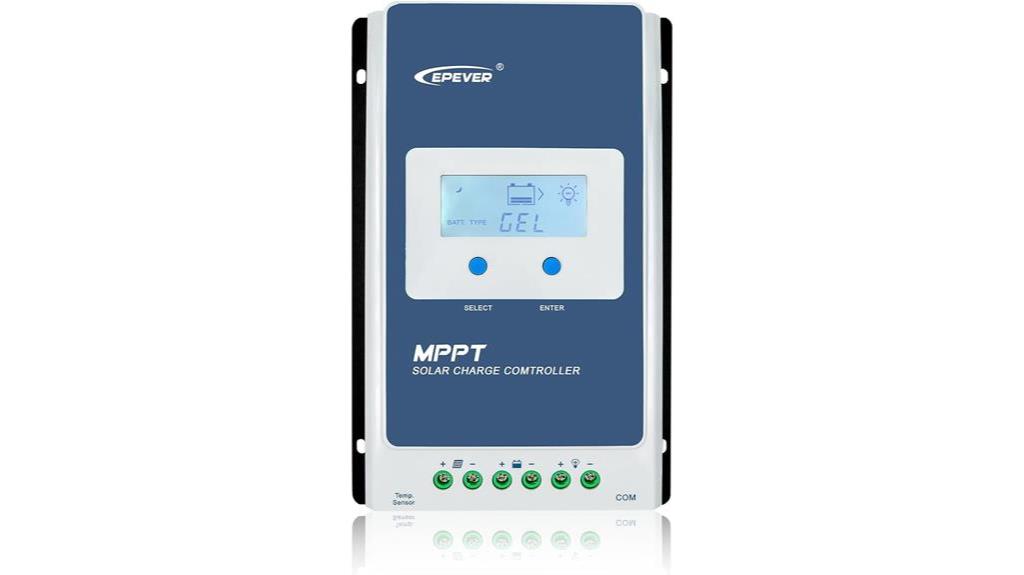
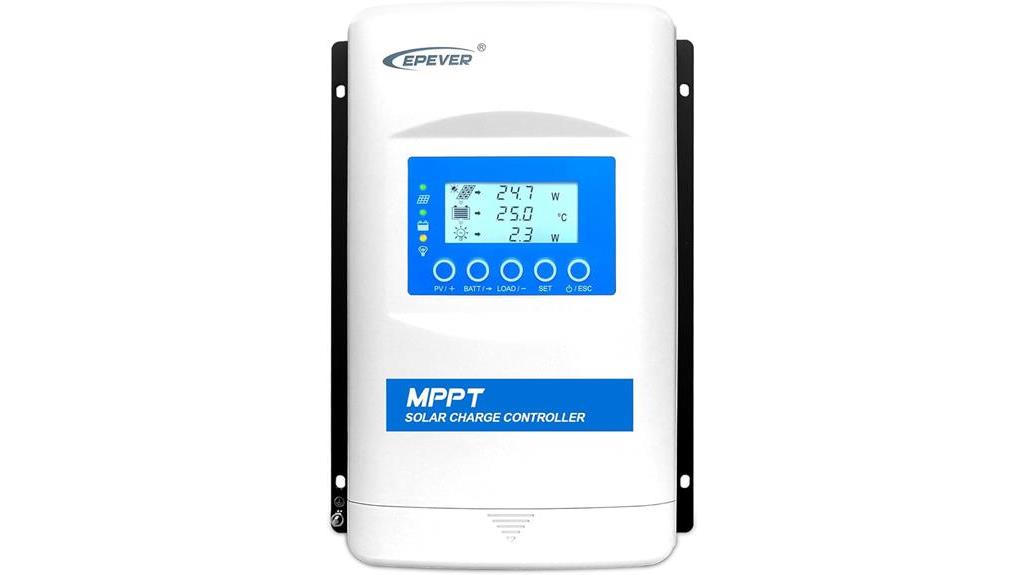
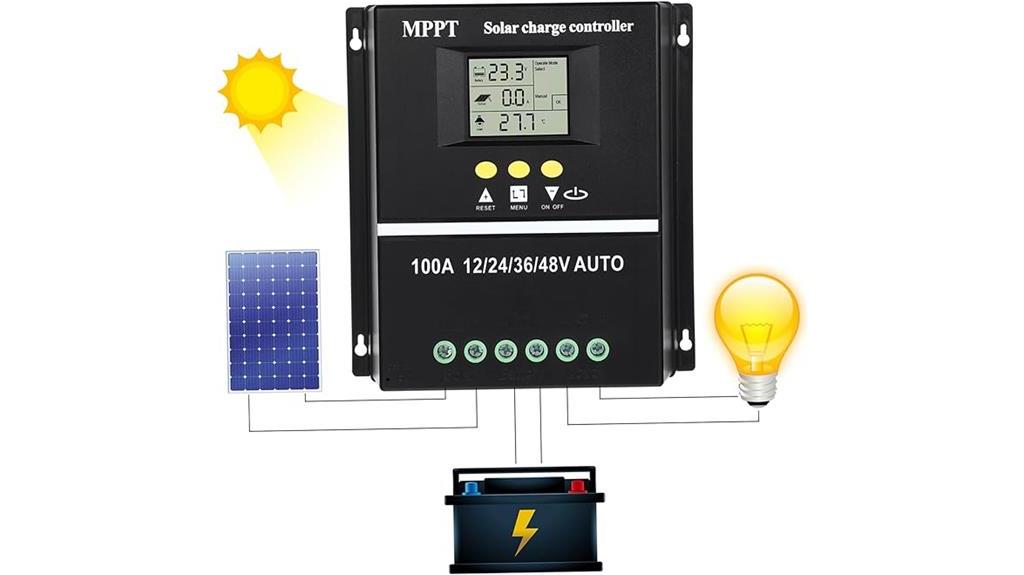
    • Charge Controllers: Imagine these as bouncers at a club; they keep the battery from getting too full or empty.
    • Batteries: Where we store all that sunny goodness for a rainy day.
    • Racking system: This is basically the bed where my solar panels will sleep on either my roof or ground mount.
    • Wiring and connectors: My trusty messengers run between my panels, inverter, and other gadgets.
    • Safety equipment: Don’t forget your gloves, hard helmet, and safety glasses! Safety first!

    Step 2: Safely Mounting Your Panels

    Now that we have our toolbox ready let’s get those panels up there safely:

    1. Find just the right spot: It should be sunny most times because shade is not our friend here. If I’m going rooftop, I’ll make sure that roof can handle it both physically and legally (remember those permits).
    2. Set up my racking system securely: Whether it’s on legs in my yard or hugging my roofline, it needs to be bolt-solid because no one likes a runaway solar panel!
    3. Lift those panels with care (and probably some help): No scratches please; these things are sensitive!
    4. Bolt them tight: We’re talking locked-in so the wind won’t whisk them away.

    Step 3: Electrical Connections Made Simple

    Here comes Mr. Electricity’s part in our beginner-friendly guide to plug-and-play with Mother Nature:

    1. Map out your wiring scheme beforehand – planning saves headaches later.
    2. Connect those panels together: It’s like stringing Christmas lights but more sunlight and less tangle-prone.
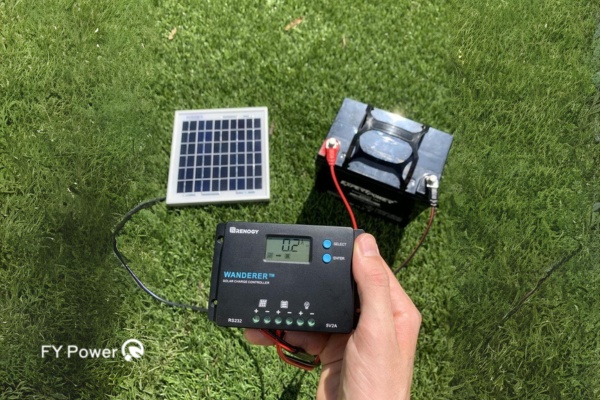
    3. Hook up your charge controller next right between those precious batteries and the assembly line of panels churning out voltage candy from sunlight.
    4. Run cables down to your inverter – here comes regular old electricity ready for pop tarts in toaster or late-night TV!
    5. Double-check each connection; is everything snug and tidy?

    You better believe safety checks are key at every step along this electric avenue! Before hitting “ON,” we whisper a little mantra; “No zap today.”

    And there you have it! My own slice of sun-to-power magic sitting pretty either on terra firma below me or gleaming gently atop where Santa visits.

    Remember making sure everything stays dry and out of harm’s way goes without saying – no sparks fly tonight! Installing those guards against mischievous children poking about might be smart too.

    Setting up solar myself may seem like climbing Everest at sunrise but look at me go — nailing down step by solid step!

    Also Read: Who Makes Westinghouse Generators and Where?

    Testing Your Newly Installed Solar Panels

    After setting up my solar panels, I always make sure to test them before having them go live. It’s a critical step—I mean, you wouldn’t drive a car without checking if the brakes work, would you? Here’s what I look into:

    Testing Your Newly Installed Solar Panels

    Initial Inspection & Precautions

    Once I am done with the solar panel installation, before turning everything on, I carry out a list of checks for safety and to ensure that all is well. These include:

    1. Visual Inspection: Look at all the panels to make sure they’re not damaged and are properly mounted.
    2. Wiring Check: Double-check that all wiring is secure and correctly placed—no loose ends!
    3. Connections Test: Ensure each connection point is tight and corrosion-free.
    4. Inverter Review: Examine the inverter display for any error messages or lights that suggest a problem.
    5. Mounting Check: Verify that the mounting system has no loose bolts or structural issues.

    Doing this helps prevent any accidents or damage when it’s time to power up.

    Troubleshooting Common Hurdles

    When I started working with solar panels, I hit some potholes along the way. Here’s what often pops up:

    1. No Power Production: Sometimes nothing happens when you flick the switch—usually because of a poor connection somewhere.
    2. Low Power Output: If there’s power, but not enough, it could be because of shading over your panels or incorrect wiring.
    3. Inconsistent Power Supply: This can happen if your batteries (if you use them) are failing or if there’s an issue with your charge controller.
    4. Error Messages on Inverter: These need immediate attention as they could signal something seriously wrong in your setup.

    Whenever these issues crop up, keeping calm is key—most problems have simple solutions like removing shade obstructions or tightening connections!

    Maximizing Efficiency After Installation

    Maximizing efficiency after installation is crucial in any system or process. It involves identifying potential bottlenecks or areas of improvement and implementing measures to enhance productivity. This can include optimizing workflow, utilizing new technologies, training employees, or streamlining operations.

    Maximizing Efficiency After Installation

    By continually striving for efficiency, organizations can increase productivity, reduce costs, and achieve better overall performance.

    Maintaining Your Panels

    Maintaining solar energy systems isn’t rocket science; follow these steps regularly:

    1. Clean Panels: Dust off dirt that blocks sunlight—I aim for at least twice a year.
    2. Inspect Wiring: Animals love biting wires; check annually to spot any gnaw marks before they cause trouble!
    3. Tree Trimming: Keep shadows away by cutting back overhanging branches that might shade your panels during certain times of the day.

    It isn’t only about installing; maintenance counts big time towards efficiency in the long-term performance of my solar setup!

    And there we have it! By sticking to these guidelines, making sure everything works perfectly feels less like another chore and more like preserving my own piece of sunshine-powered heaven on earth.

    Also Read: Crimping MC4 Solar Connectors: Detailed Guide in 7 Steps

    FAQs

    Do Solar Panels Work on Cloudy Days, and How Does This Affect Installation?

    Yes, solar panels can still generate electricity on cloudy days but at reduced efficiency. Clouds affect the amount of sunlight reaching the panels. Your installation will be the same, just make sure to plan for panel placement that captures as much light as possible.

    How Long Will My Solar Panel System Last After Installation?

    A solar panel system typically lasts around 25 to 30 years after installation. With proper care and maintenance, some methods can continue operating efficiently beyond that time frame.

    Can I Install Solar Panels Myself or Should I Hire a Professional?

    While DIY solar panel installation is possible, it requires technical knowledge and experience with electrical systems. For safety and optimum performance, it’s often recommended to hire a professional for solar panel installation.

    Conclusion

    I hope this guide has been light on your path to harnessing the sun’s power through your first solar panel system. Remember, patience and careful attention to each step can make a significant difference in not just the setup but also in the performance of your solar panels.

    If you’re ever unsure or hit a bump along this journey, don’t hesitate to seek professional advice or look up more information—you’re not alone in this!

  • Sizing Solar Charge Controller: The Ultimate Guide

    Every ardent supporter of renewable energy knows that harnessing sunlight to power a home is an art in itself. However, the secret ingredient behind an efficient solar power system lies in mastering your savior – the Sizing Solar Charge Controller Perfectly! But how does one go about sizing a solar charge controller? Read on, my friend, as this guide will handhold you through it all.

    Just like getting a well-fitted suit stitch requires your exact measurements, sizing the solar charge controller needs calculation and precision. It lays the groundwork for ensuring optimal system performance and maximizing your off-grid energy management efficiency. In short, right-sizing safeguards your entire solar set-up – battery bank, panels, and all connected devices.

    What You’ll Discover Here:

    • Insights into why accurate sizing of solar charge controllers is crucial.
    • A comprehensive step-by-step guide to help you size your charge controller correctly.
    • Compatibility check-points with other system components.
    • Additional considerations beyond basic sizing for optimizing performance.
    • Information on why factors such as temperature matter too.

    Determining the Right Size for Your Solar Charge Controller

    Determining the correct size for your solar charge controller is crucial to ensure the optimum performance of your solar power system. The size of the charge controller should match the capacity of the solar panels to regulate the charging process effectively.

    Determining the Right Size for Your Solar Charge Controller

    Oversized or undersized charge controllers can lead to reduced efficiency and potential damage. It is essential to carefully evaluate the system’s voltage, current, and power requirements to select the right controller size for proper functioning.

    Breaking Down the Basics of Sizing Solar Charge Controllers

    Before we go deep into sizing a solar charge controller, let me explain what it is. A solar charge controller is a critical part in any solar power system. It’s like a manager; it controls how electricity from your solar panels charges the batteries. Why does size matter? Because if it’s too small, it won’t handle the energy well. And if it’s too big, you waste money buying more than you need.

    Picture this: If you have a cup and try to fill it with water using a big bucket all at once, you will surely spill some water, right? That’s what happens if your charge controller is not right for your system; energy gets wasted.

    The Importance of Accurate Sizing

    Understanding the right size for a solar charge controller is very important. If it’s too small, the controller may get too hot. That’s because it has to deal with more power than it can handle. This overheating might not only break the controller but could also ruin your entire solar system.

    To keep your solar energy system working well, picking the exact right size is key. Think about a boat with a crew: each member must do their work perfectly, or the boat could flip over. In the same way, every part of your solar setup must be correctly sized to work together without any problems.

    Why is correct sizing essential?

    • Avoids Overheating: A small controller can’t manage high power and may get too hot.
    • Protects Your System: Preventing damage means everything lasts longer.
    • Ensures Efficiency: The right-sized equipment makes sure your system runs at its best.

    Always double-check that you have the right size for every piece of your solar energy setup!

    Also Read: Solar Power Bank Wonders: Do They Actually Work?

    Step-by-Step Guide to Sizing Solar Charge Controller

    To properly size a solar charge controller, follow these steps: First, calculate the total solar panel wattage and the system voltage. Next, determine the maximum charging current requirement by dividing the total solar panel wattage by the system voltage.

    Then, select a charge controller with a maximum charging current rating that matches or exceeds the calculated requirement. Finally, consider factors like system expansion and future load increase to ensure the charge controller can handle the potential growth.

    Step 1: Calculate Solar Array Wattage

    Now let’s start figuring out which solar charge controller size fits best:

    First, write down how much power each of your solar panels makes (that’s their wattage). Say one panel makes 100 watts and you have ten panels; that would be 100 watts times ten – simple math leads us to 1000 watts total!

    Next, consider what kind of battery bank you’re using – are these 12-volt batteries or maybe 24 volts? This tells us how much voltage our system deals with.

    Last thing here – remember that cables between things can affect how much energy gets through since some may be lost as heat due to resistance (that’s why thicker cables are sometimes better). Make sure this is considered in your calculations as well.

    Step 2: Account for Voltage Variations

    It is moving on! Did you know temperature can change how electricity behaves in circuits? Yep, it does. In cold weather, the voltage goes up… but when it’s hot outside, it goes down.

    For safe operation and to ensure we don’t push components past their limits:

    1. Look at the highest voltage (max PV voltage) on spec sheets for both panels and controllers.
    2. Add some breathing room by putting aside an extra bit above what we calculate as our needs during peak operation conditions – this means considering those temperature changes day-wise across seasons.

    Doing so will give us peace of mind that nothing goes wrong due to weather changes!

    Step 3: Determining Charging Current for MPPT and PWM Controllers

    Finally, let’s talk about different types of controllers:

    • MPPT (Maximum Power Point Tracking) – these guys are smart! They adjust things smoothly to get maximum performance from those sunny days by matching voltages.
    • PWM (Pulse Width Modulation) – simpler buddies who step down higher voltages from the panel so they fit with battery levels while keeping the current steady thanks to their turning on and off rhythmically.

    The current needs for each type aren’t exactly alike:

    1. For MPPTs – Divide total power (from step one) by battery bank voltage.
    2. For PWMs – Use short-circuit current ratings from panel specs since they directly relate here.

    Knowing these specifics ensures we pair up just the right one with our personal setup without fuss or fuss!

    Always aim for effective management within an off-grid energy system; understanding these minutiae immensely helps in having an eco-friendly yet robust configuration! And there we go! Follow these steps carefully when sizing folks’ favorite sun-powered colleague—the mighty Solar Charge Controller.

    Also Read: Find Out The Power Consumption Of Household Appliances

    Ensuring Compatibility with System Components

    Ensuring compatibility with system components is crucial for efficient functioning. It involves evaluating hardware, software, and network requirements to ensure smooth integration and optimal performance.

    Ensuring Compatibility with System Components

    Consideration of factors such as processing power, memory capacity, operating system compatibility, and communication standards is essential. This ensures that all components seamlessly work together, minimizing compatibility issues and maximizing overall system efficiency.

    Checking Compatibility with Battery Bank Specifications

    Picking a solar charge controller is like finding a dance partner for your batteries; they must move together well. Here’s how to make sure they’re a good match:

    • Check the Voltage: Start by looking at your battery bank’s voltage. The charge controller must work with this voltage.
    • Examine Capacity: Your battery bank has a certain capacity, measured in amp-hours (Ah). Ensure the controller can handle this capacity without any issues.
    • Understand the Type: Different batteries – like lead-acid or lithium – may need different controllers. Pick one that suits your battery type.
    • Find Flexibility: Some systems have special needs. If yours is one of them, grab a controller that lets you set custom charging profiles.

    This is really important because if things don’t match up, it can hurt your batteries or even mess up your whole power system.

    Aligning With Solar Array Parameters

    Now let me walk you through making sure the solar charge controller fits snugly with your panels:

    • What’s Its Max?: Look at the highest amount of voltage and power (watts) that can come from your solar panels. Your controller should say “I got this” and take it without breaking a sweat.
    • Voltage Details Matter: If it’s too much juice (too high of a voltage), it’s trouble. Ensure the max open circuit voltage (Voc) of the panels is within what the controller can handle.

    If these two don’t see eye to eye, efficiency drops and gear might get damaged – you don’t want that.

    Also Read: Which generator is required to run a refrigerator?

    What Else Should Be Considered When Selecting A Charge Controller?

    When selecting a charge controller, it is crucial to consider factors such as the maximum current and voltage ratings, the type of battery being used, the charge control algorithm, the type of solar panel, and the overall system size.

    Additionally, factors like temperature compensation, efficiency, and monitoring capabilities should also be taken into account to ensure optimal performance and protection of the battery.

    Eyeing Additional Features & Capabilities

    Sometimes sizing isn’t everything. Think about these extras that could spice up your solar setup:

    • Bluetooth Makes Life Easier: Imagine changing the settings on your charge controller from your phone. Bluetooth makes it possible.
    • Load Terminals for Control Freaks: Want more control? Some controllers have terminals to manage other gear directly.
    • Seeing Is Believing: A screen on the unit keeps you informed about what’s happening right there, in real-time.

    Fancy features mean more comfort in managing energy under sunny skies or starry nights.

    Accounting For Temperature Factors

    Heat and cold play big roles just like in cooking; here’s why:

    • Not Too Hot or Cold Please!: Batteries and controllers act differently when it’s hot or cold; think like humans when the weather changes their mood.
    • Factoring In Fluctuations: Since these moods affect how much energy gets pumped in or stored, adjust settings based on temperature readings.

    Keeping an eye on temperature keeps your system happy year-round.

    Wire Sizing Matters Too!

    It’s all about connections—like choosing friends wisely affects life; selecting wires affects efficiency. Here’s what I mean:

    1. Bigger Isn’t Always Better: Thick wires carry more power but also cost more—find that sweet spot for efficiency without emptying pockets.
    2. Code Talk: In some places, laws tell you what wire size to use for safety reasons—know those rules so no one gets mad at you!

    Wire wisely; my friend—it literally holds things together while saving money and keeping fires away!

    Proper wire sizing isn’t just policy – it ensures harmony in carrying precious watts where needed safely!

    FAQs

    How can I ensure my solar array wattage is properly calculated for the accurate sizing of my solar charge controller?

    To make sure you get the right numbers, add up the wattage of each solar panel in your system and multiply by the number of panels. Be precise and include everything to avoid mistakes.

    Is it necessary to adjust the maximum PV voltage of a solar charge controller based on temperature variations?

    Yes, temperature can affect voltage. It’s smart to look at your area’s highest and lowest temperatures when figuring out your max PV voltage to keep things safe.

    If my battery bank upgrades in the future, will I need to resize my solar charge controller?

    Maybe. If your new batteries have a different voltage or capacity, you might also need a new charge controller that fits well with these changes.

    Conclusion

    Sizing your solar charge controller correctly is a step you can’t overlook if you’re setting up a solar power system. It’s the heart of energy management, ensuring that your batteries are charged efficiently without any risk of damage. Through careful calculation and consideration of the factors I’ve discussed, such as panel wattage, voltage variations, and controller type (MPPT or PWM), you’ll be on the path to optimizing your off-grid power needs.

    By paying attention to compatibility with both battery banks and solar array parameters, as well as considering additional features and the impact of temperature and wiring, your system will not only run smoothly but also last longer. Just remember: little details make a big difference when it comes to harnessing the sun’s power effectively.

  • Ultimate Guide to Solar Power a 12V Fridge

    Imagine journeying through the off-beaten path, knowing that behind your all-terrain vehicle sips a powered cooling haven – your fridge. It’s not just any cooler; it’s a solar-powered 12V fridge.

    Isn’t that amazing? To be on track with this sustainable transition and reduce your heavy reliance on fossil fuels, read my guide below.

    Equipping yourself with seamless knowledge of solar power a 12V fridge can be your golden ticket to frosty beverages whenever you’re outdoors or during those periodic blackouts at home.

    Transform any conventional 12V refrigerator into an energy-efficient appliance using the energy you harness directly from the sun. With this approach, say goodbye to perennial electricity costs and gain more independence from grid power.

    Here’s What You’ll Uncover:

    • Comprehensive DIY solar setup guides
    • Calculations for optimal solar panel system requirements
    • Tips on selecting quality components for maximum output
    • Insightful tips for maintenance and common troubleshooting

    Planning Your Solar-Powered Fridge System

    When planning your solar-powered fridge system, there are a few key factors to consider. First, determine the size and capacity of the fridge based on your needs. Next, assess the location where the solar panels will be installed, ensuring adequate sunlight exposure.

    Planning Your Solar-Powered Fridge System

    It’s crucial to calculate the power consumption of the fridge to determine the number of solar panels required. Finally, select a high-quality solar panel and battery system that can efficiently store and convert solar energy for uninterrupted fridge operation.

    Assessing Your Refrigeration Needs

    When I think about keeping food cool, it’s magic! But the real-world keys to making that magic? Know my fridge and know my sun. Are you putting the two together? That’s where you find out how much sunshine you need to keep your snacks and sodas chilled.

    Let me break this down simply: First, look at your fridge. Did you get a big one or a little one? Check that energy label! It tells how much power it sucks up in a day. Next up, sun hours – not just any sunlight; I’m talking strong sun hours when it can juice up those solar panels well.

    So here’s the trick – I add up all the energy my fridge needs over time and match that with the power I can get from my solar setup. Have to make sure there’s enough juice for cloudy days too, maybe throw in an extra panel just for safe measure.

    Components You Will Need

    Now let’s talk gear – what do I need to turn sunshine into cold?

    Here’s my list:

    • Solar Panels: No-brainer, right? These are my sunlight catchers.
    • Charge Controller: Think of this as the brain that keeps everything smooth between panels and the battery.
    • Battery: Where all that sunny goodness gets stored for later.
    • Inverter: This takes battery power and flips it so my fridge can use it.
    • Cables & Wires: These are like roads; they carry all the electrons where they have to go.
    • Mounting Gear: How I’m going to stick those panels up there in the sky?

    Remember though, every setup is different! Things like how long you’re off-grid or what your budget is might mean tweaking this lineup.

    Also Read: LiFePO4 Batteries: Solar Panel Charging Simplified

    Step-by-step Guide to Set-Up Solar Power a 12V Fridge

    Setting up a device or software can be overwhelming, but with a step-by-step guide, it becomes easier. Begin by gathering all necessary materials and ensuring compatibility.

    Follow instructions carefully, including the specific sequence of actions. Take breaks if needed to avoid mistakes due to fatigue. Finally, test the setup to ensure functionality and troubleshoot if necessary.

    Step 1: Understanding the Wiring Diagrams and Basics

    Do you want to wire without fires? Get these things straight:

    1. Every piece connects with cables or wires. Follow diagrams closely – they’re like treasure maps to energy land!
    2. Fuse them! Fuses protect gear from getting fried if something goes wonky.
    3. Match ratings on equipment with fuse sizes — no guessing!

    Safety first always because nobody wants a barbecue where their kitchen used to be.

    Step 2: Assembling Parts – Charge Controller & Battery Connection

    Solar Power a 12V Fridge right starts here:

    1. Do you have your charge controller? Neat! Hook her up to your battery first—positive to positive (red), negative to negative (black).
    2. Now secure those connections tight so no wiggles cut off power unexpectedly.

    Think love connection but more… electric!

    Step 3: Harnessing Sunlight – Solar Panel to Charge Controller Connection

    Shining light on panel hook-ups now:

    1. Panels catch rays first so line them up facing Mr. Sunshine directly.
    2. Cables again—connect them from panels back down into the charge controller using positives and negatives rightly tagged.
    3. Decide whether wiring them in ‘series’ or ‘parallel’ fits best based on your charge controller model.

    Like Christmas lights brightening only if strung correctly!

    Step 4: The Big Chill – Getting Your Fridge Running Off Your System

    Finally hitting home stretch:

    1. Carefully connect the inverter output right to the fridge power input—make sure voltage deals are compatible!
    2. Fire everything up then wait eagerly as temps go down within cooler walls—it’s chill time!
    3. If hubbub happens like bleeps or no cold air—trouble spots might need eyeballing but stay calm; following through with troubleshooting steps given by equipment manuals usually helps out quickly.

    Also Read: DIY Solar Wine Bottle Lights: Create Eco-Chic Decor!

    Optimizing Your Setup

    Optimizing your setup is essential for maximizing efficiency and productivity. Evaluate your workspace, ensuring it is organized, clutter-free, and ergonomically designed. Position your equipment and peripherals in a way that minimizes strain and promotes good posture.

    Consider using productivity tools and software to streamline tasks and manage time effectively. Regularly assess and adjust your setup, as minor improvements can have a significant impact on your overall performance.

    Calculating Panel Needs – How Many Do You Require?

    When I think about how to solar power a 12V fridge, the first thing that comes to mind is the number of solar panels I’ll need. This isn’t just a guessing game. It depends on how much power my fridge uses each day.

    To work it out, here’s what I do:

    1. Find out the fridge’s daily consumption: This is measured in watt-hours per day. If it’s not listed, I can measure it with an energy usage monitor.
    2. Consider sunlight hours: I check how many hours of good sunlight I get in my area on average. This can vary depending on where I live.
    3. Do some simple math: Now, say my 12V fridge needs 600 watt-hours per day and my location gets about 5 hours of strong sunlight daily. The solar panel must generate at least 120 watts an hour during those sunlight hours (600÷5=120).
    4. Add a buffer: Things aren’t always perfect, so I add about 25% more to cover energy loss and less sunny days.

    So for this example, 120 watts plus the buffer means around a 150-watt panel would be necessary.

    Picking the Perfect Battery Size

    Choosing the right battery is like finding the best partner for my fridge—it has to be reliable and sturdy.

    Lead Acid Batteries:

    • Usually cheaper
    • Tried and tested technology
    • Heavier and bulkier
    • Need regular maintenance

    Lithium Batteries:

    • More expensive but lasts longer
    • Lighter and more efficient
    • Virtually maintenance-free

    I have to match the battery capacity—measured in amp-hours—with how much power my setup will need between charges (including that extra buffer).

    Selecting Appropriate Charge Controller Size

    The charge controller keeps my system safe by regulating electrical flow from panels to the battery and then to my fridge.

    How do I choose one? Well,

    1. Know the maximum current: This comes from adding up all current ratings of connected solar panels.
    2. Sort by voltage: Make sure it matches or exceeds system voltage levels—usually either 12V or 24V.

    Maintenance & Troubleshooting Tips

    Remember to troubleshoot issues promptly and effectively. If you encounter technical difficulties, start by restarting your device, as this can often resolve common problems. Check for software updates and ensure all programs and drivers are up to date.

    Maintenance & Troubleshooting Tips for 12V Fridge

    If the issue persists, try isolating the problem by disconnecting and reconnecting devices or running diagnostic tests.

    Consider seeking technical support if necessary, as professionals can provide expert guidance. Regular maintenance and troubleshooting will help you maintain a productive and efficient workspace.

    Maintaining Peak Performance

    To make sure everything runs smoothly over time:

    1. Keep those panels clean! Dirt blocks light.
    2. Check connections regularly for any sign of wear or corrosion.
    3. Every now and then, review all electrical components—they should not be hot to touch; if they are, check for issues.
    4. Monitor battery health; don’t let them get too low or overcharged.

    Simple checks stop small problems from becoming big ones!

    Solutions For Common Hitches

    Even with care, sometimes things go wrong:

    If your fridge isn’t cooling:

    1st – Check if there’s power at all; maybe a fuse blew?
    2nd – Look over your connections; could there be something loose?
    3rd – See if direct sunlight’s hitting your charge controller—it might overheat!

    FAQs

    Can I use my existing home refrigerator with this system?

    You probably can’t use a standard home fridge with this solar system. Home fridges usually need more power than a 12V fridge designed for solar setups.

    How do cloudy days affect my off-grid refrigerator’s efficiency?

    Cloudy days mean less sun, which can lower the power your solar panels make. Your fridge may not stay as cold, but if you have good batteries, they’ll keep things running smoothly for a while.

    Is it more cost-effective in the long term than using traditional electricity?

    Yes, typically it is more cost-effective over time. The initial cost is higher, but with no electric bills and low maintenance, you save money in the end.

    Conclusion

    Solar powering a 12V fridge is a rewarding venture that marries technology with sustainability. As many seek to be energy-independent or reduce their carbon footprint, utilizing solar power strikes as an ideal solution.

    Throughout this guide, I shared detailed insights into planning, setting up, and optimizing your own solar-powered refrigeration system. By laying out the steps for assessing requirements, selecting suitable components, and effectively connecting and maintaining the setup, I aimed to provide you with the tools necessary for a successful DIY solar project.

    Key Takeaway Points

    • Understand your energy needs for sizing the system correctly.
    • Gather all essential components such as solar panels, batteries, and charge controllers.
    • Follow safety precautions while setting up your wiring.
    • Connect panels correctly based on your charge controller type.
    • Choose the right size of battery—the heart of your system’s storage capabilities.
    • Select a charge controller that matches your system’s voltage and current requirements.

    • Regular maintenance ensures peak performance and longevity of the system.
  • Ecosia Default Search Engine: Easy, Eco-Friendly Setting!

    Have you heard about Ecosia? Imagine searching the web and helping plant trees at the same time! That’s what you get when the Ecosia Default search engine. Now, I know what you’re thinking: “Search engines don’t plant trees, right?” Well, Ecosia does!

    They use their profits to plant trees where they’re needed most. Fancy making a positive impact just by browsing online? Stick around; I’ll show you how to switch it up and make Ecosia your browser buddy!

    You were setting up Ecosia as your default search engine is simple. Whether you’re using Google Chrome, Safari, Firefox, or Microsoft Edge, I’ve got the steps that’ll guide you through making the eco-friendly shift effortlessly. You won’t need any tech expertise—just a couple of clicks here and there, and voila! You’re on your way to greener searches.

    What You Can Expect From This Guide:

    • Straightforward guidance to switch search engines
    • Tips for an eco-conscious browsing adventure
    • Effortless setting adjustments across various browsers
    • A pocketful of green karma with every click

    A Beginner’s Guide to Setting Ecosia as Your Default Search Engine

    To prioritize sustainability in your online searches, switching to Ecosia as your default search engine is a simple yet impactful step. Ecosia uses ad revenue from your searches to plant trees, contributing to environmental reforestation efforts.

    A Beginner's Guide to Setting Ecosia as Your Default Search Engine

    You can easily set Ecosia as the default search engine in your web browser’s settings or by installing the Ecosia extension, further aligning your daily activities with eco-friendly practices.

    Making the Green Switch

    If you care about our planet, you might want to know about a search engine that helps it. It’s called Ecosia. When you use Ecosia to look for something on the internet, they plant trees with the money they earn from your searches. Trees help by cleaning the air and giving homes to animals.

    Here is why making it your main search tool is good:

    1. Planting Trees: Every search helps plant trees where they’re needed most.
    2. Privacy First: They don’t sell your data or use trackers.
    3. Renewable Energy: Their servers run on 100% renewable energy.

    So, when you make Ecosia your go-to place for searching the web, you’re not just finding what you need – you’re helping Mother Earth!

    Quick Steps for Eco-friendly Browsing

    You can make Ecosia your default in just a few steps:

    Google Chrome:

    1. Open Chrome and go to ‘Settings’.
    2. Click ‘Search Engine’ on the side menu.
    3. Choose ‘Manage Search Engines’.
    4. Scroll down and select ‘Add’.
    5. Type in “Ecosia” and add https://www.ecosia.org as the URL.

    Safari:

    1. Go to Safari and click ‘Preferences’.
    2. Hit the tab that says ‘Search’.
    3. Pick Ecosia from the list of search options.

    Firefox:

    1. Click on three horizontal lines at top right corner for menu.
    2. Choose ‘Options’, then find ‘Search’.
    3. In default search engine drop-down, choose Ecosia.

    For mobile devices like phones or tablets:

    • Open your preferred browser app.
    • Find its settings (usually in a menu with three dots or lines).
    • Look for something like “search engine” or “default” in settings.
    • Choose or add Ecosia as an option.

    Also Read: 100-Watt Solar Panel Efficiency: Unlocking Energy Secrets!

    How to Make Ecosia Your Default Search Engine in Google Chrome?

    Making Ecosia your default search engine in Google Chrome is an eco-friendly choice. First, go to Chrome’s settings and select ‘Search engine’. Click on ‘Manage search engines’, find Ecosia in the list, or add it manually with the search URL. Once Ecosia appears, click the three dots and set it as your default. Your searches will now contribute to tree planting efforts.

    Commanding Chrome’s Settings to Embrace Ecosia

    Making Ecosia your default search engine on Google Chrome on your computer is simple. Follow these steps:

    1. Open Google Chrome.
    2. Click on the three dots in the top right corner to open the menu.
    3. Select “Settings” from the drop-down menu.
    4. Scroll down and click on “Search engine.”
    5. Next to “Search engine used in the address bar,” click on the down arrow.
    6. If you see “Ecosia” in the list, click it to set it as your default.
    7. If Ecosia is not listed, select “Manage search engines.”
    8. Look for Ecosia or add it by clicking “Add.” Then you must enter:
    • Search engine name: Ecosia
    • Keyword: ecosia.org
    • URL with %s in place of query: https://www.ecosia.org/search?q=%s
    1. Click “Add” once you’ve entered this information.
    2. Find Ecosia in the list of search engines and click the three dots next to it, then choose “Make default.”

    Just by doing these steps, every time you search something from your address bar, you’ll be using Ecosia and helping our planet!

    Seamless Transition with Ecosia Chrome Extension

    Adding an extension can make switching even easier! Here’s how:

    1. Visit The Chrome Web Store.
    2. In The Search Bar at The Top Left, Type “Ecosia.”
    3. Find The Ecosia Extension From The Search Results And Click On It.
    4. Hit The Blue “Add To Chrome” Button Near The Top Right Corner Of That Page.
      5 To Confirm You Want To Add It, Press “Add Extension” In The Popup.

    After doing this, a little leaf icon will show up near your browser’s address bar — that means it worked! When you click on new tabs now, they will automatically use Ecosia.

    Bringing Eco-searches To Your Chrome Mobile App

    Now let’s do this for your phone or tablet with either Android or iOS:

    For Android Users:

    1. Open Your Chrome App On Your Device.
    2. Tap On Three Dots For Options And Go Into ‘Settings.’
    3. Under ‘Basics,’ Tap ‘Search Engine.’
    4. Choose Ecosia From List Of Available Options.

    That’s it! Now when you type stuff into your mobile browser’s address bar, just like on a desktop, you’ll start searching with an eye toward helping our environment.

    Cultivating Greener Searches with Ecosia in Safari

    Ecosia, the eco-conscious search engine, has become a compelling option for Safari users seeking to promote sustainability. By planting trees with the revenue generated from searches, Ecosia offers an effortless way for individuals to contribute to reforestation efforts worldwide.

    Cultivating Greener Searches with Ecosia in Safari

    Integrating Ecosia into Safari helps cultivate a greener internet, aligning everyday online activities with environmental stewardship.

    Planting Seeds of Change on Safari Desktop

    Let’s talk about making a change in how we search the web on our computers. Especially for folks who like using Apple’s Safari browser. I want to help you use Ecosia, which is a search engine that helps plant trees when you look up things online. It’s like helping the planet while doing your everyday web searches.

    So, how do we set this up? Follow these steps:

    1. Open Your Safari Browser: Click on the Safari icon and let it load.
    2. Head to Preferences: On the top menu, there’s a word saying ‘Safari’. Click it and a list will drop down. Now, choose ‘Preferences’.
    3. Switch to the Search Tab: A window pops up with different tabs at the top—click on ‘Search’.
    4. See Your Current Search Options: You’ll see some options here like your default search engine.
    5. Change to Ecosia: If Ecosia isn’t listed as an option to choose from, don’t worry. We need to add it first.
    6. Add Ecosia as a Search Option:
    • First, go to Ecosia’s website by typing “www.ecosia.org” in the address bar.
    • Then pull down Safari’s list of search engines again in Preferences under ‘Search’.
    • Now, you should see Ecosia as an option since you visited their site.

    By taking these simple steps, every time you look something up using Safari on your desktop or laptop computer, you’re contributing to planting trees!

    Growing a Greener Mobile Experience on iOS Devices

    Now let’s get our iPhones and iPads joining in too! Setting up Ecosia Default Search Engine on your iOS device is just as easy:

    1. Find Your Settings App: On your Home screen there’s this gear-like icon called Settings.
    2. Scroll Down To Safari: It’s usually grouped together with messages and mail settings.
    3. Tap On ‘Search Engine’: Once inside safari settings scroll until you find this option.
    4. Choose Ecosia From The List:
      • Maybe there are only a few options here at first like Google or Bing.
      • If so, visit “www.ecosia.org” using Safari browser beforehand.
      • Go back and check again; now Ecosia should show up.

    Using clear steps like these can make switching browsers seem less daunting and actually quite doable‒even if tech stuff isn’t really your thing! Plus knowing that each click contributes to something good is always an added bonus.

    Go ahead and give these green tips a try; make those daily digital habits count for more than just answers—they can become part of bigger changes for our world.

    Also Read: Power consumption of household appliances

    Firefox Users Rejoicing Their Default Search Engine Selections

    Firefox users are celebrating as Mozilla reaffirms its control over default search engine choices, ensuring a personalized web experience.

    The decision bolsters user autonomy, allowing individuals to dictate their preferred search provider without external influence, a move that strengthens privacy and customization capabilities within the popular browser. This feature upholds Mozilla’s commitment to user-centric values in the browsing landscape.

    Revamping Firefox Desktop with an Eco-friendly Twist

    Hey there, friends! Have you ever thought that every time you search for something online, you could be helping our beautiful planet? It’s true! Let me tell you about how making a simple change in your Firefox browser can create a big splash for the environment.

    I’m talking about turning Ecosia into your go-to place for searching the web. Ecosia is pretty awesome because it uses the money made from your searches to plant trees all over the world. Cool, right?

    So, here’s how to make Ecosia your buddy on Firefox and start supporting Mother Earth with every click:

    1. Open Your Firefox Browser: Double-click on that familiar orange and purple icon sitting on your desktop or taskbar.
    2. Head Over to Preferences: Click on those three horizontal lines in the top-right corner of your browser – that’s the menu button. From here, choose ‘Options’ if you’re using Windows or ‘Preferences’ for macOS.
    3. Search for ‘Search’: In the options menu, find a panel labeled ‘Search’. It’s usually in the side menu on the left.
    4. Find ‘Default Search Engine’: There will be a section called ‘Default Search Engine’. You’ll see some names listed but we’re looking to add a new friend – Ecosia!
    5. Choose Ecosia from List: If Ecosia is already an option in that list, great! Just click it and boom – you’re helping plant trees!

    Microsoft Edge Adopters Joining the Eco-Movement

    Microsoft Edge is embracing sustainability, positioning itself as a browser of choice for eco-conscious users. By integrating eco-friendly features, Edge is encouraging its adopters to join the environmental movement.

    Microsoft Edge Adopters Joining the Eco-Movement

    This commitment to green initiatives reflects a growing trend within the tech industry, where companies are increasingly recognizing their role in promoting sustainable practices amongst their user base. The move not only enhances user experience but also aligns with global efforts to combat climate change.

    Horticultural Hijinks Indoctrinating Edge

    Imagine every time you search the internet, you could help plant a tree. Sounds pretty cool, right? Well, if you use Microsoft Edge as your browser and set Ecosia as your Ecosia Default Search Engine, that’s exactly what happens. Here’s how to make that magic work:

    • First, open up Microsoft Edge on your computer.
    • Go to the top right corner and click on the three dots for ‘Settings and more’.
    • Scroll down in the menu and find ‘Settings’. Click on it.

    Now comes the part where we change our search engine to Ecosia:

    • In ‘Settings’, look for ‘Privacy, search, and services’ on the left-side menu.
    • Under this section, navigate till you see ‘Address bar and search’.
    • Click it and look for ‘Search engine used in the address bar’.

    Here is where Ecosia enters:

    • You will see some options dropdown. If Ecosia is not there yet…
    1. Choose ‘Manage search engines’.
    2. Look at all your search engine choices. Find a button that says ‘Add’ near them.
      Press this ‘Add’ button.

    After pressing Add:

    • A box will pop up asking for some details.
    • For “Search engine,” write “Ecosia”.
    • For “Keyword,” put whatever shortcut word you like; perhaps just “eco”.You want to make sure you get it right. This is what makes your searches go through Ecosia.
    • Click the ‘Add’ button to finish up.

    You’re almost done now! Just a few more steps:

    • Head back to the ‘Search engine used in the address bar’ and click on it.
    • Here, you will see Ecosia as one of the options. Click on Ecosia to select it.

    And that’s it! Ecosia is now your default search engine on Microsoft Edge. Every time you search for something, you are making a little contribution to our planet — because, with Ecosia, their profits go towards planting trees!

    Reminders & Advice for Searching With Consideration for Ecosystem Impact

    When you choose a search engine like Ecosia, you are stepping toward a greener internet. But there’s more you can do! Let me share some easy tips that help both the planet and you:

    1. Be mindful of your searching habits.

    • Search only when you need to.
    • Think before you search – make sure it’s something useful.

    2. Cut down on energy use.

    • Please turn off your computer when it’s not in use.
    • Lower screen brightness to save power.

    3. Share what you learn about green browsing with friends and family.

    • Talk about the impact of eco-friendly searching.
    • Could you encourage them to make Ecosia theirs?

    4. Support websites that prioritize sustainability.

    • Spend time on sites that care about the environment.

    5. Keep your devices longer.

    • It takes a lot of resources to make new tech stuff.
    • Fix and keep using your devices as long as possible.

    FAQs

    How do I know that my searches are actually helping to plant trees?

    When you search with Ecosia, they use the profits from ads to plant trees. They show a tree counter in the corner of the browser, so you can see how your searches are contributing.

    Does switching to Ecosia as my default search engine cost anything?

    Nope, you are setting Ecosia as your default search engine is free. You change your browsing habits to help the environment.

    Can I make Ecosia my default search engine on any browser or device?

    Yes, you can make Ecosia your default on most browsers and devices by following simple steps that fit each platform’s settings.

    Conclusion

    After going through the steps, I hope it’s clear how simple it is to make Ecosia your default search engine. By choosing Ecosia, you’re not just tweaking a setting in your browser; you’re actively participating in a movement that plants trees and supports the planet with every search. It’s not just a tech choice—it’s a statement of your values and an easy step towards a more sustainable lifestyle.

    Remember that each platform has its own way of integrating Ecosia but they all share one thing: the opportunity to contribute to environmental change. Whether you’re on Chrome, Safari, Firefox, or Edge, embracing Ecosia is straightforward and impact-driven. So give it a shot! Switch, search, and let your digital life leave positive trails in the real world.

  • Charge Controller Installation: Connect in 3 Simple Steps

    When it’s time to embrace solar power, connecting a solar panel to a charge controller is like introducing your heart to its beat. In the world of renewable energy, this connection doesn’t just matter; it’s critical.

    I’m here to ensure that you nail this Charge Controller Installation without a hitch, protecting your investment and powering your world with the sun’s endless energy. Imagine securing those connections with ease – total peace of mind in the palm of your hands.

    To successfully connect a solar panel to a charge controller, first ensure all safety protocols are in place. Begin by connecting the battery to the controller ensuring it is switched off – think of it as setting up the foundation for your solar energy system.

    Then attach MC4 adapter cables from your photovoltaic panel to the charge controller. Finally, align everything correctly and test your setup for that sweet spot where everything works in harmony with nature.

    What You’ll Learn Here

    • Simple steps for stress-free solar panel connection
    • Key Tips on Charge Controller Setup
    • How-tos on safeguarding Solar Energy Systems
    • Essential tricks for swift Photovoltaic Panel Connection

    Why do Solar Panels to Charge Controller Connections Matter?

    When I set up my solar panels, I knew they weren’t just to soak up the sun and make power right away. They needed a kind of middleman to manage how that power is used. That’s where the charge controller comes into play, like a wise referee in the game of solar energy.

    Why do Solar Panels to Charge Controller Connections Matter?

    The Role in Solar Energy Systems

    Now let me tell you why exactly these connections matter big time within your whole solar system:

    1. Preventing Overcharging: Without a charge controller hooked up correctly, your precious batteries could get too much juice when they don’t need it.
    2. Avoiding Total Drain: Similarly, without its watchful eye making sure not all power gets used up at once leaving nothing for later.
    3. Proper Power Distribution: This smart device sees when and where power should go once it comes from those sunny rays hitting your panels.
    4. Keeps an Eye on Health: Like checking the temperature with a thermometer, this gadget checks how hot or cold the battery gets so things stay safe.
    5. Smart Energy Use: On cloudy days when sunlight plays hide-and-seek, charge controllers make sure whatever little light turns into energy goes to good use.
    6. Longer Life Span: All the above points come down to one big win – making everything last longer because no part is strained more than what it can handle.

    Preparing for Charge Controller Installation

    When preparing for charge controller installation, it’s mandatory to read the manufacturer’s manual thoroughly. Ensure you have all the necessary tools and components on hand. Begin by determining an appropriate location for the charge controller, close to the battery bank but away from direct heat sources.

    Securely mount the controller and confirm that the wiring pathway from the solar panels to the controller and from the controller to the battery bank is clear and safe for connection.

    Safety Comes First

    Before starting with charge controller installation, safety must come first. Here’s what I do to make sure everything is safe:

    1. Turn Off Power: I always make sure that the power from the solar panels is off. This stops electricity from flowing.
    2. Use Proper Gear: I wear safety gloves and protective eyewear.
    3. Dry Environment: I work in a dry place to stop any chance of getting a shock.
    4. Check Equipment: Before anything, I look over all equipment to see it’s in good shape and no wires are bare.

    Following these steps keeps me and my workspace safe.

    Materials You Will Need

    For a successful setup, here are the items you should gather:

    1. Solar Panels: These capture sunlight.
    2. Charge Controller: This device controls the power going to batteries.
    3. Batteries: Where the energy gets stored.
    4. Cables and Wires: For making connections between devices.

    Having all these materials ready means no last-minute surprises.

    Tools Essential for Installing Your Charge Controller

    The right tools make installation easy and efficient. Here’s what I use:

    1. Wire Strippers: To strip insulation off cables without damage.
    2. Screwdrivers: They fit screws on terminal blocks of charge controllers and other gear.
    3. Wrench Set: Sometimes needed for tight bolts especially on battery terminals.
    4. Multimeter: Good for checking voltages to be sure everything’s working as it should.

    Step 1: Connect the Battery to the Charge Controller

    When I’m setting up a solar energy system, the charge controller installation is a key step. It’s like a guardian that keeps the power from your panels safe for your batteries. It’s really important to get it right, and safety comes first here.

    Initiating With Safe Practices

    Before I even touch anything, I make sure everything is powered off. No lights on, no power running through. Safety gear is a must – so gloves and eye protection are on me at all times. Next, I check out the battery and controller manuals because they tell me how they like to be connected – some have their quirks!

    Detailed Connection Procedures

    Here’s how I do it step by step:

    1. First off, power down both the solar panel system and the battery.
    2. I got my insulated tools ready – that way there’s no risk of shock.
    3. Positive first – attach the red or positive cable from the battery to the positive in on the controller.
    4. Then it’s time for negative – secure the black or negative cable from the battery to the negative in on charge controller.
    5. A snug fit’s what you’re after with those connections; nothing should be loose.

    Taking care when doing these steps makes sure nothing goes wrong later on.

    Also Read: Choosing the Best Oil for Your Generator

    Step 2: Connect the MC4 Solar Adapter Cables to the Solar Panel

    Now let’s talk about MC4 connectors; these bad boys make connecting panels as easy as plugging in a TV!

    Identifying Your Adapters and Panels

    MC4s are universal solar cable connectors – almost like LEGO pieces for your panel wires! They’re typically marked plus (+) for positive and minus (-) for negative.

    Secure Connections Ensuring Efficiency

    Alright:

    1. Make certain that all systems stay shut off while working.
    2. Find positive and negative wires on the back of the solar panel – look out for + or – signs near terminals.
    3. Take MC4 adapter cables; line up the male connector with the female connector – just match colors or signs if unsure!
    4. Push them together till you feel it click – that means you’ve made a secure connection between your solar panel connection and charge controller setup.

    With these tight connections, you’ve set yourself up well for efficient energy flow!

    Also Read: How does an Inverter Generator Work?

    Step 3: Finalizing Your Setup – The Solar Panel & Its Relation To The Charger

    Almost done now! We need to double-check our work.

    Ensuring Correct Orientation

    For photovoltaic panels, facing them right means everything! It determines how much juice they catch:

    1. Angle matters – tilt them towards where the sun hangs around mostly during the daytime.
    2. Check compass direction; south-facing racks up those sunny hours best in most regions.

    Getting this part right translates into maximum power pulled down from our friendly neighborhood star!

    Testing Your Connection

    Last but most crucially:

    1. Flip the switch gently back on at your charge controller setup.
    2.. Keep an eye on indicators; glowing lights mean we’re good!
    3. If things seem quiet… go back over steps ensuring nothing’s missed out.

    This last piece of charge controller installation makes sure all efforts don’t go wasted after sunset hits our horizon!

    Also Read: LiFePO4 Batteries: Solar Panel Charging Simplified

    Potential Setbacks In the Setup Process And How To Resolve Them?

    When setting up a new system, common setbacks include technical glitches, compatibility issues, and user errors. To overcome these, thorough planning is necessary. This involves hardware and software compatibility checks, clear user instructions, and reliable technical support.

    Potential Setbacks In the Charge Controller Installation And How To Resolve Them

    Proactive troubleshooting, routine testing of equipment, and ensuring adequate training for all users are also crucial to resolving any potential setbacks efficiently.

    Common Mistakes During Installation

    When folks put together their solar setups with a Charge Controller, sometimes things don’t go as planned. I’ve seen a few slip-ups more often than others, which can mess up the whole process if they’re not caught in time.

    1. Mixing Up Wires: People sometimes get positive and negative wires mixed up. That can be bad news for your electronics.
    2. Skimping on Wiring: Using wires that are too thin can lead to big trouble like overheating or even fire hazards.
    3. Ignoring the Manual: Not all charge controllers work the same way, so if you skip reading the manual, you could end up scratching your head, wondering why things aren’t working right.
    4. Tightening Too Much or Too Little: Connections that are too tight can damage cables; too loose, and you’ll get weak power or none at all.

    To avoid these mistakes:

    • Always double-check which wire is positive (usually red) and which is negative (commonly black).
    • Buy quality cables that match the recommended thickness for your setup.
    • Take your time to read through and understand your charge controller’s manual—it’s golden!
    • Secure connections firmly but gently; it’s not a wrestling match.

    Troubleshooting Issues

    Now let’s say you’ve got everything connected but something’s not working right—don’t worry; I’ve got some tips to help you figure out what might be going off track:

    1. The System Won’t Power Up:
      • Check if all connections are secure.
      • Look at the battery charge state—it might simply need charging!
    2. Controller Isn’t Charging The Battery:
      • See if there’s sunlight hitting your panels—no light, no power!
      • Make sure nothing’s blocking the solar panels like shade or dirt.
    3. Flickering Lights or Unstable Power:
      • This could mean loose connections—tighten them up just right.
      • Your battery might be old or damaged; inspect its healthiness.

    When something seems off:

    • Start simple: verify every cable connection from start to finish.
    • If lights indicate an error on the controller, compare them to your manual; those little lights are trying to tell you what’s wrong!
    • Sometimes turning everything off and on again helps—really!

    FAQs

    What should I look out for when choosing a charge controller?

    When picking out a charge controller, make sure it matches your solar panel’s voltage and current output. Also, consider whether you need a PWM or MPPT type, as they manage power differently.

    Can I connect multiple solar panels to one charge controller?

    Yes, several solar panels can be connected to one charge controller as long as the combined voltage and current do not exceed the controller’s maximum input ratings.

    What happens if my connection isn’t secure?

    An insecure connection may cause electrical faults, reduce the efficiency of your solar energy system, or even damage your equipment. Ensure all links are tight and correctly insulated to avoid these risks.

    Conclusion

    The journey to successful charge controller installation might seem intimidating, but it’s quite manageable with the right approach and understanding. I’ve walked you through each step carefully, from learning the purpose of charge controllers to the final checks you should perform. Solar energy harnessed correctly not only benefits us but also contributes to a sustainable future.

    Key Takeaway Points

    • Understand your charge controller’s pivotal role in protecting batteries.
    • Always prioritize safety while handling solar equipment.
    • Gather all necessary materials and tools before beginning.
    • Follow detailed step-by-step procedures for each connection stage.
    • Troubleshoot effectively by recognizing common mistakes early on
  • Battery Charging Instructions: A Simple 3-Step Guide

    Have you ever found yourself scratching your head, trying to figure out how to hook up a charge controller to your battery? You’re not alone! Understanding battery charging instructions can be a game-changer when it comes to managing your power system.

    And guess what? I’m here to make that process as simple as flipping a light switch. Picture this: you, mastering the art of energy storage setup with ease and confidence. Sounds good, right?

    Correctly linking a charge controller with your battery ensures efficient energy use and prolongs the life of your battery. It’s like finding the secret ingredient that makes your favorite dish unforgettable—it just clicks!

    These three straightforward steps will guide you through connecting it all together; from safety first practices, adding a fuse for protection, to making sure every cable is snug and secure on the terminals.

    Materials & Tools Needed for Charging Instructions

    To ensure effective charging, gather the necessary materials and tools. These typically include the specific charger for your device, a compatible power source or socket, and any adapters required for different regions or types of outlets.

    Materials & Tools Needed for Battery Charging Instructions

    Materials Required for Effective Battery Charging

    When I’m about to set up a battery for charging, especially with a solar charge controller, there are some things I absolutely need. Here’s the list:

    • Solar Charge Controller: This is like the brain of the operation.
    • Battery Cables: Big wires to connect the battery and controller.
    • Fuses: Small safety devices that protect against too much current.
    • Battery Bank: Where power is stored – it could be just one or several batteries linked together.
    • Mounting Hardware: Screws or brackets to hold everything in place.

    To ensure everything connects safely and soundly, one must have:

    1. A solar charge controller – this manages how power flows into the battery. It’s a must-have to keep both your battery and panels from damage.
    2. Quality battery cables – thick wires that can carry electricity from your panels to your battery without getting too hot or wasting power.
    1. Fuses or circuit breakers – these are super important! If too much electricity tries to pass through, they break the current and save your gear from getting fried.
    2. A dependable battery bank – it could be just one big battery or several tied together; this is where all that power you’re generating gets stored.
    3. The proper mounting hardware – because you don’t want stuff moving around; it needs to stay put where you install it.

    Essential Tools to Follow Battery Charging Instructions

    Having my materials ready isn’t enough; I also grab some tools that make sure my hands can do what my head’s planned:

    1. Wire strippers: To take off insulation when connecting wires safely.
    2. Wrenches: For tightening nuts and bolts so nothing comes loose unexpectedly.
    3. Voltmeter: To check electric pressure (voltage) and ensure everything’s working right on my energy storage setup.

    Let me go easy with words here:

    Firstly, wire strippers are handy when I need to expose bare wire inside those thick cables which makes them ready for a good connection.

    Next, many types of wrenches join forces in my toolbox because nuts and bolts come in different sizes – they help me tighten things without breaking a sweat.

    Lastly but importantly, having a voltmeter can save me from guessing games while checking if voltage levels are right during this whole power system integration process.

    Just like building anything else sturdy in life, having both good materials and tools by my side makes sure when I follow those “battery charging instructions,” all goes smoothly without any hiccups or accidents!

    Also Read: What will a 3000-watt generator run?

    Step-by-Step Guide to Connect Charge Controller to Battery

    To properly link a charge controller to a battery, some steps need to be followed. I’m going to share how I usually do it, breaking down each step with lots of detail.

    Step 1: Safety First – Preparing for Battery Charging Instructions

    Working with any electrical component can be dangerous if you aren’t careful. For me, safety is the most important part. Here’s what I always pay attention to:

    • Wear Safe Clothing: Long sleeves and pants can protect you from sparks or accidental spills.
    • Protect Your Hands: Gloves are a must. They keep your hands safe from cuts or any electrical shock.
    • Shield Your Eyes: Flying debris can hurt your vision, so goggles or a face shield are non-negotiable.
    • Turn It Off: Make sure the charge controller and other connected devices are powered down before starting.

    This step is about preparing at its finest and making sure accidents stay away from my workspace.

    Step 2: Connecting Fuse – Key to Successful Battery Charging Instructions

    Fuses are critical in protecting against current overloads which could lead to damage or even fire. Here’s how I make sure they’re connected right:

    1. Choose the Proper Fuse: Check the manual for the recommended amp rating.
    2. Disconnect Power Sources: All switches should be in the off position.
    3. Secure Fuse Block Close to Battery: It should go on the positive wire within 18 inches of your battery.
    4. Tighten Connections Without Stripping Them: Snug enough that they won’t wiggle free but not so tight that threads strip.

    Properly installing a fuse gives me peace of mind, knowing my setup is safeguarded against potential overcurrent situations.

    Also Read: Solar USB Charging: Build Your Own in 7 Easy Steps

    Step 3: Secure Charge Controller Connections Following Proper Battery Charging Instructions

    When it comes time to join cables from the charge controller and battery, precision is key:

    1. Identify Positive and Negative Terminals: Positive usually has a red coating or a plus sign; negative has a black coating or a minus sign.
    2. Match Cables Correctly: Never mix up these terminals—it’s vital!
    3. Prepare Wires:
      • Strip ends using wire strippers—make sure not too much; just enough bare wire should show.
      • Connect terminals tightly using wrenches but gently enough not to damage them.

    Once all cables are attached securely without being overly tightened (so no risk of snapping), I feel relieved knowing every bit is connected properly without any fuss.

    Also Read: Who Makes Predator Generators?

    FAQs

    What Is The Right Way To Implement Solar Battery Charging Instructions?

    The right way to put solar battery charging instructions into action is by following a detailed guide. Get the right materials, such as a charge controller, fuses, and cables. Make sure you connect everything safely and securely, keeping in mind the voltage requirements of your battery.

    Can I Modify My Existing Wiring To Fit Newer Battery Charging Instructions?

    Yes, you can modify your existing wiring to accommodate the new battery connection guide, but it’s crucial to understand your system’s current layout. Refer to the manufacturer’s guidelines for proper wire sizes and circuit protection when making changes. It might be wise to consult with an expert if you’re unsure.

    Conclusion

    I hope these simple steps have made the task of connecting a charge controller to a battery-less daunting. It’s always important to remember that patience and attention to detail go a long way in ensuring your energy storage setup works safely and efficiently. With the proper materials, tools, and step-by-step guidance, you’re all set for successful power system integration.

    Key Takeaways From This Post:

    • Always prioritize safety by using protective gear and turning off all devices.
    • Gather all required materials like the charge controller, battery cables, and fuses before starting.
    • Use essential tools such as wire strippers and wrenches for secure connections.
    • Correctly connecting a fuse is crucial for effective operation.
    • Meticulous attachment of battery cables to the charge controller is key.
  • Solar Panel Connection to Battery in 5 Easy Steps

    Have you ever thought about harnessing the power of the sun straight into a battery? Making a solar panel connection to a battery might seem like rocket science, but I’m here to walk you through it, one step at a time.

    In this guide, I’ll share my knowledge and make sure that by the end of it, you’ll feel confident enough to tackle the setup yourself. Whether you’re looking to go green or save some green, connecting your own solar panel to a battery can be an empowering and rewarding experience!

    To connect a solar panel to a battery: start by ensuring you’ve got the right materials and tools for safe installation. Understanding your solar wiring diagram is crucial; then comes assembling sturdy cables for connections.

    After that, correctly link the charge controller with the battery before securing the solar panels with said controller. The final touch – position those panels well for maximum sunlight!

    Materials & Tools Required for Your Solar Panel Connection

    Setting up a solar panel connection to a battery needs some important stuff. I’m here to list them all for you in detail, so you have everything ready when you start.

    Materials & Tools Required for Your Solar Panel Connection

    Essential Materials for Solar Panels to Battery Setup

    First, let’s talk about the materials you’ll need for connecting your solar panel to a battery. This process is key in building your renewable energy setup.

    • Solar Panels: These are the main parts that catch sunlight and make electricity.
    • Batteries: They store the power from your solar panels. You can use different types like lead-acid or lithium-ion.
    • Charge Controller: This gadget makes sure your battery charges right and keeps it safe.
    • Inverter: If you want regular home power (AC), an inverter changes the solar power (DC) from your panels into something you can use.
    • Battery Cables: Strong cables link up the battery and charge controller.

    Required Tools to Facilitate the Solar Panel Connection Process

    Now, onto tools! These are handy items that’ll help you put everything together safely:

    • Wrench Set: For tightening nuts and bolts during installation.
    • Wire Cutters & Strippers: To cut and prepare wires.
    • Screwdrivers: To secure connections on devices like inverters or controllers.
    • Multimeter: Tests if cables and components are working right before and after setup.
    • Safety Equipment:
    • Safety Glasses: To keep your eyes safe when cutting wires or drilling holes
    • Gloves: Protect your hands while handling tools or cables

    Also Read: Solar Light DIY Ideas: 10 Must-Try Crafty Creations

    Step 1: Comprehending Your Solar Panel Wiring Diagram

    To make a good solar panel connection, it’s key to get how the wiring diagram works. This diagram shows you where wires go and how your panels, battery, and charge controller fit together. It’s like a map for electricity to follow.

    What is a wiring diagram?
    It’s a picture that shows how all the parts of your solar energy setup link up together.

    Why is it important?
    If you connect things wrong, it could break your system or be unsafe. By following the diagram, you do things right and keep safe.

    Step 2: Assembling Your Battery Cables

    Now let me walk you through making battery cables. These cables need to fit tight and right with your setup.

    • First, pick the correct cable size – bigger systems need thicker cables.
    • Cut your cable to length – measure twice so you only cut once!
    • Strip the ends of the cable – this means removing some of the covers so you can see the metal wire inside.
    • Attach connectors to each end – these are bits that let you hook up your cable to the battery and system.
    • Use heat shrink tubing over connections – this covers up where the wire meets the connector for extra safety.

    Remember, snug fittings mean good connections!

    Also Read: DIY Solar Shed Lights: Step-by-Step, Simple 12V Installation

    Step 3: Establishing the Charge Controller-Battery Link

    The next step is connecting your battery to a charge controller. This part keeps everything safe by making sure your battery charges right without getting too full.

    Here’s what to do:

    1. Check the charge controller manual – find out exactly how they say to hook it up.
    2. Wire positive (+) from controller goes to positive on battery.
    3. Wire negative (-) from the controller goes to negative on the battery.
    4. Make sure connections are not loose – loose wires can make sparks or not work at all!

    Checking everything twice never hurts!

    Step 4: Fastening the Solar Panel Connection With Charge Controller

    Time to connect those panels! Getting them hooked up right means they’ll charge better.

    Follow these tips:

    • Connect each solar panel’s positive wire (+) together, then do the same for negative wires (-).
    • Take those big combined wires and plug them into corresponding spots on the charge controller.
    • Ensure that all connections are firm – if wires jiggle free, charging stops!

    Getting it snug and secure makes all the difference.

    Step 5: Positioning Your Solar Panels For Maximum Sun Exposure

    Last but not least, put those solar panels where they will get lots of sun because more sun means more power!

    Make sure:

    1. They face towards where the sun travels in the sky – usually South if you’re in the northern half of the world
    2. Tilted just right depending on where they sit – different places need different angles
    3. Nothing’s blocking them like trees or buildings – shadows mean less sun getting through

    Also Read: Solar USB Charging: Build Your Own in 7 Easy Steps

    FAQs

    How long does it typically take for a fully drained battery to charge via solar?

    The time it takes to charge a battery depends on the size of the solar panel and the battery’s capacity. Generally, a smaller 12-volt battery may take about 5-8 hours of good sunlight.

    Can multiple batteries be connected together? If so, what’s required?

    Yes, you can link multiple batteries for greater energy storage. You’ll need proper cabling and connectors and must ensure they’re configured properly in parallel or series based on your power needs.

    Does weather affect my solar panels’ ability to charge batteries?

    Definitely! Cloudy or rainy days reduce solar panel efficiency, leading to longer charging times. In contrast, clear skies enable maximum sunlight absorption for speedy charging.

    Conclusion

    After walking through every step, I hope you find connecting your solar panel to your battery less daunting. Remember, the key is to proceed methodically and safely—it’s not just about getting power flowing; it’s about setting up a solar energy storage system that’s reliable and durable.

    With these steps, you’re now capable of harnessing the sun’s power and storing it efficiently.

    Key Takeaway Points

    • Using precise materials is critical for effective solar panel connections.
    • Understanding your wiring diagram ensures a smooth setup process.
    • Correctly assembling battery cables prevents future issues.
    • The link between the charge controller and the battery is vital for safety.
    • Proper placement of solar panels maximizes energy efficiency.
  • 12V Battery Health Check: Uncover Your Battery’s Capacity

    Welcome to the exciting world of battery care! If you’ve ever wondered, “How can I check my 12V battery’s capacity?” you’re in the right place. There’s more than meets the eye when it comes to a successful 12V battery health check.

    Being aware of its current state not only increases its life span but also safeguards you from inconvenient breakdowns and replacements. Let’s dive in, shall we?

    Checking a 12V battery‘s capacity doesn’t require any magic tricks or complex skills. All you need is a voltmeter or multimeter for measuring voltage and possibly something called a load tester if you want more thorough insights into your battery’s health.

    Then it’s just about knowledge – knowing all about the concept of battery capacity, interpreting your test results, and understanding how often you should do these checks to keep everything running smoothly.

    What You Will Discover Here:

    1. An easy understanding of what exactly “battery capacity” means
    2. The critical importance of regular checks on battery health
    3. A step-by-step guide to performing a comprehensive analysis
    4. How to interpret results from your inspection
    5. Useful maintenance tips following your successful 12V Battery Health Check

    Grasping the Capacity of a 12V Battery

    The capacity of a 12V battery is measured in amp-hours (Ah), indicating the amount of current it can deliver over a period of time.

    Grasping the Capacity of a 12V Battery

    For example, a 12V battery with a capacity of 100Ah can provide 100 amps for 1 hour or 10 amps for Understanding the capacity of a 12V battery involves knowing its amp-hour (Ah) rating, which reflects the energy charge that the battery can hold and supply over time.

    When I talk about a battery’s capacity, I mean how much power it can hold and supply over time. It’s like how much water a bucket can hold, except it’s electricity in the battery instead of water. This capacity matters a lot because it tells you how long your battery will run your stuff before it needs a charge.

    Capacity is measured in amp hours (Ah). The higher the number here, the more power you’ve got stored in there. If you understand this number, you make better choices – like not getting stuck with a dead battery when you need it most.

    Here’s why knowing about capacity is important for your 12V battery:

    • Longevity: Just like muscles get tired if you work out too much, batteries wear out faster if they always run low on juice.
    • Performance: Try running on an empty stomach and see how far you get – batteries are the same. Low capacity means less energy to work with.
    • Savings: Knowing what’s up with your capacity means no surprises and no wasted cash on new batteries all the time.
    • Optimized usage: It’s about being smart with what you’ve got; use your power wisely based on what the numbers tell you.

    Imagine driving without watching fuel levels or trying to fill an air mattress without checking if there’s enough air left; that’s why knowing your 12V battery’s capacity is key to keeping everything running smoothly.

    Also Read: DIY Portable Solar Panel Stand: An Easy Guide

    Step By Step Guide For Performing a 12V Battery Health Check

    To perform a 12V car battery health check, first, ensure safety by wearing protective gear and checking the manufacturer’s guidelines. Begin with a visual inspection of the battery for corrosion or damage.

    Use a voltmeter/multimeter to measure voltage, which should be around 12.6 volts. A 12V battery health check is essential for vehicle maintenance. Start by turning off the vehicle and wearing safety gear.

    Gather Necessary Tools For Checking

    When I want to check the health of a 12V battery, I need to have the right tools for this job. Here’s what I gather before starting:

    1. Multimeter: This is a gadget that measures voltage, current, and resistance. For battery checks, it helps me see if the power is at the right level.
    2. Hydrometer (for lead-acid batteries): This tool lets me check the specific gravity of the liquid inside each battery cell.
    3. Load tester: To put pressure on the battery and see how well it holds up, a load tester mimics real-world use.
    4. Gloves and goggles: Safety first! Batteries can be dangerous so I don’t forget these while working.
    5. Battery post cleaner or wire brush: Keeping connections clean is key for accurate tests.

    The Inspection Phase

    I start by looking at the battery carefully:

    • First off, I check it’s clean on top to stop any dirt from faking test results.
    • Next, tight connections are a must; so if clamps look wonky or wires hang loose, that gets fixed.
    • Searching for cracks or leaks is also on my list as they spell bad news for batteries.
    • Corrosion near posts or terminals? I’ve got to clear that up with my bristle brush.

    With these steps done right, I know nothing will mess with my measurements.

    Voltage Measurement

    Time for some actual testing – here’s what I do with my voltmeter:

    1. Turn on the voltmeter and set it up to measure volts DC since that’s what batteries use.
    2. Connect its red probe to the positive terminal and the black one goes on negative – gotta make sure they stay put!
    3. Now read what pops up – usually between 12.4 volts and 12.7 volts means we’re good because that’s where fully charged sits.

    Staying within those numbers means my battery starts off strong in this health check.

    Load Testing

    Even if voltage looks fine without a hitch, we’re not out of woods yet; load testing truly shows me if this battery can hustle when needed:

    1. Hook up a load tester following its instructions; these gadgets copy what happens when turning an engine over or running lights.
    2. It drains power from your battery like real usage would – watching how voltage behaves under this strain tells me more than just static tests!
    3. After holding the load for around 15 seconds (or as per your load tester recommendation), keeping voltage above 9.6 volts here means passing!

    Also Read: Find Out How Much Can A 7500 Watt Generator Run?

    Interpreting Results from your 12V Battery Health Check

    Evaluating the condition of your 12-volt battery is crucial for vehicle reliability. The health check involves assessing voltage levels, load performance, and the ability to hold a charge.

    Interpreting Results from your 12V Battery Health Check

    A result above 12.6 volts typically indicates a fully charged battery, while readings between 12.4 and assessing your 12V battery’s health are vital for assured vehicle operation.

    Ideal Voltage Reading

    When I do a 12V battery health check, I make sure to look at the voltage reading. An ideal voltage tells me if the battery is healthy and can work well. Normal car batteries, when fully charged and at rest (which means you haven’t used it for a little while) should read about 12.6 volts or more. That is what we call a full charge.

    Here’s what the numbers tell me:

    • 12.6 volts or above – It’s good news! The battery is full.
    • Around 12.4 volts – Not bad, but not full either. Your battery has about a half charge.
    • 11.8 volts or lower – That’s not good at all: the battery is empty or nearly empty.

    A healthy 12V battery will stay between these numbers under normal conditions and when it’s not working (like running your car’s lights or electronics). When we test this, we say the battery has proper “resting voltage.”

    But remember, even batteries that show a full charge might not have enough oomph (strength) left to start up a car engine – that’s where load testing comes in, but that’s another story for later.

    Warning Signs

    Some signs help me know if there might be trouble ahead with my 12V battery:

    1. Low Voltage Readings: If readings are below 11.8 volts when I haven’t been using it lately, this means my battery might be weak and close to failing.
    2. Struggle under Load: If my testing shows that under stress – like starting the engine – my voltage drops way down quickly, then my battery might be saying goodbye soon.
    3. Starting Difficulties: When I try to start my vehicle and it takes longer than usual or doesn’t want to start right away, something could be wrong with its power source — yup, possibly the battery!
    4. Dimming Headlights: If my lights get dim when I’m running low-electrical-demand accessories in the car (like the air conditioning), it could mean bad news for my trusty energy box (my name for the Schumacher Battery Charger).
    5. Weird Smells: Sometimes batteries can smell funny when they’re not working right — like rotten eggs or burning smells — which isn’t just gross; they’re also warning signals! This often means there’s an internal problem getting serious fast.

    Every once in a while seeing one of these isn’t a cause for panic, but if these issues keep popping up – especially more than one at once – then it’s probably time I get ready for a new energy box for my ride before getting stuck somewhere without power!

    Also Read: What will an 8000 watt generator run?

    Importance of Regular Checks

    Batteries are quiet workers but don’t let their silence fool ya. Regularly checking up on them can save lots of trouble:

    1. Device Functionality: Think of devices as party guests – they need drinks (electricity) to stay happy (functioning), and batteries are bartenders. No juice from bartenders means unhappy guests at shut-down party devices.
    2. Avoid Surprises: Nobody likes bad surprises like finding out your car won’t start when already late for work, right? Well, regular checks keep those bad moments away by telling when stuff might go south before it actually does.
    3. Money Saver: It’s like having pebbles in shoes – annoying right? Unchecked batteries might slowly hurt devices they power till things break down costing money! Catch problems early = saving money.
    4. Safety First: Batteries under stress might just say “I quit!” leading to risky stuff like leaks or even fires – safety checks help keep them working right so everyone stays safe.

    Maintenance Tips after Checking Your 12v Battery’s Capacity

    Maintaining your 12v battery is essential for ensuring longevity and performance. After checking its capacity, ensure that the terminals are clean, tight, and corrosion-free.

    Regularly check the electrolyte levels and top up with distilled water if necessary. Keep the battery securely mounted, avoid overcharging, and after assessing your 12V battery’s capacity, follow these maintenance tips: Keep terminals corrosion-free and tightly connected.

    After I did a thorough 12V battery health check, I learned that the job wasn’t over. It’s important to keep up with care to make sure the battery stays in top shape for as long as possible. The following maintenance tips can really help.

    Regular Inspection

    One thing I always tell people is this: keep an eye on your battery regularly. Why do this? Well, it can mean the difference between a battery that lasts and one that doesn’t. Here’s what you should do:

    • Check for Corrosion: Every so often, take a look at the terminals where the cables attach to the battery. If you see any powdery buildup or rust-like stuff, that’s corrosion. Cleaning it off helps keep electricity flowing well.
    • Ensure Tight Connections: Make sure those same cables are tight and secure. Loose cables can lead to all sorts of problems, like your car not starting right up when you need it to.
    • Look Over the Case: The plastic case around your battery should not have cracks or leaks. If there’s damage here, it might be time for a new battery.

    Hydrating Batteries

    You might think: Batteries need water too? For some, yes! Lead-acid batteries, like car batteries, need enough water to work properly and stay healthy:

    • Why Water Matters: Inside these batteries are plates submerged in a mix of acid and water called electrolytes. When levels drop too low because water has evaporated out of them, they stop working right.
    • The Right Water: Always use distilled water because tap water has minerals that can mess up your battery.
    • How to Fill Them Up: There are caps on top of your battery; twist them off and peek inside. Fill just until you reach the lines marked inside (not too full!).

    FAQs

    How often should battery capacity be checked?

    You should check the battery capacity every six months to make sure it’s working right and to catch any issues early.

    Can a battery with low capacity still operate?

    Yes, a battery with low capacity can still work, but it won’t last as long and might not run things that need a lot of power.

    What are the signs of a bad 12V Battery?

    Slow engine start, dim lights, and swelling of the battery case are common signs that your 12V battery might be going bad.

    Are there any precautions to take while checking the battery’s capacity?

    When you check your battery’s capacity, wear protective gear, work in a well-ventilated area, and follow safety manuals to avoid accidents.

    Conclusion

    In a nutshell, knowing how to conduct a 12V battery health check is important for anyone relying on devices powered by such batteries. Whether you’re maintaining a small vehicle, a generator, or any other battery-dependent appliance, understanding the capacity and the overall health of your 12V battery can save you from unexpected downtimes and help optimize its use.

    Remember that regular maintenance does not only extend the life span of your battery but also ensures safety and efficiency. With consistent checks using the correct tools and methods, you can rest assured that your device will function effectively when you need it most.

    Key Takeaway Points

    • Grasping your battery’s capacity is central to its longevity.
    • Regular checks prevent sudden failures.
    • A multimeter is indispensable for assessing 12V batteries.
    • Load tests give insight into real-world battery performance.
    • Knowing how to interpret voltage readings guides maintenance actions.
  • Crimping MC4 Solar Connectors: Detailed Guide in 7 Steps

    When you’ve set your sights on a project involving solar power systems, the last thing you want is to hit a snag because of weak links—literally. The importance of crimping MC4 solar connectors correctly couldn’t be overstated, as these little components hold the power to make your eco-friendly dream either flourish or fizzle out. So, here’s my take – stick around, and I’ll guide you through the puzzle of pins and wires.

    If someone asked me to lay it out plain and simple, I’d say secure connections are key for a seamless solar setup. It’s about more than just plugging things together; proper crimping ensures that each electron generated by your sun-soaked panels reaches its destination without loss or disruption. It keeps the energy flowing, the lights shining, and your green conscience clean.

    What You’re Going To Gain From This Read:

    • Turn confusion into clarity with step-by-step instructions.
    • Discover tips to avoid common pitfalls during installation.
    • Grasp why each move matters for long-term energy efficiency.
    • Build confidence in handling those crucial connection points.
    • Unlock the full potential of your solar panels with perfect crimps!

    Importance of Properly Crimping MC4 Solar Connectors

    When I’m setting up solar panels, I know that every small detail can have a big effect on how well things work. One tiny but super important part is getting the MC4 solar connectors just right. These connectors are like the handshakes between your cables—they need to be good and firm.

    Importance of Properly Crimping MC4 Solar Connectors
    • Ensure Electrical Safety: Crimping MC4 connectors properly minimizes the risk of loose connections, which could potentially lead to arcing and electrical fires.
    • Maintain High Performance: Tight and secure connections ensure minimal resistance and maximum conductivity, helping the solar system to operate at its highest efficiency.
    • Prevent Power Loss: A poor crimp can lead to increased electrical resistance, which can cause power loss and reduce the overall energy yield of the solar array.
    • Avoid Corrosion: Good crimping seals the connection, protecting it from moisture and environmental exposure that can lead to corrosion and degrade the connection over time.
    • Long-term Reliability: Properly crimped connections are more reliable and require less maintenance, reducing the need for inspections and repairs in the future.
    • Compatible Impedance: Correct crimping ensures that the connectors’ impedance matches with that of the cables, which is critical for AC systems to prevent energy losses.
    • Mitigate Vibration Issues: Solar panels can be exposed to wind and other mechanical vibrations, which can loosen connections over time. Proper crimping helps to keep the connectors securely fastened.
    • Fulfill Warranty Requirements: Many solar system components come with a warranty that may be voided if the connectors are not installed according to the manufacturer’s specifications, which include proper crimping.
    • Comply With Standards: Adhering to industry standards and regulations—like those set by the National Electrical Code (NEC) in the U.S.—is necessary, and these typically include the requirement for proper connector crimping.

    Also Read: What appliances can a 6000-watt generator run?

    The Complete 7-Step Guide to Crimping MC4 Solar Connectors

    To start, let me share what you’ll need to properly crimp MC4 solar connectors. Doing this job requires some specific tools, and each one plays a crucial part in the process. Here’s what you’ll need:

    • MC4 Crimping Tool: This is specialized for crimping the metal pins of your solar connectors tightly.
    • Wire Stripper: You’ll use this tool to remove the insulation from your cables without damaging them.
    • Cable Cutter: It’s important to have a sharp cutter for clean cuts on your wire ends.
    • MC4 Connectors: These come with male and female parts that join together after you’ve attached them to wires.

    Keep these tools handy as I walk you through each step. Every step is important for ensuring a secure connection in your solar system.

    Step 1. Preparing Your Wire

    The first thing I do is get my wire ready. This means cutting it to length. A good cable cutter is key here—you want a clean cut so your wires are neat and even.

    Next up is stripping the insulation off the ends where you’ll attach the connector pins. For this, use a wire stripper and make sure not to nick the metal inside—the copper part of your wire should be shiny and intact when done.

    Step 2. Male Pin Connection Process

    With our wires prepped, it’s time to connect! Take hold of your male connector pin—it looks like a tiny metal barrel—and position it carefully at the end of one of your stripped wires.

    Now grab your crimping tool; put the pin and wire inside its jaws correctly aligned with indications on it if available, then press down hard! This step squeezes them together so they won’t ever come apart easily.

    Step 3. Assembling Male Pin with Female Connector

    Once that male pin feels solidly attached, we move on to hooking him up with his partner—the female connector! She’s got an opening just waiting for Mr. Male Pin right there.

    Gently push him into her until he clicks home securely—this means he’s nestled snug inside there like two puzzle pieces fitting together just right!

    Step 4. Female Pin Connection Process

    Connecting a female pin takes patience and precision. You want that connection secure, so here’s how it works:

    1. Strip the end of your cable with your wire stripper—about 1/8 inch should do.
    2. Take your female pin and check its shape; it’s like a tiny cup waiting for that stripped wire.
    3. Slide that stripped piece right into this tiny cup on the pin.
    4. Now take up that crimping tool, fit the pin with the cable into its jaws, and squeeze! Do this with care so you don’t squash anything out of shape.

    You’ll feel when it’s done—the handle won’t go further and shouldn’t require Hulk strength.

    Step 5. Assembling Female Pin with Male Connector

    So we’ve got our female pin connected—neat! Next:

    1. Take that male connector part (it’s usually marked) and find its opening at one end.
    2. Gently push in our just-crimped female pin in there till you hear or feel a ‘click.’ Sometimes, there is no sound; trust your fingers here if they tell you it can’t go further without forcing it.

    That ‘click’ or stop-feeling means she’s home, nicely seated inside her mate.

    Step 6. Ensuring Connections are Tight

    We really don’t want any loosey-goosey connections here! So, after each side is assembled:

    1. Give a gentle tug on each cable—that feeling needs to be solid unyielding.
    2. Your connection must stay rooted when put under this small test—if not, revisit that crimp or push-in job.

    Step 7. Connecting & Disconnecting the Crimped MC4 Solar Connectors

    Last up is learning how to connect and disconnect these beauties safely:

    To connect:
    1. Click together—you’ll feel them lock snugly if all steps before were done correctly.

    Disconnect by reaching for those spanner-like assembly/disassembly tools gained from step one because pulling apart by sheer hand strength alone makes no sense—and isn’t safe!

    So secure those spanners around both ends—you’re gripping both sides together—and gently turn opposite ways till they say, “We’re free!”

    And hey presto! You’ve completed crimping MC4 solar connectors. It might seem like quite some steps, but break these down into their simple actions, and get settled in doing each carefully—it becomes second nature soon enough!

    Each step demands attention, though—cut precisely; strip the right amount off using basic English can help folks remember better: strip little hats off wires, snug pins into place, check those werewolf-strong connections click’n’lock, then spanner off again using opposites—it sounds fun now, doesn’t it? Get busy practicing, then!

    Also Read: DIY Portable Solar Panel Stand: An Easy Guide

    Common Mistakes While Crimping MC4 Solar Connectors

    Crimping MC4 solar connectors is a crucial step in setting up solar panel systems. But even simple mistakes can cause big problems. Here, I’ll share common mistakes and how to avoid them.

    Avoidable Errors During Wire Preparation

    When preparing wires for crimping, some common slip-ups happen more often than they should. Let’s go through them:

    • Cutting Wires Incorrectly: A crooked or frayed cut can lead to poor connections. Always use a sharp wire cutter and cut straight across.
    • Stripping Too Much Insulation: If you strip too much of the wire’s end, it might not hold firm in the connector. Only remove enough to fit the metal barrel of the pin.
    • Not Stripping Enough: The opposite problem—too little insulation removed—means the wire won’t make proper contact with the pin. Make sure to strip just right, matching the length of the metal barrel.
    • Damaging The Wire: Be gentle when stripping. If you nick or cut into the actual wire strands, this weakens their strength and your connection quality drops.
    • Using Wrong Tools: Using a dull blade or wrong-sized stripper can make these issues worse. Invest in good quality tools for this job.

    By paying attention to these details, your solar connector crimping will be on point every time.

    Incorrect Assembly of Pins

    Putting together pins might seem easy, but mixing up male and female parts or not securing them well is surprisingly common:

    • Mixing Up Pins: Male and female pins are different; make sure you’re using each one correctly with its matching connector part.
    • Forcing Pins In Wrongly: Pins should slide smoothly into connectors—if they don’t, check if you’re inserting them right side up, and don’t force them.
    • Incomplete Insertion: A pin that isn’t fully clicked into place will give you an unreliable connection that may fail later on under stress or movement.

    Take your time during assembly; rushing leads to mistakes here.

    Inadequate Connection Firmness

    Loose connections mean power loss or even component damage over time. Here’s how to avoid loosey-goosey situations:

    • Insufficient Crimp Force: If you don’t apply enough pressure while crimping, your connection won’t be snug. Apply firm pressure until the tool completes its ratchet cycle fully.
    • Uneven Crimping Pressure: This can give an uneven shape, causing connectivity issues later on; always apply even force when squeezing that crimp tool handle.

    Keeping connections tight makes all the difference between a system that runs smoothly and one that acts up because of power issues caused by simple human error in setup.

    By being thorough at every step — from careful wire preparation to correct pin assembly, all with deliberate practice — one ensures reliable energy flow for their solar setup through proper crimping MC4 solar connectors process mastery!

    Also Read: Which generator is required to run a refrigerator?

    FAQs

    How do you know if MC4 connectors are crimped correctly?

    You can tell if MC4 connectors are crimped right by giving the wires a gentle tug. If they stay put without moving, that means the crimp is solid. Also, check there’s good insulation and no exposed wires.

    Is there any risk involved in disconnecting solar panel MC4 connectors by hand?

    Yes, pulling apart MC4 connectors with your hands might hurt them if not done carefully. Always use proper tools and switch off the system to keep things safe.

    How do you identify a poor-quality MC4 connector?

    A bad MC4 connector might look off with weak locks or thin plastic that gets damaged easily. Real good ones feel sturdy and have a smooth snap when connecting.

    Conclusion

    I hope this guide has shed some light on the importance of Crimping MC4 Solar Connectors. It’s more than just plugging parts together. It’s about securing a safe and effective energy system that will stand the test of time and weather.

    Remember, electricity needs precision, and your solar setup deserves the best. By carefully following these steps, you safeguard not only the function of your solar array but also its longevity and output efficiency.

  • Solar Power Bank Wonders: Do They Actually Work?

    I’ve often found myself intrigued by the advancements in solar technology. In particular, the invention of the solar power bank piqued my interest. These compact devices claim to harness sunlight and convert it into electrical energy we can use to power our indispensable gadgets.

    But can you also imagine this – a sunny day at your disposal, your phone in desperate need of a charge, and no socket in sight? Who’d come to your rescue, if not a solar power bank?

    Solitary outdoor ventures or unforeseen electricity shuffles, nothing could ever stop you from staying connected if you possess one essential gadget – A Solar Power Bank!

    It’s a fabulous innovation undoubtedly, allowing us to harness natural sunlight and transform it into reusable energy anywhere under the sky. Irrespective of where you are or what time it is, with adequate sunlight, these robust companions will recharge your devices without a hitch.

    Understanding, How a Solar Power Bank Works?

    To understand how a solar power bank works, we must first take a look at the science behind it and then explore the thoughtful design that puts this science to use.

    The Science behind Solar Energy

    Solar energy is a resource of power that I find fascinating. It’s clean, inexhaustible, and free to use. But how exactly does it work? Well, thanks to something called photovoltaic cells, sunlight can be converted into usable electricity.

    These photovoltaic cells are made of semiconductor material, usually silicon. When sunlight shines on these cells, photons (light particles) are absorbed by the semiconductor material. This process excites electrons in the cell and creates an electric field across layers. Because of this electric field process, electrons are pushed out of the silicon junction creating an electrical current.

    So basically these photovoltaic cells in solar power accessories such as solar generators capture rays from the sun and convert them into electrical energy which you can use to power your devices.

    The Design of a Solar Power Bank

    The sleek designs that most solar power banks come with may look simple at first glance but there is quite some intricate engineering involved.

    The main components inside a solar power bank include:
    1) Solar Panels: They house those all-important photovoltaic cells we’ve just talked about which convert sunlight into electricity.
    2) Battery: This is where all that handy converted solar energy gets stored for later use.
    3) Charge Regulator: This little device controls how much current goes from the solar panels to the battery. This prevents your battery from overcharging which can cause damage or worse — make it explode!
    4) Inverter: Once the battery stores enough power, it’s time to charge your gadgets. But before that happens, that stored energy needs to be converted back into a usable format by the inverter.
    5) Outputs: These are the USB ports (or other types of ports, depending on the model) where you plug your device cables into.

    Also read: DIY Portable Solar Panel Stand: An Easy Guide

    Solar Power Bank Effectiveness

    Now we come to the important question: How effective are these portable solar chargers, really?

    The technology behind a solar power bank revolves around its ability to convert sunlight into electricity. This process, known as photovoltaic energy conversion, is essentially what determines the effectiveness of your portable charger.

    When it comes to solar power bank effectiveness, there are several factors at play – the amount and intensity of sunlight available, internal circuitry design, the quality of photovoltaic cells used, and technical limitations such as heat tolerance.

    In perfect conditions with direct sunlight available – say, on a clear sunny day at the beach or up a mountain – your power bank can indeed absorb enough sun rays for charging your devices. However, inside homes or on cloudy days where natural light isn’t as abundant—it’s not that efficient.

    That’s not to say they don’t work indoors or in less-than-ideal weather situations! They merely take longer due to lowered capacity caused by less intense light.

    So yes, while not perfect all-round performers like their conventional counterparts which guarantee consistent charging speed regardless of external conditions—a solar power bank provides ample backup during outdoor activities or emergencies while contributing towards reducing our carbon footprint.

    Also Read: Which generator is required to run a refrigerator?

    Factors Affecting a Solar Power Bank’s Functioning

    How well a solar power bank works largely depends on certain circumstances and external factors. These variables not only impact the charging speed and overall capacity of the solar power bank, but they also contribute to its effectiveness and durability.

    Two significant influencers I relate to the functioning of a solar power bank are sunlight intensity and temperature or weather conditions.

    Sunlight Intensity

    The first aspect I want to touch upon is sunlight intensity. Solar power banks, like other solar-powered devices, rely mainly on sunlight for energy collection. Therefore, the amount of sunlight hitting the panels directly affects their efficiency.

    In environments with high-intensity sunlight (such as clear sky days), my experience tells me that a solar power bank will charge faster due to increased exposure to direct sunlight. This condition ultimately boosts solar power bank effectiveness because it’s able to extract more energy from its primary source – thanks sun!

    However, don’t expect your solar device to perform up-to-top during early mornings or late afternoons where sunshine is weaker than midday hours of equal intensity.

    Temperature & Weather Conditions

    Another player affecting portable solar charger efficiency is weather conditions – particularly temperature. Believe it or not but hot isn’t always better for these gadgets!

    Of course, sunny days provide ample light needed for charging however exceedingly high temperatures may negatively impact your device’s performance by overheating its circuits causing inefficiency in the energy conversion process which may also reduce lifespan over time.

    Conversely, solar power banks aren’t a fan of cold weather either. When temperatures drop below freezing point, battery capacity often diminishes significantly. Frosty conditions can directly affect their solar charging speed, leading to prolonged charging times or insufficient power to feed your devices.

    But don’t get me wrong – overcast skies or rainy days aren’t total spoilers for your solar-powered dreams either! Even under these less favorable conditions, a good-quality solar power bank can still accumulate some energy – although at a slower rate compared to bright sunny days.

    Also Read: Who Makes Champion Generators & Where Are They Made?

    Practical Usage Of A Solar Power Bank

    I have discovered that solar power banks are a fantastic tool, especially when I’ve found myself in situations where access to an electricity grid was either not possible or too inconvenient. So, let me share a few scenarios where I found these devices to be incredibly beneficial.

    Practical Usage Of A Solar Power Bank

    Camping and Trekking

    With the increasing call to get closer to nature and reduce our environmental impact, many of us might enjoy camping and trekking – two activities that often lead us off the beaten path away from reliable power sources. This is where a solar power bank shows its worth.

    When I am pitched up under the stars with just my backpack as a company, a solar generator tucked into one of the pockets offers peace of mind. I can use it to charge my smartphone or digital camera without needing an outlet. Plus, it always comes in handy for overnight camps since we all know how quickly phone batteries drain when trying to capture those perfect moments.

    Rural Area Usage

    If you’ve ever been to rural areas where electricity isn’t always guaranteed or reliable, you’d understand what a difference solar power banks could make. For instance, during my travels through rural areas in Asia and Africa, electricity is seen as a commodity rather than a guaranteed right.

    On several occasions, my solar power bank served as my primary source of energy—allowing me to recharge basic devices such as phones and flashlights. This has often saved me from numerous inconveniences while providing an effective solution against intermittent blackouts – underscoring its capacity.

    Disaster Preparedness

    No one likes to think about disasters, but it’s always good to be prepared. Natural factors such as hurricanes and earthquakes can disrupt power supply for several days, rendering electric appliances useless. On those rare unfortunate occasions when I’ve found myself dealing with power outages, my solar power bank has been an absolute lifesaver.


    These devices are not just portable but durable too. By harnessing sunlight during the day, I could charge my devices at night—helping me remain connected despite the dire circumstances. So for anyone keen on developing a disaster kit, a solar power bank should definitely be included on the list.

    Also Read: Predator Engines Oil Type and Capacity Guide

    FAQs

    How long does it take for a solar power bank to charge fully?

    The charging speed of a solar power bank can vary based on its capacity and the power of the sunlight. However, in full direct sunlight, it may take approximately between 25-30 hours. If your power bank has a large capacity, it may require more time.

    Can a solar power bank be charged indoors or on cloudy days?

    Yes, you can charge your solar power bank indoors or during cloudy days. However, its effectiveness might decrease since the strength of UV rays is much less indoors and during overcast conditions. To increase portable solar charger efficiency, make sure it’s exposed to direct sunlight.

    How durable are solar power banks?

    The durability of a solar power bank primarily depends on the materials used in its construction. High-quality solar chargers are built with weather-resistant materials that can withstand harsh environmental conditions and rough handling, making them highly durable.

    Conclusion

    By and large, I’ve found that a solar power bank can indeed be an effective, efficient, portable, and durable solution for keeping my devices charged.

    Its environmental impact is also something that can truly help make a difference. While its charging speed and capacity may differ based on the model, a solar power bank certainly can do what it promises.

    Key Takeaway Points

    • Solar power banks are effective in their function.
    • They provide efficiency with charging speed varying depending on models.
    • The portability of these power banks is one of their biggest assets.

    • Durability is another factor that sets them apart.
    • Opting for a solar power bank contributes positively to environmental sustainability.
  • 100-Watt Solar Panel Efficiency: Unlocking Energy Secrets!

    When I think about harnessing the sun’s power, a few questions often pop up – one being, how effective are small solar panels? You’ve likely seen the compact panels with a “100-watt” label and wondered about their capability.

    Well, I’m here to demystify 100-watt solar panel efficiency for you! Imagine having the sun as your silent partner in energy generation; it’s quite remarkable what a piece of silicon can do on a bright day!

    A 100-watt solar panel is a small-scale energy magician. Under ideal conditions – think perfect sunlight and an optimum angle – this panel can churn out about 400 watt-hours or 0.4 kWh per day.

    But remember, that’s under perfect conditions. The real world is full of unexpected twists, like passing clouds and less-than-ideal installations.


    What You’ll Discover Here:

    • Insights into the mighty but compact 100-watt solar panels
    • Simple breakdowns of how these panels turn sunshine into electricity
    • Realistic expectations for daily energy output
    • Factors that make or break a solar panel’s performance
    • Where you fit in with small-scale renewable energy sources

    Grasping the Concept of Solar Power

    Solar power is like magic from the sun. It turns light into electricity without making any noise or mess. Let’s talk about how that magic works.

    100-watt solar panel efficiency: Grasping the Concept of Solar Power

    When I think about how solar panels change sunlight into electricity, it’s quite a wonderful process.

    Here’s how it happens in simple steps:

    1. Sunlight Hits the Panel: Each morning, the sun sends out light. This light has tiny packets of energy called photons.
    2. Photons Enter Cells: Solar panels have many small units called photovoltaic cells. Photons hit these cells and start their work.
    3. Energy Transfer Begins: Inside these cells, photons knock electrons free from atoms—a bit like balls hitting pins in a game of bowling.
    4. Electrons Move and Create Electricity: When electrons move, they make an electric current.
    5. Electricity is Captured: Metal plates on the sides of the cell grab this electric current and send it to wires.
    6. Power for Use: From there, electricity travels through these wires and is ready to power things in our homes or stored in batteries for later.

    Every time I see a solar panel do this, I’m reminded that we’re capturing a piece of the sun’s power! It’s clean energy with no smoke or noise.

    Basics of Solar Panel Efficiency

    Efficiency in solar panels means how good they are at changing sunlight into usable electricity. To understand this better:

    1. Not All Light Converts to Electricity: Some light becomes heat instead—which doesn’t help power your television or fridge!
    2. High Efficiency = More Power: When panels are more efficient, more sunlight turns into electricity for your use.
    3. Panels Have Limits: Each panel can only capture so much light; not everything that hits it can be used.
    4. Best Conditions Matter: For panels to work their best, they need clear skies and the right angle towards the sun—like sunbathing, but for solar panels!

    The efficiency part matters since we want as much power output as possible from each photon that hits our solar array.

    In short, 100-watt solar panel efficiency tells us that under perfect conditions—a full sunny day with no clouds—the panel should give us close to 100 watts of power hour after hour while the sun shines down on it.

    Solar panel efficiency means a lot when choosing which kind we buy because better efficiency can mean less space taken up on roofs and more savings over time!

    Also Read: Honda GX160 Spark Plug Gap

    Delving into 100-watt Solar Panels

    When folks talk about solar power, there’s a lot of chat about watts and solar panel efficiency. But to really get it, we need to dive deep into what these things mean, especially when we’re focusing on 100-watt solar panels.

    What Does 100 Watt Mean?

    Now, let’s untangle this watt business. Simply put, when someone says a solar panel is “100 watts,” they’re talking about its power capacity — that’s like the strength of the panel.

    It tells me how much electric power it can produce under ideal conditions in one sunny hour. So why does this matter? Well, it helps me figure out how many panels I might need for my house or camper.

    • Think of it like buckets of water: If I have one bucket that holds up to 100 cups of water (that’s my 100-watt panel), and another bucket that holds only 50 cups (a smaller or less powerful panel), naturally, the bigger bucket can collect more water in the same amount of time.
    • Not just any light: It needs direct sunlight, as bright and golden as the midday summer sun. On cloudy days, this “bucket” won’t fill up as much.

    Significance-wise, knowing a panel is rated at 100 watts lets me compare apples to apples (or panels to panels) when shopping around or planning my energy needs.

    Understanding Photovoltaic Cells

    So, what are these photovoltaic cells that everyone keeps talking about? They’re the heart of the whole operation!

    Photovoltaic cells — let’s call them ‘PV cells’ — are like tiny soldiers on the front line converting sunlight into electricity for us. Every single PV cell does its bit by taking beams from our good old sun and translating them to electric current. Here’s how they nail their job:

    1. Catch those rays: These cells catch light using layers of special materials (semiconductors like silicon).
    2. Get electrons moving: When sunlight hits these semiconductors, boom – it sends electrons hopping about.
    3. Harness the energy: That movement starts an electrical flow.
    4. Direct current (DC): Initially, what they make is DC-like battery stuff.
    5. Inverter action!: Since most homes need AC (alternating current), an inverter changes DC into something you can use at home.

    Now imagine all these PV cells together on your roof as part of your own personal mini electric station! And if you choose wisely—that is, going for better quality—you’re getting much more work out of your troop of little sunshine warriors.

    On your average bright day, with your shiny photovoltaic cells lined up neatly in a panel—all pegged at that magic number: ‘100 watts’—you’ve got yourself quite the powerhouse!

    Boldly giving us clean energy every sunny second without so much as a peep—that’s kinda their superpower!

    And did I mention this happens silently? No fuss compared to generators or other noisy gadgets! It’s just silent sunshine-turned-electricity gold!

    The bottom line here is that PV cells are small but mighty, turning what literally falls from the sky into usable juice for all our electronic gadgets!

    Also Read: What will a 6500 watt generator run?

    How Much Energy Does a 100-Watt Solar Panel Produce?

    Ever wondered about the power of a single solar panel? I’ve found that many people are curious about how efficient small solar panels are. So, let’s dive into the workings of a 100-watt panel.

    How Much Energy Does a 100-Watt Solar Panel Produce?

    Calculating Daily Power Output

    When I try to figure out how much energy a 100-watt solar panel makes every day, I think about the perfect day with lots of sun.

    Here’s how I do the math:

    1. Peak Sun Hours: This means how long the sun’s power is strong enough to be counted as full sun. Let’s say we get about 4 peak hours on an average day.
    2. Panel Wattage: The panel is made to make up to 100 watts of power.
    3. Math Time: Multiply those peak sun hours (4) by the watts (100). So, it goes like this: 4 hours x 100 watts = 400 watts.
    4. This means under good conditions, the panel can make roughly 400 watt-hours of energy in one day.

    Now, that sounds good, but it’s just a rough idea.

    Factors Affecting a 100-Watt Solar Panel Efficiency

    Not every day is perfect, though. Different things change how much power that solar panel can really make:

    1. The Way It Faces: If the panel isn’t facing right where the sun crosses the sky, it won’t get as much light.
    2. How Much Light There Is: On cloudy days or when something shades your panel even for a bit, it won’t get all the light it needs.
    3. Temperature Things: Panels like it cool, not hot! So, on very warm days, they might not work as well.
    4. The Place You Live: Near Poles? More daylight in summer! But less in winter, too!
    5. The Panel Itself: Some panels are better at catching light than others.

    All these can add up and mean you’re getting less than those nice “400-watt-hours” from above.

    And don’t forget – other hardware bits like wires and batteries also lose some energy along the way!

    Understanding all this helps me really see what my little solar friend can do – or what limits its super sunny powers!

    Real-World Applications for a 100-Watt Panel

    When I think about 100-watt solar panels, the first thing that comes to mind is their convenience. They’re not too big or too small, making them a great choice for a lot of different uses out in the real world. Let’s take a closer look at where these handy panels shine.

    Common Uses for Small-Scale Panels

    Now, you might be wondering, “Where would I even see a 100-watt solar panel?” Well, let me tell you:

    1. RVs and Camping: Many people love to hit the road in their RVs or set up camp in remote areas. With a 100-watt solar panel, they can keep their batteries charged up without needing to hook up to an electricity source.
    2. Boats: On the water, power sockets are pretty hard to come by! Boat owners use solar panels to maintain battery life and power small appliances while they’re enjoying life at sea.
    3. Remote Cabins: If you’ve got a cabin off the grid where power lines don’t reach, these panels are perfect for powering things like lights and charging your phone.
    4. Backyard Sheds: For those who spend time tinkering or gardening in their backyard sheds, having one of these panels means you can have light and power tools without running extension cords all over the place.
    5. Portable Power Stations: When disasters strike or when you’re working at outdoor events without direct power access, 100-watt panels connected to portable power stations can be real lifesavers.

    Feasibility & Limitations

    While I’d love to say that 100-watt solar panels are perfect for everything, that just isn’t true. They have their strengths and weaknesses based on what you need them for:

    • Single Panel Feasibility:
      • Perfect For Small Tasks: Charging batteries, powering LED lights, or running small appliances.
      • Great For Travel: Easy to pack and move around if your energy needs aren’t massive.
    • Multiple Panels Setup:
      • Expanding Power Capacity: When one isn’t enough but still wants portability? Hook up several together!
      • Flexible Configurations: Some setups allow adding more later as needed, which is super handy.
    • Limitations:
      • Not Ideal for Big Appliances: Don’t expect one panel alone to run heavy-duty machinery; it’s just not going to happen.
      • Weather Dependent: Cloudy days? Short winter days? These factors will reduce your panel’s effectiveness.

    In simpler terms? A single 100-watt panel is great if your energy needs are modest—think charging gadgets or keeping some lights on while camping. But if we’re talking about running an air conditioner or heating unit full-time—nope! You’ll need way more solar amps than what this can offer.

    FAQs

    How long does a 100-watt solar panel take to charge a battery?

    The time it takes for a 100-watt solar panel to charge a battery depends on the battery’s capacity and state of discharge. Roughly, it could take about 5-8 hours for a full charge on a sunny day.

    How can I increase my solar panel’s efficiency?

    You can improve your solar panel’s efficiency by keeping it clean, positioning it correctly to capture maximum sunlight, reducing shade, and using trackers or reflectors if possible.

    What happens to my solar power output on cloudy or rainy days?

    On overcast days, solar panels will still produce energy but at reduced efficiency. The output can drop to 10-25% of its capacity compared to bright, sunny conditions.

    Conclusion

    In wrapping up our journey through the intricate world of solar energy, specifically focusing on the 100-watt solar panel efficiency, I’ve delved deep into how these panels work and how their efficiency can be influenced by various factors.

    It’s clear that while a 100-watt panel might seem modest, it certainly packs a punch when it comes to its capabilities in the right conditions.

    Key Takeaway Points:

    • 100-watt panels, though small, are mighty in energy production.
    • Efficiency is key; understanding it helps maximize output.
    • Environmental factors greatly affect solar panel power yield.
    • These panels have diverse applications, perfect for RVs and other small appliances.
    • Evaluating needs versus output is essential when considering these solar solutions.
  • 12V Battery TV Run Time: Discover the Duration

    Have you ever wondered while planning a camping trip or facing a blackout, “Can my trusty portable TV keep me entertained long enough on a single battery?” You’re not alone in pondering this modern-day conundrum. When the power goes out, or you’re far from the nearest outlet, knowing how long your 12V battery can run your TV becomes not just practical knowledge but a beacon of comfort amidst the darkness.

    If you’re clutching a 12V 100Ah battery and hoping to catch up on your favorite shows, expect an average-sized television to stay live for about 8-10 hours. Of course, that’s considering your TV needs around 100 watts per hour to run; it’s just perfect for those movie nights under the stars or during an unexpected loss of power at home.

    What You Will Gain From This Read

    • In-depth insights into battery and TV energy consumption
    • Easy-to-follow formulas to calculate running times
    • Real-world examples to understand your gear’s potential
    • Energy-saving tips to maximize entertainment time

    Unraveling the Basics: Understanding 12V Batteries and TV Consumption

    Let me explain a thing or two about 12V batteries and how they work before we talk about hooking one up to a TV. A 12V battery is like a small box that holds electricity. It’s used in many cars, boats, and RVs. Here are the simple bits you need to know:

    Unraveling the Basics: Understanding 12V Batteries and TV Consumption
    • What is a 12V battery?: Think of it as a storage unit for energy. It’s designed to put out 12 volts of electrical power.
    • How does it work?: Inside the battery, a chemical reaction happens that creates electricity. This process involves lead plates and sulfuric acid if we’re talking about the common lead-acid type.
    • Keeping charge: The battery can hold onto its power until something needs it, like your TV when you’re off the grid!

    By knowing this much, we’ve laid the groundwork for understanding how such a battery could run your television.

    Calculation of Battery Capacity

    Now, let’s get our hands on some math—don’t worry; it’s nothing too hard! To figure out how long your battery might run your TV, you need to understand its capacity:

    • What is Ah rating?: “Ah” stands for Ampere-hour. It measures how much current (in amperes) a battery can supply over one hour.
    • Understanding capacity: A “12V 100Ah” means our little energy box can give out one ampere for 100 hours at 12 volts or, if you’d rather, ten amperes for ten hours… You get the picture—it’s flexible!

    By doing this math, we get an idea about how much “juice” our battery has to offer—a big piece in figuring out if it can handle powering up our TV screen.

    Every step closer brings us nearer to seeing whether we’re all set for movie night anywhere we please!

    Also Read: Who makes WEN generators and where are they made?

    Power Consumption of TVs

    When I think about the power consumption of TVs, I’m looking at how much electricity they use. This is super important because it helps me figure out how long my TV will run on a battery, like a 12V 100Ah battery.

    Understanding Power Ratings

    Power ratings on TVs tell me a couple of things; essentially, they’re clues to understanding how much electricity my TV will gulp down while I’m watching it. The lower the power rating, the less power it uses; therefore, my battery runtime for TV tends to stretch out longer.

    So imagine this: Every electrical device has got a label – something like its identity card for energy usage. It says “Hi there! This is how much power I need to work.” For example, my TV might have a power rating shown in watts (W). A larger number means it’s hungrier for energy.

    Now, here’s where things get interesting – if my TV has got a standby mode or some killer features like smart connectivity or 4K resolution, that could bump up its appetite for power even when I’m not actively using it. The key here is balance; if I want to enjoy those fancy features and also care about saving energy (and maybe cash on those bills), then picking a model with efficient power ratings would be my best bet.

    To sum up this brainy part, the higher the wattage listed on my TV’s label, the more moolah from my wallet could be zapped away in electricity bills, and the drain on any backup battery life will be faster during usage.

    How to Check Your TV’s Power Rating?

    If you’re itching to know your own TV’s juice needs, don’t fret! It’s usually no spy mission. Here are some simple steps:

    • Look Behind Your TV: Yep! Creep behind your trusty telly and find that sticker or plate stuck there forever. It probably lists Watts “AC” along with numbers that hint at voltage and current, too.
    • Dive into That Manual: If you can dig up your user manual from wherever it is gathering dust (I’d check under coffee tables or stuffed inside drawers), flip through till you find technical specs. And voilà! Precious info about your set’s power consumption is there.
    • Hit Up the Web: Okay, so let’s say both these spots didn’t do the trick; take your quest online. Manufacturers love showing off their products’ specs on their websites – type in your model number in their search box.

    Remember that manufacturers often note down ‘maximum’ ratings rather than averages because peak moments consume the most energy—like roller coaster rides for electrons!

    By now, you should have grasped why knowing all about your television’s thirst for electrifying energy matters big time when planning an off-grid movie marathon powered by our buddy Mr./Ms. Battery here.

    Also Read: Honda GX120 Spark Plug Gap Number & Socket Size

    Calculating TV Run Time with a 12V Battery

    When I want to figure out how long a 12V battery will run my TV, I’ve got to think about a few things. It’s not just about the battery; it’s about the TV too.

    Calculating TV Run Time with a 12V Battery

    How Long Will a 12V 100Ah Battery Run a TV?

    Now for the numbers part – let’s go step-by-step:

    1. Find out my TV’s wattage: The sticker behind my television tells me it uses 50 watts.
    2. Do some math for hours:
    • First, find out the watt-hour by multiplying volts by amp-hours (Ah). For example, I have this formula: Volt (V) x Ah = Watt-hour (Wh).
      So, for me, 12 volts x 100 Ah = 1200 watt-hours.
    • Now, convert that number to match what we know about the television set. We divide our total watt-hours by the amount listed on our television sticker.
      Like this: 1200 Wh / 50 W = 24 hours.
    1. Adjust for real life:
    • After subtracting that 20%, I get 80% of those 24 hours.
    • That means 24 hours x 80% = around 19 hours left when everything’s factored in.

    So if everything works out okay and those other factors don’t mess things up too much, I’ve got enough juice in one fully charged-up battery to watch shows or movies for most of the day!

    Factors Affecting the Runtime

    Some important things decide how long my TV will stay on with a 12V battery:

    • TV Power Consumption: Every TV is different. Some eat up more power than others. The label on the back of my TV says how many watts it uses.
    • Efficiency of Inverter: If an inverter is used to change battery power into something my TV can use, it will burn some power in the process.
    • Battery Age and Condition: Over time, batteries can’t hold as much charge as they did when they were new.
    • Temperature and Environment: Batteries don’t like being too hot or too cold. It can make them lose power faster.

    So it’s not just one thing but all these factors that tell me how long my battery can keep my TV on.

    Tips for Extending Battery Life

    When I’m using a 12V battery to run my TV, one key thing I always consider is how long the battery will last. There are many tips and tricks to make sure my watching time stretches on a bit longer. Here’s what one should keep in mind:

    Tips for Extending Battery Life

    Energy Efficient TVs

    For a longer run time, it’s wise to think about energy-saving televisions. They are designed to use less power, which means that they’ll go easy on your battery.

    Consider LED TVs – Compared with older plasma or LCD TVs, LED TVs need less electricity. They are thinner and lighter, too, which is great if you need to move them around.

    Look for Energy Star Ratings – The federal program Energy Star helps people save money and protect the environment through energy-efficient products. A TV that has an Energy Star label uses about 25% less energy than others.

    Let’s break down what you could do:

    1. Choose the Right Size: Bigger screens eat more power.
    2. Adjust Brightness: Turning down the screen brightness cuts consumption.
    3. Optimize Settings: Many TVs have an eco-mode that saves power.
    4. Keep Software Updated: Sometimes, software updates improve energy management.

    With these steps in place, you can enjoy your shows without worrying about draining the battery too quickly.

    Turning off Peripheral Devices

    The other equipment, like sound systems or gaming consoles, takes up extra juice from your 12V battery as well.

    Here’s how minimizing their use can help extend your battery life:

    • Turn off devices like DVD players or game consoles when not in use.
    • Unplug chargers for phones or tablets; even when they’re not charging something, they still draw power.
    • Disable any standby modes – some devices still sap energy in this state.

    By doing these simple things, every bit of saved energy results in more time enjoying your favorite shows before needing a recharge.

    Also Read: RV Camping Appliances with Their Power Consumption

    FAQs

    Can I use other devices with my 12V battery while watching television?

    Sure, you can hook up other gadgets to the 12V battery, but remember—more devices mean more power drawn, so your TV run time will shrink.

    How does screen size affect my “TV run time” on a single charge?

    Bigger screens usually gulp down more juice. So, if you’ve got a large TV, it won’t hang out as long on a single charge compared to a smaller one.

    What is the impact of viewing habits on my “TV run-time?”

    If you’re big on binge-watching or have marathon movie nights, your 12V battery will empty quickly. Shorter sessions mean your battery runtime for TV lasts longer.

    Conclusion

    When we look at everything we’ve talked about, running a TV on a 12V battery might seem like a challenge, but it truly isn’t that daunting once you understand the essentials.

    We’ve walked through the importance of knowing your TV’s power consumption and how to wield the power rating and battery capacity specs to estimate how long your television will stay on. With these insights, you’re now equipped to make informed decisions about your viewing needs during power outages or off-grid adventures.

    Key Takeaway Points:

    • Understand the basics of 12V batteries and TV consumption.
    • Learn to calculate battery capacity with Ah ratings.
    • Know where to check your TV’s power rating.
    • Estimate how long a 12V 100Ah battery will keep your TV running.
    • Adopt energy-saving tips for extended viewing times.