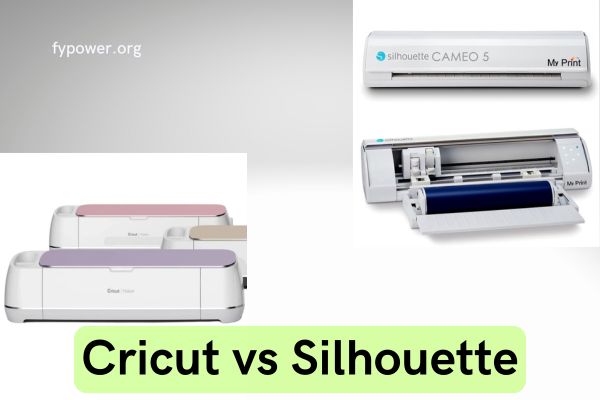
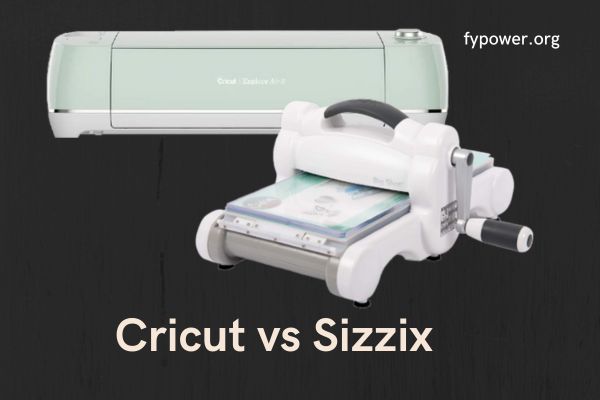
Choosing between Cricut and Silhouette cutting machines feels overwhelming. With both brands dominating the craft cutting market, how do you know which is better, Cricut or Silhouette?
Here’s the truth: Both are excellent machines, but the best choice depends on your specific needs, budget, and technical comfort level. After analyzing current models and extensive user feedback, this guide provides hands-on comparisons to help you make the right decision.
We’ll compare machines head-to-head, evaluate software differences, break down real costs, examine material capabilities, and ultimately help you choose the perfect cutting machine for your crafting journey.
Quick Answer: Which Cutting Machine Should You Choose?
Let’s cut straight to the chase with recommendations based on different user needs.
Best for Beginners: Cricut Explore Air 2/3
The Cricut Explore series wins for beginners due to its user-friendly Design Space software and straightforward setup process. You’ll be creating projects within minutes of unboxing.
Best for Advanced Users: Silhouette Cameo 5
Experienced crafters often prefer the Silhouette Cameo 5 for its advanced software capabilities and superior cutting force of 5kg. The learning curve pays off with more design control.
Best Overall Value: Depends on Your Priorities
Value isn’t just about upfront cost. Consider these factors:
Choose Cricut if you want ease of use and extensive tutorials
Choose Silhouette if you need advanced design features and don’t mind learning
Decision Matrix Table
Factor
Cricut Winner
Silhouette Winner
Ease of Use
✓
Software Features
✓
Cutting Force
✓
Material Variety
✓
Community Support
✓
Long-term Costs
✓
Cricut vs Silhouette: Head-to-Head Machine Comparison
Understanding the physical differences between these machines helps determine which fits your workspace and workflow better.
Build Quality and Design
Cricut machines feel more substantial and sturdy, with secure lids and protected internal components. Users report less worry about damaging belts or mechanisms during transport.
Silhouette machines, while well-built, have exposed roller mechanisms that require careful handling. The trade-off? These exposed parts make threading materials easier for experienced users.
Both brands offer similar footprints, requiring about 24 inches of workspace width for their standard 12-inch cutting models.
Cutting Force and Precision (4kg vs 5kg)
The numbers tell an important story:
Cricut Maker: Maximum 4kg cutting force
Silhouette Cameo 5: Maximum 5kg cutting force
That extra kilogram matters when cutting thicker materials like chipboard or multiple layers. However, for standard vinyl and cardstock projects, both machines perform excellently.
Precision-wise, both brands deliver clean cuts, though users consistently report that Cricut machines require less troubleshooting for optimal results.
Maximum Cutting Size and Mat Requirements
Here’s where the philosophical differences between Cricut and Silhouette become apparent:
Cricut Approach:
Standard cuts up to 12″ x 24″ on mats
Smart Materials allow up to 13″ x 12′ without mats
More controlled but limited in length
Silhouette Approach:
Matless cutting up to 10-16 feet (model dependent)
Greater flexibility for large projects
Higher risk of material slipping on long cuts
Noise Levels During Operation
This often-overlooked factor matters for crafters working during naptime or in shared spaces. Multiple users report that Silhouette machines operate significantly louder than Cricut models.
The difference is noticeable enough that some crafters schedule Silhouette projects for times when noise won’t disturb others.
Machine Setup and First Use Experience
First impressions matter, especially for beginners wondering which is better, Cricut or Silhouette for their first machine.
Cricut machines typically have users cutting their first project within 30 minutes of unboxing. The setup wizard walks through each step clearly.
Silhouette setup takes longer, with users reporting anywhere from one hour to several days to feel comfortable. The payoff? More control over cut settings once you understand the system.
Software Showdown: Design Space vs Silhouette Studio
Software can make or break your crafting experience. Let’s examine how these platforms compare.
User Interface and Learning Curve
Cricut Design Space embraces simplicity with its clean, modern interface. Beginners find it intuitive, though advanced users sometimes feel limited by its streamlined approach.
Silhouette Studio looks dated but packs powerful features. The interface resembles early 2000s design software, which may feel familiar to graphic designers but overwhelming to newcomers.
Design Capabilities and Limitations
This is where the difference between Silhouette and Cricut becomes most apparent:
Design Space Strengths:
Easy text manipulation
Quick project assembly
Automatic color grouping for cutting
Silhouette Studio Strengths:
Advanced node editing
Precise design control
More typography options
File Format Support (SVG Upload Costs)
Here’s a critical difference many overlook:
Cricut: Free SVG uploads included
Silhouette: Requires $50 Designer Edition upgrade for SVG imports
This hidden cost makes Silhouette more expensive for users who create designs in other software.
Internet Requirements and Offline Access
Cricut Design Space originally required constant internet connection, frustrating many users. While now downloadable for offline use, some features still need connectivity.
Silhouette Studio works completely offline once installed, giving it an edge for crafters with unreliable internet or those who travel.
Mobile App Functionality
Both brands offer mobile apps, but functionality varies:
Silhouette app: Basic functionality, mainly for sending pre-made designs to cut
Real Cost Analysis: Initial Investment and Long-Term Expenses
Understanding true costs helps you budget appropriately for your crafting journey.
Machine Prices in 2026 (All Current Models)
Cricut Lineup:
Joy: $139-179
Explore Air 2: $179-229
Explore 3: $299
Maker 3: $429-599
Silhouette Lineup:
Portrait 3: $199-249
Cameo 4: $199-269
Cameo 5: $329-449
Cameo Pro: $499+
Replacement Blades and Mats Comparison
Long-term costs add up quickly:
Cutting Mats (12″ x 24″):
Cricut: $5.11 each (bulk pricing)
Silhouette: $19.99 each
Replacement Blades:
Both brands: $10-20 depending on type
Third-party options available for both
Subscription Services: Cricut Access vs Design Store
Neither subscription is mandatory, but they offer value for frequent crafters:
Cricut Access ($9.99/month):
Unlimited access to 200,000+ images
1,000+ fonts
Ready-to-make projects
Silhouette Design Store:
Pay per design or subscription options
Often has sales on individual designs
More flexible purchasing model
Hidden Costs You Need to Consider
Factor these often-forgotten expenses:
Software upgrades (mainly Silhouette)
Specialty tools for advanced materials
Storage solutions for supplies
Weeding tools and accessories
Cost Calculator for Your Crafting Frequency
Light Crafter (1-2 projects/month):
Annual supplies: $50-100
Better value: Pay per design
Heavy Crafter (weekly projects):
Annual supplies: $200-400
Better value: Subscription service
Material Capabilities: What Can Each Machine Actually Cut?
Understanding material compatibility helps you choose based on your project plans.
Standard Materials Both Handle Well
Both Cricut and Silhouette excel with these basics:
Vinyl (adhesive and heat transfer)
Cardstock and paper
Iron-on materials
Sticker paper
Felt and foam
Advanced Materials and Thickness Limits
Cricut Maker advantages:
Balsa wood (up to 2.4mm)
Leather and faux leather
Crêpe paper
BassWood
Silhouette Cameo advantages:
Thicker materials with 3mm clearance
Better for chipboard
More consistent with dense materials
Smart Materials vs Matless Cutting
This represents a fundamental difference in approach:
Cricut Smart Materials:
Pre-sized for machine compatibility
More expensive per foot
Guaranteed reliable feeding
Silhouette Matless Cutting:
Use any brand vinyl roll
More economical for large projects
Requires careful loading technique
Print and Cut Feature Comparison
Both offer print-and-cut for stickers and labels, but execution differs:
Cricut: More reliable registration marks, limited to 9.25″ x 6.75″
Silhouette: Larger print area, but alignment can be finicky
Common Problems Users Face (And How to Avoid Them)
Learning from others’ experiences helps avoid frustration.
Silhouette’s Vinyl Slipping Issues
The most common Silhouette complaint involves vinyl slipping during long cuts. Users report wasting entire rolls due to misalignment.
Prevention tips:
Cut lengths under 4 feet
Use quality vinyl with consistent thickness
Check roller pressure before each cut
Cricut’s Internet Dependency Concerns
While improved, Design Space occasionally requires internet for basic functions, frustrating users mid-project.
Workarounds:
Download projects for offline use
Keep backup internet option available
Save work frequently
Loading and Alignment Challenges
Both machines have quirks:
Cricut challenges:
Mat loading can catch edges
Smart Material feeding needs practice
Silhouette challenges:
Curled vinyl edges jam easily
Roller positioning critical for success
Software Glitches and Workarounds
Common issues and solutions:
Design Space freezing: Clear cache regularly
Silhouette Studio crashes: Save incrementally
File import failures: Check format compatibility
Cricut vs Silhouette vs Brother vs Siser: Expanding Your Options
Sometimes neither major brand fits perfectly. Let’s explore alternatives.
When to Consider Brother ScanNCut?
Brother ScanNCut offers unique advantages:
Built-in scanner for cutting without computer
No subscription fees ever
Japanese precision engineering
Best for crafters who want complete independence from design software.
Siser Juliet for Business Users
With cutting speeds up to 23 inches per second, Siser Juliet targets commercial users:
Fastest cutting available
Professional-grade construction
Limited to vinyl/HTV focus
Quick Comparison Table of All Brands
Brand
Best For
Price Range
Key Feature
Cricut
Beginners
$139-599
Ease of use
Silhouette
Advanced users
$199-499
Design control
Brother
Independent crafters
$299-399
Built-in scanner
Siser
Businesses
$448-520
Speed
Best Cricut Machines for Different Needs
Understanding Cricut’s lineup helps narrow your choices.
Cricut Joy: Perfect for Small Projects
The compact Joy suits crafters with limited space:
5.5″ cutting width
No mat required for Smart Materials
Perfect for labels and cards
Cricut Explore Series: The Versatile Choice
The Explore line balances features and affordability:
Cuts 100+ materials
Available tool options
Best value for most crafters
Cricut Maker: For Serious Crafters
Cricut’s flagship offers maximum versatility:
300+ compatible materials
Rotary blade for fabric
Knife blade for thick materials
Best Silhouette Machines for Different Users
Silhouette’s range caters to different skill levels and needs.
Portrait 3: Compact and Capable
Perfect for crafters with space constraints:
8″ cutting width
Full software compatibility
Lower price point
Cameo 4 vs Cameo 5: Is Upgrading Worth It?
Key improvements in Cameo 5:
Stronger rollers reduce slipping
Improved cutting mat detection
Better overall reliability
The upgrade makes sense for frustrated Cameo 4 users but isn’t essential for happy owners.
Cameo Pro: When You Need Commercial Scale
The 20-inch Cameo Pro targets businesses:
Massive cutting area
Roll feeder included
Professional production speeds
Real User Reviews: What Crafters Actually Say
Honest feedback from actual users provides valuable insights.
Long-Term Cricut Users Share Their Experience
Common themes from 5+ year Cricut users:
“Reliability keeps me loyal”
“Design Space limitations frustrate sometimes”
“Customer support actually helps”
Why Some Crafters Switched from Silhouette?
Switchers frequently cite:
Material slipping wasted money
Software crashes lost work
Cricut’s ecosystem felt more supportive
Professional Crafters’ Perspectives
Business owners report:
Cricut for customer-facing work (reliability)
Silhouette for complex custom designs
Many professionals own both
Making Money with Your Cutting Machine
Considering a cutting machine for business? Here’s what matters.
Which Machine is Better for Small Business?
For variety businesses (multiple product types): Cricut Maker For vinyl-focused businesses: Silhouette Cameo 5 or Siser Juliet
Production Speed Comparisons
Real-world timing for 50 identical decals:
Cricut Maker 3: 45 minutes
Silhouette Cameo 5: 35 minutes
Siser Juliet: 20 minutes
ROI Timeline for Each Brand
Typical payback periods:
Cricut Explore: 10-15 sales
Cricut Maker: 20-25 sales
Silhouette Cameo: 15-20 sales
Frequently Asked Questions
Can I Use Cricut Mats with Silhouette (and Vice Versa)?
Yes, but with limitations. Using competitor mats loses 0.5″ of cutting area due to calibration differences. Many crafters find the savings worth this trade-off.
Which Machine is Better for Making Stickers?
Both create excellent stickers, but Cricut’s print-and-cut registration proves more reliable for beginners. Advanced users can achieve larger sticker sheets with Silhouette.
Do I Really Need the Paid Software Upgrades?
For Cricut users: No, unless you want access to the design library. For Silhouette users: Yes, if you plan to import SVG files ($50 one-time upgrade).
Can These Machines Work Without Internet?
Silhouette works completely offline after installation. Cricut requires initial internet setup but can work offline with downloaded projects.
Which is Better for Heat Transfer Vinyl Projects?
Both cut HTV excellently. Cricut’s EasyPress line gives them an ecosystem advantage, while Silhouette’s software offers more design flexibility for complex HTV layouts.
Final Verdict: How to Choose Based on Your Needs
Making the right choice between Cricut vs Silhouette becomes clear when you honestly assess your priorities.
Choose Cricut if you:
Value ease of use and quick results
Want extensive community support
Prefer integrated ecosystem products
Need to cut diverse materials
Choose Silhouette if you:
Have graphic design experience
Need advanced software features
Focus mainly on vinyl projects
Want lower long-term supply costs
Decision Checklist:
[ ] Budget available (initial and ongoing)
[ ] Technical comfort level
[ ] Primary project types
[ ] Available workspace
[ ] Internet reliability
Remember, there’s no universally “better” choice, only the right choice for your specific situation. Both Cricut and Silhouette have helped millions of crafters bring their creative visions to life.
Ready to start crafting? Research current bundle deals for your chosen brand, as packages often provide better value than buying components separately. Join brand-specific communities for tips, and most importantly, have fun creating!
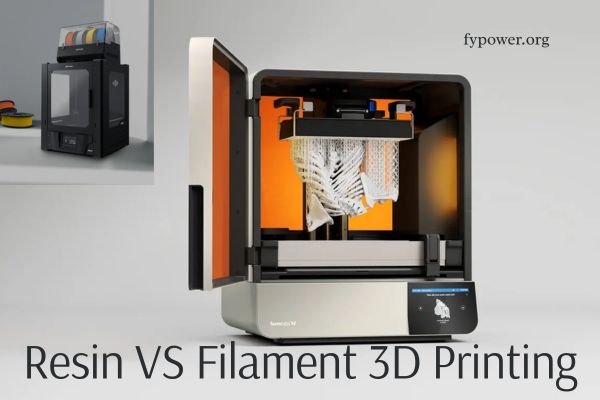
Feeling overwhelmed by the choice between resin vs filament 3D printing? You’re not alone. With dozens of printer options and conflicting advice online, choosing the wrong technology could mean wasted money and endless frustration.
Here’s the truth: there’s no universal “best” option. Your ideal choice depends on what you want to create, your budget, and your workspace. Filament printers excel at large, durable parts while resin printers dominate in detail and precision.
This comprehensive guide breaks down every crucial difference based on real testing data and industry expertise. We’ll compare print quality, total costs, safety requirements, and real-world applications. By the end, you’ll know exactly which technology matches your needs.
Here’s what we’ll cover: print quality comparisons, complete cost breakdowns, safety considerations, speed analysis, and clear recommendations for beginners. Let’s dive into the technologies themselves.
What is Filament 3D Printing? Understanding FDM Technology
Filament 3D printing, also known as Fused Deposition Modeling (FDM) or Fused Filament Fabrication (FFF), builds objects by melting and extruding thermoplastic filament through a heated nozzle. Think of it as a computer-controlled hot glue gun that deposits material layer by layer.
This technology dominates the consumer market for good reason. It’s relatively affordable, beginner-friendly, and versatile enough for everything from prototypes to functional parts. Most makerspaces and schools choose FDM for its simplicity and safety.
The process requires minimal setup compared to other methods. Load your filament, heat the nozzle, and start printing. No toxic chemicals, no special ventilation, just plastic and heat.
How Filament Printing Works: The Layer-by-Layer Process
The FDM process begins when plastic filament feeds from a spool into the printer’s extruder. The extruder grips the filament and pushes it through a heated nozzle, typically reaching 180-300°C depending on the material.
As the nozzle moves in precise patterns, it deposits molten plastic onto the build plate. Each layer bonds to the previous one as it cools, gradually building your object from bottom to top. Layer heights typically range from 0.1mm to 0.3mm.
The entire process is controlled by G-code, instructions generated by slicing software. This code tells the printer exactly where to move, how fast to extrude, and when to change layers. Modern printers can run for hours or even days unattended.
Common FDM Materials: PLA, ABS, PETG, and Beyond
FDM technology offers an impressive range of materials, each with unique properties:
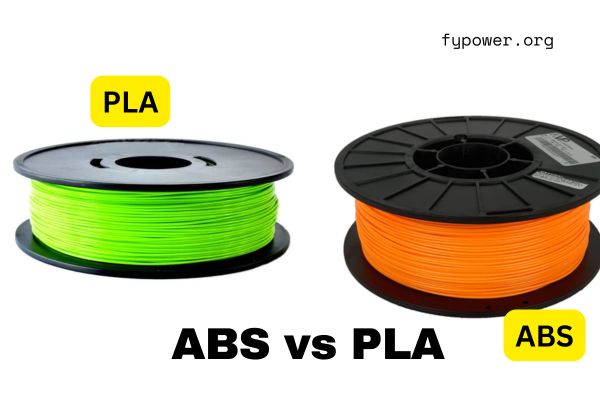
PLA (Polylactic Acid): The beginner’s choice. Biodegradable, low-temperature printing, minimal odor. Perfect for decorative items and prototypes but limited heat resistance.
ABS (Acrylonitrile Butadiene Styrene): Durable and heat-resistant. Requires ventilation due to fumes. Ideal for outdoor use and mechanical parts.
PETG (Polyethylene Terephthalate Glycol): Combines PLA’s ease with ABS’s strength. Chemical resistant and crystal clear options available. Great for outdoor equipment housings.
Specialty Filaments: TPU (flexible), Nylon (ultra-strong), PC (heat-resistant), and composites with carbon fiber or metal particles for specific applications.
Typical Applications for Filament Printing
Filament printing shines in applications requiring size, durability, or cost-effectiveness. Common uses include:
Prototyping: Rapid iteration of product designs at low cost
Cosplay and Props: Large armor pieces, helmets, and weapons
Functional Parts: Brackets, enclosures, and mechanical components
Educational Projects: Teaching design and engineering concepts
Home Repairs: Custom replacements for broken plastic parts
The technology particularly excels when you need parts larger than your hand. Build volumes of 220x220x250mm are standard, with some printers offering over 300mm in each dimension.
What is Resin 3D Printing? Exploring SLA/DLP/LCD Technologies
Resin 3D printing uses liquid photopolymer that hardens when exposed to specific wavelengths of light. This technology produces incredibly detailed prints with smooth surfaces that often require no finishing.
Unlike the mechanical extrusion of FDM, resin printing is a chemical process. UV light triggers polymerization, transforming liquid resin into solid plastic with exceptional precision. Is resin 3d printing better for detail? Absolutely.
The technology comes in three main variants: SLA (laser-based), DLP (projector-based), and LCD (masked screen). All achieve similar results but differ in speed and cost. LCD dominates the consumer market due to affordability.
How Resin Printing Works: UV Light and Photopolymers
The resin printing process starts with a vat of liquid photopolymer resin. A build platform dips into this vat, leaving a thin gap between the platform and the transparent bottom of the tank.
UV light shines through the tank bottom in a precise pattern, curing a single layer of resin. The platform lifts slightly, allowing fresh resin to flow underneath. This process repeats layer by layer, with typical heights of 0.01-0.05mm.
The magic happens at the molecular level. Photoinitiators in the resin absorb UV energy and create reactive species that link polymer chains. This reaction happens in seconds, creating solid plastic exactly where light touches.
Types of Resin Printers: SLA vs DLP vs LCD Explained
Understanding the difference between resin and filament starts with knowing how each resin technology works:
SLA (Stereolithography): Uses a UV laser to trace each layer. Extremely accurate but slower and more expensive. Professional machines can cost $3,000+.
DLP (Digital Light Processing): Projects entire layers at once using a UV projector. Faster than SLA with excellent detail. Mid-range pricing around $1,000-2,000.
LCD (Liquid Crystal Display): Uses an LCD screen to mask UV light from LED arrays. Most affordable option at $200-500. Slightly lower lifespan due to screen degradation.
Recent LCD technology advances have narrowed the quality gap significantly. Modern 4K and 8K screens deliver detail rivaling professional SLA printers.
Common Resin Types and Their Properties
Resin materials offer specialized properties for different applications:
Standard Resin: General-purpose, available in many colors. Brittle when cured. $20-35/kg.
Flexible Resin: Rubber-like properties for gaskets and wearables. Shore hardness 50-80A. $50-70/kg.
Castable Resin: Burns out cleanly for jewelry and dental casting. Specialized formulation. $100-150/kg.
Water-Washable Resin: Eliminates alcohol cleaning. Slightly lower detail but much easier workflow. $30-45/kg.
Print Quality Comparison: Detail, Resolution, and Surface Finish
When comparing filament vs resin 3d printing, quality differences become immediately apparent. Each technology has distinct characteristics that suit different applications.
Print quality encompasses three main factors: layer visibility, surface texture, and fine detail reproduction. Understanding these differences helps you choose the right technology for your projects.
Let’s examine real-world results from both technologies to see where each excels and where compromises exist.
Layer Lines and Resolution: The Numbers That Matter
The most visible difference between technologies is layer height. FDM typically prints at 0.1-0.3mm layers, while resin achieves 0.01-0.05mm. This 10x improvement dramatically affects surface quality.
Resolution Comparison Table:
Feature
Filament (FDM)
Resin (SLA/LCD)
XY Resolution
0.4mm typical
0.035-0.075mm
Z Resolution
0.1-0.3mm
0.01-0.05mm
Minimum Feature
0.8mm
0.2mm
Surface Finish
Visible layers
Nearly smooth
These numbers translate directly to print quality. A miniature figure printed in resin shows individual chain links and fabric textures. The same model in FDM shows stepped layers and lost details.
However, layer lines aren’t always negative. Some designs benefit from the mechanical texture of FDM printing, especially larger architectural models or terrain pieces.
Surface Finish: Smooth Resin vs Textured Filament
Resin vs filament 3d print surface quality differs fundamentally. Resin prints emerge with a smooth, almost injection-molded finish. Light reflects evenly, colors appear uniform, and details remain crisp.
Filament prints show their construction method. Layers create a subtle corduroy texture that’s pleasant to touch but visible to the eye. Post-processing can minimize this through sanding, chemical smoothing, or primer coats.
Consider your end use carefully. Display models and jewelry benefit from resin’s smoothness. Functional parts often work better with FDM’s texture, providing grip and hiding fingerprints.
Surface finish also affects painting and finishing. Resin’s smoothness takes paint beautifully with minimal preparation. FDM usually needs primer to hide layer lines before achieving professional results.
Achieving Professional Results with Each Technology
Both technologies can produce professional-quality parts with proper technique:
For FDM Excellence:
Use smaller nozzles (0.2-0.3mm) for fine details
Print slower (30-40mm/s) for better quality
Orient parts to minimize visible layers
Post-process with sanding and primer
For Resin Perfection:
Dial in exposure times precisely
Use appropriate support strategies
Maintain resin temperature at 25-30°C
Post-cure thoroughly for strength
Professional results often combine both technologies. Print large structures in FDM, then add detailed components in resin. This hybrid approach maximizes each technology’s strengths.
Cost Analysis: Initial Investment and Ongoing Expenses
Understanding the true cost of resin printer vs filament 3d ownership requires looking beyond sticker prices. Both technologies have hidden expenses that significantly impact your total investment.
Initial costs seem comparable, with entry-level printers around $200-300. However, the complete setup cost tells a different story. Let’s break down every expense you’ll encounter.
Budget planning should include not just the printer, but materials, safety equipment, tools, and workspace modifications. These additional costs often equal or exceed the printer price.
Printer Costs: Entry-Level to Professional
The printer market offers options from budget to professional:
Entry-Level FDM: $200-400
Ender 3 V3: $249
Prusa MINI+: $429
Sovol SV06: $239
Entry-Level Resin: $150-300
Elegoo Mars 4: $189
Anycubic Photon Mono 2: $169
Phrozen Sonic Mini 8K: $349
Professional FDM: $1,000-5,000
Prusa MK4: $1,099
Ultimaker S5: $5,995
Raise3D Pro3: $3,999
Professional Resin: $2,000-10,000
Formlabs Form 3+: $3,499
Asiga MAX X: $7,500
Phrozen Sonic Mega 8K: $2,799
Entry-level machines deliver surprising quality. The gap between budget and professional has narrowed significantly in recent years.
Material Costs Per Kilogram: The Real Numbers
Operating costs vary significantly between technologies:
Filament Pricing:
PLA: $15-25/kg
PETG: $20-30/kg
ABS: $20-30/kg
TPU: $30-50/kg
Nylon: $40-80/kg
Resin Pricing:
Standard: $25-40/kg
Tough: $40-60/kg
Flexible: $50-80/kg
Castable: $100-200/kg
Dental: $200-400/kg
Material efficiency differs too. FDM wastes 5-10% on supports and failed prints. Resin wastes 10-20% due to supports, failed prints, and tank cleaning.
Calculate your actual cost per part, not just material price. Include failures, supports, and partial spools or bottles in your planning.
Hidden Costs: Ventilation, Safety Gear, and Post-Processing
The hidden costs of each technology often surprise new users:
FDM Hidden Costs:
Replacement nozzles: $10-30
Build surfaces: $20-40
Filament storage: $50-100
Basic tools: $30-50
Total: ~$150-220
Resin Hidden Costs:
Ventilation setup: $60-200
Wash & cure station: $100-200
Safety gear (gloves, masks): $50/year
IPA alcohol: $30/month
FEP replacement: $20-40
Total: ~$300-500 + ongoing
Resin printing requires significantly more infrastructure. Proper ventilation alone can cost more than budget FDM printers. Factor these requirements into your decision.
Cost Calculator: Which is Cheaper for Your Projects?
Let’s calculate real costs for common projects:
Miniature Figurines (28mm):
FDM: $0.10 material + $0.05 time = $0.15 each
Resin: $0.08 material + $0.02 time + $0.05 post = $0.15 each
Phone Case:
FDM: $0.80 material + $0.20 time = $1.00
Resin: $2.00 material + $0.50 post = $2.50
Cosplay Helmet:
FDM: $8.00 material + $2.00 finishing = $10.00
Resin: Would require splitting + $40.00 material = Not practical
Choose based on your typical projects. High-detail small parts favor resin despite higher operating costs. Large or functional parts make FDM the clear winner.
Speed and Workflow: From Design to Finished Part
Speed comparison between resin vs filament printers isn’t straightforward. While layer curing might be faster, total workflow time tells a different story.
Print speed depends on model size, complexity, and required quality. A technology that prints faster might take longer overall due to preparation and post-processing requirements.
Understanding the complete workflow helps set realistic expectations and plan projects effectively.
Print Speed Comparison: Layer Time vs Overall Time
Raw printing speeds vary dramatically between technologies:
FDM Speed Factors:
Layer time: 1-5 minutes depending on size
Typical speed: 50-100mm/s movement
200mm tall print: 10-20 hours at 0.2mm layers
No pause between layers
Resin Speed Factors:
Layer time: 2-8 seconds exposure
Peeling time: 2-5 seconds
200mm tall print: 4-8 hours at 0.05mm layers
Must pause for peeling/resin flow
However, these numbers don’t tell the complete story. FDM can print multiple parts without speed penalty by filling the build plate. Resin prints entire layers simultaneously, making it faster for multiple small parts.
Consider a batch of 10 miniatures. FDM might take 10 hours whether printing one or ten. Resin takes the same 2 hours for one or twenty, as long as they fit on the build plate.
Post-Processing Requirements for Each Method
Post-processing time significantly impacts workflow efficiency:
FDM Post-Processing:
Remove from build plate (1 minute)
Remove supports (2-5 minutes)
Light sanding if needed (5-30 minutes)
Optional: Prime and paint
Resin Post-Processing:
Drain excess resin (2 minutes)
Wash in IPA (10 minutes)
Remove supports (5-10 minutes)
Final cure (15-30 minutes)
Disposal of contaminated IPA
Resin’s mandatory post-processing adds 30-60 minutes to every print. This fixed overhead makes it less efficient for single parts but negligible when batch printing.
Safety considerations also slow resin workflow. Donning gloves, working in ventilated areas, and careful handling add time not reflected in print speeds.
Batch Production: When Each Technology Excels
Different technologies suit different production needs:
FDM Excels At:
Large single parts
Varying geometries in one build
Long unattended prints
Quick prototyping iterations
Resin Excels At:
Multiple identical small parts
Consistent quality requirements
Detailed miniatures or jewelry
Short turnaround times
For small business or DIY electronic enclosures, consider your typical order patterns. FDM suits custom one-off orders. Resin excels at standard products in small batches.
Build Volume and Size Limitations
The liquid 3d printer vs filament size comparison reveals one of the biggest practical differences. Build volume directly limits what you can create and often decides which technology to choose.
Size limitations affect more than just maximum part dimensions. They influence design decisions, assembly requirements, and even business models. Understanding these constraints helps avoid frustration and wasted investment.
Let’s explore how each technology handles size requirements and workarounds for their limitations.
Typical Build Volumes for Each Technology
Standard build volumes vary significantly:
Common FDM Build Volumes:
Entry-level: 220 x 220 x 250mm
Mid-range: 300 x 300 x 400mm
Large format: 400 x 400 x 500mm
Industrial: 1000 x 1000 x 1000mm+
Common Resin Build Volumes:
Entry-level: 130 x 80 x 160mm
Mid-range: 192 x 120 x 250mm
Large format: 300 x 300 x 400mm
Industrial: 400 x 400 x 600mm
The size difference is striking. Budget FDM printers offer volumes that match high-end resin printers. This fundamental limitation stems from the technology itself.
Resin printers need expensive LCD screens or laser systems that scale poorly. Larger vats also require more resin to maintain minimum levels, increasing operating costs.
Printing Large Objects: Why FDM Dominates
FDM’s mechanical simplicity enables massive build volumes at reasonable costs. Extending rails and belts is relatively inexpensive compared to scaling optical systems.
Large FDM printers cost incrementally more than small ones. A 300mm printer might cost 50% more than a 220mm model. Comparable resin printer scaling often triples or quadruples the price.
Beyond cost, practical considerations favor FDM for large parts:
No toxic resin handling in large volumes
Minimal post-processing for big parts
Stronger layer adhesion for structural integrity
Lower material costs for volume printing
Consider printing a full-size helmet. FDM handles it in one piece for $10 of material. Resin would require splitting, printing, assembly, and $50+ of resin.
Working Around Size Limitations
Both technologies offer solutions for exceeding build volume:
FDM Solutions:
Design parts with assembly joints
Use alignment pins for accuracy
Acetone welding for ABS parts
Mechanical fasteners for strength
Resin Solutions:
Hollow large parts to save resin
Design clever split lines
Use registration features
CA glue or resin welding
Software assists with splitting models intelligently. Meshmixer and similar tools add joints, alignment features, and optimize split locations. This enables printing seemingly impossible objects.
Remember that assembled parts never match single-piece strength. Design accordingly, adding reinforcement at joint locations or using mechanical fasteners where possible.
Safety Considerations: Protecting Yourself and Your Space
Safety requirements present stark differences when comparing 3d printer resin or filament technologies. While both require precautions, resin printing demands significantly more safety infrastructure.
Understanding these requirements before purchasing prevents dangerous situations and unexpected costs. Many users underestimate resin’s chemical hazards or FDM’s particle emissions.
Let’s examine specific safety requirements for each technology and how to create a safe printing environment.
Resin Safety: Ventilation, PPE, and Chemical Handling
Resin printing involves handling chemicals that can cause:
Skin sensitization and allergic reactions
Respiratory irritation from vapors
Eye damage from splashes
Environmental contamination if disposed improperly
Essential Safety Equipment:
Nitrile gloves (not latex): $20/100 pairs
Safety glasses: $15
Respirator with organic vapor cartridges: $35
Ventilation system: $100-300
Spill containment supplies: $30
Ventilation is non-negotiable. Options include:
Outdoor placement (garage/balcony)
Grow tent with exhaust fan: $150-250
Professional fume hood: $500+
Never handle resin with bare skin. Even “safe” resins cause sensitization over time. One exposure might be fine, but repeated contact leads to severe allergic reactions.
Filament Safety: UFPs, VOCs, and Material-Specific Concerns
FDM printing seems safer but still produces concerning emissions:
Ultrafine Particles (UFPs): Nanoparticles that penetrate deep into lungs. All plastics produce these when heated.
Volatile Organic Compounds (VOCs): Chemical vapors varying by material:
PLA: Minimal VOCs, lactide emissions
ABS: Styrene and other harmful compounds
PETG: Relatively safe, minimal emissions
Nylon: Caprolactam vapors
Safety research shows PLA produces 20 times fewer particles than ABS. However, even PLA emissions exceed recommended exposure limits in enclosed spaces.
Recommended Precautions:
Print in ventilated areas
Use enclosures with filters
Avoid bedroom placement
Consider air quality monitors
Setting Up a Safe Printing Environment
Creating a safe workspace for either technology:
Ideal FDM Setup:
Dedicated room or garage space
Enclosure with particulate filter
Room ventilation to outside
Fire safety equipment nearby
Smoke detectors (not directly above)
Ideal Resin Setup:
Isolated, ventilated space
Grow tent or enclosure mandatory
Exhaust fan venting outside
Chemical spill kit ready
Eye wash station nearby
Temperature control for cold climates
Budget $200-500 for proper safety equipment beyond the printer itself. This investment protects your health and prevents long-term problems.
Never compromise on safety to save money. If you can’t afford proper ventilation for resin, choose FDM. If you can’t ventilate FDM properly, reconsider 3D printing entirely.
Strength and Durability: Which Prints Last Longer?
The debate over strength in resin vs filament 3d printing often relies on outdated assumptions. Modern materials in both categories offer impressive mechanical properties for different applications.
Strength encompasses multiple factors: tensile strength, impact resistance, flexibility, and environmental durability. Each technology excels in different areas.
Understanding these properties helps select the right material for functional parts that must withstand real-world use.
Material Properties Comparison Table
Mechanical Properties Comparison:
Material
Tensile Strength
Elongation
Impact Resistance
Heat Resistance
PLA
65 MPa
6%
Poor
60°C
PETG
50 MPa
120%
Good
80°C
ABS
40 MPa
20%
Excellent
95°C
Standard Resin
35 MPa
3%
Poor
60°C
Tough Resin
55 MPa
40%
Good
65°C
Engineering Resin
80 MPa
15%
Moderate
120°C
These numbers tell only part of the story. Layer adhesion, print orientation, and processing parameters significantly affect final strength.
Real-World Durability Testing Results
Practical testing reveals important insights:
FDM Durability Advantages:
Better impact resistance due to layer structure
Predictable failure modes (bending vs shattering)
UV stable with proper materials
Excellent chemical resistance (PETG/ABS)
Resin Durability Advantages:
Isotropic properties (equal strength all directions)
No weak points from layer adhesion
Smooth surface resists crack propagation
Specialized resins exceed FDM in specific areas
Long-term testing shows FDM parts maintaining properties for years outdoors. Resin parts without UV protection degrade within months, becoming brittle and discolored.
For outdoor power equipment covers, FDM with PETG or ASA provides superior weathering resistance. Indoor decorative items work well in either technology.
Choosing Materials for Functional Parts
Match material properties to application requirements:
High-Stress Mechanical Parts:
FDM: Nylon, PC, or carbon fiber composites
Resin: Engineering resins with post-processing
Flexible Components:
FDM: TPU in various durometers
Resin: Flexible resins (limited options)
Heat-Resistant Parts:
FDM: ABS, ASA, PC (up to 110°C)
Resin: High-temp resins (up to 250°C)
Chemical Resistance:
FDM: PETG, PP, or PVDF
Resin: Limited options, most vulnerable
Consider environmental factors beyond mechanical stress. Will parts face UV exposure, chemicals, moisture, or temperature extremes? These factors often matter more than raw strength numbers.
Ease of Use: Beginner-Friendliness and Learning Curves
For newcomers wondering is resin 3d printing better than filament, ease of use often decides the answer. Both technologies have learning curves, but they differ significantly in complexity and forgiveness.
Starting your 3D printing journey with the right technology prevents frustration and abandonment. Many beginners quit after choosing poorly matched equipment for their skill level.
Let’s examine what each technology demands from users and which suits different experience levels.
Setup and Calibration Requirements
Initial setup varies dramatically between technologies:
FDM Setup Process:
Assembly (1-4 hours for kits)
Bed leveling (30 minutes)
Loading filament (5 minutes)
Test print (1-2 hours)
Fine-tuning (ongoing)
Most FDM printers include helpful communities and extensive documentation. Problems have established solutions, and mistakes rarely damage equipment.
Resin Setup Process:
Assembly (usually pre-built)
Level build plate (15 minutes)
Install FEP film (if needed)
Pour resin carefully
Dial in exposure times
Set up ventilation
Prepare washing station
Resin setup seems simpler until you consider safety infrastructure. One mistake can mean resin spills, damaged screens, or chemical exposure.
Day-to-Day Operation and Maintenance
Daily use reveals major workflow differences:
FDM Daily Tasks:
Check filament supply
Clean build plate occasionally
Start print and walk away
Remove completed print
Store filament properly
Resin Daily Tasks:
Don safety equipment
Check resin level and condition
Stir or shake resin
Clean build plate after every print
Post-process immediately
Clean tools and workspace
Dispose of waste properly
FDM printing integrates into daily life easily. Start a print before work, retrieve it later. Resin demands dedicated time blocks for printing and post-processing.
Common Problems and Troubleshooting
Every technology has failure modes:
Common FDM Issues:
First layer adhesion (solved by leveling)
Stringing (retraction settings)
Warping (temperature/adhesion)
Clogs (maintenance/quality)
Common Resin Issues:
Failed supports (orientation/settings)
Overcuring (exposure time)
Layer separation (FEP condition)
Resin contamination (filtering)
FDM problems rarely cause permanent damage. Worst case: scraped build plate or clogged nozzle ($10-30). Resin failures can crack LCD screens ($50-150) or ruin entire resin batches.
Online communities strongly favor FDM for beginners. More users mean more solutions, tutorials, and troubleshooting guides. Resin communities exist but remain smaller and more specialized.
Best Use Cases: When to Choose Each Technology
Understanding when each technology excels helps make the right choice for your projects. Let’s explore specific applications where each method dominates.
The best choice often depends on production volume, detail requirements, and end-use conditions. Some projects clearly favor one technology, while others might benefit from combining both.
Consider not just what you want to make today, but what you might create tomorrow. Your interests may evolve as skills develop.
Resin Printing Excel Scenarios
Miniatures and Detailed Models
Resin printing revolutionized tabletop gaming and modeling hobbies. Details impossible with FDM emerge perfectly:
Individual chain links on 28mm figures
Readable text at 2mm height
Organic textures and skin details
Complex undercuts without support scars
Professional miniature painters universally prefer resin for display-quality pieces. The smooth surface takes primer and paint beautifully without hiding details under layers.
Jewelry and Dental Applications
Castable resins enable professional jewelry production:
Direct casting with minimal cleanup
Perfect surface finish for molding
Precise stone settings
Complex organic designs
Dental applications demand biocompatible resins and extreme accuracy. Only resin printing meets these requirements at reasonable costs.
High-Precision Prototypes
When tolerances matter, resin delivers:
±0.1mm dimensional accuracy
Smooth bearing surfaces
Fine threads and snap fits
Transparent parts for internal visualization
Engineers prototype precision mechanisms in resin before committing to expensive injection molding or CNC machining.
Filament Printing Ideal Applications
Large Props and Cosplay Items
FDM dominates cosplay and prop making:
Full-size helmets in one piece
Lightweight armor panels
Weapons and accessories
Easy finishing and painting
The community shares thousands of free designs optimized for FDM printing. Materials like PLA and PETG provide the perfect balance of ease, cost, and durability.
Functional Mechanical Parts
Need working parts? FDM delivers:
Brackets and mounts
Enclosures for electronics
Replacement parts
Custom tools and jigs
The layer structure actually helps in some applications. Prints can be stronger along layer lines than injection molded parts. Custom battery holders and project boxes work perfectly in PETG or ABS.
Rapid Prototyping
For iterative design, FDM excels:
Quick design changes
Low material costs
Multiple versions simultaneously
Functional testing possible
Engineers can test fit, form, and function without expensive post-processing. Failed iterations cost dollars, not tens of dollars.
Educational Projects
Schools choose FDM for good reasons:
Safe materials (PLA)
Minimal supervision needed
Visible printing process
Low operating costs
Extensive educational resources
Students learn design, engineering, and problem-solving without chemical hazards. Mistakes become learning opportunities, not safety incidents.
Making Your Decision: A Step-by-Step Guide
Ready to choose between resin vs filament 3d printing? This systematic approach helps you make the right decision based on your specific needs and constraints.
Don’t rush this decision. Take time to honestly assess your needs, space, and budget. The right choice now saves frustration and money later.
Follow this guide to clarify your requirements and match them to the appropriate technology.
Questions to Ask Yourself Before Buying
1. What will you primarily create?
Small detailed models → Resin
Large functional parts → Filament
Various projects → Consider both
2. What’s your true budget?
Printer only → Add 50% for accessories
Include safety equipment
Factor in monthly materials
3. Where will you print?
Bedroom/living space → FDM only
Garage/workshop → Either option
No ventilation → Reconsider resin
4. How much time can you dedicate?
Quick prints between activities → FDM
Dedicated hobby time → Either
Professional/business use → Both
5. What’s your technical experience?
Complete beginner → FDM recommended
Some technical background → Either
Experienced maker → Choose by application
Recommended Starter Printers for Each Technology
Best FDM Starters:
Bambu Lab A1 mini ($299)
Fully automated calibration
Excellent print quality
Great for beginners
Active community support
Prusa MINI+ ($429)
Industry-leading reliability
Outstanding support
Open-source design
Upgrade path available
Best Resin Starters:
Elegoo Mars 3 Pro ($235)
Good build volume
Reliable performance
Complete ecosystem
Extensive community
Anycubic Photon Mono 4K ($219)
High resolution screen
User-friendly interface
Good customer support
Reasonable running costs
Start with these proven models. Avoid unknown brands or “too good to be true” deals. Established manufacturers provide better support and parts availability.
Your First Month: What to Expect
FDM First Month:
Week 1: Assembly, calibration, first successful prints
Week 2: Learning slicing software, trying different settings
Week 3: First failures, troubleshooting, community learning
Expect failures with either technology. They’re learning opportunities, not disasters. Budget for extra materials during your learning phase.
Join communities immediately. Reddit, Discord, and Facebook groups provide instant access to experienced users. Don’t struggle alone when help is readily available.
Frequently Asked Questions
Is Resin 3D Printing Better Than Filament?
Neither technology is objectively “better” , they excel at different tasks. Resin printing produces superior detail and smooth finishes, making it ideal for miniatures, jewelry, and detailed prototypes.
Filament printing offers larger build volumes, material variety, and safer operation, perfect for functional parts, prototypes, and educational use. Choose based on your specific needs rather than seeking one “best” option.
Can You Use Both Technologies Together?
Absolutely! Many makers own both printer types. This combination offers maximum flexibility:
Print large structures in FDM
Add detailed components in resin
Use FDM for prototypes, resin for final versions
Match technology to each project’s requirements
Starting with one technology doesn’t lock you into it forever. Many users begin with FDM, then add resin for specific projects.
Which is More Cost-Effective for Small Business?
Cost-effectiveness depends on your products:
FDM suits businesses making:
Custom one-off parts
Large products
Functional components
Rapid prototypes
Resin suits businesses making:
Jewelry or miniatures
Small batch production
High-detail products
Precision components
Calculate total costs including labor. Resin’s post-processing time might eliminate profit margins on low-price items. FDM’s minimal handling keeps labor costs down.
How Much Space Do I Need for Each Type?
Minimum FDM Space:
Printer footprint: 2′ x 2′
Access space: 3′ x 3′
Storage: 1′ x 2′
Total: About 12 square feet
Minimum Resin Space:
Printer in enclosure: 3′ x 3′
Washing station: 2′ x 2′
Curing area: 2′ x 2′
Chemical storage: 2′ x 1′
Total: About 20 square feet
Resin requires dedicated space away from living areas. FDM can share space with other activities if using safe materials like PLA.
Can Children Safely Use These Printers?
FDM with supervision: Yes, with restrictions
PLA filament only
Adult handles hot end
Proper ventilation
Age 10+ recommended
Resin printing: No
Chemical hazards too severe
Requires mature handling
Professional environments only
Age 18+ recommended
Many schools successfully use FDM printers in supervised settings. The visible printing process provides excellent educational value. Resin’s chemical hazards make it inappropriate for educational environments below college level.
Conclusion
Choosing between resin and filament 3D printing doesn’t have to be overwhelming. Each technology serves distinct purposes, and understanding their differences empowers you to make the right choice.
Filament printing excels at large parts, functional components, and safe operation. It’s perfect for beginners, educators, and anyone needing durable prints without complex post-processing. The lower operating costs and minimal safety requirements make it ideal for home use.
Resin printing dominates in detail, surface quality, and precision. Professional jewelers, miniature enthusiasts, and anyone requiring museum-quality finishes should strongly consider resin. Just prepare for higher operating costs and strict safety requirements.
For many makers, the question isn’t “which one?” but “which one first?” Your immediate projects should guide this decision. Start with FDM if you’re unsure , it’s more forgiving and versatile for learning. Add resin later when specific projects demand its unique capabilities.
Remember these key decision factors:
Space and ventilation determine feasibility
Project types guide technology choice
Safety requirements can’t be ignored
True costs include setup and materials
Learning curve affects satisfaction
Whatever you choose, join the community immediately. Fellow makers provide invaluable support, inspiration, and solutions. The journey from novice to expert becomes enjoyable with proper guidance and realistic expectations.
Ready to start creating? Choose the technology that matches your needs, invest in proper setup, and begin bringing your ideas to life. The perfect print awaits.
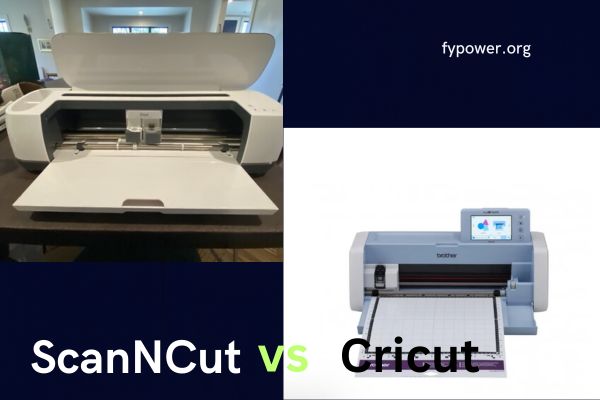
Choosing between a Brother ScanNCut and Cricut cutting machine feels like picking between two dream cars. Both promise to transform your crafting, but at $400+, you need the right one. After extensive testing and analyzing thousands of user experiences, I’ve discovered that each machine dominates in different areas.
The Brother ScanNCut excels with its revolutionary built-in scanner and offline capabilities, while Cricut Maker crushes the competition with raw cutting power and a massive ecosystem. This guide reveals the hidden costs, workflow realities, and critical differences that retailers won’t tell you.
You’ll discover which machine handles your favorite materials best, software quirks that could derail your projects, and money-saving strategies for supplies. Whether you’re starting a small business or pursuing weekend crafts, this comparison covers everything from basic features to advanced techniques.
Quick Answer: ScanNCut vs Cricut at a Glance
Best Overall Winner by Category
Making a quick decision? Here’s how each machine wins in key categories:
Category
Winner
Why
Cutting Power
Cricut Maker
4,000g force handles thick materials
Standalone Use
Brother ScanNCut
No internet required, built-in screen
Material Variety
Cricut Maker
Cuts wood, leather, and more
Scanning Features
Brother ScanNCut
Only machine with built-in scanner
Software Ecosystem
Cricut
Larger design library and community
Price Value
Brother ScanNCut
More features for similar price
Price Comparison Chart
Understanding the true cost helps avoid budget surprises:
Brother ScanNCut Models Explained (DX vs CM Series)
The Brother ScanNCut lineup splits into two distinct series. The DX series represents the newest technology with auto-blade sensors and enhanced cutting precision. These models automatically detect material thickness, eliminating guesswork and failed cuts.
The CM series, while being phased out, offers budget-friendly entry points. These require manual blade depth adjustments but maintain the signature scanning feature. Both series include the 300 DPI scanner that sets Brother apart from every competitor.
Key differences include the DX’s 5-inch touchscreen versus CM’s 3.5-inch display. The DX models also support roll feeding for vinyl up to 6 feet, perfect for larger projects.
Cricut Family Overview (Maker 3 vs Explore vs Joy)
Cricut’s ecosystem spans from the pocket-sized Joy to the powerhouse Maker 3. The Maker series leads with 4,000 grams of cutting force, handling materials no other home cutter touches. Its Adaptive Tool System automatically adjusts blade pressure for perfect cuts.
The Explore series targets everyday crafters with solid performance at lower prices. While limited to 2,000 grams of force, it handles most standard materials beautifully. The dual-carriage system allows simultaneous cutting and drawing.
The Joy fills a unique niche for small-space crafting. At just 5 pounds, it creates projects up to 20 feet long using Smart Materials. However, the 4.5-inch width limits project scope significantly.
Which Models Are We Comparing?
This comparison focuses on the flagship models: Brother ScanNCut SDX125 versus Cricut Maker 3. These represent each brand’s best technology and most versatile options. Both target serious crafters willing to invest in professional-grade tools.
The SDX125 showcases Brother’s scanning innovation with DX series refinements. Meanwhile, the Maker 3 demonstrates Cricut’s engineering prowess with unmatched cutting power. These models compete directly in price and capability.
The Scanner Advantage: Brother’s Unique Feature
How the 300 DPI Scanner Works?
Brother’s integrated scanner transforms how to approach DIY projects completely. Place any image, drawing, or pattern on the scanning mat, and watch it digitize in under 20 seconds. The 300 DPI resolution captures fine details that cheaper scanners miss.
The scanner recognizes edges, creates cut lines, and even differentiates between colors. This technology originated from Brother’s commercial embroidery machines, bringing professional capabilities to home crafters. No other home cutting machine offers this feature.
Direct-to-cut scanning eliminates the computer entirely for many projects. Scan a child’s drawing, press cut, and watch their art transform into stickers or iron-ons instantly.
Real-World Scanning Applications
Quilters revolutionize their workflow with Brother ScanNCut vs Cricut capabilities. Scan vintage quilt patterns, resize them digitally, and cut precise fabric pieces without templates. The scanner preserves pattern accuracy while saving hours of manual tracing.
Stampers and card makers scan stamped images for perfect die-cut alignment. Create custom frames around any stamped design without measuring or guessing. The scanner detects image boundaries automatically.
Small business owners digitize hand-drawn logos instantly. Skip expensive digitization services by scanning sketches directly. The machine converts drawings to cut files, preserving artistic style while enabling mass production.
When Scanning Beats Digital Design?
Physical pattern collections become instantly usable with scanning. Instead of recreating vintage designs digitally, preserve their authentic character through direct scanning. This maintains design integrity while modernizing the cutting process.
Children’s artwork transforms into lasting keepsakes through scanning. Capture their creativity exactly as drawn, then cut vinyl decals or fabric appliques. Parents report this feature alone justifies the investment.
Emergency projects benefit from rapid scanning workflow. When clients bring physical samples, scan and reproduce them immediately. This responsiveness sets businesses apart from competitors limited to digital files.
Power and Performance: Cutting Force Showdown
Understanding Cutting Force (4,000g vs 1,260g)
The Cricut Maker vs ScanNCut force difference seems dramatic on paper. Cricut’s 4,000 grams of pressure sounds like it destroys Brother’s 1,260 grams. However, real-world testing reveals surprising nuances in how this translates to actual cutting.
Cricut’s force enables cutting through dense materials like leather, basswood, and even thin aluminum. The Adaptive Tool System monitors resistance and adjusts pressure automatically. This intelligence prevents blade damage while maximizing cut quality.
Brother’s lower force doesn’t limit most projects. The precision-engineered blade angle compensates through superior geometry. For materials under 2mm thick, both machines perform identically in testing.
Material Thickness Winners
Brother ScanNCut surprisingly wins the thickness battle at 3mm capacity. The Cricut Maker maxes out at 2.4mm, though its knife blade handles denser materials within that range. This difference matters most for foam crafters and model makers.
The real distinction appears in material density rather than thickness. Cricut powers through compressed materials that stop Brother cold. Chipboard, dense leather, and hardwood require Cricut’s superior force.
Both machines handle standard crafting materials effortlessly. Vinyl, cardstock, fabric, and felt cut identically on either platform. The performance gap only appears with specialty materials.
Speed Test Results
Testing reveals Brother vs Cricut scanner speeds vary by project type. Simple shapes cut faster on Cricut, completing basic designs 20% quicker. Complex patterns with multiple direction changes favor Brother’s precision motor control.
The Print Then Cut feature shows dramatic differences. Brother scans full-page designs in 20 seconds, then cuts without registration marks. Cricut requires printed registration marks and smaller working areas, adding setup time.
For production cutting, Cricut’s Smart Materials eliminate mat loading entirely. Cutting 20 identical designs takes half the time compared to Brother’s mat-based system. Volume producers should factor this efficiency seriously.
Software Deep Dive: CanvasWorkspace vs Design Space
Offline vs Online Requirements
The internet dependency debate defines many users’ experience with brother ScanNCut vs vinyl cutting machines. Cricut Design Space requires constant internet connection, even for saved projects. Lost WiFi means lost productivity, frustrating rural crafters and mobile vendors.
Brother’s CanvasWorkspace offers true offline functionality. Download the desktop version and work anywhere. The ability to slice on Cricut requires online access, while Brother performs all functions locally.
This difference impacts more than convenience. Internet outages, server maintenance, and slow connections plague Cricut users regularly. Brother users report zero downtime from connectivity issues.
Learning Curves Compared
Design Space wins the beginner-friendly battle decisively. The interface guides new users through projects with helpful prompts. Thousands of ready-made projects provide instant gratification for newcomers.
CanvasWorkspace demands more initial investment but rewards power users. The interface resembles professional design software, offering precise control over every element. Advanced features like node editing exceed Design Space capabilities.
Both platforms frustrate users transitioning from other software. Neither imports complex SVG files perfectly, requiring cleanup and adjustment. Experienced designers often prefer creating elsewhere and importing simple designs.
Hidden Software Costs
Cricut Access ($9.99 monthly) unlocks premium features many consider essential. Without it, Design Space limits fonts, images, and projects significantly. The subscription includes licensed content, but costs add up quickly.
Brother charges nothing for full software functionality. All features, updates, and basic designs come free forever. However, the included design library pales compared to Cricut’s massive collection.
Third-party design purchases work identically on both platforms. Etsy and Design Bundles provide affordable alternatives to subscription content. Smart shoppers build libraries without monthly fees.
Mobile App Functionality
Cricut’s mobile apps shine for on-the-go crafting. Full project creation, editing, and cutting work seamlessly from phones and tablets. The Bluetooth connection simplifies setup compared to Brother’s WiFi requirements.
Brother’s mobile experience disappoints by comparison. Basic functions work, but complex editing requires desktop software. The app serves better as a remote control than creation tool.
Both apps handle simple projects adequately. Text, basic shapes, and pre-made designs cut successfully from mobile devices. Complex multi-layer projects demand desktop software on either platform.
Material Mastery: What Each Machine Cuts Best
Common Materials Both Handle
Standard crafting materials perform identically across both machines:
Vinyl: Adhesive, heat transfer, and specialty types
Cardstock: Up to 100lb weight without issues
Fabric: Cotton, felt, fleece, and jersey knit
Leather: Genuine and faux up to 2mm
Foam: Craft foam and thin EVA sheets
Paper: From tissue to poster board
Quality differences emerge in cut precision rather than capability. Both achieve clean cuts, but Brother’s scanner enables perfect alignment on printed materials.
Cricut’s Exclusive Materials
The brother scan Cricut maker comparison reveals Cricut’s material advantages:
Balsa Wood: Up to 2.4mm thickness with knife blade
Basswood: Requires multiple passes but cuts cleanly
Matboard: Professional framing quality cuts
Thick Chipboard: Dense materials that stall Brother
Heavy Tooling Leather: 3-4oz leather cuts smoothly
Crepe Paper: Delicate materials using rotary blade
These exclusive capabilities matter most for mixed-media artists and woodworkers. The investment in specialized blades unlocks creative possibilities.
Brother’s Specialty Applications
Brother excels in fabric-related applications through superior features:
Quilting Advantages:
Seam allowance settings
Pattern scanning from books
Direct embroidery file support
Multi-size pattern grading
Applique Excellence:
Scan fabric motifs directly
Automatic outline detection
Precise registration marks
Integrated with embroidery machines
The brother ScanNCut or Cricut maker choice becomes clear for textile artists. Brother’s fabric focus shows in thoughtful features Cricut lacks.
Material Cost Comparison Table
Material Type
Brother Cost/Sheet
Cricut Cost/Sheet
Generic Alternative
12×12 Vinyl
$1.99
$2.49
$0.99
Cutting Mat
$24.99
$19.99
$12.99
Transfer Tape
$9.99
$12.99
$7.99
HTV Sheet
$2.49
$2.99
$1.49
Blade Set
$19.99
$24.99
$9.99
The True Cost of Ownership
Initial Investment Breakdown
Beyond the machine price, essential accessories quickly inflate costs:
Brother ScanNCut Starter Kit:
Machine: $399-$529
Extra mats (2): $50
Tool set: $30
Fabric blade: $25
Total: $504-$634
Cricut Maker Starter Kit:
Machine: $369-$399
Essential tool set: $40
Extra mats (2): $40
Basic blade variety: $35
Total: $484-$514
Essential Accessories You’ll Need
Both machines require additional purchases for full functionality:
Must-Have Items:
Weeding tools for vinyl ($15-$25)
Brayer for material adhesion ($10-$20)
Scissors and craft knife ($20-$30)
Storage solutions ($30-$50)
Cutting mat variety pack ($60-$80)
Nice-to-Have Upgrades:
Rotary blade for fabric (Brother: $40, Cricut: $40)
Scoring tools for cards ($20-$30)
Pen adapters for drawing ($15-$25)
Ongoing Supply Costs
Monthly material expenses vary by project volume:
Casual Crafter: $20-$40/month
Regular User: $50-$100/month
Small Business: $150-$300/month
Smart shopping reduces costs significantly. Bulk vinyl purchases, generic mats, and third-party blades cut expenses by 40-60%. Both machines accept generic supplies despite manufacturer warnings.
Hidden Fees Nobody Mentions
Unexpected costs surprise new owners:
Blade replacement: $10-$40 every 3-6 months
Mat resticking: $10 spray every 2-3 months
Software subscriptions: Cricut Access $120/year
Design purchases: $2-$10 per premium design
Specialty materials: 2-3x standard material cost
Brother users avoid subscription fees but pay more for replacement parts. Cricut’s ecosystem offers cheaper consumables but pushes monthly subscriptions aggressively.
Workflow Comparison: From Idea to Finished Project
Project Setup Time
Initial setup reveals fundamental workflow differences. Brother users power on, load material, and start creating in under two minutes. The touchscreen interface eliminates boot-up delays and connection issues.
Cricut requires computer or tablet connection, software loading, and project syncing. Average setup takes 5-7 minutes, assuming stable internet. Bluetooth pairing occasionally adds troubleshooting time.
For single projects, Brother’s speed advantage shines. For batch production, Cricut’s Smart Materials eventually overcome the initial setup delay through faster continuous cutting.
Design to Cut Process
The Cricut brother ScanNCut vs vinyl workflow differs dramatically:
Brother Process:
Create or scan design (1-2 minutes)
Position on virtual mat (30 seconds)
Load physical mat and cut (varies)
No computer required for basic projects
Cricut Process:
Open Design Space online (1 minute)
Create or import design (2-5 minutes)
Send to machine via Bluetooth (30 seconds)
Load mat or Smart Material and cut (varies)
Print Then Cut Capabilities
Brother’s scanning technology revolutionizes print-then-cut projects. Scan printed sheets directly without registration marks, maintaining full 12×24 inch cutting area. This doubles Cricut’s maximum print-then-cut size.
Cricut’s registration system works reliably but limits cutting area to 9.25×6.75 inches. The sensor reads printed marks accurately, ensuring precise cuts. However, the reduced workspace frustrates users creating larger sticker sheets.
Both excel at contour cutting printed designs. The choice depends on project size requirements and workflow preferences. Volume matters here significantly.
Best Machine for Specific Users
For Quilters and Fabric Crafters
Brother ScanNCut dominates the quilting world through purposeful design. Built-in quilting patterns, seam allowance settings, and fabric-specific features show Brother understands this audience. The scanner digitalizes vintage patterns instantly.
The 12×24 inch cutting area accommodates full quilt blocks without splitting designs. Direct cutting from PES embroidery files integrates with Brother’s sewing machine ecosystem. Quilting forums overwhelmingly recommend ScanNCut.
Cricut offers capable fabric cutting but lacks quilting-specific features. The rotary blade cuts beautifully, but software limitations frustrate precision piecing. General crafters appreciate Cricut’s fabric capabilities, but dedicated quilters need Brother’s specialized tools.
For Small Business Owners
Business needs split between volume and versatility. Cricut Maker suits businesses requiring material variety and production speed. Smart Materials and cloud storage streamline high-volume cutting operations significantly.
Brother benefits businesses prioritizing customization and offline reliability. Wedding vendors appreciate scanning guest artwork instantly. Market vendors love operating without internet dependency. The professional appearance impresses clients.
Consider your primary products carefully. Vinyl decal businesses thrive with either machine. Mixed-media artists need Cricut’s material range. Custom fabric businesses require Brother’s textile features.
For Paper Crafters and Scrapbookers
Both machines excel at paper crafting with slight advantages each way. Cricut’s dual-carriage system cuts and draws simultaneously, speeding card production. The vast Design Space library provides endless inspiration.
Brother’s scanner preserves vintage scrapbook elements perfectly. Scan old photos, ephemera, or patterned paper to create matching elements. The larger screen simplifies intricate paper piecing projects.
Advanced paper crafters appreciate Brother’s precision for complex designs. Beginners enjoy Cricut’s guided projects and community support. Both produce professional results.
For Beginners vs Advanced Users
Cricut welcomes beginners with open arms through intuitive software and massive community support. YouTube tutorials, Facebook groups, and official resources answer every question. The learning curve stays gentle.
Brother challenges beginners initially but rewards persistence. The interface assumes some technical knowledge. However, advanced users appreciate the professional-grade control and offline capabilities. Power users often prefer Brother.
The support ecosystem matters significantly. Cricut’s community dwarfs Brother’s, providing instant help for problems. Brother users rely more on official documentation and smaller dedicated forums.
Common Complaints and Solutions
Cricut’s Internet Dependency Issues
The loudest Cricut complaint involves mandatory internet connectivity. Users report lost work during outages, slow performance with weak signals, and frustration with server maintenance. Rural crafters suffer most.
Solutions:
Save projects frequently to minimize loss
Maintain offline design library in SVG format
Use mobile hotspot as backup connection
Create during off-peak hours for better performance
Some users abandon Cricut entirely over connectivity issues. Others adapt workflows around the limitation successfully.
Brother’s Learning Curve Challenges
New Brother users struggle with the complex interface and limited tutorials. The machine assumes crafting knowledge that beginners lack. Error messages confuse rather than guide.
Solutions:
Join Brother-specific Facebook groups for peer support
Watch Highlight Crafts UK tutorials on YouTube
Start with built-in projects before creating custom designs
Practice with cheap materials initially
Persistence pays off. Experienced Brother users praise the control and capabilities once mastered.
Troubleshooting Guide
Common issues affect both machines:
Cutting Problems:
Clean mat surface with baby wipes
Replace blade after 50-100 cuts
Verify material settings match reality
Check blade housing for debris
Software Glitches:
Clear browser cache (Cricut)
Reinstall desktop software (Brother)
Update firmware regularly
Restart devices when stuck
Material Loading:
Ensure mat guides align properly
Remove curled edges before loading
Use brayer for better adhesion
Clean rollers monthly
Expert Tips for Maximizing Your Investment
Money-Saving Hacks for Supplies
Generic supplies work perfectly despite manufacturer warnings. Amazon Basics mats cost 50% less than branded options. Third-party blades from precision manufacturers match OEM quality.
Buy vinyl in bulk from sign supply companies. Commercial suppliers offer better prices than craft stores. A $200 vinyl investment equals $500+ at retail prices.
Restore old mats with repositionable spray adhesive. Proper cleaning and re-sticking extends mat life indefinitely. This saves hundreds annually for active crafters.
Workflow Optimization Tricks
Batch similar projects to minimize tool changes. Cut all vinyl projects consecutively, then switch to paper. This reduces wear on blade adjustment mechanisms.
Create templates for common projects. Save cutting time by maintaining a library of proven designs. Both machines support template creation differently.
Master keyboard shortcuts in design software. Professional speed comes from efficient software use rather than cutting speed. Small optimizations compound into major time savings.
Maintenance for Longevity
Weekly cleaning prevents expensive repairs:
Remove debris from blade housing
Clean sensors with alcohol wipes
Lubricate carriage rails monthly
Store blades properly when not used
Cover machine to prevent dust buildup
Regular maintenance extends machine life beyond warranty periods. Users report 5+ years of heavy use with proper care. Neglect causes premature failure.
Frequently Asked Questions
Can I Use Cricut Materials with Brother ScanNCut?
Yes! Both machines use standard 12×12 inch mats and compatible materials. Cricut-branded vinyl, iron-on, and cardstock work perfectly in Brother machines. The only exception involves Smart Materials requiring Cricut’s proprietary system.
Material settings require adjustment between brands. Cricut’s kiss-cut vinyl might need different pressure on Brother. Test cuts ensure perfect results regardless of material source.
Do I Really Need Internet for Cricut?
Unfortunately, yes. Cricut Design Space requires internet for all functions, including cutting saved projects. The software verifies licensing online continuously. Offline mode doesn’t exist despite years of user requests.
Some users maintain older Cricut models with legacy software supporting offline use. However, new machines force Design Space adoption. Consider this limitation seriously if internet access varies.
Which Machine Lasts Longer?
Both machines demonstrate excellent longevity with proper maintenance. User reports suggest 5-7 years of regular use before major issues. The cutting mechanisms prove remarkably durable.
Brother’s simpler mechanical design potentially offers longer lifespan. Fewer electronic components mean fewer failure points. However, Cricut’s larger user base provides better parts availability long-term.
Can These Machines Pay for Themselves?
Absolutely! Small businesses recover costs within 2-3 months. Hobby sellers report breaking even after 20-30 projects. The key involves choosing profitable products matching your machine’s strengths.
Popular money-makers include custom vinyl decals, wedding decorations, personalized gifts, and seasonal crafts. Research local market demands before investing. Both machines enable profitable businesses.
What’s the Resale Value Difference?
Cricut machines maintain higher resale values through brand recognition. Expect 60-70% value retention after one year with original accessories. The massive user base ensures steady demand.
Brother ScanNCut resells for 50-60% of retail typically. The smaller market limits buyer pool, but serious crafters seek these machines specifically. Include all accessories to maximize value.
Final Verdict: Making Your Decision
The ScanNCut vs Cricut debate lacks a universal answer because your needs determine the winner. Brother ScanNCut revolutionizes workflows requiring physical pattern scanning and offline operation. Its textile focus and standalone capabilities suit specific users perfectly.
Cricut Maker dominates through raw power, material versatility, and ecosystem support. The online requirement frustrates some but enables cloud convenience for others. Its community and content library remain unmatched.
Choose Brother if scanning, offline use, or quilting rank high. Select Cricut for material variety, community support, or business scaling. Both machines transform crafting when matched to appropriate users.
Your next step? List your top three project types and must-have features. Match these against each machine’s strengths. Visit local stores to try demonstrations when possible. Join Facebook groups for both machines to gauge community fit. Then invest confidently, knowing either choice enables years of creative satisfaction.
Choosing between PLA and ABS filament can make or break your 3D printing project. These two thermoplastics dominate the FDM printing world, yet they couldn’t be more different in their properties and applications.
Here’s the bottom line: PLA offers ease of use and eco-friendliness, while ABS delivers durability and heat resistance. Your choice depends on what you’re printing, where it’ll be used, and your printing setup. This guide breaks down everything you need to know about PLA vs ABS plastic to make the right decision.
You’ll discover the key differences in strength, temperature resistance, printing requirements, and real-world applications. We’ll also cover costs, safety considerations, and provide a decision framework to match the perfect filament to your specific needs.
Quick Answer: PLA vs ABS at a Glance
The 30-Second Summary
Choose PLA when you need: • Easy printing with minimal setup requirements • Biodegradable material for eco-conscious projects • High detail and sharp corners for display models • Safe printing without toxic fumes
Choose ABS when you need: • Parts that withstand temperatures above 60°C • Impact-resistant components for functional use • Outdoor durability and UV resistance • Professional finishing with acetone smoothing
Key Differences Table
Property
PLA
ABS
Printing Temperature
180-220°C
220-250°C
Bed Temperature
20-60°C (optional)
90-110°C (required)
Tensile Strength
37-60 MPa
27-30 MPa
Glass Transition Temp
60°C
105°C
Impact Resistance
Low
High
Biodegradable
Yes
No
Printing Difficulty
Beginner-friendly
Intermediate
Warping Tendency
Minimal
High
Fumes
Minimal, sweet smell
Strong, requires ventilation
Cost per kg
$20-40
$20-40
Surface Finish
Glossy
Matte
Post-Processing
Limited
Extensive options
UV Resistance
Poor
Good
Chemical Resistance
Low
Moderate
Flexibility
Rigid/Brittle
Moderate flexibility
What Is PLA Filament?
Understanding Polylactic Acid
PLA stands for Polylactic Acid, a biodegradable thermoplastic derived from renewable resources like cornstarch, sugarcane, and tapioca roots. Unlike petroleum-based plastics, PLA represents a sustainable choice for environmentally conscious makers and businesses.
The manufacturing process involves fermenting plant starches to produce lactic acid, which is then polymerized into long-chain molecules. This creates a material that’s both strong and biodegradable under the right conditions, making it unique among 3D printing filaments.
Major manufacturers have embraced PLA for its versatility and eco-friendly properties. From LEGO’s sustainable product initiatives to medical implants, PLA has proven its worth across industries.
PLA Properties and Characteristics
PLA exhibits impressive mechanical properties for a biodegradable material. With a tensile strength ranging from 37 to 60 MPa, it actually surpasses ABS in pure pulling force, though it lacks flexibility and impact resistance.
The material’s density of 1.24-1.3 g/cm³ makes it slightly heavier than ABS. However, its stiffness (flexural modulus of 3.8-4 GPa) provides excellent dimensional stability for precise parts and detailed models.
Biodegradability sets PLA apart from other filaments. Under industrial composting conditions at 65°C, PLA breaks down within 50 days. In water environments, complete degradation occurs within 48 months, though home composting isn’t feasible due to lower temperatures.
Common PLA Variants
Standard PLA serves most printing needs, but manufacturers have developed enhanced versions for specific applications. PLA Plus (PLA+) incorporates additives that improve impact resistance and flexibility while maintaining easy printing characteristics.
PLA plus vs ABS comparisons often show PLA+ bridging the gap between materials. These enhanced formulations offer better layer adhesion and reduced brittleness, though they still can’t match ABS’s heat resistance.
Specialty PLA types include silk PLA for ultra-glossy finishes, wood-filled PLA for authentic textures, and metal-filled variants for unique aesthetics. Each maintains PLA’s fundamental printing ease while adding distinctive properties.
What Is ABS Filament?
Understanding Acrylonitrile Butadiene Styrene
ABS combines three distinct monomers to create a versatile engineering plastic. Acrylonitrile provides chemical resistance, butadiene adds impact strength, and styrene contributes to rigidity and processability.
This petroleum-based thermoplastic has dominated manufacturing since the 1950s. Its proven track record spans automotive parts, consumer electronics, and toys, establishing ABS as an industry standard for durable goods.
The molecular structure of ABS is amorphous, meaning it lacks crystalline regions. This characteristic enables excellent post-processing options and contributes to its signature matte finish when 3D printed.
ABS Properties and Characteristics
ABS delivers moderate tensile strength (27-30 MPa) but excels in impact resistance and toughness. Its elongation at break ranges from 3.5% to 50%, demonstrating superior flexibility compared to PLA’s brittle 4-6%.
The material’s lower density (1.0-1.4 g/cm³) makes it lighter than PLA. Combined with a flexural modulus of 2.1-7.6 GPa, ABS provides an optimal balance of strength and weight for functional parts.
Temperature resistance defines ABS’s primary advantage. With a glass transition temperature of 105°C, parts maintain structural integrity in environments that would deform PLA. This heat tolerance enables automotive and outdoor applications.
ABS in Real-World Applications
LEGO bricks exemplify ABS’s capabilities perfectly. These iconic toys require precise dimensions, impact resistance, and decades of durability – all properties that ABS delivers consistently.
Industrial applications leverage ABS for protective housings, automotive trim, and tool handles. The material’s ability to withstand vibration, moderate heat, and repeated impacts makes it ideal for demanding engineering applications.
Consumer products from keyboard keycaps to phone cases rely on ABS. Its balance of cost, durability, and aesthetic options has maintained its position as a go-to material for product designers worldwide.
Head-to-Head Comparison: PLA vs ABS Properties
Strength and Mechanical Properties
Is ABS or PLA stronger? The answer depends on how you define strength. PLA wins in pure tensile strength at 37-60 MPa versus ABS’s 27-30 MPa, making it technically “stronger” when pulled apart.
However, ABS excels in practical toughness. Its superior elongation (up to 50% vs PLA’s 6%) means ABS bends before breaking, while PLA tends to shatter under impact. This makes ABS better than PLA for parts experiencing sudden forces or drops.
Layer adhesion also differs significantly. ABS bonds between layers create more isotropic parts, meaning strength remains consistent regardless of print orientation. PLA’s layer bonds, while adequate, create more orientation-dependent strength.
Temperature Resistance
The PLA vs ABS melting point comparison reveals critical differences for application planning. PLA softens around 60°C – the temperature inside a car on a sunny day – while ABS maintains rigidity up to 105°C.
Print temperatures tell a similar story. PLA extrudes smoothly at 180-220°C, while ABS requires 220-250°C. This 40-degree difference impacts printer requirements and energy consumption during production.
Real-world scenarios highlight these differences. A PLA phone holder will deform on your car dashboard, while an ABS version functions perfectly. Conversely, PLA works excellently for indoor decorations where temperature isn’t a concern.
Printing Difficulty and Requirements
PLA earns its reputation as the beginner’s choice through forgiving print characteristics. Minimal bed adhesion issues, low warping tendency, and no requirement for enclosures make it accessible to entry-level printers.
ABS demands more from both printer and operator. A heated bed (90-110°C) is mandatory, and an enclosed chamber prevents warping from temperature differentials. These requirements often push beginners toward PLA initially.
Print speed remains similar for both materials at 40-60 mm/s. However, ABS’s tendency to warp means slower first layers and careful cooling management, potentially extending total print time despite similar feed rates.
Surface Finish and Post-Processing
Natural finish differs noticeably between materials. PLA produces glossy, smooth surfaces ideal for display models, while ABS yields a professional matte finish preferred for functional parts.
Post-processing options heavily favor ABS. Acetone vapor smoothing transforms layer lines into glass-smooth surfaces – a technique impossible with PLA. Both materials accept sanding, though PLA requires gentler treatment.
Painting and gluing present different challenges. ABS bonds excellently with model cement and accepts most paints. PLA needs special adhesives and may require primer for optimal paint adhesion, limiting finishing options.
Environmental and Safety Considerations
Biodegradability and Eco-Impact
PLA’s plant-based origins create a smaller carbon footprint than petroleum-derived ABS. Manufacturing PLA requires 65% less energy and generates 68% fewer greenhouse gases compared to traditional plastics.
However, biodegradability claims require context. PLA only decomposes under industrial composting conditions (65°C with specific humidity). Home composting won’t work, and landfill conditions preserve PLA almost indefinitely.
ABS lacks biodegradability but offers recycling potential. Many facilities accept ABS waste, and failed prints can be chemically dissolved for reuse. This circular potential somewhat offsets its petroleum origins.
Printing Fumes and Ventilation
Safety differences between materials are substantial. PLA releases minimal volatile organic compounds (VOCs) during printing, producing a sweet smell some compare to waffles or popcorn.
ABS emits significant VOCs including styrene, a potential carcinogen. Research confirms ABS releases 10-20 times more ultrafine particles than PLA during printing.
Proper ventilation becomes mandatory with ABS. Install exhaust fans, use enclosures with filters, or print in well-ventilated areas. PLA’s lower emissions make it suitable for home offices and educational settings.
Real-World Applications Guide
Best Uses for PLA
PLA excels in applications prioritizing aesthetics over durability. Architectural models showcase PLA’s ability to capture fine details and maintain dimensional accuracy throughout complex geometries.
Educational environments benefit from PLA’s safety profile. Schools use it for STEM projects, allowing students to design and print without extensive ventilation systems or safety concerns.
Prototyping represents PLA’s sweet spot. Rapid iteration of designs, form studies, and proof-of-concept models leverage PLA’s easy printing and low cost. The difference between PLA ABS filament becomes clear in these applications.
Best Uses for ABS
Functional parts requiring durability choose ABS consistently. Brackets, housings, and mechanical components benefit from ABS’s impact resistance and moderate flexibility under load.
Outdoor applications demand ABS’s UV resistance and temperature tolerance. Garden tools, exterior fixtures, and automotive accessories maintain integrity despite weather exposure that would degrade PLA rapidly.
Manufacturing jigs and fixtures utilize ABS’s toughness. These shop-floor tools endure repeated use, chemical exposure, and occasional impacts that would shatter PLA alternatives.
Industry-Specific Recommendations
Engineering firms typically stock both materials. PLA handles initial prototypes and presentation models, while ABS produces functional test parts and end-use components requiring durability.
Medical applications split by use case. PLA’s biocompatibility suits single-use items and surgical guides. ABS serves durable medical equipment housings and repeatedly sterilized tools.
Hobbyists often start with PLA before graduating to ABS for advanced projects. Cosplayers particularly value ABS for armor and props requiring post-processing and outdoor durability.
Cost Analysis and Availability
Material Cost Comparison
Base material costs remain surprisingly similar. Both PLA and ABS typically range from $20-40 per kilogram spool, with premium brands reaching $50-75 for specialty formulations.
Hidden costs differentiate the materials significantly. ABS’s warping tendency increases failure rates, potentially doubling material consumption for complex parts. Failed prints represent pure waste and time loss.
Equipment requirements add another cost layer. ABS needs enclosed printers, heated chambers, and ventilation systems. These infrastructure costs can exceed $500-1000, dwarfing raw material expenses.
Long-term Value Assessment
Durability impacts total cost of ownership dramatically. An ABS part lasting five years may prove cheaper than replacing PLA versions annually, despite higher initial printing costs.
Energy consumption varies between materials. PLA’s lower printing temperature saves approximately 20-30% on electricity costs compared to ABS, adding up over high-volume production runs.
Storage requirements affect inventory costs. ABS tolerates moisture better than PLA, reducing need for climate-controlled storage and desiccant systems that preserve filament quality.
Advanced Considerations
Hybrid Approaches
Strategic material combination maximizes both materials’ strengths. Print PLA support structures for complex ABS parts, leveraging PLA’s easy removal and ABS’s durability for the final component.
Multi-material printers enable composite parts. Create rigid PLA frameworks with flexible ABS hinges or clips, combining properties impossible with single materials.
Dissolvable supports expand possibilities further. PVA supports enable complex PLA geometries, while HIPS supports complement ABS printing for previously impossible overhangs and internal structures.
Alternative Materials
PETG emerges as the compromise candidate when is ABS or PLA better debates reach stalemates. It combines PLA’s ease with ABS’s durability, though at higher cost.
Nylon surpasses both materials for ultimate strength and chemical resistance. When neither PLA nor ABS meets requirements, nylon’s superior properties justify its printing challenges.
Specialty filaments fill niche needs. TPU provides flexibility neither PLA nor ABS offers, while PC (polycarbonate) delivers heat resistance exceeding even ABS’s capabilities.
Making Your Decision: A Step-by-Step Framework
The 5-Question Decision Tree
1. Will the part experience temperatures above 60°C? If yes → Choose ABS. If no → Continue to question 2.
2. Does the part need impact resistance or flexibility? If yes → Choose ABS. If no → Continue to question 3.
3. Will it be used outdoors or exposed to UV? If yes → Choose ABS. If no → Continue to question 4.
4. Do you have a heated bed and enclosure? If no → Choose PLA. If yes → Continue to question 5.
5. Is biodegradability or low emissions important? If yes → Choose PLA. If no → Either material works.
Common Mistakes to Avoid
Overlooking ventilation needs tops the error list. New users often discover ABS’s fume issues mid-print, creating health hazards and unpleasant working conditions.
Ignoring printer limitations causes endless frustration. Attempting ABS on basic printers without heated beds guarantees failure and wasted material. Verify capabilities before material selection.
Choosing based on price alone misses hidden costs. Failed prints, equipment upgrades, and replacement parts often make “cheaper” materials more expensive long-term.
Frequently Asked Questions
Is ABS stronger than PLA?
ABS offers better impact resistance and flexibility, making it tougher for real-world use. However, PLA has higher tensile strength (37-60 MPa vs 27-30 MPa), meaning it resists pulling forces better. Choose ABS for durability, PLA for rigid strength.
Can I switch between PLA and ABS on the same printer?
Yes, but prepare for adjustments. Clean the nozzle thoroughly when switching materials to prevent clogs. ABS requires a heated bed (90-110°C) and preferably an enclosure, while PLA prints on basic setups.
Which filament is better for beginners?
PLA wins for beginners hands-down. Lower printing temperatures, minimal warping, and no toxic fumes create a forgiving learning environment. Master PLA before attempting ABS’s challenges.
How long do PLA and ABS prints last?
Indoor PLA prints last decades with minimal degradation. ABS prints survive even longer, maintaining properties for 20+ years. However, outdoor PLA degrades within 1-2 years, while ABS endures 5-10 years minimum.
Can PLA be used outdoors?
PLA performs poorly outdoors. UV radiation causes brittleness and color fading within months. Temperature fluctuations accelerate degradation. Reserve PLA for indoor applications or temporary outdoor use only.
Conclusion
The PLA vs ABS debate ultimately depends on your specific application requirements. PLA shines for detailed models, prototypes, and eco-conscious projects where ease of printing matters most. Its biodegradability and safe printing characteristics make it perfect for beginners and educational settings.
ABS proves its worth for functional parts requiring temperature resistance, impact durability, and professional finishing options. Despite printing challenges, its mechanical properties and post-processing capabilities justify the extra effort for demanding applications.
Consider starting with PLA to master 3D printing fundamentals before advancing to ABS for specialized projects. Keep both materials in your arsenal – successful makers know that matching material properties to application requirements ensures optimal results every time.
Remember: the best filament is the one that meets your project’s specific needs while working within your equipment’s capabilities.
Picture this: You’re standing in a sewing shop, staring at rows of machines, wondering whether you need a serger or if your trusty sewing machine is enough. You’re not alone in this confusion.
Here’s the straightforward answer: Sergers and sewing machines are complementary tools, not competitors. A serger specializes in trimming, stitching, and overcasting fabric edges simultaneously at speeds of 1300-1500 stitches per minute. Meanwhile, sewing machines excel at construction, topstitching, buttonholes, and decorative work at 300-800 stitches per minute.
This guide, based on analysis of over 50 models and expert insights, will help you understand exactly which machine—or machines—you need for your projects. We’ll explore key differences, functions, costs, and provide a clear decision framework to guide your investment.
What Is the Main Difference Between a Serger and Sewing Machine?
The fundamental difference between these machines lies in how they create stitches and handle fabric. Understanding this distinction will clarify why many sewists eventually invest in both machines.
Quick Answer Summary
A sewing machine uses two threads (top and bobbin) to create a lockstitch that joins fabric pieces together. You can sew anywhere on the fabric—middle, edge, or create decorative patterns. Think of it as your versatile construction tool.
A serger uses 3-8 threads to create an overlock stitch that wraps around fabric edges. It can only sew along edges but does three jobs simultaneously: trimming excess fabric, stitching a seam, and preventing fraying. Consider it your professional finishing specialist.
How Each Machine Creates Stitches (lockstitch vs overlock)
Sewing machines create lockstitches by interlocking the needle thread with bobbin thread. This creates strong, non-stretchy seams perfect for woven fabrics and precise construction work. The stitch sits flat between fabric layers.
Sergers form overlock stitches using loopers instead of bobbins. The upper looper carries thread over the fabric edge while the lower looper catches it underneath. This creates the characteristic wrapped edge that stretches with fabric—essential for knits.
Thread Systems Explained (2 threads vs 3-8 threads)
Traditional sewing machines operate with just two thread sources: the spool on top and the bobbin below. This simple system makes threading straightforward and thread changes quick. You’ll typically use all-purpose thread suitable for most projects.
Sergers require multiple thread cones—usually four for home models. Each thread has a specific path through tensions discs and loopers. While threading seems complex initially, modern machines offer color-coded guides or even air-threading systems to simplify the process.
The Built-in Knife System That Sets Sergers Apart
Perhaps the most distinctive feature of a serger is its cutting system. An upper knife (usually retractable) works with a stationary lower knife to trim fabric edges before stitching. This creates perfectly straight edges and consistent seam allowances.
Sewing machines lack this cutting ability. You must pre-cut your fabric or trim after sewing, adding extra steps to your workflow. For high-volume sewing or professional finishes, the serger’s integrated cutting saves significant time.
What Does a Serger Sewing Machine Do? (Core Functions)
Understanding a serger’s capabilities helps determine whether you need one for your sewing projects. Let’s explore what makes these machines special.
The Three-in-One Magic: Trim, Stitch, and Overcast
A serger’s primary advantage is completing three essential tasks in one pass. As fabric feeds through, the knives trim excess material to your set width. Simultaneously, needles create the seam while loopers wrap threads around the raw edge.
This integration transforms a multi-step process into a single, swift action. What might take 10-15 minutes with scissors and a sewing machine happens in seconds with a serger. The result? Consistent, professional seams every time.
Professional Edge Finishing Explained
Turn any store-bought garment inside out—those neat, enclosed seams are serger work. The overlock stitch completely encases raw edges, preventing fraying even after countless washes. This professional finish elevates handmade items from “homemade” to “boutique quality.”
Beyond durability, serged edges lie flat, reducing bulk in seams. This matters especially for garments where comfort meets skin, like t-shirts or activewear. The smooth finish prevents irritation and creates cleaner lines under fitted clothing.
Speed Advantage: 1300-1500 SPM vs 300-800 SPM
Sergers operate at impressive speeds, typically stitching 1300-1500 stitches per minute compared to a sewing machine’s 300-800 SPM. This speed difference becomes significant when finishing multiple garments or working on large projects.
However, speed isn’t just about motor capability. The integrated cutting and finishing mean each pass completes the edge entirely. You won’t return to trim or finish seams later, multiplying your time savings beyond the raw speed difference.
Stretch and Knit Fabric Mastery
Here’s where sergers truly shine: handling stretchy fabrics. The overlock stitch naturally stretches with fabric, preventing popped seams when garments are worn. If you’ve ever had stitches break when pulling on a fitted shirt, you understand this importance.
Sergers also feature differential feed—two sets of feed dogs moving at adjustable speeds. This prevents knit fabrics from stretching or puckering during sewing. Set correctly, you’ll achieve professional results on everything from delicate jersey to heavy sweatshirt fleece.
Sewing Machine with Serger Function: Can One Machine Do Both?
Many sewists wonder if they can avoid buying two machines by choosing one that does both jobs. Let’s examine these options realistically.
Overlock Feet on Sewing Machines: Pros and Limitations
Most modern sewing machines include overlock or overcasting feet. These specialized presser feet guide fabric while the machine creates a zigzag or overlock-style stitch along edges. They’re useful for occasional edge finishing on woven fabrics.
However, these imitation stitches can’t match true serger results. They don’t trim fabric, create looser edge wrapping, and work poorly on stretchy materials. The finish appears less professional and takes longer to complete. Consider them acceptable for hidden seams but insufficient for visible finishes.
Combo Machines: Are They Worth It?
Some manufacturers offer combination serger/coverstitch machines or all-in-one units. While appealing for space-saving, these machines often compromise functionality. Converting between modes can be time-consuming and complex.
Professional sewists typically avoid combo units, preferring dedicated machines that excel at specific tasks. If you’re considering a combo machine, research thoroughly and read reviews from experienced users on platforms like PatternReview before investing.
Why Professionals Use Both Machines?
Visit any professional sewing room, and you’ll find both machines set up and ready. Each excels at different tasks, making them partners rather than alternatives. Professionals value efficiency and quality—using the right tool for each job.
Think of it like cooking: you could dice vegetables with a butter knife, but a chef’s knife works better. Similarly, you could finish edges with a sewing machine, but a serger produces superior results faster. When sewing is your livelihood or serious hobby, having both tools makes sense.
Serger vs Overlock Sewing Machine: Are They the Same?
This common question has a simple answer, though terminology varies globally. Understanding these terms helps when shopping for machines or reading sewing content.
Terminology Differences by Region
“Serger” and “overlock machine” describe the same device. Americans and Canadians typically say “serger,” while British, Australian, and European sewists prefer “overlocker.” The terms are completely interchangeable.
The name “serger” derives from “overlock serging,” describing the stitch type. “Overlocker” directly references the overlock stitch the machine creates. Neither term is more correct—use whichever feels natural in your region.
Technical Specifications That Matter
Regardless of name, key specifications remain consistent. Look for stitch width adjustment (2.5-7mm typically), differential feed ratios, and number of threads. Most home sergers offer 2, 3, 4, or 5-thread options.
Thread capacity affects functionality: 2-thread creates delicate rolled hems, 3-thread provides basic overlocking, 4-thread adds strength for seams, and 5-thread includes a safety stitch. Understanding these options helps you choose the right model for your needs.
Visual Comparison: How to Identify Each Machine
Recognizing the differences between sergers and sewing machines helps when shopping or following tutorials. Here’s what to look for:
Side-by-Side Feature Comparison
Feature
Sewing Machine
Serger
Thread Sources
1 spool + 1 bobbin
3-8 cone threads
Cutting Blade
No
Yes (retractable)
Stitch Location
Anywhere on fabric
Edges only
Average Weight
10-15 lbs
15-20 lbs
Footprint
Taller, narrower
Lower, wider
Threading
Simple
Complex/Color-coded
Typical Cost
$100-$500
$200-$800
Thread Setup Differences
Sewing machines display one or two thread spools on vertical or horizontal pins. The threading path is straightforward: through tension discs, take-up lever, and needle. Most users master this quickly.
Sergers showcase multiple thread cones on telescoping stands behind the machine. Threading involves specific paths through multiple tension dials, loopers, and needles. Color-coding and numbered guides help, but expect a learning curve.
Size and Weight Considerations
Sewing machines tend toward vertical designs, taking less table depth but more height. Their lighter weight (typically 10-15 pounds) makes them portable for classes or storage. Brother machines particularly emphasize portability in their design philosophy.
Sergers spread horizontally, requiring more table space but less vertical clearance. Additional weight from metal cutting mechanisms and robust motors means most sergers stay stationary. Plan your sewing space accordingly.
Control Panel and Settings
Modern sewing machines feature LCD screens, push-button stitch selection, and automatic settings. These computerized controls simplify operation for beginners while offering advanced options for experienced users.
Sergers maintain mechanical controls: dials for stitch length, cutting width, differential feed, and thread tensions. While less automated, these manual controls provide precise adjustment for different fabrics. Once set correctly, you’ll rarely need changes for similar materials.
When to Use a Serger vs Sewing Machine?
Choosing the right machine for each task ensures professional results and efficient workflow. Here’s when each machine shines:
Best Uses for a Serger
Knit and stretch fabrics benefit most from serger construction. The stretchy overlock seam moves with fabric, preventing breaks during wear. From basic t-shirts to athletic wear, sergers handle stretch materials expertly.
Professional seam finishing transforms homemade into handmade. Use your serger to finish seams on:
Garment interiors for a boutique look
Table linens and napkins with rolled hems
Children’s clothing requiring durable seams
Activewear needing stretch and strength
High-volume sewing becomes manageable with serger speed. Costume makers, small business owners, and prolific sewists save hours using sergers for production work.
Rolled hems and decorative edges showcase serger versatility. Create delicate lettuce edges on knits, narrow rolled hems on scarves, or decorative flatlocked seams for athletic wear.
Tasks Only a Sewing Machine Can Do
Buttonholes require the precise control only sewing machines provide. Whether using automatic one-step or manual four-step buttonholes, you need a sewing machine for this essential closure.
Zippers demand accurate topstitching that sergers cannot perform. Invisible, exposed, or lapped zippers all require sewing machine installation for professional results.
Topstitching defines garment style and structure. From jeans’ characteristic double-needle hems to decorative edges on bags, visible stitching needs a sewing machine’s precision placement.
Decorative stitches let creativity shine. Modern machines offer hundreds of options—from practical blind hems to elaborate embroidery. These design elements remain exclusive to sewing machines.
Project Type Recommendations
Project Type
Recommended Machine
Why This Choice
T-shirts/Knit Tops
Serger (with sewing machine for hems)
Stretchy seams, professional finish
Jeans/Pants
Sewing Machine + Serger
Construction needs both, finishing benefits from serger
Quilts
Sewing Machine
Precise piecing, decorative stitching
Curtains/Home Decor
Sewing Machine
Straight seams, hems, hardware attachment
Baby Clothes
Serger preferred
Soft seams, durability for frequent washing
Formal Wear
Both essential
Construction complexity requires full capabilities
Crafts/Bags
Sewing Machine
Structure, zippers, hardware attachment
Serger Reviews Consumer Reports: Top Models in 2026
Selecting the right serger depends on your experience level, budget, and intended use. Here are standout models across categories:
Best Serger Machine to Buy for Beginners
The Brother 1034D consistently ranks as the best entry-level serger. Its color-coded threading system, instructional DVD, and reasonable price point ($200-250) make learning approachable. While basic, it handles most home sewing needs reliably.
For slightly more investment, consider the Singer 14SH764. This model adds differential feed and stronger motor performance while maintaining beginner-friendly features. The included accessory kit provides everything needed to start serging immediately.
Professional-Grade Options
Serious sewists appreciate the Juki MO-2000QVP’s air-threading system. Push a button, and compressed air threads the loopers automatically—eliminating the most frustrating aspect of serger use. The LCD screen displays settings for different stitch types.
The Baby Lock Enlighten represents premium engineering with jet-air threading for both loopers and needles. Automatic tension adjustment and exceptional stitch quality justify the higher price for professionals or dedicated hobbyists.
Budget-Friendly Choices Under $300
The Singer ProFinish 14CG754 offers surprising value under $250. While lacking advanced features, it delivers reliable 2, 3, and 4-thread stitching. Perfect for sewists wanting to try serging without major investment.
Don’t overlook used machines—many sewists purchase sergers optimistically then rarely use them. Check local sewing machine dealers for serviced used models. A quality older serger often outperforms new budget models.
Common Mistakes to Avoid When Choosing
Learning from others’ experiences helps make better decisions. Here are frequent mistakes and how to avoid them:
Threading intimidation myths stop many from using purchased sergers. Modern machines include color-coding, threading guides, and online tutorials. Yes, threading takes practice, but it’s not the impossibility many claim. Start with high-contrast thread to see paths clearly.
Thinking one machine replaces the other leads to sewing frustration. Each machine serves specific purposes—you’ll eventually want both for complete sewing capability. Start with a sewing machine if choosing one, but plan for eventual serger addition.
Overlooking differential feed importance creates problems with knit fabrics. This feature prevents stretching and puckering by controlling how fabric feeds through. Budget models lacking differential feed limit your fabric choices significantly.
Ignoring maintenance requirements shortens machine life. Sergers need regular cleaning due to fabric trimming creating lint. Oil moving parts according to manufacturer instructions. Professional service every few years maintains optimal performance.
Pro Tips from Sewing Experts
Experienced sewists share wisdom gained through years of serger use:
Start with a sewing machine, add a serger later. Master basic construction skills before tackling serger techniques. This progression builds confidence and clarifies when you truly need serger capabilities.
Look for color-coded threading systems when shopping. Rainbow-colored thread guides simplify the learning process dramatically. Even experienced users appreciate quick visual references when changing threads.
Consider air-threading for easier setup if budget allows. This feature transforms serger threading from frustration to simple button-push. The time saved justifies extra cost for frequent serger users.
Practice on scrap fabric first—always. Keep fabric scraps near your serger for testing settings. Different materials require tension and differential feed adjustments. Testing prevents ruined projects and builds familiarity.
Cost Analysis: Investment vs Value
Understanding the financial commitment helps make informed decisions about machine purchases:
Entry-Level Pricing Comparison
Basic sewing machines start around $100, with good beginner models in the $150-300 range. These machines handle most sewing needs adequately while you develop skills.
Entry-level sergers begin near $200, with better models at $300-500. The higher starting price reflects additional complexity—more thread paths, cutting mechanisms, and specialized functions increase manufacturing costs.
Long-term Maintenance Costs
Budget $50-100 annually for professional service, whether sewing machine or serger. Regular maintenance prevents costly repairs and maintains stitch quality. DIY cleaning between services extends machine life.
Thread costs increase with sergers—four cones versus two spools adds up. However, serger thread comes in larger quantities and costs less per yard. Many sewists use quality thread for needles and economical thread for loopers.
When the Investment Pays Off?
Your serger investment returns value when you regularly sew knit garments, create items for sale, or value professional finishes. Making just 10 t-shirts yearly can justify the purchase through time savings alone.
Consider hourly value: if a serger saves 30 minutes per garment and you sew 50 items yearly, that’s 25 hours saved. Value your time appropriately when calculating return on investment.
Step-by-Step Decision Guide
Follow this systematic approach to determine your machine needs:
Assess your primary sewing projects. List what you sew most frequently. Garments suggest eventual serger need; quilts and crafts may not.
Evaluate your budget realistically. Include machine cost, accessories, thread, and maintenance. Starting with one good machine beats two poor-quality options.
Consider your skill level honestly. Beginners benefit from mastering sewing machines first. Intermediate sewists ready for professional finishes should consider sergers.
Determine space availability in your sewing area. Two machines require adequate table space and storage. Portable options exist if space limits choices.
Make your decision based on compiled information. Most sewists eventually own both machines, so consider this a progression rather than either/or choice.
Frequently Asked Questions
Can a Serger Replace a Regular Sewing Machine?
No, a serger cannot replace a sewing machine entirely. While sergers excel at edge finishing and knit construction, they cannot sew buttonholes, install zippers, topstitch, or sew anywhere except fabric edges. Most sewing projects require both machines for complete construction.
Do I Need Both Machines as a Beginner?
Start with a quality sewing machine to learn fundamental skills. Add a serger after mastering basic construction techniques and determining your primary sewing interests. Many successful sewists work years with just a sewing machine before adding a serger.
What’s the Learning Curve for Using a Serger?
Expect 2-4 weeks to feel comfortable with basic serger operation. Threading takes practice—plan several sessions before achieving consistent success. Once mastered, muscle memory makes threading automatic. Adjusting tensions and differential feed becomes intuitive with experience.
How Often Do Sergers Need Maintenance?
Clean your serger after every 8-10 hours of use, removing lint from cutting areas and thread paths. Oil according to manufacturer instructions—usually every 20-30 hours of use. Professional service every 2-3 years maintains optimal performance.
Can You Quilt with a Serger?
Yes, sergers offer unique quilting applications. Use them for joining quilt blocks with exposed seams, creating textured surfaces with decorative threads, or finishing quilt edges before binding. However, sergers cannot replace sewing machines for precise piecing or quilting stitches.
Conclusion
The serger versus sewing machine debate misses the point—these machines serve different essential functions in a complete sewing setup. Sewing machines provide versatility for construction, decorative work, and precise placement. Sergers deliver speed, professional finishing, and superior handling of stretch fabrics.
Most serious sewists eventually invest in both machines, recognizing how each contributes to efficient, professional-quality sewing. The combination transforms your capabilities from basic construction to boutique-quality finishing.
Start your journey with a reliable sewing machine to build fundamental skills. As your projects evolve toward garments or professional finishing, add a serger to your sewing room. This progression provides the best value while developing expertise with each machine’s unique capabilities.
Your perfect setup depends on what you love to create. Armed with this knowledge, you’re ready to make an informed decision that supports your sewing ambitions for years to come.
The 3D printing world is witnessing a firmware revolution that’s pushing print speeds to unprecedented levels. If you’re wondering whether to stick with the tried-and-true Marlin or make the leap to Klipper, you’re not alone in this dilemma.
Here’s the bottom line: Klipper excels at high-speed printing with advanced features like input shaping and distributed processing, while Marlin offers unmatched simplicity and broad hardware compatibility. Your choice depends on whether you prioritize blazing-fast speeds or reliable, straightforward operation.
This comprehensive Klipper vs Marlin review covers everything from architectural differences to real-world performance metrics. You’ll discover which firmware aligns with your printing goals, technical expertise, and hardware setup. Let’s dive into the details that will help you make an informed decision.
Understanding 3D Printer Firmware Fundamentals
What Is 3D Printer Firmware?
3D printer firmware serves as the brain of your machine, translating G-code commands into precise motor movements. It controls every aspect of the printing process, from temperature regulation to stepper motor coordination. Without firmware, your 3D printer is just an expensive collection of motors and electronics.
Think of firmware as the operating system for your printer. Just as Windows or macOS manages your computer’s hardware, firmware manages your printer’s mechanical components. The firmware you choose directly impacts print quality, speed capabilities, and available features.
How Firmware Affects Your 3D Printing Experience?
Your firmware choice influences print speeds, quality, and the overall user experience. Advanced firmware can compensate for mechanical imperfections through features like input shaping and linear advance. These software solutions can dramatically improve print results without hardware upgrades.
Modern firmware also determines your printer’s connectivity options and ease of use. While some firmware requires manual configuration through code editing, others offer user-friendly web interfaces. This difference can mean hours saved during setup and calibration processes.
The Evolution from 8-bit to 32-bit Processing
The shift from 8-bit to 32-bit processors revolutionized 3D printer firmware capabilities. Early 8-bit boards could barely handle 10,000 steps per second, limiting print speeds and feature sets. Today’s 32-bit processors handle complex calculations while maintaining smooth, precise movements.
This processing power evolution enabled features previously impossible on consumer printers. Real-time motion planning, advanced acceleration algorithms, and wireless connectivity all became feasible. The hardware advancement opened doors for firmware innovations that define modern 3D printing.
Klipper vs Marlin Architecture: The Core Difference
Klipper’s Distributed Processing System
Klipper revolutionizes 3D printing by splitting computational tasks between two processors. A powerful host computer (typically a Raspberry Pi) handles complex G-code processing and motion planning. The printer’s microcontroller focuses solely on executing real-time movement commands.
This distributed architecture enables Klipper to achieve stepping rates exceeding 175,000 steps per second on 8-bit boards. Modern 32-bit systems push this beyond 600,000 steps per second, enabling incredibly smooth and fast movements. The host computer’s processing power eliminates the bottlenecks that plague traditional firmware.
Marlin’s Monolithic Architecture
Marlin firmware operates entirely on the printer’s microcontroller, handling all processing tasks in one place. This self-contained approach simplifies installation and eliminates the need for additional hardware. Everything from G-code interpretation to motor control happens on a single chip.
While this design limits processing power, it offers remarkable simplicity and reliability. Marlin has proven itself across millions of printers worldwide, from budget machines to professional equipment. The monolithic architecture ensures consistent performance without external dependencies.
Why Architecture Matters for Performance?
The architectural difference between these firmware options directly impacts real-world printing capabilities. Klipper’s distributed processing enables advanced features like pressure advance and input shaping that would overwhelm a single microcontroller. These features translate to faster prints with better quality.
Marlin’s unified approach, while computationally limited, offers stability and predictability. There’s no network latency or communication issues between components. This reliability makes Marlin an excellent choice for production environments where consistency trumps speed.
Speed Performance: Klipper vs Marlin Review
Klipper’s Speed Capabilities (Up to 500mm/s)
Klipper-powered printers routinely achieve print speeds of 500mm/s with acceptable quality. This incredible velocity reduces a typical 3DBenchy print to just 15-20 minutes. The distributed processing architecture ensures smooth acceleration and deceleration even at extreme speeds.
These speeds aren’t just theoretical benchmarks. Real users report successful prints at 300-400mm/s with standard hardware. The key lies in Klipper’s ability to calculate complex motion paths in advance, eliminating the processing delays that limit other firmware.
Marlin’s Speed Limitations and Improvements
Traditional Marlin installations typically max out around 100mm/s due to processing constraints. The firmware must balance G-code interpretation, motion planning, and hardware control simultaneously. This juggling act creates bottlenecks that limit maximum achievable speeds.
However, Marlin 2.0 on 32-bit boards shows significant improvements. Modern Marlin can reach 200mm/s on capable hardware, though this requires careful tuning. The recent addition of input shaping to Marlin brings it closer to Klipper’s capabilities, though implementation remains less refined.
Real-World Speed Test Results
Independent testing reveals the true performance gap between these firmware options. Let’s examine typical print times for common benchmarks:
Test Model
Klipper Time
Marlin Time
Speed Difference
3DBenchy
15-20 min
45-60 min
3x faster
20mm Cube
4-5 min
12-15 min
3x faster
Phone Stand
25-30 min
75-90 min
3x faster
Vase Mode
35-40 min
90-120 min
2.5x faster
These results demonstrate Klipper’s clear advantage in raw speed performance. However, achieving these speeds requires proper calibration and hardware capable of rapid movements.
Print Quality and Precision Comparison
Klipper vs Marlin Input Shaping
Klipper vs Marlin input shaping represents one of the most significant quality differences between these firmware options. Klipper pioneered this technology, using accelerometer data to measure and compensate for printer vibrations. The system actively modifies movement commands to cancel out resonance frequencies.
Marlin recently added input shaping capabilities, but the implementation differs significantly. Where Klipper offers automated tuning with ADXL345 accelerometers, Marlin requires manual testing and configuration. This makes Klipper’s solution more accessible and typically more effective.
The results speak for themselves: Klipper users report virtually eliminated ringing and ghosting at high speeds. This technology enables quality prints at velocities that would produce unusable results with standard firmware.
Pressure Advance: Klipper’s Secret Weapon
Pressure advance compensates for the elastic properties of molten filament, dramatically improving print quality. Klipper’s implementation smoothly adjusts extruder pressure during acceleration and deceleration. This prevents the blob-and-string artifacts common in fast printing.
Marlin offers Linear Advance as its pressure compensation system. While functional, it lacks the sophistication of Klipper’s smooth pressure advance algorithm. The difference becomes especially apparent in prints with frequent direction changes or varying speeds.
Achieving High-Quality Prints with Each Firmware
Both firmware options can produce excellent prints when properly configured. The key lies in understanding each system’s strengths and optimizing accordingly. Here are proven strategies for each:
Klipper Quality Optimization:
Enable and tune input shaping using accelerometer data
Configure smooth pressure advance for your filament
Utilize mesh bed leveling with high-resolution probing
Implement temperature PID tuning for stable hotend control
Marlin Quality Optimization:
Reduce speeds to minimize vibration and ringing
Fine-tune jerk and acceleration settings
Enable Linear Advance for better corner quality
Use UBL (Unified Bed Leveling) for precise first layers
Quality Factor
Klipper Advantage
Marlin Advantage
High-speed quality
Excellent with input shaping
Limited by vibrations
Surface finish
Smooth at all speeds
Excellent at moderate speeds
Dimensional accuracy
High with proper config
Very consistent
Stringing control
Superior with pressure advance
Good with retraction tuning
Feature Comparison: Klipper vs Marlin Firmware
Advanced Klipper Features
Klipper’s feature set reads like a wishlist for 3D printing enthusiasts. The firmware includes sophisticated capabilities that push the boundaries of consumer 3D printing technology. These aren’t just gimmicks – they’re practical tools that solve real printing challenges.
Key Klipper Features:
Smooth Pressure Advance: Eliminates oozing and stringing
Input Shaping: Cancels vibrations for cleaner prints
Multiple MCU Support: Connect multiple boards for complex setups
Exclude Objects: Skip failed parts mid-print
Adaptive Meshing: Probe only the area being printed
Macros: Create custom commands and workflows
The modular nature of Klipper allows continuous feature additions without firmware recompilation. This flexibility keeps your printer current with the latest innovations in 3D printing technology.
Essential Marlin Features
Marlin’s feature set focuses on reliability and broad compatibility. While it may lack Klipper’s cutting-edge capabilities, Marlin provides everything needed for successful 3D printing. The firmware’s maturity shows in its polished implementation of core features.
Filament Runout Detection: Pause when filament ends
Manual Mesh Leveling: No probe required
LCD Menu System: On-printer control interface
These features work reliably across thousands of printer models. Marlin’s conservative approach ensures stability over innovation, making it ideal for production environments.
Remote Control and Web Interface Options
Modern 3D printing demands remote monitoring and control capabilities. Klipper firmware includes built-in web connectivity through Moonraker, enabling sleek interfaces like Mainsail and Fluidd. These interfaces rival commercial solutions in functionality and polish.
Marlin requires external software like OctoPrint for remote access. While this adds complexity, it also provides flexibility in choosing your preferred interface. The separation of firmware and connectivity can be advantageous for DIY electronics projects where custom integration is needed.
The user experience differs significantly between approaches:
Interface Aspect
Klipper (Mainsail/Fluidd)
Marlin (OctoPrint)
Installation
Integrated with firmware
Separate setup required
Resource Usage
Minimal overhead
Higher CPU usage
Customization
Limited themes
Extensive plugins
Mobile Support
Responsive design
Dedicated apps
Update Process
Single system
Multiple components
Installation and Setup Guide
How to Install Klipper (3 Methods)
Installing Klipper offers three distinct paths, each suited to different skill levels and preferences. Understanding these options helps you choose the most appropriate method for your situation.
Method 1: DIY Installation The traditional approach involves manually installing Klipper on a Raspberry Pi or similar computer. KIAUH (Klipper Installation And Update Helper) streamlines this process significantly. This method offers maximum flexibility and learning opportunities for those interested in technical installation projects.
Method 2: Klipper Pads Devices like the Creality Sonic Pad and BTT Pad 7 provide pre-configured Klipper installations. Simply connect to your printer, run the configuration wizard, and start printing. These solutions cost more but eliminate most technical hurdles.
Method 3: Pre-Installed Printers Modern printers like the Creality K1 and Sovol SV07 ship with Klipper ready to use. This option provides the best out-of-box experience but limits hardware choices. Manufacturers optimize these systems for their specific hardware configurations.
Marlin Installation Process
Marlin installation follows a more traditional firmware flashing approach. The process requires downloading the correct configuration for your printer, compiling the firmware, and uploading it to your board. While straightforward, it demands attention to detail.
Modern tools like Marlin’s Auto Build extension for VSCode simplify compilation. However, you’ll still need to understand your printer’s specifications and adjust configuration files accordingly. This hands-on approach teaches valuable skills about printer mechanics.
Which Firmware Is Easier for Beginners?
Is Klipper better than Marlin for beginners? The answer depends on your chosen installation method. Pre-configured Klipper solutions often provide easier setup than Marlin compilation. However, DIY Klipper installation presents more challenges than basic Marlin flashing.
Consider these factors when choosing:
Marlin is easier if you:
Have a common printer model
Prefer minimal external hardware
Want extensive documentation
Value community support
Klipper is easier if you:
Choose a Klipper Pad or pre-installed printer
Enjoy web-based configuration
Want to avoid firmware compilation
Prefer modern interfaces
Hardware Compatibility: Klipper or Marlin Printer
Best Boards for Klipper
Klipper or Marlin printer compatibility varies significantly based on your hardware. Klipper performs best with modern 32-bit boards offering ample processing power and memory. The distributed architecture means board limitations matter less than with traditional firmware.
Top Klipper-Compatible Boards:
BTT Octopus series
BTT SKR series
Duet 3 boards
MKS Robin series
Fysetc Spider
Stock boards in Creality K1, Sovol SV07
These boards provide the performance headroom for Klipper’s advanced features. USB connectivity quality matters more than raw processing power since the heavy lifting happens on the host computer.
Marlin’s Universal Compatibility
Marlin’s greatest strength lies in its incredible hardware compatibility. From ancient 8-bit RAMPS boards to cutting-edge 32-bit systems, Marlin runs on virtually everything. This universality makes it the default choice for printer manufacturers worldwide.
The firmware supports countless board and driver combinations through its extensive configuration system. Whether you’re building a custom printer or upgrading an existing one, Marlin likely supports your hardware. This compatibility extends to displays, sensors, and specialty equipment.
Upgrading Older Printers: Which Firmware?
Breathing new life into aging printers requires careful firmware selection. Older 8-bit printers face different challenges than newer machines when upgrading firmware. Your choice impacts both performance gains and implementation difficulty.
For 8-bit printers, Marlin remains the safer choice unless you’re prepared for Klipper’s hardware requirements. Adding a Raspberry Pi and ensuring reliable USB connectivity can challenge older designs. However, successful Klipper conversions transform sluggish printers into capable machines.
Modern 32-bit printers benefit more from Klipper’s advanced features. The existing processing power combined with Klipper’s optimizations delivers dramatic improvements. Many users report their printers feeling completely transformed after switching firmware.
Is Klipper Better Than Marlin? Cost Analysis
Initial Hardware Investment
The financial aspect of marlin alternative firmware choices significantly impacts decision-making. Klipper requires additional hardware that increases initial costs. A Raspberry Pi 4, SD card, and power supply typically add $75-150 to your setup.
Marlin’s self-contained nature eliminates these expenses. You can run Marlin on your existing printer hardware without purchasing anything extra. This cost advantage makes Marlin attractive for budget-conscious users or those operating multiple printers.
Typical Klipper Setup Costs:
Raspberry Pi 4: $55-85
SD Card (32GB): $10-15
Power Supply: $10-15
Cooling (optional): $10-20
Total Additional: $85-155
Long-Term Value Comparison
Looking beyond initial costs reveals a different picture. Klipper’s speed advantages translate to time savings that accumulate quickly. Printing three times faster means more iterations, faster prototyping, and increased productivity.
The advanced features in Klipper can eliminate the need for hardware upgrades. Input shaping allows older printers to achieve quality previously requiring linear rail upgrades. Pressure advance reduces the need for expensive direct drive conversions.
Budget-Friendly Options for Each Firmware
Cost-conscious users can minimize expenses with either firmware choice. Strategic decisions help achieve excellent results without breaking the bank:
Budget Klipper Setup:
Use Raspberry Pi Zero 2W ($15)
Repurpose old laptop as host
Choose used/refurbished Pi models
Share one Pi between multiple printers
Budget Marlin Optimization:
Stick with existing 8-bit boards
Use free firmware compilation tools
Avoid unnecessary sensor additions
Focus on mechanical improvements
Convert Marlin to Klipper: Complete Migration Guide
Pre-Conversion Checklist
Before you convert Marlin to Klipper, proper preparation ensures a smooth transition. This checklist helps avoid common pitfalls that frustrate new Klipper users. Taking time upfront saves hours of troubleshooting later.
Essential Pre-Conversion Steps:
[ ] Document current Marlin settings (steps/mm, PID values)
[ ] Join Klipper Discord/forums for your printer model
Choosing Your Klipper Setup Method
Three paths exist for Marlin users transitioning to Klipper. Each offers different complexity levels and learning curves. Your technical comfort and goals determine the best approach.
Option 1: Full DIY Conversion Maximum control and customization potential. Install Linux, Klipper, Moonraker, and web interface manually. Best for users who enjoy DIY technical projects and want deep understanding.
Option 2: KIAUH Assisted Setup Balanced approach using installation scripts. KIAUH handles most complexity while allowing customization. Recommended for most users wanting a reliable setup without excessive complexity.
Option 3: Klipper Pad Solution Simplest migration path using pre-configured devices. Minimal technical knowledge required but less flexibility. Perfect for users prioritizing ease over customization options.
Common Conversion Challenges and Solutions
Converting firmware inevitably presents challenges. Understanding common issues helps you troubleshoot effectively and avoid frustration. Here are the most frequent problems and their solutions:
Challenge
Symptom
Solution
USB Connection Issues
“MCU protocol error”
Use quality cables, add ferrite beads
Config Errors
Printer won’t home
Verify pin assignments, endstop logic
Speed Too High
Layer shifts, crashes
Start with conservative speeds, increase gradually
Thermal Problems
“ADC out of range”
Check thermistor types, wiring
Extruder Issues
Under/over extrusion
Recalibrate rotation_distance carefully
Pro Tip: Start with proven configuration files from your printer community. Generic configs rarely work without significant modification.
Community Support: Klipper vs Marlin Reddit Insights
Marlin’s Established Community
The Klipper vs Marlin Reddit discussions highlight Marlin’s massive, established user base. With over a decade of development, Marlin’s community spans every skill level and printer type. This depth provides unparalleled troubleshooting resources.
Marlin benefits from extensive documentation, video tutorials, and proven solutions for common issues. The official Marlin Discord hosts thousands of active members ready to help. This support network proves invaluable for beginners and experts alike.
Klipper’s Growing Ecosystem
Klipper’s community, while smaller, shows remarkable enthusiasm and innovation. The rapid growth attracts technically skilled users who push boundaries and share discoveries. This creates an exciting environment for those seeking cutting-edge features.
The Klipper community excels at creating printer-specific guides and configurations. Active development means new features appear regularly, with community members often contributing code directly. For those who enjoy collaborative technical projects, Klipper offers engaging participation opportunities.
Where to Find Help and Resources
Locating quality support can make or break your firmware experience. Both communities offer multiple channels for assistance, each with unique strengths:
Marlin Resources:
Official documentation (comprehensive but technical)
Klipper becomes the clear choice when speed and advanced features take priority. If you’re pushing the boundaries of 3D printing performance, Klipper provides the tools needed for success. The firmware excels in specific scenarios and user profiles.
Choose Klipper if you:
Need print speeds above 200mm/s
Want cutting-edge features like input shaping
Enjoy tinkering and optimization
Have Delta or CoreXY printers
Value web-based control interfaces
Plan significant printer modifications
Pursue high-performance printing goals
When to Stick with Marlin?
Marlin remains excellent for users valuing stability, simplicity, and proven reliability. The Klipper vs Marlin firmware debate often overlooks Marlin’s strengths in production environments. Many scenarios favor Marlin’s approach.
Stay with Marlin if you:
Run a print farm or business
Prefer minimal setup complexity
Use older 8-bit hardware
Value extensive documentation
Need maximum hardware compatibility
Operate printers without network access
Prioritize stability over speed
Special Considerations for Different Printer Types
Printer kinematics significantly impact firmware suitability. Different mechanical designs benefit uniquely from each firmware’s strengths. Understanding these relationships helps optimize your specific printer type.
Cartesian Printers (Ender 3, Prusa style): Both firmware options work well. Klipper offers speed improvements, while Marlin provides simpler setup. Decision based on personal preferences.
CoreXY Printers: Klipper significantly outperforms Marlin due to complex motion calculations. The distributed processing handles CoreXY kinematics more efficiently.
Delta Printers: Klipper is strongly recommended. Delta calculations overwhelm single-processor systems, making Klipper’s architecture ideal for these designs.
Pro Tips for Maximizing Your Firmware Choice
Optimizing Klipper for Maximum Speed
Achieving Klipper’s maximum potential requires systematic optimization. Start with conservative settings and incrementally push boundaries. Document changes to track what works for your specific hardware.
Speed Optimization Checklist:
Run input shaper calibration with ADXL345
Tune pressure advance for each filament
Increase acceleration limits gradually
Optimize junction deviation settings
Enable adaptive bed meshing
Configure exclude objects feature
Create temperature tower macros
Remember that raw speed means nothing without quality. Balance velocity with print appearance for optimal results.
Getting the Most from Marlin 2.0
Modern Marlin includes features rivaling Klipper when properly configured. Maximizing Marlin 2.0 requires understanding its capabilities and limitations. Focus on stability while pushing reasonable boundaries.
Marlin Optimization Strategies:
Enable Linear Advance 1.5
Configure S-Curve acceleration
Implement junction deviation
Use adaptive step smoothing
Enable advanced pause features
Configure power loss recovery
Optimize buffer sizes for 32-bit boards
These optimizations significantly improve Marlin’s performance without compromising its legendary reliability.
Troubleshooting Common Issues
Both firmware options present unique troubleshooting challenges. Understanding common problems accelerates resolution and minimizes downtime. Here’s a practical reference guide:
Klipper Troubleshooting:
“Unable to read tmc uart”: Check wiring and UART pins
The 3D printing landscape evolves rapidly. Future-proofing your firmware choice requires considering upcoming trends and technologies. Both Klipper and Marlin show strong development roadmaps.
Klipper’s modular architecture positions it well for future innovations. The ability to add features without firmware recompilation ensures long-term viability. Marlin’s massive install base guarantees continued development and support.
Consider these future trends:
Multi-material printing expansion
AI-powered print optimization
Advanced sensor integration
Automated calibration systems
Cloud-based slicing integration
Frequently Asked Questions
Can Marlin achieve Klipper-like speeds?
Marlin 2.0 on 32-bit boards can reach impressive speeds, but typically maxes out around 200mm/s. While this represents significant improvement over older versions, it cannot match Klipper’s 500mm/s capabilities due to architectural limitations.
The processing overhead of handling everything on one chip creates unavoidable bottlenecks. However, for many users, 200mm/s provides more than adequate performance. Focus on print quality often matters more than raw speed.
Is it worth converting from Marlin to Klipper?
Converting makes sense if you need speeds above 150mm/s or want advanced features like input shaping. The time investment pays off through faster printing and improved quality. However, stable Marlin setups may not benefit enough to justify conversion effort.
Consider your actual printing needs before converting. If current print times satisfy you and quality meets expectations, staying with Marlin avoids unnecessary complexity. Convert when you have specific goals that Klipper addresses better.
Which firmware is better for Delta printers?
Klipper definitively wins for Delta printers. The complex trigonometric calculations required for Delta kinematics overwhelm single-processor systems. Klipper’s distributed architecture handles these calculations effortlessly, enabling smooth, fast Delta printing.
Many Delta users report transformative improvements after switching to Klipper. The difference in performance and print quality justifies any installation complexity. For Delta printers, Klipper isn’t just better – it’s practically essential.
Can I run Klipper without a Raspberry Pi?
Yes, Klipper runs on various Linux-capable devices. Old laptops, mini PCs, and alternative single-board computers work well. Some users successfully run Klipper on repurposed electronics for cost savings.
Options include Orange Pi, Rock Pi, and even some routers running OpenWRT. The key requirement is Linux compatibility and adequate processing power. Raspberry Pi simply offers the best documented, supported option for most users.
How do I know if my printer supports Klipper?
Most modern 3D printers support Klipper, but verification ensures compatibility. Check if your board appears in Klipper’s configuration directory. Community forums often provide specific guidance for your printer model.
Key compatibility factors include:
USB connection to mainboard
Known MCU chip (STM32, ATMEGA, etc.)
Available configuration examples
Community reports of success
Sufficient documentation for your model
Conclusion
The Klipper vs Marlin decision ultimately depends on your specific needs, technical skills, and printing goals. Klipper offers unmatched speed and cutting-edge features for those willing to embrace its complexity. Marlin provides proven reliability and broad compatibility for users prioritizing stability.
Consider Klipper if you’re chasing performance boundaries and enjoy technical challenges. Choose Marlin for production reliability or if you prefer straightforward solutions. Both firmware options continue evolving, ensuring a bright future for 3D printing regardless of your choice.
Take time to evaluate your actual needs rather than following trends. The best firmware is the one that helps you achieve your printing objectives efficiently. Whether you choose Klipper’s innovation or Marlin’s stability, modern 3D printing firmware offers capabilities that seemed impossible just years ago.
Ready to transform your 3D printing experience? Choose your firmware path and join the community that aligns with your goals. The journey from good to exceptional printing starts with making an informed firmware decision today.
The miter saw size debate has cost countless woodworkers both time and money. Standing in the tool aisle, comparing spec sheets, and wondering if those extra 2 inches really matter – it’s a decision that impacts every project you’ll tackle.
Here’s the quick truth: A 12-inch miter saw offers superior versatility for large projects and construction work, while a 10-inch model delivers better precision and portability for fine woodworking. But the real answer depends on your specific needs, budget, and the types of projects filling your workshop schedule.
This comprehensive guide breaks down every crucial factor: complete specification comparisons, real-world performance differences, cost analysis, and a proven decision framework. You’ll discover exactly which size matches your woodworking style and why thousands of professionals actually own both.
Quick Answer: Should You Buy a 10 or 12 Inch Miter Saw?
Need a decision in 30 seconds? Here’s your rapid-fire guide based on the most common scenarios woodworkers face.
Choose a 10-inch miter saw if:
You primarily cut 2×6 lumber or smaller stock
Precision matters more than capacity for your projects
Portability is essential for job site work
Your budget is under $400 for the complete setup
Choose a 12-inch miter saw if:
You regularly cut 4×4 posts or boards wider than 8 inches
Versatility trumps everything – you want one saw for all situations
You’re building decks, framing, or large furniture pieces
The extra $150-200 investment won’t break your budget
Remember, the “one saw to rule them all” mentality often leads to the 12-inch choice. But many experienced woodworkers find the 10-inch perfectly adequate for 90% of their work.
Understanding the numbers behind each size helps eliminate confusion. This comprehensive miter saw size chart shows exactly what you’re getting with each option.
Specification
10-Inch Miter Saw
12-Inch Miter Saw
Cutting Capacity at 90°
Width
6 inches
8-10 inches
Depth
2.5-3.5 inches
3.5-4.25 inches
Cutting Capacity at 45°
Width
4 inches
6 inches
Depth
2.5 inches
3.5 inches
Blade Speed
5,000 RPM
4,000 RPM
Motor Power
15 amps
15 amps
Average Weight
35-45 lbs
55-70 lbs
Blade Cost
$30-80
$40-110
Saw Price Range
$150-600
$250-900
Note: Specifications vary by manufacturer and model type (sliding vs. non-sliding)
Cutting Capacity: The Real-World Difference
The miter saw cutting capacity chart above tells only part of the story. Let’s explore what these numbers mean when you’re standing at your workbench with actual lumber.
10 Inch Compound Miter Saw Capabilities
A 10 inch compound mitre saw handles the majority of residential trim work and furniture projects with ease. You’ll comfortably crosscut 2×8 boards at 90 degrees and tackle most crown molding installations without breaking a sweat.
The infamous “almost enough” problem strikes when you’re working with nominal 4×4 posts or attempting compound angles on wider stock. That moment when your blade stops just 1/4 inch short of completing the cut? It’s frustrating enough to make many woodworkers upgrade immediately.
Standard dimensional lumber like 2x4s, 2x6s, and 1x8s pose no challenge for a quality 10-inch saw. For cabinet making, picture framing, and detailed furniture work, this size often provides all the capacity you need while maintaining excellent cut quality.
When larger cuts are occasionally necessary, simple workarounds exist. Flipping the board to complete cuts from both sides works for straight crosscuts. However, this technique becomes problematic with beveled or compound angles where precision alignment is critical.
12 Inch Miter Saw Cutting Capacity Chart
The expanded miter cutting capacity chart for 12-inch models reveals their true advantage: versatility without compromise. These saws slice through 4×4 posts in a single pass, even at 45-degree angles.
Wide boards up to 10 inches present no challenge, making them ideal for working with larger power equipment frames or substantial furniture components. The extra blade diameter translates to approximately 33% more cutting width at both 90 and 45-degree angles.
Professional contractors gravitate toward 12-inch saws for good reason. Deck building requires cutting 2×12 joists and 6×6 posts. Framing work involves various lumber sizes that push 10-inch saws beyond their limits. The ability to handle any board that comes your way saves time and eliminates job site frustrations.
The depth advantage also matters when cutting thick hardwood stock or laminated beams. That extra inch of blade exposure makes the difference between one clean cut and the hassle of flipping heavy timber.
Sliding vs Non-Sliding Impact on Capacity
Sliding mechanisms revolutionize the capacity equation, especially for 10-inch saws. A sliding 10-inch model can match or exceed the crosscut capacity of a fixed 12-inch saw, typically reaching 12 inches or more.
However, sliding saws demand more workshop space. You’ll need an additional 12-20 inches of clearance behind the saw for the rails to extend fully. This space requirement often surprises first-time buyers who measure only the saw’s base footprint.
The best woodworking miter saw choice might be a 10-inch slider if your projects involve wide boards but not thick stock. You’ll gain crosscut capacity while maintaining the blade precision advantages of the smaller diameter. Plus, you’ll save money on replacement blades over the saw’s lifetime.
Accuracy and Cut Quality: Which Size Delivers Better Results?
Cut quality often matters more than capacity, especially for finish carpentry and fine furniture making. The size of your miter saw blade directly impacts the precision of every cut you make.
Understanding Blade Deflection
Blade deflection – the sideways flex that occurs during cutting – increases with blade diameter. It’s simple physics: a 12-inch blade has more surface area and a longer unsupported span between the arbor and teeth.
This deflection typically measures just thousandths of an inch, but it’s enough to affect joint fit in precise woodworking. The phenomenon becomes more pronounced when cutting dense hardwoods or making aggressive plunge cuts into thick stock.
Quality 12-inch saws minimize this issue through robust arbor designs and precision bearings. However, even premium models can’t completely eliminate the physics involved. That’s why many furniture makers prefer 10-inch saws for their most exacting work.
Interestingly, blade quality matters more than size for most applications. A premium 12-inch blade with anti-vibration slots often cuts cleaner than a budget 10-inch blade, despite the size disadvantage.
Best Practices for Accurate Cuts
Achieving precision cuts requires more than choosing the right miter saw blade size chart option. Proper setup and technique make the crucial difference between professional results and frustrating gaps in your joinery.
Essential accuracy tips for both sizes:
Install a high-quality blade matched to your material (60+ teeth for fine cuts)
Check and adjust fence alignment monthly
Support long boards properly to prevent blade binding
Let the saw reach full speed before cutting
Use steady, controlled feed pressure
For maximum precision, consider creating a dedicated miter station with proper electrical setup and integrated support systems. This investment pays dividends in accuracy regardless of saw size.
Cost Analysis: Initial Investment and Long-Term Expenses
The price difference between 10 vs 12 mitre saw options extends beyond the initial purchase. Understanding the complete cost picture helps avoid budget surprises down the road.
Miter Saw Blade Size Chart and Pricing
The 30% price premium for 12-inch saws applies to both the tool and every blade you’ll buy. Here’s what to expect for quality options:
10-Inch Blade Costs:
Construction grade: $25-40
Fine finish blade: $50-80
Premium specialty: $80-120
12-Inch Blade Costs:
Construction grade: $35-55
Fine finish blade: $65-110
Premium specialty: $100-160
Blade availability also differs significantly. Most home centers stock dozens of 10-inch options but only a handful of 12-inch blades. This limited selection often forces you to order online or visit specialty suppliers.
The compatibility factor adds value to 10-inch saws. These blades work interchangeably with 10-inch table saws, allowing bulk purchases and shared inventory. It’s a practical advantage that professional woodworkers appreciate.
Value Proposition by Project Type
Calculating cost-per-cut reveals interesting insights about long-term value. A 12-inch saw cutting 4×4 posts daily justifies its premium quickly. But for occasional use, the math looks different.
Consider a typical hobbyist woodworker making 100 cuts monthly. Over five years, the blade cost difference alone reaches $300-500. Add the initial purchase premium, and you’re looking at $500-800 extra for 12-inch capability.
The “buy once, cry once” philosophy applies when you know you’ll need the capacity. However, many woodworkers discover their 10-inch saw handles 95% of tasks perfectly. That remaining 5% might not justify the ongoing expense.
Return on investment improves dramatically for contractors and production shops. Time saved by avoiding workarounds and achieving single-pass cuts on large stock quickly offsets higher costs. Plus, the professional image of handling any job matters for customer confidence.
Portability and Workshop Considerations
The weight difference between saw sizes impacts more than just transportation. It affects everything from storage solutions to daily workshop ergonomics.
Weight and Transport Factors
That 30-50 pound weight difference becomes immediately apparent when loading tools for job site work. A typical 10-inch saw weighs 35-45 pounds – manageable for one person. Most 12-inch models tip the scales at 55-70 pounds, often requiring two-handed lifting.
Job site contractors face this challenge daily. Carrying a 12-inch saw up stairs or across rough terrain tests both equipment and backs. The weight difference multiplies when you factor in stands, accessories, and extension supports.
Storage presents another consideration. Lighter 10-inch saws work well on flip-top tool stands or wall-mounted brackets. Heavier 12-inch models demand robust mounting solutions and may require dedicated generator support at remote job sites.
Mobile stand options help manage larger saws, but quality wheeled bases add $150-300 to your investment. The best units feature folding designs with integrated material supports, partially offsetting the portability disadvantage.
Workshop Space Planning
Footprint differences extend beyond the saw’s base dimensions. Consider these actual space requirements:
10-Inch Non-Sliding Setup:
Minimum space: 3 feet wide x 2 feet deep
Comfortable working area: 8 feet wide x 4 feet deep
12-Inch Sliding Setup:
Minimum space: 4 feet wide x 4 feet deep
Comfortable working area: 10 feet wide x 6 feet deep
Sliding models require significant rear clearance – often 20 inches or more. This requirement eliminates wall-mounted installations unless you build a pass-through opening. Many workshops simply can’t accommodate this spatial demand.
Integration with existing miter stations favors 10-inch saws. Their compact size allows flush mounting in standard-depth benches. Building around a 12-inch slider often requires custom solutions and workshop layout compromises.
Best 10 Compound Miter Saw Applications
The best 10 compound miter saw excels at precision work where finesse matters more than raw capacity. Understanding these ideal applications helps justify choosing the smaller size.
Perfect 10-inch miter saw projects:
Crown molding and intricate trim work
Picture frame construction with precise miters
Small to medium furniture components
Cabinet face frames and door rails
Detailed architectural millwork
Craft and hobby projects requiring accuracy
Professional finish carpenters often prefer 10-inch saws specifically for their superior control. The lighter blade maintains momentum better through delicate cuts, reducing tear-out on veneered materials and exotic hardwoods.
The precision advantage becomes clear when cutting complex crown molding angles. Less blade deflection means tighter joints and fewer gaps requiring filler. For trim work visible at eye level, this accuracy difference truly matters.
Many professionals actually maintain both sizes in their shops. They reach for the 10-inch when precision is paramount and switch to the 12-inch for rough dimensioning. It’s an approach that maximizes each tool’s strengths.
When You Need the Power of a 12-Inch Saw?
Certain projects demand the capacity only a 12-inch miter saw provides. Recognizing these scenarios helps justify the extra investment and workshop space.
Deck construction tops the list. Cutting 2×12 rim joists, notching 6×6 posts, and handling pressure-treated lumber at compound angles – these tasks push 10-inch saws beyond their limits. The frustration of incomplete cuts compounds when you’re racing weather on outdoor projects.
Large furniture pieces present similar challenges. Table legs from 4×4 stock, thick tabletops requiring crosscuts, and substantial mortise-and-tenon joinery all benefit from 12-inch capacity. Proper maintenance ensures these larger saws maintain accuracy despite handling heavier workloads.
Professional contractors rarely debate this choice. The versatility to handle any job that walks through the door justifies every penny of the premium. Time saved avoiding workarounds translates directly to profit.
Timber framing and post-and-beam construction absolutely require 12-inch capacity. These specialized fields involve massive timbers that would challenge even some 12-inch saws. But for standard construction, the 12-inch size handles everything.
Common Mistakes When Choosing Miter Saw Size
Learning from others’ regrets saves money and frustration. These purchasing mistakes appear repeatedly in woodworking forums and tool reviews.
Top 5 Purchase Regrets:
Overbuying for occasional use – Spending $800 on a 12-inch sliding saw that cuts three 4x4s annually
Underestimating future needs – Buying 10-inch, then upgrading within six months
Ignoring blade cost differences – Not budgeting for 30% higher ongoing blade expenses
The “bigger is better” mentality leads many toward unnecessary 12-inch purchases. Honest project assessment reveals most hobbyists work with dimensional lumber well within 10-inch capacity. That premium could buy a quality router or other essential tools.
Conversely, growing woodworkers often outgrow 10-inch saws faster than expected. Starting with basic projects, they soon tackle decks or furniture requiring larger capacity. The upgrade cost stings when the original saw has barely seen use.
Ignoring the sliding option represents another common oversight. A quality 10-inch slider often provides the best of both worlds – compact size with extended capacity when needed. The price premium over fixed models pays dividends in versatility.
Pro Tips for Making Your Decision
Experienced woodworkers share these strategies for choosing between 10 vs 12 inch miter saws with confidence.
The Project List Exercise: Document every cut you’ve made in the past month. Note board dimensions and cut types. This real data beats hypothetical needs every time. Most discover 10-inch capacity would have handled 90%+ of their work.
Rental Strategy: Rent both sizes for actual projects before purchasing. The $50-100 rental cost prevents expensive mistakes. You’ll immediately feel the weight difference and capacity advantages in real use.
Future-Proofing Considerations: Plan five years ahead, not five months. Will you tackle deck projects? Build large furniture? Stay focused on trim work? Your growth trajectory matters more than current projects.
The Two-Saw Solution: Many professionals eventually own both sizes. Start with the size matching 80% of your work, then add the other when projects justify it. This approach spreads costs and maximizes tool life.
Budget allocation deserves careful thought. A premium 10-inch saw often outperforms a budget 12-inch model. Quality matters more than size for cut accuracy and long-term reliability. Popular Mechanics testing confirms this repeatedly.
Best Woodworking Miter Saw Recommendations by Category
Current market leaders demonstrate the quality available at each size point. These recommendations reflect professional feedback and long-term reliability data.
Top 10-Inch Models for 2024
Best Overall 10″ Saw: The DeWalt DWS779 combines precision, power, and reasonable pricing. Its 15-amp motor handles hardwoods smoothly while maintaining the accuracy fine woodworkers demand.
Best Value Option: Metabo HPT (formerly Hitachi) C10FCGS delivers professional features at entry-level pricing. The laser guide and comfortable grip make it perfect for beginners serious about quality.
Best for Portability: Makita LS1019L weighs just 31.5 pounds but includes sliding capability. The compact design and efficient motor maximize power while minimizing bulk.
Leading 12-Inch Saws
Best Overall 12″ Saw: Bosch GCM12SD earns top marks for its innovative axial-glide system. This design eliminates rear clearance issues while maintaining superior cut quality across all materials.
Best Sliding Compound Model: DeWalt DWS780 balances features, accuracy, and price perfectly. The bright LED cutline system outperforms laser guides in real-world conditions.
Best for Contractors: Makita LS1219L offers unmatched durability and precision. The direct-drive motor and linear ball bearing system handle job site abuse while maintaining calibration.
Frequently Asked Questions
Can a 10-inch miter saw cut a 4×4?
Most 10-inch miter saws cannot cut through a 4×4 post in a single pass. Actual 4×4 dimensions (3.5″ x 3.5″) exceed the typical 3.25″ vertical capacity. You’ll need to rotate the post and make two cuts, which works for 90-degree cuts but becomes challenging for angles.
Is blade deflection really a problem with 12-inch saws?
Blade deflection exists but rarely impacts general construction work. Quality 12-inch saws with premium blades minimize this issue through engineering improvements. Fine furniture makers notice the difference more than contractors. Proper technique and sharp blades matter more than size.
What’s the actual cost difference over 5 years of use?
Expect to spend $500-800 more for 12-inch capability over five years. This includes the initial purchase premium ($150-250), higher blade costs ($300-400), and potential stand upgrades. Heavy users see faster ROI through time savings.
Should I get a sliding 10-inch or fixed 12-inch miter saw?
Sliding 10-inch saws offer superior versatility for most woodworkers. You’ll gain 12+ inches of crosscut capacity while maintaining blade precision and lower operating costs. Choose fixed 12-inch only if you regularly cut 4x material at angles.
Can I use 10-inch blades on a 12-inch miter saw?
Never use undersized blades on any power tool. The 12-inch saw’s arbor speed and guard design specifically match its intended blade diameter. Using 10-inch blades creates dangerous gaps in guarding and may exceed safe blade RPM ratings.
Conclusion: Making the Right Choice for Your Workshop
The 10 vs 12 miter saw decision ultimately reflects your woodworking reality, not theoretical possibilities. Most hobbyists discover 10-inch saws handle their needs perfectly while offering superior portability and lower operating costs.
Apply the 80/20 rule: choose the size that handles 80% of your work efficiently. For trim carpenters and furniture makers, that’s usually 10 inches. Contractors and deck builders lean toward 12-inch capacity. Growing woodworkers benefit from sliding 10-inch models that offer expansion room.
Quick Decision Framework:
Cutting mostly 2×6 or smaller? → 10-inch
Need to cut 4×4 posts regularly? → 12-inch
Want maximum versatility? → 10-inch slider
Building decks or large projects? → 12-inch
Tight on space or budget? → 10-inch
Your next step involves honest project assessment and potentially renting both sizes. Quality trumps size – invest in the best saw your budget allows rather than stretching for unnecessary capacity. With proper selection, your miter saw becomes a lifetime workshop partner.
Choosing between a Cricut and Sizzix die cutting machine feels like standing at a crafting crossroads. With prices ranging from budget-friendly to investment-level and features spanning from simple to sophisticated, the decision can overwhelm even experienced crafters.
Here’s the truth: Both Cricut and Sizzix excel in different areas. The best die cutting machine for you depends on your specific crafting needs, budget, and comfort with technology. After extensive hands-on testing and analysis, I’ll guide you through every factor that matters.
This comprehensive comparison covers over 10 key factors including costs, capabilities, learning curves, and real-world performance. Whether you’re a beginner crafter or a seasoned pro, you’ll discover which machine aligns with your creative vision.
What Are Cricut and Sizzix Die Cutting Machines?
Understanding the fundamental differences between these crafting powerhouses helps you make an informed decision. Let’s explore what makes each brand unique.
Understanding Cricut – The Digital Cutting Revolution
Cricut, headquartered in Utah, dedicates itself to empowering creativity through innovative digital tools. Their electronic cutting machines represent the cutting edge of DIY technology, similar to how modern DIY solar charger projects blend traditional crafting with digital innovation.
The company’s flagship products use electronic motors and sophisticated software to cut materials with precision. Cricut Design Space, their proprietary software, transforms digital designs into physical creations through automated cutting, drawing, and scoring functions.
This digital approach appeals to tech-savvy crafters who value versatility and custom design capabilities. The learning curve mirrors other technical DIY projects, rewarding patience with expanded creative possibilities.
Understanding Sizzix – The Manual Cutting Tradition
Sizzix, a women-led business based in California, focuses on creating vibrant crafting communities through accessible tools. Their manual die cutters operate without electricity, using a simple crank mechanism that anyone can master.
The “sandwich” method – layering material, die, and cutting plates – provides consistent results through mechanical pressure. This straightforward approach eliminates technical barriers, making crafting accessible to all skill levels.
Manual operation offers unique advantages including portability and reliability. Like traditional hand tools used in solar panel installation projects, Sizzix machines work anywhere without power requirements or software updates.
Quick Comparison Table: Cricut vs Sizzix at a Glance
Feature
Cricut
Sizzix
Operation Type
Electronic (Digital)
Manual (Hand-crank)
Power Required
Yes
No
Software Needed
Yes (Design Space)
No
Initial Cost
Higher ($170-400+)
Lower ($50-250)
Design Flexibility
Unlimited (custom designs)
Limited to dies owned
Material Thickness
Up to 2.4mm
Up to 6+ layers
Cutting Width
4.5″ – 24″ (varies by model)
6″ – 13″ (varies by model)
Best For
Intricate designs, vinyl, variety
Bulk cutting, thick materials, embossing
Learning Curve
Moderate to steep
Minimal
Ongoing Costs
Subscription optional, mats, blades
Dies ($10-65 each)
How Do These Machines Actually Work?
Understanding the mechanics helps you appreciate each machine’s strengths and limitations. Let’s examine the operational differences.
Sizzix Big Shot Operation – The Manual Process
Operating a Sizzix Big Shot involves simple, repeatable steps that become second nature quickly. First, you select your die – a metal template with raised cutting edges that determines your shape.
Next, create your cutting sandwich by layering the cutting pad, material, die, and top cutting pad. This sandwich feeds through the machine as you turn the handle, applying tons of pressure to cut cleanly through materials.
The manual process excels at cutting multiple layers simultaneously. Crafters report cutting up to six layers of felt or four layers of cardstock in a single pass, dramatically speeding bulk production.
Embossing folders add another dimension to Sizzix capabilities. These textured plates create raised designs on paper and cardstock, adding elegant details impossible with electronic cutters.
Cricut Maker Operation – The Digital Process
The Cricut Maker transforms digital designs into physical cuts through sophisticated automation. Start by creating or selecting a design in Cricut Design Space on your computer, tablet, or smartphone.
Place your material on a sticky cutting mat that holds everything in position. The software automatically detects material type and adjusts blade depth and pressure accordingly, though manual adjustments remain available.
Insert the mat into the machine and press the “C” button. The Cricut precisely follows your design’s path, cutting with accuracy measured in fractions of millimeters. Multiple tool options include rotary blades for fabric and scoring styluses for fold lines.
The digital workflow enables features impossible with manual systems. Print Then Cut technology aligns cuts with printed designs, while the adaptive tool system switches between cutting, writing, and scoring automatically.
Design Flexibility and Creative Options
Your creative vision determines which machine serves you best. Let’s explore how each system approaches design flexibility.
Sizzix Design Limitations and Advantages
Sizzix machines rely on physical dies that range from $10 for simple shapes to $65 for intricate designs. While this limits you to pre-made designs, it ensures consistent, professional results every time.
The die investment adds up quickly for varied projects. However, dies last indefinitely with proper care, and many crafters build collections over years. Popular dies like alphabets and basic shapes provide endless combination possibilities.
Sizzix’s unique embossing capability sets it apart from electronic competitors. Embossing folders create textured, dimensional effects that add sophistication to cards and paper projects without additional tools or skills.
Cricut’s Unlimited Design Potential
Cricut’s digital approach removes design limitations entirely. Create custom designs from scratch, modify existing patterns, or import SVG files from sites like Creative Fabrica.
The Design Space library contains thousands of ready-to-make projects. While basic access is free, Cricut Access subscription unlocks premium content and features for a monthly fee.
This flexibility extends to sizing – resize any design from tiny jewelry components to large wall decals. The same design works across multiple projects, eliminating the need for different-sized dies.
Material Compatibility Deep Dive
Material versatility often determines which die cutter suits your needs. Both machines handle common crafting materials, but their strengths differ significantly.
What Can Sizzix Cut?
Sizzix machines excel at thick and tough materials that challenge electronic cutters. The manual pressure system easily handles:
Multiple layers of cardstock (4-6 sheets)
Thick felt and wool felt
Leather and faux leather
Chipboard and mat board
Thin metal sheets
Cork and balsa wood
The ability to cut several layers simultaneously makes Sizzix ideal for production work. Crafters creating items for sale appreciate cutting dozens of shapes quickly without wearing out expensive electronic cutting mats.
What Can Cricut Cut?
Cricut machines boast compatibility with over 300 materials, focusing on precision over thickness. The electronic cutting machine handles:
Delicate papers and vellum
Vinyl and heat transfer vinyl
Fabric (with rotary blade)
Leather (up to 2.4mm)
Basswood and balsa wood
Acetate and transparency film
Magnetic sheets
Infusible Ink materials
Smart Materials eliminate the need for cutting mats on newer models. These materials feed directly through the machine, speeding workflow and reducing consumable costs.
Head-to-Head Material Comparison Chart
Material Type
Sizzix Performance
Cricut Performance
Paper/Cardstock
Excellent (multiple layers)
Excellent (single layer)
Felt
Superior (4+ layers)
Good (single layer)
Leather
Excellent (thick pieces)
Good (up to 2.4mm)
Vinyl
Not recommended
Superior
Fabric
Good (with proper dies)
Excellent (rotary blade)
Wood
Good (thin sheets)
Good (basswood)
Metal
Limited (thin sheets)
Not supported
True Cost Analysis: Initial Investment and Long-Term Expenses
Understanding the complete financial picture prevents budget surprises. Let’s break down all costs associated with each system.
Sizzix Cost Breakdown
The Sizzix Big Shot typically costs $70-100, making it the most affordable entry point. Larger models increase in price:
Big Shot Plus (9″ opening): $150-180
Big Shot Pro (13″ opening): $250-300
Dies represent the primary ongoing expense. Basic shapes start at $10, while elaborate designs reach $65. Building a versatile collection typically requires $200-500 investment over time.
Replacement cutting pads cost $15-20 per pair. With heavy use, expect to replace them every 6-12 months. Some crafters extend pad life by rotating and flipping them regularly.
Cricut Cost Breakdown
Cricut machines start higher but offer more features:
Cricut Joy: $170-180
Cricut Explore 3: $280-300
Cricut Maker 3: $370-400
Cricut Access subscription runs $10 monthly or $96 annually. While optional, it unlocks significant value including exclusive designs and product discounts.
Consumables add ongoing costs. Cutting mats ($10-40) need replacement every few months with regular use. Blade replacements ($10-30) depend on material types and usage frequency.
5-Year Total Cost of Ownership Comparison
Cost Category
Sizzix (Moderate Use)
Cricut (Moderate Use)
Initial Machine
$100
$300
Dies/Subscription
$400 (40 dies)
$480 (Access 5 years)
Replacement Parts
$120 (pads)
$300 (mats/blades)
Total 5-Year Cost
$620
$1,080
Note: Costs vary based on usage patterns and project types
Learning Curve and Ease of Use
Your comfort with technology significantly impacts the crafting experience. Consider these learning requirements before choosing.
Getting Started with Sizzix
Sizzix machines work immediately out of the box. No software installation, account creation, or internet connection required. This simplicity appeals to crafters who prefer focusing on creativity over technology.
Most users complete their first project within 30 minutes of unboxing. The manual process feels intuitive – if you can turn a handle, you can operate a Sizzix.
Common beginner mistakes include incorrect sandwich assembly and over-cranking. These resolve quickly with practice, and the forgiving nature of manual operation prevents permanent damage.
Mastering Cricut Design Space
Cricut requires more initial setup and learning investment. Your device needs adequate specifications:
4GB RAM minimum
2GB free storage
High-speed internet connection
Compatible operating system
Design Space intimidates some beginners, but Cricut’s official tutorials provide excellent guidance. Most users feel comfortable with basic functions after 2-3 hours of practice.
The software learning curve pays dividends through expanded capabilities. Features like contour editing, weld functions, and pattern fills enable complex projects impossible with manual systems.
Speed, Efficiency, and Production Capabilities
Production speed varies dramatically based on project type. Understanding these differences helps set realistic expectations.
Sizzix machines excel at repetitive cutting tasks. Cutting 50 identical flower shapes takes minutes with the right die. The manual operation never slows down or requires cooling periods.
Electronic cutting machines like the Cricut Maker 3 improved speed significantly over earlier models. However, intricate designs still require patience as the blade traces every curve precisely.
Setup and cleanup times favor Sizzix for quick projects. No computer booting, software loading, or mat preparation needed. Cricut’s digital workflow adds 5-10 minutes of preparation time.
For varied designs within a single project, Cricut wins decisively. Cutting 20 different shapes takes the same time as cutting 20 identical shapes, while Sizzix would require 20 different dies.
Size Options and Space Requirements
Available space influences which machine fits your crafting area. Both brands offer multiple sizes for different needs.
Sizzix Size Options:
Big Shot: 6″ opening, 14.25″ x 12.375″ x 5.875″
Big Shot Plus: 9″ opening, larger footprint
Big Shot Switch Plus: Electric option, similar to standard size
Storage differs significantly between systems. Sizzix dies require organizational systems – many crafters use magnetic sheets or specialized storage solutions. Cricut’s digital designs store infinitely in the cloud.
Portability favors manual machines. Sizzix works anywhere without power, making it perfect for craft groups or outdoor events. This independence mirrors the portability of DIY portable solar panel stands for off-grid crafting.
Which Machine Is Best for Your Specific Projects?
Project types strongly influence which cutting machine serves you best. Let’s match machines to common crafting categories.
Best Machine for Paper Crafts and Cards
Winner: Sizzix for bulk production, Cricut for variety
Sizzix dominates high-volume card making. Cut multiple layers simultaneously and add embossed details for professional results. Wedding invitation creators and greeting card sellers prefer this efficiency.
Cricut excels when each card needs personalization. The writing function adds names and messages in various fonts, while Print Then Cut creates custom designs with photos.
Best Machine for Fabric and Sewing Projects
Winner: Cricut Maker
The Cricut Maker’s rotary blade revolutionized fabric cutting for quilters and sewists. It cuts fabric without backing, preserving material integrity for sewing projects.
While Sizzix cuts felt beautifully, most fabric requires stabilizer for clean cuts. The manual die cutter works for appliqué shapes but lacks the precision needed for intricate quilt patterns.
Best Machine for Vinyl and Heat Transfer Projects
Winner: Cricut (exclusively)
Vinyl cutting remains Cricut’s domain entirely. The precise blade control and pressure settings handle various vinyl types from permanent outdoor to delicate heat transfer materials.
Sizzix cannot cut vinyl effectively. The die-based system lacks the fine control needed for weeding vinyl designs. For custom t-shirts, decals, or signs, Cricut is the only choice.
Best Machine for Mixed Media and 3D Projects
Winner: Both excel differently
3D paper crafts showcase both machines’ strengths. Cricut’s scoring stylus creates precise fold lines for complex models, while cut files ensure perfect symmetry.
Sizzix handles thick materials better for mixed media art. Cutting chipboard, multiple foam layers, or textured materials works reliably with manual pressure.
The Power of Using Both Machines Together
Many serious crafters eventually own both systems, leveraging each machine’s strengths. This combination maximizes efficiency and creative possibilities.
A typical workflow might use Cricut for designing and cutting base shapes, then Sizzix for adding embossed details. Or cut vinyl text with Cricut to apply over Sizzix-cut leather pieces.
The investment in both machines makes sense for crafting businesses. Use Sizzix for production runs of popular items while Cricut handles custom orders and personalization.
Cost-benefit analysis depends on your crafting volume. Sellers processing 50+ orders monthly often recoup the investment within months through improved efficiency.
Maintenance and Longevity
Proper maintenance extends machine life significantly. Understanding care requirements helps protect your investment.
Sizzix machines require minimal maintenance. Keep cutting plates flat by rotating them regularly. Clean dies with adhesive remover when needed. The mechanical simplicity means fewer failure points.
Some crafters report using the same Sizzix Big Shot for over a decade with only cutting pad replacements. The manual operation has no motors to burn out or electronics to fail.
Cricut machines need more careful maintenance. Clean the blade housing monthly to prevent buildup. Replace blades when cuts become inconsistent. Keep firmware updated for optimal performance through regular software updates.
Electronic components limit lifespan compared to manual machines. However, most Cricut users report 5-7 years of reliable service with proper care. This lifespan matches other electronic equipment like the best 4000-watt generators when maintained properly.
Community Support and Resources
Strong communities enhance the crafting experience through shared knowledge and inspiration. Both brands cultivate active user bases.
Cricut’s community spans official forums, Facebook groups with hundreds of thousands of members, and YouTube channels dedicated to tutorials. Design Space’s social features let users share projects directly.
Sizzix communities tend toward traditional crafting forums and local groups. The manual nature attracts paper crafters who share techniques through blogs and Pinterest rather than software platforms. Sizzix’s official education portal provides structured learning paths for new users.
Tutorial availability favors Cricut due to the digital nature requiring more instruction. However, Sizzix technique videos for advanced embossing and layering provide valuable expertise.
Common Mistakes to Avoid When Choosing
Learning from others’ experiences prevents costly mistakes. Here are the most common pitfalls:
Overlooking long-term costs leads to budget strain. Calculate total ownership including consumables and dies/subscriptions before deciding. That bargain manual die cutter becomes expensive with die accumulation.
Underestimating learning curves causes frustration. If technology intimidates you, Cricut’s requirements may overshadow its capabilities. Conversely, don’t assume Sizzix limitations won’t eventually frustrate.
Project type mismatches waste money and time. Buying Sizzix exclusively for vinyl projects or Cricut solely for bulk card production ignores each machine’s strengths.
Pro Tips from Experienced Crafters
Veteran users share insights that dramatically improve results with either machine choice.
Sizzix Pro Tips:
Buy dies during craft store sales with 40-50% off coupons
Create die storage systems immediately to prevent damage
Use wax paper between cutting pads to extend life
Layer thin materials with cardstock for cleaner cuts
Consider organizing your craft space like a workshop with proper tools and diagrams for efficiency
Cricut Pro Tips:
Master keyboard shortcuts in Design Space for faster designing
Buy third-party blades and mats for significant savings
Use transfer tape alternatives like contact paper
Learn SVG editing in free programs like Inkscape
Making Your Final Decision: A Step-by-Step Framework
This decision framework helps identify your best choice:
What’s your primary project type? (Vinyl = Cricut, Bulk paper = Sizzix)
What’s your technology comfort level? (Low = Sizzix, High = Cricut)
What’s your true budget including 2 years of supplies?
How important is portability? (Critical = Sizzix)
Do you need custom designs? (Yes = Cricut)
Will you cut fabric regularly? (Yes = Cricut Maker)
Is embossing important? (Yes = Sizzix)
Score each answer and let the pattern guide your choice. Most crafters find clear preferences emerge through this exercise.
Frequently Asked Questions
Can Cricut Dies Work with Sizzix Machines?
No, Cricut and Sizzix dies are not interchangeable. Cricut doesn’t manufacture physical dies – they use digital cut files instead. However, most third-party dies work with Sizzix machines.
Is Cricut or Sizzix Better for Beginners?
Sizzix offers the gentler learning curve for absolute beginners. No technical knowledge required means immediate crafting satisfaction. However, beginners comfortable with smartphones and apps often adapt to Cricut quickly.
Which Machine Cuts Thicker Materials Better?
Sizzix significantly outperforms Cricut for thick materials. The manual pressure easily cuts through 3mm chipboard or multiple leather layers that would damage electronic cutting machines.
Do I Need Internet for Cricut?
Initial setup and software updates require internet. However, recent Design Space updates enable offline mode for working with downloaded content. This improvement addresses a major criticism of earlier versions.
Can I Make Money with Either Machine?
Both machines support profitable crafting businesses. Sizzix suits high-volume production of consistent items. Cricut enables customization and personalization services. Many successful crafters use both for different product lines.
Conclusion
The Cricut vs Sizzix debate has no universal winner – only the best choice for your unique needs. Both die cutting machines excel in their designed purposes and serve different crafter profiles perfectly.
Choose Sizzix if you value simplicity, portability, and bulk cutting efficiency. The manual die cutter rewards hands-on crafters with reliable results and minimal technical requirements. Your investment grows through die collection rather than subscriptions.
Select Cricut if you crave design freedom, material versatility, and integrated digital workflows. The electronic cutting machine opens infinite creative possibilities for those willing to embrace the technology. Like mastering any sophisticated tool, the learning investment pays creative dividends.
Remember that many crafters eventually own both machines, and for good reason. Each tool’s strengths complement the other’s limitations, creating a complete crafting toolkit. Whether you start with one or invest in both, either choice launches your creative journey with professional-quality results.
Ready to start creating? Assess your priorities using our decision framework, then confidently choose the die cutting machine that matches your crafting dreams. Your perfect creative companion awaits.
Picture this: You’re standing in a craft store, mesmerized by colorful threads and beautiful patterns, wondering whether to dive into cross stitch or embroidery. You’re not alone in this creative crossroads.
The main difference is simple: cross stitch uses X-shaped stitches on gridded fabric following specific patterns, while embroidery offers free-form decorative stitching on virtually any fabric. But there’s so much more to discover about these beloved needlecrafts.
This comprehensive guide breaks down everything you need to know about cross stitch vs embroidery. We’ll explore techniques, materials, costs, and help you choose the perfect craft for your creative journey.
What Is Cross Stitch?
Cross Stitch Definition and History
Cross stitch is a form of counted needlework where you create pictures using X-shaped stitches on evenly woven fabric. The cross stitch meaning extends beyond simple decoration – it’s a meditative craft that transforms thread into pixelated art.
This ancient technique dates back to the 13th century, with the earliest evidence found in Lebanon. Throughout history, cross stitch has been used to embellish clothing, create samplers, and preserve cultural patterns.
Today’s cross stitchers enjoy both traditional and modern designs. From classic florals to pop culture icons, the possibilities are endless when you understand what is a cross stitch pattern.
The 5 Essential Cross Stitch Stitches
While the X-stitch dominates, cross stitch actually employs five key techniques:
Full Cross Stitch – The classic X-shape
Half Cross Stitch – Single diagonal line
Fractional Stitches – Quarter and three-quarter stitches
Backstitch – For outlines and details
French Knots – Dimensional accents
These stitches combine to create stunning designs. The cross stitch definition encompasses all these techniques working together on your fabric canvas.
How Cross Stitch Patterns Work?
Cross stitch patterns resemble graph paper with symbols representing different thread colors. Each square equals one stitch, making it straightforward to follow.
Counted cross stitch requires you to count fabric threads from a center starting point. This ensures your design stays centered and properly sized on your chosen fabric.
Pattern reading becomes second nature with practice. Most beginners find the grid system logical and easy to follow, especially compared to other needlework styles.
What Is Embroidery?
Understanding Hand Embroidery Basics
Embroidery is the art of decorating fabric using needle and thread without structural limitations. Unlike cross stitch’s grid system, embroidery flows freely across your chosen material.
This versatile craft works on cotton, linen, denim, and even leather. Modern embroiderers push boundaries further, stitching on wood, paper, and unconventional surfaces.
The creative freedom attracts artists who want to paint with thread. Your imagination and skill level are the only limits in this expressive medium.
Popular Embroidery Stitch Types
Embroidery offers an extensive stitch library:
Backstitch – Clean lines and text
Satin Stitch – Smooth, filled areas
Chain Stitch – Decorative outlines
Lazy Daisy – Quick flowers
Split Stitch – Textured lines
Seed Stitch – Scattered fill
Learning these foundational stitches opens doors to countless combinations. Advanced techniques like thread painting create remarkably realistic effects.
Creative Freedom in Embroidery Design
Embroidery patterns transfer directly onto fabric through tracing, iron-on transfers, or water-soluble stabilizers. Some embroiderers skip patterns entirely, stitching freehand designs.
This flexibility appeals to artists who enjoy improvisation. You can modify designs mid-project, add personal touches, or completely change direction without counting constraints.
The absence of rigid structure makes embroidery perfect for organic designs. Florals, landscapes, and abstract art flourish under the embroidery needle.
Cross Stitch vs Embroidery: 7 Key Differences
Fabric Requirements
The fabric choice represents a fundamental difference between embroidery and needlepoint techniques:
Fabric Type
Cross Stitch
Embroidery
Primary Choice
Aida cloth, evenweave
Cotton, linen, any fabric
Structure
Even grid with visible holes
Dense weave, no holes
Stiffness
Rigid, holds shape
Varies by fabric choice
Count System
Yes (14-ct, 16-ct, etc.)
No standardized system
Cross stitch fabrics come in counts indicating holes per inch. 14-count Aida remains the most popular for beginners.
Needle Types and Sizes
Needle selection impacts your stitching experience significantly:
Cross Stitch Needles:
Blunt tips (tapestry needles)
Sizes 24-26 most common
Won’t split fabric threads
Embroidery Needles:
Sharp points
Various sizes (3-10)
Pierce through fabric easily
The blunt cross stitch needle glides through pre-existing holes. Sharp embroidery needles create their own paths through dense fabric.
Thread and Floss Variations
Understanding embroidery thread vs cross stitch requirements helps you shop smartly:
Standard floss: 6-strand cotton (DMC, Anchor)
Cross stitch: Usually 2 strands
Embroidery: 1-6 strands depending on effect
Specialty threads: Metallics, silk, wool
Both crafts primarily use the same thread brands. The difference lies in how many strands you use and specialized threads for specific effects.
Pattern Following vs Free-Form Design
Cross stitch follows charts with mathematical precision. Each symbol corresponds to specific thread colors placed in exact locations.
Embroidery patterns serve as guides rather than rules. You interpret designs with personal flair, adjusting stitch lengths and directions for desired effects.
This fundamental difference attracts different personality types. Detail-oriented crafters often prefer cross stitch’s structure, while free spirits gravitate toward embroidery’s flexibility.
Skill Level and Learning Curve
What is cross stitch embroidery‘s learning curve compared to traditional embroidery? Cross stitch wins for beginners:
One basic stitch to master
Clear pattern instructions
Predictable results
Less hand coordination required
Embroidery demands learning multiple stitches immediately. Tension control, stitch consistency, and design interpretation require more initial practice.
Time Investment Per Project
Project completion times vary significantly:
Cross Stitch:
Small designs: 5-10 hours
Medium projects: 20-50 hours
Large pieces: 100+ hours
Embroidery:
Simple designs: 2-5 hours
Moderate complexity: 10-20 hours
Detailed work: 30+ hours
Cross stitch typically takes longer due to filling entire areas with uniform stitches. Embroidery’s varied techniques can cover ground faster.
Final Appearance and Style
The finished products showcase distinct aesthetics:
Cross stitch creates pixelated, vintage-inspired designs with consistent texture. The uniform X-stitches produce a distinctive handmade charm perfect for creating cozy home atmospheres.
Embroidery yields painterly results with dimensional textures. Various stitch types create depth, movement, and realistic details impossible with cross stitch alone.
Cross Stitch vs Needlepoint vs Embroidery: Understanding All Three
What Makes Needlepoint Different?
The cross stitch vs needlepoint embroidery confusion stems from their similar grid-based approach. However, needlepoint uses different techniques entirely.
Needlepoint employs tent stitches on canvas mesh, creating diagonal stitches rather than X-shapes. The canvas is stiffer than Aida cloth, and stitchers typically use wool or thick threads.
This technique excels at creating durable items like pillows, upholstery, and rugs. The tight, angled stitches create sturdy surfaces that withstand regular use.
Quick Comparison Table
Feature
Cross Stitch
Embroidery
Needlepoint
Base Fabric
Aida/Evenweave
Any fabric
Canvas mesh
Primary Stitch
X-shaped
Various
Tent stitch
Thread Type
Cotton floss
Cotton/silk/wool
Wool/thick fibers
Typical Projects
Wall art, samplers
Clothing, linens
Pillows, rugs
Learning Difficulty
Easy
Moderate
Easy-Moderate
Essential Supplies and Materials
Cross Stitch Supply List
Starting cross stitch requires these basics:
Essential Items:
14-count Aida fabric
Size 24 tapestry needles
DMC or Anchor floss
6-inch embroidery hoop
Small scissors
Pattern (printed or PDF)
Helpful Additions:
Needle threader
Floss organizer
Magnifying glass
Project bag
Budget approximately $30-50 for quality starter supplies. Kits offer convenience but cost slightly more than buying items separately.
Embroidery Supply List
Embroidery startup requires:
Core Supplies:
Cotton fabric (Kona recommended)
Embroidery needles (sizes 3-9)
6-strand cotton floss
6-inch wooden hoop
Fabric scissors
Transfer materials
Nice-to-Have Items:
Thimble
Needle case
Various hoop sizes
Specialty threads
Initial investment runs $25-40 for basic supplies. Quality matters less for practice materials while you’re learning.
Shared Supplies Between Both Crafts
Save money by recognizing overlapping supplies:
Embroidery scissors work for both
DMC/Anchor floss suits either craft
Hoops (though not always necessary for cross stitch)
Thread organizers
Good lighting
Pattern storage solutions
Smart storage solutions keep supplies organized whether you choose one craft or explore both.
Which Is Easier: Cross Stitch or Embroidery?
Why Beginners Often Start with Cross Stitch
Cross stitch offers the gentlest introduction to needlework:
Single stitch mastery – Learn one technique thoroughly
Clear instructions – No interpretation needed
Predictable results – Patterns show exact outcomes
Forgiving mistakes – Easy to remove and redo
The structured approach builds confidence quickly. Success with early projects motivates beginners to tackle increasingly complex designs.
When Embroidery Might Be Your Better Choice
Consider starting with embroidery if you:
Have artistic background
Prefer quick projects
Enjoy improvisation
Want immediate variety
Dislike counting
Some personalities thrive with embroidery’s creative freedom from day one. The key is matching your learning style to the craft’s demands.
Age Considerations for Each Craft
Cross stitch suits ages 8+ due to:
Simple, repetitive motions
Clear visual patterns
Less hand strength needed
Embroidery works better for ages 10+ because:
Multiple techniques require patience
Sharp needles need careful handling
Design interpretation demands maturity
Adults can start either craft successfully. Consider eyesight, hand steadiness, and patience levels when choosing.
Cross Stitch vs Punch Needle: Another Popular Comparison
Quick Overview of Punch Needle
Understanding cross stitch vs punch needle helps you explore all options. Punch needle creates looped textures using a special hollow needle tool.
This technique works faster than both cross stitch and embroidery. The punch needle tool pushes thread through fabric, creating loops on the opposite side.
Results resemble hooked rugs with plush, textured surfaces. Projects complete in hours rather than days or weeks.
How It Differs from Both Cross Stitch and Embroidery
Key distinctions include:
Speed: Punch needle covers area rapidly Texture: Creates 3D loop pile surface Tools: Requires special punch needle tool Fabric: Needs tightly woven foundation Technique: Punching motion vs. stitching
Modern crafters often combine techniques. Punch needle backgrounds with embroidered details create stunning mixed-media pieces.
Choosing the Right Thread
Embroidery Thread vs Cross Stitch Thread
While both crafts use similar threads, application differs:
Cross Stitch Threading:
Separate 6 strands into 2
Consistent strand count throughout
Loop method for starting
Embroidery Threading:
Vary strands for effects (1-6)
Mix strand counts in one project
Various starting methods
Quality thread makes noticeable differences in both crafts. Invest in colorfast, smooth floss from reputable brands.
Understanding Thread Counts and Strands
Thread terminology confuses beginners:
Skein: Bundle of thread as purchased
Strand: Individual thread within floss
Ply: Twist within each strand
Most embroidery floss contains 6 divisible strands. Cross stitch typically uses 2 strands, while embroidery varies based on desired coverage.
Project Ideas and Applications
Best Cross Stitch Projects for Beginners
Start your journey with these approachable projects:
Bookmark – Practice basic stitches
Small quote sampler – Learn letter formation
Mini seasonal ornament – Quick satisfaction
Geometric pattern – Build counting skills
Simple flower – Introduction to color changes
Choose designs under 50×50 stitches initially. Completing smaller projects maintains motivation while building skills.
Creative Embroidery Project Ideas
Embroidery beginners flourish with:
Embellished clothing – Jazz up plain items
Hoop art – Frame-ready designs
Tote bag decoration – Functional art
Pillow accents – Home decor upgrade
Handkerchief edges – Traditional practice
Start with projects featuring 3-4 stitch types. Master basics before attempting thread painting or complex dimensional work.
Combining Both Techniques
Advanced crafters blend techniques creatively:
Cross stitch backgrounds with embroidered details add dimension. Embroider faces and hands on cross-stitched figures for realism.
Mixed-media approaches showcase each technique’s strengths. Creative combinations produce unique, personalized results.
Pro Tips from Expert Crafters
Cross Stitch Success Secrets
Master cross stitchers share wisdom:
Lighting: Position light source over your working shoulder Railroading: Keep threads parallel for smooth coverage Gridding: Mark fabric every 10 squares for large projects Loop start: Begin new threads without knots Consistent direction: Top stitches always same way
These techniques elevate your work from amateur to professional appearance.
Practice sampler: Test new stitches before projects
Regular practice develops muscle memory. Your hands learn proper tension through repetition.
Common Mistakes to Avoid in Both Crafts
Sidestep these beginner pitfalls:
Cross Stitch Mistakes:
Starting without centering design
Using knots (they create bumps)
Pulling too tight (warps fabric)
Ignoring thread direction
Embroidery Mistakes:
Skipping practice swatches
Using dull needles
Rushing complex stitches
Poor transfer method choice
Learning from others’ experiences accelerates your progress. Join online communities for ongoing support and inspiration.
Cost Comparison: Budget-Friendly Crafting
Initial Investment for Each Craft
Starting costs breakdown:
Item
Cross Stitch
Embroidery
Fabric
$5-10
$3-8
Needles
$3-5
$4-6
Thread (starter)
$15-20
$15-20
Hoop
$5-8
$5-8
Scissors
$10-15
$10-15
Pattern/Transfer
$5-10
$3-5
Total
$43-68
$40-62
Both crafts offer affordable entry points. Quality tools last years with proper care.
Ongoing Supply Costs
Long-term expenses include:
Thread: $0.50-1.50 per skein Fabric: $5-20 per project Patterns: $5-15 each (or free online) Needle replacement: $5-10 annually
Smart shoppers stock up during sales. Building a thread collection happens gradually as projects demand new colors.
Frequently Asked Questions
Can I use embroidery patterns for cross stitch?
Simple embroidery designs can convert to cross stitch with effort. You’ll need to create a grid overlay and simplify curved lines into stepped patterns.
The reverse works better – cross stitch patterns easily become embroidery guides. Simply ignore the grid and stitch designs using various embroidery techniques.
What’s the difference between counted and stamped cross stitch?
Counted cross stitch provides a chart with symbols. You count fabric threads to place each stitch correctly, working from blank fabric.
Stamped cross stitch prints the pattern directly on fabric. Simply stitch over the printed design – no counting required. Beginners often find stamped versions easier initially.
Is cross stitch actually a type of embroidery?
Technically, yes. Cross stitch falls under the embroidery umbrella as decorative stitching on fabric. However, crafters typically separate them due to distinct techniques and approaches.
Think of embroidery as the broad category with cross stitch as a specialized subset. Understanding these relationships helps navigate craft store sections and online tutorials.
Which craft is better for home decor projects?
Both create beautiful home accents:
Cross stitch excels at:
Framed samplers
Traditional pillows
Kitchen accessories
Seasonal decorations
Embroidery shines for:
Modern wall art
Customized linens
Bohemian pillows
Mixed-media pieces
Your decor style determines the best choice. Traditional homes suit cross stitch’s vintage charm, while contemporary spaces welcome embroidery’s artistic flexibility.
Can I switch between cross stitch and embroidery easily?
Absolutely! Many crafters enjoy both. Skills transfer surprisingly well:
Thread handling improves in both
Color theory knowledge applies universally
Pattern reading abilities cross over
Hand-eye coordination benefits either craft
Starting with cross stitch builds foundation skills. Adding embroidery later expands your creative options without starting from scratch.
Conclusion
The cross stitch vs embroidery choice ultimately depends on your personality, goals, and creative vision. Cross stitch offers structure, predictability, and meditative repetition perfect for detail-oriented crafters.
Embroidery provides artistic freedom, quick projects, and endless technique variations for those who love experimentation. Neither choice is wrong – only different paths to creative satisfaction.
Many needleworkers eventually explore both crafts. Starting with one doesn’t lock you into that choice forever. Your crafting journey can evolve as your skills and interests grow.
Ready to begin? Choose the craft that calls to you today. Visit your local craft store, gather supplies, and take that first stitch toward a rewarding new hobby. Your creative adventure awaits!
Traditional crafts are experiencing a remarkable renaissance. From social media feeds filled with stunning embroidery to craft circles popping up in coffee shops, needlework is officially cool again. But if you’re ready to join this creative movement, you might wonder: what’s the difference between needlepoint and cross stitch?
Here’s the quick answer: Both are forms of counted thread embroidery, but needlepoint uses varied stitches on stiff canvas while cross-stitch creates X-shaped patterns on soft fabric. The difference between needlepoint & cross stitch goes beyond just materials – it affects everything from project durability to creative possibilities.
This comprehensive guide covers all the essential differences, from basic stitches to advanced techniques. You’ll discover cost comparisons, time investments, and which craft best suits your personality. Whether you’re drawn to the precision of cross stitching vs embroidery or the artistic freedom of needlepoint, you’ll find everything needed to make an informed choice.
What Is Needlepoint?
Needlepoint is a form of canvas embroidery that dates back to ancient Egypt, where slanted stitches decorated tents and furnishings. This surface embroidery technique covers the entire canvas with yarn or thread, creating durable, textured designs that can withstand daily use.
Unlike other forms of embroidery, needlepoint builds designs through various stitch types on a rigid mesh canvas. The stitches interlock to create everything from geometric patterns to detailed pictorial scenes, making it ideal for functional décor.
Essential Needlepoint Materials
The foundation of any needlepoint project starts with selecting the right canvas. The most common types include:
Canvas Types:
Mono Canvas: Single-thread mesh offering maximum flexibility (10-18 count)
Penelope Canvas: Double-thread weave allowing fine detail work (10-14 count)
Interlock Canvas: Twisted threads prevent distortion during stitching (10-18 count)
Your thread choice dramatically affects the final appearance. Wool yarn remains the traditional favorite for its durability and coverage. Silk threads add lustrous highlights to special projects, while cotton provides an affordable, versatile option with excellent color selection.
Tapestry needles sized 18-24 work best for needlepoint, with larger numbers for finer canvas. Unlike sharp embroidery needles, these blunt-tipped tools slide between canvas threads without splitting them. Stretcher bars or frames keep your canvas taut and prevent the distortion common in larger projects.
Common Needlepoint Stitches
The tent stitch forms the foundation of most needlepoint work. This diagonal stitch crosses one canvas intersection, creating uniform coverage. When worked in rows, it becomes the basketweave stitch – ideal for backgrounds because it minimizes canvas distortion.
The continental stitch offers another approach to the basic tent stitch. Worked horizontally across the canvas, it creates sturdy coverage perfect for items receiving heavy use. This stitch fully covers the canvas back, adding extra durability to your finished piece.
Decorative stitches expand your creative options:
Gobelin Stitch: Creates textured vertical or diagonal patterns
Cushion Stitch: Groups of graduated stitches form square motifs
Parisian Stitch: Alternating long and short stitches create basketweave effects
Mosaic Stitch: Three-stitch units build geometric patterns
Popular Needlepoint Projects
Needlepoint’s durability makes it perfect for home décor items. Decorative pillows remain the most popular project, offering endless design possibilities from traditional florals to modern abstracts. The sturdy stitching withstands regular handling while maintaining its beauty.
Wall hangings showcase needlepoint’s artistic potential. From family crests to landscape scenes, these pieces become heirloom artworks. Many stitchers frame their work or mount it on stretched canvas for a gallery-worthy presentation.
Functional items benefit from needlepoint’s strength. Upholstered chair seats, footstools, and bench covers combine beauty with practicality. Accessories like handbags, belts, and eyeglass cases make perfect gifts while demonstrating the craft’s versatility.
What Is Cross-Stitch?
Cross-stitch emerged during the Middle Ages as a way to decorate household linens and clothing. Young girls learned the technique by creating samplers – practice pieces featuring alphabets, numbers, and moral sayings. One of America’s earliest surviving examples, stitched by Loara Standish in 1653, demonstrates the craft’s enduring appeal.
This counted-thread embroidery creates designs through repeated X-shaped stitches. Each stitch crosses two fabric threads, forming a small square that combines with others to build patterns. The technique’s simplicity makes it accessible to beginners while offering endless complexity for advanced stitchers.
Essential Cross-Stitch Materials
Fabric choice significantly impacts your cross-stitch experience. Aida cloth remains the most popular option, with its clearly defined squares making counting effortless. Common counts include:
14-count: Ideal for beginners with easily visible holes
16-count: Balanced option for most projects
18-count: Creates finer, more detailed work
Evenweave and linen fabrics offer a softer drape and more refined appearance. These materials require counting threads rather than holes, adding complexity but producing elegant results. The choice between cross stitch vs embroidery thread also matters significantly.
Six-strand embroidery floss provides the standard thread for cross-stitch. Most patterns specify using two or three strands, allowing you to adjust coverage and texture. The remaining strands can be saved for future projects, making floss economical despite initial costs.
Embroidery hoops or Q-snap frames maintain fabric tension during stitching. Unlike needlepoint, cross-stitch fabric requires external support to prevent puckering. Blunt tapestry needles in sizes 24-28 work best, with smaller numbers for lower fabric counts.
Types of Cross-Stitch
Stamped cross-stitch eliminates counting by printing the design directly on fabric. Color-coded symbols show where each stitch belongs, making this method perfect for beginners or relaxing projects. Water-soluble ink washes away after completion, leaving only your beautiful stitchwork.
Counted cross-stitch follows charts or graphs rather than printed patterns. Starting from the fabric center, you count outward to place each stitch precisely. This method offers more flexibility in color choices and allows you to use any compatible fabric.
Modern variations expand traditional boundaries. Blackwork uses single-color thread to create intricate patterns. Hardanger combines cross-stitch with cutwork for delicate, lacy effects. These techniques demonstrate how cross stitch vs embroidery continues evolving with contemporary tastes.
Popular Cross-Stitch Projects
Framed artwork dominates cross-stitch projects. From inspirational quotes to detailed reproductions of famous paintings, these pieces add personal touches to any décor. The flat, uniform stitching creates clean lines perfect for text-based designs.
Samplers maintain their traditional appeal while embracing modern themes. Birth announcements, wedding commemoratives, and family trees preserve memories in thread. These projects often become treasured heirlooms passed through generations.
Small projects offer quick satisfaction and practical results. Bookmarks make thoughtful gifts while teaching basic techniques. Coasters, ornaments, and greeting cards provide opportunities to experiment with colors and patterns without major time commitments.
Needlepoint vs Cross Stitch: Complete Comparison
Understanding the needlepoint vs cross stitch fabric differences helps you choose the right craft. While both use counted techniques, their materials, methods, and results vary significantly.
Quick Comparison Table
Feature
Needlepoint
Cross-Stitch
Base Material
Stiff mesh canvas (10-18 count)
Soft fabric (14-28 count)
Stitch Types
Multiple (tent, basketweave, decorative)
Primarily X-shaped stitches
Pattern Method
Often painted on canvas
Counted from charts
Coverage
Entire canvas covered
Background fabric shows
Durability
Extremely durable
Moderate durability
Best Uses
Pillows, upholstery, bags
Framed art, samplers, ornaments
Learning Curve
Moderate (multiple stitches)
Easy (one main stitch)
Project Speed
Faster (larger stitches)
Slower (smaller stitches)
Key Similarities
Despite their differences, needlepoint and cross-stitch share fundamental characteristics. Both belong to the counted thread embroidery family, requiring you to follow gridded patterns for accurate stitch placement. This mathematical approach appeals to detail-oriented crafters who enjoy precision.
The basic tools overlap significantly between crafts. Both use blunt tapestry needles to prevent splitting threads. Scissors, needle threaders, and magnifying lamps benefit practitioners of either technique. Many crafters enjoy both, switching between them for variety.
Creating decorative items unites these crafts in purpose. Whether you’re stitching a needlepoint pillow or cross-stitch sampler, you’re continuing traditions that connect generations. Both offer meditative benefits through repetitive motion and focused attention.
Major Differences
The canvas versus fabric distinction creates the most noticeable difference between needlepoint and cross stitch embroidery. Needlepoint’s rigid canvas stands independently, while cross-stitch fabric requires hoops for support. This affects portability, with cross-stitch being easier to transport.
Stitch variety separates these crafts dramatically. Cross-stitch relies almost exclusively on X-shaped stitches for consistent, pixel-like effects. Needlepoint employs dozens of stitch types, creating varied textures and visual interest within single pieces.
Coverage philosophy differs completely between techniques. Needlepoint covers every canvas thread, creating thick, durable textiles suitable for heavy use. Cross-stitch leaves fabric visible between stitches, producing lighter pieces better suited for display than daily handling.
Cost Comparison: Budget Considerations
Understanding the financial investment helps you choose between needlepoint vs embroidery options. While both crafts can accommodate various budgets, their cost structures differ significantly.
Initial Investment Costs
Cross-stitch typically requires lower startup costs. A beginner kit including fabric, floss, needle, and pattern often costs $15-30. Basic supplies like hoops and scissors add another $10-20. You can begin learning with under $50 total investment.
Needlepoint demands higher initial expenses. Quality canvases start around $30-50 for small projects, with hand-painted designs reaching $100-300. Wool yarn adds $20-60 per project. Including needles and frames, expect $75-150 for your first project.
The Craft Yarn Council provides excellent resources for understanding material quality and pricing. Their standards help beginners avoid overpaying while ensuring satisfactory results.
Ongoing Project Costs
Cross-stitch remains economical for regular crafters. Fabric costs $5-15 per project, while floss averages $0.60 per skein. Most projects require 10-30 skeins, keeping material costs under $30. Patterns range from free online options to $15 commercial charts.
Needlepoint projects carry premium prices throughout. Canvases for intermediate projects cost $75-200, with custom designs higher. Quality wool yarn runs $3-8 per skein, with projects requiring 20-50 skeins. This puts typical project costs at $150-400.
Cost-Saving Tips for Both Crafts
Smart shopping reduces expenses without sacrificing quality:
For Both Crafts:
Buy supplies during sales (typically 40-50% off)
Join online communities for pattern swaps
Start with smaller projects to minimize waste
Purchase basic colors in bulk
Cross-Stitch Specific:
Use fabric remnants from previous projects
Share floss collections with stitching friends
Design your own patterns using free software
Needlepoint Specific:
Choose printed rather than hand-painted canvases
Mix wool with less expensive threads for backgrounds
Buy yarn by the pound rather than individual skeins
Time Investment: Which Is Faster?
Project completion time affects craft satisfaction. Understanding the difference between needlepoint and quickpoint, along with general speed expectations, helps set realistic goals.
Cross-stitch typically progresses slowly due to small stitch size. A 5×7 inch intermediate design requires 50-100 hours of stitching. Experienced stitchers average 100-200 stitches per hour, while beginners manage 50-75. This makes cross-stitch ideal for portable, long-term projects.
Needlepoint moves faster thanks to larger canvas mesh and varied stitch sizes. The same 5×7 inch area takes 20-40 hours using basic tent stitch. Decorative stitches cover ground quickly – a cushion stitch fills four times the space of individual tent stitches.
Time-saving strategies for both crafts:
Work in good lighting to reduce eye strain
Organize materials before starting sessions
Use laying tools for smoother thread placement
Stitch during focused time blocks rather than scattered moments
Consider quickpoint (4-7 mesh canvas) for rapid needlepoint results
Which Is Easier for Beginners?
The question of needlepoint vs cross stitch for beginners depends on individual learning styles and goals. Both offer accessible entry points with different advantages.
Cross-Stitch for Beginners
Cross-stitch provides the gentler learning curve. The single stitch type means you can start creating immediately after learning the basic X formation. Consistent technique builds muscle memory quickly, leading to early success and confidence.
Pros for beginners:
One stitch to master
Clear, gridded patterns
Abundant free resources online
Mistakes easily corrected
Portable projects
Cons to consider:
Requires careful counting
Eye strain from small stitches
Progress feels slow initially
Fabric tension takes practice
Best starter projects include bookmarks, small ornaments, or mini samplers. These build skills without overwhelming time commitments. The Embroiderers’ Guild of America offers excellent beginner resources and local chapter support.
Needlepoint for Beginners
Needlepoint suits crafters who prefer variety and immediate visual impact. While learning multiple stitches seems daunting, most projects use primarily tent stitch. Painted canvases eliminate counting, letting you focus on stitch execution.
Pros for beginners:
No counting with painted designs
Faster visible progress
Forgiving of tension issues
Canvas doesn’t require hoops
Mistakes blend into texture
Cons to consider:
Higher initial costs
Multiple stitches to learn eventually
Heavier materials less portable
Canvas distortion without proper technique
Beginning with a small painted canvas coaster or ornament builds confidence. These projects introduce basic techniques while creating usable items quickly.
Making Your Decision
Choose based on your personality and goals:
Choose Cross-Stitch If You:
✓ Enjoy precision and following detailed instructions
✓ Prefer working with charts and patterns
✓ Want maximum portability
✓ Like creating framed artwork
✓ Have a limited budget
Choose Needlepoint If You:
✓ Prefer creative freedom and texture variety
✓ Enjoy working with color and visual design
✓ Want to create durable, functional items
✓ Dislike counting
✓ Can invest in quality materials
Beyond the Basics: Related Techniques
Understanding related techniques expands your needlework horizons. The needlepoint vs embroidery relationship includes several variations worth exploring.
What Is Quickpoint?
Quickpoint represents needlepoint’s speedy cousin. Using extra-large mesh (3.75-7 count), it creates bold, dramatic designs rapidly. The difference between needlepoint and quickpoint lies purely in scale – stitches and techniques remain identical.
This technique suits crafters wanting faster gratification or those with vision limitations. Rugs, wall hangings, and large pillows work beautifully in quickpoint. The chunky texture adds contemporary flair to traditional designs.
Needlepoint vs Cross Stitch vs Embroidery
Embroidery serves as the umbrella term encompassing all decorative stitching. While needlepoint and cross-stitch follow counted patterns, free-form embroidery allows complete artistic freedom. Surface embroidery includes hundreds of stitches creating dimensional effects impossible with counted techniques.
Related techniques to explore:
Crewel Work: Wool embroidery on linen using flowing designs
Hardanger: Norwegian technique combining counting with cutwork
Blackwork: Monochromatic counted embroidery with geometric patterns
Combining Techniques
Advanced crafters often blend techniques within single projects. Adding cross-stitch details to needlepoint backgrounds creates interesting contrasts. Surface embroidery accents can personalize counted work with names or dates.
Mixed media possibilities include:
Cross-stitch on needlepoint canvas for detailed faces
Beading accents on either technique
Ribbon embroidery additions for dimensional flowers
Metallic threads for sparkle and emphasis
Common Mistakes and How to Fix Them
Every crafter encounters challenges. Understanding common problems and solutions keeps frustration minimal while building skills.
Needlepoint Troubleshooting
Canvas distortion plagues many beginners. This occurs when stitches pull too tightly or work proceeds in one direction only. Prevent distortion by maintaining even tension and rotating your work regularly. Fix existing distortion by blocking – dampening and stretching the finished piece to square.
Uneven coverage shows canvas between stitches. This usually results from thread being too thin for the canvas mesh or inconsistent tension. Solution: Add an extra strand of thread or switch to fuller fibers like wool. Maintaining consistent tension comes with practice.
Thread tangling and knotting interrupts stitching flow. Prevent tangles by using 18-inch thread lengths and allowing thread to untwist periodically. Run threads through beeswax or thread conditioner for smoother stitching.
Cross-Stitch Troubleshooting
Counting errors create the most frustration in cross stitch vs embroidery projects. One misplaced stitch can throw off entire sections. Prevent errors by marking your pattern every 10 stitches and double-checking placement frequently. Fix mistakes by carefully removing incorrect stitches with small scissors.
Fabric puckering results from too-tight stitching or improper hoop use. Maintain relaxed tension and ensure fabric sits drum-tight in hoops without stretching. Remove projects from hoops between sessions to prevent permanent creasing.
Floss separation causes fuzzy, uneven stitches. Always separate all six strands individually before recombining the needed number. This process, called “stripping,” ensures smooth, uniform coverage.
Pro Tips for Success
Experienced crafters develop strategies that enhance enjoyment and results. These professional tips apply whether you choose needlepoint or cross-stitch.
Workspace Setup:
Position lighting at 45-degree angle to prevent shadows
Use magnification for detailed work
Keep tools within easy reach
Maintain good posture with proper chair height
Organization Systems:
Sort threads by color family or project
Label everything clearly
Use project bags to keep works-in-progress together
Document thread colors for future reference
Progress Tracking:
Photograph projects regularly to see advancement
Keep stitching journals noting techniques learned
Set realistic goals to maintain motivation
Celebrate milestones with small rewards
Community resources enhance any needlework journey. Local needlework shops offer classes and stitching circles. Online forums provide 24/7 support and inspiration. The American Needlepoint Guild connects enthusiasts nationwide through chapters and correspondence courses.
Frequently Asked Questions
Can you do cross stitch on needlepoint canvas?
Yes, cross-stitch works on needlepoint canvas, creating bold, chunky designs. Use the canvas like large-count Aida cloth, making X-shaped stitches over intersections. This technique, sometimes called “quickpoint cross-stitch,” progresses rapidly while maintaining the characteristic pixelated appearance.
Which is more expensive, needlepoint or cross stitch?
Needlepoint typically costs 3-5 times more than cross-stitch. A needlepoint project averaging $150-300 compares to $30-60 for similar-sized cross-stitch. The needlepoint vs cross stitch fabric price difference accounts for much of this gap, with canvas costing significantly more than Aida cloth.
How long does it take to complete a typical project?
Cross-stitch projects average 50-100 hours for medium complexity 8×10 inch designs. Needlepoint moves faster, requiring 25-50 hours for comparable sizes. Your speed increases with experience – beginners should expect to take twice as long initially.
Can I use cross stitch patterns for needlepoint?
Cross-stitch patterns adapt well to needlepoint with minor adjustments. Each chart square equals one needlepoint stitch. Choose canvas count matching the pattern’s intended fabric count for proper sizing. Remember that needlepoint’s texture differs from flat cross-stitch appearance.
What’s the difference between needlepoint and embroidery?
Needlepoint is a specific type of embroidery using canvas and covering the entire surface. General embroidery encompasses all decorative stitching, including needlepoint, cross-stitch, crewelwork, and dozens of other techniques. Think of needlepoint as embroidery’s structured, counted cousin.
Conclusion
The needlepoint vs cross stitch decision ultimately depends on your personal preferences, lifestyle, and creative goals. Both crafts offer rewarding experiences through different approaches – cross-stitch provides meditative precision while needlepoint delivers textural artistic freedom.
Remember, there’s no “wrong” choice between these time-honored crafts. Many enthusiasts enjoy both, switching between them based on project goals and mood. Cross-stitch might suit your need for portable, budget-friendly relaxation, while needlepoint satisfies desires for durable, textured creations.
Consider starting with a beginner kit in your chosen craft. This low-commitment approach lets you explore without major investment. As skills develop, you might discover that needlepoint vs cross stitch becomes less about choosing one over the other and more about enjoying both unique experiences.
Whether you pick up a needle for stress relief, creative expression, or connecting with tradition, both needlepoint and cross-stitch welcome newcomers warmly. Choose your first project, gather your materials, and join the growing community of modern needleworkers keeping these ancient crafts alive.
Choosing between the Bosch 4100XC-10 and Dewalt DWE7491RS table saw can make or break your woodworking projects. Both saws dominate the jobsite table saw market, but which delivers better value for your specific needs?
The Quick Answer: The Dewalt DWE7491RS excels with its superior 32.5-inch rip capacity and rack-and-pinion fence system, making it ideal for professionals handling large sheet goods. The Bosch 4100XC-10 wins on portability with its gravity-rise stand and lighter weight, perfect for contractors who frequently move between job sites.
In this comprehensive comparison, we’ll examine every critical aspect of these premium table saws to help you invest wisely. Whether you’re a professional contractor or serious DIY enthusiast, understanding these differences will ensure you choose the tool that matches your workflow perfectly.
Head-to-Head Specifications Comparison
Understanding the technical differences between these saws provides the foundation for making an informed decision. Let’s examine how the Bosch 4100XC-10 and Dewalt DWE7491RS stack up in raw specifications.
Power and Performance Metrics
Both saws feature 15-amp motors drawing standard 120V power, but their performance characteristics differ significantly. The Dewalt DWE7491RS spins at 4,800 RPM, substantially faster than the Bosch’s 3,650 RPM. This higher speed translates to cleaner cuts in hardwoods and reduced burning on cherry and maple.
The Bosch compensates with its 4.0 HP motor output, nearly double the Dewalt’s 2.0 HP rating. This extra horsepower becomes crucial when ripping thick hardwoods or pressure-treated lumber. During extended cutting sessions, the Bosch maintains consistent power without bogging down.
Cutting Capacity Breakdown
Feature
Bosch 4100XC-10
Dewalt DWE7491RS
Right Rip Capacity
30 inches
32.5 inches
Left Rip Capacity
8.5 inches
22 inches
Depth at 90°
3⅛ inches
3⅛ inches
Depth at 45°
2¼ inches
2¼ inches
Bevel Range
-2° to 47°
0° to 45°
Table Size
29″ × 21.5″
26.25″ × 22″
The Dewalt’s impressive 32.5-inch rip capacity handles full sheet goods with room to spare. Meanwhile, its 22-inch left-side capacity proves invaluable for panel work. The Bosch offers a larger overall table surface, providing better support for crosscutting operations.
Portability and Stand Design Analysis
Job site portability often determines which saw professionals choose. These two models represent completely different philosophies in mobile table saw design.
Bosch’s Gravity-Rise Innovation
The Bosch 4100XC-10’s gravity-rise stand revolutionizes setup efficiency. Simply release the lock and lift – the saw pivots smoothly into position within seconds. The entire unit weighs 60 pounds, making single-person transport manageable.
The 8-inch pneumatic tires handle rough terrain effortlessly. Unlike standard casters, these wheels maintain stability on gravel, dirt, and uneven surfaces. The stand’s single-lever operation means no fumbling with multiple locks or latches during setup.
Dewalt’s Four-Leg Stability
The Dewalt DWE7491RS prioritizes rock-solid stability over quick deployment. Its four-leg design with outward-angled supports creates an incredibly stable platform. At 90 pounds, it requires more effort to transport but rewards users with unwavering performance.
The telescoping fence rails retract for transport, reducing the footprint significantly. Two fixed wheels and two legs mean the saw stays planted during operation – no accidental rolling when feeding heavy boards. Setup takes slightly longer but provides confidence when handling large materials.
Fence System Showdown
The fence system determines cutting accuracy and ease of adjustments. Both manufacturers invested heavily in their fence designs, resulting in two distinct approaches.
Dewalt’s Rack-and-Pinion Excellence
The Dewalt DWE7491RS features the gold standard in fence adjustment: a true rack-and-pinion system. Turn the front handle, and both ends move simultaneously with mechanical precision. The micro-adjust knob enables fine-tuning to 1/64-inch accuracy.
This fence locks parallel every time, eliminating the frustration of manual square-checking. The flip-over design accommodates both standard cuts and narrow rips. Heavy-duty construction resists deflection even when cutting warped lumber.
Bosch’s SquareLock System
Bosch’s SquareLock rip fence uses a different approach but achieves similar accuracy. The T-square design references off the front rail, ensuring consistent alignment. While lacking rack-and-pinion smoothness, it provides reliable performance.
The fence face stands taller than the Dewalt’s, offering better support for vertical cuts. Dual locking points prevent movement during aggressive cuts. Some users report needing occasional adjustments to maintain perfect parallel, unlike the Dewalt’s set-and-forget design.
Safety Features Comparison
Modern table saws incorporate numerous safety features beyond basic blade guards. Understanding these differences could prevent serious injuries.
Blade Guard and Riving Knife Systems
Both saws include comprehensive guard systems meeting current safety standards. The Dewalt’s tool-free guard removal system stands out – simply pull the release lever for instant access. This convenience encourages users to reinstall guards after dado cuts.
The Bosch includes anti-kickback pawls integrated into the riving knife assembly. These spring-loaded teeth grip wood if kickback occurs, potentially preventing serious accidents. Both riving knives adjust automatically with blade height, maintaining proper spacing.
Additional Safety Considerations
The Bosch 4100XC-10 features Smart Guard System technology with independent side guards. These modular components improve visibility while maintaining protection. The included push stick stores onboard, ensuring it’s always within reach.
Dewalt’s safety paddle switch prevents accidental activation better than traditional buttons. The large, red surface stops the blade quickly when bumped. Both saws include blade brakes, though the Bosch’s stops approximately one second faster.
Real-World Performance Testing
Laboratory specifications tell only part of the story. How do these saws perform during actual woodworking tasks?
Ripping Operations
The Dewalt DWE7491RS excels when ripping sheet goods thanks to its extended capacity and smooth fence adjustments. Processing full plywood sheets becomes effortless with 32.5 inches of support. The higher blade speed produces glass-smooth edges requiring minimal sanding.
The Bosch 4100XC-10 demonstrates superior power when ripping thick hardwoods. Its 4HP motor maintains speed through 8/4 oak without hesitation. The larger table surface provides better control during these demanding cuts.
Cross-Cutting Performance
Both saws handle crosscuts adequately, though neither matches a sliding compound miter saw’s precision. The Bosch’s larger table and included outfeed support excel here. Its gravity-rise stand positions the table at comfortable working height.
The Dewalt’s miter gauge disappoints many users, suffering from excessive play. Aftermarket replacements like Incra or Kreg models transform crosscutting accuracy. The Bosch gauge performs marginally better but still benefits from upgrading.
Build Quality and Durability Assessment
Long-term reliability separates professional tools from homeowner models. Both manufacturers engineered these saws for job site abuse.
Construction Materials and Design
The Bosch 4100XC-10 uses cast aluminum for critical components, balancing weight and strength effectively. The table remains flat after years of use, resisting warpage from temperature changes. All adjustment mechanisms use metal gearing rather than plastic.
Dewalt constructs the DWE7491RS with heavy-gauge steel throughout. This adds weight but ensures decades of reliable service. The powder-coated finish resists scratches and corrosion better than painted alternatives.
Component Quality Analysis
Both saws feature industrial-grade bearings and arbor assemblies. The Dewalt’s higher RPM design required upgraded bearings, which should outlast the motor. Bosch includes dual capacitors for reliable starting under load.
Switch quality favors Dewalt’s sealed design, preventing sawdust infiltration. The Bosch switch, while functional, may require cleaning after extended use. Both manufacturers offer comprehensive parts availability for repairs.
Price and Value Proposition
Investment in quality tools requires careful consideration of long-term value beyond initial purchase price.
Initial Cost Comparison
The Dewalt DWE7491RS typically costs $50-100 more than the Bosch 4100XC-10. This premium reflects the superior fence system and greater rip capacity. Both saws frequently appear in promotional bundles with stands included.
Consider total ownership costs including blades, accessories, and potential repairs. Both manufacturers support their products with multi-year warranties. Dewalt offers a 90-day money-back guarantee, demonstrating confidence in their design.
Long-Term Value Analysis
Professional contractors often recoup the Dewalt’s higher price through increased productivity. The time saved adjusting the fence and handling large materials adds up quickly. The fence system alone justifies the premium for cabinet shops.
The Bosch provides exceptional value for contractors prioritizing portability. Its lower weight reduces vehicle wear and worker fatigue. The quicker setup time means more billable hours on site rather than equipment deployment.
User Experience and Ergonomics
Daily comfort and ease of use significantly impact job satisfaction and productivity. These saws approach ergonomics differently.
Control Placement and Accessibility
The Dewalt positions all primary controls within easy reach from the operator position. Fence adjustments, blade height, and bevel controls require minimal movement. The paddle switch location feels natural during operation.
Bosch scattered controls slightly more, though still maintaining good accessibility. The blade height wheel’s position requires reaching across the table occasionally. However, the soft-start feature reduces startup torque, improving control.
Noise and Vibration Levels
The Bosch 4100XC-10’s soft-start circuitry and lower RPM produce noticeably less noise. Extended use proves less fatiguing compared to the Dewalt’s higher-pitched whine. Both saws benefit from quality ear protection regardless.
Vibration dampening favors the heavier Dewalt when properly set up. Its four-point stance absorbs cutting forces effectively. The Bosch’s two-wheel design transmits more vibration through the frame during heavy cuts.
Maintenance Requirements
Understanding maintenance needs helps budget time and resources appropriately. Both saws require regular attention for optimal performance.
Routine Maintenance Tasks
Clean the blade elevation and bevel mechanisms monthly to prevent binding. Both saws accumulate sawdust in these areas despite dust collection efforts. The Dewalt’s sealed bearing design requires less frequent lubrication.
Check fence alignment quarterly using a reliable square. The Bosch may need minor adjustments over time, while the Dewalt typically maintains settings longer. Both manufacturers provide detailed adjustment procedures in their manuals.
Common Issues and Solutions
The Bosch 4100XC-10 occasionally develops play in the blade elevation mechanism. Tightening the worm gear assembly usually resolves this issue. Some users report the soft-start capacitor failing after several years.
Dewalt DWE7491RS owners sometimes experience fence binding due to sawdust accumulation. Regular cleaning with compressed air prevents this problem. The higher RPM motor may require brush replacement sooner than the Bosch.
Best Use Cases for Each Saw
Matching the tool to your specific needs ensures satisfaction and productivity. Each saw excels in different scenarios.
When to Choose the Bosch 4100XC-10?
Select the Bosch for frequent job site moves where setup speed matters. Residential contractors appreciate the lighter weight when navigating stairs. The superior power handling makes it ideal for hardwood flooring installers.
Small shop owners benefit from the Bosch’s compact storage footprint. The gravity-rise stand folds more compactly than the Dewalt’s four-leg design. Weekend warriors find the price point and features perfectly balanced.
When to Choose the Dewalt DWE7491RS?
The Dewalt becomes essential when regularly processing sheet goods. Cabinet makers and finish carpenters need the extended rip capacity daily. The superior fence system saves hours of adjustment time over the saw’s lifetime.
Professional framers appreciate the rock-solid stability when cutting treated lumber. The left-side capacity handles panel saw duties adequately. High-volume shops benefit from the fence system’s repeatability.
Common Mistakes to Avoid
Learning from others’ experiences prevents costly errors and frustration. Avoid these common mistakes when purchasing and using either saw.
Purchase Decision Pitfalls
Don’t assume higher RPM always means better performance – the Bosch’s torque often matters more. Avoid choosing based solely on rip capacity if you rarely cut wide materials. Consider your vehicle’s capacity before selecting the heavier Dewalt.
Skipping the stand to save money usually backfires. Both saws perform best with their designed stands. Aftermarket options rarely match the convenience and stability of factory stands.
Setup and Usage Errors
Never operate without proper dust collection – both motors suffer from sawdust infiltration. Avoid over-tightening the blade, which stresses the arbor assembly. Check blade alignment after transport, as vibration can affect settings.
Don’t neglect the owner’s manual setup procedures. Both saws require careful initial alignment for optimal performance. Skipping these steps leads to accuracy problems and premature wear.
Professional Tips and Tricks
Maximize your investment with these insider techniques developed by experienced users.
Performance Enhancement Strategies
Upgrade to a quality combination blade immediately – stock blades disappoint on both saws. Thin-kerf blades reduce motor strain and improve cut quality. Consider dedicated rip and crosscut blades for best results.
Add aftermarket zero-clearance inserts to reduce tear-out. Both saws accept shop-made inserts easily. Create multiple inserts for different blade angles and dado sets.
Workshop Integration Ideas
Mount a router table in the extension wing for space-saving versatility. Both saws’ sturdy frames support this modification well. Add auxiliary fences for repetitive cuts without disturbing the main fence setting.
Install aftermarket dust collection upgrades for cleaner operation. The Dewalt’s dust port accepts standard 2.5-inch hoses directly. The Bosch may require an adapter but achieves better collection with modifications.
Frequently Asked Questions
Can either saw handle dado blade sets?
Both saws accept standard 8-inch dado sets up to 13/16-inch width. The Dewalt explicitly supports dado operations, while Bosch recommends checking arbor length. Most users report success with both saws using quality dado sets.
Which saw works better with aftermarket accessories?
The Dewalt’s standard miter slots accept more aftermarket sleds and jigs. The Bosch uses slightly non-standard dimensions, requiring modification of some accessories. Both accept standard 10-inch blades without issues.
How do these saws compare to SawStop models?
Neither includes flesh-sensing technology like SawStop. However, both cost significantly less while providing professional-grade performance. Users prioritizing safety above all else should consider SawStop’s unique protection.
Can I run either saw on a standard 15-amp circuit?
Yes, both saws operate on standard 120V, 15-amp household circuits. However, dedicated circuits prevent nuisance breaker trips during startup. Avoid extension cords under 12-gauge for best performance.
Which saw handles wet or pressure-treated lumber better?
The Bosch’s higher torque motor excels with wet lumber. Its lower RPM reduces blade binding in resinous woods. Both saws require frequent blade cleaning when cutting treated materials.
Do these saws require 220V power for optimal performance?
No, both saws are designed specifically for 120V operation. Unlike cabinet saws, they achieve full rated power on standard circuits. This portability makes them ideal for job site use.
How long do the motors typically last?
With proper maintenance, expect 5-10 years of professional use. The Bosch’s lower RPM design may extend motor life slightly. Both manufacturers offer replacement motors if needed.
Which fence system stays accurate longer?
The Dewalt’s rack-and-pinion mechanism maintains accuracy better over time. Its mechanical design resists wear compared to friction-based systems. Users report minimal adjustment needs after years of service.
Final Verdict: Making Your Choice
Both the Bosch 4100XC-10 and Dewalt DWE7491RS represent excellent investments in professional-grade equipment. Your specific needs should drive the final decision.
Choose the Dewalt DWE7491RS if you prioritize cutting capacity, fence precision, and stability. Cabinet makers, finish carpenters, and high-volume shops benefit most from its features. The superior fence system alone justifies the premium for many professionals.
Select the Bosch 4100XC-10 when portability and power matter most. Contractors moving between sites daily appreciate the weight savings and instant setup. The exceptional motor torque handles demanding materials that would challenge the Dewalt.
Take Action Today
Ready to upgrade your workshop with professional-grade precision? Both saws transform woodworking capabilities when matched to appropriate needs. Consider your typical projects, workspace constraints, and mobility requirements.
Invest in the right tool today – your future projects will thank you. Whether you choose Bosch or Dewalt, either saw provides years of reliable service when properly maintained. Stop compromising with inadequate equipment and experience the difference professional tools make.Remember to explore FyPower’s maintenance guides to keep all your power equipment running smoothly. For additional woodworking insights and table saw expertise, Family Handyman’s expert reviews offer valuable perspectives from seasoned professionals.
Picture this: You’ve spent hours preparing the perfect 3D model, your printer is calibrated, and you hit print. Hours later, you return to find a tangled mess of filament instead of your masterpiece. Sound familiar?
Poor bed adhesion is the silent killer of 3D prints, wasting both time and precious filament. But here’s the good news: choosing the right adhesion method can transform your success rate from frustrating to fantastic.
The difference between rafts, brims, and skirts is simple: rafts create a full platform beneath your print, brims extend only from the edges, and skirts don’t touch the print at all. Each serves a unique purpose in ensuring perfect first layers.
This guide will save you filament, reduce failures, and help you achieve professional results every time. We’ll explore detailed definitions, head-to-head comparisons, optimal settings for each method, and troubleshooting tips that actually work.
Quick Answer: What’s the Difference Between Raft, Brim, and Skirt?
30-Second Summary
Need answers fast? Here’s everything you need to know about brim vs raft 3d printing methods:
Feature
Raft
Brim
Skirt
Contact with Print
Full base coverage
Edge contact only
No contact
Layers
3-6 layers
1 layer
1-3 layers
Adhesion Strength
Maximum
Moderate
None (indirect)
Filament Usage
High (+30%)
Medium
Minimal
Removal Difficulty
Moderate
Easy
N/A
Best For
Warping materials, small bases
Corner lifting, medium adhesion
Nozzle priming, bed checking
Key Differences at a Glance
The difference between skirt and brim comes down to contact. Brims physically attach to your print’s first layer, expanding its footprint. Skirts maintain a set brim distance between the print and themselves, typically 3-5mm.
Rafts take adhesion to the extreme by creating a thick foundation that covers the entire print base. This multi-layer approach provides maximum stability but requires careful separation distance calibration.
Each method excels in specific scenarios. Understanding these differences means fewer failed prints and optimized material usage.
Which Should You Choose? (Decision Tree)
Follow this simple decision process:
Is your print material prone to warping? (ABS, Nylon)
Yes → Use a RAFT
No → Continue to #2
Does your print have a small footprint or tall profile?
Yes → Use a RAFT
No → Continue to #3
Are you experiencing corner lifting with current prints?
Yes → Use a BRIM
No → Continue to #4
Is bed adhesion generally good?
Yes → Use a SKIRT
No → Use a BRIM
What is a Raft in 3D Printing?
How Rafts Work: The Complete Platform Solution
A raft is essentially a disposable foundation for your 3D print. Think of it as building a house on a concrete slab rather than directly on soil. This thick, multi-layer platform adheres strongly to the build plate while providing a stable base for your actual print.
The brim vs raft pattern difference is significant. While brims create a thin perimeter extension, rafts build upward with multiple layers. This creates a buffer zone between your print and any bed imperfections.
Rafts excel when printing with challenging materials or dealing with less-than-perfect print surfaces. They compensate for minor bed leveling issues and provide consistent first-layer quality.
Anatomy of a 3D Printing Raft
Understanding raft structure helps optimize your settings:
Base Layers (2-3 layers):
Printed slowly with thick layer heights (0.3-0.4mm)
Maximum bed contact for strong adhesion
Often printed at higher temperatures
Interface Layers (1-2 layers):
Bridge between base and top layers
Moderate speed and layer height
Creates the separation gap for easy removal
Top Layers (2-3 layers):
Smooth surface for print adhesion
Normal layer height matching your print
Determines bottom surface quality
Why Rafts Use 30% More Filament (But When It’s Worth It)
The extra material investment in rafts pays dividends in specific situations. Yes, you’ll use approximately 30% more filament compared to skirts vs brims, but consider the alternative: a failed 10-hour print wastes far more.
Rafts are worth the extra filament when:
Printing with ABS or other warp-prone materials
Working with perforated or textured build surfaces
Creating tall, narrow objects prone to toppling
Dealing with persistent adhesion failures
The key is using rafts strategically, not as a default for every print.
What is a Brim in 3D Printing?
Understanding Brims: Your First Layer’s Best Friend
A brim is a single-layer skirt that actually touches your print. Imagine the brim of a hat extending outward from the crown – that’s exactly what a 3D printing brim does for your model’s base.
Unlike the difference between skirt and raft options, brims strike a perfect balance. They increase the first layer’s surface area without adding significant height or complexity. This makes them ideal for prints that need just a bit more grip.
Brims typically extend 3-8mm from your print’s edge, though this is highly customizable. The wider the brim, the stronger the adhesion, but also the more post-processing required.
Brim vs Raft Pattern: The Key Structural Differences
The structural difference between brims and rafts impacts both function and removal:
Brim Structure:
Single layer only (matches first layer height)
Extends horizontally from print edges
No vertical separation from print
Connected via perimeter lines
Raft Structure:
Multiple layers (5-6 typical)
Extends under entire print base
Includes engineered separation gap
Grid or linear infill pattern
This fundamental difference means brims are easier to remove but provide less dramatic adhesion improvement than rafts.
Inner vs Outer Brims: Which Type Do You Need?
Most users only know about outer brims, but inner brims serve specific purposes:
Outer Brims:
Standard brim type
Extends outward from print
Best for general adhesion improvement
Easy to remove with minimal scarring
Inner Brims:
Fill holes within the print’s first layer
Useful for prints with large internal gaps
Prevent curling in hollow sections
More challenging to remove completely
Some slicers like PrusaSlicer offer both options, letting you customize based on your model’s geometry.
What is a Skirt in 3D Printing?
The Multi-Purpose Skirt: More Than Just a Line
Despite being the simplest bed adhesion option, skirts serve multiple critical functions. A skirt is one or more loops of filament printed around your model without making contact – think of it as a practice run for your printer.
The primary purpose isn’t adhesion at all. Instead, skirts prime your nozzle, establish consistent flow, and give you a chance to spot problems before they affect your actual print.
Many beginners overlook skirts, but experienced makers know they’re invaluable for print preparation and diagnostics.
Skirts vs Brims: Why Distance Matters
The difference between a skirt and brim boils down to one parameter: offset distance. Set this to zero, and your skirt becomes a brim. Increase it to 3-5mm, and you have a traditional skirt.
This distance serves several purposes:
Prevents accidental adhesion to the model
Creates space for nozzle cleaning
Allows for thermal expansion without contact
Provides room for ooze collection
Standard skirt offset is 3mm, but increase this for larger nozzles or materials prone to stringing.
Advanced Skirt Functions: Draft Shields and Ooze Shields
Skirts can do more than just prime your nozzle:
Draft Shield Mode:
Print skirt as tall as your object
Creates a thermal barrier around the print
Essential for ABS in open-air printers
Reduces warping from air currents
Ooze Shield Mode:
Used with dual-extruder printers
Catches material from inactive nozzle
Prevents color contamination
Maintains clean print surfaces
These advanced applications transform the humble skirt into a powerful printing tool.
When to Use Each Adhesion Method: A Practical Guide
Material-Specific Recommendations
Different materials have vastly different adhesion requirements:
High-Warp Materials (Use RAFT):
ABS: Almost always needs a raft
Nylon: Raft essential for stability
PC (Polycarbonate): Maximum adhesion required
Medium-Adhesion Materials (Use BRIM):
PETG: Brim prevents corner lifting
ASA: Similar to ABS but brim often sufficient
TPU: Brim helps with flexible material challenges
Easy-Adhesion Materials (Use SKIRT):
PLA: Usually only needs skirt
PLA+: Good bed adhesion naturally
SILK filaments: Skirt for priming only
Print Geometry Considerations
Your model’s shape dramatically impacts adhesion needs:
Small Footprints (<20mm²):
Always use raft for stability
Tall objects especially vulnerable
Consider increasing raft margin
Large Flat Surfaces:
Brim usually sufficient
Watch for corner lifting
5-10 brim lines recommended
Complex First Layers:
Multiple small contact points need rafts
Intricate designs benefit from full support
Text or fine details print better on rafts
Printer and Bed Condition Factors
Your hardware setup influences adhesion choices:
Textured/PEI Beds:
Generally need less adhesion help
Skirts often sufficient for PLA
Brims for challenging materials
Glass Beds:
Smooth surface may need more help
Brims standard for most prints
Rafts for problematic materials
Damaged/Uneven Beds:
Rafts compensate for imperfections
Avoid relying on skirts alone
Consider bed replacement long-term
Optimal Settings for Rafts, Brims, and Skirts
Raft Settings Explained
Master these critical raft parameters for perfect results:
Separation Distance (Z Gap):
Default: 0.1mm
Increase for easier removal (0.15-0.2mm)
Decrease for better adhesion (0.05-0.08mm)
Adjust based on material properties
Layer Configuration:
Base layers: 2-3 (more for uneven beds)
Top layers: 2-3 (more for smoother bottom surface)
Base layer height: 0.3-0.4mm
Top layer height: Match print layer height
Print Speeds:
Base layer: 15-20mm/s (slow for adhesion)
Interface layers: 25-30mm/s
Top layers: Match first layer speed
Never exceed 50% of normal print speed
Brim Configuration Guide
Optimize your brim settings for reliable adhesion:
Brim Line Count:
Minimum: 3-5 lines for small prints
Standard: 5-10 lines for medium adhesion
Maximum: 15-20 lines for challenging prints
Each line adds ~0.4mm width (with 0.4mm nozzle)
Brim Width Calculation:
Formula: Line Count × Nozzle Diameter
Example: 10 lines × 0.4mm = 4mm brim
Adjust based on bed adhesion quality
Special Parameters:
Brim offset: 0mm (touching) to 0.1mm (slight gap)
Interior brim: Enable for hollow prints
Brim layer height: Always match first layer
Skirt Parameters for Different Uses
Configure skirts based on intended function:
Basic Priming Setup:
Loops: 2-3
Distance: 3-5mm from object
Height: 1 layer
Minimum extrusion: 5-10mm
Draft Shield Configuration:
Loops: 1-2
Distance: 5-10mm
Height: Match object height
Speed: Normal print speed
Diagnostic Settings:
Loops: 3-5 (more for bed leveling checks)
Distance: 10-15mm (easier observation)
Height: 1 layer
Speed: Slow (50% first layer speed)
Slicer-Specific Settings
Each slicer implements these features slightly differently:
Material-Saving Techniques Without Sacrificing Quality
Optimize adhesion with minimal waste:
Smart Raft Design:
Reduce margin to 2-3mm
Fewer base layers for good beds
Increase separation slightly
Efficient Brim Usage:
Variable width based on geometry
Skip brim on well-adhering sections
Use interior brim only when needed
Skirt Optimization:
Single loop for simple priming
Reduce distance to 2mm
One layer unless draft shield needed
Cost Analysis: Filament Usage and Time Comparison
Real Numbers: How Much Extra Filament Does Each Method Use?
Let’s break down actual costs for a 50mm cube print:
Adhesion Type
Extra Filament
Cost (@ $20/kg)
% Increase
Skirt (3 loops)
0.5g
$0.01
2%
Brim (8mm)
2.5g
$0.05
10%
Raft (standard)
7.5g
$0.15
30%
For a typical 100g print, raft adds $3 in material costs. Compare this to reprinting after failure!
Time Investment: Print Duration Differences
Time impacts are often overlooked:
Additional Print Time:
Skirt: 1-2 minutes
Brim: 5-10 minutes
Raft: 15-30 minutes
Removal Time:
Skirt: 0 minutes (no removal)
Brim: 2-5 minutes
Raft: 5-15 minutes
Factor both into your workflow planning.
ROI Calculator: Failed Prints vs. Adhesion Aid Costs
Simple math reveals the truth:
Failure Cost Calculation:
Average print: 50g filament ($1)
Print time: 4 hours
Electricity: $0.50
Total loss per failure: $1.50 + time
Break-even Analysis:
Raft cost: $0.15
Prevents failure rate: 20% → 5%
ROI: 10 rafts = 3 prevented failures
Net savings: Significant
Frequently Asked Questions
Can I use a raft and brim together?
Technically possible but rarely beneficial. Rafts already provide maximum adhesion, making brims redundant. The only exception might be experimental materials with extreme warping tendencies.
Most slicers won’t allow both simultaneously anyway. Choose the stronger option (raft) when in doubt.
Why does my raft fuse to the print?
Fusion occurs when separation distance is too small. Common causes include:
Z-gap set below 0.1mm
Printing temperature too high
First layer over-squished
Material prone to strong layer adhesion
Increase separation distance by 0.05mm and reduce print temperature by 5°C.
What’s the difference between skirt and brim distance settings?
The settings control the same parameter – offset from the model. The difference between them is that:
Skirt distance: Typically 2-10mm (no contact intended)
Brim distance: Always 0mm (must touch model)
Some slicers call this “offset” or “gap” instead of distance.
Do resin printers use rafts, brims, or skirts?
Resin printing uses different adhesion methods entirely. Instead of these FDM techniques, resin printers use:
Supports (similar function to rafts)
Burn-in layers (extra exposure for adhesion)
Lift speed adjustments
The concepts don’t translate directly between technologies.
How do I know if I need bed adhesion help?
Watch for these warning signs:
Corners lifting during printing
First layer not sticking uniformly
Prints detaching mid-print
Inconsistent first layer width
Previous failures with similar geometry
When in doubt, start with a brim – it’s the best balance of effectiveness and efficiency.
Conclusion
Mastering the difference between rafts, brims, and skirts transforms your 3D printing success rate. Each method serves a unique purpose: rafts provide bombproof adhesion for challenging prints, brims offer balanced support with easy removal, and skirts handle priming and diagnostics.
The key to success lies in matching the method to your specific situation. Consider your material, geometry, and printer setup when choosing. Remember that using extra filament for adhesion is always cheaper than reprinting failed projects.
Start with these recommended settings, then fine-tune based on your results. Every printer is slightly different, and experience will teach you when to use each technique.
Your next print deserves the right foundation. Choose wisely, print confidently, and enjoy consistent first-layer perfection. The difference between frustration and success is often just a matter of selecting the right bed adhesion method.