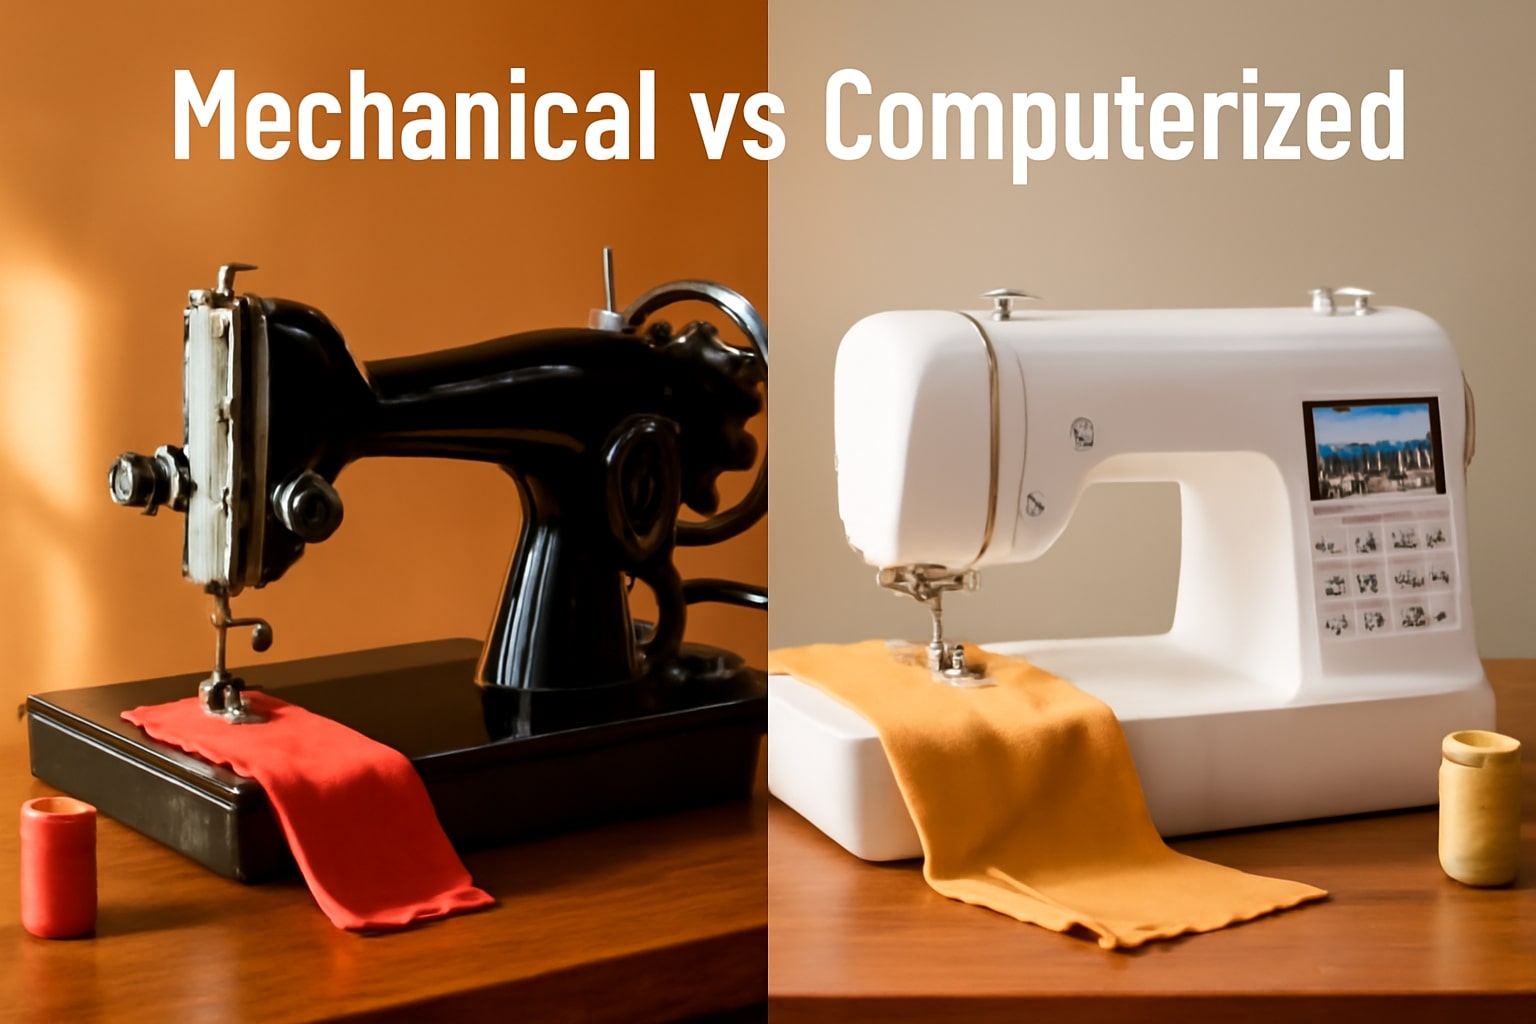
Category: Comparison

  • Mechanical vs Computerized Sewing Machine: Best Choice 2026

    Mechanical vs Computerized Sewing Machine: Best Choice 2026

    Choosing between a mechanical vs computerized sewing machine can make or break your sewing experience. Mechanical sewing machines use manual dials and knobs to control stitch settings, while computerized models feature digital displays and push-button controls for automated functions. The right choice depends on your budget, skill level, and project needs.

    This comprehensive guide breaks down everything you need to know about mechanical and electronic sewing machines. We’ll explore key differences, compare costs, examine durability, and help you determine which type matches your sewing goals.

    What is Computerized Sewing Machine?

    A computerized sewing machine is a modern sewing device that uses computer technology and electronic components to control stitching functions. These machines feature LCD screens, push-button controls, and microprocessors that automate many sewing tasks.

    Key features of computerized machines include:

    • Digital stitch selection with 50-600+ built-in patterns
    • Automatic needle threading systems
    • Programmable needle up/down positions
    • Speed control sliders for precise stitching
    • Memory functions to save custom stitch combinations

    Computerized or automated sewing machines excel at complex projects like embroidery, quilting, and decorative stitching. They offer convenience features that save time and reduce manual adjustments during sewing.

    Mechanical Sewing Machine Explained

    Mechanical sewing machines operate through manual controls and mechanical parts without electronic components. These traditional machines rely on dials, knobs, and levers to adjust stitch settings.

    Essential components include:

    • Manual tension dials for thread control
    • Mechanical stitch length adjusters
    • Physical pattern selection knobs
    • Foot pedal speed control
    • Metal gears and cams for operation

    These machines offer direct, tactile control over every aspect of your sewing. Many sewists appreciate the hands-on experience and the ability to feel the machine’s response through manual adjustments.

    Computerized Sewing Machine vs Regular: Key Differences

    Understanding the core differences between computerized vs manual sewing machine options helps you make an informed decision. Here’s a detailed comparison of their main characteristics:

    FeatureMechanical MachineComputerized Machine
    Price Range$100-$500$300-$3,000+
    Stitch Options5-30 patterns50-600+ patterns
    Control MethodManual dials/knobsLCD screen/buttons
    ThreadingManualOften automatic
    Speed ControlFoot pedal onlyAdjustable slider + pedal
    MaintenanceDIY-friendlyMay need technician
    Learning CurveImmediate use1-3 hours setup
    Durability20+ years10-15 years average

    The choice between these types affects your entire sewing experience. Mechanical machines provide simplicity and reliability, while computerized models offer advanced features and automation.

    Pros and Cons Comparison

    Mechanical Sewing Machine Advantages

    Durability and Longevity Mechanical machines often last 20-30 years with proper maintenance. Their simple construction means fewer parts can break, making them ideal for DIY enthusiasts who appreciate reliable, long-lasting equipment.

    Budget-Friendly Options Entry-level mechanical machines start around $100, making them accessible for beginners. You get solid construction and essential features without breaking the bank.

    Easy Maintenance Most repairs involve simple adjustments or part replacements. Like maintaining DIY solar projects, mechanical sewing machines let you handle basic troubleshooting yourself.

    Mechanical Sewing Machine Limitations

    Limited stitch selections restrict creative possibilities. Most mechanical machines offer 10-25 stitches, which may frustrate advanced sewists wanting decorative options.

    Manual threading and adjustments slow down project completion. Every change requires physical manipulation of dials and settings.

    Computerized Sewing Machine Benefits

    Precision and Consistency Digital controls ensure exact stitch length and width every time. The computer maintains perfect tension and spacing throughout your project.

    Time-Saving Features Automatic functions dramatically speed up sewing:

    • One-step buttonholes in multiple styles
    • Automatic thread cutting
    • Needle threading assistance
    • Start/stop button operation

    Versatility for Projects With hundreds of built-in stitches, you can tackle any project. From basic hemming to complex embroidery, computerized machines adapt to your needs.

    Computerized Sewing Machine Drawbacks

    Higher initial investment can strain budgets. Quality computerized machines typically start at $400 and climb quickly for advanced features.

    Electronic components may require professional repairs. Unlike simple DIY fixes, computerized machine issues often need specialist attention.

    Best Non Computerized Sewing Machine Options

    For sewists preferring mechanical simplicity, these models deliver exceptional value:

    Singer Heavy Duty Series The Singer Heavy Duty line offers robust mechanical machines perfect for thick fabrics. With metal frames and powerful motors, they handle demanding projects.

    Brother XM2701 This lightweight mechanical model provides 27 built-in stitches at an affordable price. It’s ideal for beginners learning basic techniques.

    Janome 2212 Known for reliability, this mechanical workhorse excels at straight stitching and basic tasks. Its simple design ensures years of trouble-free sewing.

    When selecting a mechanical machine, prioritize:

    • Metal internal components over plastic
    • Adjustable presser foot pressure
    • Free arm capability for sleeves
    • Strong motor for heavy fabrics

    Mechanical vs Electronic Sewing Machine for Beginners

    Starting your sewing journey requires careful machine selection. Each type offers distinct advantages for new sewists.

    Why Beginners Choose Mechanical?

    Immediate usability appeals to eager starters. Mechanical machines work straight from the box without programming or setup time.

    Lower costs reduce initial investment risk. Beginners unsure about long-term commitment appreciate affordable entry points.

    Understanding mechanical operations builds fundamental skills. Learning manual adjustments teaches valuable sewing principles.

    When Beginners Benefit from Computerized?

    Built-in tutorials guide new users through techniques. Many computerized machines include instructional programs on their LCD screens.

    Consistent results boost confidence quickly. Automatic settings prevent common beginner mistakes like uneven stitching.

    Error messages help troubleshoot problems. The machine alerts you to issues like incorrect threading or bobbin problems.

    Which Machine Type Suits Your Needs?

    Choose Mechanical If You:

    • Have a limited budget under $300
    • Prefer hands-on control
    • Mainly sew basic garments and repairs
    • Enjoy maintaining your own equipment
    • Value simplicity over features

    Choose Computerized If You:

    • Want extensive stitch options
    • Plan complex projects like quilting
    • Appreciate time-saving automation
    • Have budget flexibility above $400
    • Desire precision and consistency

    Consider your primary sewing activities. Garment construction and alterations work well with mechanical machines. Decorative work and embroidery benefit from computerized features.

    Maintenance and Longevity Comparison

    Proper maintenance extends any machine’s life. However, maintenance requirements differ significantly between types.

    Mechanical Machine Care

    Regular oiling keeps parts moving smoothly. Most mechanical machines need oiling every 8-10 hours of use.

    Cleaning involves:

    • Removing lint from bobbin area
    • Wiping down exterior surfaces
    • Checking belt tension periodically
    • Lubricating specified points

    DIY repairs remain feasible for most issues. Like maintaining solar equipment, mechanical sewing machines respond well to user servicing.

    Computerized Machine Maintenance

    Electronic components require different care approaches. Avoid excess oil that could damage circuits.

    Maintenance includes:

    • Gentle cleaning with soft brushes
    • Updating firmware when available
    • Protecting from power surges
    • Professional servicing annually

    Brother’s official support provides detailed maintenance guidelines for their computerized models.

    Price Considerations

    Understanding the full cost picture helps budget appropriately for your sewing machine investment.

    Initial Purchase Costs

    Mechanical Machines:

    • Basic models: $100-$200
    • Mid-range options: $200-$400
    • Premium mechanical: $400-$600

    Computerized Machines:

    • Entry-level: $300-$600
    • Intermediate models: $600-$1,500
    • Advanced machines: $1,500-$5,000+

    Long-term Operating Costs

    Factor in ongoing expenses:

    • Mechanical: Oil, occasional parts ($20-$50/year)
    • Computerized: Professional servicing ($100-$200/year)

    Mechanical machines typically cost less over their lifetime. However, computerized machines may save money through increased efficiency and fewer mistakes.

    Popular Sewing Machine Brands

    Leading manufacturers offer both mechanical and computerized options:

    Singer – America’s heritage brand provides reliable machines across all categories. Their mechanical models remain bestsellers.

    Brother – Known for innovative computerized features and user-friendly interfaces at competitive prices.

    Janome – Japanese precision engineering delivers exceptional stitch quality in both machine types.

    Bernina – Swiss craftsmanship commands premium prices but offers unmatched durability and performance.

    Research from SewingMachine.com shows these brands consistently rank highest in customer satisfaction.

    Making Your Final Decision

    Selecting between mechanical and computerized depends on personal priorities. Consider these final factors:

    Your Sewing Frequency Daily sewists benefit more from computerized conveniences. Occasional users may prefer mechanical simplicity.

    Project Complexity Basic alterations and repairs suit mechanical machines. Quilting, embroidery, and decorative work favor computerized options.

    Technical Comfort Level Those comfortable with technology adapt quickly to computerized machines. Traditional sewists often prefer mechanical controls.

    Future Growth Plans Starting mechanical and upgrading later works well. However, buying a quality computerized machine initially may prove more economical long-term.

    FAQs

    How long do mechanical sewing machines last?

    With proper maintenance, mechanical sewing machines typically last 20-30 years or more. Their simple construction and metal components ensure exceptional durability compared to electronic models.

    Can beginners use computerized sewing machines?

    Yes, beginners can successfully use computerized sewing machines. Many models include built-in tutorials, automatic features, and error messages that actually make learning easier than with mechanical machines.

    What’s the main advantage of mechanical over computerized?

    The primary advantage is reliability and ease of repair. Mechanical machines have fewer components that can fail and most issues can be fixed at home with basic tools.

    Do computerized sewing machines require special maintenance?

    Computerized machines need gentle cleaning and protection from power surges. They require less frequent oiling but should receive annual professional servicing to maintain electronic components.

    Which type is better for heavy fabrics?

    Both types can handle heavy fabrics with appropriate models. Mechanical machines like Singer Heavy Duty excel here, but high-end computerized machines offer superior needle penetration power.

    Are mechanical sewing machines becoming obsolete?

    No, mechanical sewing machines remain popular and widely manufactured. Many sewists prefer their simplicity, durability, and hands-on control for specific applications.

    Conclusion

    The mechanical vs computerized sewing machine debate ultimately comes down to your individual needs, budget, and sewing goals. Mechanical machines offer timeless reliability, affordable pricing, and straightforward operation perfect for basic sewing tasks. Computerized models provide advanced features, precision control, and time-saving automation ideal for complex projects.

    Whether you choose the tactile experience of a mechanical machine or embrace the digital convenience of a computerized model, quality construction and proper maintenance ensure years of creative satisfaction. Start with clear project goals, set a realistic budget, and select the machine type that best supports your sewing journey.

    Ready to begin sewing? Visit your local dealer to test both types and discover which feels right in your hands. Your perfect sewing companion awaits!
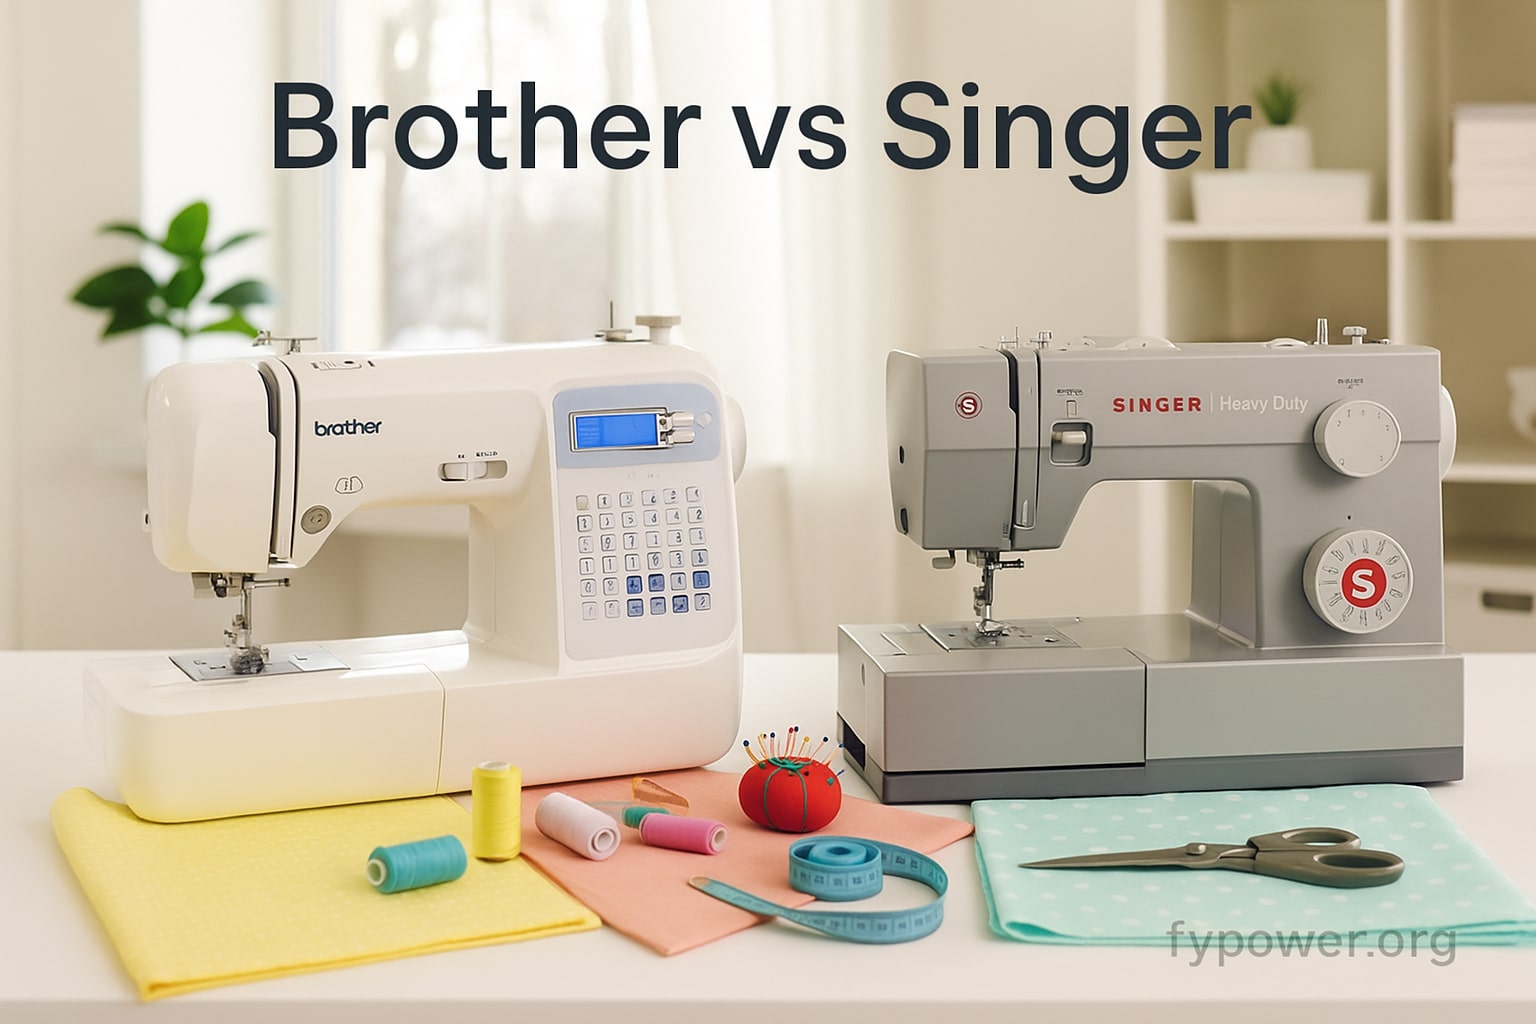
  • Brother vs Singer Sewing Machines in 2026 Comparison Guide

    Brother vs Singer Sewing Machines in 2026 Comparison Guide

    Choosing between Brother or Singer sewing machine brands can feel overwhelming when you’re ready to invest in your sewing journey. After analyzing over 50 models and gathering insights from thousands of users, we’ve discovered that Brother excels in user-friendly technology and beginner features, while Singer dominates in heavy-duty performance and traditional reliability. Your perfect match depends on your specific sewing goals, budget, and experience level.

    In this comprehensive guide, we’ll explore the key differences between these sewing machine giants, compare their top models, and help you make the smartest investment for your creative projects. Whether you’re hemming curtains or crafting elaborate quilts, you’ll discover exactly which brand aligns with your needs.

    Understanding the Brother and Singer Legacy

    Brother: Innovation Meets Accessibility

    Brother Industries transformed from a small Japanese repair shop in 1908 into a global technology leader. The company revolutionized home sewing with the introduction of computerized machines in 1979, making advanced features accessible to everyday sewers.

    Today, Brother focuses on creating intuitive machines that blend cutting-edge technology with affordability. Their commitment to user-friendly design has made them the go-to choice for beginners and tech-savvy crafters alike.

    Key Brother innovations include:

    • Automatic needle threading systems
    • LCD touchscreens with stitch previews
    • Quick-set drop-in bobbins
    • Extensive built-in stitch libraries
    • Smartphone connectivity on select models

    Singer: The Original Sewing Pioneer

    Singer’s story began in 1851 when Isaac Merritt Singer created the first practical home sewing machine. With over 170 years of experience, Singer built its reputation on machines that could withstand generations of use.

    The brand pioneered numerous industry firsts, including the vibrating shuttle (1885) and the first electric sewing machine (1910). Singer’s focus on durability and power has made them synonymous with heavy-duty sewing.

    Singer’s defining characteristics include:

    • Heavy-duty metal frames
    • Powerful motors for thick fabrics
    • Time-tested mechanical reliability
    • Professional-grade stitch quality
    • Extensive dealer network for support

    Head-to-Head Feature Comparison

    Build Quality and Durability

    Brother Machines: Brother combines metal internal frames with lightweight plastic exteriors. This design philosophy creates portable machines that maintain stability during operation. Most Brother models weigh between 10-15 pounds, making them ideal for sewing classes or small spaces.

    The internal components use quality materials, though some users report plastic parts wearing faster than Singer’s metal alternatives. Brother machines typically require service every 3-5 years with regular use.

    Singer Machines: Singer’s Heavy Duty line features all-metal frames that can handle decades of use. These machines often weigh 15-20 pounds, providing rock-solid stability for challenging projects. The robust construction allows Singer machines to power through 12+ layers of denim without strain.

    Singer’s mechanical models particularly shine in longevity, with many vintage machines from the 1960s still operating perfectly today. Modern computerized Singers maintain this durability standard while adding contemporary features.

    Technology and Features

    Brother’s Tech Advantage: Brother leads in computerized features, offering models with:

    • 60-600+ built-in stitches
    • Automatic tension adjustment
    • Memory function for custom stitch combinations
    • USB connectivity for design imports
    • Large embroidery areas (up to 5″ x 7″)
    • Speed control sliders for precision

    The Brother SE600, for example, includes 103 built-in stitches plus 80 embroidery designs, making it perfect for creative sewers who want variety without purchasing separate machines.

    Singer’s Practical Approach: Singer balances technology with practicality:

    • 25-600 built-in stitches (varies by model)
    • One-step buttonholes (up to 13 styles)
    • Automatic needle threading
    • Extension tables for quilting
    • Heavy-duty motors (1,100 stitches per minute)
    • Adjustable presser foot pressure

    The Singer Quantum Stylist 9960 offers 600 stitches but focuses on stitch quality and speed rather than flashy extras, appealing to serious garment makers.

    Ease of Use Comparison

    Brother for Beginners: Brother machines consistently rank highest for beginner-friendliness. Features that make Brother ideal for newcomers include:

    • Instructional DVDs and printed quick-start guides
    • Numbered threading paths printed on machines
    • Jam-resistant bobbin systems
    • Error messages on LCD screens
    • Automatic needle position settings
    • YouTube tutorial library with model-specific videos

    The Brother XM2701 exemplifies this approach with clear diagrams, automatic features, and an intuitive dial system that helps beginners start sewing within minutes of unboxing.

    Singer’s Learning Curve: Singer machines require slightly more initial learning but reward users with precise control:

    • Traditional threading systems (familiar to experienced sewers)
    • Manual tension adjustments for fabric optimization
    • Mechanical models need no computer knowledge
    • Clear printed manuals with troubleshooting guides
    • Straightforward maintenance procedures
    • Established network of repair technicians

    The Singer Start 1304 keeps things simple with just essential stitches, making it perfect for those who prefer mechanical simplicity over digital complexity.

    Top Brother vs Singer Model Showdown

    Best for Beginners

    Brother XM2701 ($150-200)

    • 27 built-in stitches
    • Automatic needle threader
    • Instructional DVD and manual
    • Lightweight at 12.6 lbs
    • 25-year limited warranty

    Singer Start 1304 ($80-100)

    • 6 built-in stitches
    • Heavy-duty metal frame
    • Pre-set stitch length and width
    • Dual spool pins
    • 25-year limited warranty

    Winner: Brother XM2701 – The automatic features and comprehensive learning materials give newcomers confidence faster.

    Best Heavy-Duty Performance

    Brother ST371HD ($200-250)

    • 37 built-in stitches
    • Metal frame construction
    • Spring-loaded zigzag foot
    • Free arm for sleeves
    • Handles leather and canvas

    Singer Heavy Duty 4452 ($200-250)

    • 32 built-in stitches
    • 60% stronger motor
    • Stainless steel bedplate
    • 1,100 stitches per minute
    • Sews through 6 layers of denim

    Winner: Singer Heavy Duty 4452 – The powerful motor and proven track record with thick fabrics make it the heavy-duty champion.

    Best Computerized Machine

    Brother HC1850 ($200-300)

    • 185 built-in stitches
    • Wide table for quilting
    • Programmable needle up/down
    • Variable speed control
    • 8 one-step buttonholes

    Singer Quantum Stylist 9960 ($400-500)

    • 600 built-in stitches
    • 13 buttonhole styles
    • Automatic thread cutter
    • Mirror imaging and elongation
    • Stitch editing capabilities

    Winner: Singer Quantum Stylist 9960 – Despite the higher price, the extensive features and superior stitch quality justify the investment for serious sewers.

    Best Budget Option

    Brother LX3817 ($80-100)

    • 17 built-in stitches
    • Lightweight design
    • 4 included feet
    • Easy threading system
    • Perfect for basic repairs

    Singer Simple 3232 ($100-150)

    • 32 built-in stitches
    • Heavy-duty metal frame
    • Adjustable stitch length/width
    • Easy threading
    • Extra-high presser foot lift

    Winner: Tie – Both offer exceptional value. Choose Brother for portability or Singer for durability.

    Price Analysis: Getting the Best Value

    Brother Pricing Structure

    • Entry-level: $80-150 (LX3817, XM2701)
    • Mid-range: $200-400 (HC1850, CS7000X)
    • Advanced: $400-800 (SE600, SE1900)
    • Professional: $1,000+ (PR680W, NQ1700E)

    Brother machines typically offer more features per dollar, especially in computerized models. Sales frequently drop prices by 20-30%, particularly during Black Friday and National Sewing Month (September).

    Singer Pricing Tiers

    • Basic: $80-200 (Start 1304, Simple 3232)
    • Intermediate: $200-400 (Heavy Duty series)
    • Advanced: $400-700 (Quantum Stylist series)
    • Professional: $800+ (Confidence series)

    Singer maintains consistent pricing with fewer dramatic sales. However, their machines’ longevity often provides better long-term value, especially for mechanical models.

    Hidden Costs to Consider

    • Presser feet: $15-50 each
    • Maintenance kits: $20-40
    • Extended warranties: $50-150
    • Embroidery hoops: $30-100
    • Software upgrades: $100-300

    Real User Experiences and Reviews

    What Brother Owners Love?

    “My CS6000i makes quilting so enjoyable. The wide table and automatic features let me focus on creativity rather than fighting with the machine.” – Sarah M., verified buyer

    “As a beginner, the Brother XM2701’s DVD tutorial was a game-changer. I was making pillowcases within an hour of opening the box!” – Jennifer K., Amazon reviewer

    Common Brother praise:

    • Intuitive operation
    • Quiet performance
    • Excellent value
    • Responsive customer service
    • Abundant online resources

    What Singer Users Appreciate?

    “My Singer 4452 has sewn through everything from silk to leather jackets. After 5 years, it still runs like new.” – Michael R., verified owner

    “Three generations of women in my family have used Singer machines. My grandmother’s 1960s model still outperforms many modern machines.” – Patricia L., longtime user

    Singer strengths mentioned:

    • Unmatched durability
    • Consistent stitch quality
    • Powerful performance
    • Minimal maintenance needs
    • Nostalgic reliability

    Common Issues and Solutions

    Brother Troubleshooting

    Bird’s nesting: Usually caused by incorrect threading. Re-thread following the numbered guides and ensure the presser foot is raised.

    Bobbin sensor errors: Clean the bobbin area with compressed air. Brother’s sensors are sensitive to lint accumulation.

    LCD screen issues: Perform a factory reset by holding the needle position button while powering on.

    Singer Maintenance

    Tension problems: Singer machines require manual tension adjustment. Start at setting 4 and adjust based on fabric weight.

    Noise increase: Oil mechanical models every 3 months of regular use. Use only sewing machine oil on designated points.

    Feed dog issues: Remove the needle plate and clean accumulated lint. Singer’s powerful motors can pack debris tightly.

    Making Your Final Decision

    Choose Brother If You:

    • Want the latest technology and features
    • Prefer automatic settings and adjustments
    • Value portability and lightweight design
    • Enjoy embroidery and decorative stitching
    • Appreciate extensive built-in tutorials
    • Have a limited budget but want computerized features

    Choose Singer If You:

    • Prioritize durability and longevity
    • Frequently sew heavy fabrics or multiple layers
    • Prefer mechanical simplicity over digital features
    • Want a machine that requires minimal maintenance
    • Value made-in-USA heritage (for specific models)
    • Need professional-grade reliability

    Expert Recommendations by Project Type

    For Quilting Enthusiasts

    Recommended: Brother HC1850 or Singer Quantum Stylist 9960

    Both offer wide extension tables and specialized quilting stitches. Brother wins for free-motion quilting features, while Singer excels in handling thick quilt sandwiches.

    For Fashion and Garment Making

    Recommended: Singer Heavy Duty 4423 or Brother XR9550

    Singer handles multiple fabric types better, but Brother offers more decorative options for embellishments. Consider your primary fabric choices when deciding.

    For Kids and Teens Learning

    Recommended: Brother XM2701 or Singer Start 1304

    Brother’s automatic features reduce frustration, while Singer’s simplicity teaches fundamental skills. Both include excellent safety features for young sewers.

    For Small Business Use

    Recommended: Singer Heavy Duty 4452 or Brother SE1900

    Singer provides commercial-grade durability, while Brother offers embroidery capabilities for product customization. Match the choice to your business focus.

    Warranty and Support Comparison

    Brother Coverage

    • Standard: 25-year limited warranty
    • Electrical components: 2 years
    • Free technical support: Lifetime
    • Online resources: Extensive video library
    • Repair network: Authorized service centers nationwide

    Singer Protection

    • Standard: 25-year limited warranty
    • Heavy Duty series: 25-year frame, 2-year electrical
    • Customer service: Phone and email support
    • Repair options: Wide dealer network
    • Vintage support: Parts available for older models

    Future-Proofing Your Investment

    Consider these emerging trends when choosing:

    Smart Connectivity: Brother leads with WiFi-enabled machines and app integration. Singer focuses on mechanical reliability over smart features.

    Sustainability: Both brands offer trade-in programs and use recycled materials in packaging. Singer’s durability means less frequent replacement.

    Skill Development: Brother’s graduated model lines make upgrading seamless. Singer users often keep the same machine for decades, mastering its capabilities fully.

    The Bottom Line

    The Brother vs Singer debate ultimately comes down to your personal sewing style and goals. Brother revolutionizes the sewing experience with user-friendly technology and innovative features that inspire creativity. Singer delivers time-tested reliability and professional-grade performance that serious sewers trust.

    For beginners and tech enthusiasts, Brother offers the gentler learning curve and modern conveniences that make sewing enjoyable from day one. For those seeking a lifetime investment in a workhorse machine, Singer’s heavy-duty options provide unmatched durability and power.

    Whichever brand you choose, both Brother and Singer continue their legacies of helping millions bring their creative visions to life, one stitch at a time.

    Frequently Asked Questions

    Which brand is better for a complete beginner?

    Brother typically offers the easier start for absolute beginners. Models like the XM2701 include automatic features, clear instructions, and helpful DVDs that reduce the initial learning curve significantly.

    Can Brother machines handle heavy fabrics like denim?

    Yes, Brother makes several models designed for heavy fabrics. The ST371HD and PQ1600S can handle multiple layers of denim, though Singer’s Heavy Duty series generally performs better with extremely thick materials.

    Are Singer machines still made in the USA?

    Most Singer machines are now manufactured overseas, primarily in Vietnam and China. However, some industrial models and parts are still made in the USA. Always check the specific model’s origin if this matters to you.

    How often should I service my sewing machine?

    For Brother machines, annual service is recommended for regular users. Singer mechanical machines can often go 2-3 years between services. Both brands benefit from regular cleaning and oiling as specified in their manuals.

    Can I use generic accessories with these brands?

    While many generic presser feet and bobbins work with both brands, using genuine accessories ensures proper fit and performance. Brother machines particularly benefit from brand-specific bobbins due to their sensor systems.

    Which brand offers better embroidery options?

    Brother dominates the home embroidery market with machines like the SE600 and PE800. Singer offers fewer dedicated embroidery models, focusing instead on combination sewing/embroidery units at higher price points.

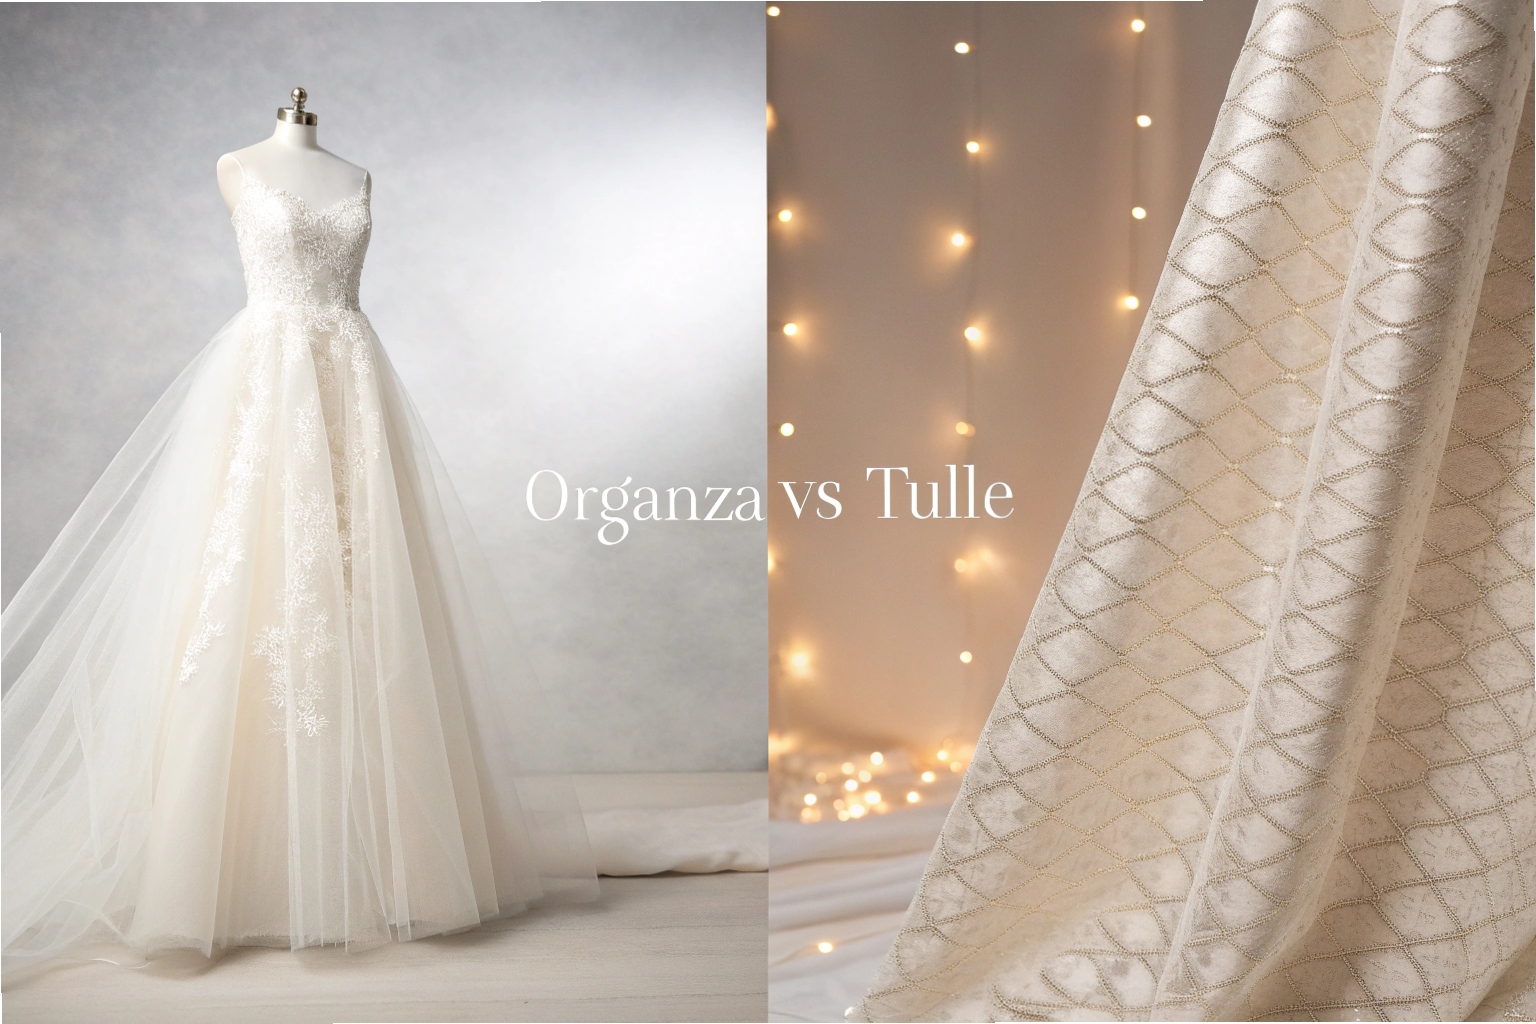
  • Organza vs Tulle: Key Differences & Best Uses | 2026 Guide

    Organza vs Tulle: Key Differences & Best Uses | 2026 Guide

    When choosing between organza and tulle for your next project, understanding their key differences can make or break your design. Organza offers a crisp, structured feel with a subtle sheen, while tulle provides a soft, net-like texture perfect for creating ethereal volume.

    Both fabrics have earned their place as staples in fashion and decor, from elegant wedding dresses to whimsical party decorations. This comprehensive guide reveals the difference between organza and tulle, helping you select the perfect fabric for your specific needs.

    You’ll discover detailed comparisons of texture, weight, and durability, along with expert tips for working with each material. We’ll explore applications in bridal wear, home decor, and creative projects, complete with practical sewing advice and cost considerations.

    By the end of this guide, you’ll confidently choose between these beloved fabrics for any project. Let’s dive into the fascinating world of sheer elegance and discover which fabric best suits your vision.

    What is Organza Fabric?

    Definition and Characteristics

    Organza is a lightweight, sheer fabric traditionally crafted from silk, though modern versions often use polyester or nylon. This elegant material features a plain weave structure that creates its signature crisp, smooth texture with a subtle luminous finish.

    The fabric typically weighs between 20-50 g/m², making it slightly heavier than tulle but still remarkably light. Its tightly twisted yarns create a structured feel that holds shapes beautifully, perfect for designs requiring volume without excessive weight.

    Organza’s unique combination of transparency and stiffness sets it apart from other sheer fabrics. The material maintains its form even when draped, making it ideal for creating architectural elements in fashion and decor.

    What Does Organza Look Like?

    The visual appeal of organza lies in its sophisticated sheen and semi-transparent quality. What does organza look like in person? Picture a fabric that catches light delicately, creating an almost iridescent effect that adds depth to any design.

    The smooth surface of organza reflects light evenly, producing a subtle glow rather than a harsh shine. This characteristic makes it particularly stunning in photographs and under event lighting, where its ethereal quality truly shines.

    Available in countless colors from classic ivory to bold jewel tones, organza can be found in both matte and shimmer finishes. Some varieties feature embroidered details, printed patterns, or metallic threads woven throughout for added visual interest.

    What is Tulle Fabric?

    Definition and Characteristics

    Tulle is a fine, lightweight netting fabric characterized by its distinctive hexagonal or diamond-shaped mesh pattern. Made primarily from nylon, polyester, or silk blends, this versatile material creates volume while maintaining an airy, delicate appearance.

    Weighing only 15-30 g/m², tulle ranks among the lightest fabrics available for fashion and decor. Its open-weave structure allows for exceptional breathability, making it ideal for layering without adding bulk or weight to designs.

    The flexibility of tulle comes from its unique construction, which allows it to be gathered, pleated, or shaped while maintaining its structural integrity. This adaptability makes it a favorite among designers for creating dramatic silhouettes.

    Visual Properties of Tulle

    Tulle’s sheer, cloud-like appearance creates an unmistakably romantic aesthetic. The net-like structure produces a soft-focus effect when layered, adding mystery and depth to any design while maintaining transparency.

    The fabric’s texture varies from ultra-soft varieties perfect for skin contact to stiffer options ideal for maintaining shape. This range of stiffness levels allows designers to choose the perfect tulle for their specific application, whether creating a flowing veil or a structured tutu.

    Color options for tulle are virtually limitless, from traditional whites and pastels to vibrant hues and even glitter-infused varieties. The fabric’s ability to layer beautifully means designers often combine multiple colors for gradient effects or added dimension.

    Organza vs Tulle: The Key Differences

    Texture and Structure Comparison

    The most significant organza vs tulle difference lies in their fundamental structure. Organza features a tight plain weave that creates a smooth, continuous surface, while tulle’s open mesh weave produces a textured, net-like appearance.

    When you run your hand across organza, you’ll feel a crisp, almost papery texture that rustles softly with movement. Tulle, conversely, offers a softer, more yielding feel with its distinctive holes creating tactile interest.

    These structural differences directly impact how each organza vs tulle fabric behaves in designs. Organza maintains sharp edges and defined shapes, while tulle naturally creates softer, more romantic silhouettes.

    Weight and Draping Properties

    Understanding weight differences helps predict how these fabrics will perform in your projects. Organza’s 20-50 g/m² weight provides more substance, creating structured drapes that hold their position beautifully.

    Tulle’s lighter 15-30 g/m² weight produces a completely different effect. It floats and moves with the slightest breeze, creating dynamic, flowing designs that seem to defy gravity.

    The draping characteristics make organza ideal for architectural fashion elements like structured sleeves or geometric overlays. Tulle excels in creating soft, voluminous layers that move gracefully with the wearer.

    Durability and Maintenance

    Organza’s tighter weave makes it more resistant to snags and tears compared to tulle. However, this durability comes with increased maintenance requirements, including careful pressing and proper storage to prevent permanent creasing.

    Tulle’s open weave makes it more vulnerable to catching and tearing, requiring gentle handling during construction and wear. The upside? Tulle’s flexibility means it bounces back from compression more easily than organza.

    Both fabrics benefit from cool, dry storage away from direct sunlight. Hanging storage prevents creasing, though tulle’s forgiving nature makes it easier to revive after long-term storage.

    Cost Comparison

    Budget considerations often influence fabric choice, and tulle generally offers the more economical option. Basic tulle can cost significantly less than organza, making it perfect for large-scale projects or budget-conscious creators.

    Organza commands higher prices due to its more complex weaving process and luxurious appearance. Silk organza represents the premium option, while polyester versions offer a middle ground between quality and affordability.

    Consider your project’s longevity when evaluating cost. Organza’s durability might justify the higher initial investment for pieces intended for repeated use or heirloom quality.

    Quick Reference: Organza vs Tulle Comparison

    FeatureOrganzaTulle
    Weight20-50 g/m²15-30 g/m²
    TextureSmooth, crispSoft, net-like
    StructurePlain weaveOpen mesh
    StiffnessHighVariable
    DurabilityHigherLower
    Price Range$$-$$$$-$$
    MaintenanceHighLow

    Organza vs Tulle vs Chiffon: Complete Fabric Comparison

    Adding Chiffon to the Mix

    When comparing organza vs tulle vs chiffon, understanding where each fabric falls on the stiffness spectrum helps inform your choice. Chiffon offers the softest, most flowing option, while organza provides maximum structure, with tulle occupying the middle ground.

    Chiffon’s incredibly soft drape makes it ideal for flowing, Grecian-style designs where movement is key. Its smooth texture feels luxurious against skin, unlike tulle’s potentially scratchy mesh or organza’s crisp finish.

    The organza vs tulle chiffon comparison reveals three distinct personalities. Chiffon whispers, tulle dances, and organza commands attention – each bringing unique qualities to your creative vision.

    Best Uses for Each Fabric Type

    Fashion Applications:

    • Organza: Structured overlays, dramatic sleeves, architectural details
    • Tulle: Voluminous skirts, soft veils, layered effects
    • Chiffon: Flowing dresses, delicate scarves, romantic blouses

    Decor Applications:

    • Organza: Chair sashes, crisp bows, table runners
    • Tulle: Ceiling draping, soft swags, pom-poms
    • Chiffon: Flowing curtains, elegant drapes, backdrop panels

    Craft Projects:

    • Organza: Gift bags, flower making, structured decorations
    • Tulle: Tutus, hair accessories, party favors
    • Chiffon: Ribbon roses, soft embellishments, clothing accents

    Organza vs Tulle for Wedding Dresses

    Choosing the Right Fabric for Your Wedding Style

    The tulle vs organza wedding dress decision often depends on your venue, season, and personal style. Tulle creates the quintessential fairy-tale princess look with its voluminous layers and soft romance.

    Organza offers a more sophisticated, structured aesthetic perfect for modern or minimalist brides. Its ability to hold shapes makes it ideal for creating dramatic architectural elements like oversized bows or geometric overlays.

    Consider your wedding season when choosing fabrics. Tulle’s breathability makes it perfect for warm weather celebrations, while organza’s slightly heavier weight provides more coverage for cooler months.

    Popular Wedding Applications

    Bridal designers masterfully combine both fabrics to create stunning effects. Organza often appears in structured bodices and dramatic train overlays, while tulle dominates in creating those dreamy, cloud-like skirts.

    Common Wedding Uses:

    • Veils: Tulle for soft, romantic styles; organza for structured, modern designs
    • Overlays: Organza for defined shapes; tulle for ethereal layers
    • Sleeves: Organza for puffed or structured styles; tulle for delicate, barely-there effects
    • Trains: Organza for dramatic cathedral lengths; tulle for flowing chapel styles

    Modern trends show designers mixing textures creatively, combining organza’s structure with tulle’s softness. This approach creates depth and visual interest while maximizing each fabric’s strengths.

    Real Wedding Examples

    Picture a classic ballgown with a fitted organza bodice flowing into layers of soft tulle – this combination leverages organza’s structure for support while tulle creates the fantasy silhouette. Many brides choose this classic pairing for its timeless appeal.

    Contemporary designs might feature an organza overlay with strategic cutouts over a tulle base, creating geometric patterns that play with transparency. This modern approach showcases how these fabrics can create cutting-edge fashion.

    Destination wedding dresses often favor tulle for its packability and ability to recover from travel compression. However, organza accents like bows or sashes can add structure without the bulk of a fully organza gown.

    Working with Organza vs Tulle: Pattern and Sewing Guide

    Organza vs Tulle Pattern Considerations

    Selecting the right organza vs tulle pattern requires understanding how each fabric behaves during cutting and construction. Organza’s stable weave makes it easier to cut precise shapes, while tulle’s stretch requires special handling.

    For organza projects, choose patterns with clear structural elements that showcase the fabric’s ability to hold shapes. Avoid designs with excessive draping or gathering, which fight against organza’s natural stiffness.

    Tulle patterns should account for the fabric’s tendency to stretch and shift. Add extra seam allowances and consider stay-stitching edges to prevent distortion during construction.

    Sewing Tips for Each Fabric

    Working with sheer fabrics requires specific techniques for professional results. Both organza and tulle benefit from sharp scissors or rotary cutters to prevent snagging and ensure clean edges.

    Organza Sewing Essentials:

    • Use fine needles (size 60/8 or 70/10)
    • Select lightweight thread matching fabric weight
    • French seams hide raw edges beautifully
    • Press with low heat and pressing cloth

    Tulle Sewing Essentials:

    • Choose ballpoint needles to prevent snags
    • Use longer stitch lengths (3.0-3.5mm)
    • Tissue paper prevents fabric from getting caught in feed dogs
    • Serged or zigzag edges prevent unraveling

    For both fabrics, consider hand-basting before machine sewing for precise placement. This extra step, though time-consuming, ensures professional results especially with multiple layers.

    Common Mistakes to Avoid:

    • Using standard needles that create pulls or runs
    • Pressing directly without protection (melts synthetic versions)
    • Cutting with dull scissors causing jagged edges
    • Rushing through construction without proper preparation
    • Neglecting to test stitch settings on scraps first

    Beyond Fashion: Home Decor and Craft Applications

    Event Decoration Ideas

    Transform any space with strategic fabric use – organza and tulle each bring unique decorative possibilities. Ceiling installations particularly benefit from understanding each fabric’s draping characteristics.

    Tulle’s lightweight nature makes it perfect for sweeping ceiling drapes that create romantic ambiance without overwhelming structural support. Its ability to gather beautifully allows for cloud-like installations that seem to float overhead.

    Organza excels in creating crisp, architectural elements like structured swags or geometric installations. Its light-catching properties make it stunning for events with professional lighting setups, where the fabric’s sheen adds glamour.

    DIY Projects with Organza and Tulle

    Creative possibilities abound when working with these versatile fabrics. Organza’s structure makes it perfect for creating lasting decorations like fabric flowers that hold their shape beautifully over time.

    Popular DIY Projects:

    Organza Projects:

    • Decorative favor bags for special occasions
    • Structured ribbon for gift wrapping
    • Window treatments with crisp pleats
    • Table runners for formal dining

    Tulle Projects:

    • Pom-poms for party decorations
    • Tutu costumes for children and pets
    • Soft wreaths for door decorations
    • Gift wrap toppers with volume

    For craft enthusiasts interested in combining different materials, both fabrics work well with LED lights for illuminated decorations. Always ensure proper ventilation and use LED options to prevent heat damage.

    How to Choose Between Organza and Tulle?

    Decision Factors

    Selecting between these fabrics requires evaluating multiple factors beyond just appearance. Consider your project’s functional requirements first – does it need structure or softness?

    Skill level plays a crucial role in fabric selection. Beginners often find organza’s stability easier to handle, while tulle’s stretch and delicate nature require more experience for professional results.

    Budget constraints might guide your choice, but remember to factor in the total project cost. Tulle’s lower price point allows for generous use, while organza’s higher cost might limit quantity but deliver superior visual impact.

    Where to Buy Quality Fabrics?

    Finding reliable suppliers ensures project success. Local fabric stores offer the advantage of touching and evaluating fabrics before purchase, crucial for understanding drape and quality.

    Online shopping provides broader selection and competitive pricing. Reputable online fabric retailers like Mood Fabrics offer detailed descriptions and swatches to help make informed decisions.

    When shopping, always check fabric content labels and request samples when possible. Quality indicators include consistent weave, absence of snags or pulls, and appropriate stiffness for your intended use.

    Pro Tips from Industry Experts:

    • Buy 10-15% extra fabric for testing and mistakes
    • Store fabric rolls rather than folded to prevent permanent creases
    • Test wash a sample before committing to care methods
    • Consider the fabric’s purpose – temporary decoration vs. lasting garment
    • Match thread type to fabric content for best results

    Frequently Asked Questions

    Is Organza the Same as Tulle?

    No, organza and tulle are distinctly different fabrics. Organza features a tight plain weave creating a smooth, crisp surface, while tulle has an open mesh structure with a net-like appearance.

    The difference between organza and tulle extends beyond appearance to include weight, stiffness, and applications. Understanding these differences ensures you choose the right fabric for your specific project needs.

    Which Fabric is Better for Outdoor Events?

    Tulle generally performs better for outdoor events due to its lightweight nature and ability to move gracefully with breezes. Its open weave prevents it from acting like a sail in windy conditions.

    Organza can work outdoors but requires more secure anchoring due to its surface area catching wind. Consider weighted hems or strategic placement to prevent organza decorations from becoming airborne.

    Can You Mix Organza and Tulle in One Design?

    Absolutely! Combining these fabrics creates stunning textural contrast and visual interest. Use organza for structured elements and tulle for soft, flowing sections to maximize each fabric’s strengths.

    Professional designers often layer organza over tulle to create depth while maintaining volume. This technique works particularly well in formal wear and elaborate event decorations.

    What’s the Best Fabric for Beginners?

    Organza’s stability makes it more forgiving for beginners learning sheer fabric techniques. Its resistance to stretching and shifting during cutting and sewing reduces frustration for newcomers.

    However, tulle’s lower cost allows for practice without significant financial investment. Consider starting with inexpensive tulle for technique development before moving to pricier options.

    How Do You Test Fabric Quality Before Buying?

    Quality testing involves several simple checks you can perform in-store or on samples. Gently pull the fabric to test recovery – quality fabrics return to shape without distortion.

    Hold fabric to light to check for consistent weave without thin spots or irregularities. Crumple a small section to see how well it recovers, indicating its performance during use and storage.

    Conclusion

    The choice between organza and tulle ultimately depends on your project’s specific requirements and aesthetic goals. Organza brings structure, sophistication, and dramatic presence to designs, while tulle offers softness, romance, and ethereal volume.

    Understanding these fundamental differences empowers you to make informed decisions that elevate your creative projects. Whether crafting a wedding dress, decorating for events, or exploring craft projects, each fabric offers unique possibilities.

    Armed with this comprehensive knowledge of texture, weight, applications, and working techniques, you’re ready to confidently select the perfect fabric. Let your creativity soar as you bring your vision to life with the ideal sheer fabric for your needs.

  • 2025 Solar Panel Showdown: Who Wins?

    Picture this: You’re making a significant move towards a more sustainable future, beginning right above your head. You’re deciding between Newpowa and Renogy solar panels, both leading brands. Which one truly shines? Let’s find out!

    That’s precisely my purpose! I rigorously evaluated these solar solutions. Thorough assessment is crucial in the renewable energy sector.

    Wondering who triumphs in a Newpowa versus Renogy solar panel battle? Both brands are strong contenders, each offering unique advantages.

    Newpowa is known for budget-friendly, reliable panels. Renogy is famous for efficiency and durability. I put them to the test! Forget the jargon. I’m sharing real-world results. Join me as we explore my findings in detail.

    Discover These Key Insights:

  • Side-by-side brand background check – who’s who in solar panel history?
  • Detailed specs compared for both panel heavyweights.
  • Test results unfolded – efficiency and output under the sun.
  • Durability showdown – how these panels stand up to mother nature’s mood swings.
  • Installation tug-of-war – which panels promise an easier climb up that roof?
  • Cost-effectiveness clash – getting those dollars to make cents over time.
  • True user tales about which panels are rocking rooftops across the land.
  • Kicking Off the Solar Showdown Newpowa vs. Renogy Solar Panels

    Choosing the best solar panels for my home energy needs is crucial. Today, I’m comparing two popular brands: Newpowa vs. Renogy Solar Panels. This comparison will help you make an informed decision.

    FeatureNewpowa Solar PanelsRenogy Solar Panels
    PriceCost-effectiveOften incorporates the latest tech advancements
    Panel EfficiencyGood efficiencyHigh efficiency
    DurabilityResilient to elementsPremium-priced
    Product RangeBroad selection for various needsExtensive range with advanced options
    Technology UsedUses standard solar technologiesOften incorporates latest tech advancements
    Warranty & SupportCompetitive warranty termsComprehensive warranty and customer support
    Popularity/ReputationKnown for valueRenowned for quality and reliability
    Installation EaseUser-friendly setupProfessional installation advised
    Eco-ImpactReduces carbon footprintStrong commitment to sustainability

    These two solar brands are industry titans. Eco-conscious individuals globally highly respect them for their commitment to sustainability and reducing carbon footprints.

    Alright, let’s dive into a head-to-head comparison that’s sure to spark interest among those exploring renewable energy. We’re pitting Newpowa, celebrated for its budget-friendly solar panels, against Renogy, a brand recognized for its superior quality and performance.

    We’re not just comparing brands based on marketing hype. This is a practical examination of solar panel performance. We’ll analyze manufacturing processes, weather resistance, and long-term cost-effectiveness. Discover which panels truly deliver value for your investment.

    I’m going to reveal everything you need to know. I won’t hold back any details. By the end of this, you’ll feel like a solar panel expert. You’ll be fully equipped to choose between Newpowa and Renogy solar panels.

    The pursuit of sustainable energy is a long-standing one. Each comparison of top solar technologies is exciting. Get ready for an illuminating showdown! We’re pitting Newpowa against Renogy solar panels!

    Explore Further: Battery Charging Guide: A Quick 3-Step Process

    The Battle of Brands: Newpowa vs Renogy Solar Panels

    Thinking about solar energy? Newpowa and Renogy are top contenders. These leading solar panel brands are popular choices for those embracing renewable power.

    Each platform boasts dedicated fans claiming theirs reigns supreme. But which truly excels? I’ve thoroughly investigated their offerings to determine the superior choice.

    Background Check

    Newpowa has established itself in the solar energy market. They specialize in affordable solar solutions that deliver reliable performance. Customers often choose Newpowa for budget-friendly options that don’t compromise on quality.

  • Started: Not as old as some other brands but made a mark fast.
  • Products: Offers solar panels (of course!), charge controllers, accessories.
  • Reputation: Seen as the budget-friendly go-to with reliable performance.
  • Alternatively, Renogy has established a strong reputation in the solar energy sector. They are a leading brand in solar panel technology.

  • Founded: A bit further back than Newpowa and established with strong roots in renewable energy.
  • Range: They’ve got solar panels plus whole kits and fancy bits for getting your home or RV set up.
  • Image: More premium-like against Newpowa but also with prices that tell you they mean business.
  • Tech Specs Breakdown

    Let’s dive right in and compare Newpowa and Renogy solar panels. Here’s a breakdown of how they measure up in 2025:

    Newpowa Solar Panels: Updated for 2025

  • Power Output: Usually ranges from small ones fit for little jobs to big ones that can handle a house’s needs.
  • Efficiency: Pretty solid — they squeeze good energy from each ray of sun.
  • Warranty Period: Okay-ish; could be longer, but hey, it fits their price tag.
  • Next, explore Renogy Panels. You’ll find details such as:

  • Power Range: Similar spread; tiny ones for camping trips all the way up to large systems packing serious wattage.
  • Conversion Efficiency: A bit higher numbers here; they brag about turning more sunlight into electricity better than average Joe’s.
  • Guarantee Timespan: Definitely longer; showing they bet their panels will stick around without trouble.
  • Reviewing company specs revealed distinct preferences for different gear. However, technical details are limited. Real-world performance is the ultimate test!

    You Might Also Like: Discover the Manufacturer of Predator Generators

    Real-World Performance Testing

    Choosing solar panels for your property? Understand their real-world performance. Official specs are helpful, but seeing them work in sunlight is key.

    In 2025, I rigorously tested Newpowa and Renogy solar panels under demanding, real-world conditions. This head-to-head comparison reveals how these popular brands performed when pushed to their absolute limits.

    Setting Up the Stage for Testing

    To ensure a level playing field, both the Newpowa and Renogy solar panels underwent identical setup procedures.

  • The same angle towards the sun.
  • No shade anywhere close.
  • At a place where they can get sun all day long.
    I used reliable gadgets to keep track of how much power they made and took notes on every little detail I could.
  • Daylight Duel – Efficiency and Output Results

    The crucial moment arrived: observing which solar panel performed best under sunlight.

  • Started testing as soon as the first light hit.
  • Checked out how fast each panel started making electricity.
  • Recorded power output every hour until sunset.
  • Our mission was straightforward: determine which solar panel offered superior energy conversion efficiency. We aimed to discover which panel maximized energy output from sunlight. Testing revealed similar performance between the two brands. However, subtle variations emerged under different lighting conditions. We observed differences in power generation during peak daylight hours versus lower-intensity evening light.

    Weathering the Storm – Durability Tests Outcomes

    You want your solar panels to last, even after harsh weather. I get it! Here’s my approach to ensuring their longevity:

  • Threw some fake hail (just safe stuff) at them and watched if any damage happened.
  • Sprayed water all over them like it was raining hard.
  • Left them under the burning sun then suddenly cooled them down fast.
  • These updated tests, conducted in 2025, provided valuable insights. They helped me identify solar panels with superior durability and weather resistance. This is crucial information when investing in solar energy solutions.

    You Might Also Like: Generator Storage: Top Tips for 2025

    Installation Showdown

    Solar energy often brings to mind rooftop panels silently capturing sunlight. However, installing these panels is a crucial first step. Today, we’ll explore the ease or difficulty of installing Newpowa and Renogy solar panels.

    These are leading renewable energy brands. Let’s explore which is simpler to install. This guide helps both experienced professionals and first-time users.

    DIY Friendliness – Ease of Setup Analysis

    Installing solar panels can seem daunting. The difficulty varies from simple to complex. Let’s explore the process.

  • Instruction Manuals: The first thing I check is how clear the instruction manuals are. Both Newpowa and Renogy come with guides that help step by step. The pictures are a big help here.
  • Weight: Now, think about carrying these things onto your roof. Newpowa’s panels are a bit lighter generally speaking, which might save your back some trouble.
  • Tools Needed: What about tools? Both need basic stuff like wrenches and screwdrivers. Nothing too out there.
  • Technical Support: Sometimes you hit a snag; it happens! This is where customer support comes in handy. From what I’ve seen and heard, both brands respond well when asked for assistance.
  • Selecting either brand often boils down to individual taste. Both provide user-friendly equipment that’s easy to integrate, regardless of technical expertise.

    Mounting Mechanics – Hardware & Flexibility Comparison

    Alright, let’s dive into the practical details of installing these solar panels on your roof. We’ll cover everything you need to know.

  • Mounting Hardware Included: It’s like opening a box of furniture that needs assembly; all parts should be included. Renogy often throws in Z brackets for mounting which is pretty durable stuff! Newpowa sometimes leaves out certain hardware pieces—you may need to run down to the store or order some extras.
  • Flexibility of Installation: Some roofs are flat; others slope like a hillside! Can these brands handle all sorts? Renogy offers tilt mounts as an extra option giving their system some adjustability angle-wise—which could mean more sun-catching power!
  • Panel Size & Fitting: Each brand makes panels in different sizes so make sure you measure before you buy! No square pegs into round holes here.
  • The real challenge isn’t about picking one panel over another. It’s ensuring your chosen system perfectly fits the available space. You want a snug fit, avoiding extra drilling or makeshift fixes!

    Choosing a specific mounting brand often depends on individual preferences. Your unique home or work setup, with its varying space sizes, also plays a crucial role in the decision.

    Economic Efficiency

    Choosing solar panels for a sustainable lifestyle involves more than just energy conversion. Financial considerations and longevity are key. I carefully evaluate the initial investment and the potential savings on future energy bills.

    Newpowa and Renogy solar panels are popular choices due to their eco-friendliness and affordability. Let’s compare their costs to see which offers better value in 2025.

    Dollar-Saving Debate – Cost Comparison per Wattage

    Let’s dive into the cost comparison between Newpowa and Renogy solar panels, updated for 2025.

  • Price Tags: First off, I take a peek at the stickers. The price can swing quite a bit between these two.
  • Watts Up: After that, it’s all about watts – that’s the juice these panels can churn out under perfect blue skies.
  • Doing Math: Now comes the fun part. A little division – price divided by watts – tells me which is more buck-for-sun friendly.
  • Understood? Great! Knowing your cost per watt helps you determine if you’re getting a good deal.

    Long-Term Thinking – Warranty & Lifespan Expectations

    Alright, let’s dive into long-term planning.

  • Promise Land: Warranties are like pinky promises from companies saying their stuff won’t quit early on ya.
  • Many Moons: And then there’s lifespan – that’s how many years those shiny panels keep pumping out sun juice before they’re too tired.
  • A solar panel boasting a long warranty and proven track record signals quality. Investing a bit more upfront can save you headaches down the road.

    You Might Also Like: Is It Safe to Use a Generator in Wet Weather?

    Consumer Chatter

    Considering solar panels? Customer feedback is invaluable. Real users of Newpowa and Renogy panels share their experiences. This peer advice highlights both pros and cons. These insights can significantly influence your purchase. Here’s what customers are currently saying in 2025.

    User Experience Unfolded – Customer Reviews Highlighted

    After careful review of recent discussions, here’s a concise summary of the key points.

  • Performance: Many users notice that Newpowa panels give them lots of power even when the sun isn’t super bright. Renogy users often praise their panels for working great in different weather, which is pretty important.
  • Support: A big win for Renogy seems to be its customer service. Folks mention getting quick help when they need it—thumbs up for that! But some folks wish Newpowa’s support was a bit speedier.
  • Warranty claims: Warranties are like safety nets; nobody wants to fall but if you do, they better hold up! It turns out that both Newpowa and Renogy honor their warranties well—that’s good peace of mind.
  • Market Movement – Sales & Popularity Trajectory

    Let’s examine how these companies are performing in the competitive landscape for consumer spending. We’ll explore their strategies and successes.

  • Sales Trends: Renogy has been around for longer, which means more people know about them—that’s gotta count for something. But hey, looks like Newpowa is catching up because folks are talking about how you get more bang for your buck with them.
  • Popularity Contest: If popularity was a game, Renogy would be winning—not by miles but definitely ahead. However, online reviews show an increasing number of cheerleaders rooting for Newpowa because of their solid products at nicer prices.
  • The competition is fierce between these two leading brands! Customers have strong opinions, and neither emerges as a clear winner. Your choice depends on your priorities. Consider factors like performance in cloudy conditions or reliable customer support.

    Engage with current users or explore online forums. This will address any concerns before embracing renewable energy. It’s a significant life change, so be informed!

    FAQs

    Which brand offers better efficiency in their solar panels?

    Regarding efficiency, Newpowa and Renogy are closely matched. Minor variations can occur based on specific models and their performance in diverse environmental conditions.

    When it comes to pricing, which brand offers more value?

    Both Newpowa and its competitor provide competitive pricing. However, Newpowa frequently offers a slight advantage. This makes it ideal for budget-minded shoppers seeking solid performance without breaking the bank in 2025.

    Can customers expect similar lifespans from both brands’ solar solutions?

    Absolutely! When installed correctly and well-maintained, both Newpowa and Renogy solar panels offer impressive lifespans, aligning with industry standards in 2025.

    Conclusion

    In 2025, choosing between Newpowa and Renogy solar panels requires careful consideration. I’ve analyzed recent test data and user feedback to simplify your decision. Sustainability is crucial, and the ideal solar panel is key. My detailed analysis clarifies which brand best fits your renewable energy goals.

    Key Highlights:

  • Both Newpowa and Renogy offer quality solar solutions; your choice might hinge on specific technical needs.
  • Real-world testing proves critical in assessing true performance – consider efficiency and durability.
  • Installation ease could be a dealbreaker – check mounting mechanics.
  • Long-term cost savings are essential – weigh up warranty terms against initial outlay.
  • Customer feedback is invaluable for insights into after-sales support and overall satisfaction.
  • Monocrystalline vs Polycrystalline Solar Panels: Choose Smartly

    Monocrystalline vs Polycrystalline Solar Panels: Choose Smartly

    When I think about “Monocrystalline vs Polycrystalline Solar Panels”, it’s like trying to pick the winner in a heavyweight boxing match. Both contenders have their unique strengths, and believe me, the difference between them can make or break your energy savings.

    You might be on the fence right now, not knowing which one to cheer for – and it’s a big decision considering you’re not just choosing solar panels; you’re choosing the future of your electricity bill.

    Making the right choice between monocrystalline and polycrystalline solar panels boils down to balancing efficiency and cost over time – both play massive roles on your rooftop.

    Monocrystalline panels are known for their sleek black look and high efficiency, making them effective even on smaller roofs or areas with less sunlight.

    On the flip side, polycrystalline panels are slightly less efficient but often come with a smaller price tag upfront – making them a go-to choice for those keeping an eye on initial expenses.

    What You Will Reap from This Read

    • Crystal clear comparison of solar panel types
    • Budget-friendly advice for long-term savings
    • Efficiency secrets tailored to your home climate
    • Insights into how each option impacts nature’s look on your roof

    Decoding Solar Panel Types: An Overview

    When you’re looking into solar panels, you might get a little confused. There are mainly two types that people talk about a lot. These are called monocrystalline and polycrystalline solar panels.

    Decoding Solar Panel Types: An Overview

    They both have their own good points and not-so-good points. Let’s take a deep dive to see what makes each of them special.

    What Are Monocrystalline Solar Panels?

    Monocrystalline solar panels are the kind that many folks know about for being really good at turning sunlight into electricity. I’ve seen a lot of them on homes and businesses because they can be pretty sleek and nice to look at.

    • Efficiency: They pull ahead of others with their high efficiency, meaning they can make more power from the same amount of sunlight.
    • Look: Most times, these panels have a dark black color that some people find nicer than other types.
    • Cost: But with all these great things, they usually cost a bit more too.
    • Lifespan: One thing that’s cool is they tend to last longer than other kinds – we’re talking many years here!

    People pick monocrystalline when they want something that works really well and looks great on their roof.

    How Do Polycrystalline Solar Panels Stand Out?

    Polycrystalline solar panels are the ones with bits that look blue and sometimes like there’s a mosaic on them. They’re pretty popular for some good reasons too.

    • Cost-effective: The biggest thing is they cost less than monocrystalline ones. That means if you don’t want to spend loads of money, these could be right for you.
    • Makeup: Now, they are made by melting lots of silicon bits together as opposed to using one big piece.
    • Efficiency Talk: Alright, so these aren’t as top-notch at turning light into electricity as the monocrystals – but don’t write them off yet!
    • Space Needs: Because they’re less efficient, you might need more space on your roof or land to fit enough panels and get the power you need.

    So people often go for polycrystalline when saving money is their main goal or if they’ve got plenty of space for the extra panels.

    Also Read: Who makes Predator generators?

    Here is a Quick Comparison of Both

    FeatureMonocrystallinePolycrystalline
    Efficiency15-20%13-16%
    CostHigherLower
    Long-term SavingsPotentially higher due to efficiencyLower upfront cost, but lower efficiency may lead to less savings over time
    Space RequirementLess space needed due to higher efficiencyMore space needed for same power output
    Temperature PerformanceBetter performance in hot climatesLower performance in hot climates
    Low-light PerformanceBetter performance in low-light conditionsLower performance in low-light conditions
    Lifespan25-30 years20-25 years
    DurabilityMore durable due to single-crystal structureSlightly less durable due to multi-crystal structure
    WarrantyTypically 25 yearsTypically 25 years
    AppearanceBlack, uniform colorBlueish hue with speckled pattern

    The Showdown: Monocrystalline vs Polycrystalline

    When you look at solar panels, two types you will often hear about are monocrystalline and polycrystalline. People sometimes get stuck on which one to choose.

    The Showdown: Monocrystalline vs Polycrystalline

    Both have their own good points and not-so-good points, kind of like choosing between apples and oranges: they’re both fruits, but they taste different. Let me walk you through what makes each one special, so you can pick the right one for your home.

    Comparing Costs – Price Points Matter

    When I look at solar panels, the first thing that jumps out is the price tag. Let’s dive into how monocrystalline and polycrystalline solar panels stack up against each other in terms of cost:

    • Upfront Costs: Monocrystalline panels are often more expensive upfront. They use purer silicon, which means they cost more to make.
    • Polycrystalline Panels: These are usually less pricey when you buy them. They’re made with different bits of silicon melted together, which is cheaper to do.
    • Long-term Savings: Even though monocrystalline panels cost more at first, they can save you money over time because they tend to be more efficient.
    • Return on Investment (ROI): If I’m thinking long-term, monocrystalline might be a better deal because they work better for longer and could lower my energy bills by a bigger chunk.

    So yeah, I’d say it’s not just about what you pay today but also about how much these panels are going to help you save on those pesky electricity bills in the years to come.

    Efficiency Face-off – Maximizing Energy Output

    Efficiency is all about getting the most bang for your buck — or the most power from your panels. Here’s what I’ve learned comparing these two:

    • Monocrystalline Panel Efficiency: These guys are champs at turning sunlight into electricity — usually around 15% to 20% efficiency. This means in places with lots of sun, they’re superstars at making power.
    • Polycrystalline Panel Efficiency: They’re not slackers but typically fall behind mono panels with efficiency between 13% and 16%. So if your roof isn’t overflowing with space for lots of panels, mono might be your best bet.

    People who live where there’s a lot of sunshine or those who don’t have loads of room will probably get more from monocrystalline panels even though it’s a bit harder on their wallets upfront. It’s like choosing between two kinds of cars – one that might be pricier but gives you better gas mileage and another that’s cheaper initially but doesn’t go as far on a gallon. It all depends on how you’re going to use them!

    Keep this in mind too – “efficiency” isn’t just some fancy term; it directly impacts how many dollars stay in or fly out of your pocket!

    Also Read: 12V Battery Wiring: Series & Parallel Connections

    Customizing Your Choice – Factors to Consider When Selecting

    When it comes time to pick solar panels, there’s more to think about than just the Monocrystalline vs Polycrystalline Solar Panels. It’s like choosing a coat.

    Customizing Your Choice – Factors to Consider When Selecting

    You don’t just think about the color; you also consider how warm it needs to be, how much you can spend, and how it fits. I’m here to help you look at everything that matters when picking solar panels that fit just right for your home.

    Assessing The Price Impact on Your Budget

    Price can make or break a deal. That’s true for solar panels too. Monocrystalline and polycrystalline solar panels come with different price tags and savings in the long run. Let’s get into the nitty-gritty:

    • Monocrystalline solar panels are like high-end brands; they cost more upfront because they are efficient and look neat.
    • Polycrystalline solar panels might not break records in looks or power but are easier on your wallet from the start.

    In time, both types can cut down your energy bills. It’s like investing in a good appliance that saves electricity.

    There might be sweet deals from the government or local authorities that give you some money back if you go green with your energy choice.

    I’ll tell you this: always keep an eye out for tax credits or rebates that match up with your choice of panel. This is money that stays in your pocket! Governments often help out folks who choose solar power through these incentives.

    Available Mounting Space Constraints

    Space: it’s what we all need, whether we’re talking about our personal bubble or where to put our stuff – including solar panels. If space was unlimited, we’d all have fields of solar panels soaking up sunshine! But here in reality-town, space is precious:

    • Do you have a big roof? Great! You might fit enough polycrystalline panels up there because they don’t mind snuggling close to each other.
    • A smaller patch of roof? Might want those top-of-the-line monocrystallines; they pack more punch per square inch.
    • Remember: no amount of squeezing will make the extra room appear – choose based on what fits!

    Choosing between monocrystalline and polycrystalline isn’t just about preference but practicality too. Make sure those shiny new friends called “solar panels” will feel at home on your roof!

    It doesn’t end here though – next up we need to talk about powering through various weather conditions and making sure these silent energy-makers stay strong over time! Stay tuned as I dive deeper into tailoring the perfect sunny setup for yourself.

    Adapting to Climate Variances

    When it comes to handling the ups and downs of weather, not all solar panels are created equal. So, how do monocrystalline and polycrystalline panels measure up when the weather decides to throw a curveball? Let’s break it down:

    • Monocrystalline solar panels – These guys are like the tough kids on the block. They don’t let a little heat get them down. In fact, they work pretty well even when things get hot outside. That’s because they’re made from high-quality silicon that can take the heat without losing much power.
    • Polycrystalline solar panels – Think of these as more laid-back in the face of rising temperatures. They tend to lose some steam when it gets really warm. That means if you live somewhere where summers feel like you’re living in the sun, these may not be your best bet for peak efficiency.

    When clouds roll in or snow starts falling:

    • Monocrystalline keeps chugging along better than most because each panel is cut from a single crystal of silicon, which means it’s more “pure”. This helps in low-light situations.
    • Polycrystallines might struggle a bit more since they’re made from many pieces of silicon fused together.

    Longevity & Durability Concerns

    Now let’s chat about how long these solar panels last and how strong they are against Mother Nature’s mood swings:

    • Monocrystalline solar panels live quite long – we’re talking around 25 to 30 years! And since their one big crystal is pretty sturdy, they aren’t scared of some wind or hail.
    • Polycrystalline solar panels have got good years in them too, but their patchwork nature makes them slightly less tough compared to their single-crystal cousins.

    Here’s what else you should consider:

    • Warranty talk: For both mono and polytypes, warranties matter. Most companies will offer something like 25 years guaranteeing that your panels won’t just give up on you.
    • Standing tall against storms: Both can hold their own in rough weather, but mono tends to have a slight edge due to its uniform structure.

    So if sticking around for decades matters heaps to you – both types are solid options with slight props going out to monocrystalline.

    Aesthetic Preferences & Color Choices

    Righto! Apart from all that techie performance stuff, looks matter too! And here’s where I come into play:

    1. Monocrystalline solar panels – Slick and stylish! They usually have this dark black hue that looks neat and tidy on roofs.
    2. Polycrystalline solar panels – These come off with a bit more flavor; think blue-ish speckles over here!

    Why this matters:

    • Some folks might fancy their home looking sharp with those slick dark tiles—monos fit right in then!
    • Others who prefer a bit of spice or don’t mind varied patterns could dig polys instead for their unique look.

    So go ahead and pick whatever fits your taste best ’cause with both options; either way, you’re still getting sunshine turned into sweet usable energy!

    Also Read: Storing Your Generator: Short-Term & Long-Term Storage Tips

    Conclusion

    After diving deep into the subject, I’ve unpacked the various nuances in the “Monocrystalline vs Polycrystalline Solar Panels” debate. I discussed how the choice between monocrystalline and polycrystalline solar panels could be influenced by a mix of factors. From efficiency and cost to appearance and longevity, each type offers distinct advantages.

    Monocrystalline panels are more efficient but come with a higher price tag. On the other hand, polycrystalline panels are more affordable but may not perform as robustly in low-light conditions. These contrasts often lead folks to weigh their specific needs against what each panel has to offer.

    Key Takeaway Points:

    • Monocrystalline panels boast higher efficiency and sleek design.
    • Polycrystalline options can be kinder to your wallet upfront.
    • Climate and available rooftop space influence which panel type might suit you best.
    • Long-term savings should also factor into your decision-making process.
    • Don’t overlook aesthetic preferences; they add value too.
  • PWM vs MPPT Efficiency: Discover What Sets Them Apart

    When you think of solar power, what’s the first thing that pops into your mind? Shiny panels soaking up the sun, right? Well, behind those silent sun-catchers is a whirlwind of science making sure that clean energy gets packed away safely.

    One little piece of that science decides how effectively this happens: charge controllers. Now, there’s a bit of a squabble in solar town – which charge controller reigns supreme when it comes to efficiency? I’m here to crack open this can of worms. Everyone’s buzzing about “PWM vs MPPT efficiency,” but why does it matter and how will it affect you?

    Let me get down to the nitty-gritty and clear up the confusion once and for all. A PWM (Pulse Width Modulation) charge controller is like your sensible old uncle – reliably managing your solar energy but with traditional methods.

    An MPPT (Maximum Power Point Tracking) charge controller, on the other hand, is like a smart tech whiz-kid who squeezes out every drop of power with cutting-edge technology. When it comes down to cold hard figures, MPPT usually takes home the trophy for being more efficient than PWM. However, there’s more to this story than just numbers; stick around as we delve deeper into what makes each one tick.

    What You’ll Reap from This Read

    • Unwrap the mystery behind PWM vs MPPT efficiency
    • Harness wisdom on which controller fits your sunshine story
    • Expert insights laid out in super simple language
    • Practical tips on choosing solar smarts for your space

    Quick Comparison of PWM vs MPPT Charge Controllers

    Selecting the right charge controller is crucial for optimizing your solar power system’s efficiency and performance. This table provides a quick comparison of two popular options: Pulse Width Modulation (PWM) and Maximum Power Point Tracking (MPPT). Understanding their key differences empowers you to make an informed decision based on your specific needs and budget.

    PWM vs MPPT Efficiency: Breaking Down the Basics

    When I’m setting up a solar power system, choosing the right charge controller is a big deal. It’s like picking the best coach for a sports team. Two main types are out there: PWM and MPPT. So let me break down what these are.

    PWM vs MPPT Efficiency: Breaking Down the Basics

    Defining PWM and MPPT

    PWM stands for Pulse Width Modulation. Think of it as a basic but clever way to keep your batteries charged just right. It does this by switching the electrical path to the batteries on and off really quickly, sort of like blinking lights fast so they don’t shine too bright.

    On the flip side, MPPT, short for Maximum PowerPoint Tracking, is like the smart kid in class who always gets an A+. It looks at what your solar panels can do and figures out how to get the most juice out of them to charge your batteries – even when the Sun’s being shy.

    Here’s why they matter:

    • PWM controllers are like older phones; simple and easy to use but not that powerful.
    • MPPT controllers are more like smartphones; they’ve got more brains, do more stuff, definitely pricier, but give you more bang for your buck when it counts.

    So in my solar setup journey:

    I use a PWM charge controller when I’ve got smaller needs or my pockets aren’t deep. Cause they’re good enough and save me some cash. But if I’m going big or want top efficiency from my panels no matter what Mother Nature throws at me – yep, I pick an MPPT charge controller.

    Comparing Conversion Efficiency

    When someone says “conversion efficiency,” think about how much sunlight gets turned into usable power for my stuff or saving in batteries.

    • With PWMs, imagine trying to fill up two different-sized cups (panel & battery voltages) by pouring water from one into another without spilling – tricky right? That’s PWM handling power; some energy gets lost because it’s not as smooth.
    • MPPTs have this magic touch where they adjust their pouring style so almost every drop goes where it should. They take whatever my panels dish out and change it up perfectly so my batteries can lap it up – less waste!

    And why do we care about this ‘efficiency’ thing? Well:

    • The better this works (and trust me, with solar panel technology, sometimes we need all the help we can get), the less money I throw at electric bills or extra panels.
    • This also means if Sunshine’s playing hide-and-seek or doing a mini winter no-show, my lights won’t flicker off because MPPT dug out every ounce of power possible.

    The Significance of Charge Controllers in Solar Systems

    When I think about making the most out of the sun’s power, I know charge controllers play a big part in solar systems. These little devices do so much work to keep our batteries safe and lasting longer.

    They are like smart guards that make sure everything runs smoothly and efficiently, no matter if we’re talking about a small setup at home or a big one for a business.

    The Function of Charge Controllers

    Charge controllers serve one main goal: they manage the power that comes from solar panels before it goes into the batteries. Here’s why they’re so important:

    • Protect batteries: Without these controllers, batteries could get too much juice and get damaged. It’s their job to make sure this doesn’t happen.
    • Prevent overcharging: They watch the battery levels like hawks and slow down the charging when needed.
    • Keep electricity steady: Solar energy can be up and down because of clouds or time of day. Controllers smooth this out so our gadgets don’t face those ups and downs.
    • Avoid too much drain: At night or on cloudy days, they stop the batteries from giving away too much power.

    These helpers make solar setups smarter—keeping things running without asking us to check them all the time.

    How They Influence Your Solar Power System?

    Both PWM (Pulse Width Modulation) charge controllers and MPPT (Maximum Power Point Tracking) charge controllers can have a big impact on your solar system’s health:

    • System efficiency: Efficiency is key in getting as much power as possible from your panels. MPPTs are top-notch here—they squeeze out more energy than PWMS can under most conditions.
    • Battery life: Batteries can wear out fast if not cared for right. PWMs do it simply but well enough for smaller setups, while MPPT technology shines by adjusting better to what your battery needs, giving them a longer life.
    • Cost over time: An MPPT might cost more upfront, but it could save money in the long run thanks to its efficiency gains—especially if you’ve got a bigger system.

    In-Depth Comparison: PWM vs MPPT Efficiency

    When we talk about harnessing solar energy, charge controllers come into the picture as a key part of the system. They keep the batteries from overcharging by controlling the voltage and current coming from solar panels to batteries.

    In-Depth Comparison: PWM vs MPPT Efficiency

    If you’re deciding between a PWM (Pulse Width Modulation) and an MPPT (Maximum Power Point Tracking) charge controller, it’s important to understand how they stand up against each other in terms of efficiency. Let’s dig deep into how these two types perform under different circumstances and what their durability looks like.

    Performance Under Various Conditions

    Controllers are like managers for your solar power—they have to adapt to whatever nature throws at them. Let’s see how they do that:

    • PWM Charge Controllers:
      • They work best when it’s sunny out.
      • In shade or low light, they can’t grab much power because they match the panel voltage to the battery voltage.
      • When it gets hot, their efficiency might go down since solar panel voltage drops and there’s less for PWM to work with.
    • MPPT Charge Controllers:
      • These guys are smarter at dealing with changes—they adjust themselves to get maximum power even when it’s not so bright or partially shaded.
      • MPPT can take advantage of higher voltages from panels on cooler days or anytime panels deliver more volts than batteries need.

    Both do a good job but in different ways. If you live somewhere with lots of weather changes, an MPPT might handle those ups and downs better.

    Durability & Longevity

    Talking long-term lifespan here—what lasts longer assuming you take care of them right?

    • PWM Charge Controllers:
      • Simple in design means less that could go wrong over time.
      • Expect these to keep going strong for quite some years if no overheating happens or connections stay tight.
    • MPPT Charge Controllers:
      • More complex parts inside due to their smart tracking tech.
      • Despite the complexity, many last as long as PWMs if installed neatly without moisture problems and checked regularly.

    Durability-wise, both types aim for the long haul—we’re talking years. Just make sure they’re not exposed directly to harsh conditions like water or super high heat. A well-set-up charge controller is like a good roof—it should last you through many seasons with proper care.

    Whether choosing simple reliability with a PWM or advanced adaptability with an MPPT, keeping tabs on maintenance is key for both!

    Tuning Into Price Points: Is One More Cost-Effective?

    When we talk about setting up solar panels, knowing which charge controller to pick can be as important as the panels themselves. Now, let’s get down to business and talk about money. We gotta ask ourselves: “Is one of these controllers going to save me some cash?”

    So here, I’ll take a fine look at how much you’ll pay right off the bat for PWM and MPPT charge controllers. And I won’t stop there; we will peek into the future and see how these costs will play out in the long run.

    Upfront Costs Comparison

    When it’s time to open up your wallet and buy a solar charge controller, you usually meet two types: PWM (Pulse Width Modulation) and MPPT (Maximum Power Point Tracking). Here’s the simple truth:

    • PWM Charge Controllers: These are the old-school guys. They’re simpler in design and don’t dig too deep into your pockets when it comes to initial costs.
    • MPPT Charge Controllers: These are like the clever kids on the block. They got more smarts thanks to better tech but expect them to come with a higher price tag upfront.

    Simply put, if you’re trying not to spend too much from the get-go, PWM might be your best buddy.

    Return on Investment Analysis

    Shelling out some extra dough at first might make you cringe, but what if that could mean more savings down the road? Let’s crunch those numbers:

    • Savings with PWM: If your setup is small-scale or you live where sunshine plays hide-and-seek (I’m looking at you, cloudy days), a PWM could do just fine without breaking your bank.
    • Efficiency of MPPT: But here’s where it gets interesting—if your system is larger or lives under clear skies most days, MPPT controllers work smarter by adjusting things so that they use every bit of sunlight they can catch. Over time, this means less waste and more power for each dollar spent.

    How does Solar Array Size Influence Choice Between PWM vs MPPT?

    When setting up a solar power system, choosing the right charge controller is as crucial as picking the solar panels themselves. Two popular types are PWM (Pulse Width Modulation) and MPPT (Maximum Power Point Tracking).

    The size of your solar array plays a big part in determining which one you should go for. If you want your system to work its best, understanding how array size affects your choice between PWM and MPPT is key.

    When Size Matters in System Design Choices

    The size of a solar array can influence which charge controller will fit better in a system. Here’s why:

    • Small Arrays: For smaller setups, where the budget is often tighter, a PWM charge controller might be the go-to pick. It’s more affordable and works fine when energy demands aren’t too high.
    • Large Arrays: However, when you’ve got a big array with lots of panels soaking up the sun, an MPPT controller shines. It’s great at handling higher voltages and can improve efficiency.

    PWM controllers match the solar panel voltage to the battery level; they’re like simple on/off switches that adjust how long they’re “on” to control charging. But when there’s extra power from large arrays that could be used, these controllers can’t take full advantage because they only use what matches the battery at that moment.

    MPPT controllers are smarter. They tweak incoming voltage to squeeze out all available power—transforming what doesn’t immediately match battery needs into something usable.

    Optimizing Output Based on Array Dimensions

    Now let me tell you how to get the most out of your setup:

    • Proper Matching: Pair small arrays with a PWM if the cost is tight and power needs are modest.
    • Squeeze Extra Juice: With larger arrays, an MPPT can boost total power pulled from your panels by adapting what it gets—it converts excess voltage into useful amps for batteries.

    For instance, imagine it’s like filling up water balloons under different taps – one has just enough pressure while another comes with an extra force that requires adjustment so no water goes to waste.

    Also Read: Solar Panel Wall Mount DIY: Complete Installation Guide

    Geographical Impacts on Choosing Between Controllers

    Not every place on Earth is equal for solar power — weather and sun hours vary a lot! Just like some plants grow better in certain places, some charge controllers work better under specific local conditions. Let’s look at why understanding where you live can steer you towards the best choice for your home’s solar setup.

    Geographical Impacts on Choosing Between Controllers

    How Your Location Might Inform Your Choice?

    • Sunshine All Year? Lucky You!: Places with lots of sunny days make any controller look good. But MPPT still edges out because it converts more effectively.
    • Frequent Clouds or Shade? No Problem: Here’s where MPPT shines (no pun intended). Even with less light or brief shadows passing over, an MPPT squeezes out more energy than PWM can manage.
    • Hot Summers & Cold Winters? Gear Up!: Great temperature swings throughout the year affect how well your solar system works; MPPT takes these changes in stride far better than PWM does.
    • Predictable Weather Patterns Win: Know your area’s weather trends. Predictability helps choose between PWM and MPPT based on consistent seasonal performance.

    Connectivity Conundrums – Series vs Parallel Panel Setups

    When you’re setting up a solar energy system, how you link your panels—either in series or parallel—can make a big difference. This choice affects how much power your setup can pump out and what kind of charge controller will work best.

    It’s important to get it right so your system runs smoothly and efficiently. Let’s dig into the details to see which charge controller shines when matched with either series or parallel connections.

    Which Controller Excels Depending on Connection Type?

    Choosing to wire your solar panels in series or parallel can really impact how well your whole setup works, especially when it comes to the brains behind the operation—the charge controller.

    • Series Connections:
      • When solar panels are wired in series, their voltages add up while the current stays the same as one single panel.
      • In this kind of setup, a Maximum Power Point Tracking (MPPT) charge controller is usually your best bet.
      • Why? Because MPPT controllers are designed to handle higher voltages from the series arrangement without breaking a sweat.
      • MPPT controllers convert excess voltage into amperage. This means even when sunlight is playing hide and seek (like during dawn or dusk), they still manage to pull more energy than their Pulse Width Modulation (PWM) pals.
    • Parallel Connections:
      • In a parallel configuration, it’s like joining hands with others; each panel’s current adds up while the voltage remains at that of a single panel.
      • For this scenario, both PWM and MPPT charge controllers can do the job, but there are some twists.
      • A PWM might be more cost-effective upfront if you’re working with a small-scale system where voltage isn’t going sky-high.
      • But if we’re talking bigger systems that need more juice consistently—even in less-than-perfect light conditions—an MPPT would again flex its muscles for better overall efficiency.

    So, breaking it down simply:

    • Think of an MPPT as being like someone good at dealing with high-volt situations calmly—essential for those series setups.
    • A PWM is like your reliable friend who’s fine handling less intense stuff—which can be just right for smaller systems hooked up in parallel.

    Each has its stage where it performs best—it all depends on what sort of solar array show you’re putting on! Just remember: getting this pairing right plays a huge role in getting that sweet spot for maximum effectiveness out of every ray that hits your panels.

    Space Constraints – Mounting Space Necessities for Each Controller Type

    When setting up a solar system, it’s not just the tech that matters. I also think about how much room I have to put stuff. For instance, charge controllers are a big deal in solar setups. These little boxes manage the power coming from the sun. So, it’s key to know how much space they’ll take up before I even start.

    Room to Grow – Factoring in Space Availability

    Every controller type has its own space needs for running right and lasting long. To keep things clear, let’s drill into what each one asks for:

    • PWM Charge Controllers: Usually smaller and more basic than their fancier cousins, PWMs don’t ask for a lot of room. They get hooked up between solar panels and batteries but stay small so they can fit in tight spots without trouble.
    • MPPT Charge Controllers: These guys are bigger because they’re packed with tech that makes them smarter at handling power. The upside is better performance; the sort-of-downside is that they need more real estate inside your setup.

    Imagine your space as a garden – some plants can thrive in cozy corners while others need room to spread out. It’s just like that with PWM and MPPT controllers; you’ve got to pick the right one based on how big your “garden” is.

    And when we talk optimal operation, we mean setting these devices up with enough breathing room so they can stay cool and not overheat. Overcrowding can cut their life short, which nobody wants after spending their hard-earned money.

    So here’s my rule of thumb: always check the size specs when shopping around for controllers and match that against the space you’ve got available. It saves headaches later on!

    By picking right based on size — along with other factors — ensures smooth sailing (or should I say ‘solar-ing’) down the line!

    Battery Types Supported by Each Controller

    When I decide on a charge controller for my solar system, I have to think about the batteries I’ll use. Different types of batteries need different types of care. Some like to be treated gently, and others can handle a rougher charge. That’s where the choice between PWM and MPPT controllers gets important.

    Understanding Compatible Battery Technologies

    It’s like picking the right partner for a dance. I’ve got to make sure they move together smoothly or things could get messy. Let me break down which battery types go well with which controllers:

    1. Lead-Acid Batteries:
      • PWM Controllers: These are good buddies with traditional lead-acid batteries including sealed (AGM) and flooded types.
      • MPPT Controllers: They can also dance nicely with lead acid, but they shine brightest when you need that extra precision in charging.
    2. Gel Batteries:
      • PWM Controllers: Gel batteries don’t like it too hot or too cold, so PWMs that are simple and careful work well enough.
      • MPPT Controllers: If you’re looking for a perfect charge every time, no matter the weather outside, then MPPT is your guy.
    3. Lithium Batteries:
      • MPPT Controllers: Lithium is the fancy new tech on the block; it loves being paired with an MPPT because it needs that smart, accurate charging to keep going strong.
    4. Nickel-Based Batteries:
      • Not as common in solar setups these days, but if you come across them, check the manual; sometimes PWM is good enough but check if your MPPT agrees too.

    Distance Dilemmas – Cable Lengths from Panels to Batteries

    When setting up a solar energy system, an important but often overlooked factor is the distance between the solar panels and the batteries. The length of cable you use can have a big impact on how much power gets lost before it even reaches your battery bank.

    This matters because you want as much of that power as possible for your use, not wasted along cables. Let’s take a close look at how these different kinds of controllers—PWM and MPPT—affect power transmission over distances.

    Lost in Transmission – Evaluating Losses Over Distance

    The path electricity takes from your solar panels to your batteries can be simple or complex. But one thing’s for sure; the longer the cable, the more power you risk losing.

    This is due to something called ‘voltage drop’. To help make sense of how this happens with PWM and MPPT charge controllers, here’s what needs to be known:

    • Cable Thickness: For both PWM and MPPT, choosing thicker cables helps reduce power loss over distance. Thicker cables have less resistance.
    • Voltage Levels: PWM controllers match the battery voltage. If there’s a long wire run with low voltage (like 12V), there will be more loss compared to higher voltages.
    • Efficiency with Voltage: An MPPT charge controller can adjust inputs from solar panels down to what your battery needs without losing much energy in long wires.

    So, if I have a setup where my panels are far away from where my batteries are stored, using an MPPT controller might save me more power because it works well with high voltages—you get less “lost in transmission”. With a PWM setup, I’d need very thick cables if I didn’t want too much of my electricity disappearing before it charges my batteries.

    Indeed, thicker wires and shorter distances will always work best no matter what type of controller you’re using. However, since MPPT technology deals better with high voltage scenarios typical in long-cable setups, it generally ensures fewer losses compared to a PWM controller in equivalent conditions.

    Choosing between these two types when planning out your solar installation gets even trickier when considering wire lengths—you have got to weigh up all factors, like how far apart things are going to be and whether that extra efficiency is worth any additional costs upfront for an MPPT system or not.

    Field Testing Results – Real-World Applications Of PWM Vs. MPPT

    When picking between a PWM (Pulse Width Modulation) charge controller and an MPPT (Maximum Power Point Tracking) one, looking at the facts is always the way to go. Not just the numbers on paper, but how these gadgets do their job under real skies and sunlight.

    It’s all about performance in the field – that means gardens, roofs, or wherever solar panels sit soaking up rays. So let’s get into some nitty-gritty details from tests and studies that show what these two different types of solar charge controllers actually do when they’re out there in the world.

    True Performance Metrics

    Folks who have laid out their cash for solar set-ups want to know if they’ve made the smart choice – is it doing what it promised? It’s pretty simple: folks have tested both PWM and MPPT controllers to see which one comes out on top when it really matters.

    • Tests Under Different Conditions: Some say variety is the spice of life; well, it’s also key to testing charge controllers. From blazing hot summers to chilly winters, tests have been done to see how these devices stand up to Mother Nature. Here’s the lowdown:
      • In hotter weather or as temperatures rise high, MPPT keeps it’s cool better than PWM, still pushing energy efficient-like into batteries.
      • But when skies are cloudy and light isn’t as strong, MPPT shows off by still grabbing more power than a basic PWM might manage.
    • Battery Health: We all know what happens when we drain our phone battery again and again – it doesn’t like it one bit. Well, the same goes for big batteries hooked up to solar panels. Tests keep an eye on this too:
      • Controllers need smart brains that stop batteries from overcharging or going too low – kind of like a caring nanny but for batteries.
      • With proper settings tweaked just right, both controller types can play nice with your battery bank but word on the street (or should I say sunbeam?) is that MPPT does this chore with a touch more finesse.
    • Real-world Juice Output: Let’s talk turkey here; watts and volts are where it’s at.
      • Folks have put up identical solar panels side by side; half wired up to a slick MPPT unit while its neighbor sings along with an honest PWM pal.
      • When the dust settles at day’s end, figures generally nod towards team MPPT pulling ahead with more energy saved up in those battery banks.

    Smarty pants out there will tell you DIY tests don’t beat certified lab work-ups because there are lots of fiddly bits you gotta keep straight when testing like this. But even think-piece creators in labs agree after their own run-throughs: if squeezing every drop of sun juice efficiently matters to you then MPPT often crosses the finish line first against PWM in most conditions.

    Alrighty then! Got numbers rattling around your noggin yet? The blueprint isn’t hard: field results shore up what plenty of sun-chasers figure — hooking up with an MPPT might pinch your pocketbook harder at checkout time but can pay off over time as day follows sunny day.

    Conclusion

    In wrapping up, the debate on PWM vs MPPT efficiency is much more than an academic exercise; it’s about practical performance in real-world solar setups. Understanding the nuances between Pulse Width Modulation (PWM) and Maximum Power Point Tracking (MPPT) charge controllers can make or break the effectiveness and reliability of a solar power system. Their role is undeniably crucial in managing energy flow to batteries, ensuring longevity, and maximizing output.