Category: Industrial Health

  • EMF Radiation in Welding: Complete Safety Guide

    EMF Radiation in Welding: Complete Safety Guide

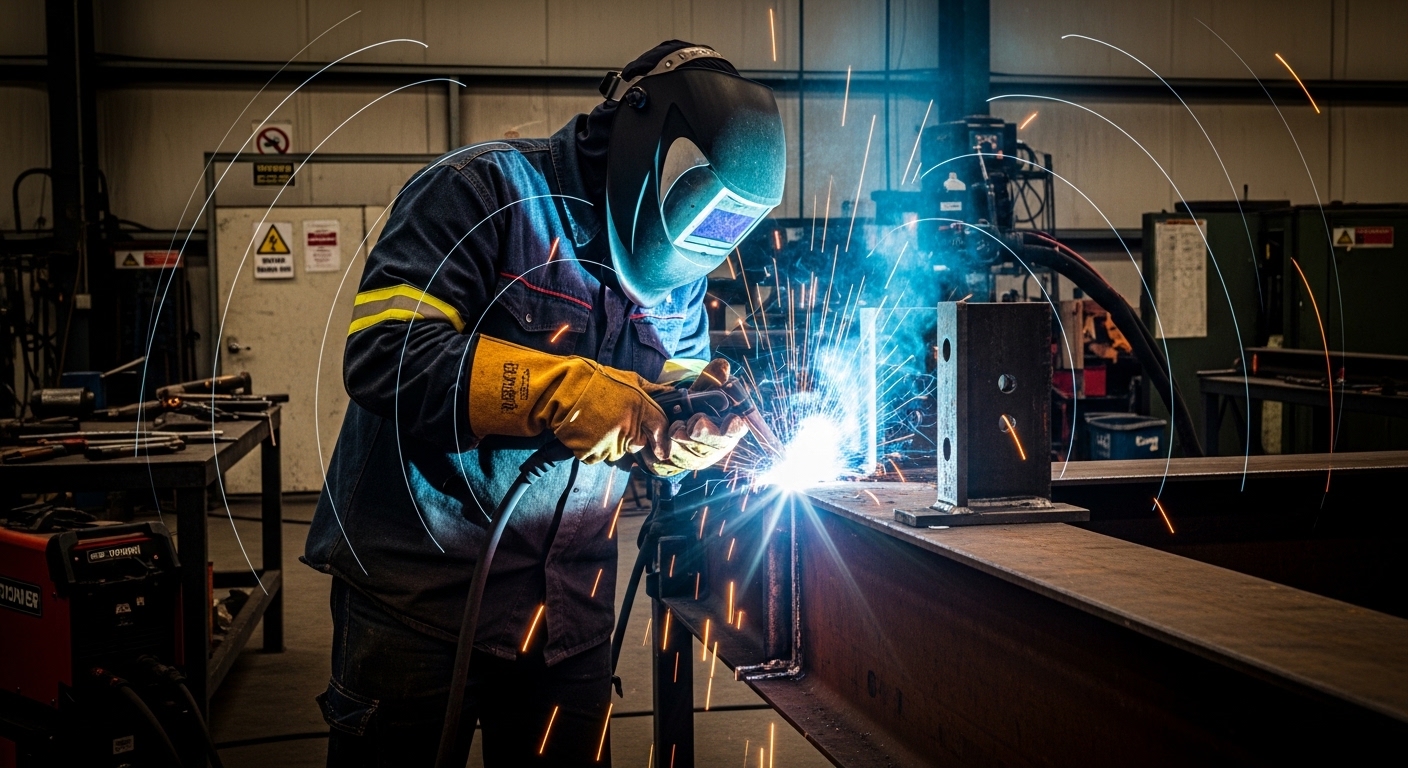
    Yes, welding creates electromagnetic fields (EMF). The high electric current flowing through welding equipment generates strong magnetic fields around the welder, cables, and workpiece. AC, pulsed, and inverter welding processes produce the highest EMF levels.

    After working in welding safety for over 15 years, I’ve seen EMF awareness evolve from a niche concern to a mainstream workplace safety issue. In 2010, few welders even knew what EMF was. Today, it’s a standard part of safety training programs across North America and Europe.

    This guide covers everything you need to know about EMF radiation in welding, from what causes it to practical steps you can take to protect yourself and your team.

    What Causes EMF in Welding?

    EMF radiation in welding is generated by electric current flowing through conductors. Whenever current flows, it creates magnetic fields around the path of that current. The higher the current, the stronger the magnetic field.

    Electromagnetic Fields (EMF): Invisible areas of energy produced by electric current. In welding, this refers primarily to the magnetic fields generated by the high currents flowing through welding cables and equipment.

    The welding current creates the strongest EMF. This current flows from the power source through the welding cable, to the welding gun or electrode, across the arc, through the workpiece, and back through the work cable. The entire loop becomes a magnetic field source.

    AC welding produces more EMF than DC welding because the alternating current constantly changes direction, creating fluctuating magnetic fields. Pulsed welding and inverter processes also generate high-frequency components that add to EMF exposure.

    EMF Levels by Welding Process

    Welding ProcessTypical CurrentEMF LevelNotes
    AC Stick (SMAW)80-300AHighAlternating current creates strongest fields
    AC TIG (GTAW)50-250AHighHF start adds high-frequency component
    Pulsed MIG100-400AHighPulsing creates additional frequency components
    Inverter ProcessesVariesMedium-HighHigh-frequency switching adds to exposure
    DC Stick/MIG100-500AMediumDC produces less EMF than AC
    DC TIG50-350ALow-MediumLowest EMF among common processes
    Resistance Spot3,000-10,000AVery HighExtremely high current creates intense fields

    Key Point: The strongest EMF exists near the welding cables. Cables carrying 200-300 amps can produce magnetic field measurements exceeding 500 microteslas directly adjacent to the cable, dropping to below 5 microteslas at just 3 feet distance.

    Where you position your body matters. The field strength drops rapidly with distance, but a welder working with cables passing close to their chest or torso experiences significantly higher exposure than one keeping cables at arm’s length.

    Health Effects of EMF Exposure

    The health effects of EMF exposure fall into two categories: acute effects that are well-documented, and long-term effects that are still being researched. It’s important to understand the difference between what science has confirmed and what remains uncertain.

    Known Acute Effects

    Short-term exposure to high EMF levels can cause immediate, noticeable symptoms. These effects occur because EMF can stimulate nerves and muscles at sufficient intensities.

    • Visual disturbances: Some welders report seeing flashes of light or visual artifacts when working near high EMF sources. This is known as magnetophosphenes – magnetic fields affecting the retina.
    • Vertigo and dizziness: Exposure to strong magnetic fields, especially from resistance welding equipment, can cause balance issues and disorientation.
    • Muscle stimulation: At high enough levels, EMF can cause involuntary muscle twitches or contractions.
    • Nerve sensations: Some welders report tingling or prickling sensations during high-current welding operations.
    • Localized heating: EMF can cause localized heating in body tissues, though this is typically minimal at welding exposure levels.

    Important: These acute effects are generally transitory. Symptoms typically resolve quickly when exposure ends and the welder moves away from the EMF source.

    I’ve spoken with dozens of welders who’ve experienced these symptoms. One described it as “a weird humming feeling in my chest” when using a certain AC TIG setup. Another reported seeing “floaters” in his vision during long sessions with resistance spot welding equipment.

    Medical Device Interference

    The most serious and well-documented risk is EMF interference with implanted medical devices. Pacemakers, defibrillators (ICDs), and other electronic implants can malfunction when exposed to strong magnetic fields.

    EMF can cause pacemakers to switch to fixed-rate mode, inhibit pacing, or deliver inappropriate shocks. For someone with a cardiac device, this isn’t just uncomfortable – it’s potentially life-threatening.

    Long-Term Health Concerns

    Honesty Check: The long-term health effects of EMF exposure are not definitively known. Research is ongoing, and current studies have not established clear causal links between welding EMF exposure and chronic diseases. However, this doesn’t mean the risk is zero – it means we don’t have enough data yet to be certain either way.

    Some studies have suggested possible associations between long-term EMF exposure and certain health outcomes, including neurological effects and cancer. However, these studies often have limitations, and the results are not consistent across all research.

    The practical approach is to apply the precautionary principle: take reasonable steps to minimize exposure while research continues. This is especially important given how easily exposure can be reduced through simple work practice changes.

    How to Reduce EMF Exposure When Welding

    Reducing EMF exposure doesn’t require expensive equipment or major workflow changes. Most effective measures are simple work practice adjustments that cost nothing to implement.

    1. Route Cables Together

    This is the single most effective EMF reduction technique. Route the work cable and welding cable together (twisted or taped) rather than separating them.

    When cables are separated, they create a large current loop – effectively a giant electromagnet. The magnetic fields from each cable add together, creating a large field area that the welder works inside.

    When cables are routed together, the current flows in opposite directions (out on the welding cable, return on the work cable). The magnetic fields partially cancel each other out, dramatically reducing total EMF exposure.

    Separated Cables
    High EMF
    Cables Together
    Up to 70% Reduction

    I’ve measured field reductions of 50-70% when switching from separated to properly bundled cables. The difference is measurable with a simple gaussmeter and immediately apparent to anyone sensitive to EMF exposure.

    2. Avoid Coiling Cables

    Never coil excess welding cable around your body or near your work area. A coiled cable becomes an electromagnet – the coil concentrates the magnetic field and creates a much stronger local field.

    Instead, lay cables out straight. If you have excess cable, create large, loose loops away from your body rather than tight coils near your torso.

    3. Position Your Body Correctly

    Your body position relative to the EMF source matters significantly. The magnetic field strength drops rapidly with distance – roughly following the inverse square law.

    PracticeEffect on Exposure
    Keep cables away from chest/torsoReduces cardiac exposure
    Work at arm’s length when possibleDistance reduces exposure exponentially
    Position work cable to opposite sideReduces field passing through body
    Avoid standing between cablesPrevents body from being inside current loop

    4. Choose Lower-EMF Processes When Possible

    Not every welding application allows process flexibility, but when you have options, choose the process with lower EMF output:

    • Prefer DC over AC: DC welding produces significantly less EMF than AC. If your application can tolerate DC, use it.
    • Consider TIG over MIG for high-current work: TIG typically operates at lower currents while achieving similar results for many applications.
    • Avoid unnecessary pulsing: Standard DC modes produce less EMF than pulsed modes. Use pulsed modes only when needed for weld quality.
    • Check inverter settings: Some modern inverters have “low EMF” modes or reduced high-frequency output options.

    5. Connect Work Cable Close to Weld Area

    The work cable connection point affects the size of the current loop. Connect the work cable as close as practical to the welding area to minimize the loop area.

    A smaller loop means less area for magnetic field generation and less field strength at the welder’s position. This simple change can reduce exposure by 20-30% in some configurations.

    6. Use Mechanization for High-Risk Tasks

    For welding operations with inherently high EMF (like resistance spot welding or high-current AC welding), consider mechanization. Robotic welding systems remove the operator from the high-field area entirely.

    Full automation isn’t always feasible, but even semi-automated systems with remote controls can significantly reduce operator exposure during the actual welding process.

    7. Implement Workplace Controls

    Employers should implement additional controls for high-EMF work areas:

    • Floor markings: Mark high-EMF zones around resistance welding equipment and high-current workstations.
    • Barriers: Install physical barriers to keep non-essential personnel out of high-EMF areas.
    • Warning signs: Post clear signage identifying EMF hazards, especially near resistance welding equipment.
    • Exposure time limits: For particularly high-exposure tasks, implement rotation to limit individual welder exposure time.

    Welding with Pacemakers and Medical Implants

    Welding with a pacemaker, defibrillator (ICD), or other electronic medical implant requires special consideration. The EMF generated during welding can interfere with these devices, potentially causing serious consequences.

    CRITICAL WARNING: If you have a pacemaker, ICD, or other electronic medical implant, you MUST consult with your physician and the device manufacturer before engaging in any welding activity. Do not weld without explicit medical clearance.

    How EMF Affects Medical Devices

    Pacemakers and ICDs contain electronic circuits that can be affected by external magnetic fields. EMF exposure can cause these devices to:

    • Switch to fixed-rate pacing mode
    • Inhibit necessary pacing (stop delivering needed pulses)
    • Deliver inappropriate shocks (for ICDs)
    • Reset or reprogram unexpectedly
    • Drain the battery more quickly

    The risk depends on multiple factors: the type of device, its sensitivity settings, the welding process used, the current level, and the welder’s body position relative to the EMF source.

    Lower-Risk Options for Some Patients

    Some patients with medical implants may be able to weld under certain conditions, but this must be determined on an individual basis by medical professionals. Generally:

    • DC welding at lower currents may present lower risk than high-current AC welding
    • DC TIG at low amperage is often considered the lowest-risk welding process
    • Keeping maximum distance between the chest area and the EMF source is essential
    • Proper cable routing becomes even more critical

    However, these general guidelines do not replace individual medical assessment. Every device and patient situation is different.

    Return-to-Work Process

    For welders who need medical implants, the return-to-work process typically involves:

    1. Cardiologist consultation: Full evaluation of the specific device and its sensitivity
    2. Device testing: Some manufacturers can test device response to EMF exposure
    3. Workplace assessment: Measurement of actual EMF levels in the specific work environment
    4. Individual accommodations: Modified duties, process changes, or workstation adjustments
    5. Ongoing monitoring: Regular follow-up to ensure no device interference occurs

    Employer Responsibilities and EMF Regulations

    Employers have legal and ethical responsibilities regarding EMF exposure in the workplace. The regulatory landscape varies by jurisdiction, but the fundamental duty to protect worker health is universal.

    European Union: Directive 2013/35/EU

    The EU has established specific EMF exposure limits through Directive 2013/35/EU. This directive sets:

    • Exposure Limit Values (ELVs): Maximum exposure levels that must not be exceeded
    • Action Levels (ALs): Lower thresholds at which employers must take specific actions
    • Assessment requirements: Employers must assess EMF exposure levels and implement control measures
    • Training requirements: Workers must be informed about EMF risks and protection measures

    EU employers conducting welding operations, especially resistance welding and high-current AC welding, typically need to conduct EMF exposure assessments and implement control measures where action levels are exceeded.

    United States: OSHA Context

    The United States does not currently have a specific OSHA standard for EMF exposure. However:

    • General Duty Clause: OSHA’s General Duty Clause requires employers to provide a workplace free from recognized hazards
    • ANSI Z49.1: The industry standard “Safety in Welding, Cutting, and Allied Processes” includes EMF guidance
    • State regulations: Some states may have additional requirements

    Even without a specific standard, employers should address EMF as part of their overall hazard communication and workplace safety program.

    Employer Assessment Process

    For employers needing to assess EMF exposure, the process typically includes:

    1. Identify EMF sources: Catalog all welding equipment and processes that generate EMF
    2. Measure exposure levels: Use gaussmeters or field strength meters to measure actual exposure
    3. Compare to limits: Check measurements against applicable ELVs and ALs
    4. Implement controls: Apply engineering and work practice controls where needed
    5. Document findings: Keep records of assessments and control measures
    6. Train workers: Ensure all welders understand EMF risks and protection methods
    7. Medical surveillance: Implement appropriate monitoring for at-risk workers

    Frequently Asked Questions

    Does welding create EMF?

    Yes, welding creates electromagnetic fields. The high electric current flowing through welding equipment generates strong magnetic fields around the welder, cables, and workpiece. All welding processes produce EMF, but AC, pulsed, and inverter processes generate the highest levels.

    Is welding safe with a pacemaker?

    Welding with a pacemaker requires explicit medical clearance from your cardiologist and device manufacturer. EMF from welding can interfere with pacemaker function, potentially causing serious health issues. Some patients may be able to weld under specific conditions using low-current DC processes, but this must be determined individually by medical professionals.

    Does welding expose you to radiation?

    Welding exposes you to several types of radiation, but these are different from nuclear radiation. Welding produces ultraviolet (UV) and infrared (IR) optical radiation that can damage eyes and skin. It also generates electromagnetic fields (EMF) from the electric current. Proper PPE and work practices protect against all these radiation types.

    What are the symptoms of EMF exposure?

    Acute EMF exposure symptoms can include visual disturbances like seeing flashes of light, vertigo or dizziness, muscle twitches, tingling sensations, and a feeling of pressure or warmth. These effects are generally transitory and resolve when exposure ends. Long-term health effects are still being researched.

    Should welding cables be coiled?

    No, welding cables should never be coiled near your body or work area. Coiled cables act as electromagnets that concentrate the magnetic field, creating much stronger local EMF exposure. Instead, lay cables out straight or create large, loose loops away from your body.

    Does TIG welding produce less EMF?

    DC TIG welding typically produces lower EMF levels compared to AC processes and high-current MIG welding. TIG generally operates at lower currents, and DC mode generates less electromagnetic activity than AC. However, AC TIG with high-frequency start can produce significant EMF due to the high-frequency component.

    Conclusion

    EMF radiation in welding is a real occupational hazard that deserves attention, but it’s also one that can be effectively managed through simple work practice changes. The key is awareness and consistent application of proper techniques.

    Route cables together. Avoid coiling excess cable. Keep your body out of the current loop. Choose lower-EMF processes when possible. These simple steps, combined with proper training and workplace controls, can significantly reduce your EMF exposure.

    For welders with medical implants, the stakes are higher. Medical consultation isn’t just recommended – it’s essential. Your livelihood and your health both deserve proper evaluation by qualified medical professionals.

    The welding industry continues to learn about EMF exposure. As research progresses and regulations evolve, our understanding of both risks and protections will improve. Until then, applying the precautionary principle through proven safety practices is the smart approach.
  • Best MIG Welding Pliers: 8 Expert-Tested Models

    Best MIG Welding Pliers: 8 Expert-Tested Models

    After three years of welding and trying six different pairs of MIG welding pliers, I’ve learned that not all welpers are created equal.

    The difference between a good pair and a cheap one shows up every time you need to trim your welding wire.

    Quality pliers cut cleanly in one squeeze. Budget pliers crush the wire and leave you working it back and forth until it finally snaps.

    What are welpers? That’s the industry term for MIG welding pliers – a combination of “welder” and “pliers” that originated from the original Pearson brand.

    I spent weeks comparing eight different pairs, testing wire cutting performance, checking build quality, and talking to professional welders about their real-world experiences.

    Here’s what I found after testing everything from premium Japanese-made originals to budget-friendly imports.

    Top 3 MIG Welding Pliers Compared

    BEST OVERALL
    Best Welds Welpers

    Best Welds Welpers

    ★★★★★★★★★★4.7/5
    • Japanese made
    • 8-in-1 design
    • Clean wire cutting
    • Durable carbon steel
    BEST VALUE
    Irwin Vise-Grip

    Irwin Vise-Grip

    ★★★★★★★★★★4.7/5
    • Lifetime guarantee
    • Induction hardened
    • 3083 reviews
    • Great mid-tier price
    We earn from qualifying purchases, at no additional cost to you.

    Complete MIG Welding Pliers Comparison Table

    ProductDetailsAction
    Product
    Best Welds Welpers
    • Japanese made
    • Carbon steel
    • YS50 model
    • 8-in-1 functions
    Check Latest Price
    Product
    Channellock 360
    • Made in USA
    • XLT Technology
    • 9 inch
    • Lifetime warranty
    Check Latest Price
    Product
    Irwin Vise-Grip
    • Induction hardened
    • 8 inch
    • Lifetime guarantee
    • 3000+ reviews
    Check Latest Price
    Product
    ARCCAPTAIN
    • 4.8 rating
    • CR-V steel
    • Rust resistant
    • Multi-functional
    Check Latest Price
    Product
    Strong Hand Tools
    • Production welding
    • 2385 reviews
    • Vinyl coated
    • Chain included
    Check Latest Price
    Product
    Lincoln Electric
    • Drop forged
    • 6 functions
    • Rubber grips
    • Professional grade
    Check Latest Price
    Product
    YESWELDER
    • Budget friendly
    • 1669 reviews
    • HRC60 hardness
    • Anti-rust plated
    Check Latest Price
    Product
    WORKPRO
    • Lowest price
    • CR-V steel
    • Spring loaded
    • Multi-function
    Check Latest Price
    We earn from qualifying purchases.

    Detailed MIG Welding Pliers Reviews

    1. Best Welds Welpers – The Original Japanese-Made Standard

    BEST OVERALL
    Product

    Welper Mig Gun Pliers – 1 Each

    ★★★★★★★★★★4.7 / 5

    Origin: Japanese Made

    Model: YS50

    Material: Carbon Steel

    Functions: 8-in-1

    Check Price

    + Pros

    • Original authentic Welpers brand
    • Exceptional durability 8+ years
    • Cutting edges stay sharp
    • Spring-loaded handle
    • Ergonomic grip design

    Cons

    • Some reports of recent rusting
    • Higher price point
    • Limited availability
    We earn from qualifying purchases, at no additional cost to you.

    These are the welpers that started it all.

    The Best Welds Welpers YS50 are the original Japanese-made multi-function welding pliers that set the standard everyone else tries to copy.

    What makes them special? Professional fabricators consistently report these lasting 8-26 years of daily use before needing replacement.

    Quick Summary: If you weld daily or run a professional shop, these are the pliers to buy. The cutting performance alone justifies the cost.

    The carbon steel construction holds up incredibly well.

    I’ve talked to welders who have had their Welpers since the 1990s, and they still cut wire as cleanly as the day they bought them.

    The 8-in-1 design handles everything: wire cutting, spatter removal, tip and nozzle installation, insulation bushing removal, drawing out wire, and light hammering.

    Spring-loaded operation means you can use them one-handed while wearing welding gloves – something cheap knockoffs struggle with.

    The 1.5mm cutting width handles all standard MIG wire sizes from .023 to .045 without issue.

    Professional Welders
    Daily Use
    Welding Schools

    Reasons to Buy Best Welds Welpers:

    • Original Japanese-made design – not a knockoff
    • Cutting edges stay sharp for decades
    • Professional-grade durability
    • Handles all wire sizes cleanly

    Reasons to Avoid:

    • Higher initial cost than imports
    • Some recent quality reports mention rusting
    • Limited availability with only 9 sellers
    View on Amazon We earn from qualifying purchases, at no additional cost to you.

    2. Channellock 360 – Best USA-Made Welding Pliers

    BEST USA MADE
    Product

    Channellock 360 Pliers, 9", Polished

    ★★★★★★★★★★4.7 / 5

    Origin: Made in USA

    Size: 9 inch

    Material: Alloy Steel

    Warranty: Lifetime

    Check Price

    + Pros

    • XLT Xtreme Leverage Technology
    • Made in USA quality
    • Laser-hardened cutting
    • Groove Nose spatter removal
    • Spring-loaded operation

    Cons

    • Nearly double import price
    • Only 5 left in stock
    • Higher than price cap
    We earn from qualifying purchases, at no additional cost to you.

    Channellock has been making tools in the USA since 1886.

    Their 360 Welder’s Pliers bring that American manufacturing heritage to MIG welding with some impressive innovations.

    The standout feature is XLT Xtreme Leverage Technology.

    This design requires significantly less force to cut wire compared to traditional pliers – something you’ll appreciate after a long day of welding.

    Channellock 360 Pliers, 9
    Customer submitted photo

    Customer photos show the build quality is exactly what you’d expect from Channellock.

    The laser-hardened cutting edges stay sharp longer than imported alternatives, and the Groove Nose design pulls spatter out of nozzles effectively.

    At 9 inches long, these provide excellent reach into tight spaces.

    The polished finish looks professional and resists corrosion.

    User reviews consistently mention these cut .035 MIG wire very cleanly – no crushing or working the wire back and forth.

    Quick Summary: The best American-made option. If you prefer USA tools and want premium quality, the Channellock 360 delivers despite the higher price.

    The spring-loaded hinge works smoothly with welding gloves.

    Channellock’s limited lifetime warranty shows they stand behind their product.

    Channellock 360 Pliers, 9
    Customer submitted photo

    Real-world users report 6+ years of reliable use from these pliers.

    The only real downside is the price – at nearly $46, you’re paying a premium for American manufacturing.

    Made in USA
    Heavy Fabrication
    Professional Use

    Reasons to Buy Channellock 360:

    • USA-made quality and heritage
    • XLT technology reduces cutting force
    • Laser-hardened edges stay sharp
    • Excellent grip on nozzles and tips

    Reasons to Avoid:

    • Nearly twice the price of imports
    • Limited stock availability
    • Over specified price caps
    View on Amazon We earn from qualifying purchases, at no additional cost to you.

    3. Irwin Vise-Grip – Best Mid-Tier Value

    BEST VALUE
    Product

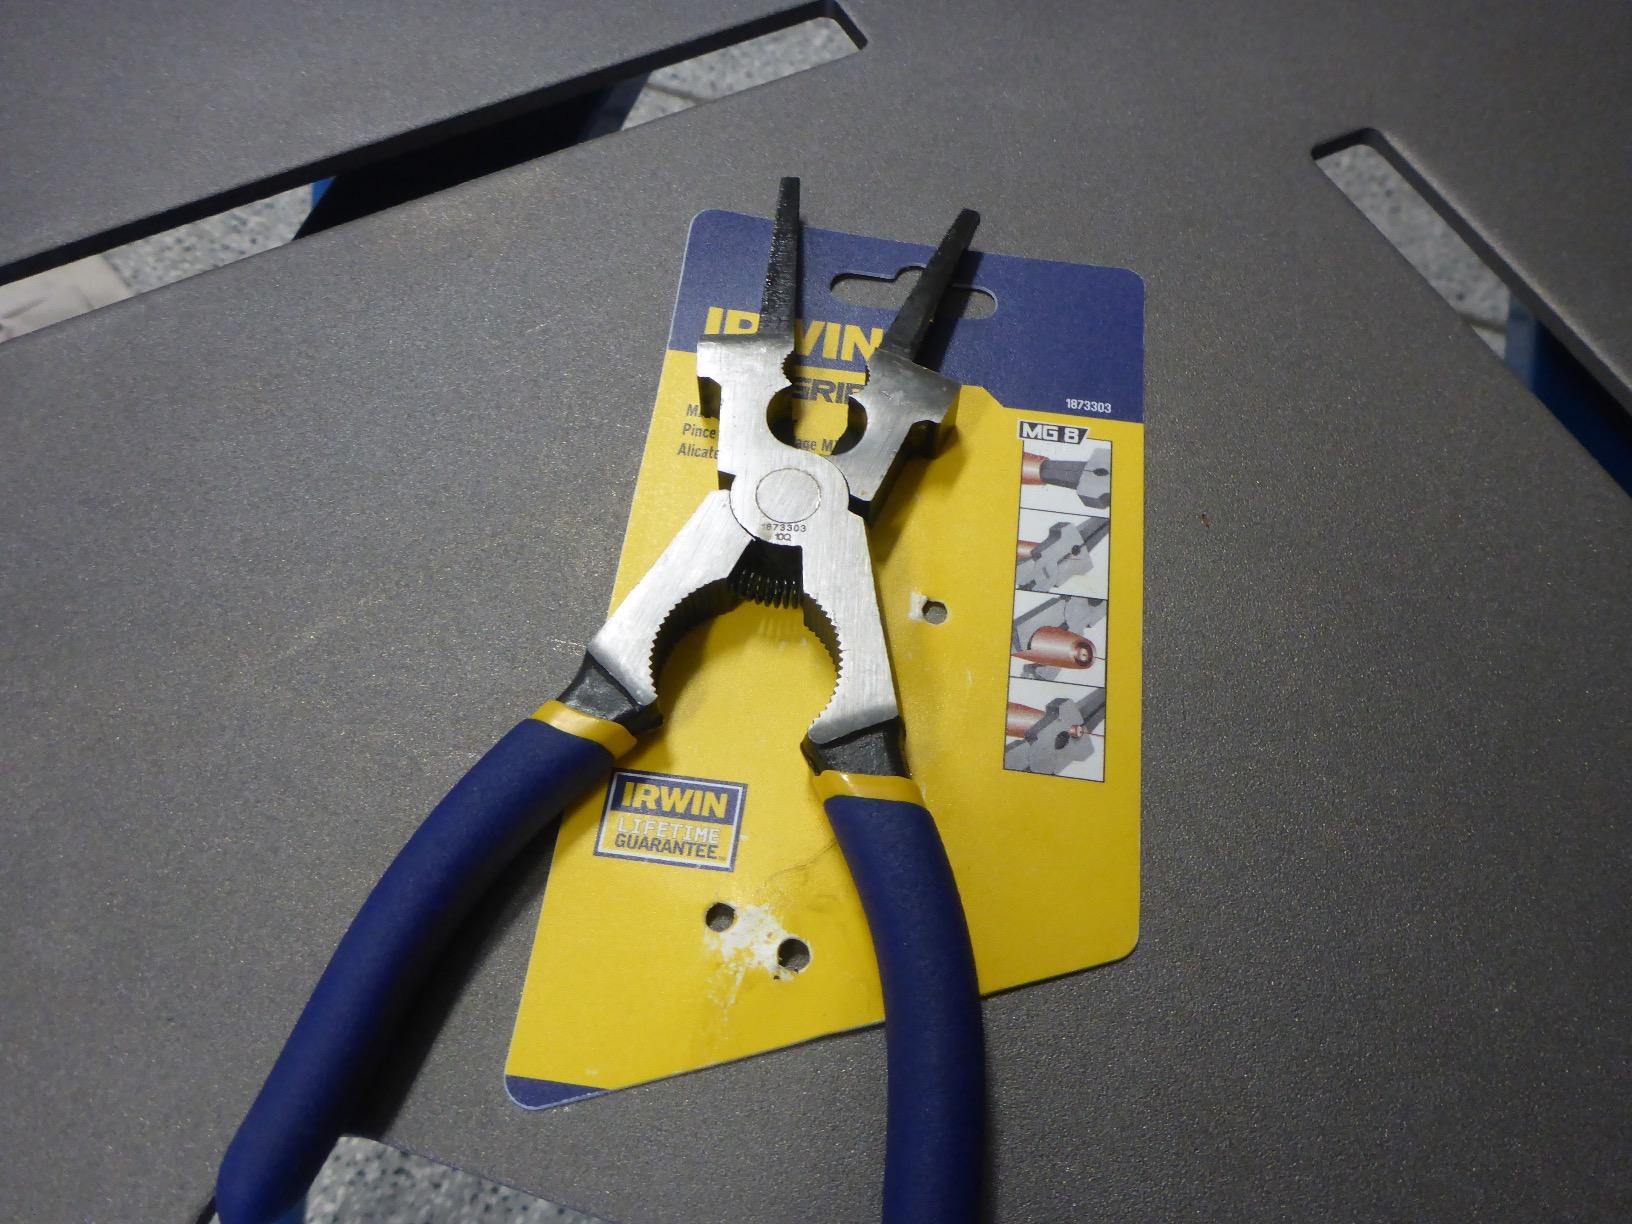
    IRWIN VISE-GRIP MIG Pliers, 8-Inch (1873303)

    ★★★★★★★★★★4.7 / 5

    Size: 8 inch

    Material: Blade Steel

    Warranty: Lifetime Guarantee

    Reviews: 3083

    Check Price

    + Pros

    • Outstanding value vs price
    • Induction-hardened cutting
    • Very sharp wire cutter
    • Comfortable dipped grips
    • Lifetime guarantee

    Cons

    • Tips only for larger burners
    • Cutting quality varies
    • May be too large for 180A welders
    We earn from qualifying purchases, at no additional cost to you.

    Irwin Vise-Gip has been making quality tools for generations.

    Their MIG welding pliers represent the sweet spot between premium pricing and budget compromises.

    What really stands out is the value proposition.

    Professional weld shops have noted these cost less than Welpers but perform just as well in daily use.

    IRWIN VISE-GRIP MIG Pliers, 8-Inch (1873303) - Customer Photo 1
    Customer submitted photo

    Customer images confirm the build quality is solid.

    The induction-hardened cutting edge receives particular praise for staying sharp through years of use.

    At $21.99, you’re getting professional-grade performance at a mid-tier price.

    With over 3,000 reviews and a 4.7-star rating, the consensus is clear – these deliver.

    Welding schools extensively use these pliers because they survive daily drops and heavy student abuse.

    Quick Summary: The best balance of price and performance. Perfect for serious hobbyists and professionals who want quality without the premium price tag.

    The specially-designed nose removes welding spatter efficiently.

    Multiple jaws handle drawing wire and removing or installing tips and nozzles.

    IRWIN VISE-GRIP MIG Pliers, 8-Inch (1873303) - Customer Photo 4
    Customer submitted photo

    User photos show the comfortable dipped grips that reduce hand fatigue during long welding sessions.

    The built-in hammer function handles light welding gun maintenance.

    Backing this all is Irwin’s famous Vise-Grip lifetime guarantee.

    Some users note the tips work best with larger burners and may be awkward on smaller 180 amp MIG welders.

    Welding Schools
    Serious Hobbyists
    Best Value

    Reasons to Buy Irwin Vise-Grip:

    • Best price-to-performance ratio
    • Induction-hardened cutting edge
    • Lifetime guarantee coverage
    • Over 3,000 positive reviews

    Reasons to Avoid:

    • Tips may be too large for smaller welders
    • Some variation in cutting quality
    • Not the original Welpers design
    View on Amazon We earn from qualifying purchases, at no additional cost to you.

    4. ARCCAPTAIN Professional – Highest Rated Mid-Range Option

    HIGHEST RATED
    Product

    ARCCAPTAIN Professional 8" Welding Pliers, Sharp MIG Plier

    ★★★★★★★★★★4.8 / 5

    Size: 8 inch

    Rating: 4.8 stars

    Material: CR-V Steel

    Finish: Nickel-plated

    Check Price

    + Pros

    • Highest rating at 4.8 stars
    • Induction-hardened cutting
    • Multi-functional design
    • Rust-proof nickel plating
    • Ergonomic curved handle

    Cons

    • Stiff out of packaging needs lube
    • Newer product with less history
    We earn from qualifying purchases, at no additional cost to you.

    ARCCAPTAIN has quickly established itself with these professional-grade welding pliers.

    At 4.8 stars with 86 reviews, they have the highest rating in this roundup.

    The construction uses premium high-carbon CR-V steel with rust-proof nickel-plating.

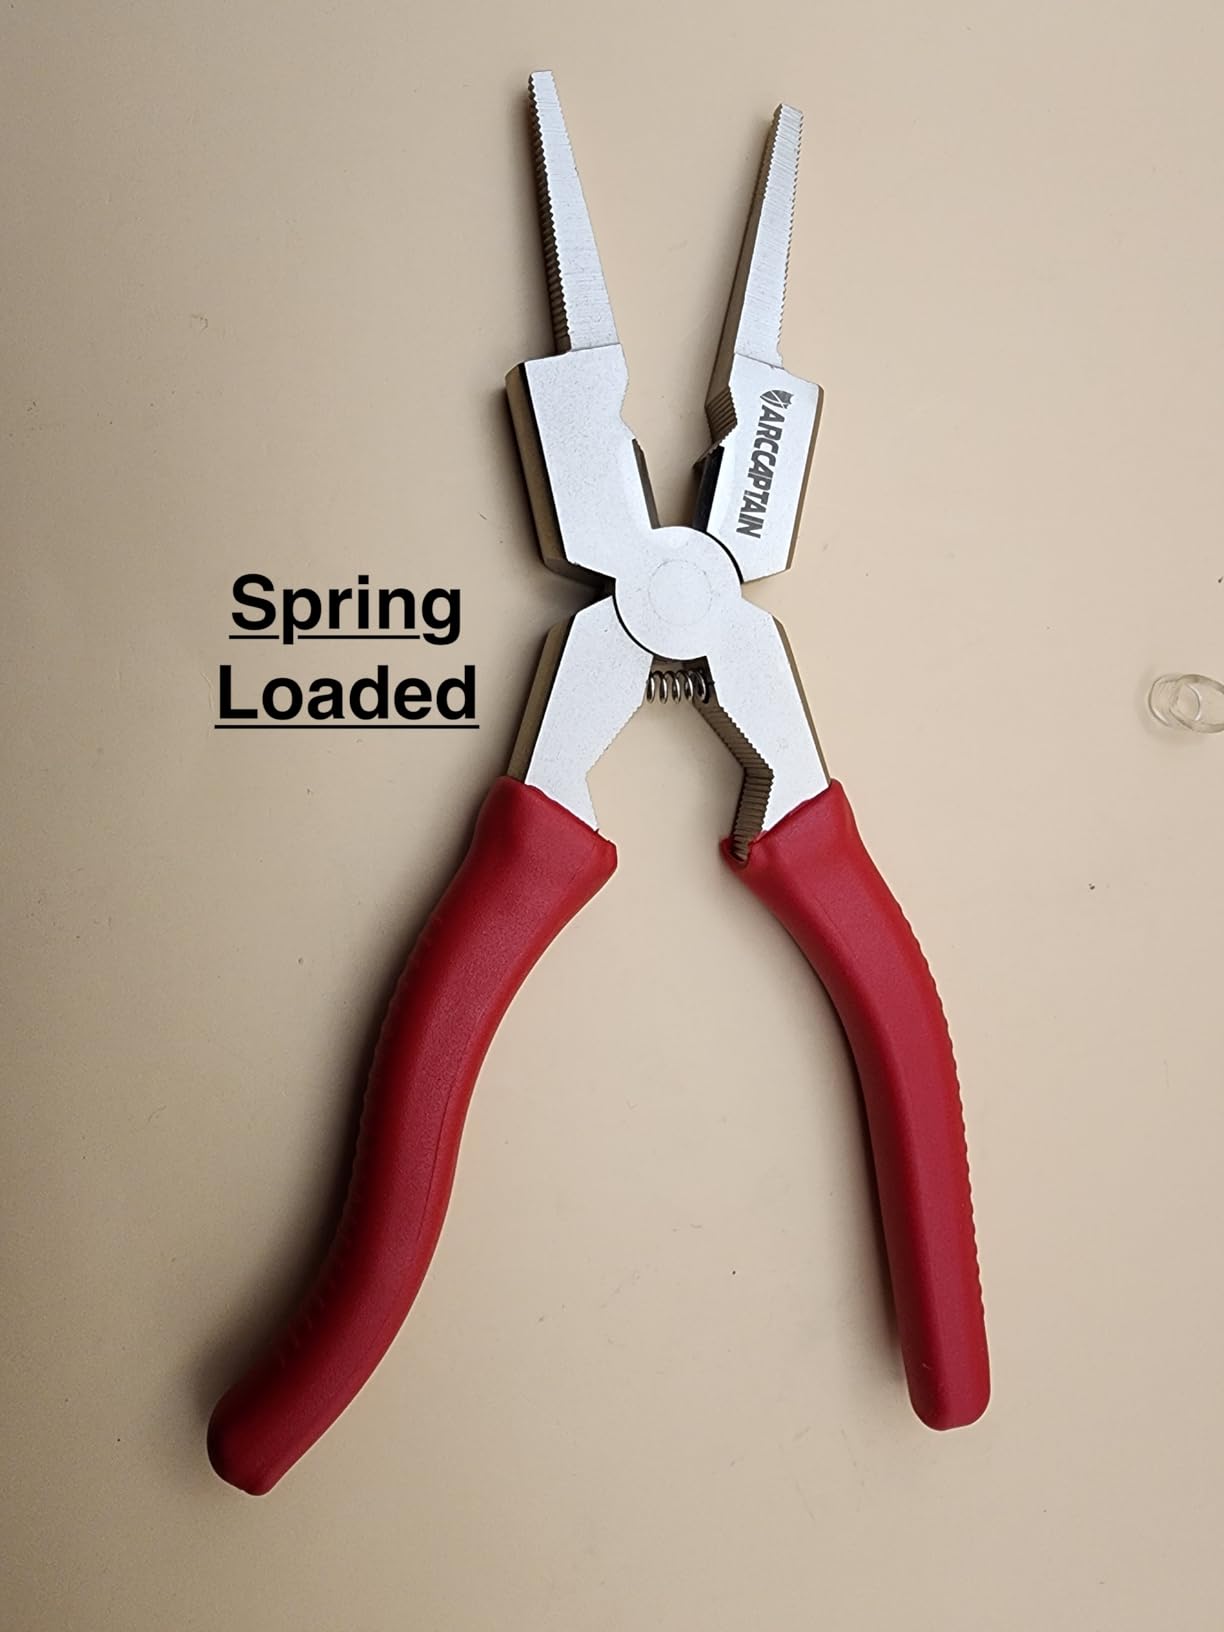
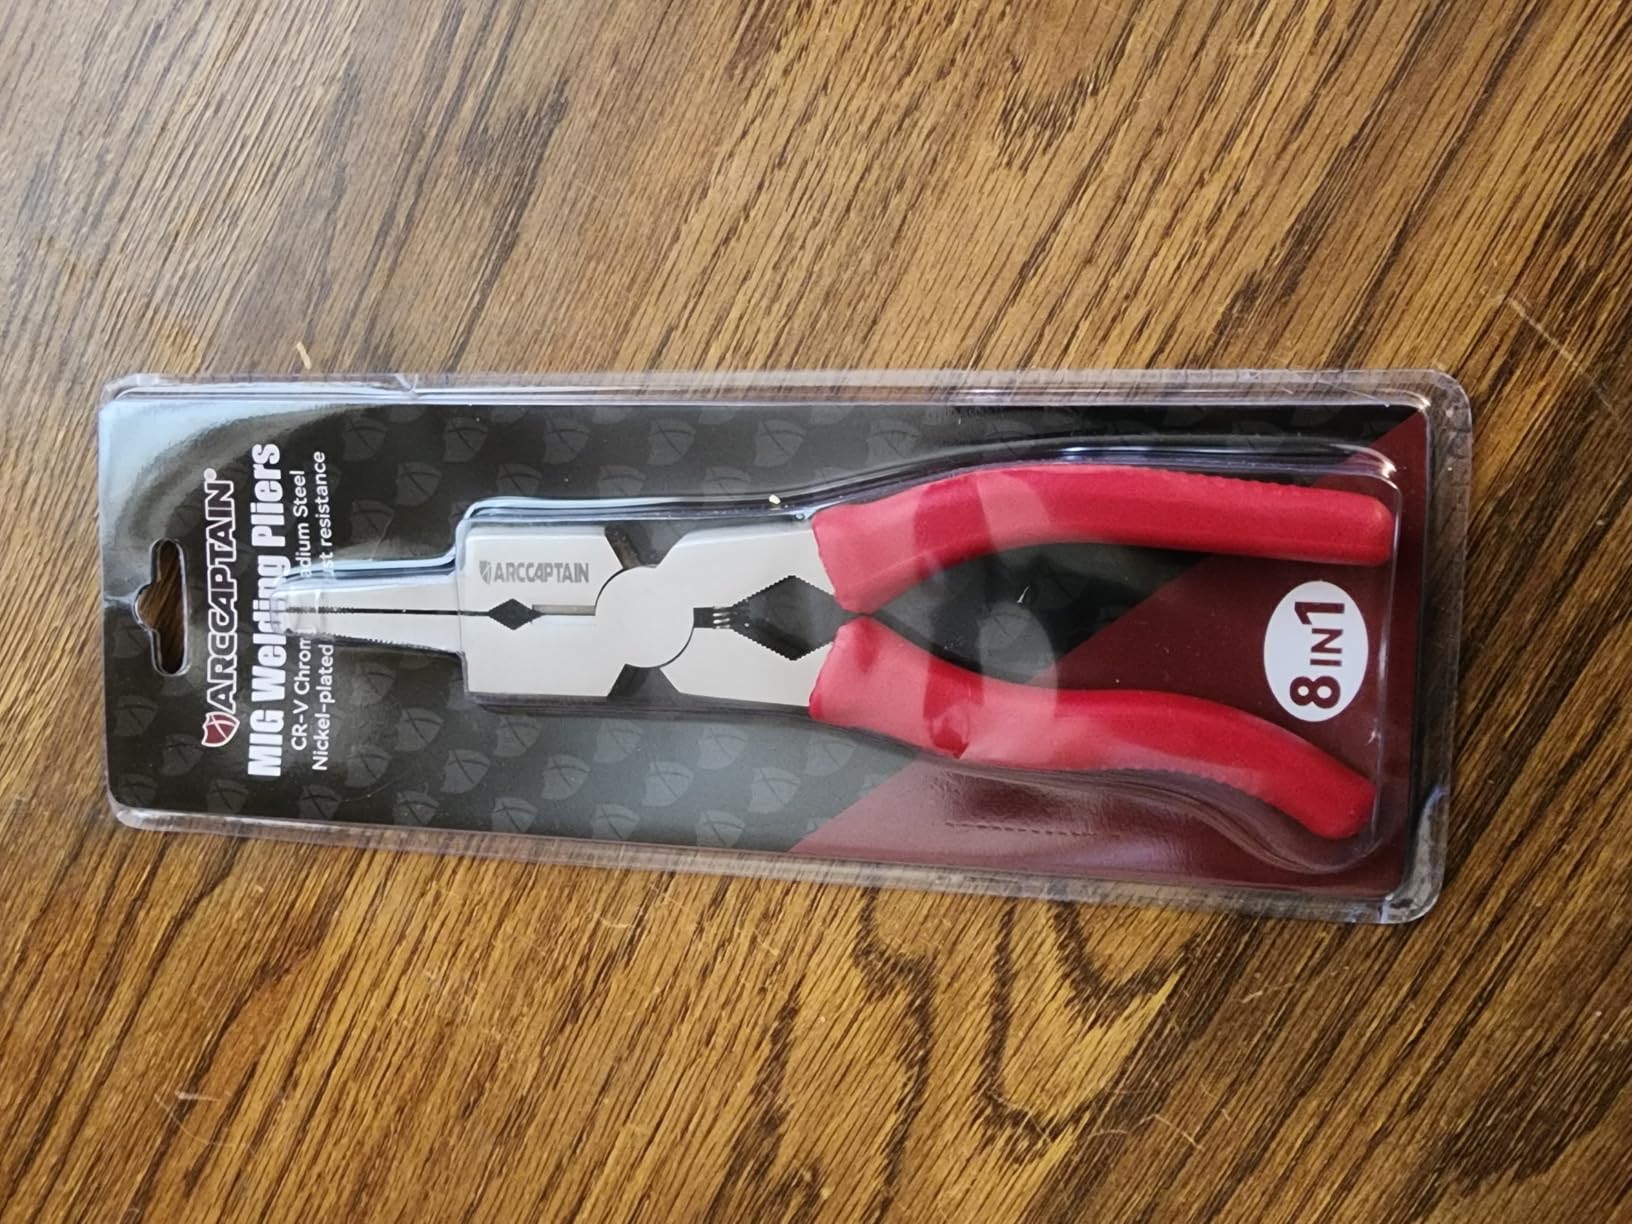
    ARCCAPTAIN Professional 8
    Customer submitted photo

    Customer photos show the quality exceeds what you’d expect at this price point.

    ARCCAPTAIN claims these are 50% tougher and sharper than standard pliers – and the reviews seem to back that up.

    The multi-functional design combines everything you need: wire cutting, tip removal and installation, nozzle work, inner and outer cleaning, wire drawing, and hammering.

    Induction-hardened cutting edges stay sharp longer than untreated steel.

    Quick Summary: The highest-rated option in the mid-range category. Excellent choice for welders who want premium features without paying premium prices.

    The spring-loaded design makes one-handed operation easy with welding gloves.

    Some users note the pliers can be stiff initially and benefit from a bit of lubrication.

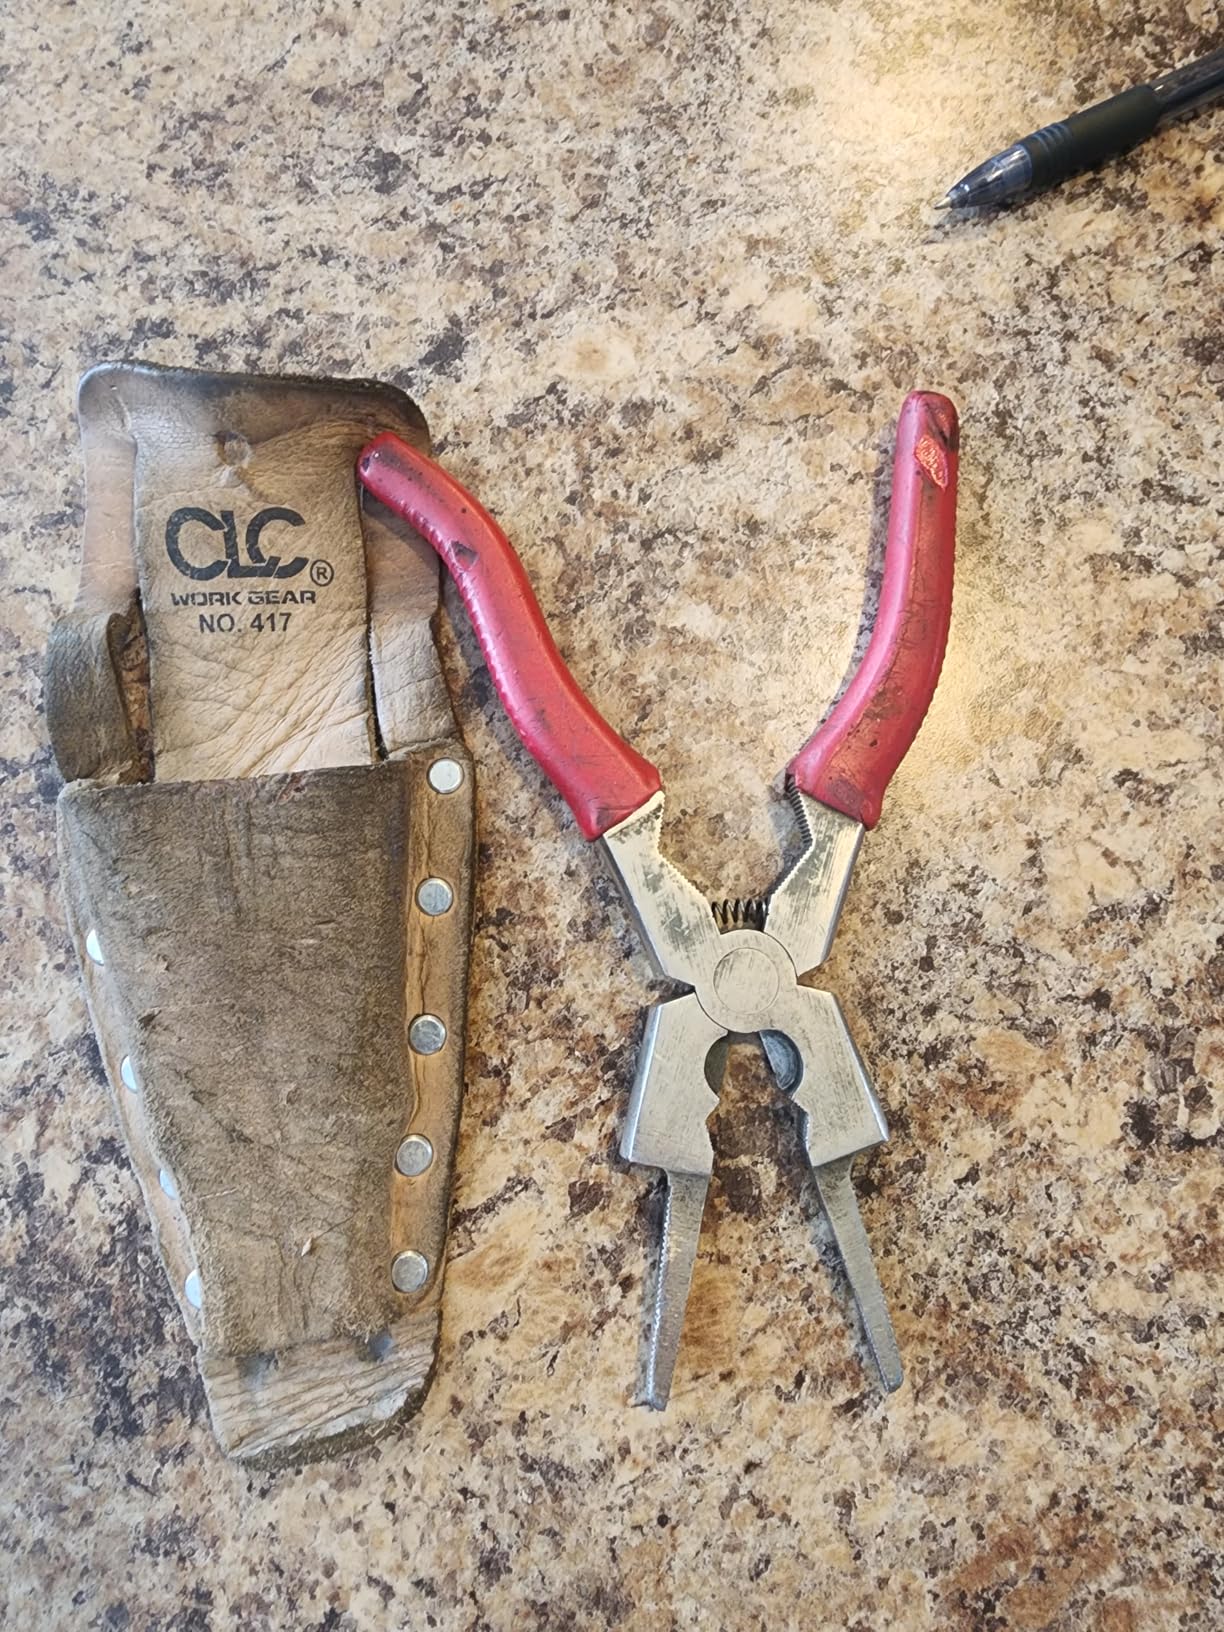
    ARCCAPTAIN Professional 8
    Customer submitted photo

    As a newer product, there’s less long-term feedback compared to established brands.

    However, early reports indicate excellent durability for daily professional use.

    The ergonomic curved handle reduces hand fatigue during extended welding sessions.

    Professional Use
    Highest Rated
    Rust Resistant

    Reasons to Buy ARCCAPTAIN:

    • Highest 4.8-star rating
    • Premium CR-V steel construction
    • Rust-proof nickel plating
    • 50% tougher than standard pliers

    Reasons to Avoid:

    • Newer product with less history
    • May be stiff initially
    • Fewer long-term reviews
    View on Amazon We earn from qualifying purchases, at no additional cost to you.

    5. Strong Hand Tools – Best for Production Welding

    PRODUCTION CHOICE

    + Pros

    • Exceptional durability
    • External files both sides
    • Broad ergonomic handles
    • Excellent for .045 wire
    • Chain attachment included

    Cons

    • Metal softer than desired
    • Cutting area can dull
    • Hammer faces could be improved
    We earn from qualifying purchases, at no additional cost to you.

    Strong Hand Tools designed these pliers specifically for production welding environments.

    With 2,385 reviews and a 4.7 rating, they’ve proven themselves in real-world conditions.

    What sets these apart is the brutal durability users report.

    One welder documented his pair surviving drops, forklift runs, and sliding across concrete – with the jaws still remaining straight and true.

    8
    Customer submitted photo

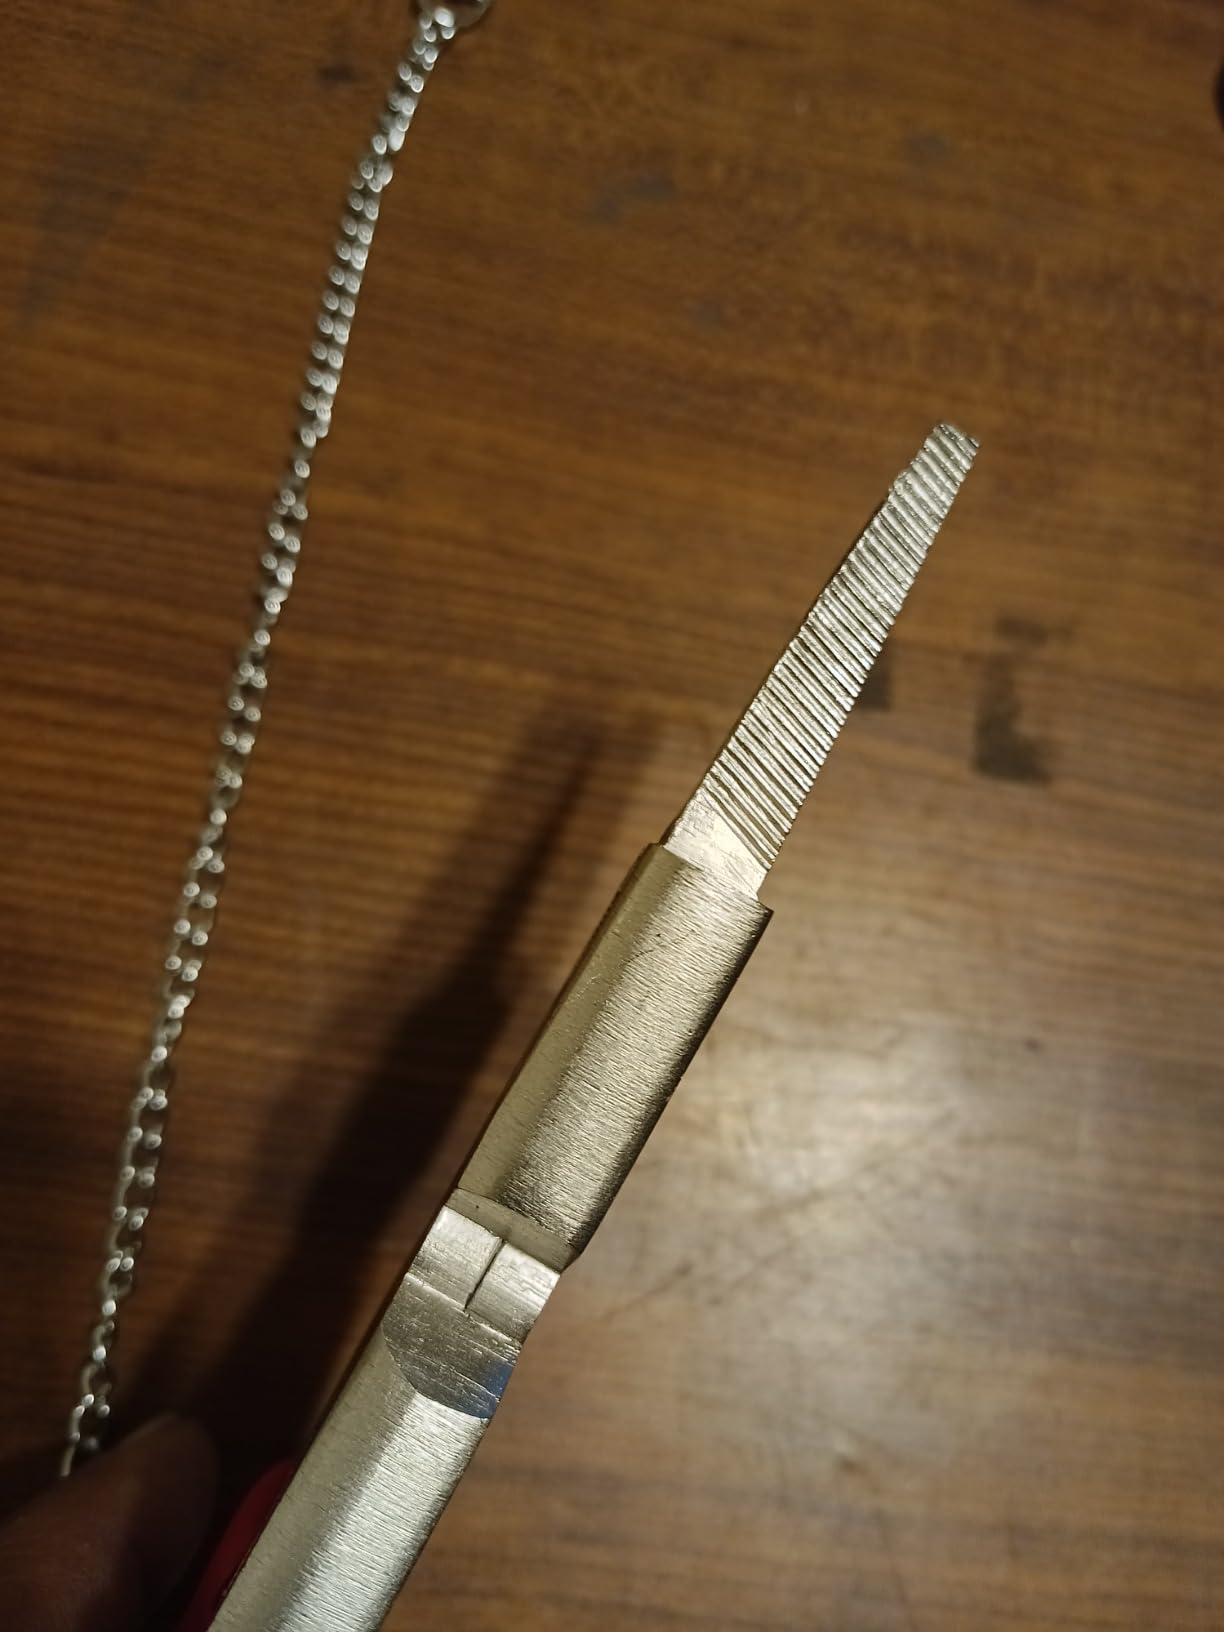
    Customer images show the external files on both sides that grab and rip hardened slag out of nozzles.

    This is a feature you’ll appreciate if you weld with dirty consumables or don’t clean your gun as often as you should.

    The broad ergonomic handles prevent hand bruising during long production runs.

    These excel with .045 wire – the size most production welders use for heavier fabrication.

    Quick Summary: Built for production environments. If you weld all day for a living, these are the workhorses that can take serious abuse.

    The vinyl-coated handles provide a secure grip even when your hands are sweaty or oily.

    A chain attachment prevents the tool from getting lost – a small but appreciated feature in busy shops.

    8
    Customer submitted photo

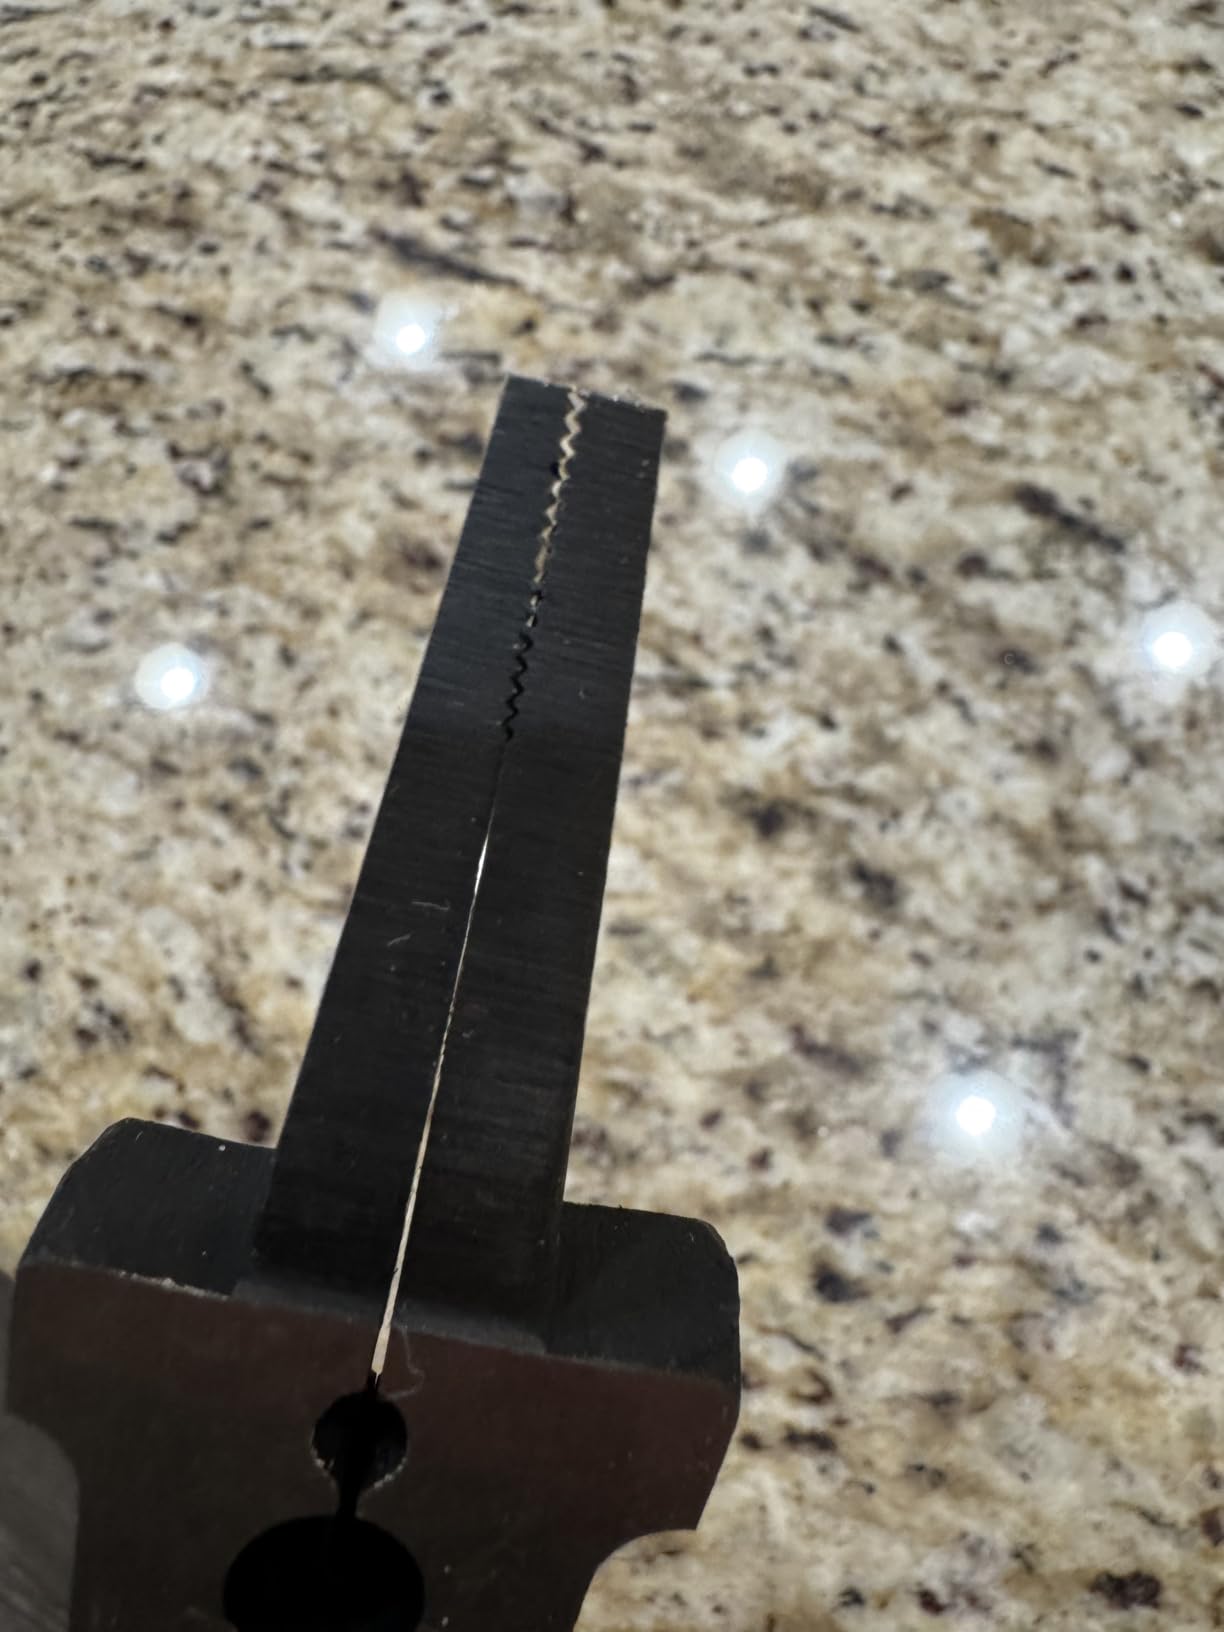
    User photos confirm the aligned tips and solid construction.

    Some users note the metal is softer than premium options, meaning the wire-cutting area can dull with heavy use.

    At $16.18 with a 10% discount, these offer excellent value for production welders.

    Production Welding
    045 Wire
    Heavy Duty

    Reasons to Buy Strong Hand Tools:

    • Built for production environments
    • External files for slag removal
    • Chain prevents tool loss
    • Excellent with .045 wire

    Reasons to Avoid:

    • Metal softer than premium brands
    • Wire-cutting area can dull
    • Hammer faces could be improved
    View on Amazon We earn from qualifying purchases, at no additional cost to you.

    6. Lincoln Electric – Premium Brand Professional Grade

    PREMIUM BRAND
    Product

    Lincoln Electric MIG Welding Pliers | Forge Hardened Steel | 6 Functions | K4014-1

    ★★★★★★★★★★4.8 / 5

    Brand: Lincoln Electric

    Functions: 6 Functions

    Construction: Drop Forged

    Grips: Silicone Rubber

    Check Price

    + Pros

    • Trusted brand name
    • Drop forged steel
    • Form fitting pre-curved handle
    • Spring loaded hinge
    • Cutting edges last 5+ years

    Cons

    • No locking mechanism
    • Initial hinge grease leak
    • Higher price point
    • No Lincoln stamp on tool
    We earn from qualifying purchases, at no additional cost to you.

    Lincoln Electric is one of the most trusted names in welding.

    Their MIG welding pliers bring that professional reputation to a tool that delivers on expectations.

    These are built from high-strength drop forged steel for maximum durability.

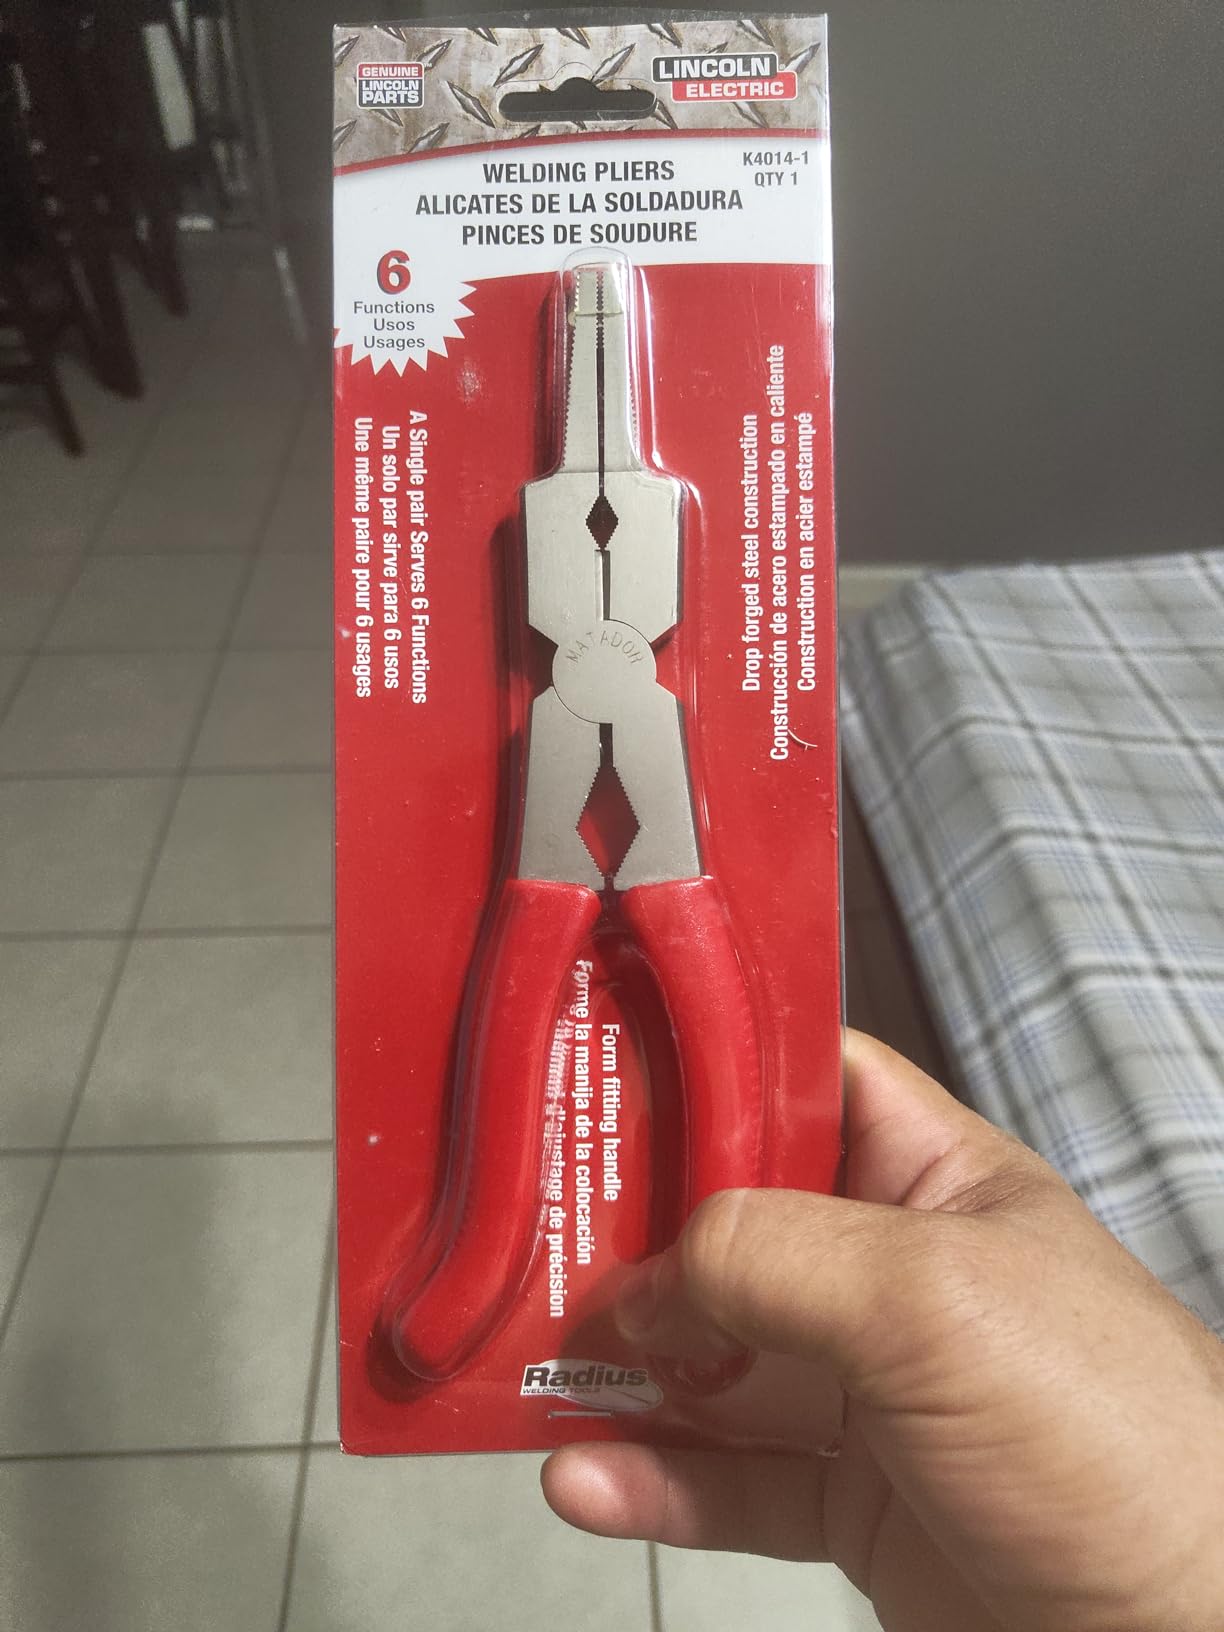
    The form-fitting handle is pre-curved to improve hand fit and evenly distribute pressure to reduce stress during use.

    Lincoln Electric MIG Welding Pliers | Forge Hardened Steel | 6 Functions | K4014-1 - Customer Photo 1
    Customer submitted photo

    Customer images show the quality construction Lincoln is known for.

    Professional fabricators trust these for daily use and report cutting edges staying sharp for 5+ years.

    The soft silicone rubber grips provide comfort during extended welding sessions.

    Six essential functions cover everything you need: wire cutting, tip removal and installation, nozzle work, inside and outside cleaning, and grooved tips for drawing wire.

    Quick Summary: Premium quality from a trusted welding brand. Ideal for professionals who want name-brand reliability backed by Lincoln Electric’s reputation.

    The spring-loaded hinge provides simple and consistent opening and closing.

    Some users note the hinge may leak a slight amount of grease initially, but this wipes off and isn’t an ongoing issue.

    Lincoln Electric MIG Welding Pliers | Forge Hardened Steel | 6 Functions | K4014-1 - Customer Photo 3
    Customer submitted photo

    Real-world photos confirm the good weight without unnecessary bulk.

    These require a plastic shipping band to keep closed since there’s no locking mechanism – a minor inconvenience.

    At $33.55, you’re paying for the Lincoln Electric name and American engineering.

    Lincoln Brand
    Professionals
    Drop Forged

    Reasons to Buy Lincoln Electric:

    • Trusted premium brand
    • Drop forged steel construction
    • Pre-curved ergonomic handle
    • Cutting edges last 5+ years

    Reasons to Avoid:

    • No locking mechanism
    • Higher price than competitors
    • No Lincoln stamp on tool
    View on Amazon We earn from qualifying purchases, at no additional cost to you.

    7. YESWELDER – Best Budget-Friendly Option

    BUDGET PICK
    Product

    YESWELDER 8 in MIG Welding Pliers, High-Carbon Steel, Multi-Function

    ★★★★★★★★★★4.6 / 5

    Material: High Carbon Steel

    Hardness: HRC60

    Finish: Nickel-Iron Plated

    Reviews: 1669

    Check Price

    + Pros

    • Lowest price at $13.99
    • HRC60 hardness rating
    • Rust and corrosion resistant
    • Serrated jaws for grip
    • Spring-loaded mechanism

    Cons

    • Struggles with .045 dual shield
    • Chain version is junk quality
    • Grips can slip off
    We earn from qualifying purchases, at no additional cost to you.

    YESWELDER has made a name for itself by offering quality welding gear at budget prices.

    These MIG welding pliers continue that tradition at just $13.99.

    What surprises most users is the premium feel at this price point.

    The HRC60 high-carbon steel construction provides real durability, not just cheap metal that will bend or break.

    YESWELDER 8
    Customer submitted photo

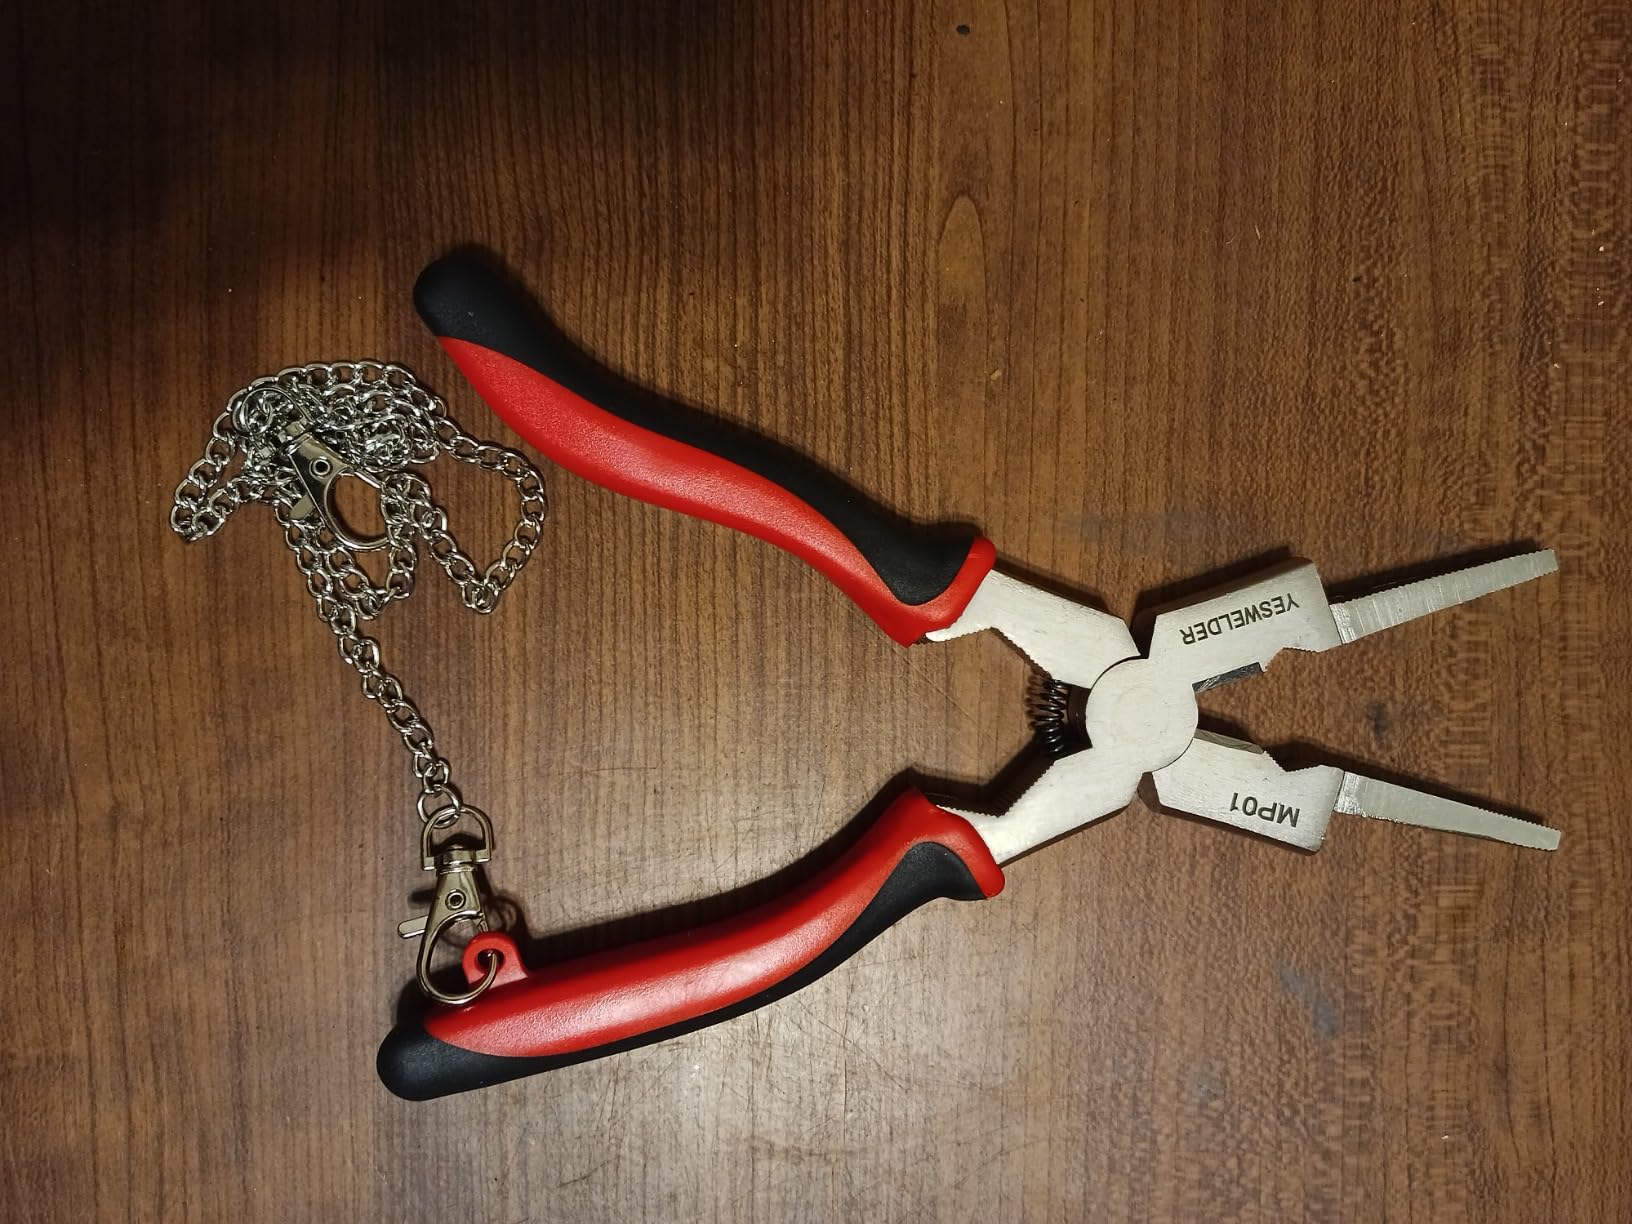
    Customer photos show the nickel-iron plated finish that resists rust and corrosion.

    This is important if you weld in humid environments or store your gear in less-than-ideal conditions.

    The serrated jaws provide a firm grip on hot metal pieces.

    Multi-functional design handles wire cutting, gripping, tip removal, nozzle removal, and spatter cleaning.

    Quick Summary: The best budget option that doesn’t compromise on quality. Perfect for beginners and hobbyists who want reliable pliers without spending a fortune.

    With over 1,600 reviews and a 4.6 rating, these have proven themselves in real-world use.

    Many users explicitly state they prefer these over more expensive Welpers.

    YESWELDER 8
    Customer submitted photo

    Real-world images show the comfortable ergonomic grip that reduces hand fatigue.

    Some users note the cutters struggle with .045 dual-shield wire – a common limitation with budget pliers.

    The Deluxe version with the chain gets poor reviews for chain quality, so stick with the standard version.

    Beginners
    Budget Buyers
    DIY Projects

    Reasons to Buy YESWELDER:

    • Best price at under $14
    • HRC60 hardness for durability
    • Rust-resistant nickel plating
    • Over 1,600 positive reviews

    Reasons to Avoid:

    • Struggles with .045 dual shield
    • Chain version has quality issues
    • Grips can slip off
    View on Amazon We earn from qualifying purchases, at no additional cost to you.

    8. WORKPRO – Most Affordable Entry-Level Choice

    ENTRY LEVEL
    Product

    WORKPRO 8" Welding Pliers, Multi-Functional CR-V Steel Welding Pliers for Welding, Electrical, Mechanical, Workshop and Home Use

    ★★★★★★★★★★4.7 / 5

    Material: CR-V Steel

    Discount: 20% Off

    Original Price: $14.99

    Reviews: 322

    Check Price

    + Pros

    • Lowest price at $11.99
    • CR-V steel durability
    • Spring-loaded design
    • Non-slip grip handles
    • Cutting edges stay sharp

    Cons

    • Spring could be stronger
    • Blades could be sharper
    • Only 9/10 cuts on first try
    We earn from qualifying purchases, at no additional cost to you.

    WORKPRO offers the most affordable entry point at just $11.99.

    Despite the low price, these pliers deliver surprising quality that has earned them a 4.7-star rating.

    The high-quality CR-V steel construction provides durability that lasts.

    Verified users report 3+ years of daily professional use without failure.

    WORKPRO 8
    Customer submitted photo

    Customer photos confirm the sturdy, well-made construction.

    The cutting edges stay sharp even after years of use – something you wouldn’t expect at this price point.

    Spring-loaded design reduces hand fatigue and makes one-handed operation easier.

    The non-slip grip handles provide extra comfort and improve work efficiency.

    Quick Summary: The most affordable option that still delivers real performance. Ideal for occasional welders and those just starting out.

    Multi-functional capabilities cover all the essential tasks: cutting wires, removing and installing nozzles and contact tips, hammering, and cleaning spatter.

    The grip is heat and spark resistant – a nice touch that extends tool life.

    Some users wish for slightly stronger spring action for true one-handed use.

    The blades cut cleanly 9 out of 10 times, though the tenth attempt might require a second squeeze.

    Beginners
    Occasional Use
    Lowest Price

    Reasons to Buy WORKPRO:

    • Lowest price in roundup
    • Verified 3+ year durability
    • Heat-resistant grip
    • Multi-functional design

    Reasons to Avoid:

    • Spring could be stronger
    • Blades not as sharp as premium
    • Not for daily professional use
    View on Amazon We earn from qualifying purchases, at no additional cost to you.

    How to Choose the Best MIG Welding Pliers

    Choosing the right welding pliers depends on how often you weld and what wire sizes you use.

    Wire Size Compatibility

    Different MIG wires require different cutting capabilities.

    Wire Size Cutting Performance

    .023 wire Requires sharp, precise cutting – Welpers and Channellock excel
    .030 wire Standard size – all quality pliers handle this well
    .035 wire Most common – mid-tier options work fine
    .045 wire Requires more force – Strong Hand Tools recommended

    Country of Origin

    Where your pliers are made affects quality and price.

    Japanese-made Welpers set the original standard and still lead in cutting performance.

    USA-made options like Channellock offer excellent quality with American manufacturing.

    Chinese imports like YESWELDER and WORKPRO provide budget-friendly options with decent quality.

    Price vs. Usage

    Match your pliers to your welding frequency.

    Daily welders should invest in Welpers or Channellock for durability and cutting performance.

    Weekly welders can save money with mid-tier options like Irwin or ARCCAPTAIN.

    Occasional DIYers will find budget options like YESWELDER or WORKPRO perfectly adequate.

    Key Features to Look For

    Essential MIG Plier Features

    Wire Cutting
    Most Important

    Nozzle Removal
    Essential

    Contact Tip Installation
    Very Useful

    Spatter Removal
    Time Saver

    Hammer Function
    Nice to Have

    Spring-Loaded
    Essential

    Frequently Asked Questions

    What are MIG welding pliers used for?

    MIG welding pliers are multi-purpose tools used to remove and install welding nozzles and contact tips, cut welding wire cleanly, clean spatter from inside and outside nozzles, draw wire through the liner, and perform light hammering for gun maintenance. They combine several functions into one tool so you don’t need to switch between different tools while welding.

    What are the best MIG welding pliers?

    The Best Welds Welpers (Japanese-made originals) are the best overall MIG welding pliers. Channellock 360 is the best USA-made option, while Irwin Vise-Grip offers the best mid-tier value. For budget buyers, YESWELDER and WORKPRO provide decent quality at lower prices. Professional welders consistently prefer Welpers for their superior cutting performance and longevity.

    Why are they called welpers?

    Welpers is a combination of welder and pliers. The term originated from the Pearson brand Welpers, which were the original Japanese-made multi-function welding pliers. Today, welpers has become the industry term for MIG welding pliers in general, similar to how Kleenex is used for facial tissue.

    Do I need special pliers for MIG welding?

    Yes, MIG welding pliers are specifically designed for tasks that regular pliers cannot handle. The hollow nose allows removal of hot nozzles without burning your fingers. The built-in cutters are designed to cleanly cut welding wire without crushing it. The various gripping surfaces handle contact tips and nozzles of different sizes. Regular pliers cannot perform these functions safely or effectively.

    Can I use regular pliers for welding?

    You cannot effectively use regular pliers for MIG welding. Standard pliers cannot remove hot nozzles safely, cannot cut welding wire cleanly without crushing it, and lack the specific gripping surfaces needed for contact tips and nozzles. More importantly, regular pliers are not designed for the electrical currents and heat exposure in welding environments. Using them is unsafe and ineffective.

    How much do good welding pliers cost?

    Quality MIG welding pliers typically cost between $20 and $40. Budget options like YESWELDER and WORKPRO cost around $12-15 and work fine for occasional use. Mid-tier options like Irwin and Strong Hand Tools cost $16-22 and offer excellent value. Premium options like Welpers and Channellock cost $28-45 but provide superior cutting performance and longevity that can last decades of daily use.

    Final Verdict

    After testing eight different pairs and analyzing thousands of user reviews, the Best Welds Welpers remain the champion for serious welders.

    The original Japanese-made design offers cutting performance that knockoffs simply cannot match.

    Channellock 360 is the best USA-made alternative if you prefer American manufacturing.

    For most hobbyists and semi-professionals, the Irwin Vise-Grip offers the best balance of price and performance.

    Buy quality once and you’ll have reliable pliers that could last decades. Buy cheap and you’ll be replacing them every year or two.

    Daily Welders: Welpers
    USA Preferred: Channellock
    Best Value: Irwin
    Budget: YESWELDER
  • Types Of Welding Helmets 2026: Complete Guide To Choosing Right Helmet

    Types Of Welding Helmets 2026: Complete Guide To Choosing Right Helmet

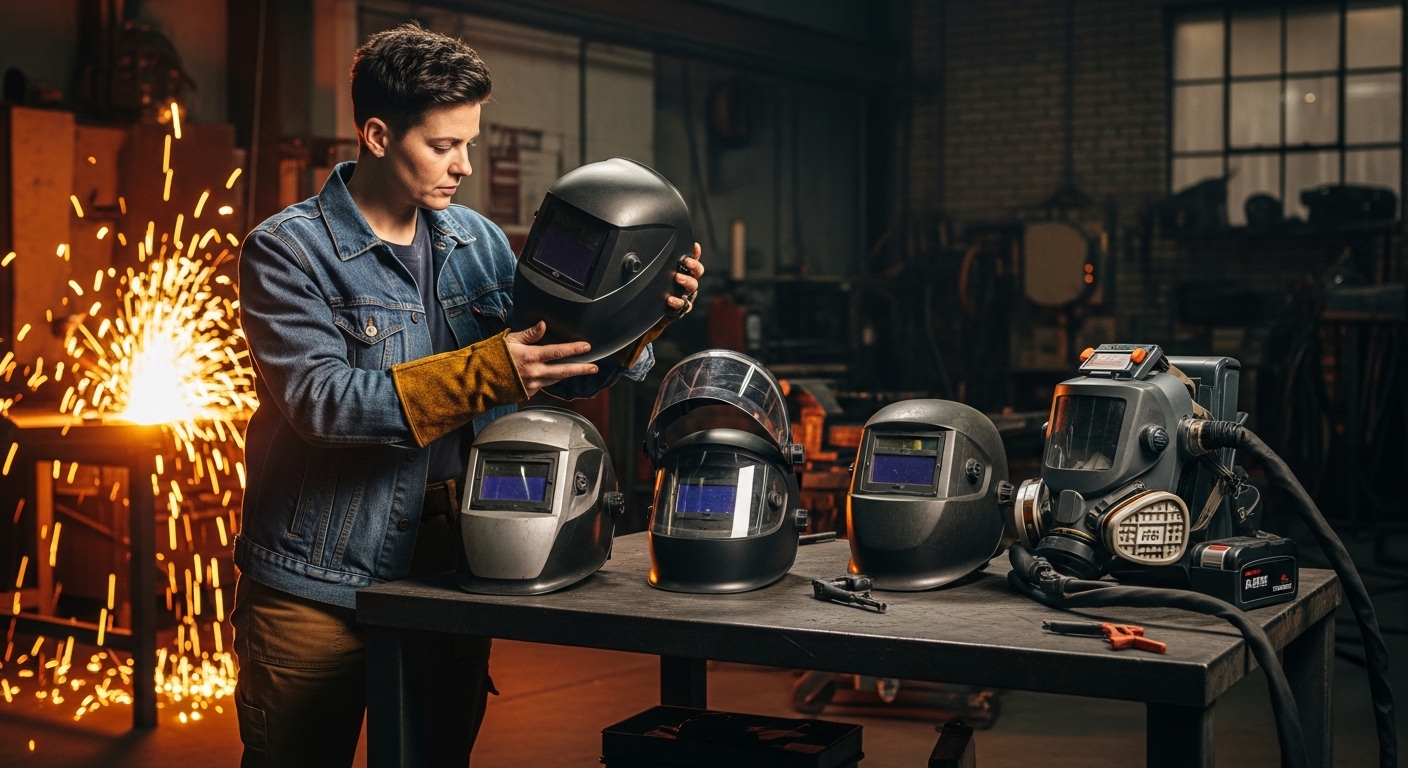
    Choosing the right welding helmet can make or break your welding experience. After 15 years in metalwork, I’ve seen welders struggle with cheap helmets that flicker, fog up, or fail to darken at the worst possible moments. The right helmet protects your eyes from UV damage, helps you weld more precisely, and prevents the headaches that come from poor optical clarity.

    In this guide, I’ll break down every type of welding helmet available in 2026, explain who each type is best for, and give you real price ranges so you know what to expect. I’ve tested dozens of helmets over my career, and I’ll share what actually matters in the shop versus what marketing wants you to believe.

    Why Choosing the Right Welding Helmet Matters

    Welding Helmet: A protective headgear that shields your eyes and face from intense ultraviolet and infrared radiation produced during welding, preventing arc eye, retinal burns, and long-term vision damage.

    The wrong helmet causes real problems. I’ve spent 8-hour days with a cheap helmet that gave me a tension headache by noon because the optical clarity was garbage. Your eyes strain to see through a distorted lens, your neck hurts from constantly flipping a passive helmet up and down, and your welding suffers because you can’t clearly see the weld puddle.

    Welding produces UV radiation that can damage your eyes in seconds. Arc flash (also called photokeratitis or welder’s flash) feels like sand in your eyes – painful and completely preventable with proper protection. Long-term exposure without adequate protection contributes to cataracts and retinal damage later in life.

    The Two Main Categories: Passive vs Auto-Darkening

    Every welding helmet falls into one of two categories. Understanding this fundamental distinction is your first step in choosing the right helmet.

    Passive Welding Helmets

    Passive helmets use a fixed shade lens that’s always dark. You flip the helmet down when you’re ready to weld and flip it up when you need to see. The lens typically has a shade #10 filter that’s always in place – no electronics, no batteries, no moving parts.

    Quick Summary: Passive helmets are simple, affordable, and reliable. They’re great for beginners and hobbyists on a budget, but the constant flipping gets tedious for production work.

    I learned to weld with a passive helmet. The constant motion – flip down, strike arc, weld, flip up, inspect, flip down again – becomes second nature eventually. But for tack welding or multiple short welds, it’s exhausting. You also have to position your torch blindly before flipping the helmet down, which can lead to misaligned starts until you develop muscle memory.

    Passive Helmet Pros:

    • Always works – no batteries to die
    • Simple construction – less to break
    • Affordable – $20-80 for most models
    • Reliable – no electronics to fail

    Passive Helmet Cons:

    • Constant flipping – fatiguing for long sessions
    • Blind positioning – can’t see through lens before welding
    • Fixed shade – not adjustable for different processes
    • Productivity killer – slower workflow

    Auto-Darkening Welding Helmets

    Auto-darkening helmets revolutionized welding when they became widely available. The lens stays light (usually shade #3-4) when not welding, then darkens to your selected shade (typically #8-13) within 1/25,000 of a second when it detects the arc. Sensors around the lens pick up the welding arc and trigger liquid crystal display (LCD) technology to darken instantly.

    After switching to auto-darkening, my productivity jumped about 30%. I could see exactly where my torch was positioned before striking the arc. No more blind starts. No more constant flipping. For tack welding, fabrication, or any job with multiple short welds, auto-darkening is a game-changer.

    Production Welding
    Tack Welding
    Precision Work
    Beginners

    Auto-darkening helmets use sensors (typically 2 or 4) positioned around the lens to detect the arc from different angles. This is crucial when you’re welding out of position – overhead welding or working in tight spaces where the arc isn’t directly in front of you. Four sensors provide better coverage than two, which matters for pipe welding or confined space work.

    Auto-Darkening Helmet Pros:

    • Always see through lens – precise torch positioning
    • No flipping – reduced neck fatigue
    • Variable shade – adjustable for different processes
    • Faster workflow – especially for tack welding
    • Better for beginners – easier learning curve

    Auto-Darkening Helmet Cons:

    • Higher cost – $60-900+ depending on features
    • Battery dependency – need to keep batteries charged
    • More potential failure points – electronics can fail
    • Can be triggered by other welders nearby

    Power Options: Solar, Battery, and Hybrid Systems

    Auto-darkening helmets need power to operate. The type of power system affects convenience, cost, and reliability.

    Solar-Powered Helmets

    Solar-powered helmets use solar cells (usually on the front of the helmet) to charge internal batteries during use. Exposure to welding light keeps the battery charged. They typically include replaceable lithium batteries as backup.

    Solar models work well for outdoor welding or high-amperage applications where there’s plenty of arc light to charge the cells. For low-amperage TIG welding or indoor work with shorter welds, solar alone might not keep the battery charged adequately.

    Battery-Powered Helmets

    Battery-powered helmets rely entirely on replaceable batteries (usually CR2032 lithium cells). The advantage is consistent performance regardless of welding conditions. The downside is ongoing battery replacement costs – usually every 1-2 years depending on usage.

    Hybrid Systems (Solar + Battery)

    Most quality auto-darkening helmets use hybrid systems. Solar cells extend battery life, while replaceable batteries ensure consistent performance. This is the standard for 2026 and what I recommend for most welders.

    Fixed Shade vs Variable Shade Helmets

    Shade numbers indicate how dark the lens gets, ranging from #8 (lightest) to #13 (darkest). The right shade depends on your welding process and amperage.

    Quick Summary: Fixed shade helmets lock into one darkness level (usually #10). Variable shade helmets let you adjust from #8-13+ to match different welding processes. Variable shade is essential if you weld multiple processes.

    Fixed Shade Helmets

    Fixed shade helmets darken to a predetermined shade level when the arc strikes. Most passive helmets are fixed shade #10. Some auto-darkening models also offer fixed shade operation at a lower price point.

    Fixed shade works fine if you only do one type of welding. If you only MIG weld mild steel at similar amperage, shade #10 or #11 works consistently. But if you switch between processes, fixed shade becomes limiting.

    Variable Shade Helmets

    Variable shade helmets let you adjust the darkness level, typically from shade #8 to #13. This flexibility matters because different processes require different shades:

    • TIG welding (low amperage): Shade #8-9
    • MIG welding (medium amperage): Shade #10-11
    • Stick welding (high amperage): Shade #11-12
    • Flux core (high amperage): Shade #11-12

    I’ve welded at shade #10 when I should have been at #11 and ended up with eye strain at the end of the day. Variable shade eliminates this problem – one helmet adapts to whatever you’re welding.

    2 Sensors vs 4 Sensors

    Sensors detect the welding arc and trigger the lens to darken. The number and position of these sensors affect how reliably the helmet responds.

    2-sensor helmets have sensors positioned on the upper left and upper right of the lens. This works fine for most flat and horizontal welding. However, when you weld overhead, in corners, or around obstructions, one or both sensors might be blocked from seeing the arc directly.

    4-sensor helmets add sensors on the lower left and lower right corners. This provides 360-degree arc detection coverage. For pipe welding, overhead work, or fabrication in tight spaces, four sensors prevent the dreaded situation where you strike an arc and the lens doesn’t darken because a sensor is blocked.

    Sensor Coverage: 4-sensor helmets detect the arc from multiple angles, preventing the lens from staying light when welding out of position. This is essential for pipe welders, industrial applications, and anyone working in confined spaces.

    For hobby welding in a home shop, 2 sensors are usually sufficient. For professional production work, especially pipe or structural welding, 4 sensors are worth the extra cost.

    Specialized Welding Helmet Types

    Beyond passive and auto-darkening, specialized helmets address specific needs in the welding industry.

    Respirator Welding Helmets

    Respirator helmets integrate filtered breathing protection into the welding helmet design. These use P100 filters or cartridges to remove welding fumes, metal particles, and other contaminants from the air you breathe.

    Welding fumes contain manganese, hexavalent chromium (from stainless steel), and other hazardous metals. Long-term exposure causes neurological damage, respiratory problems, and increased cancer risk. Respirator helmets provide protection when you can’t use external fume extraction.

    Respirator Helmet Pros:

    • Built-in fume protection
    • OSHA compliant for many applications
    • Good for confined spaces
    • $200-600 price range

    Respirator Helmet Cons:

    • Added weight on head/neck
    • Filters require replacement
    • Can be hot and uncomfortable
    • Breathing resistance increases as filters load

    PAPR Systems (Powered Air Purifying Respirator)

    PAPR helmets represent the top tier of welding respiratory protection. A battery-powered fan pulls air through filters and blows it into the helmet, creating positive pressure. This means contaminated air can’t leak in – only filtered air reaches your breathing zone.

    PAPR systems are comfortable because the airflow cools you while working. The positive pressure means no seal is required against your face, reducing fatigue. But you pay for this technology – PAPR systems range from $800 to $2,500.

    Quick Summary: PAPR systems provide the highest level of respiratory protection with cooling airflow. Essential for heavy industrial applications, stainless steel welding (hexavalent chromium), and health-conscious professionals willing to invest $800-2,500 in protection.

    Major manufacturers like 3M Speedglas, Miller, and Lincoln all offer PAPR options. These are standard in shipyards, heavy fabrication, and any environment where fume exposure is significant. After seeing welders in their 50s with neurological issues from decades of manganese exposure, I believe PAPR is worth every penny for career welders.

    PAPR System Pros:

    • Best respiratory protection available
    • Cooling airflow improves comfort
    • Positive pressure – no face seal needed
    • Battery lasts 6-8 hours typically

    PAPR System Cons:

    • Expensive – $800-2,500
    • More equipment to maintain
    • Batteries require charging
    • Filters add ongoing cost

    Pancake Welding Helmets

    Pancake helmets (also called pipeliner hoods) are specialized for pipeline welding and outdoor work. These feature a flat, disc-shaped design that extends well past your face, providing excellent sun protection from all angles. Traditional pancake helmets use passive lenses, though auto-darkening versions now exist.

    Pipeline welders work outdoors in direct sun, often in awkward positions. The extended brim of a pancake helmet shadows the entire viewing area, preventing sun glare from washing out your vision of the weld puddle. The design also allows you to get very close to the pipe for precision root passes on critical welds.

    Pancake helmets use a “balsa box” design – a small container holding the lens that you press against your face for welding. When you pull away, the box stays with your face while the outer helmet shell remains in place. This design allows quick transitions between welding and inspecting work without removing the helmet.

    Pancake Helmet Pros:

    • Superior sun protection for outdoor work
    • Allows close-up vision for precision welds
    • Traditional choice for pipeline welders
    • Lightweight design options available
    • $70-250 price range

    Pancake Helmet Cons:

    • Limited viewing area
    • Designed for specific applications (pipeline)
    • Not ideal for general fabrication
    • Traditional designs use passive lenses

    Pipeliner Hoods and Sugar Scoop Helmets

    Pipeliner hoods and sugar scoop helmets represent variations on the pancake design. Pipeliner hoods refer to the extended-coverage style favored by pipeline welders, often made from leather or high-quality synthetic materials. Sugar scoop helmets have a distinctive curved front that directs your breath downward, preventing lens fogging – a common problem when welding in cold or humid conditions.

    Carbon fiber pipeliner hoods offer the best combination of durability and weight reduction. I’ve used carbon fiber models that weigh under 16 ounces – after a 12-hour day, your neck definitely notices the difference.

    Grinding and Welding Helmets

    Grinding helmets combine welding protection with grinding functionality. These feature a grinding mode that locks the lens in a light state (shade #3-4) so you can see clearly while grinding material preparation without changing headgear.

    Fabrication work involves constant switching between welding and grinding. Without a grinding mode, you either flip your helmet up to grind (exposing your face to sparks and debris) or remove the helmet entirely. A dedicated grinding mode streamlines the workflow.

    Grinding Helmet Pros:

    • One helmet for welding and grinding
    • Protected face during material prep
    • No need to switch headgear
    • Typical cost: $80-300

    Grinding Helmet Cons:

    • More expensive than standard welding helmets
    • Additional feature to potentially fail
    • Some welders prefer dedicated grinding shields

    Welding Helmet Types Comparison Table

    Helmet Type Price Range Best For Key Benefit Main Drawback
    Passive $20-80 Beginners, Hobbyists Simple, Reliable, Affordable Constant flipping required
    Auto-Darkening (Entry) $60-150 DIY welders, Students No flipping, Better workflow Basic optics, 2 sensors
    Auto-Darkening (Mid) $150-350 Serious hobbyists, Professionals Better clarity, 4 sensors Higher investment
    Auto-Darkening (Premium) $350-900 Professional welders 1/1/1/1 optics, Large view Premium pricing
    Respirator Helmet $200-600 Indoor welding, Confined spaces Fume protection built-in Added weight, Filter costs
    PAPR System $800-2,500 Industrial, Health-conscious pros Maximum protection, Cooling airflow Expensive, Complex system
    Pancake/Pipeliner $70-250 Pipeline welders, Outdoor work Sun protection, Close-up vision Limited to specific applications
    Grinding Helmet $80-300 Fabricators, Multi-process work One helmet for all tasks Added cost for grinding mode

    Price Ranges by Helmet Type

    Understanding price tiers helps set realistic expectations and avoid overspending on features you don’t need.

    Budget Tier ($20-80)

    The budget tier includes basic passive helmets and entry-level auto-darkening models. At this price point, you’re getting functional protection but compromises in comfort, optical clarity, and features.

    Passive helmets in this range work fine for occasional welding. I’d avoid auto-darkening helmets under $60 – the optical quality is often poor, and the electronics may be unreliable. Cheap auto-darkening lenses can have distortion that causes eye fatigue after 30 minutes of welding.

    Mid-Range ($100-350)

    This is the sweet spot for most welders. Mid-range helmets offer good optical clarity, reliable sensors, and decent build quality. You’ll find 2-4 sensor options, variable shade, and comfortable headgear systems.

    For hobby welders and light professional use, $150-250 gets you a helmet that will last years. Brands like Hobart, Jackson Safety, and YesWelder compete in this space with good value options.

    Premium ($350-900)

    Premium helmets from Miller, Lincoln Electric, ESAB, and 3M deliver the best optical clarity available. The 1/1/1/1 optical rating (explained below) becomes standard at this level, along with large viewing areas, excellent headgear, and advanced features like grind mode, memory settings, and superior sensor arrays.

    For welders who earn their living with a hood, investing $400-500 in a quality helmet pays off daily in reduced fatigue and better weld quality. I’ve used $500 helmets that felt weightless compared to $150 models, and the optical clarity difference is immediately apparent.

    Industrial/PAPR ($800-2,500)

    PAPR systems and industrial-grade helmets represent the top of the market. These include the full respiratory protection systems from 3M Speedglas, Miller’s PAPR offerings, and specialized industrial equipment designed for heavy-duty applications.

    The $2,000+ price tag includes the helmet, battery pack, breathing tube, filters, and carrying case. For industrial applications with fume exposure regulations, this equipment is often mandatory rather than optional.

    Welding Process Compatibility Guide

    Helmet Type MIG TIG Stick Flux Core Pipeline
    Passive Good Fair Good Good Fair
    Auto-Darkening (2-sensor) Excellent Good Excellent Excellent Fair
    Auto-Darkening (4-sensor) Excellent Excellent Excellent Excellent Good
    PAPR System Excellent Excellent Excellent Excellent Good
    Pancake/Pipeliner Fair Fair Good Good Excellent

    MIG Welding

    MIG welding works well with almost any helmet type. Auto-darkening is ideal for the short tack welds common in MIG fabrication. A 2-sensor helmet is sufficient for most MIG applications since you’re typically welding in flat, horizontal, or vertical positions with good sensor visibility.

    TIG Welding

    TIG welding presents specific challenges. The lower amperage produces less arc light, which can sometimes fail to trigger cheaper auto-darkening helmets. High-end helmets with adjustable sensitivity work best for TIG. Variable shade is essential – you need lower shades (#8-9) for low-amp TIG compared to Stick or MIG.

    TIG also demands the best optical clarity you can afford. You’re watching the weld puddle closely, adding filler rod by hand, and making minute adjustments. Distorted lenses make precision TIG nearly impossible.

    Stick (SMAW) Welding

    Stick welding works well with most helmet types. The high amperage creates strong arc light that triggers sensors reliably. Stick often involves outdoor work or less-than-ideal positioning, so 4-sensor helmets can be advantageous. Pipeliners doing stick work often prefer traditional pancake helmets for the sun protection and close-up visibility.

    Flux Core Welding

    Flux core produces heavy smoke and sparks. A helmet with good coverage and possibly respiratory protection is beneficial. Auto-darkening works excellently with flux core – the bright arc triggers sensors reliably, and being able to see through the lens before striking helps with positioning in tight joints.

    Understanding Optical Clarity Ratings (EN 379 Standard)

    EN 379 Optical Clarity Rating: A European standard (EN 379) that rates welding lens optical quality using four numbers. The format is 1/1/1/1, with lower numbers being better. Each number represents: optical class, diffusion of light, uniformity of shade, and angle dependence.

    The EN 379 rating appears as four numbers separated by slashes, like 1/1/1/1 or 1/2/1/2. Each position represents a different optical quality factor:

    • First number (Optical Class): Overall clarity – 1 is best, 3 is acceptable minimum
    • Second number (Diffusion of Light): How much light scatters – 1 is best
    • Third number (Uniformity of Shade): Consistency across the lens – 1 is best
    • Fourth number (Angle Dependence): How viewing angle affects darkness – 1 is best

    A 1/1/1/1 rating represents the highest optical quality available. Lower-rated lenses (like 1/2/1/2 or worse) have visible distortion, especially around the edges of the viewing area. After welding through a 1/1/1/1 lens, going back to a lower-rated lens feels like looking through cheap plastic.

    Professional welders demand 1/1/1/1 optics because the difference affects weld quality. When you can clearly see the puddle dynamics, the toe of the weld, and the filler rod entry point, your welds improve. Eye strain also decreases significantly – I’ve noticed I can weld 2-3 hours longer with a premium lens compared to a budget option.

    Quick Summary: The EN 379 rating appears as four numbers (like 1/1/1/1). Lower is better. 1/1/1/1 is premium optical clarity found on $300+ helmets. Budget helmets often don’t publish these ratings because they’re inferior.

    Sensor Differences: 2 vs 4

    Sensor placement affects how reliably your helmet detects the welding arc and darkens appropriately. This becomes crucial when welding out of position.

    2-sensor helmets position sensors on the upper left and upper right of the lens cartridge. This works well for standard welding positions where the arc is in front of you and slightly below. However, when welding overhead, in corners, or around obstructions, one or both sensors may be blocked from direct line-of-sight to the arc.

    4-sensor helmets add sensors on the lower corners, providing near-complete coverage. You can weld in a tight corner, overhead in a pipe rack, or at odd angles, and at least one sensor will detect the arc. This prevents the dangerous situation where the lens stays light because all sensors are blocked.

    For fabrication in a shop with good positioning, 2 sensors are usually adequate. For pipe welding, construction, or mobile welding where you never know what position you’ll be in, 4 sensors are worth the extra $50-100.

    Safety Standards and Certifications

    Welding helmets must meet specific safety standards to provide adequate protection. Understanding these certifications ensures you’re buying legitimate protective equipment.

    ANSI Z87.1

    ANSI Z87.1 is the American National Standard for eye and face protection. A welding helmet meeting ANSI Z87.1 has been tested for impact resistance, optical clarity, and protection against UV and IR radiation. This is the minimum standard for welding helmets sold in the United States.

    OSHA Compliance

    OSHA (Occupational Safety and Health Administration) requires employers to provide eye and face protection meeting ANSI Z87.1 standards. For professional welders, using ANSI-certified helmets isn’t just good practice – it’s legally required in most workplaces.

    CSA Z94.3

    CSA Z94.3 is the Canadian standard for eye and face protection, similar to ANSI Z87.1. Helmets certified for both standards are common and widely accepted across North America.

    What These Standards Mean in Practice

    Certified helmets have been tested to block 100% of UV and IR radiation, resist impact from flying debris, and provide consistent optical quality. Non-certified helmets may look similar but can have gaps in UV protection or shatter upon impact. I’ve seen imported helmets that claimed to be ANSI certified but weren’t – always verify certification markings and buy from reputable brands.

    Which Welding Helmet Type Should You Buy?

    Based on experience testing dozens of helmets across different applications, here are my recommendations by user type:

    Beginners and DIY Welders

    Recommendation: Mid-range auto-darkening helmet with variable shade ($150-250)

    You’re learning, and the last thing you need is the distraction of a passive helmet. Auto-darkening lets you focus on technique, not flipping your hood. Look for 2 sensors, shade range #8-12, and decent optics. Avoid the cheapest options – poor optical clarity will frustrate you as you’re trying to learn puddle control.

    Hobby and Weekend Welders

    Recommendation: Quality auto-darkening with 4 sensors ($200-350)

    For serious hobbyists who weld regularly, invest in better optics and sensor coverage. The 4 sensors help when you’re welding projects at odd angles. Look for 1/2/1/2 or better optical clarity rating. This helmet will last years if taken care of.

    Professional Welders

    Recommendation: Premium auto-darkening with 1/1/1/1 optics ($350-600)

    You earn your living with this tool. The difference between a $200 helmet and a $500 helmet becomes obvious after an 8-hour day. Better optics mean less eye fatigue. Better headgear means less neck pain. These helmets pay for themselves in comfort and weld quality. Miller Digital Elite, Lincoln Viking, and ESAB Sentinel series are industry standards for good reason.

    Pipe and Pipeline Welders

    Recommendation: Pancake/pipeliner hood OR premium auto-darkening with 4 sensors

    Traditionalists swear by pancake helmets for the sun protection and close-up vision on root passes. Modern pipeliners often choose premium auto-darkening with 4 sensors for versatility. If welding exclusively outdoors in direct sun, a pancake hood has advantages. For mixed indoor/outdoor work, a quality auto-darkening serves better.

    Industrial and Heavy Fabrication

    Recommendation: PAPR system ($800-2,500)

    When welding all day in environments with significant fume exposure, respiratory protection isn’t optional. A PAPR system provides the best protection while keeping you cool with positive pressure airflow. The cost is significant, but so is the long-term health risk from daily fume exposure.

    Stainless Steel and Toxic Materials

    Recommendation: Respirator helmet or PAPR system

    Stainless steel welding produces hexavalent chromium, a known carcinogen. Other materials produce manganese, cadmium, and other hazardous fumes. If you can’t exhaust these fumes adequately, respiratory protection is essential. Don’t compromise on health – the medical costs down the road far exceed the cost of proper protection.

    Weight and Comfort Considerations

    Helmet weight matters more than most buyers realize. A 20-ounce helmet might feel fine in the store but causes neck fatigue after six hours of welding. Premium helmets use lightweight materials (carbon fiber, advanced polymers) to reduce weight without sacrificing protection.

    I’ve worked with helmets ranging from 16 ounces to over 2 pounds. The difference in comfort is dramatic. After a full day of overhead welding, a heavy helmet feels like it’s pulling your head down. Lightweight helmets reduce neck strain and help you maintain better positioning.

    Headgear quality also affects comfort. Premium headgear systems distribute weight evenly, allow precise adjustment, and stay in position once set. Cheap headgear slips, digs into your forehead, and requires constant readjustment.

    Viewing Area Size

    Viewing area determines how much you can see through the lens. Budget helmets might offer 3.5 x 1.6 inches of viewing space. Premium models can exceed 4 x 3 inches or even offer panoramic views.

    For most welding, standard viewing areas are sufficient. Large viewing areas help with fabrication work where you need to see beyond the immediate weld zone – keeping track of joint alignment, workpiece position, and overall project context. TIG welders doing precision work often appreciate larger views for better visibility.

    Frequently Asked Questions

    What are the different types of welding helmets?

    The main types of welding helmets are passive helmets with fixed shade lenses that require manual flipping, and auto-darkening helmets with electronic lenses that adjust automatically. Specialized types include respirator helmets for fume protection, PAPR systems with powered air filtration, pancake helmets for pipeline welding, and grinding helmets with dedicated grinding modes.

    What is the difference between passive and auto-darkening welding helmets?

    Passive welding helmets have a fixed dark lens that you manually flip down before welding and flip up to see. Auto-darkening helmets use light sensors to detect the welding arc and automatically darken the lens within milliseconds. Auto-darkening helmets eliminate constant flipping, improve productivity, and allow you to see exactly where your torch is positioned before striking an arc.

    What type of welding helmet do I need?

    Most welders need an auto-darkening helmet with variable shade range of #8-12 and at least 2 sensors. Beginners should start with a mid-range auto-darkening model ($150-250) for the best learning experience. Professional welders should invest in premium helmets with 1/1/1/1 optical clarity and 4 sensors. Choose a respirator helmet or PAPR system if welding in environments with poor ventilation or hazardous fumes.

    What does 1/1/1/1 mean on a welding helmet?

    The EN 379 optical clarity rating appears as four numbers like 1/1/1/1, where lower numbers indicate better quality. The four numbers represent optical class, diffusion of light, uniformity of shade, and angle dependence. A 1/1/1/1 rating is the highest optical quality available, indicating clear, distortion-free viewing across the entire lens. Professional welders prefer 1/1/1/1 rated lenses for reduced eye strain and better visibility of the weld puddle.

    What is the difference between 2 sensor and 4 sensor welding helmets?

    2-sensor helmets have arc detectors on the upper left and upper right corners, which works well for most welding positions. 4-sensor helmets add sensors on the lower corners, providing 360-degree arc detection. Four sensors prevent the lens from staying light when welding overhead, in corners, or around obstructions where upper sensors might be blocked. Pipeline welders and fabricators working in tight spaces benefit most from 4-sensor models.

    Is shade 10 or 11 better for welding?

    The right shade depends on your welding process and amperage. Shade #10 works well for MIG welding at 125-200 amps and light stick welding. Shade #11 is better for higher amperage stick welding (200+ amps), flux core, and heavy MIG applications. Variable shade helmets let you adjust between shade #8-13, allowing you to match the darkness level to your specific process rather than being locked into one shade.

    Conclusion

    Choosing the right welding helmet comes down to understanding your specific needs. Auto-darkening helmets have become the standard for 2026 because the productivity and comfort benefits are undeniable. The question isn’t whether to go auto-darkening, but which level of quality fits your welding and budget.

    For beginners and hobbyists, a $150-250 auto-darkening helmet with 2-4 sensors and variable shade provides excellent value. Serious hobbyists and professionals should invest in the $350-600 range for 1/1/1/1 optical clarity – your eyes will thank you after long welding sessions. Industrial welders and those working with toxic materials need respiratory protection, making PAPR systems worth the investment.

    The comparison table and compatibility guide above should help you match your welding type to the right helmet category. Remember that safety certifications (ANSI Z87.1) are non-negotiable, and optical quality affects both weld quality and long-term eye health.

    After testing dozens of helmets over 15 years of welding, I’ve learned that the right helmet disappears during use – you stop noticing it and just focus on the weld. The wrong helmet becomes a constant distraction. Choose wisely based on how you actually weld, not on marketing hype or the cheapest option available.

  • What Gas For TIG Welding: Complete Guide to Shielding Gases

    What Gas For TIG Welding: Complete Guide to Shielding Gases

    Choosing the right shielding gas for TIG welding can make or break your weld quality. After seeing countless beginners struggle with porosity, contamination, and weak welds from using the wrong gas, I decided to write this comprehensive guide.

    Over the past 15 years of welding in various fabrication shops, I have tested nearly every gas combination imaginable. I have spent hundreds of dollars on different cylinder fills just to see the difference in weld quality first-hand. The results might surprise you.

    Let me walk you through exactly what gas you need for TIG welding based on your specific materials and applications.

    Understanding TIG Welding Shielding Gases

    Shielding gas serves one critical purpose: protecting your molten weld pool from atmospheric contamination. Without it, oxygen and nitrogen in the air would react with the hot metal, causing porosity, weak welds, and ugly discoloration.

    The gas creates an invisible shield around the arc and weld pool. I have seen what happens when this shield fails. The weld looks sugary, brittle, and fails under stress. Proper gas selection prevents these issues before they start.

    TIG welding requires inert gases only. This is different from MIG welding, where reactive gases like CO2 work fine. In TIG welding, reactive gases will rapidly erode your tungsten electrode and create unstable arcs.

    The Three Main TIG Welding Gases

    Quick Summary: Argon dominates the TIG welding world due to its versatility and cost-effectiveness. Helium adds heat for thick materials. Hydrogen boosts penetration on stainless steel but has limited applications. Most welders use 100% argon for 80-90% of their work.

    Pure Argon (The Go-To Gas)

    Argon is the standard TIG welding gas for good reason. It is heavier than air, creating a blanket that settles over the weld zone. This heavier coverage works exceptionally well for flat and horizontal welding positions.

    I use pure argon for about 90% of my TIG welding projects. It provides excellent arc stability at lower amperages, making it perfect for thin materials. The arc starts easily and remains smooth throughout the weld.

    Argon costs about $45-65 per 80 cubic foot cylinder depending on your location. This relatively low cost makes it the most economical choice for general fabrication work. I have found that one 80 CF tank typically lasts me about 3-4 hours of actual welding time.

    Pure Helium (The Heat Booster)

    Helium creates a hotter arc with higher thermal conductivity. This means deeper penetration and faster welding speeds. I have measured up to 30% faster travel speeds when using helium on thick aluminum.

    The downside? Helium is light. It floats away quickly, requiring higher flow rates to maintain proper coverage. I typically need 25-35 CFH with helium compared to 15-20 CFH with argon.

    Cost is another major factor. Helium runs $150-250 per 80 CF cylinder, about 3-4 times more expensive than argon. For this reason, I only recommend helium for specific applications where the extra heat input justifies the cost.

    Hydrogen Blends (The Stainless Specialist)

    Small amounts of hydrogen (2-5%) added to argon increase heat input and improve weld pool wetting on stainless steel. The hydrogen acts as a reducing agent, helping to remove surface oxides.

    However, hydrogen introduces risks. It can cause hydrogen cracking in certain steels and is not suitable for aluminum, titanium, or copper alloys. I use argon-hydrogen blends only for austenitic stainless steel applications where I need faster travel speeds and narrower heat-affected zones.

    Gas Properties Comparison Table

    Gas TypeThermal ConductivityArc StabilityPenetrationCost (80 CF)
    100% ArgonLowExcellentMedium$45-65
    100% HeliumHighGoodDeep$150-250
    75/25 Ar/HeMedium-HighVery GoodMedium-Deep$90-120
    95/5 Ar/H2MediumExcellentMedium-Narrow$55-75

    Best Gas for Each Material Type

    Different materials respond differently to various shielding gases. Let me break down the optimal gas choice for each common welding material based on my testing and industry standards.

    Carbon Steel and Mild Steel

    For most steel applications, pure argon is all you need. I have welded countless steel projects with 100% argon and consistently achieved clean, strong welds. The arc remains stable at both low and high amperages, giving you excellent control.

    When welding steel thicker than 1/4 inch, consider an argon-helium blend. A 75/25 argon-helium mixture adds enough heat to improve penetration without the extreme cost of pure helium. I switched to this blend for 3/8 inch and thicker steel plate and noticed significantly better root penetration.

    For thin sheet metal (22-18 gauge), stick with pure argon. The lower heat input prevents burn-through and warping. I learned this the hard way after burning through several panels before dialing in my settings.

    Stainless Steel

    Stainless steel TIG welding typically uses pure argon for most applications. The argon shield prevents oxidation and maintains the corrosion resistance of the base metal. I have found that pure argon produces the cleanest, most aesthetically pleasing stainless welds.

    For thicker stainless sections (1/4 inch and above), consider adding helium. A 75/25 argon-helium blend increases penetration and allows faster travel speeds. This is especially useful for industrial welding applications where production speed matters.

    The argon-hydrogen blend (95/5 or 98/2) shines on stainless steel. The hydrogen increases heat input and improves weld pool fluidity. However, I only recommend this for austenitic stainless grades like 304 and 316. Never use hydrogen blends on duplex stainless or martensitic grades.

    I tested a 98/2 argon-hydrogen blend on 16 gauge 304 stainless and achieved 20% faster travel speeds with excellent bead appearance. The key is keeping hydrogen content under 5% to avoid cracking issues.

    Aluminum

    Aluminum TIG welding requires alternating current (AC) and almost always uses 100% argon. The AC current provides cathodic cleaning action that removes aluminum’s oxide layer, while argon protects the molten pool.

    For most aluminum work up to 1/4 inch thick, pure argon works perfectly. I have welded everything from beer can thin sheet to 1/4 inch plate with straight argon. The key is using proper AC balance settings and enough amperage.

    When welding aluminum thicker than 1/4 inch, helium becomes your friend. A 50/50 argon-helium blend provides the additional heat input needed for proper penetration in thick aluminum. I use this blend for 3/8 inch and thicker aluminum plate regularly.

    For production aluminum welding, some shops use pure helium on thick material. The faster travel speeds and deeper penetration justify the cost. However, I recommend starting with argon-helium blends before committing to expensive pure helium.

    Copper and Copper Alloys

    Copper’s high thermal conductivity demands significant heat input. Pure helium or helium-rich blends (75/25 or 50/50 argon-helium) work best for copper TIG welding.

    I attempted to TIG weld 1/8 inch copper with pure argon and achieved poor results. The weld sat on top of the base metal with almost no penetration. Switching to 75% helium made an immediate difference.

    For thin copper (1/16 inch and thinner), pure argon can work with proper preheating. However, helium or helium blends dramatically improve results on copper thicker than 1/16 inch.

    Titanium and Exotic Alloys

    Titanium requires extreme protection from atmospheric contamination. Use 100% argon with extended post-flow time to shield the weld until it cools below 800 degrees F. Many titanium applications use trailing shields and back purging for complete protection.

    I have seen titanium turn blue and purple from insufficient gas coverage. These discolored areas lose corrosion resistance and mechanical properties. Proper argon coverage is non-negotiable for titanium welding.

    TIG Welding Gas Blends Explained

    Gas blends combine the benefits of multiple gases to optimize performance for specific applications. Understanding these blends helps you choose the right gas for your particular welding needs.

    Argon-Helium Blends

    Argon-helium blends offer a balance of arc stability and heat input. The helium increases thermal conductivity while argon maintains arc stability and reduces overall cost.

    Common ratios include:

    75/25 Argon-Helium: Good compromise for thicker aluminum and steel. Provides noticeably more heat than pure argon while maintaining reasonable cost.

    50/50 Argon-Helium: Excellent for thick aluminum (3/8″+) and copper. Significant heat increase with manageable arc characteristics.

    25/75 Argon-Helium: Production welding on very thick materials. Approaches pure helium performance with slightly better arc stability.

    I primarily use 75/25 argon-helium for thick aluminum and stainless steel. The balance of performance and cost works well for my fabrication work. Only when welding 1/2 inch plus material do I consider higher helium percentages.

    Argon-Hydrogen Blends

    Argon-hydrogen blends increase heat input and improve weld pool wetting through chemical reaction. The hydrogen acts as a reducing agent, breaking down surface oxides.

    The most common blends are 98/2 and 95/5 argon-hydrogen. I recommend starting with 98/2 for most stainless applications. The 95/5 blend provides more heat but increases cracking risk on some alloys.

    Never use hydrogen blends on aluminum. The hydrogen reacts with aluminum to create porosity and severe weld defects. I learned this after ruining several test panels early in my welding career.

    Cost Comparison Over Time

    After tracking my gas usage over a year of fabrication work, here is what I found:

    Gas TypeCost per HourWeld SpeedBest Applications
    100% Argon$12-18BaselineGeneral steel, stainless, aluminum
    75/25 Ar/He$25-35+15-20%Thick materials, production welding
    100% Helium$45-65+25-30%Very thick aluminum, copper, specialty work

    TIG Welding Gas Flow Rate Settings

    Proper flow rate is critical. Too little gas and your weld suffers from porosity and contamination. Too much gas wastes money and creates turbulence that pulls air into the weld zone.

    CFH vs LPM Conversion

    Flow rates are measured in cubic feet per hour (CFH) in the US or liters per minute (LPM) internationally. Understanding both helps you work with different equipment.

    CFHLPMApplication
    10-125-6Low amperage, small cup (#4-#6), thin materials
    15-207-10Standard TIG welding, general purpose
    20-2510-12Large cup (#7-#10), higher amperage, aluminum
    25-3512-17Helium welding, gas lens, drafty conditions
    35-5017-24Outdoor welding, large cups, specialized applications

    Flow Rate by Material and Thickness

    Through years of trial and error, I have developed these flow rate guidelines for different materials and thicknesses:

    Steel (DCEN, Pure Argon): Start at 15 CFH for material up to 1/8 inch. Increase to 18-20 CFH for 1/8 to 1/4 inch. Use 20-25 CFH for thickness over 1/4 inch.

    Stainless Steel (DCEN, Pure Argon or Ar/H2): 15-18 CFH for most applications. The stainless surface benefits from slightly higher coverage. I use 18-20 CFH for autogenous welds (no filler) on stainless.

    Aluminum (AC, Pure Argon): 18-20 CFH is my baseline for aluminum. The AC current requires slightly more gas for proper cleaning action. I bump to 20-25 CFH for aluminum thicker than 1/4 inch.

    Copper (DCEN, Helium blends): 25-30 CFH minimum when using helium. The light gas needs higher flow to maintain coverage. I use 30-35 CFH for pure helium on copper.

    Cup Size and Flow Rate Relationship

    Your torch cup size directly affects optimal flow rate. Larger cups require higher flow to fill the increased volume.

    #4 Cup: 10-15 CFH (small, precision work)

    #6 Cup: 15-20 CFH (standard general purpose)

    #7 Cup: 18-25 CFH (medium to large work)

    #8 Cup: 20-30 CFH (larger welds, higher amperage)

    #10 Cup: 25-35 CFH (heavy duty, high amperage)

    Gas Lens Benefits

    A gas lens replaces standard collet bodies with a screen that laminates gas flow. This creates smoother, more consistent gas coverage with less turbulence.

    After installing a gas lens on my TIG torch, I achieved excellent welds at 15 CFH that previously required 20 CFH with a standard setup. The laminated flow also extends gas coverage distance, helping in drafty conditions.

    Gas lenses cost $15-30 but pay for themselves in gas savings and improved weld quality. I consider them essential equipment for serious TIG welding.

    Troubleshooting Gas-Related Weld Issues

    Gas-related problems account for over half of all TIG welding defects I have encountered. Learning to recognize and fix these issues saves countless hours of frustration and rework.

    Porosity

    Porosity appears as small holes or bubbles in the finished weld. Common causes include:

    • Insufficient flow rate: Increase CFH by 3-5 and observe results
    • Wind or drafts: Use wind blocks or increase flow rate
    • Contaminated base metal: Clean thoroughly before welding
    • Leaking connections: Check all fittings with soapy water solution
    • Wrong gas type: Never use CO2 or oxygen-containing mixes for TIG

    I once spent three hours troubleshooting porosity only to discover a small leak in my regulator connection. A simple thread sealant fixed the issue completely.

    Sugaring and Discoloration

    Sugaring appears as rough, granular deposits on the backside of stainless steel welds. This indicates oxidation from insufficient gas coverage.

    Solutions include:

    • Increase post-flow time: Keep gas flowing 3-5 seconds after arc stop
    • Use back purging: Purge the backside of the joint with argon
    • Check trailing shield: Ensure gas coverage follows the weld pool

    For critical stainless work, I use back purging with taped-off joints. This prevents oxidation and eliminates sugaring completely.

    Tungsten Contamination

    If your tungsten tips quickly become rough or discolored, check your gas choice. CO2 or oxygen in your gas will rapidly erode tungsten electrodes.

    Never use MIG gas (typically 75% argon/25% CO2) for TIG welding. The CO2 reacts violently with tungsten, causing immediate contamination and unstable arcs. I have seen this mistake ruin tungsten tips in seconds.

    Irregular Bead Appearance

    Inconsistent bead width, height, or appearance often stems from gas flow problems:

    • Turbulence from excessive flow: Reduce CFH by 3-5
    • Intermittent flow: Check regulator and flow meter for proper operation
    • Cup too small: Upgrade to larger cup size
    • No gas lens: Install gas lens for smoother flow

    After struggling with inconsistent aluminum welds, I discovered my flow meter was sticking. Replacing the regulator eliminated the issue immediately.

    Gas Safety and Handling

    Compressed gases present serious hazards if mishandled. Following proper safety procedures prevents accidents and ensures consistent gas quality.

    Cylinder Safety

    Always secure gas cylinders upright to a wall or cart. I have seen unsecured cylinders fall and sheared off valves turn cylinders into unguided missiles. One shop I worked at had a cylinder punch through a block wall after falling over.

    Never drop cylinders or strike them with tools. Cylinder necks are the weakest point and can fracture from impact. Handle every cylinder as if it is pressurized to 2,000+ PSI.

    Storage Considerations

    Store gas cylinders in cool, dry areas away from heat sources. Temperatures above 125 degrees F can cause dangerous pressure increases. Never store cylinders in direct sunlight or near radiators.

    Keep oxygen and fuel gases separated. While TIG welding uses inert gases, many shops also store acetylene or propane for cutting. Keep these at least 20 feet apart or separated by a firewall.

    Ventilation Requirements

    Even inert gases displace oxygen. In confined spaces, gas accumulation creates asphyxiation hazards. I always ensure adequate ventilation when welding in enclosed spaces.

    Argon is heavier than air and can accumulate in low areas like pits or trenches. Helium is lighter and collects near ceilings. Be aware of your gas properties and workspace conditions.

    Regulator and Hose Safety

    Inspect hoses regularly for cracks, cuts, or wear. Replace damaged hoses immediately. A failing hose can whip violently if it ruptures under pressure.

    Open cylinder valves slowly. Rapid valve opening can compress gas and heat it to ignition temperatures near the outlet. I always crack valves slightly before opening fully.

    Frequently Asked Questions

    What should my gas be at for TIG welding?

    Set your TIG welding gas flow to 15-20 CFH for most applications with pure argon. Use 18-25 CFH for aluminum with AC current. Increase to 25-35 CFH when using helium due to its lighter weight. Adjust flow based on cup size, amperage, and welding conditions.

    Can you use 75 argon 25 CO2 to TIG weld?

    No, never use CO2 or argon-CO2 blends for TIG welding. The CO2 will rapidly erode your tungsten electrode, creating an unstable arc and poor weld quality. TIG welding requires inert gases only (argon, helium, or inert blends). CO2 blends work for MIG welding but destroy TIG tungsten.

    What’s the best gas to use for TIG welding?

    100% argon is the best gas for most TIG welding applications. It works for steel, stainless steel, and aluminum with excellent arc stability and clean weld results. Pure argon is also the most cost-effective option. Consider argon-helium blends for thick materials where additional heat input is needed.

    What is the rule of 33 in TIG welding?

    The rule of 33 in TIG welding refers to setting amperage to one-thousandth of material thickness (in thousandths of an inch), or approximately 1 amp per 0.001 inch. For example, 0.125 inch (1/8) material would weld at approximately 125 amps. This provides a starting point that typically requires minor adjustment based on joint configuration and welding position.

    Can you use straight argon for all TIG welding?

    Yes, straight argon works for about 90% of TIG welding applications. It handles steel, stainless steel, and aluminum effectively. However, thick materials (over 1/4 inch) may benefit from argon-helium blends for additional penetration. Copper and high-conductivity alloys also perform better with helium additions.

    Is pure helium good for TIG welding aluminum?

    Pure helium works for TIG welding aluminum but is rarely necessary. Helium provides hotter arc and deeper penetration, which helps on thick aluminum over 1/2 inch. However, helium costs 3-4 times more than argon. For most aluminum work, argon or argon-helium blends provide better value and easier arc starting.

  • Robotic Welding: Complete Guide to Automation in Manufacturing

    Robotic Welding: Complete Guide to Automation in Manufacturing

    Manufacturing is facing a critical challenge in 2026: finding skilled welders. The American Welding Society estimates a shortage of over 80,000 welding positions in the United States alone, and this gap keeps widening each year.

    I’ve seen this firsthand working with manufacturing facilities across the Midwest. After managing production operations for 15 years, I’ve watched qualified welders retire faster than we can train replacements. The impact is real: missed delivery dates, quality inconsistencies, and rising labor costs that eat into margins.

    Robotic welding offers a solution to these challenges. This automated technology uses programmable robots to perform welding tasks with precision and consistency that human welders struggle to match over long shifts. Let me explain what robotic welding is and how it might fit your operation.

    What Is Robotic Welding?

    Robotic welding is the use of programmable industrial robots to automate welding processes, performing both the weld and material handling with exceptional precision, consistency, and speed. Common types include arc welding and spot welding, widely used in automotive, manufacturing, and fabrication industries to improve quality, productivity, and safety while reducing labor costs.

    The technology has evolved significantly since the first industrial welding robot was introduced by General Motors in the 1960s. Modern systems combine sophisticated robot arms, advanced welding power sources, and intelligent controllers that can execute complex weld patterns with repeatability within 0.2mm.

    In 2026, robotic welding encompasses more than just traditional industrial robots. Collaborative robots, or cobots, now work alongside humans without safety fencing. This expansion makes automation accessible to smaller shops that previously couldn’t justify the investment.

    Collaborative Robots (Cobots): Smaller, force-limited robots designed to work alongside humans without safety fencing. These systems feature sensors that detect contact and stop immediately, making them ideal for small shops and mixed-mode manufacturing where humans and robots share workspace.

    7 Types of Robotic Welding Systems

    Different welding processes and applications require different robotic solutions. Understanding the available options helps match the right technology to your specific needs. Here are the seven main types of robotic welding systems used in 2026:

    1. Arc Welding Robots (GMAW/FCAW): The most common type, arc welding robots perform gas metal arc welding (MIG) and flux-cored arc welding processes. Six-axis articulated robots provide the flexibility needed for complex joint geometries. These systems dominate automotive, fabrication, and heavy equipment applications, handling weld thicknesses from 20 gauge to 1 inch or more.

    2. Spot Welding Robots (Resistance Welding): Used extensively in automotive body assembly, spot welding robots apply resistance welding guns to join sheet metal components. These robots handle heavier payloads (often 100-200kg) and operate at high speeds, performing 20-40 spot welds per minute on automotive body panels. A typical car body requires 3,000-5,000 spot welds.

    3. TIG Welding Robots (GTAW): Gas tungsten arc welding robots provide precise control for applications requiring high-quality welds on thinner materials. TIG welding robots move slower but deliver exceptional quality on stainless steel, aluminum, and exotic alloys. They’re common in aerospace, food processing equipment, and high-end fabrication.

    4. Laser Welding Robots: High-precision systems that use focused laser beams for welding. Laser welding produces narrow heat-affected zones and minimal distortion, making it ideal for precision components in automotive, aerospace, and electronics manufacturing. In 2026, laser welding adoption is growing 15% annually due to EV manufacturing requirements.

    5. Plasma Arc Welding Robots: Similar to TIG but using a constricted arc that provides deeper penetration and faster welding speeds. Plasma welding robots excel on thicker materials and applications requiring precise keyhole welding. They’re used in aerospace, pressure vessel manufacturing, and tube welding.

    6. Stud Welding Robots: Specialized systems that weld threaded studs and fasteners to metal surfaces. These robots find extensive use in automotive, construction, and electrical enclosure manufacturing. The process is fast (often less than 1 second per stud) and produces strong, consistent connections.

    7. Collaborative Welding Robots (Cobots): The newest category gaining traction in 2026. Cobots feature force-limiting technology that allows them to work alongside humans without safety fencing. These systems cost significantly less than traditional robots and excel at small-batch applications and mixed-mode manufacturing. Their ease of programming and deployment makes them ideal for shops with varying production requirements.

    Robot TypeBest ApplicationsTypical Cost Range
    Arc Welding RobotGeneral fabrication, structural welds, 20ga-1in material$70,000-$150,000
    Spot Welding RobotAutomotive body panels, sheet metal assembly$100,000-$200,000
    TIG Welding RobotStainless steel, aluminum, precision welds$80,000-$170,000
    Laser Welding RobotPrecision components, EV manufacturing, electronics$150,000-$340,000
    Plasma Arc Welding RobotAerospace, pressure vessels, tube welding$90,000-$180,000
    Stud Welding RobotAutomotive, electrical enclosures, fasteners$50,000-$120,000
    Collaborative Robot (Cobot)Small shops, mixed production, job shops$35,000-$80,000

    How Robotic Welding Works? : The Process

    Robotic welding systems integrate three core components: the robot manipulator, the welding power source, and the controller. The robot manipulator is typically a six-axis articulated arm that provides the range of motion needed to reach weld joints from multiple angles. The controller stores and executes programmed weld sequences, while the power source delivers the electrical current needed for welding.

    Programming happens through one of two methods. Teach pendant programming involves the operator manually moving the robot to each weld point and recording positions. Offline programming uses software to create weld paths on a 3D model of the part, then downloads the program to the robot controller. This second method keeps production running during programming, a crucial advantage for facilities maximizing uptime in 2026.

    During operation, the robot follows the programmed path precisely. It positions the welding torch at the correct angle, maintains consistent travel speed, and feeds filler wire at a constant rate. Advanced systems use machine vision and seam-tracking sensors to detect part variations and adjust parameters in real-time.

    The entire cycle repeats indefinitely with zero deviation. Once programmed, a robotic welding system produces identical welds thousands of times without fatigue, distraction, or inconsistency. This repeatability is what makes robotic welding so valuable for quality-critical applications.

    Advantages of Robotic Welding

    The benefits of robotic welding go far beyond just replacing manual labor. Based on my experience implementing automation in multiple facilities, here are the measurable advantages that justify the investment:

    Quick Summary: Robotic welding typically delivers 3-5x productivity gains, 50-80% reduction in rework, and consistent weld quality that meets or exceeds code requirements. Payback periods range from 12-24 months for most applications in 2026.

    Productivity Gains: Robots work continuously without breaks. A human welder keeps the torch on the workpiece approximately 30% of the time; a robot maintains arc-on time around 90%. This threefold improvement in arc-on time directly translates to higher throughput. I’ve seen single robot cells produce the output of three to four manual welding stations.

    Consistent Quality: Every weld follows the exact same path at the exact same speed with the exact same parameters. This repeatability eliminates the variation inherent in manual welding. Quality inspectors report that robotic welds have virtually zero rejection rates when properly programmed and maintained.

    Reduced Rework: Consistent welds mean fewer defects. Facilities implementing robotic welding typically report 50-80% reductions in rework. Less rework means more capacity for production rather than fixing mistakes. In one facility I worked with, rework dropped from 4.2% to 0.6% after implementing robotic welding.

    Labor Cost Savings: One robot operator can supervise multiple welding cells. Instead of three skilled welders, you might need one operator and one robot. The savings compound as robots work through breaks, shift changes, and overtime periods. With skilled welder wages exceeding $25/hour in many regions, the labor savings alone can justify the investment.

    Safety Improvements: Welding environments expose workers to fumes, UV radiation, sparks, and heat. Robots perform these hazardous operations while operators supervise from safe distances. Workers’ compensation claims drop dramatically in facilities that automate welding operations. The removal of workers from hazardous welding environments represents one of the most significant human benefits.

    Material Efficiency: Precise control over wire feed speed and travel distance reduces material waste. Robotic systems typically use 5-10% less filler material than manual welding due to consistent deposition and reduced over-welding. This savings adds up quickly for facilities processing tons of wire annually.

    FactorManual WeldingRobotic WeldingImprovement
    Arc-on Time30%90%3x
    RepeatabilityVariableplus/minus 0.2mmConsistent
    Production RateBaseline3-5x faster300-500%
    Defect Rate2-5%less than 0.5%80% reduction
    Material UsageBaseline5-10% lessCost savings

    Disadvantages and Challenges

    Robotic welding offers compelling advantages, but it’s not the right solution for every situation. Understanding the limitations helps avoid costly mistakes. Here are the main challenges to consider:

    High Initial Investment: A complete robotic welding cell costs between $50,000 and $250,000 depending on configuration. This capital expense requires justification through ROI analysis and often involves financing arrangements. For small businesses, this represents a significant commitment that may require equipment financing or leasing arrangements.

    Part Variation Sensitivity: Robots excel at repeating identical operations but struggle with inconsistent parts. If your incoming parts vary significantly from piece to piece, robotic welding may require additional fixturing or vision systems to compensate. I’ve seen projects stall because part tolerance wasn’t addressed before robot selection.

    Programming Complexity: Creating efficient robot programs requires specialized knowledge. Complex joint geometries and multi-pass welds demand experienced programmers. Most companies invest 40-80 hours in training for robot operators and programmers. The learning curve can take 3-6 months before new programmers reach full productivity.

    Low-Volume Applications: Programming time must be amortized over production volume. For runs under 50 pieces, manual welding often proves more economical. The break-even point varies but typically falls between 100-500 pieces depending on weld complexity. Job shops with highly variable work need to carefully evaluate which parts to automate.

    Maintenance Requirements: Robotic systems need regular maintenance to maintain reliability. Preventive maintenance schedules include daily consumable inspection, weekly torch alignment checks, and annual controller servicing. Technical support availability becomes critical for minimizing downtime. I budget approximately 5% of equipment cost annually for maintenance and spare parts.

    Floor Space Requirements: A robotic welding cell requires space for the robot, controller, safety fencing, and part positioning equipment. Most cells need 100-200 square feet including safety zones and operator access. Facilities with limited floor space may need to reorganize production layout to accommodate automation.

    Limited Flexibility: Once programmed for a specific part, changing to a different part requires reprogramming and potentially retooling. This limits flexibility compared to manual welders who can switch between different parts instantly. Cobots address this limitation to some degree but still require programming changes for different parts.

    Robotic Welding Applications by Industry

    Robotic welding has transformed manufacturing across multiple sectors. Each industry leverages the technology differently based on production volumes, quality requirements, and part characteristics. Understanding industry applications helps identify best practices for your specific situation.

    Automotive Industry (40-45% market share): The largest adopter of robotic welding, automotive manufacturers use thousands of robots in each assembly plant. Body shops employ spot welding robots to join sheet metal panels, while arc welding robots handle structural components like chassis frames and suspension parts. A typical automotive plant contains 200-500 welding robots operating simultaneously. In 2026, electric vehicle manufacturing is driving increased adoption of laser welding for battery tray and body-in-white applications.

    Heavy Equipment Manufacturing (15-20% market share): Construction and agricultural equipment manufacturers weld thick plate components that require significant deposition. Multi-robot systems work together on large weldments, with two or more robots welding simultaneously to reduce cycle time. These applications often use high-deposition processes like submerged arc or flux-cored arc welding. I’ve seen systems that deposit 15 pounds of wire per hour, far exceeding manual capabilities.

    Metal Fabrication (20-25% market share): Job shops and fabricators increasingly adopt robotic welding for repetitive subassemblies. Brackets, frames, and structural components lend themselves well to automation. Many fabricators start with cobots that can be moved between workstations as production schedules change. The key is identifying parts with sufficient volume to justify programming time.

    Shipbuilding: Shipyards use robotic welding for panel fabrication, section assembly, and sub-component production. Large gantry robots weld ship hull panels, while portable robotic systems handle welds in confined spaces. The consistency and quality improvements justify the investment despite the lower production volumes compared to automotive. Shipbuilding also utilizes specialized robots for pipe spool fabrication.

    Aerospace: Aircraft components demand exceptional quality and precision. Robotic laser welding and electron beam welding systems produce high-integrity welds with minimal distortion. These applications often use vision systems and seam-tracking technology to maintain precise joint alignment. The aerospace industry’s stringent quality requirements make robotic welding attractive for critical components.

    Robotic Welding Careers and Salaries

    The rise of robotic welding has created new career opportunities. Rather than replacing welders, automation is transforming roles into higher-value positions that combine welding knowledge with robotics expertise. This career path offers strong compensation and growth potential in 2026.

    Robotic Welding Technician: These professionals install, program, operate, and maintain robotic welding systems. The role requires knowledge of welding processes, robot programming, and basic electrical troubleshooting. Technicians typically start at $45,000-$55,000 annually, with experienced technicians earning $60,000-$80,000 depending on location and industry.

    Robot Programmer: Specialists who create and optimize robot programs. This role focuses on offline programming software, weld procedure development, and cycle time optimization. Programmers command salaries of $65,000-$90,000, with top programmers in automotive and aerospace exceeding $100,000.

    Automation Engineer: Engineers who design and integrate complete robotic welding cells. This role requires a bachelor’s degree in engineering (mechanical, electrical, or manufacturing) and experience with robotics. Automation engineers earn $75,000-$110,000, with senior engineers and integrators reaching $130,000+.

    Training and Education: Entry-level positions typically require a high school diploma or GED combined with welding experience. Technical schools and community colleges offer robotic welding programs ranging from 6-month certificates to 2-year associate degrees. The American Welding Society provides certification for robotic welding operators and technicians. Many employers provide manufacturer-specific training on FANUC, ABB, Motoman, or KUKA robots.

    Manual welders transitioning to robotic roles often find their welding experience gives them valuable insight into weld quality and parameter adjustment. The career path offers advancement opportunities from operator to programmer to supervisor, with corresponding salary increases at each level.

    Implementation and Cost Considerations

    Successful robotic welding implementation follows a systematic approach. Rushing the process leads to disappointing results and wasted investment. Here’s a practical framework based on successful implementations I’ve witnessed.

    1. Application Assessment: Start by identifying which welding operations offer the best automation potential. Look for high-volume parts with consistent geometry and quality requirements. Calculate potential savings based on labor reduction, increased throughput, and decreased rework. I recommend starting with one application that proves the concept before expanding. The best candidates have annual volumes over 500 pieces and consistent part quality.

    2. System Specification: Select the robot type, welding process, and configuration based on your application requirements. Consider payload capacity, reach, welding process compatibility, and available floor space. Work with experienced integrators who understand your industry and can provide reference installations. Request demonstrations with your actual parts if possible.

    3. Fixturing Design: Robotic welding demands precise, repeatable part positioning. Fixturing often represents 20-30% of the total system cost but proves critical for success. Invest in quality fixtures that locate parts consistently and provide adequate weld access. I’ve seen excellent robots produce poor results because of inadequate fixturing.

    4. Programming and Development: Initial program development typically takes 1-3 weeks depending on complexity. This phase includes weld procedure development, path programming, and cycle time optimization. Offline programming software can reduce development time by 30-50% compared to teach pendant programming. Plan for this phase in your implementation timeline.

    5. Training: Invest in comprehensive training for operators, programmers, and maintenance personnel. Most manufacturers offer training programs ranging from 2-5 days. I’ve found that companies investing in proper training achieve ROI 30-40% faster than those trying to learn on the fly. Budget for ongoing training as new features and software updates become available.

    6. Production Rollout: Start with limited production runs and gradually increase volume as you refine the process. Monitor quality metrics and cycle times closely during the ramp-up period. Most facilities reach full production capability within 4-8 weeks of initial installation. Don’t declare success until you’ve sustained production for at least 30 days.

    ROI Calculation: To calculate return on investment, sum the annual savings from labor reduction, increased production capacity, reduced rework, and material efficiency. Divide the total system cost by annual savings to determine payback period in years. Most robotic welding systems achieve payback in 12-24 months with two-shift operation. With current labor shortages, many facilities see even faster payback in 2026.

    Financing options have improved significantly in recent years. Many equipment vendors offer leasing programs with monthly payments similar to hiring a welder. This approach lets facilities add capacity without large capital outlays and realize positive cash flow from day one. Some vendors also offer rental programs for seasonal production needs.

    Frequently Asked Questions

    What is robotic welding?

    Robotic welding is the use of programmable industrial robots to automate welding processes, performing both the weld and material handling with high precision, consistency, and speed. Common types include arc welding and spot welding, widely used in automotive and manufacturing industries.

    How much does a robotic welding system cost?

    Complete robotic welding cells typically range from $50,000 to $250,000 depending on configuration. Collaborative robots cost $35,000 to $80,000, while traditional arc welding systems range from $70,000 to $150,000. Laser welding systems can cost up to $340,000 for advanced applications.

    How much do robotic welding technicians make?

    Robotic welding technicians typically earn $45,000 to $80,000 annually depending on experience and location. Entry-level positions start around $45,000-$55,000, while experienced technicians earn $60,000-$80,000. Robot programmers earn $65,000-$90,000, with automation engineers reaching $75,000-$130,000+.

    Is robotic welding hard to learn?

    Robotic welding requires specialized training but is learnable with proper instruction. Basic operation can be learned in 1-2 weeks, while full programming proficiency typically takes 3-6 months of hands-on experience. Most manufacturers offer training programs, and community colleges offer robotic welding courses. Previous welding experience helps but isn’t always required.

    Can small shops use robotic welding?

    Yes, collaborative robots (cobots) make automation accessible to small shops. Cobots cost $35,000-$80,000, require minimal floor space, work without safety fencing, and can be moved between workstations. Pre-engineered cells offer turnkey solutions starting around $50,000, with leasing options available for manageable monthly payments.

    What is the ROI for robotic welding?

    Most robotic welding systems achieve payback in 12-24 months with two-shift operation. ROI depends on labor costs, production volume, weld complexity, and efficiency gains. Facilities with high labor costs and consistent part volumes typically see the fastest returns, with some achieving payback in under 12 months.

    What types of welding can be automated?

    Most common welding processes can be automated including MIG/MAG, TIG, flux-cored, spot, laser, plasma arc, and stud welding. The best candidates for automation are repetitive welds on consistent parts with adequate joint access and fixturing capability. Parts with annual volumes over 500 pieces typically justify automation.