Category: Informative

  • How to Paint 3D Prints: Pro Guide & Tips 2026

    How to Paint 3D Prints: Pro Guide & Tips 2026

    Transform your bland, single-color 3D prints into vibrant, professional-looking masterpieces that rival commercial products. Whether you’re creating miniatures, prototypes, or decorative pieces, the right paint job can make all the difference.

    Painting 3D prints requires proper preparation through sanding and priming, followed by applying thin layers of acrylic paints or specialty coatings. The process involves surface smoothing, primer application, painting with your chosen technique, and finishing with protective clear coats.

    This comprehensive guide delivers everything you need: material recommendations, step-by-step techniques, troubleshooting tips, and professional secrets. You’ll learn methods that work for PLA, ABS, resin, and other materials.

    We’ll walk you through essential preparation work, help you choose the right materials, master various painting techniques, and achieve professional finishing touches. Let’s turn your 3D prints into works of art.

    Why Paint Your 3D Prints?

    Enhanced Visual Appeal and Realism

    Single-color prints often look unfinished or toy-like. Painting 3d prints with acrylic transforms them into realistic models with depth, character, and professional appeal. The right paint job can make plastic look like metal, wood, or stone.

    Color gradients, shadows, and highlights bring your prints to life. Whether you’re creating cosplay props, architectural models, or display pieces, paint adds the finishing touch that separates amateur work from professional results.

    Protection from UV and Environmental Damage

    Raw 3D printed plastic degrades under UV exposure, becoming brittle and discolored over time. A proper paint job with UV-resistant clear coat acts as armor, protecting your prints from sun damage, moisture, and handling wear.

    This protection is especially crucial for outdoor displays or frequently handled items. The paint layer prevents oxidation and maintains structural integrity, extending your print’s lifespan significantly.

    Hiding Layer Lines and Print Imperfections

    Even high-quality prints show layer lines, especially with FDM printing. Paint, combined with proper preparation, conceals these imperfections for a smooth, injection-molded appearance.

    Support marks, z-seam lines, and minor surface irregularities disappear under properly applied paint. This transformation is why many professional prop makers rely on painting to achieve cinema-quality finishes.

    Cost-Effective Alternative to Multi-Color Printing

    Multi-material or full-color 3D printing remains expensive and limited. Painting single-color prints offers unlimited color options at a fraction of the cost, plus the ability to add effects impossible with printing alone.

    You can achieve gradients, metallic finishes, weathering effects, and complex color schemes. The flexibility to change or update colors later adds value that multi-color printing can’t match.

    Essential Materials and Tools for Painting 3D Printed Models

    Best Paint for 3D Printed Plastic

    Acrylic paints for 3d prints reign supreme due to their water-based formula, safety, and versatility. They adhere well to prepared surfaces, dry quickly, and clean up easily with water.

    Paint TypeBest ForDrying TimeDurabilityCost
    AcrylicGeneral use, beginners20-30 minGoodLow
    EnamelOutdoor items, high wear2-4 hoursExcellentMedium
    LacquerProfessional finish15-20 minVery GoodHigh
    SpecialtyEffects (metallic, glow)VariesGoodHigh

    Enamel paints create harder, more durable finishes but require ventilation and longer drying times. They excel for items needing weather resistance or heavy handling.

    Specialty paints open creative possibilities: metallics for armor and props, glow-in-the-dark for unique effects, and color-shifting paints for eye-catching displays. Choose based on your project’s specific needs.

    Primers – The Foundation of Great Paint Jobs

    The best primer for 3d prints depends on your material and desired finish. Filler primers like Rust-Oleum Filler Primer excel at smoothing surface imperfections while providing excellent paint adhesion.

    Standard primers work well for already-smooth surfaces or when preserving fine details. Tamiya Fine Surface Primer delivers ultra-thin coats that maintain intricate details while ensuring paint adhesion.

    Automotive primers offer heavy-duty filling for rough prints but may obscure details. Choose primer color strategically: gray for most colors, white for bright tones, black for metallics and dark schemes.

    Tools You’ll Need

    Preparing 3d prints for paint requires specific tools for each stage:

    Sanding Supplies:

    • 220-grit for initial smoothing
    • 320-grit for general surface prep
    • 400-600 grit for fine finishing
    • Flexible sanding sheets for curves
    • Sanding blocks for flat surfaces

    Painting Tools:

    • Quality brushes in various sizes
    • Airbrush for smooth coverage (optional)
    • Spray booth or ventilated area
    • Palette for mixing colors
    • Paint stands or holders

    Safety Equipment: Always prioritize safety when working with paints and solvents. Use NIOSH-approved respirators for spray painting and ensure adequate ventilation.

    Preparing 3D Prints for Paint – The Critical First Steps

    Support Removal Techniques

    Start with careful support removal using flush cutters for the bulk material. Hold cutters flat against the surface to minimize scarring and work systematically around your print.

    For stubborn supports near delicate features, switch to precision tools. X-Acto knives excel at reaching tight spots, while needle-nose pliers grip small remnants. Take your time—rushed removal causes more damage than patient work.

    Different materials require adjusted techniques. PLA supports snap cleanly when cooled, while ABS benefits from slight warming. Resin prints need extra care as supports can leave divots requiring filling.

    Surface Smoothing and Sanding

    Begin sanding with 220-grit paper to remove major imperfections and support marks. Use circular motions for even material removal, checking progress frequently to avoid over-sanding.

    Progress through grits systematically: 220→320→400→600. Each step refines the previous scratches until achieving a smooth surface. Wet sanding with 400+ grit reduces dust and provides better results.

    GritPurposeTechniqueTime
    220Remove supports, major flawsCircular motion5-10 min
    320General smoothingBack-and-forth5-10 min
    400Fine smoothingWet sand10-15 min
    600Final polishLight wet sand5-10 min

    Special materials need adjusted approaches. Carbon fiber-infused filaments require masks and ventilation due to harmful dust. Flexible materials sand poorly—consider chemical smoothing instead.

    Cleaning Your Print

    Remove all sanding dust before proceeding—any particles trapped under primer create permanent flaws. Start with compressed air to blast debris from crevices and detail areas.

    Follow with a thorough water wash using an old toothbrush. This mechanical action removes stubborn particles better than rinsing alone. For prints from beds using adhesive, ensure complete glue removal.

    Finish with tack cloth, using long strokes in one direction. This waxy cloth grabs remaining dust without leaving residue. For best results, let prints dry completely before tacking.

    Priming 3D Prints – Your Key to Professional Results

    Why Primer is Essential

    Primer creates a uniform surface that paint can properly bond to. Without it, acrylic paint 3d print applications often fail, peeling or showing uneven coverage.

    Beyond adhesion, primer fills micro-scratches and minor layer lines invisible to the eye but apparent under paint. This filling action creates the smooth base essential for professional finishes.

    The neutral color blocks the plastic’s base color from affecting your paint. This proves crucial when painting light colors over dark plastics or achieving consistent colors across multi-part assemblies.

    How to Apply Primer Correctly?

    Mount your print on a dowel using the Adam Savage method—drill a small hole in an inconspicuous area. This allows 360-degree access without touching the surface, similar to techniques used in DIY project assembly.

    Critical mixing technique: Swirl the primer can for 2-3 minutes rather than shaking. Shaking creates propellant bubbles that cause orange peel texture. Listen for the mixing ball rolling smoothly.

    Hold the can 6-8 inches from the surface and spray in quick passes. Start spraying before the part and continue past it. Apply multiple thin coats rather than one thick coat—patience prevents runs and drips.

    Primer Application Checklist:

    • [ ] Surface cleaned and dried
    • [ ] Part mounted on holder
    • [ ] Primer swirled (not shaken)
    • [ ] First coat: Light dusting
    • [ ] Dry 20-30 minutes
    • [ ] Second coat: Even coverage
    • [ ] Inspect under bright light
    • [ ] Light sand with 400 grit if needed
    • [ ] Final coat if necessary

    Troubleshooting Common Primer Issues

    Orange peel texture indicates spraying too far away or in high humidity. Move closer and work in controlled conditions—ideally 65-75°F with less than 50% humidity.

    Runs and drips mean too much primer at once. Strip with appropriate solvents following safety guidelines, sand smooth, and restart with thinner coats.

    Poor adhesion suggests contamination or incompatible primer. Ensure complete cleaning and use plastic-specific primers. Some plastics like PP or PE require special adhesion promoters first.

    Painting 3D Prints with Acrylic – Hand Painting Mastery

    Acrylic Paint Selection and Preparation

    Quality matters when selecting acrylic paints for 3d prints. Professional brands like Vallejo, Citadel, or Golden offer superior pigment density and coverage compared to craft paints.

    Thin your paints appropriately—thick paint obscures details and shows brush marks. Mix paint with water or acrylic medium to achieve milk-like consistency. Test on a practice piece first.

    Paint Dilution Guide:

    • Base coats: 2:1 paint to thinner
    • Detail work: 3:1 paint to thinner
    • Washes: 1:3 paint to thinner
    • Dry brushing: Use straight from bottle

    Hand Painting Techniques

    Start with larger areas using appropriately sized brushes. Work from the center outward, maintaining a wet edge to prevent visible seams between sections.

    Apply multiple thin coats rather than attempting full coverage immediately. Each layer should be slightly transparent, building color gradually. This approach prevents brush strokes and maintains detail.

    For painting 3d prints with acrylic, use quality synthetic brushes that hold their shape. Natural bristles absorb water and lose precision. Clean brushes frequently to maintain sharp points for detail work.

    Advanced Effects with Acrylics

    Weathering brings realism to any model. Start with a dark wash in recesses to create shadow and depth. Mix dark paint with lots of water and let it flow into crevices naturally.

    Dry brushing highlights raised edges convincingly. Load a stiff brush with paint, remove most on paper towel, then lightly sweep across surfaces. This technique makes details pop dramatically.

    Layer different effects for complexity. Base color, wash for shadows, dry brush for highlights, then selective detail painting creates professional results. Practice these techniques separately before combining them.

    Spray Painting 3D Prints – Achieving Smooth, Even Coverage

    Spray Paint Selection

    Choose spray paints specifically formulated for plastics when coloring 3d printed objects. Brands like Krylon Fusion or Rust-Oleum Universal bond directly to plastic surfaces without primer (though primer still improves results).

    Tamiya model spray paints deliver the finest results for detailed work. Their ultra-thin formula preserves details while providing excellent coverage. The investment pays off in superior finishes.

    Avoid general-purpose spray paints lacking plastic compatibility. These often contain solvents that attack certain plastics or fail to adhere properly, leading to peeling or cracking over time.

    Professional Spray Painting Technique

    The 6-8 inch rule ensures optimal paint delivery. Too close causes runs and pooling; too far creates dry, rough texture. Practice on cardboard to perfect your distance and speed.

    Maintain consistent motion throughout each pass. Start spraying before the part, sweep across at steady speed, and continue past before releasing. This prevents heavy spots at start and stop points.

    Rotation strategy maximizes coverage efficiency. Mount parts on a lazy Susan or rotating platform for smooth rotation while spraying. This eliminates repositioning delays and ensures even coverage.

    Spray Painting Best Practices:

    • Temperature: 65-75°F ideal
    • Humidity: Below 50%
    • Multiple light coats
    • 10-15 minutes between coats
    • Full cure: 24-48 hours

    Masking for Multi-Color Designs

    Quality masking tape designed for delicate surfaces prevents paint bleeding and surface damage. Tamiya masking tape excels for model work, conforming to curves without leaving residue.

    Press tape edges firmly using a credit card or similar tool. This seals the edge, preventing paint from seeping underneath. For complex curves, use liquid mask applied with a brush.

    Remove tape at the optimal time—after paint becomes tacky but before full drying. Pull at 45-degree angle away from the paint edge. This technique ensures clean, sharp lines every time.

    Special Techniques for Different 3D Printing Materials

    Painting PLA 3D Prints

    PLA’s low temperature resistance requires careful consideration. Avoid baking or heat-curing paints that could warp your print. Stick to air-dry options for best results.

    The material’s slight flexibility means paint must flex too. Acrylic paints for 3d prints work perfectly on PLA, maintaining adhesion even with minor part flexing during handling.

    PLA accepts most primers well, but avoid automotive primers with strong solvents. Water-based primers prove safest while still providing excellent adhesion and filling properties.

    Coloring 3D Printed Objects in ABS

    ABS’s chemical resistance allows more aggressive paint options. Acetone smoothing before painting creates glass-smooth surfaces rivaling injection molded parts—perfect for professional applications.

    The material’s durability pairs well with enamel paints for outdoor use. These combinations withstand weather and UV exposure better than PLA with acrylics, though proper primer remains essential.

    Consider ABS’s tendency to warp with temperature. Store painted ABS prints away from heat sources and direct sunlight to maintain dimensional stability and prevent paint cracking.

    Finishing Resin Prints

    Resin prints often need less surface preparation due to their smooth finish. Light sanding with 400-600 grit removes support marks without extensive work required for FDM prints.

    UV exposure affects uncured resin trapped in prints. Ensure complete curing before painting, either through extended UV exposure or washing with appropriate solvents as recommended by resin manufacturers.

    Some resins remain slightly tacky even after curing. A light primer coat seals this tackiness, providing the ideal surface for paint adhesion. Choose primers compatible with your specific resin type.

    Working with Flexible Materials (TPU)

    Flexible filaments require special paint considerations. Standard paints crack when flexed, ruining your finish. Seek flexible paint additives or specialty flexible paints designed for rubber and vinyl.

    Surface preparation differs too—aggressive sanding tears rather than smooths TPU. Use fine grits with light pressure, or consider chemical surface treatments designed for flexible plastics.

    Test paint flexibility before committing to the entire model. Paint a small area, let cure completely, then flex the part. Cracking or peeling indicates incompatible paint requiring different products.

    Professional Finishing Touches

    Clear Coating for Protection and Shine

    Clear coats provide the final protection layer while controlling surface finish. Matte coats reduce glare and create realistic appearances for military models or weathered items.

    Gloss coats enhance colors and create wet-look effects perfect for automotive models or glossy creatures. Semi-gloss balances both, providing protection without excessive shine.

    Apply clear coats using the same techniques as primer—thin, even layers from proper distance. Two to three coats ensure complete coverage and maximum protection. Allow full curing between coats.

    Polishing for Car-Like Finish

    Achieve automotive-quality finishes using progressive polishing techniques. Start with nail buffing sticks, progressing through grades from buff to polish. Work small sections systematically.

    Fiber-backed polishing papers surpass traditional methods for final finishing. Starting at 3000 grit and progressing to 12000 creates mirror-like surfaces rivaling professional automotive paint.

    Polishing Progression:

    1. Nail buffer (coarse) – Remove orange peel
    2. Nail buffer (medium) – Smooth surface
    3. Nail buffer (fine) – Initial shine
    4. 3000 grit wet – Deep smoothing
    5. 6000 grit wet – High polish
    6. 12000 grit wet – Mirror finish

    Adding Special Effects

    Metallic finishes transform prints into convincing metal replicas. Apply black base coat, then dry brush with metallic paints. Layer different metallics for complex, realistic effects.

    Glow effects require proper base preparation. White primer under glow paint maximizes brightness and duration. Apply multiple glow coats for stronger effect, charging with UV light for best results.

    Texture additions create tactile interest. Mix fine sand with paint for rough surfaces, or use crackle medium for aged effects. These techniques add realism impossible to achieve through printing alone.

    Common Mistakes to Avoid When Painting 3D Prints

    Skipping primer on “smooth” prints ranks as the top mistake. Even glass-smooth resin prints benefit from primer’s adhesion promotion and color-blocking properties. Never skip this crucial step.

    Painting in high humidity causes numerous problems: poor adhesion, clouding, and extended dry times. Monitor conditions and wait for suitable weather. Indoor climate control proves invaluable for consistent results.

    Using incompatible paint types together causes adverse reactions. Enamel over uncured acrylics wrinkles and cracks. Always let previous coats fully cure and test compatibility on scraps first.

    Rushing between coats traps solvents, causing bubbling, wrinkling, or poor adhesion. Follow manufacturer dry times religiously. When in doubt, wait longer—patience ensures professional results.

    Over-sanding delicate details destroys hours of printing time. Work carefully around fine features, using precision tools rather than aggressive sanding. Protect details with masking tape when sanding nearby areas.

    Pro Tips from Expert Model Painters

    Adam Savage’s dowel mounting system revolutionizes painting workflow. Beyond basic mounting, create dedicated painting stands with multiple dowels for batch processing. This assembly-line approach maximizes efficiency.

    Temperature and humidity optimization goes beyond avoiding extremes. The sweet spot sits at 68-72°F with 40-45% humidity. These conditions ensure optimal paint flow and drying.

    Batch painting identical or similar colors saves significant time and paint. Group parts by color rather than by model. This approach mimics production line efficiency used in manufacturing.

    Color theory application elevates your work. Warm highlights and cool shadows create depth. Complementary colors make details pop. Study color wheels to understand relationships and create harmonious schemes.

    Photography tips preserve your hard work. Use diffused lighting to avoid harsh shadows. Neutral backgrounds let colors shine. Multiple angles document techniques for future reference or portfolio building.

    Troubleshooting Paint Problems

    Paint Not Adhering

    Poor adhesion stems from contamination, incorrect primer, or incompatible paint. Strip affected areas with appropriate solvents, thoroughly clean, and restart with proper primer selection.

    Check material compatibility—some exotic filaments resist standard paints. Research your specific material or test on scraps. Adhesion promoters solve stubborn cases but add cost and complexity.

    Environmental factors matter too. Cold surfaces prevent proper paint bonding. Warm parts to room temperature before painting, especially when bringing prints from cold storage or garages.

    Visible Brush Strokes

    Thick paint shows every brush movement. Thin appropriately and apply multiple coats rather than one heavy application. Quality brushes also minimize stroke visibility.

    Brush technique affects results significantly. Use long, smooth strokes in consistent directions. Avoid overworking areas—let paint self-level rather than repeatedly brushing.

    Consider alternative application methods for large areas. Sponges create texture-free surfaces, while airbrushes eliminate brush strokes entirely. Match tool to task for best results.

    Orange Peel Texture

    This bumpy texture indicates spray paint drying before reaching the surface. Move closer, increase ambient temperature, or use retarder additives in humid conditions.

    Incompatible thinners cause similar effects. Use only manufacturer-recommended thinners or additives. When switching brands, clean equipment thoroughly to prevent contamination.

    Surface contamination from fingerprints or residue also creates texture issues. Always handle primed parts with gloves and ensure thorough cleaning before paint application.

    Cracking or Peeling

    Paint cracking suggests either thick application or incompatible layers. Build thin coats gradually and ensure chemical compatibility between all products in your finishing system.

    Flexibility mismatches cause peeling on moving parts. Rigid paints on flexible substrates crack with movement. Choose appropriate paint systems for your material’s properties.

    Poor surface preparation remains the primary cause. Shortcuts in cleaning or sanding haunt you later. Invest time in proper prep—it’s faster than stripping and repainting failed finishes.

    Frequently Asked Questions

    Can You Paint 3D Prints Without Primer?

    While technically possible, skipping primer severely compromises results. Paint may initially adhere but often peels or chips with handling. The minimal time saved doesn’t justify the quality loss.

    Certain self-priming paints claim to eliminate separate priming. These work adequately for quick projects but still underperform compared to proper primer application for professional results.

    How Long Should Paint Dry Between Coats?

    Follow manufacturer specifications, typically 20-30 minutes for acrylics and 1-2 hours for enamels. Environmental conditions affect timing—high humidity or low temperature extends drying significantly.

    Test dryness by gently touching an inconspicuous area. Tackiness indicates more time needed. When properly dry, paint feels completely solid without any give under light pressure.

    What’s the Best Paint for Outdoor 3D Prints?

    Enamel paints with UV-resistant clear coats provide maximum durability for outdoor exposure. These combinations withstand weather, temperature fluctuations, and sun exposure better than acrylics.

    Consider marine-grade paints for extreme conditions. Though more expensive, they offer superior protection for permanently outdoor items. Proper surface prep remains crucial regardless of paint choice.

    How Do You Paint Small Details on 3D Prints?

    Fine detail brushes with quality tips maintain precision. Thin paint more than usual—multiple transparent layers build color without obscuring details. Support your painting hand for maximum control.

    Magnification helps tremendously. Use magnifying lamps or optivisors for tiny details. Take frequent breaks to prevent eye strain and maintain steady hands throughout detail work.

    Can You Use Regular Spray Paint on 3D Prints?

    Regular spray paint works poorly on plastics without proper primer. Adhesion fails, and solvents may damage certain plastics. Always choose plastic-specific formulations for reliable results.

    With appropriate primer, regular spray paints become viable options. This two-step process often costs more than plastic-specific paints, making direct-adhesion formulas more economical.

    Conclusion

    Transforming your 3D prints through painting opens unlimited creative possibilities. The key steps—thorough preparation, proper priming, careful paint application, and protective finishing—ensure professional results every time you pick up a brush or spray can.

    Remember that patience pays dividends in this process. Thin coats, proper drying times, and systematic techniques separate amateur work from professional finishes. Each step builds upon the previous one.

    Your journey into painting 3D prints starts with your next model. Begin with simple projects to master basic techniques before attempting complex multi-color schemes or special effects. Practice breeds confidence and skill.

    Share your painted prints with the community and continue exploring advanced techniques. Each project teaches new lessons and pushes your capabilities further. The only limit is your imagination—now go create something amazing!

  • Converting SKP to STL Files: Quick & Easy Methods | 2026

    Converting SKP to STL Files: Quick & Easy Methods | 2026

    Ready to transform your SketchUp designs into 3D-printed masterpieces? Converting SKP to STL files is the essential bridge between your creative vision and physical reality. Whether you’re an architect prototyping building models, a designer crafting custom parts, or a hobbyist exploring 3D printing, mastering this conversion process opens up endless possibilities.

    The good news? Converting your SketchUp files to STL format is simpler than you might think. You have three main options: using SketchUp’s native export feature with the STL extension, leveraging free online converters, or working around SketchUp Free’s limitations with clever export methods. Each approach takes just minutes to complete.

    In this comprehensive guide, you’ll discover step-by-step instructions for each conversion method, learn best practices for ensuring print-ready files, and troubleshoot common issues that can derail your 3D printing projects. Let’s dive into everything you need to know about SKP to STL conversion.

    Understanding SKP and STL File Formats

    Before jumping into the conversion process, understanding these file formats helps ensure successful results every time.

    What is an SKP File?

    SKP files are SketchUp’s native 3D model format, containing complete design information including geometry, textures, scenes, components, and metadata. Created by Trimble’s SketchUp software, these files excel at architectural visualization and design work. They support complex hierarchies, groups, and components that make modeling efficient.

    The SKP format stores rich data beyond simple geometry. It includes material properties, shadow settings, camera positions, and even embedded images. This comprehensive approach makes SKP files perfect for design work but requires conversion for 3D printing applications.

    What is an STL File?

    STL (STereoLithography) files represent 3D models as collections of triangular surfaces. This format has become the universal standard for 3D printing because of its simplicity and widespread compatibility. Unlike SKP files, STL files contain only surface geometry data without colors, textures, or other complex properties.

    Every 3D printer and slicing software supports STL files. The format describes objects using triangulated meshes, where each triangle is defined by three vertices and a surface normal. This straightforward approach ensures reliable printing across different machines and software platforms.

    Why Convert SKP to STL Format?

    The primary reason for conversion is compatibility. While SketchUp excels at design and visualization, 3D printers require the simpler STL format. Your printer’s slicing software needs clean geometric data to generate printing instructions, which STL provides perfectly.

    Additionally, STL files are optimized for manufacturing processes. They strip away unnecessary design data like textures and scenes, focusing solely on the physical shape. This results in smaller file sizes and faster processing times during the printing preparation phase.

    Method 1: Using SketchUp’s Native Export Feature

    The most reliable way to convert SKP to STL files involves using SketchUp’s official STL extension. This method provides the most control over export settings and ensures optimal compatibility.

    Installing the SketchUp STL Extension

    First, you’ll need to install the free STL extension from SketchUp’s Extension Warehouse. Open SketchUp and navigate to Window > Extension Warehouse. If you don’t see this option, access it through the Window menu at the top of your screen.

    Search for “SketchUp STL” in the Extension Warehouse search bar. Select the official extension created by the SketchUp Team. Click the red “Install” button and confirm the installation when prompted. The extension installs automatically and adds new export options to your File menu.

    After installation completes, restart SketchUp to ensure the extension loads properly. You’ll now find “Export STL” under the File menu, ready for your first conversion.

    Step-by-Step Export Process

    With the extension installed, converting your model is straightforward. Open your SKP file in SketchUp and ensure your model is complete and ready for printing. Check that all surfaces are properly connected and the model forms a solid object.

    Navigate to File > Export STL to open the export dialog. Choose your save location and enter a descriptive filename. The export options dialog appears, offering several important settings to configure.

    Select your preferred file format (Binary or ASCII), with Binary being recommended for smaller file sizes. Choose appropriate units matching your model’s scale. Enable “Export only current selection” if you want to export specific parts rather than the entire model.

    Export Settings and Options

    Understanding export settings ensures optimal results for your 3D printing projects. The Binary format creates compact files ideal for most situations, while ASCII format produces human-readable files useful for troubleshooting.

    Unit selection critically impacts your printed object’s size. Match the units to your original model to maintain proper scale. Common options include millimeters for small parts, centimeters for medium objects, and inches for larger projects.

    The “Swap YZ coordinates” option helps when transferring between different 3D software with varying axis orientations. Leave this unchecked unless you encounter orientation issues in your slicing software.

    Pro Tips for Best Results

    Always verify your model is a solid before exporting. Use SketchUp’s Solid Inspector extension to identify and fix any issues. Small gaps or reversed faces can cause printing failures.

    Group or make components of complex models before exporting. This prevents accidental modifications and makes it easier to export specific parts. For multi-part assemblies, export each component separately for better print orientation control.

    Consider model complexity when choosing export settings. High-detail models benefit from finer mesh settings, while simple geometric shapes work well with default options. Balance file size with required detail level for your specific printing needs.

    Method 2: Free Online SKP to STL Converters

    When SketchUp isn’t available or you need quick conversions, free online converters offer convenient alternatives. These web-based tools handle the conversion process without requiring software installation.

    Top Free SKP to STL Converter Tools

    Several reliable online converters specialize in SKP to STL conversion. ImagetoSTL stands out with its batch processing capability, converting up to 25 files simultaneously. The tool maintains geometric accuracy while offering quick turnaround times.

    FabConvert provides another excellent option with advanced features like voxelization and mesh optimization. Their converter handles complex models well and includes options for repairing common geometry issues during conversion.

    AnyConv offers a simple drag-and-drop interface supporting files up to 100MB. The service works across all devices and operating systems, making it perfect for quick conversions on any platform.

    How to Use Online Converters?

    Using online converters follows a similar pattern across platforms. Start by selecting or dragging your SKP file into the upload area. Most converters accept files between 20-100MB, though limits vary by service.

    After uploading, the converter processes your file automatically. This typically takes 5-30 seconds depending on model complexity and server load. Some services offer conversion options like unit selection or quality settings.

    Once conversion completes, download your STL file immediately. Most services delete files after 15-60 minutes for privacy protection. Save the converted file to your local drive or cloud storage for safekeeping.

    Advantages and Limitations

    Online converters excel at convenience and accessibility. They work on any device with internet access, require no software installation, and handle basic conversions well. Free services make them perfect for occasional users or testing purposes.

    However, limitations exist. File size restrictions prevent converting large, complex models. Privacy concerns arise when uploading proprietary designs to third-party servers. Internet connectivity requirements can slow workflow in areas with poor connections.

    Advanced features like batch processing or custom export settings often require paid subscriptions. Free tiers may include watermarks or limit daily conversion counts. Consider these factors when choosing between online and desktop solutions.

    Quality Considerations

    Conversion quality varies between online services. Reputable converters maintain geometric accuracy and properly handle complex surfaces. However, some free services may simplify geometry or introduce artifacts during conversion.

    Test your converter with a simple model first. Compare the converted STL against your original SKP file using free STL viewers. Check for missing faces, altered dimensions, or corrupted geometry before committing to large projects.

    For critical projects requiring precise dimensional accuracy, use SketchUp’s native export feature instead. Online converters work best for quick prototypes, concept models, or non-critical parts where minor variations are acceptable.

    Method 3: Converting SketchUp Free Files to STL

    SketchUp Free users face unique challenges since the web-based version lacks native STL export. However, clever workarounds enable successful conversions without upgrading to Pro.

    The COLLADA Export Method

    SketchUp Free supports COLLADA (.dae) export, providing a pathway to STL conversion. Access File > Download > COLLADA File (.dae) from the SketchUp Free interface. This exports your model in an intermediate format that online converters can process.

    After downloading the COLLADA file, use an online converter that accepts DAE input. Many free converters support COLLADA to STL conversion with good results. Upload your DAE file and download the resulting STL for 3D printing.

    This two-step process adds minimal time while maintaining model integrity. COLLADA preserves geometry accurately, ensuring your final STL file matches the original design. Test this workflow with simple models before tackling complex projects.

    Alternative Solutions for Free Users

    Consider using SketchUp Make 2017, the last free desktop version supporting extensions. Though no longer officially supported, it remains functional for STL conversion using the extension method described earlier. Download it from reputable archive sites if needed.

    Another option involves importing your SKP file into free 3D software like Blender or FreeCAD. These programs open SKP files and export STL natively. While requiring additional software knowledge, this approach offers more control over mesh quality.

    For occasional conversions, asking colleagues with SketchUp Pro to export your files works well. Many makerspaces and libraries provide access to SketchUp Pro on public computers, offering another conversion avenue.

    Best Practices for 3D Printing Success

    Successful 3D printing starts with properly prepared models. Following these best practices ensures your converted STL files print reliably every time.

    Model Preparation Checklist

    Before conversion, verify your model meets basic 3D printing requirements. Ensure all surfaces connect properly without gaps or holes. Use SketchUp’s Section Plane tool to inspect internal geometry for hidden issues.

    Check that your model has adequate wall thickness for printing. Most 3D printers require walls at least 1-2mm thick. Thin features may not print correctly or could break during handling.

    Confirm proper scale before exporting. A model designed in meters but exported as millimeters will print 1000 times too small. Double-check units in both SketchUp and your export settings to avoid costly mistakes.

    Common Mistakes to Avoid

    Reversed faces cause significant printing problems. SketchUp displays front faces in white and back faces in blue-gray. Ensure all external surfaces show white faces outward before exporting.

    Avoid creating non-manifold geometry where edges connect to more than two faces. This confuses slicing software and creates unprintable models. Use SketchUp’s Solid Tools to combine overlapping geometry properly.

    Don’t forget to remove internal geometry from solid models. Hidden faces inside your model waste material and printing time. Delete unnecessary internal structure unless specifically required for your design.

    Optimizing File Size

    Large STL files slow down processing and may exceed printer limitations. Reduce polygon count for simple geometric shapes without sacrificing necessary detail. SketchUp’s native geometry often contains more detail than 3D printing requires.

    Consider splitting complex models into multiple parts. This reduces individual file sizes and often improves print quality by optimizing orientation for each component. Design connection methods like snap-fits or alignment pins for easy assembly.

    Use mesh reduction tools cautiously. While they decrease file size, aggressive reduction destroys important details. Test reduced models thoroughly before committing to final prints.

    Ensuring Watertight Models

    Watertight models have completely closed surfaces without gaps. Even tiny holes prevent successful printing. Use SketchUp’s Solid Inspector extension to automatically detect and highlight problem areas.

    Fix small gaps by redrawing edges or faces. For complex repairs, the Solid Inspector’s automatic fix feature resolves many common issues. Always recheck after repairs to confirm watertightness.

    Edge gaps often occur where curved surfaces meet flat planes. Increase segment counts for arcs and circles to minimize gaps. Balance smoothness with file size by using appropriate segment counts for your model’s scale.

    Troubleshooting Common Conversion Issues

    Even experienced users encounter conversion problems. Understanding common issues and solutions saves time and frustration during your SKP to STL workflow.

    File Size Problems

    Oversized STL files result from excessive polygon counts or inappropriate export settings. If your file exceeds 100MB for simple objects, investigate polygon reduction options. Online converters often reject files over their size limits.

    Reduce complexity by simplifying curved surfaces. Replace high-polygon cylinders with lower segment counts where possible. Hide or delete non-essential details that won’t affect the final printed appearance.

    For unavoidably large files, use desktop software instead of online converters. SketchUp’s native export handles large files better than web-based alternatives. Consider upgrading to Pro for commercial projects requiring complex geometry.

    Geometry Errors

    Missing faces after conversion indicate problems with the original model. Return to SketchUp and examine areas where faces disappeared. Often, these result from tiny gaps or non-planar surfaces.

    Reversed normals create inside-out models that confuse slicing software. Fix by selecting all geometry and choosing “Reverse Faces” from the context menu. Proper face orientation ensures successful printing.

    Duplicate vertices or overlapping faces cause conversion failures. Use SketchUp’s cleanup tools to merge nearby vertices and remove duplicate geometry. Clean models convert more reliably and print better.

    Scale and Unit Mismatches

    Incorrect scale ranks among the most frustrating conversion issues. A model appearing correct in SketchUp may import at wrong sizes in slicing software. Always verify units during export and import processes.

    Document your model’s intended dimensions before conversion. Measure key features in SketchUp and confirm they match in your slicing software. Adjust import scale if necessary to achieve correct sizing.

    Create a reference cube of known dimensions (like 10mm) in your models. This provides an easy scale verification method across different software. If the cube measures incorrectly after conversion, you’ll know scale adjustment is needed.

    Professional Tips for Advanced Users

    Power users can streamline their workflow with advanced techniques and specialized tools. These professional tips maximize efficiency for high-volume conversion needs.

    Batch Conversion Options

    Processing multiple files individually wastes valuable time. Several online converters support batch processing, converting entire folders simultaneously. ImagetoSTL handles up to 25 files per batch with consistent settings.

    For larger batches, consider command-line tools or scripting solutions. Ruby scripts can automate SketchUp’s export process for hundreds of files. This approach requires programming knowledge but saves hours on large projects.

    Desktop batch converters offer another option. Software like Meshlab or CloudCompare includes batch processing features. While requiring initial setup, these tools handle unlimited files without online restrictions.

    Plugin Alternatives

    Beyond the official STL extension, third-party plugins offer enhanced features. Some provide advanced mesh optimization, automatic repair functions, or specialized export formats for specific 3D printers.

    SimLab STL Exporter includes mesh analysis tools and quality reports. The plugin identifies potential printing issues before export, saving material and time. Premium features justify the cost for professional users.

    Eneroth’s various extensions enhance SketchUp’s solid modeling capabilities. Better solid tools mean cleaner geometry and more reliable STL exports. Investigate extensions matching your specific workflow needs.

    Quality Optimization Techniques

    Professional-quality STL files require attention to mesh density and surface quality. Balance polygon count with surface smoothness for optimal results. Higher counts improve curved surface quality but increase file size and processing time.

    Use adaptive meshing where possible. Increase polygon density only for detailed areas while keeping simple surfaces low-poly. This optimization maintains quality where needed without bloating file size unnecessarily.

    Consider post-processing STL files in dedicated mesh editing software. Tools like Meshmixer or Netfabb offer advanced repair and optimization features beyond SketchUp’s capabilities. Professional workflows often include these specialized tools.

    Frequently Asked Questions

    Can SketchUp Make Export STL Files?

    Yes, SketchUp Make 2017 can export STL files after installing the free SketchUp STL extension. Access the Extension Warehouse through the Window menu, search for “SketchUp STL,” and install the official extension by SketchUp Team. After installation, you’ll find “Export STL” in the File menu.

    What’s the Best Free SKP to STL Converter?

    The best free converter depends on your specific needs. For SketchUp Pro users, the native STL extension provides the most reliable results. For online conversion, ImagetoSTL excels with batch processing capabilities. AnyConv offers the simplest interface for quick single-file conversions. FabConvert provides advanced features like automatic repair.

    How Do I Ensure My Converted File is 3D Printable?

    Start by verifying your model is solid in SketchUp using the Entity Info panel or Solid Inspector extension. Ensure all faces point outward with no reversed normals. Check minimum wall thickness meets your printer’s requirements (typically 1-2mm). After conversion, validate the STL file using free tools like Meshmixer or your slicing software’s analysis features.

    What File Size Should I Expect for STL Files?

    STL file sizes vary dramatically based on model complexity. Simple geometric shapes typically range from 100KB to 5MB. Detailed organic models may reach 50-100MB. Files exceeding 100MB for relatively simple objects indicate excessive polygon counts requiring optimization. Binary format produces files roughly 80% smaller than ASCII format.

    Should I Choose Binary or ASCII STL Format?

    Binary format is recommended for most 3D printing applications. It creates smaller files that transfer and process faster. ASCII format produces human-readable text files useful for debugging but results in files 5-6 times larger. Unless specifically required by your workflow, choose Binary format for efficiency.

    Conclusion

    Converting SKP to STL files opens the door to bringing your SketchUp designs into the physical world through 3D printing. Whether you choose SketchUp’s native export feature, leverage free online converters, or work around SketchUp Free’s limitations, you now have the knowledge to succeed.

    Remember these key points: always verify your model is solid before conversion, choose appropriate export settings for your project scale, and test your workflow with simple models before tackling complex designs. The right conversion method depends on your specific needs, software access, and project requirements.

    Ready to start printing? Download the SketchUp STL extension or bookmark your favorite online converter today. Transform your digital designs into tangible objects and join the growing community of makers bridging the gap between virtual and physical creation. Your next 3D printing success story begins with mastering SKP to STL conversion!

  • How to Mix Airbrush Paint | Complete Guide in 2026

    How to Mix Airbrush Paint | Complete Guide in 2026

    Getting the right paint consistency is the make-or-break factor in airbrush painting. Mix it too thick, and you’ll face constant clogs and uneven coverage. Too thin, and your colors will run and lack opacity. This comprehensive guide shows you exactly how to mix airbrush paint for flawless results every time, whether you’re mixing acrylic paint for airbrushing or working with other paint types.

    You’ll discover the precise ratios, mixing techniques, and troubleshooting solutions that professionals use to achieve smooth, consistent spray patterns. From understanding viscosity to mastering color mixing charts, this guide covers everything you need to transform your airbrushing results.

    Understanding Paint Viscosity for Airbrushing

    Paint viscosity determines how well your paint flows through the airbrush. Think of viscosity as the thickness or resistance of your paint – similar to comparing honey (high viscosity) to water (low viscosity). For airbrushing, you need paint that flows like milk, typically measuring between 35-60 centipoise (cPs) for detail work.

    The airbrush paint viscosity chart below shows optimal thickness levels for different applications:

    Application TypeViscosity RangeConsistencyNeedle Size
    Fine Detail35-60 cPsSkim milk0.2-0.3mm
    General Work60-80 cPsWhole milk0.3-0.5mm
    Base Coating80-100 cPsLight cream0.5mm+
    Textile Paint100-150 cPsHeavy cream0.5-0.7mm

    Temperature and humidity affect paint viscosity significantly. In hot conditions, paint thins naturally, requiring less reducer. Cold environments thicken paint, demanding more thinning medium. Always test your mix on scrap material before applying to your project.

    Essential Tools for Mixing Airbrush Paint

    Professional results start with proper tools. Having the right equipment ensures accurate mixing and prevents contamination that leads to clogging. Just as choosing the right generator requires understanding your power needs, selecting mixing tools depends on your project scale.

    Measuring Tools:

    • Graduated mixing cups (2-4 oz capacity)
    • Precision pipettes or syringes
    • Digital scale for exact ratios
    • Small measuring spoons

    Mixing Equipment:

    • Stainless steel or plastic stirring sticks
    • Magnetic stirrers for large batches
    • Clean mixing containers with lids
    • Fine-mesh paint strainers (100-200 micron)

    Safety Gear:

    • Nitrile gloves for paint handling
    • Safety glasses for eye protection
    • Respirator mask (N95 minimum)
    • Proper ventilation system

    Always use distilled water for thinning water-based paints. Tap water contains minerals that can affect paint performance and cause tip-dry issues. Store your mixing tools in a clean, dust-free environment to prevent contamination.

    Basic Airbrush Paint Mixing Ratios

    The foundation of successful airbrushing lies in understanding proper paint-to-thinner ratios. Your airbrush paint mixing chart should account for paint type, desired opacity, and application method. Start with these baseline ratios and adjust based on your specific needs.

    Standard Mixing Ratios:

    For acrylic paints, begin with a 1:1 ratio (equal parts paint and thinner). This works well for most general airbrushing at 25-30 PSI. Adjust the ratio based on these factors:

    • Heavy Coverage: 2:1 (paint to thinner)
    • Medium Coverage: 1:1 (equal parts)
    • Light Coverage: 1:2 (more thinner)
    • Fine Detail: 1:3 or 1:4 (very thin)

    Enamel paints typically require a 3:1 ratio for smooth application. Always use the manufacturer’s recommended thinner to maintain paint integrity. Some specialty paints come pre-thinned for airbrush use, requiring minimal adjustment.

    Test your mixture by drawing a line on your mixing palette. Properly mixed paint should flow smoothly without pooling or breaking. If paint beads up, add more thinner. If it runs excessively, add more paint.

    Mixing Acrylic Paint for Airbrushing

    When mixing acrylic paint for airbrushing, success depends on understanding the unique properties of water-based acrylics. These paints offer easy cleanup and lower toxicity but require specific techniques for optimal flow and adhesion.

    Start by shaking or stirring your paint thoroughly. Acrylic pigments settle during storage, creating inconsistent color if not properly mixed. Pour your desired amount into a clean mixing cup, leaving room for thinner and mixing action.

    Step-by-Step Mixing Process:

    1. Add paint to mixing cup (fill 1/3 of container)
    2. Gradually add acrylic thinner or distilled water
    3. Stir gently in circular motions for 30-60 seconds
    4. Check consistency by lifting stirrer – paint should drip steadily
    5. Strain through fine mesh to remove clumps
    6. Test spray on practice surface

    For mixing acrylic paint for airbrush applications on different surfaces, consider these additives:

    • Flow improver (5-10% of total volume) for better leveling
    • Retarder (2-5%) to slow drying time in hot conditions
    • Adhesion promoter for non-porous surfaces

    Never mix more paint than you’ll use in one session. Thinned acrylics can separate over time, affecting spray quality.

    Advanced Color Mixing Techniques

    Creating custom colors requires understanding color theory and proper mixing techniques. Your airbrush paint color mixing chart serves as a roadmap for achieving precise shades while maintaining proper consistency throughout the mixing process.

    Primary Color Mixing Guide:

    To create secondary colors, use these ratios as starting points:

    • Orange: 2 parts yellow + 1 part red
    • Purple: 1 part red + 2 parts blue
    • Green: 1 part yellow + 1 part blue

    For tertiary colors and custom shades, document your ratios carefully. Keep a mixing log with color swatches for future reference. This proves invaluable when matching colors for large projects or repairs.

    Creating Specific Colors:

    The airbrush color mixing chart for popular shades includes:

    • Maroon: 2 parts red + 3 parts brown
    • Sage Green: 3 parts green + 1 part gray + touch of yellow
    • Burnt Orange: Base orange + small amount of brown
    • Peach: Large amount white + equal small amounts red and yellow

    Always mix colors before thinning to ensure accurate color matching. Add thinner only after achieving your desired shade. This prevents over-thinning while trying to adjust color.

    Troubleshooting Common Mixing Problems

    Even experienced artists encounter mixing challenges. Understanding how to diagnose and fix these issues saves time and materials. Like troubleshooting solar panel systems, identifying the root cause leads to effective solutions.

    Paint Too Thick:

    • Symptoms: Frequent clogs, splatter patterns, inconsistent spray
    • Solution: Add thinner in 10% increments until flow improves
    • Prevention: Start with manufacturer’s recommended ratios

    Paint Too Thin:

    • Symptoms: Runs, drips, poor coverage, spider webbing
    • Solution: Add fresh paint to thicken mixture
    • Prevention: Add thinner gradually, testing frequently

    Separation Issues:

    • Symptoms: Pigment settling, color streaking, uneven coverage
    • Solution: Re-mix thoroughly, consider adding flow improver
    • Prevention: Mix only what you’ll use immediately

    For persistent problems, check your air pressure settings. Higher pressure can compensate for slightly thick paint, while lower pressure works better with thin mixtures.

    Professional Airbrushing Paint Mixing Techniques

    Master-level airbrushing paint mixing techniques separate hobbyists from professionals. These advanced methods ensure consistent results across extended painting sessions and complex projects.

    Pre-Session Preparation:

    Professional artists prepare multiple pre-mixed colors before starting. This workflow maintains consistency and reduces interruption. Mix your base colors first, then create variations for highlights and shadows.

    Store pre-mixed paints in airtight containers with mixing balls. Small glass bottles with dropper tops work excellently. Label each mixture with:

    • Color name/code
    • Mixing ratio used
    • Date mixed
    • Paint brand

    Batch Consistency Tips:

    When mixing larger quantities, use a paint shaker or magnetic stirrer for uniform consistency. Add a few stainless steel balls to aid mixing. For critical color matching, use a digital scale to measure components by weight rather than volume.

    Professional mixing stations include dedicated areas for different paint types, preventing cross-contamination. Just as a well-organized home workshop improves efficiency, a proper mixing setup enhances your painting workflow.

    Specialty Paint Mixing Guidelines

    Different paint types require unique approaches. Understanding these variations ensures success across all airbrushing applications. Each paint system has specific requirements for thinners and additives.

    Metallic Paints:

    Metallic paints contain larger pigment particles that settle quickly. Mix these paints more frequently during use. Thin to approximately 1:1.5 ratio and increase air pressure slightly. Add flow improver to prevent tip-dry from metallic flakes.

    Transparent Colors:

    For candy colors and transparents, maintain higher paint ratios (3:1) to preserve color intensity. Layer multiple thin coats rather than attempting heavy coverage. These paints work best over metallic or white bases.

    Specialty Applications:

    • Textile paints: Keep thicker (whole milk consistency) to prevent bleeding
    • Automotive paints: Follow manufacturer’s technical data sheets precisely
    • Food-safe colors: Use only approved thinners and additives
    • UV-reactive paints: Mix under normal light to see true color

    According to Golden Artist Colors, proper viscosity varies significantly between paint types and applications.

    Turning Regular Acrylic Paint Into Airbrush Paint

    Many artists want to turn acrylic paint into airbrush-ready consistency. While possible, this process requires careful attention to maintain paint quality and performance. Standard tube or bottle acrylics have larger pigment particles that need proper preparation.

    Conversion Process:

    1. Select appropriate paint: Choose high-quality acrylics with fine pigments
    2. Initial thinning: Start with 1:3 ratio (paint to medium)
    3. Add flow enhancer: Include 5-10% airbrush medium
    4. Mix thoroughly: Blend for 2-3 minutes minimum
    5. Strain carefully: Use 100-micron mesh filter
    6. Test extensively: Verify flow before project use

    Important considerations:

    Heavy body acrylics require more aggressive thinning and may never achieve the fine atomization of purpose-made airbrush paints. Craft paints often contain fillers that clog fine nozzles, making them poor candidates for conversion.

    For best results, use airbrush-specific mediums rather than water alone. Products like Iwata’s Medea Airbrush Medium maintain binder integrity while achieving proper flow.

    Maintaining Paint Consistency During Sessions

    Paint consistency changes during extended painting sessions. Environmental factors, evaporation, and paint settling all affect your carefully mixed ratios. Developing strategies to maintain consistency ensures uniform results throughout your project.

    During-Session Management:

    Monitor your paint mixture every 15-20 minutes. Stir gently to prevent settling, especially with metallics or heavy pigments. Keep a small amount of thinner ready for quick adjustments as paint thickens from evaporation.

    Cover your paint cup between color changes to minimize evaporation. In dry environments, add a drop of retarder to slow drying. This proves especially important when working on large projects requiring consistent color across multiple sessions.

    Temperature Control:

    Maintain workspace temperature between 65-75°F for optimal paint flow. Just as proper generator maintenance ensures consistent power output, controlling your environment provides consistent paint performance.

    Use a small desk fan for air circulation, but avoid direct airflow on your work surface. This prevents premature paint drying while maintaining comfortable working conditions.

    Safety Considerations When Mixing Paint

    Proper safety practices protect your health during paint mixing and airbrushing. Even water-based acrylics release fine particles that shouldn’t be inhaled. Solvent-based paints require additional precautions due to toxic fumes.

    Ventilation Requirements:

    Ensure cross-ventilation in your workspace with both intake and exhaust airflow. Position exhaust fans to pull contaminated air away from your breathing zone. For indoor work, consider a spray booth with filtered exhaust system.

    Personal Protective Equipment:

    • Respirator: Minimum N95 for water-based, organic vapor cartridge for solvents
    • Eye protection: Wrap-around safety glasses prevent overspray exposure
    • Skin protection: Nitrile gloves resist paint chemicals better than latex
    • Clothing: Wear old clothes or painting apron

    According to The Army Painter’s professional guidelines, proper safety equipment is non-negotiable for serious airbrush work.

    Frequently Asked Questions

    What is the ideal paint-to-thinner ratio for beginners?

    Start with a 1:1 ratio for most acrylic paints. This provides good flow while maintaining color opacity. Adjust based on your specific paint brand and desired coverage.

    How can I prevent paint from drying in my airbrush during breaks?

    Keep a damp paper towel over your paint cup and spray a small amount of thinner through the brush every few minutes. For longer breaks, empty and clean your airbrush completely.

    Why does my paint separate after mixing? Separation occurs when paint and thinner aren’t fully compatible or when mixture sits too long. Always use recommended thinners and mix only what you’ll use within 2-3 hours.

    Can I use windshield washer fluid to thin acrylic paint? While some artists use it successfully, it’s not recommended for professional work. Proper airbrush thinners ensure paint integrity and predictable results.

    How do I achieve consistent color when mixing custom shades? Document exact ratios by weight using a digital scale. Create color swatches with mixing notes. Mix enough for your entire project to avoid batch variations.

    Conclusion

    Mastering airbrush paint mixing transforms your artistic capabilities. From understanding viscosity requirements to implementing professional mixing techniques, each element contributes to superior results. The key lies in patient practice and careful documentation of what works for your specific applications.

    Remember that paint mixing is both science and art. While ratios and charts provide starting points, developing your feel for proper consistency comes through experience. Start with basic techniques, gradually advancing to complex color mixing and specialty applications.

    Take action today by organizing your mixing station and practicing with inexpensive paints. Document your successes and learn from challenges. With dedication to proper technique, you’ll achieve the smooth, professional finishes that make airbrushing such a rewarding medium.

  • How to Get Acrylic Paint Out of Brushes? 4 Methods (2026)

    How to Get Acrylic Paint Out of Brushes? 4 Methods (2026)

    Getting acrylic paint out of brushes doesn’t have to end with ruined bristles and expensive replacements. The key to removing acrylic paint from brushes is acting quickly while the paint is still wet, using warm soapy water and gentle cleaning techniques. For dried paint, specialized cleaners like The Masters Brush Cleaner or household items like rubbing alcohol can restore even the stiffest brushes to working condition.

    Whether you’re tackling fresh paint or rescuing brushes with dry acrylic paint on them, this comprehensive guide covers every method you need to know. From basic cleaning acrylic paint from brushes to advanced restoration techniques, you’ll learn how to maintain your tools like a professional artist.

    We’ll explore seven proven cleaning methods, proper drying techniques, and preventive care that will extend your brush life by years. Plus, discover which cleaning products work best for different brush types and how to avoid common mistakes that damage expensive bristles.

    Understanding Acrylic Paint and Your Brushes

    Acrylic paint transforms from a water-based liquid to a plastic-like polymer when it dries. This chemical change is what makes acrylics so durable on canvas but so challenging to remove once dried on brush bristles. The paint can harden in as little as 5-10 minutes, making quick action essential.

    Different brush types require different cleaning approaches. Synthetic brushes, commonly used with acrylics, can withstand more aggressive cleaning than natural bristles. Natural hair brushes need gentler treatment to preserve their shape and flexibility.

    The ferrule (metal part holding the bristles) is particularly vulnerable. Paint that dries here causes bristles to splay and eventually fall out. This is why thorough cleaning at the base of the bristles matters as much as cleaning the tips.

    Essential Supplies for Brush Cleaning

    Before starting any cleaning method, gather these basic supplies to ensure effective paint removal:

    Basic Cleaning Kit:

    • Warm water (not hot, which can damage bristles)
    • Mild dish soap or dedicated brush cleaner
    • Paper towels or lint-free cloth
    • Clean containers for rinsing
    • Palette knife for removing excess paint

    Advanced Cleaning Supplies:

    Having multiple water containers helps maintain cleaner rinse water throughout the process. Just like when working on DIY projects, proper preparation makes the task much easier.

    Method 1: Basic Soap and Water Technique

    The foundation of washing acrylic paint brushes starts with this simple but effective method. This works best for wet paint and should be your go-to technique after every painting session.

    Start by wiping excess paint from the brush using a paper towel or cloth. Work from the ferrule toward the tip to push paint out rather than deeper into the bristles. Never pull on the bristles, as this can damage their alignment.

    Next, rinse the brush under warm running water. Hold it at an angle so water flows from ferrule to tip, preventing paint from being pushed deeper into the metal collar. Gently work the bristles with your fingers to loosen paint particles.

    Apply a small amount of dish soap directly to the bristles. Work it into a lather using circular motions on your palm. You’ll see paint color releasing into the suds. Rinse thoroughly and repeat until the water runs clear and no color remains in the lather.

    Method 2: The Masters Brush Cleaner

    Professional artists swear by The Masters Brush Cleaner for good reason. This specialized acrylic paint off brush cleaner works like shampoo and conditioner combined, removing paint while preserving bristle integrity.

    Wet your brush and swirl it directly on the cleaner cake. The formula activates with water, creating a lather that penetrates deep into the bristles. Work the lather through the brush, paying special attention to the area near the ferrule where paint tends to accumulate.

    The cleaner pulls out hidden paint you didn’t know was there. Brushes used for dark colors might release surprising amounts of pigment. Rinse thoroughly in clean water, then repeat if necessary until the lather stays white.

    For conditioning, leave a small amount of cleaner on the bristles and shape them to their original form. Let dry overnight. The cleaner acts as a leave-in conditioner, and the bristles will hold their shape. Rinse before your next painting session.

    Method 3: Removing Dried Acrylic Paint

    When dealing with dry acrylic paint on brushes, more aggressive methods become necessary. These techniques can save brushes you thought were destined for the trash.

    Rubbing Alcohol Method: Soak the hardened brush in rubbing alcohol for 30 minutes to several hours, depending on paint thickness. The alcohol breaks down the acrylic polymer, softening the paint. Work the bristles gently with your fingers, then clean with soap and water. Note that alcohol can dry out natural bristles, so condition afterward.

    Hot Vinegar Technique: Heat white vinegar to just below boiling (microwave for 60-90 seconds). Soak brushes for 20-30 minutes. The combination of heat and acidity helps dissolve dried paint. This method works especially well for brushes with paint caked at the ferrule.

    Boiling Water Method: For synthetic brushes only, dip the bristles in boiling water for 5-10 seconds. The extreme heat softens the plastic-like dried paint. Immediately work the bristles with soap, being careful not to burn yourself. Never use this method on natural hair brushes.

    Method 4: Deep Cleaning Stubborn Paint

    Some situations require combining methods to clean paint off brushes effectively. This approach works for brushes with multiple layers of dried paint or those used with heavy body acrylics.

    Cleaning AgentSoak TimeBest ForCaution
    Murphy’s Oil Soap2-4 hoursNatural bristlesMay leave residue
    Fabric Softener1-2 hoursSynthetic brushesRinse thoroughly
    Acetone15-30 minutesExtreme casesCan damage bristles
    Commercial CleanersPer instructionsAll brush typesFollow safety guidelines

    Start by soaking in your chosen solution. After soaking, use a palette knife to gently scrape softened paint from the bristles. Work from the ferrule outward, being careful not to bend or break bristles.

    Follow with the soap and water method to remove cleaning solution residue. Multiple rounds may be necessary for heavily caked brushes. Always finish with a conditioning treatment to restore bristle flexibility.

    Proper Drying and Storage

    How you dry your brushes impacts their longevity as much as how you clean acrylic paint from them. Proper drying prevents water damage to the ferrule and maintains bristle shape.

    Never stand brushes upright in a container to dry. Water runs down into the ferrule, loosening the glue that holds bristles in place. Over time, this causes bristles to shed and handles to crack.

    Lay brushes flat on a clean towel with the bristles hanging slightly over the edge. This position allows air circulation while preventing water from pooling in the ferrule. For precision brushes, you can create a simple drying rack similar to those used in DIY solar panel projects.

    Once completely dry, store brushes upright in a container with bristles pointing up, or lay them flat in a drawer. Avoid crushing the bristles under other supplies. Proper storage maintains the shape you worked hard to preserve during cleaning.

    Common Mistakes to Avoid

    Even experienced artists make these cleaning errors that shorten brush life and compromise performance.

    Leaving brushes in water: This seems convenient during painting sessions, but water seeps into the ferrule, causing permanent damage. Instead, rinse brushes and lay them flat on your work surface between colors.

    Using hot water: While tempting for stubborn paint, hot water can melt the glue in the ferrule and damage natural bristles. Stick to warm water for regular cleaning.

    Aggressive scrubbing: Harsh treatment splays bristles and breaks their natural alignment. Always use gentle circular motions and work with the bristle direction, not against it.

    Neglecting the ferrule: Paint buildup here is the primary cause of brush damage. Make sure to clean thoroughly where bristles meet metal during every washing session.

    Prevention Tips for Easier Cleaning

    The best way to remove acrylic paint is preventing it from drying on brushes in the first place. These habits make cleaning easier and extend brush life significantly.

    Keep a container of water at your workspace and rinse brushes immediately after each use. Even a quick swish removes most wet paint, making thorough cleaning later much easier. Change this water frequently to avoid recontaminating clean brushes.

    When taking breaks, don’t leave brushes sitting on your palette. Either clean them properly or wrap the bristles in a damp paper towel to keep paint from drying. For longer breaks, do a quick soap and water cleaning.

    Consider using a stay-wet palette that keeps acrylics workable longer. This reduces the urgency of cleaning and gives you more flexibility during painting sessions. Just as energy-efficient practices save resources, efficient painting habits save brushes.

    Frequently Asked Questions

    Can I save brushes with rock-hard dried paint?

    Yes, most brushes can be restored even with completely hardened paint. Soak them in rubbing alcohol or specialized brush cleaner for several hours or overnight. The paint will eventually soften enough to remove. Severely damaged brushes might not return to their original shape, but they can still be useful for texture work or rough applications.

    How often should I deep clean my brushes?

    Perform basic soap and water cleaning after every painting session. Deep clean with specialized products monthly if you paint regularly, or whenever you notice paint buildup near the ferrule. Brushes used with dark or staining colors may need deep cleaning more frequently.

    Will these methods work on other paint types?

    These techniques work primarily for water-based paints like acrylics. Oil paints require different solvents like turpentine or mineral spirits. Watercolors clean easily with just water. Never use alcohol or acetone on brushes used with oil paints, as residue can cause problems.

    Why do my brushes still feel stiff after cleaning?

    Stiffness usually indicates paint residue remains in the bristles or cleaning product wasn’t fully rinsed out. Try another round of cleaning, focusing on the base of the bristles. Finish with a conditioning treatment using professional brush cleaner to restore flexibility.

    Should I use different methods for expensive brushes?

    Quality brushes deserve extra care but use the same basic methods. Start with gentler approaches before trying aggressive techniques. Invest in professional-grade cleaners for valuable brushes. The cost of proper cleaning products is minimal compared to replacing premium brushes.

    Conclusion

    Knowing how to clean acrylic paint from brushes transforms them from disposable tools into lasting investments. The key is acting quickly with wet paint, using appropriate cleaners for dried paint, and maintaining consistent cleaning habits. Whether you’re using basic dish soap or specialized products, proper technique matters more than expensive supplies.

    Remember that different brushes and situations require different approaches. Start with gentle methods and escalate only as needed. With these seven proven techniques, you can rescue brushes others would throw away and keep your favorite tools in pristine condition for years of creative work.

    Take action today by organizing your cleaning supplies and establishing a routine. Your brushes, your art, and your wallet will thank you. Happy painting!

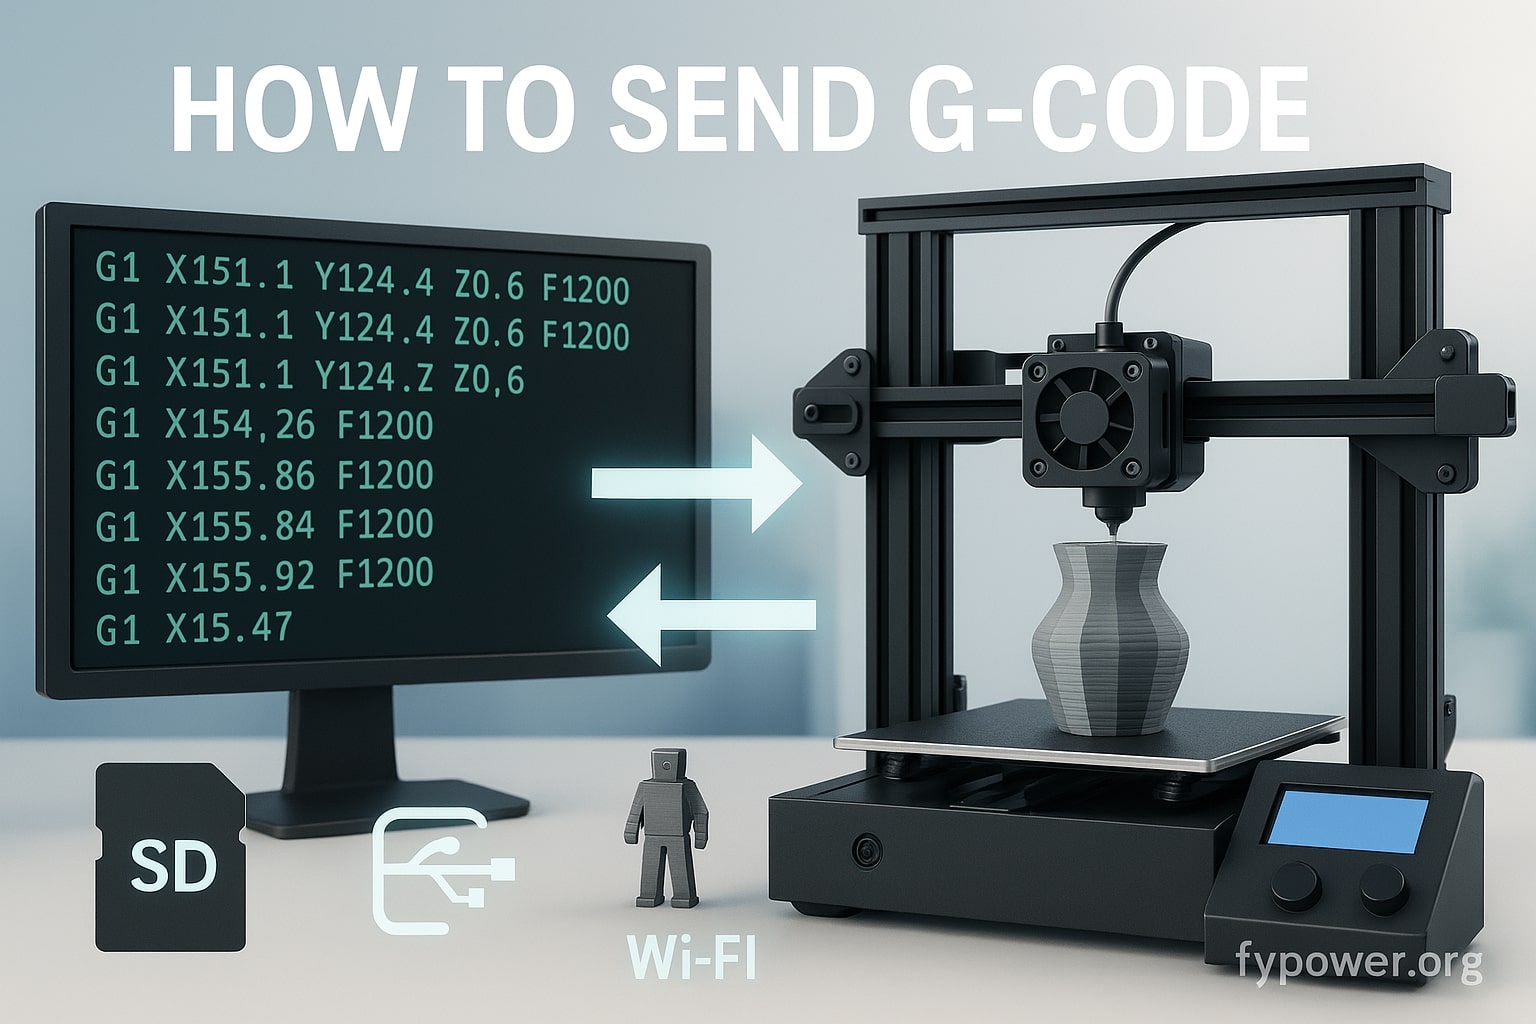
  • How to Send G-Code to 3D Printer | 5 Methods 2026 Guide

    How to Send G-Code to 3D Printer | 5 Methods 2026 Guide

    Sending G-code files to your 3D printer doesn’t have to be complicated. Whether you’re using an SD card, USB connection, or wireless transfer via OctoPrint, the right method can transform your 3D printing workflow from frustrating to effortless. This guide reveals the five most reliable ways to transfer G-code files, helping you choose the perfect solution for your setup.

    G-code is the language that tells your 3D printer exactly what to do, controlling everything from nozzle temperature to precise movements along the X, Y, and Z axes. Once your slicer software creates these instruction files, you need an efficient way to send them to your printer.

    In this comprehensive guide, you’ll discover:

    • The simplest SD card method that works with 95% of printers
    • Direct USB connections for real-time control
    • Wireless solutions using OctoPrint and Raspberry Pi
    • Professional G-code sender software options
    • Advanced terminal commands for power users

    Understanding G-Code Files Before Transfer

    G-code (Geometric Code) is a numerically controlled programming language that contains precise instructions for your 3D printer. These files translate your 3D model into thousands of commands controlling temperature, movement, and extrusion.

    Before sending any G-code file, verify these essential elements:

    • File extension is .gcode (not .stl or .obj)
    • File size matches your model complexity
    • Slicer settings match your printer specifications
    • Preview shows correct layer structure

    Most slicing software like Cura, PrusaSlicer, or Simplify3D automatically generates compatible G-code files. However, understanding what you’re sending helps prevent failed prints and wasted filament.

    Method 1: SD Card Transfer (Most Common)

    The SD card method remains the most popular way to send G-code to 3D printers due to its simplicity and universal compatibility. Nearly every consumer 3D printer includes an SD card slot, making this approach accessible to beginners and professionals alike.

    Step-by-Step SD Card Process

    1. Prepare Your SD Card
      • Use a MicroSD card (8-32GB recommended)
      • Format as FAT32 for maximum compatibility
      • Keep file names under 8 characters when possible
    2. Save Your G-Code File
      • Export from your slicer software
      • Save directly to the SD card root directory
      • Avoid special characters in filenames
    3. Transfer to Your Printer
      • Safely eject the SD card from your computer
      • Insert into your printer’s card slot
      • Navigate to the file using your printer’s LCD menu

    SD Card Best Practices

    Always use high-quality SD cards from reputable manufacturers. Cheap cards often cause read errors mid-print, ruining hours of work. Class 10 cards offer optimal read speeds for smooth printing.

    Create organized folder structures on larger cards. Group files by project, date, or material type for easy navigation on small printer screens.

    Never remove the SD card during printing. This immediately stops the print and can damage both the card and your printer’s card reader.

    Method 2: Direct USB Connection

    USB connections provide real-time control and monitoring capabilities that SD cards can’t match. This method transforms your computer into a powerful 3D printer control station.

    Setting Up USB Printing

    First, install appropriate drivers for your 3D printer. Most printers use standard USB serial drivers, but some require manufacturer-specific software.

    Connect your printer using a data-capable USB cable. Many charging cables lack data wires, so verify your cable supports data transfer.

    Configure your slicer software’s printer settings:

    • Set correct COM port (Windows) or device path (Mac/Linux)
    • Match baud rate (typically 115200 or 250000)
    • Enable USB printing in software preferences

    USB Printing Advantages and Limitations

    USB connections enable live monitoring of temperatures, print progress, and real-time adjustments. You can pause, modify settings, or cancel prints instantly without touching the printer.

    However, your computer must remain powered throughout the entire print. Screensavers, sleep mode, or Windows updates can interrupt communication and ruin prints.

    For reliable USB printing, consider using an older laptop dedicated to printer control. Disable all power-saving features and automatic updates to prevent disruptions.

    Method 3: Wireless Transfer with OctoPrint

    OctoPrint revolutionizes 3D printing by adding wireless capabilities to any printer. This free, open-source software runs on a Raspberry Pi, creating a powerful web-based control interface.

    OctoPrint Installation Guide

    Required Hardware:

    • Raspberry Pi 3B+ or newer
    • MicroSD card (16GB minimum)
    • Power supply for Raspberry Pi
    • USB cable for printer connection

    Installation Process:

    1. Download OctoPi image from octoprint.org
    2. Flash image to SD card using Etcher or similar tool
    3. Configure Wi-Fi settings in octopi-wpa-supplicant.txt
    4. Boot Raspberry Pi and access web interface

    Sending G-Code Through OctoPrint

    Once configured, OctoPrint provides multiple upload methods:

    Web Interface Upload:

    • Drag and drop files directly to browser
    • Upload from any device on your network
    • Organize files in folders

    Slicer Integration:

    • Configure slicer with OctoPrint API key
    • Send files directly after slicing
    • Start prints remotely

    Mobile Apps:

    • Use OctoPod (iOS) or Printoid (Android)
    • Monitor and control from anywhere
    • Receive print completion notifications

    Advanced OctoPrint Features

    OctoPrint’s plugin ecosystem adds incredible functionality. Install plugins for automatic bed leveling, time-lapse creation, or filament tracking.

    The terminal interface allows sending individual G-code commands for testing and calibration. This proves invaluable for troubleshooting and fine-tuning your printer.

    Method 4: G-Code Sender Software

    Dedicated G-code sender applications provide professional-level control over your 3D printer. These programs offer features beyond basic file transfer, including real-time visualization and advanced monitoring.

    Pronterface: The Classic Choice

    Pronterface remains a favorite among 3D printing enthusiasts for its simplicity and reliability. This lightweight program provides essential controls without overwhelming complexity.

    Key Features:

    • Direct command terminal
    • Temperature monitoring graphs
    • Manual control interface
    • Print progress visualization

    Using Pronterface:

    1. Connect printer via USB
    2. Select correct port and baud rate
    3. Click “Connect” button
    4. Load G-code file or type commands
    5. Monitor print progress in real-time

    Alternative Sender Software

    Repetier-Host offers advanced features including multi-printer support and integrated slicing. Its comprehensive interface suits users managing multiple printers or complex projects.

    MatterControl combines design, slicing, and printing in one application. This all-in-one solution streamlines workflow but requires more system resources.

    Simplify3D includes built-in sending capabilities with its premium slicing software. The investment pays off for professionals needing advanced support generation and print optimization.

    Method 5: Direct Terminal Commands

    Power users can send G-code directly through terminal commands on Linux and Mac systems. This method offers ultimate control but requires command-line proficiency.

    Linux Terminal Setup

    # Set permissions for printer access

    sudo chmod 666 /dev/ttyUSB0

    # Configure serial connection

    stty -F /dev/ttyUSB0 115200 -echo -onlcr

    # Send commands

    echo “G28” > /dev/ttyUSB0

    Creating Custom Scripts

    Automate repetitive tasks by creating bash scripts:

    #!/bin/bash

    # Print start script

    echo “G28” > /dev/ttyUSB0  # Home all axes

    echo “G29” > /dev/ttyUSB0  # Auto bed leveling

    echo “M109 S210” > /dev/ttyUSB0  # Heat extruder

    echo “M190 S60” > /dev/ttyUSB0  # Heat bed

    This approach integrates perfectly with DIY automation projects using single-board computers.

    Troubleshooting Common Transfer Issues

    SD Card Not Recognized

    Format cards using the official SD Card Formatter tool rather than operating system utilities. Some printers require specific formatting parameters.

    Check for bent pins in the card slot. Use compressed air to remove debris that might prevent proper connection.

    Update printer firmware if cards work in other devices but not your printer. Manufacturers often fix SD card compatibility in firmware updates.

    USB Connection Failures

    Install the latest drivers from your printer manufacturer. Generic drivers sometimes lack necessary features for reliable communication.

    Try different USB ports, preferably directly on the motherboard rather than through hubs. USB 2.0 ports often work better than USB 3.0 for older printers.

    Reduce cable length to under 6 feet. Longer cables can cause signal degradation and intermittent disconnections.

    Wireless Transfer Problems

    Ensure your Raspberry Pi has adequate power. Undervoltage causes random disconnections and corrupted uploads. Use official Raspberry Pi power supplies rated at 2.5A minimum.

    Check Wi-Fi signal strength at printer location. Weak signals cause slow uploads and failed connections. Consider using ethernet for critical prints.

    Update OctoPrint regularly. Developers frequently release security patches and compatibility improvements for newer printers.

    Choosing the Right Method for Your Workflow

    For Beginners: SD Card

    Start with SD card transfers while learning 3D printing basics. This method requires no additional hardware or software configuration.

    Focus on mastering slicing settings and print parameters before adding complexity. SD cards provide reliable, straightforward printing.

    For Hobbyists: USB + Software

    Graduate to USB connections with Pronterface or similar software. Real-time monitoring helps understand how printers respond to different settings.

    This setup costs nothing extra and provides valuable learning experiences. Watch temperature graphs and print progress to optimize your techniques.

    For Professionals: Wireless Solutions

    Invest in OctoPrint or similar wireless systems for production environments. Remote monitoring and control save countless hours.

    Wireless printing enables managing multiple printers from a central location. Queue jobs, monitor progress, and maintain consistent quality across all machines.

    Advanced Tips for G-Code Transfer

    File Organization Strategies

    Implement consistent naming conventions including date, project, and version numbers. Example: “202026_ProjectName_v3.gcode”

    Maintain a digital archive of successful prints. Store G-code files with photos and print settings for easy reproduction.

    Use cloud storage for backup and sharing between multiple locations. Services like Google Drive or Dropbox sync files automatically.

    Optimizing Transfer Speeds

    Compress large G-code files using ZIP to reduce transfer times. Most modern printers can read compressed files directly.

    For OctoPrint, enable upload compression in settings. This significantly speeds up wireless transfers without affecting print quality.

    Consider using faster SD cards (UHS-I or UHS-II) for printers supporting higher read speeds. Check manufacturer specifications for compatibility.

    Security Considerations

    Protect OctoPrint installations with strong passwords and SSL certificates. Exposed printers face risks from unauthorized access.

    Avoid using default credentials on any network-connected device. Change passwords immediately after installation.

    Keep firmware and software updated to patch security vulnerabilities. Subscribe to manufacturer notifications for critical updates.

    Future of G-Code Transfer Technology

    Cloud-based printing services continue evolving, offering remote slicing and direct printer connections. Services like AstroPrint and 3DPrinterOS provide professional features for distributed manufacturing.

    5G technology promises ultra-fast wireless transfers and real-time remote control with minimal latency. This enables true remote manufacturing capabilities.

    Blockchain integration may provide secure, verified file transfers for sensitive applications. Medical and aerospace industries show particular interest in tamper-proof printing workflows.

    Smart home integration allows voice control and automation. “Hey Google, print the replacement part” becomes reality with proper setup.

    Quick Reference Guide

    MethodSpeedReliabilityCostBest For
    SD CardMediumHighLowBeginners
    USB DirectFastMediumLowLearning
    OctoPrintFastHighMediumRemote Access
    PronterfaceFastMediumFreeTroubleshooting
    TerminalInstantLowFreeAutomation

    Common G-Code Commands for Testing

    After successfully transferring files, test your connection with these essential commands:

    • G28 – Home all axes
    • G29 – Auto bed leveling
    • M104 S200 – Set extruder temperature
    • M140 S60 – Set bed temperature
    • M106 S255 – Fan on full speed
    • M107 – Fan off

    Frequently Asked Questions

    Can I send G-code while printing?

    Most methods don’t allow sending new files during active prints. However, you can queue files in OctoPrint or send individual commands through terminal interfaces for adjustments.

    What’s the maximum G-code file size?

    SD cards typically handle files up to 4GB (FAT32 limit). USB and wireless methods have no practical limits, though extremely large files may cause slower interface response.

    Why does my printer ignore uploaded files?

    Verify your G-code matches printer firmware expectations. Marlin, RepRap, and other firmware flavors use slightly different command sets. Check slicer firmware settings.

    How do I resume failed transfers?

    OctoPrint includes resume capabilities for interrupted uploads. SD card and USB transfers must restart from the beginning if interrupted.

    Can I edit G-code before sending?

    Yes, G-code files are plain text. Use any text editor for minor adjustments. For major changes, return to your slicer software and regenerate the file.

    Which method uses the least power?

    SD card printing allows turning off computers completely, using minimal power consumption. The printer runs independently once started.

    Conclusion

    Mastering G-code transfer methods transforms your 3D printing experience from frustrating to seamless. Start with simple SD card transfers, then explore advanced options as your skills develop.

    Whether you choose the reliability of SD cards, the control of USB connections, or the convenience of wireless OctoPrint setups, each method offers unique advantages. Select based on your technical comfort, budget, and workflow requirements.

    Take action today: Try a new transfer method on your next print. Experience firsthand how the right approach can enhance your 3D printing productivity and enjoyment.

  • How Long Does 3D Printing Take? Complete Time Guide in 2026

    How Long Does 3D Printing Take? Complete Time Guide in 2026

    If you’re considering getting into 3D printing or already own a printer, one of your first questions is likely: how long does 3D printing actually take? The answer ranges from as little as 30 minutes for simple objects to several days for complex designs. Understanding 3D printing time factors helps you plan projects effectively, meet deadlines, and optimize your workflow. This comprehensive guide breaks down everything you need to know about print times, from the basics to advanced optimization strategies.

    Quick Answer: 3D Printing Time Ranges

    Before diving into details, here’s what you can expect for typical 3D printing times:

    • Small, simple objects: 30 minutes to 3 hours
    • Medium-sized items: 3 to 12 hours
    • Large, complex designs: 24 hours to several days
    • Miniature figurines: 2 to 6 hours
    • Phone cases: 3 to 5 hours
    • Full-size helmets: 24 to 72 hours

    The exact time depends on multiple factors including size, complexity, printing technology, and your chosen settings.

    Key Factors That Determine 3D Printing Speed

    1. Object Size and Dimensions

    The physical size of your model is the most obvious factor affecting print time. However, it’s not just about overall volume.

    Height plays a particularly crucial role in determining how long your print will take. A tall, slender tower requires more vertical layers than a flat, wide object of the same volume. Each layer adds time to the total print duration.

    For example, a 4x4x8 inch part will take longer to print than a 5x5x5 inch part, even though the cubic volume is similar. This is because the taller object requires more individual layers to complete.

    2. Layer Height Settings

    Layer height in 3D printing directly impacts both quality and speed. Think of it as the resolution of your print.

    Common layer height settings include:

    • 0.1mm (Fine): Produces smooth, detailed prints but takes significantly longer
    • 0.2mm (Standard): Offers a good balance between quality and speed for most projects
    • 0.3mm (Draft): Faster printing for prototypes or functional parts where appearance is less critical

    A practical example: printing a small figurine at 0.1mm layer height might take 6 hours, while the same model at 0.3mm could finish in just 2 hours.

    3. Infill Density Print Time Impact

    Infill is the internal structure that gives your prints strength. The density you choose dramatically affects printing time.

    Standard infill percentages and their uses:

    • 10-20%: Light-duty decorative objects
    • 30-50%: General purpose items with moderate strength requirements
    • 60-80%: Functional parts requiring high strength
    • 100%: Solid parts for maximum durability

    Increasing infill from 20% to 50% can add 50% or more to your total print time. Many users find that 20-30% infill provides adequate strength for most applications while keeping print times reasonable.

    4. Print Speed Settings

    Your printer’s speed, measured in millimeters per second (mm/s), significantly impacts completion time. However, faster isn’t always better.

    Typical speed ranges by printer type:

    • Budget FDM printers: 30-60 mm/s
    • Mid-range FDM: 60-100 mm/s
    • High-end FDM: 100-200 mm/s
    • SLA/resin printers: Fixed exposure times per layer

    Pushing speeds too high can result in poor quality, failed prints, or mechanical issues. Most users find a sweet spot between 50-80 mm/s for reliable results.

    5. 3D Printing Materials and Their Speed Requirements

    Different materials have unique printing characteristics that affect speed. Understanding these differences helps you choose the right material for your timeline.

    PLA (Polylactic Acid): The fastest printing material due to its low melting point and easy handling. Ideal for beginners and quick prototypes.

    ABS (Acrylonitrile Butadiene Styrene): Requires slower speeds and higher temperatures, adding 10-20% to print times compared to PLA.

    TPU (Flexible): Must be printed very slowly (20-40 mm/s) to prevent jamming, often doubling or tripling print times.

    PETG: Prints at moderate speeds, slightly slower than PLA but faster than ABS.

    3D Printing Technology Comparison

    FDM Printing Time Characteristics

    Fused Deposition Modeling (FDM) remains the most popular technology for home users. FDM printing time varies widely based on your settings and model complexity.

    FDM excels at larger prints and offers the flexibility to adjust speed based on your needs. You can prioritize quality with slow, fine layers or opt for rapid prototyping with faster, coarser settings.

    SLA Printing Time Considerations

    Stereolithography (SLA) uses UV light to cure liquid resin layer by layer. Unlike FDM, SLA printing time depends more on layer count than object size.

    Each layer typically takes 5-15 seconds to cure, regardless of how much of the build plate is being used. This means printing one small item takes nearly as long as printing multiple items that fit on the same layer.

    Fastest 3D Printing Technology Options

    For those prioritizing speed, several technologies stand out:

    • LCD/MSLA printers: Can cure entire layers at once, making them faster than traditional SLA for multiple objects
    • SLS (Selective Laser Sintering): Excellent for batch production but requires long cooldown periods
    • High-speed FDM: Modern printers with advanced motion systems can achieve 200+ mm/s reliably

    How to Calculate Your Print Time?

    Using a 3D Print Time Calculator

    Modern slicing software includes built-in time estimation features. Popular options include:

    • Cura: Free, open-source with accurate time predictions
    • PrusaSlicer: Excellent estimation accuracy, works with many printer brands
    • Simplify3D: Professional software with detailed time breakdowns

    These programs analyze your model and settings to provide estimates typically within 10-15% accuracy.

    Manual Estimation Methods

    For quick estimates without software, consider these rules of thumb:

    1. Volume-based: Approximately 1 cubic inch takes 1-2 hours at standard settings
    2. Layer count: Multiply total layers by average layer time (usually 30-60 seconds)
    3. Height-based: Add roughly 1 hour per inch of height for standard prints

    Online 3D Printing Calculators

    Several websites offer 3D print time calculators for quick estimates. These tools consider basic parameters like dimensions and layer height to provide rough timeframes.

    Optimization Strategies to Reduce Print Time

    Smart Orientation

    Rotating your model to minimize height can dramatically reduce print time. A part that takes 10 hours standing upright might finish in 4 hours when laid flat.

    Adaptive Layer Heights

    Some slicers offer variable layer heights, using fine layers only where detail is needed. This can cut print time by 20-40% while maintaining quality in critical areas.

    Hollow Models with Thick Walls

    For decorative items, printing hollow models with 3-4 wall layers provides strength while eliminating hours of infill printing.

    Multiple Parts Simultaneously

    When printing multiple copies, arrange them to maximize bed usage. The time to print 4 items together is often only slightly more than printing one.

    Common Print Time Examples

    To give you realistic expectations, here are typical print times for popular projects:

    ItemSizeQualityEstimated Time
    Keychain2 inchesStandard45-90 minutes
    Phone CaseStandardHigh3-5 hours
    Miniature Figure3 inchesFine Detail4-8 hours
    Vase6 inches tallStandard6-10 hours
    Cosplay HelmetFull sizeStandard48-72 hours
    Chess SetCompleteStandard20-30 hours

    Advanced Considerations

    Support Material Impact

    Complex designs requiring support structures add significant time. Support material must be printed alongside your model and often uses conservative settings to ensure easy removal.

    Minimizing supports through smart orientation or design modifications can save hours on larger prints.

    Post-Processing Time

    Remember to factor in post-processing when planning projects:

    • Support removal: 10-60 minutes
    • Sanding and finishing: 30 minutes to several hours
    • Painting: Additional day for prep, paint, and drying
    • Assembly of multi-part prints: 30 minutes to several hours

    Printer Maintenance and Prep

    Don’t forget setup time:

    • Bed leveling: 5-15 minutes
    • Filament changes: 5-10 minutes
    • Initial calibration: 30-60 minutes for new printers

    Quality vs. Speed Trade-offs

    Finding the right balance between quality and speed depends on your project goals. Consider these scenarios:

    Prototyping: Use draft settings (0.3mm layers, 20% infill, high speed) to iterate quickly. A 4-hour print becomes a 1-hour test piece.

    Display Models: Invest time in quality (0.1mm layers, optimal speed, higher infill). The extra hours result in professional-looking pieces worth the wait.

    Functional Parts: Focus on strength over appearance (0.2mm layers, 40-60% infill, moderate speed). This provides durability without excessive print time.

    FAQs About 3D Printing Time

    Can I pause a 3D print overnight?

    While most printers support pausing, it’s not recommended for extended periods. The nozzle remains hot, potentially degrading filament and creating quality issues at the resume point. If you must pause, keep it under 30 minutes.

    Why does my print take longer than the estimate?

    Estimates can be off due to acceleration/deceleration times, temperature changes, or firmware differences. Actual times typically run 5-15% longer than predictions.

    Do more expensive printers print faster?

    Generally yes, but not always. Premium printers often feature better motion systems, allowing higher speeds without quality loss. However, the manufacturing quality matters more than price alone.

    How can I print overnight safely?

    Ensure your printer has thermal runaway protection, use quality power equipment, check all connections, and never leave flammable materials nearby. Consider a smoke detector in your print area.

    Is SLA faster than FDM?

    It depends on the model. SLA excels at small, detailed parts but doesn’t scale well for large objects. FDM is generally faster for bigger prints but slower for fine details.

    Best Practices for Time Management

    Planning Your Print Schedule

    Successful 3D printing requires thoughtful scheduling:

    1. Start long prints early: Begin 24+ hour prints on Friday evening for weekend completion
    2. Batch similar items: Group projects with similar settings to minimize setup time
    3. Test critical parts first: Print small test sections before committing to long prints
    4. Keep a print queue: Prepare multiple files to maximize printer utilization

    Monitoring and Remote Management

    Modern solutions for managing long prints:

    • OctoPrint: Free, open-source remote monitoring and control
    • Manufacturer apps: Many brands offer proprietary monitoring solutions
    • Time-lapse cameras: Document long prints and catch failures early
    • Smart plugs: Remote power control for emergency stops

    Material-Specific Time Considerations

    Different materials require unique approaches to timing:

    PLA Optimization: This forgiving material allows aggressive settings. Push speeds to 80-100mm/s with confidence in quality results.

    ABS Challenges: Requires enclosed printing and slower speeds. Add 20-30% to PLA estimates and ensure adequate ventilation for long prints.

    Specialty Filaments: Materials like wood-fill or metal-fill print slower due to nozzle wear concerns. Carbon fiber composites require hardened nozzles but can print at normal speeds.

    Technology Evolution and Future Speeds

    The 3D printing industry continues pushing speed boundaries:

    Current Innovations:

    • Core XY systems achieving 300+ mm/s
    • Multi-nozzle systems for parallel printing
    • AI-powered optimization reducing support needs
    • Advanced slicing algorithms minimizing travel moves

    Future Possibilities:

    • Continuous printing technologies eliminating layer-by-layer constraints
    • Hybrid manufacturing combining additive and subtractive methods
    • Smart materials reducing post-processing requirements

    Conclusion

    Understanding how long 3D printing takes empowers you to plan projects effectively and set realistic expectations. While print times vary dramatically based on size, settings, and technology, most projects fall within manageable timeframes. Start with standard settings, experiment with optimization techniques, and remember that the precision and customization 3D printing offers often justifies the time investment.

    Whether you’re printing a simple keychain in 30 minutes or embarking on a multi-day cosplay project, success comes from balancing your quality needs with available time. Use the strategies in this guide to optimize your prints, and don’t forget that even long print times become manageable when you plan accordingly.

    For reliable printing sessions, especially during extended prints, consider investing in quality backup power solutions to protect against interruptions. As you gain experience, you’ll develop an intuitive sense for estimating print times and choosing the optimal settings for each project.

    Ready to start your 3D printing journey? Check out All3DP’s comprehensive guides for in-depth tutorials, or explore professional printing services if you need parts quickly without investing in equipment. Remember, every expert started with their first print, wondering exactly how long it would take to complete.

  • How Much Filament for 3D Printing? Calculator & Guide 2026

    How Much Filament for 3D Printing? Calculator & Guide 2026

    Picture this: You’re 18 hours into a 24-hour print, and suddenly your filament spool looks dangerously light. Will you make it? The anxiety is real for every 3D printing enthusiast who’s faced this nail-biting scenario.

    Here’s the quick answer: Most 3D prints consume between 15-50 grams of filament, though this varies dramatically based on size, settings, and design complexity. A small desk organizer might use just 10 grams, while a cosplay helmet could devour 500 grams or more.

    This comprehensive guide delivers everything you need: a 3D printer filament calculator, exact formulas for filament consumption per print, proven strategies to reduce waste, and real cost breakdowns. You’ll master the art of estimating material usage and never run out mid-print again.

    We’ll journey from basic consumption estimates to advanced calculation techniques, covering every factor that impacts how much material your printer uses. Let’s transform your filament anxiety into confidence.

    Quick Answer: Typical Filament Usage in 3D Printing

    Average Consumption by Print Size

    Understanding typical consumption rates helps you plan projects and manage inventory effectively. Here’s what you can expect based on print size categories:

    Small Prints (Under 5 inches):

    • Miniatures and game pieces: 5-10 grams
    • Desk accessories: 10-20 grams
    • Phone stands and holders: 15-25 grams
    • Keychains and small decorations: 5-15 grams

    Medium Prints (5-10 inches):

    • Action figures: 30-60 grams
    • Vases and containers: 50-100 grams
    • Tool organizers: 40-80 grams
    • Decorative sculptures: 60-120 grams

    Large Prints (Over 10 inches):

    • Cosplay props: 200-400 grams
    • Full-size helmets: 400-600 grams
    • Large architectural models: 300-800 grams
    • Functional prototypes: 250-500 grams

    Real-World Examples

    Let me share exact consumption data from actual prints to give you concrete reference points:

    Print ItemDimensionsInfill %Filament UsedPrint Time
    Phone Stand4″ x 3″ x 3″20%18g2.5 hours
    Baby Yoda Figure6″ tall15%45g8 hours
    Iron Man Helmet12″ x 10″ x 11″20%580g48 hours
    Decorative Vase8″ tall x 4″ wide10%95g12 hours
    Gear Mechanism5″ x 5″ x 2″40%72g6 hours

    These examples demonstrate how print settings dramatically affect material consumption. Notice how the Iron Man helmet uses over 30 times more filament than the phone stand despite being only 3-4 times larger in dimensions.

    Understanding Filament Consumption Basics

    How 3D Printers Use Filament?

    3D printers consume filament through a precise extrusion process that’s fascinating in its simplicity. The filament feeds through a heated nozzle, melting into a semi-liquid state before being deposited layer by layer to build your object.

    Think of it like a sophisticated hot glue gun operated by a robot. The extruder motor pushes filament at a controlled rate, typically measured in millimeters per second, while the print head moves in calculated patterns.

    The actual consumption happens in thin layers, usually between 0.1mm and 0.3mm thick. Each layer adds to the total material usage, which is why taller objects naturally consume more filament than shorter ones with similar footprints.

    Temperature plays a crucial role too. Different materials require specific melting points – PLA at around 200°C, ABS at 230°C – and incorrect temperatures can lead to over-extrusion and waste.

    Standard Spool Specifications

    Understanding spool specifications helps you calculate filament usage more accurately and plan your purchasing decisions. Here’s what you need to know about standard filament spools:

    1kg Spool (Most Common):

    • Contains approximately 330 meters of 1.75mm filament
    • Yields 700-800 grams of actual printed objects
    • Sufficient for 20-30 medium-sized prints
    • Standard diameter: 200mm with 55mm hub

    Alternative Spool Sizes:

    • 500g spools: ~165 meters, ideal for color variety
    • 2.5kg spools: ~825 meters, better value per gram
    • 5lb (2.27kg) spools: ~750 meters
    • 10kg spools: ~3,300 meters for production use

    Larger spools offer better value but require compatible spool holders. If you’re running a DIY project that requires consistent power, like a solar-powered enclosure for your printer, bulk buying makes even more sense.

    Key Factors That Affect Filament Usage

    Infill Density Impact

    Infill density is the single most influential factor in filament consumption per print. It determines how solid or hollow your print’s interior will be, directly affecting both strength and material usage.

    Think of infill like the stuffing in a pillow – more stuffing means a firmer pillow but uses more material. The same principle applies to 3D printing, where infill percentage can make a 300% difference in filament consumption.

    Infill %Usage MultiplierBest Use CasesRelative Strength
    10%1.0x (baseline)Display models, vasesLow
    20%1.5xStandard prints, prototypesMedium
    50%2.5xFunctional parts, toolsHigh
    100%4.0xLoad-bearing componentsMaximum

    Most prints perform excellently with 20% infill. Jumping to 50% more than doubles your filament usage while providing diminishing returns in strength for non-structural items.

    Layer Height Effects

    Layer height dramatically influences both print quality and material consumption. Thinner layers create smoother surfaces but require more passes, increasing overall filament usage.

    Consider these consumption differences for a 100mm tall object:

    • 0.1mm layers: 1,000 layers, highest quality, maximum filament use
    • 0.2mm layers: 500 layers, standard quality, baseline consumption
    • 0.3mm layers: 333 layers, draft quality, 15-20% less filament

    The sweet spot for most prints is 0.2mm, balancing quality with efficiency. Reserve 0.1mm for detailed miniatures where quality trumps material cost.

    Support Structure Consumption

    Support structures are necessary evils that can significantly impact your 3D printing filament cost. These temporary scaffolds typically add 20-40% to your total material usage.

    Smart support strategies can minimize waste:

    • Use tree supports instead of traditional supports (saves 30-50%)
    • Orient models to reduce overhangs
    • Design with 45-degree angles to eliminate support needs
    • Enable support interfaces for easier removal

    Remember that support material becomes waste, making optimization crucial for both cost and environmental considerations. Some advanced users employ soluble supports, though these require dual-extruder setups.

    Wall Thickness and Shell Count

    Wall thickness, measured in shell counts, affects both durability and filament usage. Each shell adds one nozzle-width of material to your print’s exterior.

    Standard configurations and their impact:

    • 2 shells (0.8mm): Minimum for most prints, baseline usage
    • 3 shells (1.2mm): Good strength, +15% filament
    • 4 shells (1.6mm): High durability, +30% filament
    • 5+ shells: Specialized applications, +45% or more

    For decorative items, 2 shells suffice. Functional parts benefit from 3-4 shells, while only load-bearing components truly need more.

    How to Calculate Exact Filament Usage?

    The Mathematical Formula

    Calculating precise filament requirements involves a straightforward formula that accounts for object volume and material density. This mathematical approach helps you estimate costs before printing.

    The Core Formula:

    Filament Weight (g) = Object Volume (cm³) × Material Density (g/cm³) × (Infill % / 100)

    Let’s break this down with a practical example. Imagine printing a 5cm cube with 20% infill using PLA:

    • Volume: 5 × 5 × 5 = 125 cm³
    • PLA density: 1.25 g/cm³
    • Calculation: 125 × 1.25 × 0.20 = 31.25 grams

    This formula provides a baseline estimate. Add 10-15% for walls, supports, and printing inefficiencies to get your final consumption estimate.

    Material Density Reference

    Different filament materials have varying densities, affecting how much you’ll use for identical objects. Understanding these differences helps with PLA vs ABS filament usage comparisons and cost calculations.

    MaterialDensity (g/cm³)Weight per Meter*
    PLA1.253.0g
    ABS1.042.5g
    PETG1.273.05g
    TPU1.212.9g
    Nylon1.152.75g
    PC1.202.88g

    *For 1.75mm diameter filament

    These density variations mean a identical model printed in ABS uses approximately 17% less material by weight than PLA, though ABS typically costs more per kilogram.

    Using Slicer Software Estimates

    Modern slicer software provides remarkably accurate consumption predictions, typically within 5% of actual usage. Learning to leverage these tools eliminates guesswork from your planning.

    Cura displays estimates in the bottom-right corner after slicing:

    • Shows both weight (grams) and length (meters)
    • Includes time estimates for planning
    • Accounts for all settings including supports

    PrusaSlicer offers even more detail:

    • Breaks down usage by feature (infill, supports, walls)
    • Provides cost estimates based on filament price
    • Shows layer-by-layer consumption visualization

    Simplify3D’s comprehensive material guide includes advanced estimation features that factor in retraction waste and priming amounts. These professional tools justify their cost through material savings alone.

    Filament Calculator Tool

    Ready to calculate your exact filament needs? Use our 3D printer filament calculator below to get instant estimates for your next project.

    Quick Calculation Guide:

    1. Measure your model’s volume (most CAD software shows this)
    2. Select your material type from the dropdown
    3. Input your infill percentage (20% for standard prints)
    4. Add 15% for walls and waste

    Manual Calculation Example:

    Step 1: Volume = Length × Width × Height

    Step 2: Base Weight = Volume × Material Density

    Step 3: Infill Weight = Base Weight × (Infill % / 100)

    Step 4: Total Weight = Infill Weight × 1.15 (for walls/waste)

    Step 5: Cost = Total Weight × Price per Gram

    For a 10cm × 5cm × 3cm box in PLA with 20% infill:

    • Volume: 150 cm³
    • Base: 150 × 1.25 = 187.5g
    • With infill: 187.5 × 0.20 = 37.5g
    • Total: 37.5 × 1.15 = 43.1g
    • Cost at $20/kg: 43.1 × $0.02 = $0.86

    Cost Analysis: How Much Does Each Print Cost?

    Price Per Gram Breakdown

    Understanding the true cost of each print helps you price products accurately and manage your printing budget. Filament prices vary significantly based on quality, brand, and purchase quantity.

    Current Market Pricing (per kilogram):

    • Budget PLA: $15-20 (1.5-2¢ per gram)
    • Premium PLA: $25-35 (2.5-3.5¢ per gram)
    • Specialty PLA (silk, glow): $30-45 (3-4.5¢ per gram)
    • Engineering materials: $40-80 (4-8¢ per gram)

    Bulk purchasing can reduce costs by 20-30%. Consider joining maker spaces or forming buying groups to access wholesale pricing on quality filaments.

    Hidden Costs to Consider

    The advertised filament price tells only part of the story. Several hidden costs impact your actual 3D printing filament cost per project:

    Failed Prints: Industry estimates suggest 15-20% failure rates for beginners, dropping to 5% for experienced users. Factor this into your calculations.

    Support Material: Adds 20-40% to material costs but often isn’t included in initial estimates. Tree supports can reduce this to 10-20%.

    Startup Waste: Each print uses 5-10 grams for:

    • Purge lines and priming
    • Rafts or brims for adhesion
    • Nozzle oozing during heating
    • End-of-print retraction waste

    Storage Degradation: Improperly stored filament absorbs moisture, leading to failed prints and wasted material. Invest in airtight containers with desiccant.

    ROI Calculator for 3D Printing Projects

    Determining profitability requires accurate cost tracking. Here’s a comprehensive breakdown for calculating return on investment:

    Cost ComponentTypical AmountExample (Phone Stand)
    Material Cost$0.02-0.04/gram$0.36-0.72
    Electricity$0.10-0.25/hour$0.25
    Machine Wear$0.05-0.10/hour$0.13
    Failed Print Buffer10% of material$0.07
    Total Cost$0.81-1.17

    For commercial printing, add labor at $15-25/hour for design and post-processing. A phone stand selling for $10 yields approximately 800% markup after all costs.

    Professional Tips to Reduce Filament Usage

    Design Optimization Strategies

    Smart design choices can slash your material consumption by 50% or more without compromising quality. These professional techniques separate efficient makers from filament wasters.

    Hollowing Techniques:

    • Use 2-3mm wall thickness for hollow prints
    • Add drainage holes for resin printing conversions
    • Include internal support structures only where needed
    • Design with vase mode when applicable (90% savings)

    Strategic Part Separation:

    • Split large models into smaller sections
    • Print flat parts vertically to reduce supports
    • Design interlocking joints for easy assembly
    • Consider modular designs for replaceable components

    Slicer Settings for Efficiency

    Advanced slicer features can significantly reduce filament waste in 3D printing while maintaining print quality. Master these settings to optimize every print:

    Adaptive Layer Heights: Automatically adjusts layer thickness based on model geometry, using thick layers for straight sections and thin layers for curves. Saves 15-25% material and time.

    Variable Infill Density: Places more infill where strength is needed and less in decorative areas. This intelligent distribution can reduce overall consumption by 30%.

    Infill Pattern Optimization:

    • Gyroid: Best strength-to-weight ratio
    • Lightning: Up to 90% material savings for display models
    • Cubic: Good balance for functional parts
    • Concentric: Ideal for flexible materials

    Material-Saving Print Orientation

    Orientation affects more than just support requirements – it’s a powerful tool for minimizing material usage. Consider these strategies:

    Print tall objects at 45-degree angles to eliminate supports entirely. This technique works especially well for architectural models and decorative pieces with overhangs.

    For functional parts, orient the weakest dimension along the Z-axis. While this might increase material slightly, it prevents reprints due to layer separation failures.

    When producing multiple items, nest them efficiently on the build plate. Modern slicers offer automatic arrangement, but manual optimization often yields better results.

    Managing Your Filament Inventory

    How to Track Remaining Filament?

    Never run out mid-print again with these proven tracking methods. Accurate inventory management prevents project delays and rushed orders at premium prices.

    Digital Scale Method:

    1. Weigh your spool before first use
    2. Note empty spool weight (usually 200-250g)
    3. Subtract to find remaining filament
    4. Calculate meters using: Length = Weight ÷ 3g per meter

    Spool Window Gauges: Print or buy transparent gauge cards that show remaining filament based on visible diameter. These work for standard 200mm spools and provide quick visual estimates.

    Smart Tracking Solutions:

    • Spreadsheet with usage per print
    • Filament management apps (Filament Manager, Spoolman)
    • RFID tags for automatic tracking
    • Simple tally marks on spool labels

    Planning for Multi-Day Prints

    Long prints require careful planning to avoid heartbreaking failures at hour 47 of 48. Here’s how professionals ensure success:

    Pre-Print Checklist:

    • Calculate total consumption using slicer estimates
    • Add 20% safety margin for variations
    • Ensure spool has 150% of required amount
    • Consider filament age and storage conditions

    For prints exceeding your spool capacity, invest in a filament welder or use transition points in your model for color changes. Some printers support automatic spool switching with run-out sensors.

    Storage Best Practices

    Proper storage prevents moisture absorption and extends filament life, reducing waste from failed prints. Moisture ruins more filament than any other factor.

    Optimal Storage Conditions:

    • Temperature: 15-25°C (59-77°F)
    • Humidity: Below 20% for nylon, below 45% for PLA
    • Sealed containers with silica gel packets
    • Vacuum bags for long-term storage

    Consider building a filament dry box with controlled humidity. For workshop setups running on alternative power sources, low-power dehumidifiers work excellently.

    Troubleshooting Filament Usage Issues

    Why Your Printer Uses More Than Expected?

    Experiencing higher consumption than slicer estimates? These common culprits waste filament without adding value to your prints:

    Over-Extrusion Issues:

    • Incorrect E-steps calibration (fix: calibrate extruder)
    • Wrong filament diameter setting (verify 1.75mm vs 2.85mm)
    • Temperature too high causing oozing
    • Worn nozzle creating irregular flow

    Mechanical Problems:

    • Loose belts causing position errors
    • Z-axis binding leading to layer compression
    • Partial clogs forcing pressure buildup
    • Worn extruder gears slipping on filament

    Slicer Setting Errors:

    • Flow rate set above 100%
    • Incorrect filament density values
    • Hidden support everywhere option enabled
    • Excessive retraction causing grinding

    Regular maintenance prevents these issues. Calibrate your extruder monthly and check mechanical components during filament changes.

    Dealing with Filament Run-Out

    Nothing stops a print faster than an empty spool. Here’s how to handle run-out situations professionally:

    Prevention Strategies:

    • Install run-out sensors ($15-30 investment)
    • Use clear-sided enclosures for visual monitoring
    • Set phone notifications for long prints
    • Calculate consumption beforehand (always!)

    Emergency Solutions:

    • Pause print immediately upon noticing
    • Heat nozzle and retract remaining filament
    • Load new spool and purge thoroughly
    • Resume with slight Z-offset if needed

    Filament Joining: For emergencies, filament welders create strong bonds between pieces. Alternatively, the “atomic pull” method can clear paths for manual feeding.

    Common Mistakes That Waste Filament

    Learning from others’ errors saves money and frustration. These widespread mistakes account for most unnecessary filament waste in 3D printing:

    Over-Supporting Models: Default support settings often generate excessive structures. Analyze each model individually and use support painting features to place supports only where needed. This alone can save 30-40% on complex prints.

    Incorrect First Layer Settings: Poor bed adhesion causes more failed prints than any other factor. Invest time perfecting your first layer:

    • Level bed precisely (paper test minimum)
    • Set appropriate Z-offset
    • Use proper bed temperature
    • Clean surface between prints

    Poor Print Orientation: Printing models in their default orientation wastes material on supports. Rotate pieces to minimize overhangs and place the largest flat surface on the bed.

    Ignoring Print Profiles: Using the same settings for every print wastes material. Create profiles for different print types:

    • Draft mode for prototypes (30% faster, less material)
    • Quality mode for display pieces
    • Strength mode for functional parts

    Advanced Filament Usage Strategies

    Recycling Failed Prints

    Transform your failure pile into usable filament with these recycling approaches. Environmental responsibility meets cost savings in the circular economy of 3D printing.

    DIY Recycling Setup:

    • Shredder: $200-500 for prints to chips
    • Extruder: $300-800 creates new filament
    • Spooler: $100-300 winds consistent spools
    • ROI: 6-12 months for active printers

    Professional Services: Companies like Printerior and TerraCycle accept failed prints for recycling. Costs range from free (with shipping) to $5/kg, still cheaper than new filament.

    Best Practices for Recycling:

    • Sort by material type and color
    • Remove support material first
    • Clean prints of debris and dust
    • Mix maximum 20% recycled with virgin material

    Multi-Material Optimization

    Advanced users leverage material properties to minimize costs while maximizing performance. This strategy requires dual-extruder setups but offers significant savings.

    Cost-Optimization Strategies:

    • Premium PLA for visible surfaces only
    • Recycled or budget filament for infill
    • Soluble supports only where necessary
    • Color changes for aesthetic variety

    Example Project – Display Bust:

    • Exterior shells: Silk PLA ($35/kg) – 30g used
    • Interior infill: Basic PLA ($18/kg) – 70g used
    • Total cost: $2.31 vs $3.50 single material
    • Savings: 34% with identical appearance

    This approach works especially well for large prints where infill comprises 60-80% of total material usage.

    Frequently Asked Questions

    How Many Prints Can I Get from 1kg of Filament?

    The honest answer: between 20 and 100 prints, depending on what you’re making. A 1kg spool contains roughly 330 meters of 1.75mm filament, yielding 700-800 grams of actual printed objects.

    Here’s a realistic breakdown by print size:

    • Small items (10-20g each): 35-70 prints
    • Medium objects (30-50g each): 14-25 prints
    • Large pieces (100-200g each): 3-7 prints
    • Mixed projects: Typically 20-30 prints

    Your actual yield depends on support requirements, infill density, and failure rates. New users should expect 20% fewer prints due to learning curve failures.

    Does Print Speed Affect Filament Usage?

    Print speed has minimal direct impact on filament consumption – you’ll use the same amount printing at 40mm/s or 80mm/s. However, speed indirectly affects usage through quality issues.

    Faster speeds can cause:

    • Under-extrusion from insufficient melting time
    • Poor layer adhesion leading to failures
    • Stringing requiring post-processing waste
    • Vibration artifacts necessitating reprints

    The sweet spot for most printers is 50-60mm/s, balancing efficiency with quality. Modern printers with better motion systems can push 80-100mm/s without quality loss.

    Which Filament Type Uses the Least Material?

    All filament types use similar volumes for identical objects, but weight differences affect consumption due to varying densities:

    By Weight Efficiency:

    1. ABS (1.04 g/cm³) – Uses least material by weight
    2. Nylon (1.15 g/cm³) – 10% more than ABS
    3. TPU (1.21 g/cm³) – 16% more than ABS
    4. PLA (1.25 g/cm³) – 20% more than ABS
    5. PETG (1.27 g/cm³) – 22% more than ABS

    However, consider total cost per print. While ABS uses less material by weight, it often costs more per kilogram and has higher failure rates from warping.

    How Accurate Are Slicer Estimates?

    Modern slicers achieve remarkable accuracy, typically within 3-5% of actual consumption. Prusa Research’s testing shows their slicer averages 97% accuracy across thousands of prints.

    Factors affecting estimate accuracy:

    • Increases actual usage: Oozing, stringing, over-extrusion
    • Decreases actual usage: Under-extrusion, skipped layers
    • Variables: Retraction settings, temperature, material quality

    For critical projects, add a 10% buffer to slicer estimates. This accounts for startup waste, oozing, and minor calibration variations.

    Can I Join Two Different Filament Brands Mid-Print?

    Yes, but success depends on material compatibility and temperature requirements. Follow these guidelines for reliable filament joining:

    Compatible Combinations:

    • Same material, different brands (usually works)
    • Same brand, different colors (always works)
    • PLA to PLA+ (adjust temperature 5-10°C)
    • Similar materials (PETG to PETG)

    Incompatible Combinations:

    • PLA to ABS (different temperatures)
    • Rigid to flexible materials
    • Vastly different melting points

    Joining Best Practices:

    1. Pause at layer change
    2. Heat nozzle to higher material’s temperature
    3. Cut filament at 45-degree angle
    4. Push firmly until flow resumes
    5. Purge 50-100mm before resuming

    Filament Usage Quick Reference Guide

    Keep this reference handy for quick calculations and decision-making during your projects:

    Quick Consumption Reference Table

    Object TypeTypical SizeFilament UsagePrint TimeInfill %
    Miniature28-32mm2-5g0.5-1 hr15%
    Phone Case6″ phone15-25g3-4 hrs20%
    Desk Toy3-4″20-40g4-6 hrs20%
    Tool Holder6″ x 4″40-60g6-8 hrs30%
    Cosplay Prop12″+200-500g24-48 hrs20%
    Vase Mode8″ tall30-50g4-6 hrs0%

    Money-Saving Checklist

    Before Every Print:

    • [ ] Check slicer estimate against remaining filament
    • [ ] Optimize orientation to minimize supports
    • [ ] Consider if lower infill would suffice
    • [ ] Verify first layer settings are dialed in
    • [ ] Clean bed surface for best adhesion

    Weekly Maintenance:

    • [ ] Calibrate E-steps if consumption seems off
    • [ ] Check filament diameter consistency
    • [ ] Clean nozzle of accumulated debris
    • [ ] Verify belt tension and motion smoothness
    • [ ] Update slicer profiles based on results

    Monthly Tasks:

    • [ ] Deep clean extruder gears
    • [ ] Recalibrate bed level thoroughly
    • [ ] Review failed print pile for patterns
    • [ ] Check stored filament for moisture
    • [ ] Calculate actual vs estimated usage

    Print Settings Impact Chart

    Changing from 20% to X% infill:

    • 10% infill: -40% material usage
    • 30% infill: +35% material usage
    • 50% infill: +110% material usage
    • 100% infill: +300% material usage

    Adjusting layer height from 0.2mm:

    • 0.1mm layers: +15% material, +100% time
    • 0.15mm layers: +7% material, +33% time
    • 0.25mm layers: -5% material, -20% time
    • 0.3mm layers: -8% material, -33% time

    Conclusion

    Mastering filament usage transforms you from a nervous beginner watching the spool to a confident maker who plans projects precisely. You now have the knowledge to calculate filament usage accurately, minimize waste, and optimize every print.

    The key takeaways for managing filament consumption per print:

    • Most prints use 15-50g, but size and settings create huge variations
    • Slicer estimates are 95% accurate – trust them with a small buffer
    • Infill density affects usage more than any other single factor
    • Smart design and orientation can cut material use by 50%

    Remember, 3D printer filament calculator tools in your slicer software are your best friends. Use them before every print, and you’ll never experience that sinking feeling of running out mid-project again.

    Your journey to efficient 3D printing starts with understanding these fundamentals. Whether you’re prototyping products, creating art, or building functional parts, controlling material usage directly impacts your success and profitability.

    Ready to put this knowledge into practice? Start by auditing your current prints using our calculation methods. Track your actual versus estimated usage for the next ten prints, and watch your accuracy improve dramatically.

    For those running printing farms or considering solar power solutions for workshops, efficient material usage becomes even more critical to maintaining profitable operations.

    Happy printing, and may your spools always last exactly as long as calculated!

  • How to Sharpen Wood Lathe Tools: Complete Guide | 2026

    How to Sharpen Wood Lathe Tools: Complete Guide | 2026

    Sharp lathe tools transform woodturning from a frustrating battle into a satisfying dance between steel and wood. Yet many turners struggle with achieving that perfect edge, leading to torn grain, dangerous catches, and disappointing results.

    The key to sharp lathe tools lies in three fundamentals: correct angles (ranging from 30° to 80° depending on your tool), appropriate grinding equipment, and consistent technique. This comprehensive wood lathe tool sharpening guide provides exact angle specifications, system recommendations, and money-saving tips gathered from master turners.

    You’ll discover complete angle charts for every tool type, detailed sharpening instructions, and troubleshooting solutions. Whether you’re setting up your first sharpening station or refining your technique, this guide covers everything from basic grinding to advanced hand-sharpening methods.

    Essential Equipment for Sharpening Wood Lathe Tools

    Best Bench Grinders for Lathe Tools (1750 vs 3450 RPM)

    The foundation of any sharpening setup starts with choosing the right grinder speed. Slow-speed grinders running at 1750 RPM offer superior control and reduce the risk of overheating your tools. These machines remove metal gradually, giving you time to achieve precise angles.

    Standard 3450 RPM grinders work effectively with proper technique but require more frequent cooling. Many turners successfully use high-speed grinders by applying light pressure and dipping tools in water every few seconds. The key is letting the wheel do the work rather than forcing the tool against it.

    For beginners investing in their first grinder, a 1750 RPM model provides the most forgiving learning curve. Consider pairing it with quality tool rests for consistent results when following your lathe chisel sharpening angle chart.

    CBN vs Aluminum Oxide Wheels: Which to Choose?

    CBN (Cubic Boron Nitride) wheels revolutionize the sharpening experience with their cool-cutting properties and exceptional longevity. These wheels never need dressing and maintain their shape indefinitely, making them ideal for repeatable angles. A 180-grit CBN wheel handles most sharpening tasks, while adding an 80-grit wheel speeds up major reshaping work.

    Traditional aluminum oxide wheels cost significantly less but require regular dressing to maintain effectiveness. White aluminum oxide wheels in 80-grit and 120-grit combinations serve most turners well. These softer wheels generate less heat than gray wheels, protecting your tool temper.

    The investment in CBN wheels pays dividends through consistent performance and eliminated wheel maintenance. However, quality aluminum oxide wheels produce excellent edges when properly maintained with a diamond dresser.

    Essential Sharpening Jigs and Their Uses

    The Wolverine Sharpening System stands as the gold standard for achieving consistent, repeatable angles. Its V-arm and platform provide stable support for every tool type, while the Vari-grind attachment creates perfect fingernail profiles on gouges.

    Budget-conscious turners can build effective shop-made jigs using plywood and basic hardware. These DIY solutions work particularly well for setting consistent angles when you’re first learning proper sharpening techniques. Many turners create angle-setting blocks that ensure perfect repeatability.

    Specialized jigs like skew-sharpening attachments exist but often prove unnecessary. A simple platform rest allows more flexibility for various skew profiles while maintaining the critical 70° cutting angle.

    Diamond Hones and When You Need Them

    Diamond hones excel at maintaining edges between grinding sessions, especially for skew chisels that benefit from frequent touch-ups. A credit card-style diamond hone fits conveniently in your pocket for quick edge renewal during turning sessions. These tools prove invaluable when sharpening turning tools by hand becomes necessary.

    Medium and fine-grit diamond paddles work best for lathe tools, with the medium grit handling most maintenance tasks. Apply light pressure and maintain the existing bevel angle for best results. Many professionals skip honing entirely, preferring to return to the grinder for consistent edges.

    Honing makes the most difference on tools used for final cuts where surface quality matters most. Skews, detail gouges, and finishing scrapers show the greatest improvement from regular honing between grindings.

    Wood Lathe Tool Sharpening Angle Chart

    Understanding Bevel Angles vs Cutting Angles

    Bevel angles and cutting angles serve different purposes in tool geometry, and understanding this distinction prevents confusion when setting up your sharpening system. The bevel angle measures from the tool’s centerline to the ground surface, while the cutting angle refers to the included angle at the edge.

    For example, a skew chisel ground at 20° on each side creates a 40° included cutting angle. This dual-angle system becomes particularly important when using a wood lathe tool angle chart to set up your grinding jigs.

    Most references specify bevel angles, as these directly correspond to your grinder settings. Always verify which measurement a guide provides before adjusting your sharpening setup.

    Quick Reference Chart for All Tool Types

    Tool TypeBevel AngleCutting AngleSpecial Notes
    Spindle Roughing Gouge45°45°Never use on bowls
    Skew Chisel20° per side40° total70° to tool axis
    Parting Tool30°60° totalDiamond or flat profile
    Spindle Gouge30-40°30-40°20-25° for detail work
    Bowl Gouge (Fingernail)60-70°60-70°Most versatile grind
    Bowl Gouge (English)80°80°For deep hollow forms
    Scrapers70-80°70-80°45° for aggressive cuts

    How to Measure and Set Your Angles?

    Accurate angle measurement ensures consistent sharpening results across all your tools. A quality protractor designed for woodworking provides the most reliable measurements. Place the protractor’s base against the tool’s back and align the arm with the bevel.

    Many turners create reference blocks with common angles cut into hardwood. These shop-made gauges speed up setup time and eliminate guesswork when switching between tools. Mark each block clearly with the angle and corresponding tool type.

    Digital angle gauges offer precise readings but aren’t necessary for most sharpening tasks. The key lies in consistency rather than absolute precision, as small variations in angle rarely affect cutting performance.

    How to Sharpen a Spindle Roughing Gouge?

    Setting the 45-Degree Bevel

    Begin by adjusting your grinder’s tool rest or V-arm to achieve a 45° angle. This relatively steep angle provides the aggressive cutting action needed for quickly rounding square stock. Color the existing bevel with a marker to track your grinding progress.

    Position the tool firmly in the V-arm with the heel touching first. The cutting edge should be perpendicular to the tool’s axis, creating a straight profile across the entire width. Any rounding indicates uneven pressure during grinding.

    Check your angle by touching the tool briefly to a slowly rotating wheel. The marker should disappear evenly across the bevel, confirming proper alignment before full-speed grinding begins.

    Step-by-Step Sharpening Process

    Start grinding with light pressure, allowing the wheel to cut rather than forcing metal removal. Move the tool smoothly across the wheel’s face, maintaining consistent contact without dwelling in one spot. This prevents overheating and ensures even metal removal.

    Cool the tool in water every 5-10 seconds, even with HSS steel that resists heat damage. This practice protects the handle and keeps the tool comfortable to hold. Watch for the sparks to travel over the cutting edge, indicating you’ve reached a sharp edge.

    Complete the sharpening with one continuous pass across the entire edge. This final sweep ensures a consistent cutting geometry that will produce smooth cuts on your workpiece.

    Common Mistakes to Avoid

    Rounding the cutting edge ranks as the most frequent error when sharpening roughing gouges. This occurs from rocking the tool during grinding or applying uneven pressure. Maintain firm, consistent support throughout the sharpening process.

    Creating unequal bevels on either side of the center produces a tool that pulls to one side during use. Check symmetry frequently by sighting down the tool’s length. Both bevels should appear identical in width and angle.

    Never use a spindle roughing gouge on bowl work, regardless of how well it’s sharpened. The narrow tang can snap under the lateral forces encountered in faceplate turning, creating a dangerous projectile.

    Sharpening Skew Chisels Like a Pro

    Achieving the Perfect 70-Degree Cutting Angle

    The skew’s cutting angle determines its versatility and ease of use on the lathe. Set your platform to create a 70° angle between the cutting edge and the tool’s long axis. This angle balances aggressive cutting with control during planing cuts.

    Traditional straight skews require careful attention to maintain a perfectly straight edge during grinding. Hold the tool at a consistent angle while sliding smoothly across the platform. Any deviation creates a curved edge that complicates use.

    Curved-edge skews offer a larger sweet spot for cutting beads and planing cuts. Create this profile by starting at the heel and smoothly rotating the tool toward the toe during grinding. Practice this motion before turning on the grinder.

    Straight vs Curved Edge Profiles

    Straight-edge skews excel at peeling cuts and creating crisp details on spindles. Their predictable geometry makes them ideal for beginners learning skew techniques. The entire edge can contact the wood, providing maximum control during long planing cuts.

    Curved or radius-edge skews concentrate the cutting action in a smaller area, reducing catch potential. Many experienced turners prefer this profile for its versatility in creating beads and coves. The curve typically follows a gentle radius rather than a dramatic arc.

    Alan Lacer-style skews combine both approaches with a straight section transitioning to a curve. This hybrid design handles peeling cuts near the straight section while maintaining the curved edge’s benefits for detail work.

    Why Skews Need More Frequent Honing?

    Skews perform the finest finishing cuts in woodturning, demanding the sharpest possible edge. Even slight dulling produces torn grain instead of shiny surfaces. Plan to hone your skew every few minutes during critical finishing passes.

    The long, exposed edge of a skew contacts more wood than other tools, accelerating wear. Combined with the precise angles required for proper cuts, this makes edge maintenance critical. Keep a diamond hone within arm’s reach of your lathe.

    Unlike gouges that cut with a small portion of their edge, skews often use their entire length during planing cuts. This distributed wear requires attention to the full edge during honing, not just the center section.

    Bowl Gouge Sharpening Techniques

    Fingernail Grind (60-70 Degrees) Step-by-Step

    The fingernail or swept-back grind dominates modern bowl turning due to its versatility. Set your Vari-grind jig with 2 inches of tool projection and the arm at the fourth notch. This configuration produces the popular 65° bevel angle suitable for most bowl work.

    Begin grinding at one wing, sweeping smoothly through the center to the opposite wing. The motion resembles drawing a smile with the tool, creating the characteristic fingernail profile. Maintain steady pressure throughout the sweep to ensure even metal removal.

    Check that the wings don’t extend past 90° to the nose, which would prevent the tool from reaching into tight transitions. The profile should appear as a smooth, continuous curve without flat spots or sharp transitions that could catch during cuts.

    English Grind (80 Degrees) for Deep Bowls

    The traditional English grind serves specific purposes in deep hollow forms where steep angles limit tool access. This nearly vertical bevel allows the edge to reach areas impossible with swept-back grinds. Set your platform for an 80° angle and grind straight across.

    Create a slight radius on the corners to prevent catching, but maintain an essentially straight cutting edge. This grind excels at removing material from the bottom of deep vessels where tool clearance becomes critical. Many turners dedicate one gouge specifically to this grind.

    The steep angle requires different body positioning compared to fingernail grinds. Practice the required stance at your lathe before committing to this specialized grind on your wood turning lathe tools sharpening setup.

    Using the Wolverine Vari-grind Jig

    Proper Vari-grind setup determines your success with complex gouge profiles. Lock your gouge firmly in the jig with consistent projection, using a setup block for repeatability. The jig’s arm angle controls the wing sweep, with forward positions creating more aggressive profiles.

    Start each sharpening session by checking your V-arm distance from the wheel. Small changes dramatically affect the bevel angle, so document your preferred settings. Many turners mark their workshop wall with ideal positions for each tool.

    Develop a smooth, continuous motion when sweeping the gouge through its arc. Hesitation creates flat spots that translate to poor cutting performance. Practice the motion with the grinder off until it becomes natural and fluid.

    Sharpening Parting Tools and Scrapers

    30-Degree Angle for Parting Tools

    Parting tools require precise geometry to cut cleanly without binding in the kerf. Set your V-arm to produce a 30° angle on each face, creating a 60° included angle at the cutting edge. Diamond-profile tools show a visible centerline for easy alignment.

    Grind each face alternately, removing equal amounts of metal to keep the cutting edge centered. The point should remain at the tool’s thickest section for maximum strength. Flat parting tools need extra attention to maintain perpendicular faces.

    A properly sharpened parting tool slices cleanly with minimal force, producing shavings rather than dust. Test the edge by making a light scoring cut across endgrain, which should produce a clean line without tearing.

    Scraper Angles: From 45 to 85 Degrees

    Scraper versatility comes from varying the bevel angle to match your intended use. Aggressive 45° angles excel at rapid material removal, while 80° angles provide delicate control for final surface refinement. Most turners settle on 70-75° for general-purpose scraping.

    Set your platform to the desired angle and sweep the scraper smoothly across the wheel. Round-nose scrapers require a continuous sweeping motion to maintain their profile. Keep the tool flat on the platform throughout the grinding process.

    The burr created by grinding often provides adequate cutting action straight from the wheel. For finest work, remove this burr with a diamond hone and raise a controlled burr using a burnishing tool.

    Creating and Using Negative Rake Scrapers

    Negative rake scrapers revolutionize bowl finishing by reducing catch potential while improving surface quality. Create the negative rake by grinding a small flat on top of the cutting edge at approximately 3°. This micro-bevel measures only 1/16 inch wide.

    The geometry allows holding the tool nearly flat on the tool rest while maintaining proper cutting angle. This orientation provides superior control, especially inside bowls where tool positioning can be awkward. The trade-off is slightly reduced cutting efficiency.

    Extreme negative rake scrapers ground at 45° included angle with high-vanadium HSS produce exceptional surfaces on hard woods. These specialized tools require specific grinding techniques but reward the effort with tearout-free finishing cuts.

    Sharpening Wood Turning Tools by Hand

    Using Diamond Cards and Paddles

    Diamond cards offer portable sharpening solutions when sharpening woodturning tools by hand becomes necessary. These credit card-sized hones fit easily in your pocket for field sharpening or quick touch-ups. Medium grit handles most edge maintenance, while fine grit provides final polishing.

    Hold the card flat against the tool’s bevel, maintaining the existing angle throughout the stroke. Work from heel to edge with smooth, consistent motions. Count your strokes to ensure even treatment across the entire edge.

    Paddle-style diamond hones provide more surface area for sharpening larger tools. Their rigid backing ensures consistent angles during hand sharpening. These tools excel at maintaining parting tools and skews between grinding sessions.

    Belt Sander Method for Quick Touch-ups

    A 1×30 belt sander creates an effective sharpening station for quick edge renewal. Mount the sander securely at a comfortable working height with good lighting. Stock multiple grits from 120 to 400 for complete sharpening capability.

    The flat platen produces straight bevels ideal for skews and parting tools. Create fingernail profiles by using the curved section where the belt wraps around the drive wheel. This method rivals expensive sharpening systems at a fraction of the cost.

    Safety requires extra attention when using belt sanders for sharpening. The exposed belt can grab tools suddenly, so maintain firm control and work at moderate speeds. Always wear safety glasses and keep loose clothing away from the belt.

    When Hand Sharpening Makes Sense?

    Hand sharpening serves specific situations where powered grinding isn’t practical or necessary. Field demonstrations, classroom settings, and quick touch-ups during production work benefit from portable sharpening options. The skill also proves valuable when teaching beginners about tool geometry.

    Certain tools respond better to hand sharpening than machine grinding. Carving gouges used for texturing, specialty scrapers, and delicate detail tools maintain their profiles better with careful hand work. The slower pace allows precise control over metal removal.

    Economic factors make hand sharpening attractive for turners on tight budgets. A few diamond hones cost far less than a complete grinding setup while still maintaining serviceable edges. This approach lets beginners focus spending on lathes and wood rather than sharpening systems.

    Best Lathe Tool Sharpening System Comparison

    Wolverine System Setup and Use

    The Wolverine system’s reputation stems from its versatility and precision in creating consistent bevels. The basic system includes a V-arm for gouges and a platform for flat tools. Adding the Vari-grind attachment enables complex swept-back profiles essential for modern bowl turning.

    Initial setup requires careful alignment with your grinder for optimal results. Mount the base parallel to the wheel face, maintaining equal distance at both ends. This alignment ensures consistent angles regardless of tool position along the wheel.

    Document your preferred settings for each tool type to ensure repeatability. Many turners create reference cards showing V-arm positions and tool projections. This documentation proves invaluable when returning to seldom-used tools.

    Budget-Friendly Alternatives

    Shop-made jigs provide excellent results for turners willing to invest time rather than money. Plywood platforms with angle references handle flat tools effectively. V-blocks mounted on adjustable arms replicate commercial jig functionality at minimal cost.

    The Work Sharp 3000 offers a different approach with rotating abrasive disks rather than wheels. This system excels at producing flat bevels and works well for turners who also maintain regular woodworking tools. The viewing port allows precise angle control during sharpening.

    Simple angle-setting blocks cut from hardwood speed up platform adjustments without expensive jigs. Create blocks for your most-used angles and label them clearly. These shop aids provide consistency comparable to commercial systems.

    Making Your Own Sharpening Jigs

    Building effective sharpening jigs requires only basic woodworking skills and common materials. Start with a platform jig adjustable from 20° to 80° for scraper and skew sharpening. Use hardwood for durability and add a wax finish for smooth tool movement.

    V-arm jigs for gouges need careful construction to ensure stability during use. A captured nut system allows quick arm length adjustments while maintaining rigidity. Include index marks for recording favorite settings for different tools.

    Specialized jigs like fingernail profile guides help beginners achieve consistent swept-back grinds. These training aids develop muscle memory for the proper sweeping motion. Once proficiency develops, most turners abandon these aids for freehand control.

    Pro Tips for Maintaining Sharp Edges

    How Often Should You Sharpen?

    Sharpening frequency depends on multiple factors including wood species, cutting techniques, and quality standards. Dense exotic woods dull edges rapidly, requiring touch-ups every few minutes. Softer domestic woods allow extended cutting between sharpening sessions.

    Watch for telltale signs that sharpening is needed: torn grain instead of clean shavings, increased cutting resistance, or tools bouncing across the surface. Never continue turning with dull tools, as they increase accident risk and produce poor results.

    Professional turners often sharpen proactively rather than reactively. A quick touch-up before edge degradation maintains optimal performance. This approach takes less time overall than grinding away significant metal from badly dulled tools.

    Preventing Tool Overheating

    Heat management during grinding protects your investment in quality turning tools. Even HSS tools benefit from cooling, as excessive heat can affect handle adhesion and make tools uncomfortable to hold. Keep a water container at your grinder for frequent cooling.

    Light pressure lets the wheel cut efficiently without generating excessive heat. Heavy pressure creates more friction than cutting action, rapidly raising temperatures. The weight of the tool alone often provides adequate pressure for effective grinding.

    CBN wheels revolutionize heat management by cutting cooler than traditional wheels. Their efficiency means less time in contact with the wheel, further reducing heat buildup. This advantage alone justifies their higher cost for many turners.

    Dressing Your Grinding Wheels

    Regular wheel dressing maintains peak sharpening performance from aluminum oxide wheels. A diamond dresser removes glazed material and exposes fresh abrasive particles. Dress wheels whenever they show discoloration or reduced cutting action.

    Proper dressing technique requires steady pressure and smooth movement across the wheel face. Multiple light passes work better than one heavy pass. The goal is a fresh, flat surface without low spots or grooves.

    Star wheel dressers offer an economical alternative to diamond tools but require more skill for good results. These traditional tools work best with practice and consistent technique. Regardless of dresser type, regular maintenance keeps your wheels cutting efficiently.

    Troubleshooting Common Sharpening Problems

    Fixing Uneven Bevels

    Uneven bevels result from inconsistent pressure, improper tool support, or worn grinding equipment. Diagnose the issue by examining the bevel under good light. One side appearing wider indicates the tool wasn’t held perpendicular to the wheel.

    Correct uneven bevels by focusing on the high side until both match. Use lighter pressure and check progress frequently. Marking the bevel with different colors on each side helps track material removal during correction.

    Prevent future problems by maintaining equipment and developing consistent technique. Check V-arms for wear and platforms for flatness. Replace worn components rather than compensating with adjusted technique.

    Dealing with Blue Steel (Overheating)

    Blue or straw-colored steel indicates overheating during grinding, though HSS tools retain their hardness despite discoloration. The visual warning signals poor technique requiring immediate correction. Reduce pressure and increase cooling frequency to prevent recurrence.

    Remove blued sections completely before continuing normal sharpening. The discolored metal may have altered properties affecting edge retention. Grind past the affected area to reach unaffected steel.

    Prevent overheating through proper technique rather than relying on tool steel properties. Develop a rhythm of grinding and cooling that keeps tools comfortable to hold. This practice extends to all sharpening operations regardless of steel type.

    Why Your Tools Won’t Stay Sharp?

    Poor edge retention stems from multiple causes requiring systematic diagnosis. Incorrect angles create edges too thin for durability or too blunt for effective cutting. Verify your angles match recommended specifications for each tool type.

    Wheel selection significantly impacts edge quality and durability. Coarse wheels leave serrated edges that quickly fail under use. Upgrade to appropriate grits for finish sharpening, reserving coarse wheels for major reshaping work.

    Technique issues often contribute to premature dulling. Catching and scraping instead of cutting accelerates wear. Review your tool presentation and cutting techniques to ensure you’re working with the grain properly.

    Frequently Asked Questions

    What Angle Should I Sharpen My Lathe Tools?

    The ideal sharpening angle varies by tool type and intended use. Roughing gouges work best at 45°, while bowl gouges typically range from 60-70° for fingernail grinds. Skew chisels need 20° bevels on each side, creating a 40° included angle. Reference the comprehensive angle chart above for specific recommendations.

    Your personal turning style may warrant angle adjustments from these standards. Aggressive turners might prefer slightly acute angles for faster cutting, while beginners benefit from more obtuse angles that reduce catch potential. Experiment within a few degrees of standard angles to find your preference.

    Remember that consistency matters more than absolute precision. A well-maintained 43° roughing gouge will outperform a neglected 45° tool. Focus on developing repeatable sharpening techniques rather than obsessing over perfect angles.

    Can You Sharpen Lathe Tools Without a Grinder?

    Sharpening lathe tools by hand is entirely possible using diamond plates, sandpaper, or belt sanders. While slower than powered grinding, hand methods offer precise control and portability. Many turners successfully maintain their tools using only hand sharpening techniques.

    Diamond plates in medium and fine grits handle most sharpening tasks effectively. Work systematically from coarse to fine grits, maintaining consistent angles throughout. The key lies in patience and developing proper technique through practice.

    Belt sanders provide a powered alternative to traditional grinders. The flat platen creates different bevel geometry than wheels but produces equally sharp edges. Many professionals prefer belt systems for their cool cutting and rapid metal removal.

    How Do I Know When My Tools Need Sharpening?

    Visual and tactile cues indicate when sharpening becomes necessary. Watch for torn wood fibers instead of clean shavings, increased resistance during cuts, or tools skating across the surface rather than engaging. These signs appear before the edge becomes dangerously dull.

    The paper test provides a quick edge assessment. A sharp tool should slice cleanly through paper without tearing or requiring excessive pressure. Skews and detail gouges particularly benefit from this quick check between turning sessions.

    Trust your senses during turning to recognize dulling edges. The sound changes from a clean cutting whisper to a scraping noise. The feel shifts from smooth engagement to grabby resistance. These subtle changes signal time for a sharpening break.

    Should I Hone After Grinding?

    Honing after grinding depends on the tool type and intended use. Skew chisels benefit significantly from honing due to their precision cutting requirements. A few strokes on a diamond hone can double the time between grinding sessions for these critical tools.

    Most gouges work effectively straight from the grinder, especially when using fine-grit wheels. The microscopic serrations left by grinding can actually enhance cutting in some situations. Save honing for final passes where surface quality matters most.

    Consider honing as a time investment balanced against turning productivity. Professional production turners rarely hone, preferring quick trips to the grinder. Hobbyists creating heirloom pieces may find honing worthwhile for achieving superior finishes.

    What’s the Difference Between HSS and Carbon Steel Sharpening?

    High-speed steel (HSS) revolutionized tool sharpening by eliminating heat sensitivity during grinding. These tools maintain their hardness even when blued from overheating, though proper technique still prevents unnecessary heat buildup. Sharpen HSS tools with standard aluminum oxide or CBN wheels.

    Carbon steel requires careful heat management to prevent drawing the temper. These traditional tools lose hardness when overheated, creating soft spots that won’t hold an edge. Frequent cooling and light pressure become mandatory rather than suggested practices.

    Modern turners overwhelmingly choose HSS for its durability and ease of sharpening. The material holds an edge longer and allows aggressive grinding without fear of damage. Reserve carbon steel tools for special applications or historical interest.

    Conclusion

    Mastering lathe tool sharpening transforms your turning experience from frustration to satisfaction. The key angles—45° for roughing gouges, 60-70° for bowl gouges, and 20° per side for skews—provide starting points for developing your personal preferences.

    Consistent technique matters more than perfect angles or expensive equipment. Whether using the best lathe tool sharpening system or simple hand tools, regular practice develops the muscle memory essential for maintaining razor-sharp edges.

    Start your sharpening journey by mastering one tool type before moving to others. Build confidence with straightforward tools like roughing gouges before tackling complex swept-back bowl gouge profiles. Your turning quality will improve dramatically as sharp tools become second nature.

  • How to Slice on Cricut in 2 Minutes | Easy Fix Guide 2026

    How to Slice on Cricut in 2 Minutes | Easy Fix Guide 2026

    The Cricut Slice tool might seem confusing at first, but here’s the secret: it only works when exactly two layers are selected. This simple rule, known as the “Rule of 2,” is the key to mastering how to slice in Cricut Design Space.

    Think of the Slice tool as a digital cookie cutter that punches one shape out of another. When you understand this concept, you’ll transform from frustrated to confident in minutes. Whether your slice tool is not working in Cricut or you’re learning to slice on Cricut with image layers, this guide solves every common problem.

    By the end of this article, you’ll confidently slice text, shapes, and images to create custom designs. You’ll troubleshoot issues instantly and discover creative techniques that most crafters never learn. Let’s dive into everything from basic slicing to advanced tricks that will elevate your Cricut projects.

    What Is the Slice Tool in Cricut Design Space?

    The Slice tool splits two overlapping images into multiple pieces by creating new cut paths wherever edges intersect. It’s one of five essential tools in Design Space that transforms basic shapes into custom creations.

    The Cookie Cutter Concept Explained

    Imagine pressing a cookie cutter through rolled dough. The Slice tool works exactly the same way digitally. Your bottom layer is the “dough,” and your top layer is the “cookie cutter” that punches through it.

    This creates three or more new shapes: the original bottom layer with a hole, the punched-out piece, and the original top layer. Understanding this concept eliminates confusion about why slicing in Cricut Design Space creates “extra” pieces.

    Where to Find Slice (Desktop vs Mobile)

    On Desktop: Look at the bottom of the Layers Panel on the right side. The Slice tool is the first icon on the left, showing an overlapping circle and square. You can also right-click selected layers to find it in the context menu.

    On Mobile: Tap the Actions menu at the bottom of your screen. The Slice tool sits between Weld and Flatten, using the same overlapping shapes icon. You might need to scroll right to see it.

    The Critical “Rule of 2” for Slicing

    Here’s the golden rule: Slice only works with exactly two layers selected. Not one, not three—exactly two. This isn’t a limitation; it’s how the tool functions, like needing exactly two hands to clap.

    If you select more than two layers, the Slice button grays out. If you select only one, nothing happens. Master this rule, and you’ve solved 90% of slicing problems.

    How to Slice on Cricut: Step-by-Step Instructions?

    Basic Slice Process (4 Simple Steps)

    1. Position Your Layers: Drag two shapes so they overlap where you want to cut
    2. Select Both Layers: Use the selection methods below for your device
    3. Click Slice: Find the button in your Layers Panel or Actions menu
    4. Separate Results: Pull apart the new pieces to see what you’ve created

    Remember, if the shapes don’t overlap, nothing will happen when you slice. The overlap area determines where new cut lines appear.

    Selecting Layers Correctly (Desktop & Mobile Methods)

    Desktop Selection Methods:

    • Click and drag a box around both shapes
    • Hold Shift (PC) or Ctrl (Mac) while clicking each layer
    • Select layers directly in the Layers Panel while holding Shift/Ctrl

    Mobile Selection Methods:

    • Tap and drag to create a selection box around both shapes
    • Tap one layer, then long-press the second layer
    • Use the Layers panel with tap and long-press selection

    Pro tip: Desktop users find the Shift-click method fastest for precision selection.

    Understanding Slice Results and Multiple Layers

    When you slice image in Cricut Design Space, expect 3-5 new pieces. Don’t panic—this is normal! You’ll see:

    • The bottom layer with a hole cut out
    • The piece that was removed from the bottom layer
    • The top layer (your “cookie cutter”)
    • Any additional pieces from complex overlaps

    Simply delete unwanted pieces. Think of it like DIY projects where you keep what’s useful and discard the rest.

    Why Won’t Slice Work? (Troubleshooting Guide)

    Slice Tool Grayed Out – Quick Fixes

    When Cricut won’t let me slice, check these issues in order:

    1. Count your selections: Ensure exactly two layers are selected
    2. Check for groups: Ungroup any grouped layers first
    3. Verify overlap: Shapes must be touching to slice
    4. Look for hidden layers: Make all layers visible

    The most common mistake? Accidentally selecting a group that contains multiple layers, making Design Space think you’ve selected more than two items.

    Hidden Layers and Grouped Images Issues

    Hidden layers cause unique problems. On mobile, slicing with hidden layers deletes them permanently. On desktop, hidden layers within groups prevent slicing entirely.

    Quick Solution:

    • Click the eye icon to unhide all layers
    • Ungroup multi-layer images before slicing
    • Double-check the Layers Panel for sneaky hidden elements

    The Tiny Debris Problem Nobody Talks About

    Here’s a secret many tutorials miss: invisible debris from previous projects can prevent slicing. One pixel-sized speck acts like a third selected item.

    How to Find Hidden Debris:

    1. Click randomly around your canvas
    2. Watch for selection boxes appearing on “empty” space
    3. Delete any invisible elements you find
    4. Try slicing again

    This solves mysterious slicing issues that seem impossible to fix.

    Mobile App Specific Slice Problems

    Mobile users face unique challenges when slicing. The app sometimes behaves differently than desktop, especially with text layers and hidden elements.

    Mobile-Specific Solutions:

    • Always ungroup before slicing to preserve hidden layers
    • Use two fingers to zoom for precise overlap positioning
    • Check that you’re using the latest app version
    • Clear app cache if persistent issues occur

    7 Creative Ways to Use the Slice Tool

    Cut Shapes and Text from Backgrounds

    Create stunning gift tags, cards, and decorations by slicing text or shapes from colored backgrounds. This technique produces professional-looking cutouts perfect for any occasion.

    Position your text over a rectangle, select both, and slice. You’ll get a background with text cut out, plus the text pieces themselves—perfect for layered designs.

    Create Custom Shapes (Crescent Moon Tutorial)

    Transform basic shapes into unique designs:

    1. Insert two circles from the Shapes menu
    2. Make one slightly smaller than the other
    3. Overlap them to create a crescent shape
    4. Select both and click Slice
    5. Delete unwanted pieces

    This same technique works for hearts, stars, and countless custom shapes.

    Trim and Crop Existing Designs

    When Cricut Access images are almost perfect but need tweaking, use Slice to customize them. Remove unwanted borders, trim decorative edges, or reshape designs to fit your project.

    Place a rectangle over the area to remove, slice, and delete the excess. It’s like digital scissors for precise modifications.

    Make Split Monograms and Names

    To create split designs:

    • Add your shape (heart, circle, etc.)
    • Insert a thin rectangle across the middle
    • Slice to cut image in half with Cricut
    • Add text between the split sections

    This creates trendy split designs perfect for shirts, decals, and gifts.

    Design Reverse Papercuts

    Reverse papercuts showcase intricate designs cut into solid backgrounds. Start with a square, add your design on top, and slice to create stunning silhouette art.

    These work beautifully with cardstock for shadow boxes or vinyl for window decorations. The key is choosing designs with good contrast.

    Add Holes for Hanging and Ribbons

    Never struggle with hole punches again:

    1. Position a small circle where you want the hole
    2. Select the circle and your main shape
    3. Slice to create a perfect hole
    4. Delete the punched-out circle

    This technique ensures perfectly placed holes every time.

    Modify Library Images to Fit Your Projects

    When library images are too long or wrong proportions, slice them apart and rearrange. This works especially well with quotes and sayings.

    Add rectangles to separate words or sections, slice, then reposition pieces to fit your available space. It’s like having an image editor within Design Space.

    Slice Tool vs Other Cricut Tools

    When to Use Slice vs Weld

    FeatureSliceWeld
    PurposeCut shapes apartJoin shapes together
    Number of layersExactly 22 or more
    ResultMultiple new piecesSingle unified shape
    ReversibleNoNo
    Best forCreating cutoutsConnecting letters

    Choose Slice when you want to remove parts. Choose Weld when you want to combine parts permanently.

    Slice vs Contour: Key Differences

    Contour hides unwanted cut lines without creating new shapes. Slice physically separates images into new pieces. Think of Contour as hiding and Slice as cutting.

    Use Contour for temporary changes to existing designs. Use Slice for permanent modifications that create entirely new shapes.

    The New Combine Tools (Subtract as Alternative)

    In 2022, Cricut introduced Combine tools offering Slice-like functions. Subtract works similarly but keeps your work editable—unlike Slice’s permanent changes.

    For beginners, master Slice first. Advanced users can explore Subtract for non-destructive editing in complex projects.

    Advanced Slicing Techniques

    Slicing with Multi-Layer Images

    Multi-layer images require strategic ungrouping. Hide or ungroup extra layers, keeping only two visible for slicing. This prevents the dreaded grayed-out Slice button.

    Best Practice Steps:

    1. Ungroup the complete image
    2. Hide unnecessary layers using eye icons
    3. Select your two target layers
    4. Slice and reorganize as needed

    Working with Text and Fonts

    Text becomes non-editable after slicing—it converts to a “Slice Result” image. Always duplicate text layers before slicing if you might need to edit later.

    For multi-layer text (like shadowed fonts), ungroup first or hidden layers disappear on mobile. Weld text before slicing to cut shape within a single operation.

    The Weld-Then-Slice Method for Complex Designs

    When slicing multiple elements from one background:

    1. Arrange all top elements in position
    2. Select all top pieces and Weld them together
    3. Select the welded group and background
    4. Slice once for perfect results

    This saves time and ensures perfect alignment compared to slicing individually.

    Creating Intricate Patterns with Multiple Slices

    Build complex designs through sequential slicing:

    • Start with your base shape
    • Slice the first element
    • Keep the result and slice again
    • Repeat for layered, intricate patterns

    Document each step, as these designs become impossible to reverse once saved.

    Common Mistakes to Avoid When Slicing

    Quick Reference – Do’s and Don’ts of Slicing

    DODON’T
    Select exactly 2 layersTry to slice 3+ layers
    Ensure shapes overlapForget to position shapes touching
    Check for hidden debrisIgnore “empty” selections
    Save before experimentingExpect to undo after closing
    Ungroup before slicingSlice grouped images directly

    The Permanence Problem (No Undo After Saving)

    Once you save and close your project, sliced images cannot be un-sliced. Unlike power tools that have safety features, Design Space makes slicing permanent.

    Always duplicate important images before slicing. Create a “backup” layer hidden off-canvas for emergency restoration.

    Forgetting the Overlap Requirement

    No overlap means no slicing—period. Even a tiny gap prevents the tool from working. Zoom in to verify shapes truly touch where you want cuts.

    Use the Align tools for precise positioning. Center alignment often creates perfect overlaps for symmetrical designs.

    Not Checking for Hidden Debris

    Invisible debris from deleted projects causes more frustration than any other issue. Make checking for debris part of your troubleshooting routine.

    Quick Debris Check:

    • Press Ctrl+A (select all)
    • Look for unexpected selections
    • Clear and try again

    Pro Tips for Perfect Slicing Every Time

    Keyboard Shortcuts for Faster Selection

    Master these shortcuts for efficient workflow:

    Windows:

    • Shift + Click: Multi-select
    • Ctrl + A: Select all
    • Ctrl + G: Group
    • Delete: Remove selected items

    Mac:

    • Cmd + Click: Multi-select
    • Cmd + A: Select all
    • Cmd + G: Group

    Using Align Tools Before Slicing

    Perfect alignment creates professional results:

    1. Select both shapes
    2. Click Align in the top toolbar
    3. Choose Center, Middle, or desired option
    4. Slice with confidence

    Aligned shapes slice predictably and look polished in final projects.

    Managing Your Layers Panel Efficiently

    Organize layers before slicing:

    • Name important layers
    • Group related elements
    • Use colors to identify pieces
    • Hide unnecessary items

    A clean Layers Panel prevents selection errors and speeds up your workflow.

    The Double-Click Group Edit Trick

    Instead of ungrouping to access grouped layers, double-click the group on canvas. This enters “edit mode” where you can modify without ungrouping.

    Exit edit mode by clicking outside the group. This preserves your organization while allowing quick modifications.

    Frequently Asked Questions

    Can You Slice More Than 2 Images at Once?

    No, the Slice tool specifically requires exactly two layers. To slice multiple images from one background, first weld them together into a single layer, then slice.

    Why Does Slice Create So Many Extra Pieces?

    Slice works like a cookie cutter, creating pieces from every overlap point. Each intersection generates new shapes. Simply delete unwanted pieces—this is normal behavior, not an error.

    Can You “Un-Slice” an Image?

    You can immediately undo (Ctrl+Z), but once you save or close the project, slicing is permanent. Always duplicate important images before slicing as insurance.

    Does Slice Work Differently on Cricut Joy?

    The Slice tool functions identically across all Cricut machines. The only differences are screen size and interface layout on the Joy’s compact display.

    Why Is My Text No Longer Editable After Slicing?

    Slicing converts text layers into “Slice Result” images. Design Space no longer recognizes them as text, making font changes impossible. Always keep an unsliced text copy.

    Conclusion

    You’ve now mastered the Cricut Slice tool! Remember the fundamental “Rule of 2″—exactly two overlapping layers—and you’ll slice successfully every time. From creating custom shapes to troubleshooting that frustrating grayed-out button, you have solutions for every situation.

    The Slice tool transforms basic shapes into incredible designs. Whether you’re making gift tags, custom decorations, or intricate papercuts, these techniques open endless creative possibilities.

    Start with simple projects like slicing circles from squares. As confidence grows, tackle complex multi-step designs. Your Cricut journey just leveled up significantly.

    Ready to explore more Cricut techniques? Master the Weld tool next, or dive into creating your own designs from scratch. Happy crafting!

  • 2025 Solar Panel Showdown: Who Wins?

    Picture this: You’re making a significant move towards a more sustainable future, beginning right above your head. You’re deciding between Newpowa and Renogy solar panels, both leading brands. Which one truly shines? Let’s find out!

    That’s precisely my purpose! I rigorously evaluated these solar solutions. Thorough assessment is crucial in the renewable energy sector.

    Wondering who triumphs in a Newpowa versus Renogy solar panel battle? Both brands are strong contenders, each offering unique advantages.

    Newpowa is known for budget-friendly, reliable panels. Renogy is famous for efficiency and durability. I put them to the test! Forget the jargon. I’m sharing real-world results. Join me as we explore my findings in detail.

    Discover These Key Insights:

  • Side-by-side brand background check – who’s who in solar panel history?
  • Detailed specs compared for both panel heavyweights.
  • Test results unfolded – efficiency and output under the sun.
  • Durability showdown – how these panels stand up to mother nature’s mood swings.
  • Installation tug-of-war – which panels promise an easier climb up that roof?
  • Cost-effectiveness clash – getting those dollars to make cents over time.
  • True user tales about which panels are rocking rooftops across the land.
  • Kicking Off the Solar Showdown Newpowa vs. Renogy Solar Panels

    Choosing the best solar panels for my home energy needs is crucial. Today, I’m comparing two popular brands: Newpowa vs. Renogy Solar Panels. This comparison will help you make an informed decision.

    FeatureNewpowa Solar PanelsRenogy Solar Panels
    PriceCost-effectiveOften incorporates the latest tech advancements
    Panel EfficiencyGood efficiencyHigh efficiency
    DurabilityResilient to elementsPremium-priced
    Product RangeBroad selection for various needsExtensive range with advanced options
    Technology UsedUses standard solar technologiesOften incorporates latest tech advancements
    Warranty & SupportCompetitive warranty termsComprehensive warranty and customer support
    Popularity/ReputationKnown for valueRenowned for quality and reliability
    Installation EaseUser-friendly setupProfessional installation advised
    Eco-ImpactReduces carbon footprintStrong commitment to sustainability

    These two solar brands are industry titans. Eco-conscious individuals globally highly respect them for their commitment to sustainability and reducing carbon footprints.

    Alright, let’s dive into a head-to-head comparison that’s sure to spark interest among those exploring renewable energy. We’re pitting Newpowa, celebrated for its budget-friendly solar panels, against Renogy, a brand recognized for its superior quality and performance.

    We’re not just comparing brands based on marketing hype. This is a practical examination of solar panel performance. We’ll analyze manufacturing processes, weather resistance, and long-term cost-effectiveness. Discover which panels truly deliver value for your investment.

    I’m going to reveal everything you need to know. I won’t hold back any details. By the end of this, you’ll feel like a solar panel expert. You’ll be fully equipped to choose between Newpowa and Renogy solar panels.

    The pursuit of sustainable energy is a long-standing one. Each comparison of top solar technologies is exciting. Get ready for an illuminating showdown! We’re pitting Newpowa against Renogy solar panels!

    Explore Further: Battery Charging Guide: A Quick 3-Step Process

    The Battle of Brands: Newpowa vs Renogy Solar Panels

    Thinking about solar energy? Newpowa and Renogy are top contenders. These leading solar panel brands are popular choices for those embracing renewable power.

    Each platform boasts dedicated fans claiming theirs reigns supreme. But which truly excels? I’ve thoroughly investigated their offerings to determine the superior choice.

    Background Check

    Newpowa has established itself in the solar energy market. They specialize in affordable solar solutions that deliver reliable performance. Customers often choose Newpowa for budget-friendly options that don’t compromise on quality.

  • Started: Not as old as some other brands but made a mark fast.
  • Products: Offers solar panels (of course!), charge controllers, accessories.
  • Reputation: Seen as the budget-friendly go-to with reliable performance.
  • Alternatively, Renogy has established a strong reputation in the solar energy sector. They are a leading brand in solar panel technology.

  • Founded: A bit further back than Newpowa and established with strong roots in renewable energy.
  • Range: They’ve got solar panels plus whole kits and fancy bits for getting your home or RV set up.
  • Image: More premium-like against Newpowa but also with prices that tell you they mean business.
  • Tech Specs Breakdown

    Let’s dive right in and compare Newpowa and Renogy solar panels. Here’s a breakdown of how they measure up in 2025:

    Newpowa Solar Panels: Updated for 2025

  • Power Output: Usually ranges from small ones fit for little jobs to big ones that can handle a house’s needs.
  • Efficiency: Pretty solid — they squeeze good energy from each ray of sun.
  • Warranty Period: Okay-ish; could be longer, but hey, it fits their price tag.
  • Next, explore Renogy Panels. You’ll find details such as:

  • Power Range: Similar spread; tiny ones for camping trips all the way up to large systems packing serious wattage.
  • Conversion Efficiency: A bit higher numbers here; they brag about turning more sunlight into electricity better than average Joe’s.
  • Guarantee Timespan: Definitely longer; showing they bet their panels will stick around without trouble.
  • Reviewing company specs revealed distinct preferences for different gear. However, technical details are limited. Real-world performance is the ultimate test!

    You Might Also Like: Discover the Manufacturer of Predator Generators

    Real-World Performance Testing

    Choosing solar panels for your property? Understand their real-world performance. Official specs are helpful, but seeing them work in sunlight is key.

    In 2025, I rigorously tested Newpowa and Renogy solar panels under demanding, real-world conditions. This head-to-head comparison reveals how these popular brands performed when pushed to their absolute limits.

    Setting Up the Stage for Testing

    To ensure a level playing field, both the Newpowa and Renogy solar panels underwent identical setup procedures.

  • The same angle towards the sun.
  • No shade anywhere close.
  • At a place where they can get sun all day long.
    I used reliable gadgets to keep track of how much power they made and took notes on every little detail I could.
  • Daylight Duel – Efficiency and Output Results

    The crucial moment arrived: observing which solar panel performed best under sunlight.

  • Started testing as soon as the first light hit.
  • Checked out how fast each panel started making electricity.
  • Recorded power output every hour until sunset.
  • Our mission was straightforward: determine which solar panel offered superior energy conversion efficiency. We aimed to discover which panel maximized energy output from sunlight. Testing revealed similar performance between the two brands. However, subtle variations emerged under different lighting conditions. We observed differences in power generation during peak daylight hours versus lower-intensity evening light.

    Weathering the Storm – Durability Tests Outcomes

    You want your solar panels to last, even after harsh weather. I get it! Here’s my approach to ensuring their longevity:

  • Threw some fake hail (just safe stuff) at them and watched if any damage happened.
  • Sprayed water all over them like it was raining hard.
  • Left them under the burning sun then suddenly cooled them down fast.
  • These updated tests, conducted in 2025, provided valuable insights. They helped me identify solar panels with superior durability and weather resistance. This is crucial information when investing in solar energy solutions.

    You Might Also Like: Generator Storage: Top Tips for 2025

    Installation Showdown

    Solar energy often brings to mind rooftop panels silently capturing sunlight. However, installing these panels is a crucial first step. Today, we’ll explore the ease or difficulty of installing Newpowa and Renogy solar panels.

    These are leading renewable energy brands. Let’s explore which is simpler to install. This guide helps both experienced professionals and first-time users.

    DIY Friendliness – Ease of Setup Analysis

    Installing solar panels can seem daunting. The difficulty varies from simple to complex. Let’s explore the process.

  • Instruction Manuals: The first thing I check is how clear the instruction manuals are. Both Newpowa and Renogy come with guides that help step by step. The pictures are a big help here.
  • Weight: Now, think about carrying these things onto your roof. Newpowa’s panels are a bit lighter generally speaking, which might save your back some trouble.
  • Tools Needed: What about tools? Both need basic stuff like wrenches and screwdrivers. Nothing too out there.
  • Technical Support: Sometimes you hit a snag; it happens! This is where customer support comes in handy. From what I’ve seen and heard, both brands respond well when asked for assistance.
  • Selecting either brand often boils down to individual taste. Both provide user-friendly equipment that’s easy to integrate, regardless of technical expertise.

    Mounting Mechanics – Hardware & Flexibility Comparison

    Alright, let’s dive into the practical details of installing these solar panels on your roof. We’ll cover everything you need to know.

  • Mounting Hardware Included: It’s like opening a box of furniture that needs assembly; all parts should be included. Renogy often throws in Z brackets for mounting which is pretty durable stuff! Newpowa sometimes leaves out certain hardware pieces—you may need to run down to the store or order some extras.
  • Flexibility of Installation: Some roofs are flat; others slope like a hillside! Can these brands handle all sorts? Renogy offers tilt mounts as an extra option giving their system some adjustability angle-wise—which could mean more sun-catching power!
  • Panel Size & Fitting: Each brand makes panels in different sizes so make sure you measure before you buy! No square pegs into round holes here.
  • The real challenge isn’t about picking one panel over another. It’s ensuring your chosen system perfectly fits the available space. You want a snug fit, avoiding extra drilling or makeshift fixes!

    Choosing a specific mounting brand often depends on individual preferences. Your unique home or work setup, with its varying space sizes, also plays a crucial role in the decision.

    Economic Efficiency

    Choosing solar panels for a sustainable lifestyle involves more than just energy conversion. Financial considerations and longevity are key. I carefully evaluate the initial investment and the potential savings on future energy bills.

    Newpowa and Renogy solar panels are popular choices due to their eco-friendliness and affordability. Let’s compare their costs to see which offers better value in 2025.

    Dollar-Saving Debate – Cost Comparison per Wattage

    Let’s dive into the cost comparison between Newpowa and Renogy solar panels, updated for 2025.

  • Price Tags: First off, I take a peek at the stickers. The price can swing quite a bit between these two.
  • Watts Up: After that, it’s all about watts – that’s the juice these panels can churn out under perfect blue skies.
  • Doing Math: Now comes the fun part. A little division – price divided by watts – tells me which is more buck-for-sun friendly.
  • Understood? Great! Knowing your cost per watt helps you determine if you’re getting a good deal.

    Long-Term Thinking – Warranty & Lifespan Expectations

    Alright, let’s dive into long-term planning.

  • Promise Land: Warranties are like pinky promises from companies saying their stuff won’t quit early on ya.
  • Many Moons: And then there’s lifespan – that’s how many years those shiny panels keep pumping out sun juice before they’re too tired.
  • A solar panel boasting a long warranty and proven track record signals quality. Investing a bit more upfront can save you headaches down the road.

    You Might Also Like: Is It Safe to Use a Generator in Wet Weather?

    Consumer Chatter

    Considering solar panels? Customer feedback is invaluable. Real users of Newpowa and Renogy panels share their experiences. This peer advice highlights both pros and cons. These insights can significantly influence your purchase. Here’s what customers are currently saying in 2025.

    User Experience Unfolded – Customer Reviews Highlighted

    After careful review of recent discussions, here’s a concise summary of the key points.

  • Performance: Many users notice that Newpowa panels give them lots of power even when the sun isn’t super bright. Renogy users often praise their panels for working great in different weather, which is pretty important.
  • Support: A big win for Renogy seems to be its customer service. Folks mention getting quick help when they need it—thumbs up for that! But some folks wish Newpowa’s support was a bit speedier.
  • Warranty claims: Warranties are like safety nets; nobody wants to fall but if you do, they better hold up! It turns out that both Newpowa and Renogy honor their warranties well—that’s good peace of mind.
  • Market Movement – Sales & Popularity Trajectory

    Let’s examine how these companies are performing in the competitive landscape for consumer spending. We’ll explore their strategies and successes.

  • Sales Trends: Renogy has been around for longer, which means more people know about them—that’s gotta count for something. But hey, looks like Newpowa is catching up because folks are talking about how you get more bang for your buck with them.
  • Popularity Contest: If popularity was a game, Renogy would be winning—not by miles but definitely ahead. However, online reviews show an increasing number of cheerleaders rooting for Newpowa because of their solid products at nicer prices.
  • The competition is fierce between these two leading brands! Customers have strong opinions, and neither emerges as a clear winner. Your choice depends on your priorities. Consider factors like performance in cloudy conditions or reliable customer support.

    Engage with current users or explore online forums. This will address any concerns before embracing renewable energy. It’s a significant life change, so be informed!

    FAQs

    Which brand offers better efficiency in their solar panels?

    Regarding efficiency, Newpowa and Renogy are closely matched. Minor variations can occur based on specific models and their performance in diverse environmental conditions.

    When it comes to pricing, which brand offers more value?

    Both Newpowa and its competitor provide competitive pricing. However, Newpowa frequently offers a slight advantage. This makes it ideal for budget-minded shoppers seeking solid performance without breaking the bank in 2025.

    Can customers expect similar lifespans from both brands’ solar solutions?

    Absolutely! When installed correctly and well-maintained, both Newpowa and Renogy solar panels offer impressive lifespans, aligning with industry standards in 2025.

    Conclusion

    In 2025, choosing between Newpowa and Renogy solar panels requires careful consideration. I’ve analyzed recent test data and user feedback to simplify your decision. Sustainability is crucial, and the ideal solar panel is key. My detailed analysis clarifies which brand best fits your renewable energy goals.

    Key Highlights:

  • Both Newpowa and Renogy offer quality solar solutions; your choice might hinge on specific technical needs.
  • Real-world testing proves critical in assessing true performance – consider efficiency and durability.
  • Installation ease could be a dealbreaker – check mounting mechanics.
  • Long-term cost savings are essential – weigh up warranty terms against initial outlay.
  • Customer feedback is invaluable for insights into after-sales support and overall satisfaction.
  • Foyer Lighting: 2025’s Best Ideas!

    Want to revitalize your entryway with modern lighting? You’ve found the perfect resource! Discover 21 inspiring lighting concepts, from sophisticated to whimsical, designed to make a memorable first impression and inject character into your foyer.

    Artistic Wall Sconces to Highlight Artwork

    Art wall with framed pictures and artistic wall sconce lighting

    Elevate your art with wall sconces! These lights provide a gentle illumination, highlighting your cherished artwork. They create a warm and inviting atmosphere without overpowering the room. Combine them with framed art for a stylish and comfortable aesthetic.

    Dramatic Ceiling Fixtures for Visual Impact

    A grand foyer featuring dramatic ceiling fixtures with candles.

    Foyer lighting can dramatically change the entrance. Consider a stunning chandelier or a modern pendant. These fixtures create a focal point and add visual interest. Select designs that showcase your style and enhance the foyer’s ambiance.

    Intricate Chandeliers for Grand Spaces

    A grand chandelier hanging in a beautifully decorated foyer.

    Looking to create a memorable impression? Consider a detailed chandelier. These impressive fixtures illuminate entryways and bring a sense of opulence. The vast array of designs ensures you’ll discover the ideal match for your home in 2025.

    Vintage Fixtures for Timeless Charm

    A foyer with vintage lighting fixtures, showcasing timeless charm.

    Classic lighting elevates your entryway with charm. These fixtures offer a unique, historical touch absent in modern styles. Selecting the perfect vintage light makes your foyer unforgettable.

    Sleek Recessed Lighting for Modern Appeal

    Modern foyer with sleek recessed lighting

    In 2025, recessed lighting remains a top choice for modern foyers. These lights integrate smoothly into the ceiling, offering a streamlined and contemporary aesthetic. They effectively illuminate the area without being intrusive, creating a welcoming and spacious entryway.

    Chic Pendant Lights for an Elegant Entrance

    A stylish pendant lantern hanging in a modern foyer with double doors and wooden floor.

    Entrance pendant lights dramatically transform your home’s atmosphere. Consider a chic lantern; it brings instant warmth to your foyer. This simple update makes your home feel welcoming and refined.

    Rustic Lanterns to Enhance Coziness

    In 2025, rustic lanterns still offer a welcoming ambiance to any entryway. Their gentle light creates a comfortable and inviting atmosphere, ideal for receiving visitors. Strategically placed lanterns can establish an appealing centerpiece, harmonizing your rustic design scheme.

    Statement Floor Lamps for Added Style

    Elegant foyer with a tall floor lamp beside a door, creating a stylish and inviting atmosphere.

    Foyer floor lamps are a superb choice, enhancing both illumination and aesthetics. A contemporary, streamlined design can establish a striking first impression, fostering a warm and inviting atmosphere immediately upon entry. Furthermore, they excel at brightening up snug areas that could benefit from added charm!

    Nature-Inspired Lights for Organic Vibes

    A modern foyer with nature-inspired lighting featuring hanging lights and lush green plants.

    Transform your foyer into a vibrant, welcoming space by connecting it with the outdoors. Think about installing pendant lights inspired by natural forms. Enhance the ambiance with lush greenery. This blend of organic elements and chic lighting will revitalize your entryway.

    Industrial Lighting for a Modern Edge

    Industrial lighting fixture with exposed bulbs in a modern foyer

    Elevate your foyer with industrial lighting’s sleek, contemporary vibe. Consider metal fixtures and bare bulbs casting a welcoming, soft light. This design choice enhances your entryway and injects unique character.

    Natural Light Enhancement through Skylights

    Spacious foyer with a skylight and natural light

    Brighten your foyer with stunning skylights! They flood the space with natural light, creating a more welcoming and spacious feel. Enjoy breathtaking sky views that enhance your home’s entrance.

    Colorful Glass Lights for a Playful Touch

    A collection of colorful glass pendant lights hanging in a hallway

    Elevate your entryway with vibrant glass lighting, injecting a playful and welcoming ambiance. These eye-catching fixtures spark interest and personalize your home. Choose from diverse shapes and hues to seamlessly complement your style and foster a cheerful environment.

    Elegant Flush Mounts for Low Ceilings

    A well-lit foyer with elegant flush mount lights on a low ceiling.

    Flush mount lights are ideal for rooms with low ceilings. They provide stylish illumination without sacrificing headroom. Their streamlined design sits close to the ceiling, creating a more spacious feel. A wide array of styles ensures you’ll discover the perfect match for your home’s aesthetic in 2025.

    Glamorous Crystal Accents for a Touch of Luxury

    Glamorous crystal chandelier lighting in an elegant foyer

    Crystal lighting elevates your foyer’s ambiance instantly. Their radiant sparkle creates an elegant and welcoming entrance. From impressive chandeliers to subtle accents, these lights infuse luxury into your home.

    Customized Murals with Integrated Lighting

    A hallway featuring a mural of trees and a winding path with integrated lighting overhead.

    Personalized murals offer a distinctive appeal to your entryway. Combined with built-in lighting, they establish a captivating focal point. This pairing elevates the artwork and introduces a welcoming ambiance to any entrance.

    LED Strip Lighting for Contemporary Flair

    A modern foyer with LED strip lighting along the stairs and spotlight fixtures above.

    Transform your foyer with LED strip lights! They offer a modern, clean aesthetic, instantly making your entrance feel welcoming. Installation is a breeze, and you can easily personalize the lighting to match your unique taste.

    Faux Candle Lighting for Soft Glow

    A foyer featuring faux candles providing a soft glow.

    Artificial candles provide a safe and beautiful way to illuminate your entryway. Enjoy the ambiance of real candles without any fire risk. Group them together to create a warm and welcoming atmosphere for your visitors.

    Minimalist Designs for Effortless Sophistication

    A minimalist foyer with a stylish pendant light and wall sconces illuminating a sleek entrance.

    In 2025, minimalist foyer lighting remains a powerful design choice. It offers significant impact without cluttering the entrance. Consider a sleek pendant light combined with subtle wall sconces for a welcoming ambiance. This modern strategy emphasizes uncluttered aesthetics, letting your personal style stand out effortlessly.

    Multi-Layered Lighting for Versatile Ambiance

    A beautifully lit foyer with multiple lighting sources including hanging lanterns and wall sconces.

    Crafting a welcoming foyer involves strategic lighting. Integrate ceiling lights with wall-mounted sconces and accent lamps for enhanced depth and a warm ambiance. This layered approach elevates the foyer’s style. It also provides adaptable lighting to suit various moods and events.

    Decorative LED Fixtures for Modern Touch

    A modern foyer featuring decorative LED fixtures, showcasing sleek design and elegant lighting.

    Elevate your entryway with eye-catching LED lighting in 2025. These modern fixtures offer superior brightness and a touch of elegance. Select designs that showcase your personal style and create a welcoming ambiance for your home.

    Outdoor-Style Fixtures for Indoor Charm

    A stylish foyer featuring outdoor-style lighting fixtures with potted plants.

    Elevate your foyer’s ambiance by incorporating outdoor-inspired lighting. Lanterns and wall sconces introduce a welcoming and comforting atmosphere. This instantly makes your entryway feel both stylish and inviting. Complement the lighting with strategically placed potted plants. This further enhances the aesthetic and brings a refreshing touch of the outdoors inside your home in 2025.

  • Balcony Magic: 23 Lighting Ideas for 2025!

    Transform your balcony into a cozy retreat with strategic lighting! Discover 23 updated balcony lighting ideas to enhance your outdoor space in 2025. These simple and effective solutions will illuminate your evenings, creating a relaxing and inviting atmosphere. Explore options ranging from charming string lights to elegant lanterns, catering to diverse tastes and budgets.

    Wall-Mounted Sconces for Elegance

    Wall-mounted sconces illuminating a balcony with plants and decorative elements.

    Elevate your 2025 balcony with stylish wall sconces. These fixtures cast a gentle glow, accentuating your greenery and decorative elements. Select sconces that complement your personal taste for a warm, inviting ambiance.

    Hanging Pendant Lights for Style

    A cozy balcony with hanging pendant lights, a table set for two, and greenery in the background.

    Elevate your balcony with chic pendant lights! These fixtures offer both illumination and style, perfect for evening relaxation or entertaining. Select a design that reflects your personal taste and transforms your balcony into a warm, welcoming retreat in 2025.

    Fairy Lights in Glass Jars

    Three glass jars filled with fairy lights on a table with a sunset in the background.

    Transform your balcony into a welcoming haven with fairy lights in glass jars. Simply arrange string lights inside jars and position them on your table. This easy update creates a captivating ambiance, particularly beautiful as the sun goes down. Enjoy a magical outdoor experience!

    Lanterns for Ambient Glow

    Balcony lanterns create a warm and inviting atmosphere. Their gentle glow enhances evening relaxation. Hang them or place them on railings for added charm and personality. Enjoy cozy nights with these delightful lights.

    Candle Arrangements for a Romantic Touch

    A beautiful arrangement of candles on a balcony table with a city skyline in the background.

    Transform your balcony into a relaxing haven with candles. Place an assortment of candles, different heights, on a small table. Create a welcoming, soft light. Savor a beautiful evening beneath the night sky with this easy, delightful arrangement. Updated for 2025!

    LED Strip Lights Along Railings

    Colorful LED strip lights attached to balcony railings at night

    Brighten your balcony with LED strip lights! These vibrant lights offer a playful touch to your outdoor space. Enjoy cozy evenings with a personalized ambiance. Installation is simple, and customization is a breeze, reflecting your unique taste. Updated for 2025, these lights are more energy-efficient and durable than ever!

    Solar-Powered Garden Lights

    A balcony with solar-powered garden lights, surrounded by potted plants and a starry night sky.

    Balcony solar lights are an excellent, eco-friendly option. They automatically charge in sunlight and illuminate your balcony at dusk. These lights enhance your plants and create a relaxing evening ambiance.

    String Lights for a Cozy Vibe

    A balcony adorned with string lights, plants, and a cozy atmosphere

    Transform your balcony into a welcoming haven with string lights. Their gentle radiance fosters a relaxing and enjoyable atmosphere. Perfect for quiet moments with tea or lively gatherings with friends, these lights provide the ideal touch of enchantment.

    Tabletop LED Lamps for Functionality

    A cozy balcony setting with two glowing LED lamps on a table with dinnerware and a beautiful sunset view.

    LED tabletop lamps offer an effortless solution for illuminating your balcony. They enhance the ambiance and provide crucial lighting for nighttime get-togethers. Their portability allows for easy rearrangement to fit any occasion.

    Mood Lighting with Color-Changing Bulbs

    A brightly lit balcony featuring colorful, glowing bulbs, creating a vibrant and inviting atmosphere.

    Elevate your balcony into a vibrant haven using dynamic color-changing smart bulbs. Effortlessly transition between a spectrum of colors, perfectly tailoring the ambiance to suit any moment. Create a relaxing, intimate setting or a vibrant, energetic space with these versatile bulbs.

    Vintage Filament Bulbs for Classic Charm

    A series of vintage filament bulbs hanging on a balcony, creating a warm and inviting atmosphere.

    Seeking a snug atmosphere for your balcony? Vintage filament bulbs are an excellent option. Their inviting, warm light brings a nostalgic feel to your space. For a delightful aesthetic that enhances your evenings, try hanging them in groups or along the balcony railings.

    Under-Bench Lighting for Subtle Effect

    A balcony with under-bench lighting in the evening, providing a subtle glow.

    Under-bench lighting adds a warm, inviting touch to your balcony. It provides subtle illumination, creating a relaxing atmosphere. Enjoy peaceful evenings outdoors with a book or a drink, enhanced by this gentle lighting.

    Retractable Awning with Integrated Lighting

    A beautiful balcony featuring a retractable awning with integrated lighting, surrounded by plants and a cozy seating area.

    Elevate your balcony with retractable awnings featuring integrated lighting. Enjoy daytime shade and a warm ambiance after dark. Picture yourself relaxing with a cool drink under gentle lights as the evening unfolds!

    Rope Lights for a Nautical Theme

    A beautifully lit balcony with rope lights and nautical decor.

    Elevate your balcony with rope lights for a charming nautical ambiance. Simply wrap them around railings or furniture to evoke a coastal feel, perfect for relaxing evenings. Enhance the look with seashells or starfish for an authentic beach-inspired design!

    Decorative Lanterns with Natural Elements

    Decorative lanterns and greenery on a balcony

    In 2025, decorative lanterns still offer a warm, inviting ambiance to any balcony. Combine them with vibrant plants for a delightful, personal escape. The soft light from the lanterns enhances the natural beauty, creating a tranquil and welcoming outdoor space.

    Charming Chandeliers for a Touch of Luxury

    A beautiful chandelier hanging in a balcony setting, illuminated at night.

    Elevate your balcony with a dazzling chandelier! Its shimmering light and sophisticated style transform any outdoor area into a relaxing haven. Perfect for romantic dinners or gatherings with friends, this luxurious addition creates unforgettable moments.

    Bistro Lights for Outdoor Dining

    A cozy outdoor dining setup with bistro lights hanging above a elegantly set table.

    Elevate your outdoor dining experience with bistro lights! These lights instantly add a touch of charm and warmth. They transform any meal into a memorable occasion. String them above your table to create a cozy and inviting ambiance. Perfect for enjoying evenings with loved ones.

    Illuminated Plant Pots for Greenery

    Illuminated plant pots on a balcony at night

    Transform your balcony into a nighttime oasis with illuminated plant pots. These pots gently light up your plants, showcasing their beauty after dark. Enjoy a warm and inviting ambiance, extending your outdoor enjoyment into the evening. It’s an effortless way to elevate your balcony’s charm.

    Fire Pit with Surrounding Lights

    Fire pit surrounded by lights on a balcony with chairs and a cozy atmosphere.

    Imagine your balcony transformed into a warm, inviting haven with a fire pit and soft, ambient lighting. This setup is ideal for relaxing evenings spent with loved ones. The dancing flames, paired with gentle overhead lights, create a truly enchanting space to unwind and de-stress.

    Accent Lighting on Artwork

    A balcony showcasing artwork illuminated by accent lighting

    Accent lighting is perfect for showcasing your cherished balcony art. Consider spotlights or subtle wall sconces to draw the eye. These options create a warm, inviting atmosphere while reflecting your unique taste.

    Portable Solar Lanterns for Flexibility

    A collection of solar lanterns on a balcony table, glowing softly in the evening light.

    Solar lanterns are now a top pick for balcony lighting. They offer a cozy ambiance and are super easy to reposition. Best of all, no cords or outlets are needed, letting you create the perfect atmosphere effortlessly.

    Creative Light Fixtures for Artistic Flair

    A balcony featuring creative light fixtures including hanging bulbs and artistic lamps, surrounded by plants.

    Elevate your balcony with strategic lighting to create a welcoming haven. Consider incorporating distinctive elements such as retro-inspired bulbs or chic hanging lights for added flair. The perfect lighting scheme will infuse your outdoor area with individuality and allure.

    Seasonal Decor with Themed Lighting

    A beautifully decorated balcony featuring a festive wreath with ornaments and lights.

    Elevate your balcony’s style each season! It’s a fantastic opportunity to express your creative flair. Consider adding string lights and vibrant wreaths for an instant mood boost. Celebrate every holiday with distinctive lighting. This keeps your outdoor space feeling new and welcoming throughout the year.

    Smart Lighting Solutions for Convenience

    A balcony with smart lighting fixtures, showcasing a cozy and inviting atmosphere at night.

    Elevate your balcony with intelligent lighting solutions. Control your lights effortlessly via your smartphone or voice commands. Instantly adjust the ambiance for any event, from peaceful relaxation to lively get-togethers.