I’ve seen countless beginners struggle with MIG welding gas settings, and honestly, I don’t blame them. The confusion between PSI and CFH alone has caused more headaches than any other welding topic I’ve encountered. After years of welding everything from thin sheet metal to thick structural steel, I’ve learned that getting your gas flow right isn’t complicated once you understand what’s actually happening.
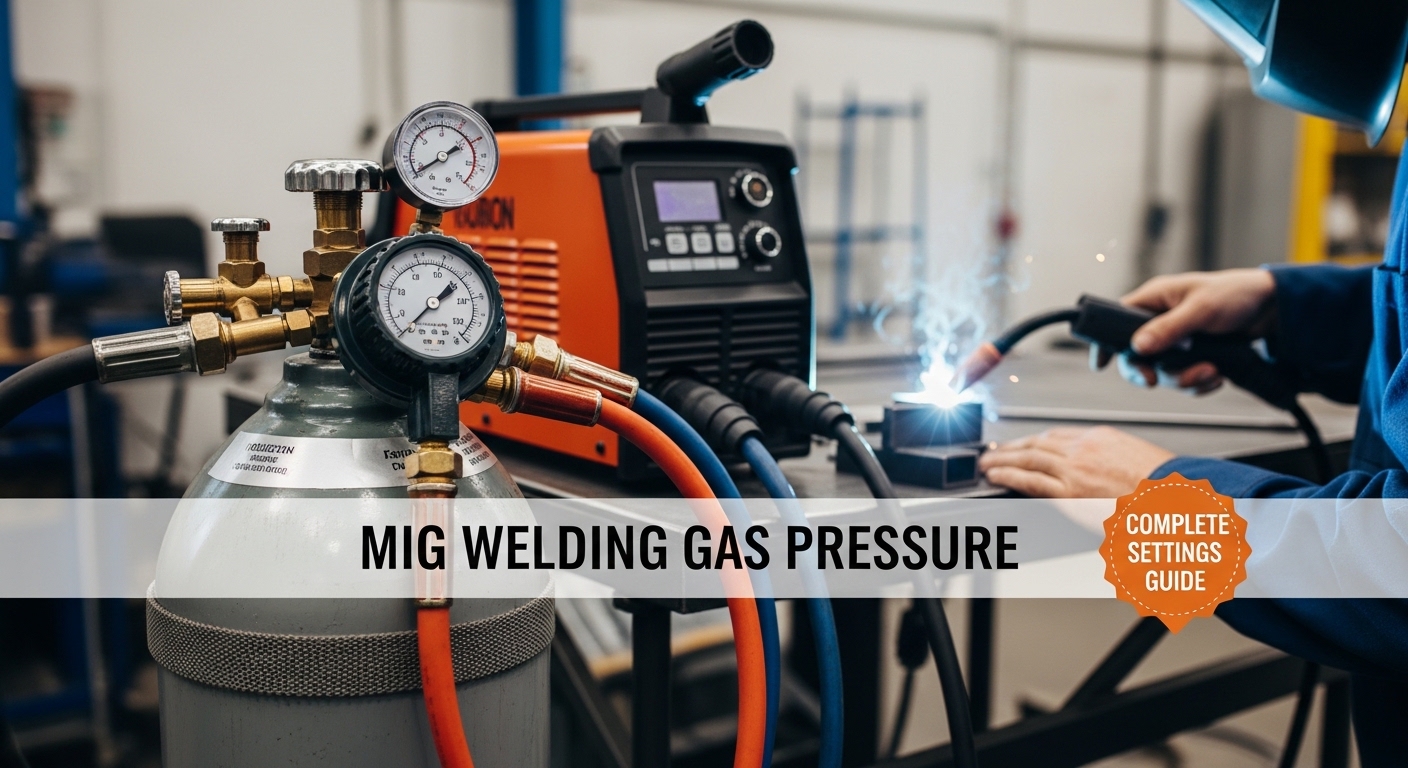
What is the Correct MIG Welding Gas Pressure?
For MIG welding, gas flow is measured in cubic feet per hour (CFH), not PSI. The general setting for mild steel indoors is 15-20 CFH with a 75/25 argon/CO2 mixture. Use 10-15 CFH for pure CO2 in calm conditions, or 20-30 CFH if there’s a draft. For stainless steel, use 20-25 CFH. Aluminum requires higher flow: 30 CFH with pure argon, or up to 50 CFH when using helium blends.
Notice I said CFH, not PSI. That distinction alone will save you hours of frustration. Let me explain why this matters and how to set up your welder correctly the first time.
Quick Reference: Gas Flow Settings by Material
Quick Summary: Most MIG welding indoors with 75/25 gas works well at 15-20 CFH. Pure CO2 needs slightly less at 10-15 CFH. Aluminum demands more gas at 30-50 CFH due to its thermal properties. If you’re welding in drafty conditions, add 5-10 CFH to compensate.
| Material | Gas Type | Indoor Flow (CFH) | Outdoor/Drafty (CFH) |
|---|---|---|---|
| Mild Steel (18ga – 1/4″) | 75/25 Ar/CO2 | 15-20 | 25-35 |
| Mild Steel (thicker) | 75/25 Ar/CO2 | 20-25 | 30-40 |
| Mild Steel | 100% CO2 | 10-15 | 20-25 |
| Stainless Steel | 98/2 Ar/CO2 or Tri-mix | 20-25 | 25-35 |
| Aluminum | 100% Argon | 30-35 | 40-50 |
| Aluminum (with Helium) | Ar/He mix | 40-50 | 50-60 |
Understanding CFH vs PSI: The Critical Difference
This is where most beginners get tripped up, and I’ve seen it cause real problems.
CFH (Cubic Feet Per Hour): This measures the volume of gas flowing through your MIG gun per hour. This is what actually matters for shielding your weld pool.
PSI (Pounds Per Square Inch): This measures the pressure inside your gas cylinder and lines. Your regulator shows this to let you know how much gas you have left, but it’s not what you set your welding gas to.
Here’s why this distinction matters: shielding gas needs to flow at a certain volume to protect your weld, not at a certain pressure. The PSI reading on your regulator tells you cylinder pressure, which starts around 2000 PSI when full and drops as you use gas. Setting your welder to “20 PSI” means nothing if you don’t know the flow rate.
Think of it like a garden hose. The water pressure in your pipes might be 60 PSI, but what matters for watering your plants is how much water comes out the end. That’s flow rate, and that’s what CFH measures for welding gas.
Most modern flow meters show CFH directly. If you have an older regulator that only shows PSI, you’ll need to estimate or upgrade to a proper flow meter. After helping friends set up their first welders, I’ve learned that a $40 flow meter saves more than its cost in wasted gas and frustration.
Gas Flow Settings by Material Type
Different metals require different gas flow rates based on how they react to heat and atmospheric contamination. Let me break down what I’ve found works best for each material.
Mild Steel with 75/25 Argon/CO2
This is the most common MIG welding setup, and for good reason. The 75/25 mixture (also called C25) provides excellent arc stability and minimal spatter.
For general purpose welding indoors, I set my flow meter to 15-20 CFH. This has worked consistently for me across material thicknesses from 18 gauge to 1/4 inch. The key is consistency: find a setting in this range and stick with it.
Why not more gas? I’ve seen welders crank their flow up to 40+ CFH thinking more is better. This actually creates problems. Excessive gas flow creates turbulence that pulls air into the weld area through the venturi effect, causing the exact porosity you’re trying to prevent.
For outdoor welding or drafty shops, bump it up to 25-35 CFH. I welded a trailer frame outside last summer and found that 30 CFH was the sweet spot to compensate for the light breeze.
Mild Steel with 100% CO2
Pure CO2 is a budget-friendly option that penetrates deeper than 75/25 mix. However, it creates more spatter and requires slightly different gas settings.
Use 10-15 CFH for CO2 in calm indoor conditions. I run my CO2 at about 12 CFH for most projects and get clean, porosity-free welds.
The lower flow rate works because CO2 is heavier than argon mixtures. It blankets the weld area more effectively. If you’re using a flow meter calibrated for argon mixes (most are), you might need to adjust slightly downward when switching to pure CO2.
Important Warning: CO2 requires a different regulator than argon mixtures. Using an argon regulator on CO2 can cause it to freeze up due to the temperature drop during gas expansion. CO2 regulators are built with thicker diaphragms to handle this.
Stainless Steel
Stainless steel requires careful gas protection because it’s more sensitive to contamination than mild steel. I use 20-25 CFH with a proper stainless gas mixture.
Common stainless gas mixes include 98/2 (argon with 2% oxygen) and tri-mix (helium/argon/CO2). The helium-containing blends need slightly higher flow rates due to helium’s lighter weight.
I welded some food-grade stainless tables last year and found that 22 CFH with tri-mix gave the cleanest results. Any less and I’d get slight discoloration; any more and I’d notice the gas waste without improvement.
Aluminum
Aluminum welding demands more gas than steel. I use 30-35 CFH with pure argon for most aluminum work.
The higher flow is necessary because aluminum conducts heat away from the weld zone quickly, requiring more gas coverage. Also, aluminum’s oxide layer breaks down differently, exposing more molten metal to potential contamination.
When using helium blends for thicker aluminum (which I recommend for anything over 3/16 inch), increase flow to 40-50 CFH. Helium is lighter than argon and doesn’t blanket as effectively, so the extra volume compensates.
Gas Regulators and Flow Meters
Choosing the right regulator makes a bigger difference than most welders realize. I’ve used both types extensively, and here’s what I’ve learned.
| Type | Pros | Cons | Best For |
|---|---|---|---|
| Flow Meter (dual gauge) | Shows CFH directly, easier to set accurately | More expensive, slightly more fragile | Beginners and most users |
| Pressure Regulator (single gauge) | Budget-friendly, durable | Only shows PSI, requires estimation | Experienced welders, occasional use |
| Digital Flow Meter | Precise readings, easy to read | Most expensive, requires batteries | Production environments |
CGA Fittings Explained
This is another source of confusion that catches people off guard. Gas cylinders use different fittings depending on the gas type.
CGA-320: The fitting used for CO2 cylinders. Your CO2 regulator must have this fitting.
CGA-580: The fitting used for argon and argon mixture cylinders. Most 75/25 and specialty gas regulators use this fitting.
You cannot swap these fittings without an adapter, and I don’t recommend using adapters for high-pressure gas connections. Get the right regulator for your gas type. It’s safer and more reliable.
How to Set Your Gas Flow Rate
Setting your gas flow correctly takes just a few minutes. Here’s the process I use every time I set up my welder:
Step-by-Step Setup Process
- Secure your cylinder: Chain your gas cylinder to a wall or cart. A full cylinder contains high-pressure gas and can be dangerous if tipped over.
- Inspect your connections: Check all O-rings and fittings. Replace any damaged seals before connecting gas.
- Connect the regulator: Hand-tighten the regulator to the cylinder valve, then give it a snug turn with a wrench. Don’t overtighten.
- Open the cylinder valve slowly: Stand to the side of the regulator (not in front) and open the valve one turn. The high-pressure gauge should jump to your cylinder pressure (around 2000 PSI if full).
- Set your flow rate: With the cylinder open, adjust the flow control knob until your desired CFH reading shows on the flow meter. Start with 15-20 CFH for most applications.
- Test your gas flow: Trigger the MIG gun for 2-3 seconds and watch the flow meter ball. It should drop slightly then return to your setting. If it doesn’t return, you may have a leak.
- Check for leaks: Mix some dish soap with water and brush it over all connections. Bubbles indicate a leak that needs to be fixed before welding.
Nozzle Size and Gas Flow
Your nozzle size directly affects how much gas you need. I’ve created this reference based on my experience:
| Nozzle Size | Recommended Flow (CFH) | Best Applications |
|---|---|---|
| 3/8″ (small) | 10-15 CFH | Thin material, tight spaces, short-circuit transfer |
| 1/2″ (standard) | 15-25 CFH | General purpose welding, most common size |
| 5/8″ – 3/4″ (large) | 25-40 CFH | Thick material, spray transfer, high-amperage welding |
| Gas Lens Nozzle | 20-30 CFH (typically) | TIG primarily, improves gas coverage for critical welds |
Match your nozzle to your work. Using a tiny nozzle with high flow creates turbulence and wastes gas. Using a giant nozzle with low flow doesn’t provide any benefit and just gets in your way.
Environmental Factors That Affect Gas Flow
Where you weld matters as much as what you weld. I’ve learned to adjust my settings based on conditions.
Indoor vs Outdoor Welding
Indoor welding in still air allows the lowest gas flow settings. Your shielding gas can blanket the weld area without interference.
Outdoor welding requires more gas. I add 10-15 CFH to my normal settings when welding outside. Even on seemingly calm days, small air currents can disrupt your gas coverage.
For really windy days, consider creating a wind break. I’ve used welding blankets, tarps, and even my truck to block wind when necessary. Alternatively, switch to flux-core wire which doesn’t require shielding gas.
Shop Ventilation
Strong exhaust fans near your welding area can pull away shielding gas just like wind. I’ve seen porosity issues caused by fans that were 15 feet away from the weld.
Position yourself so ventilation doesn’t blow directly across your weld path. If you can’t reposition, increase your gas flow by 5-10 CFH to compensate.
Troubleshooting Gas Flow Problems
After helping dozens of welders diagnose their weld issues, I’ve found that gas flow problems are often misdiagnosed as something else. Let me help you identify the real culprit.
Porosity: The Number One Symptom
Porosity shows up as small holes or bubbles in your finished weld. It’s almost always caused by gas coverage issues.
| Symptom | Likely Cause | Solution |
|---|---|---|
| Random small holes throughout weld | Gas flow too low | Increase flow by 3-5 CFH |
| Porosity at edges of weld | Gas flow too high (turbulence) | Decrease flow by 5-10 CFH |
| Consistent porosity on one side | Draft or wind | Reposition or increase flow |
| Sudden porosity mid-weld | Gas ran out or leak developed | Check cylinder and connections |
Common Mistakes I See
Setting flow based on PSI: I’ve watched welders set their regulator to “20 PSI” thinking this equals 20 CFH. These are completely different measurements. Get a flow meter if your regulator only shows PSI.
Ignoring nozzle condition: Spatter buildup inside your nozzle disrupts gas flow. Clean your nozzle regularly and replace it when the interior gets rough or coated with spatter.
Extending the gun too far: Holding the MIG gun too far from the work (more than 1/2 inch) reduces gas coverage effectiveness. Keep your contact tip 1/4 to 3/8 inch from the metal.
Welding with wind: Even a light breeze can disrupt your gas coverage. I learned this the hard way welding a gate frame on a breezy day. Use wind breaks or switch to flux-core when you can’t control the air flow.
The Venturi Effect: When More Gas Makes Things Worse
This is counterintuitive but important. When gas flows too fast through your nozzle, it creates a low-pressure area that pulls surrounding air into the weld zone through the venturi effect.
Venturi Effect: A phenomenon where fast-moving fluid creates a pressure drop that pulls in surrounding fluid. In welding, excessive gas flow pulls air into the weld area, causing porosity despite having plenty of gas flow.
I’ve seen this countless times. A welder experiences porosity, cranks up the gas, and the problem gets worse. The solution is often to reduce gas flow, not increase it.
Stay under 40 CFH for most applications. Exceeding this usually causes more problems than it solves unless you’re welding in significant wind or using large nozzles for spray transfer.
Gas Consumption and Cost Considerations
Understanding gas consumption helps you plan your projects and budget. After tracking my usage over several years, here’s what I’ve found:
A standard 80 cubic foot cylinder of 75/25 gas will last approximately 3-4 hours of continuous welding at 20 CFH. For weekend project work, this typically means 2-3 months of casual use.
At 30 CFH (common for outdoor work), that same cylinder lasts about 2-2.5 hours of welding time. The higher flow rate consumes gas 50% faster.
For high-volume users, larger cylinders (125, 150, or 250 cubic feet) provide significantly better value per cubic foot of gas. The upfront cost is higher, but the refill cost per hour of welding is considerably lower.
Advanced Gas Flow Topics
Temperature Effects on Gas Flow
Cold weather affects your gas flow. In temperatures below 40degF, gas density increases, which can slightly reduce effective flow. I bump my settings up by 2-3 CFH when welding in unheated garages during winter.
Conversely, hot weather can cause regulators to read slightly high due to gas expansion. This effect is minor but worth noting for precision work.
CO2 Regulator Freeze Issues
CO2 cools significantly as it expands from liquid to gas in your cylinder. During heavy use, this can cause your regulator to freeze up, reducing or stopping gas flow.
Symptoms include the flow meter reading dropping during welding or frost forming on the regulator. If this happens, take breaks to let the regulator warm up, or consider using an argon/CO2 mixture which doesn’t have this issue.
Summary: Getting Your Settings Right
After everything I’ve covered, here’s the practical takeaway: start with 15-20 CFH for most indoor MIG welding with 75/25 gas on mild steel. Adjust based on your specific conditions.
Increase flow for: outdoor welding, drafty areas, larger nozzles, aluminum, or helium blends.
Decrease flow for: small nozzles, thin materials, or if you notice porosity at weld edges (indicating turbulence).
The key is finding the sweet spot where you have enough gas to shield the weld but not so much that you create turbulence. Once you find it for your typical setup, you’ll consistently produce clean, porosity-free welds.
Frequently Asked Questions ?
What pressure should my MIG gas be set at?
MIG welding gas should be set by flow rate (CFH), not pressure. For mild steel indoors with 75/25 argon/CO2, set your flow meter to 15-20 CFH. The PSI reading on your regulator shows cylinder pressure, not your welding setting.
What is the gas pressure for MIG welding 75/25?
For 75/25 argon/CO2 mixture, set your flow meter to 15-20 CFH for most indoor welding applications. The bottle pressure will read around 2000 PSI when full, but this is not your welding setting.
What should I set my MIG welding regulator to?
Set your flow meter to 15-20 CFH for general mild steel welding with 75/25 gas. If using pure CO2, set to 10-15 CFH. For aluminum with pure argon, set to 30-35 CFH. Always trigger the gun briefly to verify the reading stabilizes at your chosen setting.
What PSI should argon MIG have?
Your argon cylinder pressure will be around 2000-2200 PSI when full and drops as you use gas. This is NOT your welding setting. Set your flow meter to 15-20 CFH for 75/25 mix or 30-35 CFH for pure argon on aluminum. The PSI gauge only tells you how much gas remains.
Is 100% argon ok for MIG welding?
100% argon works for aluminum MIG welding but is NOT suitable for steel welding. Steel requires either 75/25 argon/CO2 or 100% CO2. Using pure argon on steel creates an unstable arc and poor weld penetration. Always match your gas to your material.
Can I use 75 argon 25 co2 to weld aluminum?
No, 75/25 argon/CO2 will not work properly for aluminum MIG welding. Aluminum requires 100% argon or argon/helium blends. The CO2 in the 75/25 mix contaminates aluminum welds and creates poor results. Use pure argon for aluminum welding.
What causes porosity in MIG welding?
Porosity is caused by atmospheric contamination of the weld pool. Common causes include gas flow too low (insufficient coverage), gas flow too high (turbulence pulling in air), wind or drafts, worn nozzle or contact tip, contaminated base metal, or improper welding technique. Check your gas flow first, then eliminate drafts and verify your equipment condition.
How do I know if my gas flow is too high?
Signs of excessive gas flow include porosity at the weld edges (from turbulence), excessive gas noise when welding, frost forming on the nozzle, and faster gas cylinder consumption. If you see porosity at weld edges, try reducing your flow by 5-10 CFH. Too much gas can be as problematic as too little.
Leave a Reply