Aluminum welding opens up incredible possibilities for lightweight, corrosion-resistant fabrication. I’ve spent the past 15 years welding everything from steel structural beams to delicate aluminum sheet, and here’s what I’ll tell you upfront: aluminum behaves differently than steel. The first time I tried to weld aluminum with my steel MIG setup, I created a bird’s nest of tangled wire and a porous mess. But once you understand how aluminum handles heat and how to properly prepare it, aluminum welding becomes manageable and even enjoyable.
Yes, aluminum is more challenging to weld than steel, but definitely weldable with the right equipment and technique. Aluminum has much higher thermal conductivity (conducts heat 3-5x faster than steel) and forms an oxide layer that melts at a much higher temperature than the base metal. These properties make aluminum sensitive to heat input and require thorough cleaning. MIG welding with a spool gun or TIG welding with AC current are the two most effective methods for aluminum.
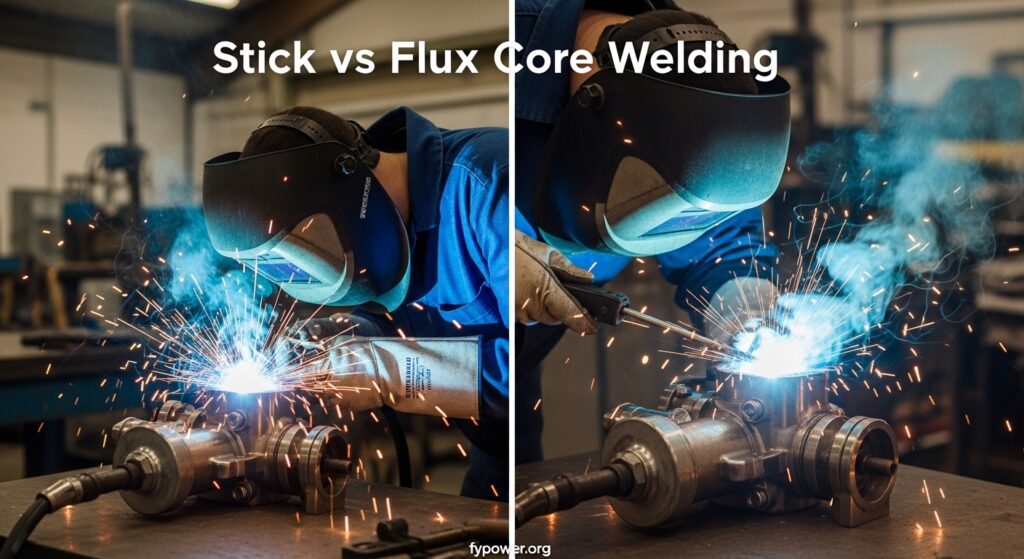
In this guide, I’ll walk you through everything you need to know to successfully weld aluminum, based on real experience working with automotive body panels, boat repairs, and custom fabrication projects. These industrial welding applications show how aluminum welding is used in manufacturing everything from heavy equipment to precision components.
Why Aluminum Welding is Different from Steel?
Understanding why aluminum behaves differently than steel will save you frustration. After ruining $200 worth of aluminum sheet on my first attempts, I learned these differences the hard way.
Thermal Conductivity: Aluminum conducts heat 3-5 times faster than steel. This means heat spreads rapidly away from your weld zone, requiring higher amperage and faster travel speeds. The heat doesn’t stay concentrated like it does with steel.
The second major difference is the oxide layer. Aluminum naturally forms a thin oxide coating when exposed to air. This oxide melts at approximately 3,700°F, while the aluminum underneath melts at only 1,200°F. If you don’t remove this oxide layer, you’ll be trying to weld through a crust that won’t melt until your base metal has turned into a puddle.
Aluminum also has a much lower melting point than steel (1,220°F vs 2,500°F for mild steel). Combined with high thermal conductivity, this creates a narrow window between “not enough heat” and “burned through completely.” I’ve watched aluminum go from solid to dripping through the backside in seconds.
Quick Summary: Aluminum conducts heat rapidly, forms a high-melting oxide layer, and has a low melting point. These three factors make aluminum welding unforgiving of improper technique but rewarding once mastered.
Preparation and Cleaning: The Critical First Step
To prepare aluminum for welding: (1) Remove oil, grease, and contaminants with acetone or alcohol, (2) Use a dedicated stainless steel brush to remove the oxide layer, brushing only in one direction, (3) Clean immediately before welding since oxide reforms within hours, (4) Ensure tight joint fit-up with no gaps, (5) Clamp securely to prevent movement during welding.
I can’t stress this enough: 80% of aluminum welding success happens before you ever strike an arc. In my experience, poor preparation causes more aluminum weld failures than all other factors combined. After working with hundreds of students and fabricators, I’ve seen that skipping cleaning steps always results in porosity, lack of fusion, or both.
Step-by-Step Aluminum Cleaning Checklist
- Degrease the surface: Wipe both sides of the joint with acetone, alcohol, or a dedicated aluminum cleaner. This removes oils, lubricants, and handling contaminants. I use acetone on a clean rag and wipe until the rag comes away clean. Don’t skip this step—even clean-looking aluminum has invisible oils from manufacturing and handling.
- Remove the oxide layer: Use a stainless steel brush dedicated only to aluminum (never use a brush that’s touched steel or you’ll embed iron particles). Brush firmly in one direction only, not back and forth. The one-direction brushing helps sweep oxide away rather than redistributing it. Brush until you see shiny, clean aluminum exposed.
- Brush inside the joint: If you’re welding a butt joint or tee joint, make sure to brush the surfaces that will be in contact. The oxide layer inside the joint will cause lack of fusion if left untouched. I’ve seen countless beautiful-looking welds that had zero penetration because the joint surfaces weren’t properly cleaned.
- Final solvent wipe: After brushing, do a final quick wipe with clean solvent to remove any oxide particles or debris from brushing. This step takes 30 seconds and prevents contamination in your weld pool.
- Weld immediately: The oxide layer begins reforming immediately after cleaning. For critical welds, clean and weld within 30 minutes. For general fabrication, try to weld within a few hours. If more than 4 hours have passed, re-clean the surface.
- Joint fit-up: Aluminum expands significantly when heated. A tight fit-up before welding becomes a gap as the metal heats. I prefer a slight root gap (about the thickness of a dime) for butt joints to account for thermal expansion. Use clamps liberally—aluminum moves more than steel when heated.
Marine Repair
DIY Fabrication
MIG Welding Aluminum: Process and Techniques
MIG welding aluminum is the faster option and works well for material thicknesses from 1/8 inch up to 1/2 inch or more. It’s the go-to process for production work, thicker aluminum, and situations where speed matters more than appearance. I use MIG for boat trailer repairs, aluminum toolboxes, and structural fabrications where TIG would take too long.
Do You Need Special Equipment for MIG Aluminum?
Yes, standard steel MIG welding equipment won’t work well for aluminum. Here’s what you need:
Spool Gun: A specialized MIG gun that holds a small spool of wire (typically 4 inch or 1 pound) right at the gun. This eliminates the long cable feed path that causes aluminum wire to birdnest due to its softness. Spool guns are essential for MIG welding aluminum with most standard welders.
The challenge with MIG welding aluminum is wire feeding. Aluminum wire is soft and has low column strength. When you try to push it through a 10-15 foot MIG gun cable, it tends to tangle, creating what’s called a “birdnest” at the drive rolls. This is why a spool gun or push-pull system is mandatory for most applications.
You’ll also need 100% argon shielding gas. Never use the C25 mixed gas (75% argon, 25% CO2) that you use for steel. CO2 reacts with aluminum and creates poor welds. Pure argon provides proper shielding and arc characteristics for aluminum MIG welding.
Aluminum MIG Welding Settings
| Material Thickness | Wire Size | Voltage | Wire Speed (IPM) | Gas Flow (CFH) |
|---|---|---|---|---|
| 1/16 inch (1.6mm) | 0.030″ | 16-18V | 220-280 | 20-25 |
| 1/8 inch (3.2mm) | 0.035″ | 18-21V | 280-340 | 20-25 |
| 3/16 inch (4.8mm) | 0.035″ | 21-24V | 340-400 | 25-30 |
| 1/4 inch (6.4mm) | 0.045″ | 23-26V | 350-420 | 25-30 |
IPM: Inches Per Minute – the speed at which the wire feeds from the MIG gun. Higher IPM means more wire (and thus more filler metal) is being deposited into the weld.
MIG Aluminum Technique: The Push Method
Unlike steel MIG welding where you can push or pull the gun, aluminum MIG welding requires the push technique. Angle the gun 10-15 degrees forward (pushing direction) so the gas flow is ahead of the arc. This helps the shielding gas cover the weld pool before contamination can occur and provides better cleaning action.
I recommend a spray transfer mode for most aluminum MIG applications. This means using voltage and wire speed high enough that the wire transfers across the arc as fine droplets rather than short-circuiting. Spray transfer produces a smooth, clean weld with less spatter and better penetration. You’ll recognize spray transfer by the characteristic hissing sound and lack of crackling.
Travel speed should be faster than you’d use for steel. Aluminum’s high thermal conductivity means the heat dissipates quickly, so you need to keep moving. If you move too slowly, you’ll experience burn-through, especially on thinner materials. I often run travel speeds 30-50% faster for aluminum compared to similar thickness steel.
TIG Welding Aluminum: Process and Techniques
TIG welding aluminum produces the cleanest, most precise welds and is the preferred method for thin materials, critical joints, and applications where weld appearance matters. I use TIG for aluminum automotive body work, thin sheet fabrication, and any weld that will be visible on the finished product. The control TIG offers is unmatched, but it requires more skill and practice than MIG.
AC TIG: The Secret to Aluminum
TIG welding aluminum requires alternating current (AC), unlike steel TIG which uses DC. The alternating current performs two crucial functions: during the electrode positive (EP) half-cycle, the arc blasts away the aluminum oxide layer; during the electrode negative (EN) half-cycle, heat focuses into the workpiece and melts the base metal. This cleaning and penetration balance is what makes AC TIG work for aluminum.
AC Balance: The ratio of time spent in the cleaning (EP) phase versus the penetration (EN) phase during AC TIG welding. A balance of 70% EN / 30% EP is typical for most applications. More cleaning action helps with dirty material but reduces penetration and increases heat input.
Modern inverter TIG welders offer adjustable AC balance and frequency settings. For general aluminum welding, I start with 70% EN (penetration) / 30% EP (cleaning) and adjust from there. If you’re welding material with heavy oxidation or contamination, increase the cleaning side. If you need maximum penetration or are welding thicker material, shift toward more penetration.
Aluminum TIG Filler Metal Selection
| Filler Type | Best For | Characteristics |
|---|---|---|
| ER4043 | General fabrication, 6XXX series aluminum | Easier to use, crack-resistant, lower melting point, silvery appearance after welding |
| ER5356 | 5XXX and 6XXX series, structural applications | Higher strength, better ductility, slightly harder to feed, requires higher amperage |
| ER4047 | Cast aluminum, high-silicon alloys | 12% silicon content, excellent for casting repair, low melting point |
| ER5556 | High-strength applications, 5XXX series | Maximum strength, specialty structural use |
For most general aluminum fabrication, ER4043 filler is the go-to choice. It flows nicely, is more forgiving of less-than-perfect cleaning, and produces a clean-looking weld. I keep 4043 rods in 1/16 inch and 3/32 inch diameters for different material thicknesses. Use 1/16 inch for material up to 3/16 inch thick, and step up to 3/32 inch for thicker material.
TIG Aluminum Technique Tips
Establishing and maintaining an arc on aluminum takes practice. The high thermal conductivity means the heat wants to dissipate quickly. I recommend starting on a scrap piece of the same thickness to establish your amperage setting. The ideal amperage will create a small, shiny puddle that forms within 1-2 seconds of establishing the arc.
Add filler rod by dipping it into the leading edge of the puddle, not the center. This ensures proper mixing and prevents the rod from sticking or balling up. I hold the rod at about a 45-degree angle to the workpiece and feed it rhythmically as I move the torch forward.
Foot pedal control is your friend for aluminum TIG. The ability to vary heat on the fly helps manage the narrow temperature window. I’ll often start slightly hotter to establish the puddle, then back off the pedal as I progress. For aluminum TIG, I generally run 10-20% higher amperage than I would for similar thickness steel.
Keep your arc length tight—about 1/8 inch or slightly less. Aluminum’s high thermal conductivity means the arc wants to wander. A tight arc keeps the heat focused and prevents the tungsten from getting contaminated by touching the filler rod or workpiece.
MIG vs TIG for Aluminum: Which Should You Choose?
Choosing between MIG and TIG for aluminum depends on your application, material thickness, and skill level. After welding aluminum with both processes for various projects, here’s my practical comparison:
| Factor | MIG (Aluminum) | TIG (Aluminum) |
|---|---|---|
| Speed | Fast, good for production | Slower, more precise control |
| Skill Required | Moderate – easier to learn | High – requires more practice |
| Best Thickness | 1/8 inch and thicker | Any thickness, excels thin material |
| Weld Appearance | Functional, may require cleanup | Clean, aesthetic, minimal post-weld |
| Equipment Cost | Moderate ($800-1500 for spool gun setup) | Higher ($1500-3000+ for AC TIG) |
| Typical Applications | Boat trailers, toolboxes, structural | Auto body, aerospace, thin sheet |
Understanding Aluminum Alloys
Not all aluminum welds the same. The aluminum alloy designation system uses a four-digit number that tells you about the material’s composition and characteristics. Understanding these designations helps you choose the right filler and welding approach.
| Series | Alloy Type | Weldability |
|---|---|---|
| 1XXX | Pure aluminum (99%+) | Excellent – very weldable |
| 2XXX | Copper (high strength) | Poor – crack-sensitive, avoid welding |
| 3XXX | Manganese | Excellent – very weldable |
| 4XXX | Silicon (filler metals) | Good – used as filler, not base |
| 5XXX | Magnesium (marine grade) | Excellent – very weldable |
| 6XXX | Magnesium + Silicon (structural) | Good – weldable with proper filler |
| 7XXX | Zinc (aircraft grade) | Fair to Poor – crack-sensitive |
The most common aluminum alloys you’ll encounter are 6061 (structural extrusions, tubing) and 5052 (marine and sheet applications). Both weld well with proper technique and filler selection. For 6061, use 4043 or 5356 filler. For 5052, stick with 5356 for best results.
2XXX and 7XXX series alloys are considered generally unweldable. These high-strength aerospace alloys become crack-sensitive when welded. If you need to join these materials, consider mechanical fastening or other fabrication methods instead of fusion welding.
Common Problems and Troubleshooting
Even experienced welders encounter issues with aluminum. Understanding what causes problems and how to fix them will save you frustration. After troubleshooting hundreds of aluminum weld failures, I’ve found that most issues trace back to a few root causes.
Porosity: The Most Common Aluminum Weld Defect
Porosity in aluminum welds is caused by trapped gas or contaminants. Common causes include: dirty base material (insufficient cleaning), contaminated filler wire, moisture in the wire, insufficient gas flow, gas shielding disrupted by drafts, or too long arc length. Fix by: thorough cleaning with acetone and stainless brush, using fresh dry wire, increasing gas flow to 20-25 CFH, shielding from drafts, and maintaining proper arc length.
Porous aluminum welds look like Swiss cheese with small voids throughout the bead. These voids weaken the weld and can lead to failure. In my experience, porosity is almost always a cleaning issue. I’ve rescued many porous welds simply by stopping, re-cleaning the joint thoroughly, and starting fresh.
Burn-Through
Aluminum’s narrow temperature window makes burn-through common, especially on thin materials. Signs include holes in the workpiece, excessive penetration, or a sagging backside. Causes include: travel speed too slow, amperage too high, improper joint fit-up, or inadequate heat sinking.
To fix burn-through on thin aluminum, increase travel speed, reduce amperage, use a copper backing bar to sink heat, or switch to a smaller diameter filler wire. For sheet metal thinner than 1/16 inch, TIG welding with pulsed settings helps manage heat input.
Lack of Fusion
Lack of fusion occurs when the weld metal doesn’t properly merge with the base metal, creating a weak joint. It’s often invisible from the surface but shows up in cross-section. Causes include: too cold amperage, travel speed too fast, oxide layer not removed, or improper joint preparation.
The fix is ensuring thorough cleaning (especially inside the joint), using proper amperage for the material thickness, and maintaining appropriate travel speed. I’ve seen countless aluminum welds that looked great from the outside but had zero penetration because the joint surfaces weren’t brushed before assembly.
Cracking
Cracking in aluminum welds can occur immediately (hot cracking) or over time (stress cracking). Causes include: wrong filler metal selection, excessive restraint, improper joint design, or welding crack-sensitive alloys. Using 4043 filler (more crack-resistant than 5356) and ensuring proper joint fit-up with some flexibility helps prevent cracking.
Wire Feeding Problems (MIG)
Birdnesting, wire slipping, and inconsistent feeding plague aluminum MIG welding. Causes include: incorrect drive roll tension, worn liner, wrong contact tip size, or using wire that’s too small for your application. Ensure you’re using U-groove drive rolls for aluminum (not V-groove), check liner condition regularly, and size your contact tip appropriately (wire diameter + 0.015-0.030 inch).
Safety Considerations for Aluminum Welding
Aluminum welding presents specific safety considerations beyond standard welding precautions. The lower melting point means you’ll be working with higher amperage, which increases electrical shock risk. Always inspect your cables and connections before welding aluminum.
Aluminum welding produces intense UV radiation due to the high amperage required. Use a welding helmet with at least shade 11-13 for MIG and shade 10-12 for TIG. I’ve seen welders get “arc flash” from aluminum welding faster than from steel because of the brighter arc.
Proper ventilation is critical. Aluminum welding fumes contain oxides and potentially magnesium from the base metal. Use local exhaust ventilation when possible, and always weld in a well-ventilated area. If you’re welding in a confined space, respiratory protection is mandatory.
For mobile welding operations or remote job sites, you may need welding power generators to run your equipment. Always ensure proper power supply setup before beginning any welding project.
Frequently Asked Questions
Is aluminum hard to weld?
Yes, aluminum is more challenging to weld than steel due to its high thermal conductivity and oxide layer. However, with proper equipment (spool gun for MIG, AC capability for TIG), thorough cleaning, and appropriate technique, aluminum welding becomes very manageable. The learning curve is steeper than steel but rewarding once mastered.
What is the best welding process for aluminum?
TIG welding produces the highest quality, cleanest welds and is best for thin materials and applications where appearance matters. MIG welding is faster and better suited for thicker materials and production work. For most DIY and fabrication work, MIG with a spool gun offers the best balance of speed and quality. TIG is preferred for automotive body work and precision fabrication.
Can you weld aluminum with a MIG welder?
Yes, MIG welding aluminum is possible and very effective with the right equipment. You need either a spool gun or push-pull gun to handle the soft aluminum wire, 100% argon shielding gas, and DCEP polarity. Standard steel MIG setups won’t work well due to wire feeding issues. A spool gun setup typically costs $800-1500 in addition to your welder.
Do you need special equipment to weld aluminum?
For MIG welding, yes – you need a spool gun or push-pull system ($800-1500), 100% argon gas, aluminum wire, and U-groove drive rolls. For TIG welding, you need an AC-capable TIG welder, argon gas, and aluminum filler rods. Additionally, you need stainless steel brushes dedicated to aluminum, acetone or alcohol for cleaning, and proper clamps. The cleaning supplies are just as important as the welding equipment.
What gas is used for aluminum welding?
100% argon is the standard shielding gas for both MIG and TIG welding aluminum. For thicker aluminum (over 1/2 inch), some welders use an argon-helium blend for better penetration and higher heat input. Never use CO2 or mixed gases containing CO2 – they react with aluminum and create poor welds. Typical gas flow rate is 20-25 cubic feet per hour (CFH) for most applications.
How do you prepare aluminum for welding?
Aluminum preparation requires: (1) Remove oils and contaminants with acetone or alcohol, (2) Use a dedicated stainless steel brush to remove the oxide layer, brushing only in one direction, (3) Clean inside the joint surfaces, (4) Do a final solvent wipe to remove debris, (5) Weld immediately – oxide reforms quickly, (6) Ensure proper joint fit-up with clamps. Cleaning accounts for about 80% of aluminum welding success.
What polarity for MIG welding aluminum?
DCEP (Direct Current Electrode Positive), also called reverse polarity, is required for MIG welding aluminum. This polarity provides the cleaning action needed and proper heat distribution. Your MIG welder should have polarity terminals that can be switched – the ground lead connects to the positive terminal and the gun lead to the negative terminal when set up for aluminum MIG welding.
What filler rod for TIG welding aluminum?
ER4043 is the most common and versatile filler for general aluminum fabrication – it’s easier to use, crack-resistant, and works well with 6XXX series aluminum. ER5356 provides higher strength and is better for 5XXX and 6XXX series alloys, especially in structural applications. ER4047 is specialized for cast aluminum repairs. Match your filler to your base material when possible, and use 4043 as your all-purpose choice.
Can you weld aluminum with a stick welder?
Yes, but it’s difficult and limited. Aluminum stick welding requires specialized aluminum electrodes (typically DCEN polarity), is very sensitive to technique, produces heavy slag, and requires extensive cleaning. It’s primarily used for field repairs where MIG or TIG aren’t available. For any quality work or beginner applications, stick welding aluminum is not recommended. The results are generally poor compared to MIG or TIG.
Why is my aluminum weld porous?
Porosity is caused by gas or contaminants trapped in the solidifying weld. Common causes: dirty base material (clean with acetone and stainless brush), contaminated or moisture-laden wire, insufficient shielding gas coverage, drafts disrupting gas flow, or too long arc length. Fix by: thorough cleaning immediately before welding, using fresh dry wire, increasing gas flow to 20-25 CFH, shielding work area from drafts, and maintaining proper arc length of about 1/8 inch.
What speed should I MIG weld aluminum?
Aluminum MIG welding requires faster travel speeds than steel – typically 30-50% faster. The exact speed depends on material thickness and your settings, but you should be moving steadily to keep up with the heat input. A good starting point for 1/8 inch aluminum is around 25-35 inches per minute. If you’re experiencing burn-through, increase speed. If you’re getting lack of fusion, slow down slightly.
Can you weld aluminum to steel?
No, you cannot directly fusion weld aluminum to steel – they have vastly different melting points and thermal properties. The joint would fail immediately. Options for joining aluminum to steel include: mechanical fasteners (bolts, rivets), adhesive bonding with specialized epoxies, or using bimetallic transition inserts that are pre-welded on both sides. Always choose the appropriate joining method based on your application requirements.
What causes black soot when welding aluminum?
Black soot or oxidation during aluminum welding typically indicates improper AC balance (TIG), insufficient gas coverage, or contamination. For TIG, try increasing the cleaning portion of AC balance or check that your gas is flowing properly. For MIG, ensure you’re using 100% argon and check for gas leaks. Soot can also indicate base material contamination – clean thoroughly with acetone and a fresh stainless brush before welding.
Is AC or DC better for welding aluminum?
AC (Alternating Current) is required for TIG welding aluminum – the electrode positive half-cycle cleans the oxide layer while the electrode negative half-cycle provides penetration and heat. DCEN (Direct Current Electrode Negative) is used for TIG welding steel. For MIG welding aluminum, you use DCEP (Direct Current Electrode Positive), which is different from TIG and provides the necessary cleaning action for the MIG process.
What is the thinnest aluminum you can weld?
With TIG welding, experienced welders can weld aluminum as thin as 0.020 inch (about 22 gauge) using pulsed settings and precise heat control. For MIG welding, the practical minimum is around 1/16 inch due to heat input challenges. Thin aluminum requires fast travel speeds, lower amperage, and often pulse welding capabilities. Beginners should start with material at least 1/8 inch thick to develop technique before progressing to thinner material.