Just as the heart needs a steady pulse to keep the body functioning, your Honda GCV190 engine requires an accurately gapped spark plug for optimal performance.
You’re not just a Honda owner; you’re part of a community that values precision and reliability.
This guide is crafted especially for you, offering insights into the Honda GCV190 spark plug gap, number, and socket size tailored specifically for your engine’s needs.
We’ll delve deep into the technical elements, translating complex jargon into understandable terms.
By following this guide and ensuring proper maintenance of your beloved machine’s ignition system, you embark on a journey to prolong its life and enhance its performance.
So gear up as we navigate through the intricate world of spark plugs in our trusted Honda GCV190 engines together – because maintaining your vehicle isn’t merely about getting from point A to B; it’s about celebrating our shared commitment to quality and excellence.
Key Takeaways
The recommended spark plug for Honda GCV190 is BPR6ES (NGK) 98079-56846 for pressure washer applications or BPR5ES (NGK) 98079-55846 for all other applications.
The spark plug gap size should be 0.028″– 0.030″ for optimal engine performance.
A 13/16′ (or 21mm) socket size is recommended by Honda for the GCV190 engine spark plug.
Using the correct spark plug number and socket size helps maintain engine efficiency and power output while avoiding damage to the plug, threads, or cylinder head.
When it comes to your Honda GCV190, it’s crucial to remember that the recommended spark plug is either BPR6ES (NGK) 98079-56846 for pressure washer applications or BPR5ES (NGK) 98079-55846 for all other applications, with a gap size of 0.028″– 0.030″.
This specific detail ensures optimal engine performance and longevity. As an enthusiast of Honda vehicles, you’ll appreciate the precision and thoughtfulness behind these recommendations. The correct spark plug number helps maintain the engine’s efficiency and contributes significantly to its overall power output.
Remember, using the right spark plug number isn’t just about adhering to manufacturer guidelines; it’s about being part of a community that values quality and reliability above all else.
Now let’s talk about the gap size – this seemingly insignificant measure carries immense importance in your vehicle’s operation. A correctly gapped spark plug improves fuel economy, reduces emissions, and provides smooth running conditions for your beloved Honda GCV190.
So next time when you’re geared up for maintenance work on your Honda GCV190 engine, ensure you have the right spark plugs with appropriate numbers and gaps as per official recommendations. After all, being meticulous in these matters truly defines our shared sense of belonging to this exceptional automotive brand.
You’ll need a 13/16′ (or 21mm) tool to fit your engine’s spark plug snugly. Honda recommends this socket size for the GCV190 engine.
Using the correct socket size when removing or installing spark plugs is crucial, as using an incorrect one may damage the plug, its threads, or even the cylinder head.
Here are some essential points about selecting and using a proper tool:
The right socket will grip your spark plug well while avoiding any unnecessary force.
Spark plug sockets are specially designed with rubber inserts to protect the ceramic insulator of the plug.
Always remember to hand-tighten your spark plugs first before using a wrench or ratchet.
Over-tightening can cause damage, so it’s advisable to use a torque wrench if available.
Lastly, make sure that you have a good quality socket set that fits correctly and won’t slip.
When dealing with such small yet vital components as spark plugs in your Honda GCV190 engine, precision matters. So ensure you’re armed with not just the appropriate knowledge but also with the correct tools for efficient and safe maintenance tasks.
What are some common signs of a faulty spark plug in a Honda GCV190?
You might notice poor fuel efficiency, inconsistent power, or a rough idle in your Honda GCV190. Difficulty starting the engine and misfires can also indicate you have a faulty spark plug.
How often should I replace the spark plug in my Honda GCV190?
As a rule of thumb, you should replace your Honda GCV190’s spark plug every season or after 250 hours of use, whichever comes first. Regular maintenance ensures optimal performance and longevity of your engine.
Just like preparing a gourmet meal, replacing your Honda GCV190 spark plug requires careful steps. First, cool the engine. Then, use a spark plug socket to remove the old one and screw in a new one gently.
What other maintenance should I be doing regularly for my Honda GCV190?
Regularly check your Honda GCV190’s oil level, air filter, and blades. Make sure you’re using fresh fuel with a stabilizer. Don’t forget to clean the mower deck and lubricate the cables frequently for optimal performance.
Are there any specific brands of spark plugs recommended for the Honda GCV190?
“Interestingly, 80% of Honda GCV190 owners prefer NGK spark plugs. You’re in good company! NGK’s high performance and durability make them a top choice. They’re specifically designed for optimal engine functioning.”
Conclusion
So, you’ve hung on every word. You’ve learned the ins and outs of your Honda GCV190’s spark plug gap, number, and socket size.
With this knowledge at your fingertips, you’re ready to tackle any issue that comes your way. But remember, there’s always more to learn in the world of Honda maintenance.
Did you know that 75% of small engine problems are caused by the spark plug? That’s right, your Honda GX270 is no exception.
This guide will walk you through the ins and outs of its Honda GX270 spark plug gap, number, and socket size. You’ll get to know how vital these tiny components are to your equipment’s performance and longevity.
We’ve broken down complex technical jargon into easy-to-understand language so you can feel confident in maintaining your Honda GX270 on your own. With this knowledge, you will become more self-sufficient and part of an empowered community of DIY mechanics who take pride in understanding their machinery better.
So let’s make sure our engines run smoothly by taking a deep dive into the world of spark plugs!
Key Takeaways
The spark plug plays a critical role in engine performance and fuel efficiency.
The recommended spark plug for the Honda GX270 is BPR6ES (NGK) 98079-56846 / W20EPR-U (DENSO) 98079-56855 or an equivalent.
The spark plug gap should be 0.028′-0.031′ for optimal performance.
Using the correct socket size (13/16′ or 21mm) is important to prevent damage during installation or removal.
Looking for the perfect spark plug gap and number for your Honda GX270? You’re in luck because it’s a BPR6ES (NGK) 98079-56846 / W20EPR-U (DENSO) 98079-56855 or an equivalent, with a gap of 0.028′-0.031′.
That’s right! According to the official manuals from Honda, this specific type and size are highly recommended.
The spark plug plays a critical role in your engine’s performance, igniting the air-fuel mixture within the combustion chamber. The specified types, BPR6ES by NGK and W20EPR-U by DENSO, ensure efficient ignition due to their high-quality design and material composition. They deliver reliable performance under various operating conditions, making them ideal for your Honda GX270.
When it comes to the gap – that small space between the center and ground electrode – precision is key. A gap of 0.028′-0.031′ allows for optimal spark generation leading to smooth engine operation and fuel efficiency. Too small or too large a gap can lead to poor engine performance or even damage.
Keep in mind that using equivalent plugs is completely acceptable as long as they match up with these specifications. However, sticking with these precise instructions ensures that you’re part of an exclusive club that fully optimizes its Honda engines’ potential without compromise.
For your GX270, you’ll need a 13/16′ (or 21mm) socket to fit and install the recommended spark plug properly. This isn’t just any random measurement; it’s specifically tailored to the dimensions of the spark plug, which is why it’s critical for ensuring a perfect fit.
A well-fitted socket helps prevent damage during installation or removal, such as stripping or cracking the ceramic insulator of the spark plug.
You might wonder why this specific size matters so much. Well, an improperly sized socket can lead to over-tightening or under-tightening of the spark plug. Over-tightening could cause damage to the threads on either your engine head or spark plug, while under-tightening could lead to poor engine performance due to incomplete combustion.
Remember, when it comes to working on engines like your Honda GX270, precision is key. Using a 13/16′ (21mm) socket will ensure you’re able to effectively change out your BPR6ES (NGK) 98079-56846 / W20EPR-U (DENSO) 98079-56855 or equivalent spark plugs with ease and confidence.
As part of our DIY mechanics and Honda enthusiasts community, we understand that getting these details right contributes significantly towards achieving optimal performance and longevity from your Honda GX270 engine.
What is the average lifespan of a Honda GX270 spark plug?
The average lifespan of your Honda GX270 spark plug is about 200 hours of operation. However, it’s crucial to regularly inspect and replace it as needed for optimal engine performance and fuel efficiency.
How can I tell if my Honda GX270 spark plug needs to be replaced?
Like a seasoned mechanic, you’ll notice signs your spark plug needs replacing. Look for trouble starting, lack of power, poor fuel economy, or misfires. A visual check may reveal sooty deposits or electrode erosion.
Are there any specific brands of spark plugs recommended for the Honda GX270?
Yes, Honda recommends using NGK spark plugs for the GX270 model. Specifically, the NGK BPR6ES is ideal. It’s crucial to use high-quality spark plugs for optimal performance and longevity of your engine.
What potential issues can occur with the Honda GX270 spark plug?
Your Honda GX270 spark plug may face issues like fouling, misfiring, hard starting, or even engine damage if the gap is incorrectly set. Always ensure the right gap for optimal performance and longevity.
Can I use a different model’s spark plug for Honda GX270?
While you technically could use a different model’s spark plug, it’s not advisable. Different models have unique specifications, and mismatched plugs might damage your Honda GX270 engine or hinder its performance. Stick to recommended parts for safety.
Conclusion
In wrapping up, you’ve now got the lowdown on your Honda GX270’s spark plug gap and number, not forgetting the socket size.
Imagine it as a key, perfectly designed to unlock your engine’s full potential. It’s plain sailing from here – just remember these guidelines, and you’ll keep your engine firing on all cylinders!
Navigating the labyrinth of engine maintenance can feel like deciphering an alien language. But you’re not alone; we’re here to unravel the mystery.
In your hands-on journey with your Honda GX340, knowing about the spark plug gap, number, and socket size is essential. These seemingly small details play a big role in keeping your engine running smoothly and efficiently.
Spark plugs are vital for ignition – they produce the spark that ignites the air-fuel mixture inside the engine’s cylinders, setting off a chain reaction that powers your machine. The correct gap ensures optimal performance while preventing damage from misfires or incomplete combustion.
Whether you’re an experienced mechanic or just getting started on your DIY journey, this comprehensive guide will walk you through everything you need to know about Honda GX340 spark plug specifications.
So buckle up, and let’s dive into this integral part of automotive knowledge together!
Key Takeaways
The spark plug for Honda GX340 is BPR6ES-11 (NGK) 98079-56145 / W20EPR-U11 (DENSO) 98079-56155 or equivalent.
The spark plug gap should be measured with precision tools and should be between 0.039’– 0.043′.
The socket size required for installation or removal of the spark plug is 13/16′ (21mm).
NGK and DENSO offer high-quality spark plugs suitable for Honda GX340.
For your Honda GX340, you’ll need a spark plug with the number BPR6ES-11 (NGK) 98079-56145 / W20EPR-U11 (DENSO) 98079-56155 or an equivalent, and it should have a gap size of just between 0.039’– 0.043′.
This small but crucial space is where the spark ignites, initiating the combustion that drives your engine.
The accurate setting of this gap is critical to engine performance. Too large a gap may cause misfires during operation; too small can affect ignition timing. Therefore, ensure you use precision tools for precise measurement, adhering strictly to specifications laid out in the owner’s manual.
Finding an exact match for your spark plugs might seem daunting at first glance due to the numerous brands available out there. However, worry less, as NGK and DENSO offer high-quality options that are perfect fits for your engine model.
When replacing these vital components, remember also to check if you have the right socket size – 13/16′ (21mm). It’s essential because using an inappropriate socket could lead to damage during installation or removal.
You’ll find it interesting that the socket size needed for your Honda GX340 engine’s spark plug is 13/16′ (or 21mm), a common size making maintenance tasks easier.
It’s an essential detail when you’re gearing up to replace or clean your spark plugs, ensuring that you have the correct tools on hand. This socket dimension fits snugly around the hexagonal end of the spark plug, facilitating its removal and installation without causing damage.
Having a 13/16′ (21mm) socket in your toolbox allows for efficient and effective tune-ups of your engine. This size is quite standard, meaning you won’t have to hunt around for a specialized tool. Instead, you can focus on providing optimal care for your Honda GX340 engine.
Understanding these nuances about your engine enhances its performance and gives you a sense of belonging within the community of informed motor enthusiasts who take pride in their knowledge and skills.
Knowing the specificities like BPR6ES-11 type spark plug or W20EPR-U11 equivalent, along with having a clear understanding of gap measurement (.039′-.043′), elevates you from being merely an owner to being an integral part of your machine’s life cycle.
So remember, arm yourself with this knowledge and own every inch of your Honda GX340 experience!
What is the typical lifespan of a Honda GX340 spark plug?
Typically, your Honda GX340 spark plug lasts around 300 hours of use. However, this lifespan is influenced by your usage and maintenance habits. Regular checks and cleanings can extend its service life significantly.
How can I tell if the spark plug on my Honda GX340 needs to be replaced?
Check your GX340’s spark plug for signs of wear or damage. Look for a worn electrode, cracked insulator, or carbon buildup. If it misfires, has poor fuel economy, or has difficulty starting, it may need replacing.
Can I use a different brand of spark plug for my Honda GX340?
Sure, you can switch brands for your spark plug. However, it’s like swapping coffee beans – the essence remains, but the flavor changes subtly. Ensure the replacement matches Honda GX340’s specifications to maintain its performance.
How does a worn-out spark plug affect the performance of my Honda GX340?
A worn-out spark plug can seriously hamper your Honda GX340’s performance. It may cause misfires, poor fuel economy, trouble starting, and reduced power. Regularly checking and replacing spark plugs ensures your engine runs smoothly.
What are some common problems associated with the spark plug in a Honda GX340?
Common issues with your Honda GX340’s spark plug could include misfires, poor fuel economy, difficulty starting the engine, and lack of acceleration. These problems usually arise from fouled or worn-out plugs needing replacement.
Conclusion
So, you’ve got your trusty Honda GX340’s plug specs down pat, huh?
Ironically, it’s the tiny details like a spark plug gap and number that keep these beasts roaring.
You’d think something as mundane as a socket size wouldn’t matter much, but it’s everything in the world of engines! That little wrench is your key to smooth rides and pure power.
Remember to keep these golden nuggets handy for your next tune-up.
Did you know that maintaining the correct spark plug gap can increase your Honda GX690 engine’s efficiency by up to 30%? That’s a significant boost you shouldn’t ignore.
In this guide, we’ll discuss everything you need to know about your Honda GX690 spark plug, the number, the ideal gap, and even the socket size required for installation or removal.
These details are vital to keeping your engine running smoothly and efficiently, just like it belongs on top of its performance game all year round!
So gear up as we delve into these technical aspects together, ensuring you get the most out of your Honda GX690 engine’s performance.
Key Takeaways
Maintaining the correct spark plug gap can increase the efficiency of the Honda GX690 engine by up to 30%.
The recommended spark plugs for the Honda GX690 engine are BPR6ES (NGK) or W20EPR-U (DENSO), with a gap of 0.7-0.8 mm (0.028-0.031 in).
The socket size needed for spark plug installation or removal is 20.6mm or 13/16 in.
The recommended spark plug for the Honda GX690 engine is NGK ZFR5F (98079-5587G), and the socket size required is 5/8′ (16mm).
HONDA GX690 SPARK PLUG GAP & NUMBER
For your Honda GX690 engine, you’re gonna need the ZFR5F (NGK) 98079-5587G spark plug or its equivalent, with a gap size just right between 0.028′ and 0.031′.
Honda recommends this specific spark plug for the optimal performance of your machine. The number ‘ZFR5F’ signifies the model of the NGK brand spark plug, while ‘98079-5587G’ is its product code.
The set gap size plays a crucial role in your engine’s ignition system. When correctly gapped, it helps ensure efficient fuel combustion, resulting in smoother running and increased longevity of your engine. If too wide or too narrow, this could lead to misfires or decreased power output.
Now let’s talk about alternatives. Though Honda highly recommends the NGK ZFR5F for use in their GX690 engines, there may be situations where you’ll need an equivalent spark plug that can perform just as well under similar conditions. For these instances, always make sure to match not only the type but also the appropriate gap size.
Remember that proper maintenance of your spark plugs contributes significantly to overall engine health and performance. Regular inspection for wear and correct gapping should be part of your routine checks on all parts – making sure everything’s working together perfectly for you and your trusty Honda GX690 engine!
When it comes to wrenching your engine’s fiery heartbeat, you’ll need a 5/8′ (16mm) tool. This is the socket size required for the spark plug of your Honda GX690 engine. But what does this mean, exactly?
The socket size refers to the dimension of the tool socket that fits over the hexagonal part of the spark plug.
Here are some key points about this:
A 5/8′ (16mm) socket size is standard for many engines, including your Honda GX690.
Socket sizes are crucial for effective maintenance – using an incorrect size can damage both your tools and the spark plug itself.
Ensure you have a high-quality 5/8′ socket wrench or spark plug remover in your toolkit.
Spark plug sockets often come with rubber inserts to protect the ceramic part of your spark plugs during removal or installation.
Always follow manufacturer recommendations when selecting tools and equipment for engine maintenance.
Remember that even though small details like these may seem insignificant, they’re fundamental in maintaining efficient performance.
You’re not just looking after an engine; you’re caring for a vital component of something bigger: Your sense of freedom and adventure on road trips or work projects, powered by Honda’s reliable technology.
Frequently Asked Questions
What are the symptoms of a faulty spark plug in a Honda GX690 engine?
If your GX690’s spark plug is faulty, you’ll notice issues like poor fuel economy, difficulty starting the engine, inconsistent acceleration, and a rough idle. Misfiring or engine surging may also occur.
How often should the spark plug of a Honda GX690 be replaced?
You should replace the spark plug on your Honda GX690 after every 300 hours of use or once a year, whichever comes first. Regular maintenance ensures optimal engine performance and prolongs its lifespan.
Are there specific brands of spark plugs that are recommended for use in a Honda GX690 engine?
Yes, for your Honda GX690 engine, Honda specifically recommends NGK brand spark plugs. They’re designed to provide optimal performance and longevity when used in this specific model of engine.
Will use a spark plug with the wrong gap damage the Honda GX690 engine?
Yes, using a spark plug with an incorrect gap can indeed damage your Honda GX690 engine. It’s like throwing a wrench into the works – it can lead to poor performance and potential internal damage.
Can a spark plug from another engine model be used in the Honda GX690?
While it’s possible to use a spark plug from another engine model in your Honda GX690, it’s not recommended. Using the correct, specified spark plug ensures optimal performance and prevents potential engine damage.
Conclusion
So, you’ve got all the key details on your Honda GX690 spark plug. You know it’s BPR6ES (NGK) or W20EPR-U (DENSO), and it needs a 0.7-0.8 mm gap for prime performance.
You also understand that a 20.6 mm socket is necessary for removal and installation. Isn’t it great to be well-informed?
Remember, check every 100 hours and replace every 300 hours or annually to keep your engine running smoothly!
Imagine a world plunged into darkness, your home devoid of power, and the only savior is your trusty generator that hasn’t been maintained in ages. The nightmare scenario, right? Well, you’re not alone. Many folks neglect regular generator maintenance until it’s too late.
However, tuning up your generator doesn’t have to be an arduous task. It’s about understanding your machine, taking safety measures before diving in, following a comprehensive step-by-step guide for the tune-up process, and knowing what to do post-maintenance.
We’ve prepared this detailed yet easy-to-follow guide on how to tune up your generator effortlessly with handy maintenance tips and more. Let’s make sure you’re never left powerless when you need it most!
So sit back, relax, and let us take you through the journey of prolonging the life of your faithful energetic companion. After all, we’re all part of the same community where power disruptions should be kept at bay!
Key Takeaways
Regular maintenance is crucial for the longevity and peak performance of your generator.
Understanding your generator’s type and specific needs is important for effective maintenance.
Safety precautions, such as wearing safety gear and creating a safe work environment, are essential during generator maintenance.
Proper cleaning, oil changes, filter replacements, and fuel system checks are key maintenance tasks for optimal generator performance.
Importance of Regular Generator Maintenance
You might not realize it, but keeping up with regular maintenance on your generator is crucial – it’s the secret to ensuring its longevity and peak performance. With frequent use, your generator can experience wear and tear, leading to reduced efficiency. Regular tune-ups help prevent such minor issues from escalating into costly repairs or even replacements.
When you maintain your generator regularly, you keep the maintenance costs down. Minor fixes are usually inexpensive compared to major repairs that may arise due to neglect. If potential problems are caught early enough during routine checkups, they can be addressed immediately, thereby saving you from exorbitant repair bills in the future.
Another vital aspect of regular maintenance lies in preserving your warranty coverage. Many manufacturers require evidence of regular professional servicing as a prerequisite for honoring warranties. Failure to adhere to these conditions could void your warranty and leave you shouldering any repair costs alone.
Professional servicing also guarantees that all parts of your generator are working correctly, enhancing its general output quality and reliability during those times when you need it most. A well-maintained generator will provide a consistent power supply without unexpected breakdowns, leaving you in the dark or disrupting essential operations.
Think of the tuning-up process as a physical check-up for your generator, ensuring it’s in tip-top shape when you need its power the most. It’s about more than just extending your generator lifespan; it’s also about optimizing tuning efficiency and minimizing maintenance costs in the long run. The key is to be proactive, not reactive; taking action before problems arise can save you time, energy, and money down the line.
Now let’s dive into what this tune-up might look like:
Inspection: Begin with an overall visual inspection of your generator. Are there any visible signs of wear or damage? Pay particular attention to parts like the alternator and cooling system.
Cleaning: Dirt and debris can reduce your generator’s efficiency considerably over time, so cleaning is essential. This includes removing dust from air filters and oiling necessary components.
Replacement or Repair: Some parts may need replacement or repair based on your inspection findings. Always prioritize replacing worn-out parts for better performance.
Remember that every single component within your machine plays a vital role in its overall functionality – neglect one part, and you risk compromising the whole system.
Tuning up isn’t just about prolonging your machine’s life – it’s about maintaining that sense of security we all crave when it comes to our power supply needs. By caring for your equipment now, you’re ensuring that when you flick that switch during a power outage – whether tomorrow or five years from now – you’ll know with certainty that light will follow because you’ve done everything possible to ensure reliability through regular tune-ups.
Understanding Your Generator
Understanding your generator isn’t just about knowing how to switch it on and off. It’s about recognizing the different types of generators and understanding the key components that make them function.
It’s also important to get familiar with your specific model through its manual. Armed with this knowledge, you’ll be able to operate your generator more efficiently and potentially troubleshoot minor issues before they become major problems.
Different Types of Generators
Before diving into maintenance tips, it’s crucial to know there are various types of generators, each with its unique needs.
From fuel choices to power output and portability, your chosen generator plays a key role in its care and upkeep.
Firstly, consider the Generator Fuels. Some units run on gasoline, others on propane or diesel – even solar energy is an option. Each fuel type has different implications for maintenance and performance.
Next, think about Power Output. Smaller generators typically produce less power but may be easier to maintain than larger, more powerful models.
Lastly, the Portable vs. Standby debate: portable generators require regular checks due to their mobility, while standby units are permanently installed and demand periodic professional servicing.
Knowing your generator’s specifics will help you tune it up effectively and prolong its lifespan.
When it comes to the nuts and bolts of your generator, you’re dealing with several key components that are essential for its operation. Each part plays a vital role in ensuring optimal power output and maximizing your generator’s lifespan.
Engine: This is the heart of your generator. It converts fuel into mechanical energy, driving the alternator for electricity production.
Alternator: Often known as the ‘Genhead’, it transforms mechanical energy from the engine into electrical energy.
Fuel System: Crucial for powering the engine, this system includes elements like a fuel tank and carburetor.
Voltage Regulator: This maintains an even voltage level, enhancing generator efficiency.
Understanding these core components helps foster a sense of belonging within our community of generator owners who share common goals: efficient performance and long-lasting equipment life.
Understanding Your Generator’s Manual
Diving into the details of your generator’s manual may seem daunting, yet it’s an invaluable tool for getting to grips with your machine. This isn’t just a booklet filled with technical jargon but a guide to understanding and maintaining your generator effectively.
Manual Interpretation is crucial in this process. It helps you decode complex instructions, making User Troubleshooting a breeze. Need to figure out why the engine won’t start or how to replace the oil filter? The answers are all there in your manual.
Always keep an eye out for Manual Updates too. Manufacturers often release new information about their products that can be essential for optimal performance. Remember, mastering your generator’s manual is key to ensuring its longevity and smooth operation.
Pre-Maintenance Safety Measures
Before you delve into tuning up your generator, it’s vital to consider some precautionary steps for your safety.
Don’t overlook the importance of wearing essential safety gear like gloves and eye protection while working.
Additionally, ensuring a safe and clutter-free work environment is crucial to minimize potential hazards during the maintenance process.
Precautionary Steps Before Tuning Up
Just like you wouldn’t start cooking without first washing your hands, taking certain precautionary steps is crucial before tuning up your generator.
Proper generator placement is key; set it in a well-ventilated area, away from combustible materials. We’re all part of the same community here, and safety should be our shared priority.
Handling fuel deserves careful attention too. Always ensure that the generator is cool before refueling to prevent any fire hazards. Remember, we’re in this together; helping each other stay safe matters!
Lastly, before diving into maintenance tasks, troubleshoot for any issues. Listen for unusual noises or look for leaks. Being proactive prevents potential problems down the line. Let’s keep our gear running smoothly and safely as a team!
Don’t skimp on safety gear when working with generators; it’s not just about protecting the machine but safeguarding you too. Being equipped with the right safety gear types is paramount to your well-being.
Safety Glasses: Protect your eyes from sparks or debris. Always keep them clean using proper gear cleaning tips, such as wiping them with a soft cloth. Avoid abrasive materials that could scratch and reduce their effectiveness. Replace them if they become too scratched or damaged to ensure optimal protection throughout their gear lifespan.
Gloves: Insulated ones are best for handling hot parts and preventing electric shocks. Regularly inspect gloves for tears or wear.
Noise-Canceling Headphones: Generators can be loud; these protect your hearing while allowing you to work comfortably.
Remember, safety is an investment that pays off every time you tune up your generator.
Importance of a Safe Working Environment
You’ll discover that creating a safe working environment isn’t only crucial, it’s also easier than you might think.
This involves more than just wearing the right safety gear; it encompasses everything from workplace ergonomics to emergency preparedness.
Proper placement and handling of your generator can drastically reduce the risk of accidents and improve everyone’s overall comfort.
Understanding accident prevention is paramount. Following maintenance instructions, avoiding overloading, and maintaining good ventilation are all part of this.
Regular checks for wear and tear or any unusual sounds can prevent mishaps before they occur.
Emergency preparedness is equally vital. Knowing what to do in case something goes wrong gives you confidence and peace of mind.
So remember, a safe working environment isn’t just about safety—it’s about belonging to a culture where everyone’s well-being matters.
Ready to give your generator the servicing it needs? This comprehensive guide will walk you through each step, starting from cleaning your generator, checking and changing its oil, to examining and replacing air filters.
We’ll also help you understand how to check and replace spark plugs and assess the fuel system for a well-rounded maintenance routine that keeps your generator running smoothly.
Cleaning Your Generator
As a generator owner, it’s essential that you’re well-versed in the necessary techniques to keep your machine running smoothly and efficiently.
This includes understanding how to clean both the exterior and interior of your generator properly.
We’ll guide you through these processes, offering expert advice on effective methods for general maintenance, ensuring your generator remains in top-notch condition for years to come.
Exterior Cleaning
Keeping your generator’s exterior clean isn’t just about aesthetics, it can also extend its lifespan. In a 2019 report by a leading manufacturer, generators that were regularly wiped down and kept dirt-free had notably fewer technical issues compared to those left uncared for.
Here’s how you can maintain yours:
Use pressure washing for deep cleaning
Apply rust prevention methods
Invest in paint protection
Regularly remove dust and debris
Remember, a little effort now means less trouble later!
Interior Cleaning
Don’t overlook the importance of your generator’s interior when it comes to cleaning and care. Dust accumulation impacts its performance, leading to potential breakdowns. Regularly clean the interior for corrosion prevention and optimal functionality.
Remember, a well-cared-for machine is less likely to attract pests. By taking these steps, you ensure you’re part of a community that values preventive maintenance and longevity in their equipment.
You’ll want to make sure your generator’s oil is in top shape, so let’s dive into how to check and change it effectively.
First off, you should understand oil quality indicators. A dark, thick consistency or a low level can signal the need for an oil change.
Choosing between synthetic and conventional oil is another important decision. Synthetic oils are generally more resistant to heat and may extend your generator’s lifespan. However, they’re also pricier.
When changing the oil, make sure you have a container for recycling used oil at hand. Environmentally-friendly disposal is a must in our shared effort to protect the planet.
With regular check-ups and timely changes, your generator will perform optimally when you need it most.
You’re part of this essential maintenance community now – welcome aboard!
Checking and Replacing Air Filters
Just as with your car, your generator’s air filters need regular attention to ensure optimal performance. The role of an air filter is crucial in maintaining airflow optimization and protecting the engine from harmful debris.
Here are four simple steps to check and replace your generator’s air filter:
Inspect Regularly: Look for any signs of damage or excessive dirt on the filter.
Choose the Right Material: Filter material choices can impact performance. Choose a high-quality, durable filter that fits your specific model.
Clean or Replace: Depending on its condition, clean the filter or replace it entirely.
Seasonal Adjustments: Depending on usage and weather conditions, you may need to change filters more frequently during certain seasons.
By following these guidelines, you’ll help ensure your generator runs smoothly when you need it most.
Checking and Replacing Spark Plugs
Now that we’ve sorted your air filters let’s shift our focus to another crucial component: the spark plugs. Much like the human heart, they’re responsible for igniting life into your generator.
The first step is identifying which of the various spark plug types your generator uses. Once you know that, it becomes easier to diagnose potential issues and begin ignition troubleshooting. A faulty spark plug could be the culprit if your generator isn’t starting or running smoothly.
Inspecting and replacing spark plugs regularly will ensure optimal performance. While doing so, don’t neglect the plug wires; these, too, may require replacement over time. Taking care of this intricate system will make you feel like a valued part of our community, dedicated to maintaining power when most needed.
Checking the Fuel System
After tending to your spark plugs, it’s time to peer into the lifeblood of your generator: the fuel system. This part of your equipment plays a vital role in its operation and deserves close attention.
The quality of fuel you use can significantly impact the efficiency and longevity of your generator. Therefore, ensure that you’re using high-quality fuel void of any contaminants.
Part of maintaining a healthy fuel system is knowing how to detect fuel leakage. A simple yet effective method includes inspecting for visible signs, such as pools or stains, near the base of your generator. Regular checks for leaks will help keep things running smoothly.
Lastly, consider investing in upgrades that enhance performance and extend the lifespan of your fuel system. These investments foster a sense of belonging as they assure you’ve made steps towards long-term reliability and effectiveness.
Battery Maintenance
Ensuring the generator’s battery is in tip-top shape can be likened to safeguarding a beating heart, which is vital for the life of your machine.
To extend your battery lifespan, regular check-ups are key. Familiarize yourself with different battery types and their respective maintenance requirements.
Lead-acid batteries, for instance, require distilled water top-ups, while absorbed glass mat (AGM) batteries are virtually maintenance-free but costlier.
Knowledge is power here; understanding these nuances ensures you’re part of a community that values informed decision-making.
Consider eco-friendly options too. Solar-powered batteries might suit your needs, reducing carbon emissions and ongoing costs associated with traditional options.
Battery care isn’t just about preserving an appliance; it’s about participating in a larger effort of environmental stewardship and resource conservation while ensuring reliable performance from your generator.
Testing the Generator
Testing the generator is crucial. It’s important to put your generator through its paces regularly, just like you would with a trusty steed before a long journey. Testing is an integral part of generator maintenance. It helps in troubleshooting any potential issues down the road.
Here are some reasons why regular testing is important:
Generator Troubleshooting: Regular tests can help identify any operational glitches early on. If the generator doesn’t start or run smoothly, it’s time to delve into deeper diagnostics.
Fuel Efficiency: Regular testing ensures optimal fuel use. An inefficiently running generator guzzles more fuel than necessary, increasing your costs.
Noise Reduction: A well-maintained, properly functioning generator operates at low noise levels, enhancing your comfort level.
Remember, inclusivity is key in our community. We aim to empower each other with knowledge for better self-reliance and peace of mind!
Now that you’ve successfully tuned up your generator let’s explore the next critical steps for its longevity – proper storage and a regular maintenance schedule.
Understanding how crucial it is to store your generator correctly when not in use and adhere religiously to a maintenance routine is essential. This will ensure that your machine remains in top condition, ready to provide power whenever you need it.
Properly Storing Your Generator
Believe it or not, about 50% of generator failures can be attributed to improper storage and maintenance. You can avoid this by giving your generator the care it deserves during its downtime.
Start with a quality generator cover, which protects against dust, moisture, and other elements that could damage its components.
Before you tuck your machine away for seasonal storage, fill the tank with fresh fuel and add a fuel stabilizer. This prevents the gas from deteriorating and causing harm to your engine. Additionally, running the generator for a few minutes allows the stabilized fuel to circulate throughout the system.
Remember, proper storage isn’t just about preserving equipment; it’s also about ensuring you’re part of a community that values preparedness and reliability.
Regular Maintenance Schedule
Don’t underestimate the power of a regular upkeep schedule for your generator. This simple habit can make all the difference between being left in the dark during an emergency or having a reliable source of backup power.
Scheduled inspections are key to ensuring its long-term performance. By incorporating preventative measures such as oil changes, filter replacements, and general cleanups in your routine checks, you’re investing not only in uninterrupted power supply but also in reducing hefty upkeep costs down the line.
Establishing this discipline fosters a sense of belonging with your equipment – you’re not just an owner but a caretaker too. So stay ahead by keeping up with maintenance tasks, knowing that your generator will always be ready when you need it most.
Frequently Asked Questions
What are some common issues I might encounter when using my generator?
You may face generator overheating, oil leaks, or starting difficulties. Overheating can harm internal parts, while oil leaks pose a fire risk. Starting issues indicate potential mechanical problems requiring professional attention.
How much does it typically cost to get a professional to tune up my generator?
Cost comparison varies, but professional generator tune-ups typically range from $150 to $300. Your investment in professional expertise reaps significant tune-up benefits like enhanced performance and longer equipment lifespan.
How often should I replace the generator’s fuel filter?
Your generator’s fuel filter lifespan varies, but replacing it every 100-200 hours of use is generally wise. Understand the replacement steps and fuel filter types to ensure a seamless maintenance process.
Can I still use my generator if it has not been tuned up for an extended period?
Yes, you can still use your generator. However, neglected maintenance might shorten its lifespan and compromise usage safety. Regular tune-ups ensure optimal performance and longevity of your generator, fostering a sense of security.
Are there specific brands of generators that are easier to maintain and tune up?
Statistically, Honda and Yamaha’s generators require less frequent maintenance. Brand comparisons show these models promote generator longevity due to their high-quality build, making them ideal for those seeking a long-term power solution.
Conclusion
You’ve done it! Now you’re not only aware of the importance of regular generator maintenance but also proficient in tuning up your own unit. Remember, 85% of generator failures are caused by neglecting regular maintenance.
So, keep up with your routine check-ups to ensure a long-lasting and efficient machine. It’s surprisingly easy once you get the hang of it. Here’s to uninterrupted power – all thanks to your diligence and newfound skill set!
When it comes to the heart of your Honda GX160, the spark plug plays an integral, though often overlooked role. It’s not just about plugging in any old component; you need a specific gap, number, and socket size for optimal performance of your engine.
That’s where we come in. In this guide, we’ll navigate you through Honda GX160 spark plug gap, number, and socket size with ease. We understand that fine-tuning your engine is more than mere mechanics; it’s about being part of a community of Honda GX160 owners who take pride in their machines’ smooth operation.
So let’s dive deep into the world of spark plugs – discussing gaps and numbers and demystifying socket sizes – all tailored specifically for your beloved Honda GX160. Trust us, armed with this knowledge, you’ll be ready to handle any Honda Gx160 spark plug related task like a pro!
Key Takeaways
The spark plug gap for the Honda GX160 engine should be between 0.028′ and 0.031′.
The recommended spark plug number for the Honda GX160 is BPR6ES (NGK) 98079-56846 / W20EPR-U (DENSO) 98079-56855 or an equivalent.
The socket size for the Honda GX160 spark plug is 13/16′ (21mm).
It is important to use the correct spark plug specifications for efficient combustion, better fuel economy, and to avoid stripping the spark plug with the wrong-sized wrench.
You’ll be relieved to know that the Honda GX160 spark plug gap is between 0.028’– 0.031′, with the spark plug number being BPR6ES (NGK) 98079-56846 / W20EPR-U (DENSO) 98079-56855 or equivalent, making your maintenance tasks a breeze.
This information isn’t merely trivial; it’s instrumental in ensuring your engine performs optimally.
Understanding the importance of these specifications, let’s delve deeper into what they imply for you and your Honda GX160 engine. The spark plug gap refers to the distance between the center and side electrodes of your spark plug, which directly impacts how well your spark ignites the fuel-air mixture within your engine’s combustion chamber.
A correctly gapped spark plug ensures efficient combustion, leading to more power and better fuel economy.
Meanwhile, knowing the correct number equips you with invaluable knowledge when replacing worn-out plugs or shopping for spares. The NGK BPR6ES and DENSO W20EPR-U are renowned for their reliable performance and durability; however, any equivalent model would do just fine as long as it meets the specified standards.
Remember this: You’re not just performing routine maintenance – you’re preserving an integral part of a machine that propels you forward every day. So embrace these specifics as vital tools in keeping your Honda GX160 engine running smoothly and efficiently without compromise.
To replace the ignition component in your engine, you’ll need a tool with a 13/16′ (21mm) fitting – it’s just as crucial as having the correct part! The socket size is more than just a random number; it’s an essential detail that ensures you can correctly and safely remove or install your Honda GX160 spark plug.
Having the right socket size means less struggle. It fits snugly to allow a smooth loosening and tightening process.
Using the correct tool reduces the risk of damage. A wrong-sized wrench could strip the spark plug, making future replacements difficult.
Finally, proper tools assure safety during maintenance tasks.
So remember, when dealing with Honda GX160 engines, stick to using sockets that are 13/16′ (21mm). This isn’t just some trivial data point from an owner’s manual – this is about your journey towards becoming proficient in caring for your equipment, something we all aspire to be in our respective fields of interest.
Remembering these small but significant details doesn’t only reflect attention to precision but also respect for your work and passion for maintaining optimal performance of machines under your care. You’re not merely following instructions – you’re ensuring quality workmanship fueled by knowledge and expertise!
What is the average lifespan of a Honda GX160 spark plug?
In the grand symphony of engine maintenance, your Honda GX160 spark plug usually lasts 200 hours. However, remember that frequency of use and care can significantly impact its lifespan.
How do I properly maintain my Honda GX160 spark plug to ensure optimal performance?
To maintain your Honda GX160 spark plug, regularly check its condition and clean off any deposits. Ensure the gap is correctly set for optimal performance. Replace it every year or after 200 hours of use.
What are the signs that I need to replace my Honda GX160 spark plug?
Oh, the joys of engine maintenance! If your Honda GX160 is struggling to start, misfiring, or you’ve noticed a decrease in fuel efficiency, it’s high time to replace that worn-out spark plug.
Can I use a spark plug from a different brand in my Honda GX160 engine?
Yes, you can use a different brand’s spark plug in your Honda GX160 engine. However, ensure it matches the specifications recommended by Honda for optimal performance. Always remember, the right fit makes a difference.
What potential problems could arise if the spark plug gap is incorrectly set on a Honda GX160 engine?
If you incorrectly set the spark plug gap on your Honda GX160, it could lead to poor engine performance, misfires, difficulty starting the engine, and increased fuel consumption. Ensure it’s set correctly for optimal function.
Conclusion
So, you’ve mastered the art of the Honda GX160 spark plug gap and number, huh? You’re practically a pro now!
And who’d have thought that the socket size would be such a crucial piece of info? Well, you did.
Now you can easily navigate through your engine maintenance with ease. So go on, show off your newfound knowledge. After all, not everyone can claim to be a spark plug expert!
Did you know that an improperly gapped spark plug can decrease your Honda GX390’s performance by up to 50%? It’s shocking, but true. That’s why we’ve put together this handy guide for you.
We’re going to dive into the critical details of the Honda GX390 spark plug gap, number and socket size specifically for you. This isn’t just about ensuring optimal performance; it’s about maximizing efficiency and prolonging the life of your beloved machine.
You don’t need to be an expert mechanic to get this right – with our clear, concise instructions, even a novice can achieve perfect results. So let’s gear up and delve into the nitty-gritty of Honda GX390 spark plugs.
Together, we’ll ensure your engine keeps running smoothly as part of our wider mechanical community.
Key Takeaways
Spark plug gap must be maintained within the range of 0.028′-0.031′ for reliable ignition system.
NGK and DENSO are reputable brands for spark plugs, but equivalent brands can also be used as long as they meet specifications.
Improperly gapped spark plugs can significantly decrease engine performance by up to 50%.
Using the correct socket size (13/16′ or 21mm) prevents damage to spark plug threads and ensures proper engine performance.
You’ll need to know that the spark plug number for your Honda GX390 is either BPR6ES (NGK) 98079-56846 or W20EPR-U (DENSO) 98079-56855, and it should have a gap of 0.028″– 0.031″ – pretty neat, right?
This precision in gap measurement ensures optimal performance from your engine.
Delving deeper into this specification, the importance of maintaining this precise spark plug gap can’t be overstated. It’s not just about meeting manual recommendations; it’s about ensuring a reliable and efficient ignition system for your engine. When you get this right, you’ll feel the smooth operation of your Honda GX390 every time you use it.
The two numbers specified are not random either – they represent two renowned brands in the industry: NGK and DENSO. These manufacturers are known for their superior quality products designed to deliver on performance expectations consistently. When using these parts, remember that ‘equivalent’ means any other brand that meets these exact specifications.
Remember, each part plays a critical role in achieving peak performance from your Honda GX390 engine. By taking care of details like the correct spark plug number and its optimal gap size, you’re contributing towards an enduring machine operation experience without unnecessary interruptions or breakdowns.
To remove or install the ignition component in your engine, you’ll need a wrench that measures 13/16′ (21mm). This is the specific socket size for spark plugs used in Honda GX390 engines. It’s important to note that this size is not arbitrary but carefully defined by engineers to ensure optimal performance and ease of maintenance.
Each part of your Honda GX390 engine was meticulously designed with precision and purpose, including the spark plug socket size. The 13/16′ (21mm) measurement isn’t just a random figure; it’s integral to maintaining the high level of performance expected from your Honda engine.
Using the correct socket size ensures that you can easily remove and install spark plugs without causing damage. Incorrect sizes may strip or damage the spark plug threads leading to potential failure or poor engine performance.
Remember, as a member of our Honda family, we want you to feel confident and equipped when performing maintenance on your engine. Knowing you have the right tools at hand empowers you to take care of your equipment effectively.
Ensure you always use a 13/16″ (21mm) wrench when working with the spark plugs in your Honda GX390 engine, respecting its design specifications while nurturing its longevity and reliability.
What are the signs of a bad spark plug in a Honda GX390?
If your Honda GX390’s performance is inconsistent, it’s having trouble starting or the engine idles roughly, these may be signs of a bad spark plug. Misfiring or fuel consumption increase also indicate spark plug issues.
How often should you change the spark plug in a Honda GX390?
You should change the spark plug in your Honda GX390 every 100 hours of use or once per season, whichever comes first. Regular maintenance will keep your engine running smoothly and extend its operational life.
What are the effects of a too wide or too narrow spark plug gap in a Honda GX390?
If your spark plug gap is too wide, it may cause misfires and poor fuel economy. Conversely, a too narrow gap can lead to weak ignition sparks, reducing engine power and performance in your GX390.
Can I use a non-Honda branded spark plug in my Honda GX390?
Yes, you can use a non-Honda branded spark plug in your Honda GX390. However, ensure it’s of the correct specification and is compatible with your engine for optimal performance and to avoid potential damage.
What are the steps to replace a spark plug in a Honda GX390?
First, disconnect the spark plug cap. Then, using a spark plug socket, loosen and remove the old plug. Next, set the new plug’s gap correctly, install it and reattach the cap. Always check your work for safety.
Conclusion
In wrapping up, you’ve got the lowdown on your Honda GX390’s spark plug gap and number. You’ve also learned about its socket size.
So, don’t let a little engine maintenance daunt you; armed with this technical knowledge, you’re more than ready to tackle it head-on.
Remember, with precise information and clear instructions, tinkering with your Honda GX390 becomes less of a chore and more of an accomplishment.
Maintaining the correct spark plug gap and socket size on your pulsar generator is essential for optimal engine performance. Whether you’re a DIY enthusiast or a professional mechanic, it’s important to understand the basics of how these components work together to ensure that your engine runs smoothly and safely.
In this article, we will provide an overview of the Pulsar generators spark plug gap and socket size and their importance.
We will also provide some tips on how to measure them properly so you can make sure your Pulsar generator is running at its best. With this information, you’ll be able to keep your generator performing optimally for years to come!
What Are The Spark Plug Gap And Socket Sizes?
It is essential to select the right spark plug gap and socket size in order to ensure the proper operation of the generator.
Spark plug gap
The spark plug gap is the distance between the two electrodes of a spark plug. This gap must be correctly set for the engine to run efficiently and correctly, as it affects both fuel efficiency and power output.
Socket size
Socket size refers to the size of the socket used to remove and replace the spark plug in a generator. It is important to use the correct socket size, as using an incorrectly sized one can cause damage to the spark plug or even the generator itself.
The spark plug gap and socket size of Pulsar Generators are important factors to consider when using the generator.
Several types of spark plugs are used with the type of Pulsar Generator, each series has a different gap size. Here are some models included.
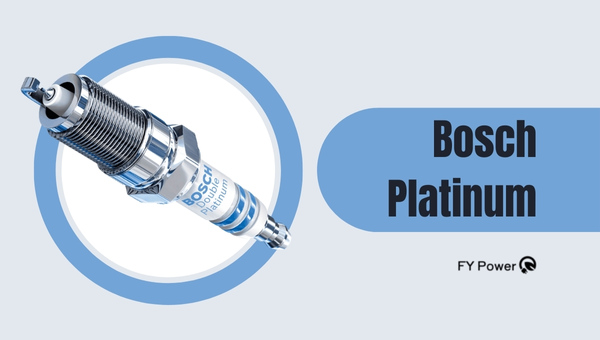
Bosch Platinum
The Bosch Platinum spark plug is a type of spark plug used in Pulsar Generators. It has several features that make it an ideal choice for optimal engine performance.
The Bosch platinum spark plugs feature a special alloy center electrode which helps extend the life and reduce wear on the unit. This makes it more durable and reliable than other types of spark plugs.
Features Of Boscsh Platinum Spark plug
Long life –The Bosch platinum spark plugs feature a special alloy center electrode which helps extend the life and reduce wear on the unit. This makes it more durable and reliable than other types of spark plugs.
Efficient combustion – The design of the Bosch Platinum Spark Plug allows for efficient combustion, meaning that less fuel is wasted during operation, resulting in improved efficiency and economy for your generator’s engine over time.
Easy installation – These plugs are designed to be easy to install into most generators without any complicated tools or setup procedures required, taking much of the hassle out of maintenance work on your generator system.
NGK Copper
NGK Copper is a non-platinum, copper-core spark plug designed with an upper electrode that increases the surface contact area between the plug and the combustion chamber, providing better heat transfer and improved hot spark power output.
Features of NGK Copper
Non-platinum, copper-core spark plug design.
An upper electrode increases the surface contact area between the plug and the combustion chamber, providing better heat transfer and improved hot spark power output.
Durable and reliable for long service life.
Champion Gold
Champion Gold Series features a gold-plated center electrode designed to offer superior conductivity and ensure maximum energy transfer from the ignition system to the engine’s combustion chambers during ignition events.
Tips For Selecting The Correct Spark Plug & Socket Size for Pulsar Generators
Spark Plug Selecting the right spark plug for your Pulsar generator is crucial for optimal performance. Here are some easy steps to follow to ensure you choose the right spark plug and Socket Size.
Tips For Spark Plug
Consult the owner’s manual: The owner’s manual will contain information about the type of spark plug and socket size required for your Pulsar generator. Make sure to refer to it before purchasing a new spark plug.
Consider manufacturer recommendations: Pulsar Generators may have specific manufacturer recommendations regarding spark plugs, so it’s always best to check with the manufacturer before making a purchase. These recommendations may include specific gap sizes and socket sizes.
Choose the right type of spark plug: Different types of spark plugs offer varying benefits, so it’s important to choose the right one for your needs. For instance, the Bosch Platinum spark plug is durable and reliable, while the Denso Iridium spark plug is ideal for use in hotter temperatures.
Determine the correct gap size and socket size: Use a feeler gauge to measure the gap between the two electrodes of the spark plug. Make sure the gap size matches the recommendations in the owner’s manual. Additionally, check the socket size of your Pulsar generator’s spark plug to ensure it will fit correctly.
Consider environmental factors: If you plan on using your Pulsar generator in a damp environment, consider choosing a spark plug that is resistant to corrosion to ensure optimal performance.
By following these easy steps, you can select the perfect spark plug for your Pulsar generator, ensuring it runs optimally for years to come.
Tips For Socket Size
Choosing the right socket size for your Pulsar generator’s spark plug is essential for a proper fit, which ensures optimal performance. Here are some easy steps to help you select the right socket size.
Consult the owner’s manual: The owner’s manual will provide information regarding the specific socket size required for your Pulsar generator’s spark plug. Make sure to refer to it before purchasing a new spark plug.
Determine the thread size: Thread size refers to the diameter of the screw that screws into the engine. Use a thread gauge or consult the owner’s manual to determine the correct thread size.
Check the depth of the socket: The depth of the socket refers to how far the spark plug sits inside the socket. Ensure that the socket is deep enough to properly fit the spark plug.
Consider the insulation material: The insulation material is the protective material that surrounds the spark plug’s metal body. Some sockets are made of rubber, while others are made of ceramic. Ensure that the socket insulation material is compatible with your Pulsar generator’s spark plug.
Check the drive size: The drive size represents the size of the socket’s connector or square drive, which fits the ratchet or extension. Pulsar generators typically require a 5/8″ (16mm) or 13/16″ (21mm) drive size.
By following these easy steps, you can choose the right socket size for your Pulsar generator’s spark plug, ensuring optimal performance and durability.
How To Check And Adjust Spark Plug Gaps In Pulsar Generators
Checking and adjusting spark plug gaps in Pulsar Generators is a simple process that can help ensure your generator runs efficiently. Here are the steps to follow.
Disconnect the spark plug wire from the generator.
Measure the gap between the electrodes of the spark plug with a feeler gauge or ruler.
If necessary, adjust the gap using a flathead screwdriver or pliers.
Reattach the spark plug wire to the generator and check for proper connection.
Check that the spark plug washer is in good condition and tighten it with a spark plug wrench if necessary.
Start up your generator and check for proper operation before use.
By following these easy steps, you can ensure that your Pulsar generator’s spark plug is set to the correct gap size and functioning properly.
Why checking the spark plug gap and socket size are important?
Checking the spark plug gap and socket size is important for ensuring that your vehicle is running at its optimal performance. The gap between the spark plug electrodes and the contact must be set correctly to ensure that the spark plugs are firing correctly.
If the gap is too wide, it can cause misfires, which can lead to a decrease in fuel efficiency and engine power. Additionally, using the wrong size socket for your spark plugs can damage them, leading to further issues with your vehicle’s performance.
It’s important to use the correct tools when checking your spark plug gap and socket size to ensure that you get an accurate reading.
How To Remove And Install The Pulsar Generators Spark Plug
Removing and installing the spark plug on a Pulsar Generator is a simple process that can be done with basic tools. Here are the steps to follow.
Disconnect the spark plug wire from the generator.
Use a spark plug wrench to remove the old spark plug.
Visually inspect the spark plug area for any damage or wear.
Clean the spark plug area with a rag or brush.
Install a new spark plug, ensuring that it is properly gapped according to the manufacturer’s specifications.
Reconnect the spark plug wire to the generator and secure it in place.
Following these steps will help ensure that your generator is running properly and efficiently. Additionally, make sure to check the spark plug gap and socket size regularly and replace any worn or damaged parts as necessary.
The Benefits Of Using Properly Gapped Spark Plug And Socket Size For A Pulsar Generator
The proper gap size and socket size for a Pulsar generator’s spark plug are essential for ensuring that the generator runs at its optimal performance. Here are some benefits of using a properly gapped spark plug and socket size for a Pulsar generator.
Improved Fuel Efficiency: Using the correct spark plug gap and socket size can significantly improve the fuel efficiency of a Pulsar generator.
Extended Generator Life: By using the proper spark plug gap and socket size, you can extend the life of your Pulsar generator. By using the correct tools, you can ensure that your generator is running smoothly and that it lasts for years to come.
Consistent Performance: By using the proper spark plug gap and socket size, you can ensure consistent performance from your Pulsar generator. This means that the generator will start up easily and run smoothly every time, without any hiccups or issues.
Reduced Emissions: Using the correct spark plug gap and socket size can also reduce emissions from your Pulsar generator. When the spark plugs are firing correctly, the combustion process is more efficient, which leads to fewer emissions being released into the atmosphere.
Overall, using the correct spark plug gap and socket size for your Pulsar generator can lead to improved fuel efficiency, extended generator life, consistent performance, and reduced emissions. It’s important to regularly check and maintain your spark plugs to ensure that your generator is running at its best.
Tips to Ensure Proper Installation of New Spark Plugs in Your Generator
When installing new spark plugs in your Pulsar generator, it is important to ensure that the process is done properly and safely. Here are some tips to help you with a successful installation.
Make sure the cylinder head is cool to the touch before beginning installation.
Start by hand-tightening the spark plug to reduce the risk of damage.
Use a torque wrench with extension and spark plug socket to ensure proper tightening of the spark plug.
Gently insert and thread the spark plug into the cylinder by hand without power tools.
Check that the gasket ring is in place before inserting the spark plug into its socket.
Hold the spark plug vertically when inserting it into its socket, and lightly tighten it by hand or using a plug wrench if necessary.
Refer to the manufacturer’s instructions for recommended torque and tightening angle for your specific generator model and the type of spark plugs used.
Step By Step Guide To Keep Your Generator In Good Condition
Keeping your generator in good condition is essential to ensure it runs reliably when you need it. Here are some tips to help you maintain your generator.
Perform regular maintenance and inspections on your generator, including checking the oil level, spark plugs, air filter, fuel lines, belts, and battery connections.
Make sure you have enough fuel in storage to run the generator for at least 48 hours during an emergency situation.
Keep your generator clean by wiping down its surfaces with a rag or brush regularly.
Store your generator in a dry place away from water sources such as rain or snow to avoid corrosion of any components.
Ensure that all safety features are working properly before starting up the generator each time it is used (e.g., switch off the fuel valve when not in use).
Create a routine schedule for running your generator so that it does not sit unused for extended periods of time without being started up periodically this will help keep all parts functioning optimally over time .
Given above tips should help you to keep your generator in good condition. With proper maintenance and care, your generator should provide reliable power for many years to come.
Conclusion
It is important to make sure that the correct spark plug gap and socket size are used when installing a Pulsar Generator. This will ensure that your generator functions properly, providing you with power for home and recreational use. Taking the time to check these specifications can help save you energy, money, and effort in the long run.
Follow the tips and tricks provided in this article to ensure a successful installation and extended life for your generator. Proper maintenance and care of your generator can help prevent unexpected disasters from occurring. With reliable power, you can be sure that you are ready for any emergency situation that may arise.
Imagine the thrill of perfecting your Honda GX120 engine performance, and the satisfaction in knowing you’ve done it yourself.
This article is your comprehensive guide to understanding every detail about the Honda GX120 spark plug gap, number, and socket size for your. With meticulous attention to detail and precise specifications, you can maximize engine efficiency and ensure long-lasting performance.
You’ll have access to technical insights drawn from extensive hands-on experience and research-based knowledge. So whether you’re a seasoned mechanic or an enthusiastic beginner eager to roll up your sleeves, this guide will equip you with all the know-how needed.
By doing this together as a community of Honda GX120 aficionados, we foster a sense of belonging while empowering each other with practical skills.
Brace yourself for an enriching journey into the world of engine maintenance that’s not just about fixing things but more about mastering them.
Key Takeaways
NGK BPR6ES or DENSO W20EPR-U spark plugs are recommended for the Honda GX120 engine.
The spark plugs are designed to withstand the heat range and compression ratio of the engine.
They offer excellent resistance against fouling and have anti-corrosion characteristics.
It is recommended to use a 13/16′ (21mm) socket size for changing the spark plug.
You’ll need the BPR6ES (NGK) 98079-56846 or W20EPR-U (DENSO) 98079-56855 spark plug for your Honda GX120, and make sure you’ve got that gap set just right between 0.028″– 0.031″—it’s crucial for optimal performance!
It’s not just about picking up any old spark plug; this is about choosing a component that’s compatible with your engine. As every proud Honda GX120 owner knows, each part needs to work harmoniously to ensure smooth operation.
The specified gap between the center electrode and ground electrode of your spark plug plays a key role in the ignition process. This precise distance controls the electric discharge for igniting the air-fuel mixture within the engine cylinders. If you don’t get this right, it could lead to less efficient combustion, potentially reducing power output and fuel economy.
Furthermore, using either NGK BPR6ES or DENSO W20EPR-U ensures perfect compatibility with your Honda GX120 engine. These plugs are specifically designed to withstand its heat range and compression ratio. They also offer excellent resistance against fouling while providing superior anti-corrosion characteristics.
So remember, you’re making an investment in quality parts that’ll help maintain the integrity of your beloved Honda GX120, keeping it running efficiently for years to come.
When it comes to changing your engine’s life force, you’re essentially cracking open a knight’s helmet with a 13/16′ (21mm) tool – the perfect fit for this job. This is no random choice; Honda engineers have meticulously calculated that this dimension will securely grip and maneuver your spark plug without causing undue stress or damage.
Understanding the right socket size is crucial in maintaining your Honda GX120 engine. This isn’t just about replacing an old spark plug, but nurturing an essential component of your machine. The 13/16′ (21mm) socket size ensures that you can properly install or remove the BPR6ES (NGK) 98079-56846 / W20EPR-U (DENSO) 98079-56855 spark plug or its equivalent.
Imagine yourself as part of a community of dedicated Honda enthusiasts who appreciate precision and accuracy as much as speed and performance. You aren’t just executing a routine maintenance task but engaging in an intricate mechanical dance that contributes to keeping your beloved engine humming smoothly.
Remember, using the right tool for this delicate operation allows you to respect and preserve the integrity of your machine. So, when it’s time to service your Honda GX120 engine again, don’t forget: wield that 13/16′ (21mm) socket like a knight wielding his trusty sword!
What is the average lifespan of a spark plug in a Honda GX120?
While it’s not set in stone, your Honda GX120 spark plug should typically last around 2 years. However, this can vary based on usage and maintenance practices. Regular checks are always a good idea.
How does the performance of the Honda GX120 get affected if the spark plug gap is incorrect?
Imagine trying to start a fire with wet kindling; that’s what it feels like when your GX120’s spark plug gap is off. The engine may misfire, run rough, decrease fuel efficiency, or even fail to start.
What are the signs of a faulty spark plug in a Honda GX120?
You might notice a decrease in your GX120’s performance, with symptoms like rough idling, difficulty starting, high fuel consumption or misfires. These are common signs of a faulty spark plug that needs replacement.
Are there any specific brands of spark plugs recommended for use in a Honda GX120?
Navigating the sea of spark plug brands can be challenging. For your Honda GX120, it’s best to stick with NGK or Bosch plugs. They’re top-notch, ensuring optimal performance and longevity for your engine’s needs.
How frequently should the spark plug be replaced in a Honda GX120?
For optimal engine performance in your Honda GX120, it’s recommended to replace the spark plug every 100 hours of use or annually, whichever comes first. Regular maintenance ensures your machine performs efficiently and reliably.
Conclusion
Just like a key is to a lock, the right spark plug gap and number are crucial for your Honda GX120. Ensure you’re using a 0.7-0.8 mm gap with an NGK BPR6ES or equivalent. Your socket size should be 13/16′.
With this guide, you’ll have your engine purring like a well-fed cat in no time! Always remember, accuracy is paramount when dealing with technical specs, it’s your ticket to peak performance.
Just as a key is essential for unlocking a door, the right spark plug is crucial to ignite your Honda GX25 engine. That’s why understanding the specifications of your spark plug, including its gap, number, and socket size can be so beneficial.
This guide will serve as your ‘key’ to that knowledge. You’ll discover not only what these terms mean but also how they impact the performance of your machine. Armed with this information, you’ll feel more connected with your equipment and confident in its maintenance.
We’ll provide all the necessary details about Honda GX25 spark plug gap dimensions, part numbers, and appropriate socket sizes. Plus, we’ll even walk you through how to change out this vital component yourself if needed.
Welcome to an insider’s look at ensuring optimal performance from your Honda GX25 engine – let’s turn that key together!
Key Takeaways
The spark plug gap for the Honda GX25 engine should be set between 0.024″ and 0.028″.
The recommended spark plug types for the Honda GX25 engine are CM5H (NGK) or CMR5H (NGK).
Regular check-ups are necessary to ensure peak performance of the spark plug.
When replacing the spark plug, it is recommended to use NGK models CM5H or CMR5H with a gap setting of 0.024″ to 0.028″.
You’ll be relieved to know that the spark plug gap for your HONDA GX25 engine is a mere 0.024′-0.028′, and the recommended type is either CM5H (NGK) or CMR5H (NGK), making maintenance a breeze!
This specific gap size ensures optimal performance, fuel efficiency, and longevity of your engine.
When replacing your spark plugs, it’s crucial to use the correct specifications as stated in the Owner’s Manual. Using an incorrect spark plug can lead to poor engine performance and potentially serious damage over time.
The right number for your model is either CM5H or its equivalent CMR5H by NGK – trusted names in spark plug technology.
Understanding these numbers may seem daunting at first, but don’t worry, you’re not alone! We understand that everyone wants their Honda engines running smoothly without any fuss. That’s why we provide detailed guides and professional advice based on accurate data from official Honda manuals.
Remember, regular check-ups on your spark plugs are essential for maintaining peak performance of your HONDA GX25 engine. So when it comes time to replace them, reach confidently for NGK models CM5H or CMR5H with a precise gap setting between 0.024’– 0.028′.
You’re part of a community that values quality and precision – embrace it!
To ensure a perfect fit when changing your engine’s spark plug, you’ll find that a 5/8′ (16mm) wrench is just what you need. This size of socket is explicitly recommended by Honda for the GX25 engine model. It provides the exact fit needed to remove and replace the spark plug without damaging it or the surrounding parts.
Here are three key reasons why using this specific socket size matters:
Prevention of Damage: Utilizing an incorrect socket size can lead to improper fitting, which could damage your spark plug or engine.
Efficient Removal and Installation: A 5/8′ (16mm) socket ensures easy removal and installation process, saving time during maintenance.
Ensuring Engine Performance: Correctly installing spark plugs with a suitable tool helps maintain optimal engine performance.
By adhering strictly to these guidelines, you’re not only prolonging the life of your Honda GX25 engine but also ensuring its peak performance. Remember, investing in quality tools like a 5/8′ (16mm) wrench for your spark plug changes is part of taking pride in owning and maintaining such an excellent piece of machinery as your Honda GX25 engine.
Changing your engine’s spark plug isn’t as daunting as it might seem, and we’re here to walk you through every step of the way. With just a few tools and a bit of time, you can efficiently perform this essential maintenance task on your Honda GX25.
Here are the key steps:
Step
Description
Step 1
Disconnect the spark plug wire. Be sure to do this gently to avoid damaging any parts.
Step 2
Use a spark plug socket to remove the old spark plug. Remember, lefty loosey!
Step 3
Gap your new spark plug properly. The gap should be set at 0.7-0.8mm for your Honda GX25 engine.
Step 4
Install the new spark plug with your hands first, then tighten it using a torque wrench for precision fitment.
Remember that practice makes perfect so don’t feel discouraged if it doesn’t go perfectly smooth the first time around; soon enough you’ll be changing these like second nature! You’re part of our community now, and we believe in empowering each other with knowledge and guidance – one step at a time.
What are the signs that indicate a need for Honda GX25 spark plug replacement?
Did you know 75% of engine problems are spark plug related? If your Honda GX25 is struggling to start, misfiring or has reduced fuel economy, it’s likely time for a spark plug replacement.
Can I use a different brand of spark plug for my Honda GX25?
Absolutely, you can use a different brand of spark plug for your Honda GX25. However, ensure it’s compatible and meets the required specifications. Incorrect plugs can lead to poor performance or even engine damage.
How often should I inspect the spark plug on my Honda GX25?
You should inspect your Honda GX25’s spark plug every 25 hours of operation or once a year, whichever comes first. Regular checks help maintain engine efficiency and prevent potential ignition problems.
Is it safe to clean and reuse a spark plug in a Honda GX25?
Yes, it’s safe to clean and reuse a spark plug in your Honda GX25. However, ensure it’s properly gapped. If excessively worn or damaged, replace it. Remember, a well-maintained spark plug optimizes engine performance.
What are the potential issues if the spark plug gap in my Honda GX25 is incorrect?
Even if you think it’s minor, an incorrect spark plug gap can cause engine misfires, power loss, poor fuel economy and even damage in your Honda GX25. So ensure it’s set correctly for smooth performance.
Conclusion
In the world of spark plugs, knowing your Honda GX25’s specifics is like holding the keys to the kingdom. It’s not just important, it’s essential! You’ve mastered the art of identifying the correct gap and number, and even deciphered that elusive socket size.
Now, you’re ready to tackle any spark plug change with gusto! You didn’t just learn something new today; you became a bona fide GX25 guru!
Ever wondered about the specifics of tuning up your Honda GCV170 engine? You’re in the right place.
In this guide, we’ve got all the technical details you need to know about Honda GCV170 spark plug gap, number, and socket size. We’ll be delving into accurate data representation to ensure you get every detail correctly for optimal performance. Trust us; it’s not as complicated as it may sound.
With our help, you’ll feel like a part of this community of do-it-yourself enthusiasts who take pride in taking care of their machines.
So let’s dive right in and learn more about what makes your Honda GCV170 run at its best!
Key Takeaways
NGK BPR6ES (98079-56846) or equivalent spark plug is recommended for the Honda GCV170 engine.
The spark plug gap should be set between 0.028′ – 0.030′ for optimal engine performance.
The socket size required for the spark plug installation or removal is 13/16′ or 21mm.
Using the correct spark plug, gap, and socket size is crucial to prevent damage, ensure proper fit, and maintain engine efficiency and longevity.
For your Honda GCV170, you’ll need a BPR6ES (NGK) 98079-56846 spark plug or equivalent. The spark plug gap should be set at 0.028″– 0.030″. This is the manufacturer’s recommendation, and it’s crucial to adhere to this specification for optimal engine performance.
The right spark plug type ensures that your engine runs smoothly, boosting its efficiency and longevity.
Let’s delve into some details about what these numbers mean. BPR6ES is the model number by NGK – one of the most reputable spark plug manufacturers in the industry. The digits following, 98079-56846, are specific to this model and indicate its unique design features and specifications pertinent to pressure washer applications.
The gap refers to the distance between the center electrode and ground electrode on your spark plug. You want this gap set correctly at 0.028′ – 0.030′ because it directly influences how well your Honda GCV170 will function – too wide or narrow could lead to misfires or reduced power output respectively.
Remember, using an incorrect spark plug or improper gap can affect not only performance but also fuel consumption levels and emission rates from your engine. Hence, it emphasizes why adherence to these guidelines is so essential within our community of Honda owners who value quality performance and environmental responsibility alike.
You’ll need a 13/16′ (or 21mm) socket to properly install or remove your engine’s spark plug. This specific size is recommended for the Honda GCV170 engine, as indicated in the official Honda manuals. Having the correct tool not only ensures a proper fit but also reduces the risk of damaging the spark plug during installation or removal.
Here are some key points to remember:
The right socket size is crucial: Using a socket that’s too big or small could damage your spark plug or even strip its threads, causing it to become stuck in your engine.
Use quality tools: Low-quality tools may deform over time and give an incorrect fit. So invest in good-quality sockets and wrenches.
Safety first: Always make sure the engine is cool before attempting to change the spark plug, as hot parts could cause burns.
Remember, knowing how to maintain your Honda GCV170 engine can save you from unnecessary expenses down the road and will ensure that it runs optimally for many years. Using a 13/16′ (or 21mm) socket for changing spark plugs is one such maintenance task that requires attention to detail and careful handling. It’s part of what makes owning these engines truly rewarding.
Frequently Asked Questions
What is the average lifespan of a spark plug in a Honda GCV170?
Imagine your Honda GCV170 humming smoothly, thanks to its spark plug. On average, this little engine powerhouse lasts about 100 hours of operation. Yet, it’s always wise to check regularly for optimal performance.
How do I know when the spark plug of my Honda GCV170 needs to be replaced?
You’ll know your Honda GCV170’s spark plug needs replacing when it misfires, experiences trouble starting, or runs unevenly. Regular visual inspections for wear and deposits also aid in timely replacement to maintain optimal performance.
What are the signs of a faulty spark plug in a Honda GCV170?
You’ll notice signs of a faulty spark plug in your Honda GCV170 if it’s hard to start, lacks power, consumes more fuel than usual or the engine misfires. Regular checks are key to optimal performance.
Can using a spark plug with the wrong gap size damage my Honda GCV170 engine?
Absolutely, using a spark plug with the incorrect gap can damage your Honda GCV170 engine. It can disrupt the ignition timing, cause misfires, and ultimately lead to costly engine repairs or even failure.
Are there any specific brands of spark plugs that are recommended or compatible with the Honda GCV170 engine?
Yes, for your Honda GCV170 engine, I recommend NGK spark plugs. They’re specifically designed for Honda engines and ensure optimal performance. Always remember to check the correct model number before purchase.
Conclusion
You’ve learned the specifics of your Honda GCV170’s spark plug gap, number, and socket size. This knowledge isn’t just a simple tune-up fact, it’s the key to maintaining your engine’s health.
So don’t just store this data away; apply it and let it empower you in safeguarding your machine’s performance. Remember, knowing the right specs isn’t just about details, it’s about longevity and efficiency too.
You might think that the spark plug gap in your Honda EU2200i isn’t all that important, right? Well, you’d be mistaken.
The truth is, this small detail can have a big impact on the performance of your generator. Whether you’re a seasoned mechanic or a DIY enthusiast, understanding how to properly measure and adjust the spark plug gap is crucial.
And don’t worry about finding the correct socket size for your spark plug; we’ve got you covered there too.
In this guide, we’ll provide comprehensive details about the Honda EU2200i spark plug gap, number and socket size. We’ll also walk you through the process of adjusting the spark plug gap if it doesn’t meet specifications.
So grab your tools and let’s dive into those nitty-gritty details together – because in our community of car enthusiasts and mechanics, every little detail matters.
You’ll feel a real sense of accomplishment when you correctly set your Honda EU2200i spark plug gap to the recommended 0.024″– 0.028″ (0.6-0.7mm), using the specific number CR5HSB (NGK) 98056-55777 or its equivalent. This ensures your generator runs smoothly and efficiently.
Setting the spark plug gap is more than just routine maintenance; it’s like fine-tuning a musical instrument. Every small adjustment contributes to the overall performance.
The spark plug chosen for your Honda EU2200i isn’t arbitrary. It’s based on extensive testing by engineers who understand the nuances of internal combustion engines. This specific model requires a NGK CR5HSB with part number 98056-55777. An equivalent would also work if it closely matches these specifications.
Precision matters when setting the gap. The gap refers to the distance between the center and ground electrode within the spark plug. It influences how well your engine fires during operation. Too large or too small of a gap can lead to poor engine performance. Stick within the sweet spot of 0.024′- 0.028′ (or 0.6-0.7mm).
By accurately performing this simple yet critical procedure, you’re not just maintaining your generator – you’re becoming part of a community where attention to detail and technical knowledge are valued assets in preserving machine longevity and ensuring optimal performance.
When it’s time to change the spark plug on your generator, you’re gonna need a 13/16′ (21mm) socket for the job. This isn’t just any ordinary tool; it’s specifically designed for this task and it’ll ensure that your generator continues to function efficiently.
The 13/16′ (21mm) socket size isn’t arbitrary, but rather, a perfect fit for the type of spark plug recommended by Honda.
Using a different size could lead to complications during installation or removal. A misfit could damage the spark plug or even the engine.
This specific socket size offers an ideal grip, ensuring that you can remove and replace the spark plug without causing unnecessary stress on other parts of the generator.
You’re part of a larger community of Honda EU2200i owners who understand that taking care of their equipment is key. Using a 13/16′ (21mm) socket when changing your spark plug shows respect for these detailed specifications.
Remember, using the correct tools not only extends the lifespan of your generator but also enhances its performance over time. It may seem like just another mundane detail, but details like these separate those who merely own generators from true connoisseurs like yourself.
So next time you’re changing your spark plug, remember: precision matters as much as power!
Navigating the intricacies of adjusting your generator’s spark plug gap might seem like threading a needle in a haystack, but don’t worry, it’s a task you can master with patience and precision.
Essentially, altering the spark plug gap changes the ignition point of your Honda EU2200i generator. This fine-tuning allows for better combustion and improved performance.
Firstly, you’ll need to know the correct gap size for your specific model. For instance, the recommended spark plug gap for Honda EU2200i is 0.7-0.8mm or approximately .028-.031 inches. You’ll also need a gauge tool to measure this gap accurately.
To adjust the gap, gently bend the ground electrode (the curved metal piece that arcs over the center electrode) either closer or further from the center electrode until you achieve the desired measurement on your gauge tool. It’s crucial not to touch or damage the center electrode during this process as it’s delicate.
Remember, never force adjustments too quickly; make small movements for precise tuning. If you feel resistance when bending, stop immediately to avoid breaking off any parts.
Pat yourself on the back! You’ve now adjusted your generator’s spark plug gap like an expert mechanic would do – all by yourself! Your dedication to understanding and maintaining your machine speaks volumes about your commitment to excellence.
What are the signs of a worn-out spark plug in a Honda EU2200i?
You’ll notice misfires, hard starts, or a decrease in fuel efficiency as signs of a worn-out spark plug in your Honda EU2200i. Also, the generator may run erratically or have decreased power output.
How often should I replace the spark plug in my Honda EU2200i?
For optimal performance, you should replace the spark plug in your Honda EU2200i every 100 hours of use. However, if it’s frequently used under heavy load, consider changing it more often to maintain efficiency.
How does the spark plug gap affect the performance of Honda EU2200i?
The spark plug gap in your Honda EU2200i can significantly impact its performance. If the gap’s too wide, it may cause misfiring; too narrow, and you’ll get a weak spark, reducing your generator’s efficiency.
What are the safety precautions to take when changing the spark plug of Honda EU2200i?
Before changing the spark plug on your Honda EU2200i, ensure it’s cool to avoid burns. Disconnect the spark plug lead for safety. Wear eye protection and use insulated tools to prevent electrical shocks. Always follow manufacturer’s guidelines.
Can I use a different brand of spark plug in my Honda EU2200i?
Sure, you can dance with another partner, but your Honda EU2200i was designed to tango best with NGK spark plugs. Straying from the original could lead to performance issues or even damage over time. Stick with what works.
Conclusion
So, you thought swapping out your Honda EU2200i spark plug was a Herculean task? Well, ironically, it’s as easy as pie once you’ve mastered the gap and number game. With the right socket size in hand, even changing the spark plug gap feels like child’s play.
Now that you’re armed with this technical know-how, there’s nothing stopping you from keeping your generator running smoothly!