Category: Generator FAQs

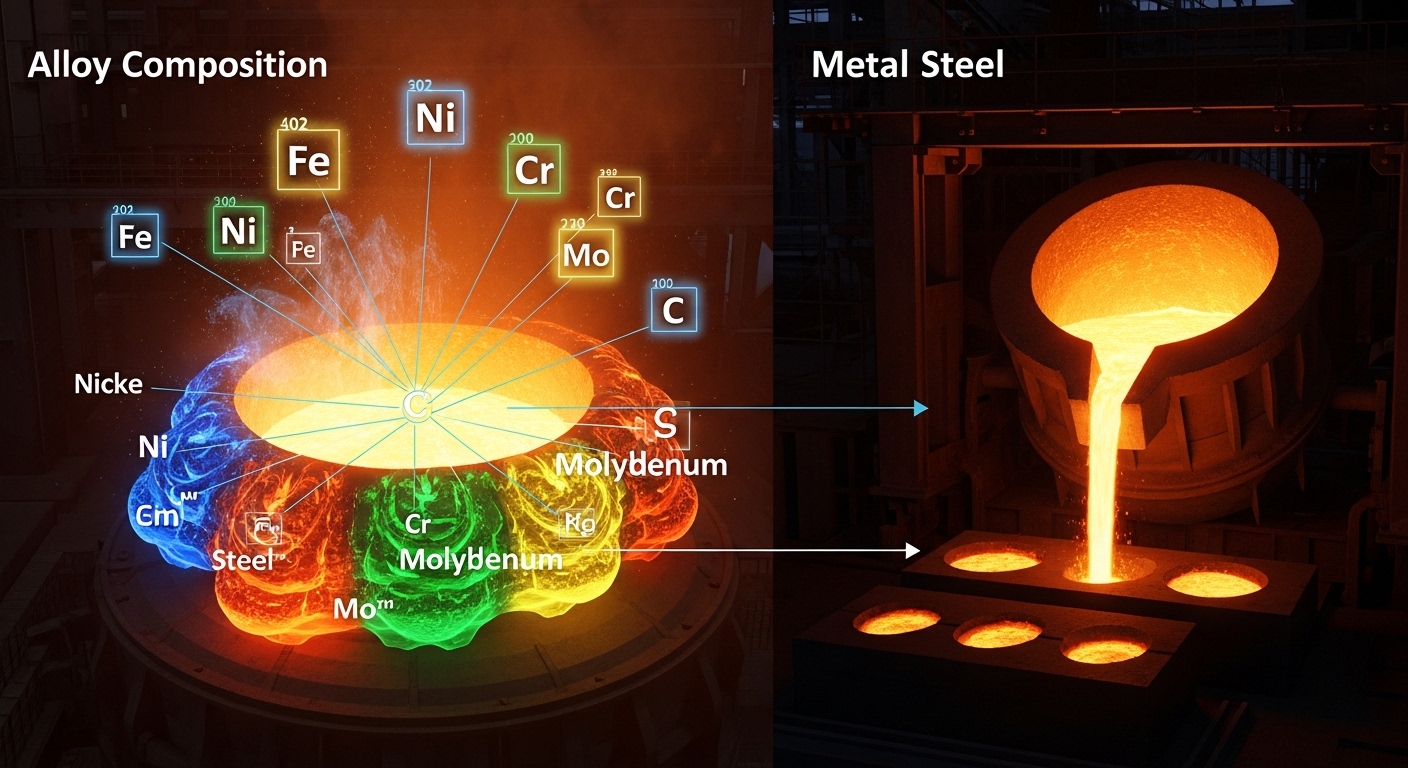
  • Metal Composition: A Complete Guide to Alloys and Metallurgy

    Metal Composition: A Complete Guide to Alloys and Metallurgy

    Metal composition determines whether a skyscraper stands tall for a century or an aircraft can safely fly at 35,000 feet. The difference between pure iron and the steel that builds our world comes down to carefully controlled chemical makeup.

    What Is Metal Composition?

    Pure metals rarely meet industrial demands. Gold is too soft for jewelry without alloying. Pure iron corrodes rapidly. Copper alone lacks the strength for electrical connectors.

    By controlling composition at the atomic level, metallurgists create materials that exceed the sum of their parts. This has driven human civilization from the Bronze Age to today’s advanced aerospace alloys.

    I’ve spent years studying metallurgy, and what fascinates me most is how tiny changes in composition—sometimes less than 1%—can transform a material’s behavior completely.

    Alloy: A mixture of chemical elements of which at least one is a metal. Unlike chemical compounds, the constituent elements in alloys retain their individual identities and can be separated by physical means.

    What Is an Alloy?

    Alloys dominate our material world. Over 90% of metal used in manufacturing exists as alloy rather than pure element.

    The atoms in alloys arrange themselves in specific patterns. These atomic arrangements—called crystal structures—determine the material’s fundamental properties.

    Think of alloys like recipes. Just as a pinch of salt transforms a dish, a fraction of a percent of carbon transforms iron into steel.

    Types of Alloys: How Atoms Arrange

    Alloys form through two primary mechanisms at the atomic level. Understanding these reveals why composition matters so profoundly.

    Substitutional Alloys

    In substitutional alloys, atoms of similar size replace each other in the crystal lattice. The guest atoms substitute for host atoms like swapping players in a formation.

    Brass works this way. Zinc atoms (similar size to copper) replace some copper atoms in the lattice structure. This substitution increases strength while maintaining electrical conductivity.

    Quick Summary: Substitutional alloys form when component atoms have similar atomic radii (within 15%). The atoms replace each other in crystal lattice positions, creating a homogeneous solid solution.

    Common substitutional alloys include:

    AlloyBase MetalAlloying ElementKey Property Change
    BrassCopperZinc (5-40%)Increased strength, lower cost
    BronzeCopperTin (up to 12%)Improved corrosion resistance
    Sterling SilverSilverCopper (7.5%)Hardness for durability
    Jewelry GoldGoldCopper, Silver, ZincWear resistance

    Interstitial Alloys

    Interstitial alloys form when smaller atoms fit into the spaces (interstices) between larger atoms in the crystal lattice.

    Steel is the most important interstitial alloy. Carbon atoms (much smaller than iron) occupy gaps in the iron lattice. This simple addition—usually less than 2% carbon—transforms soft, pure iron into one of humanity’s most versatile materials.

    Interstitial Alloy: An alloy where smaller atoms occupy spaces between larger atoms in the crystal structure. This creates lattice strain that significantly increases hardness and strength.

    The strain from these interstitial atoms prevents layers of metal from sliding past each other easily. This resistance to slip is what makes steel hard and strong.

    Key interstitial alloys include:

    • Steel: Iron with carbon (0.02-2.1%)
    • Cast Iron: Iron with higher carbon content (2-4%)

    Homogeneous vs Heterogeneous Alloys

    Homogeneous alloys consist of a single phase throughout. The components are uniformly distributed at the atomic level. Most substitutional alloys fall into this category.

    Heterogeneous alloys contain multiple distinct phases. You might see different compositions under a microscope, even though they appear uniform to the naked eye.

    Many high-strength steels are heterogeneous. They combine hard, brittle phases with soft, ductile phases to achieve an optimal balance of properties.

    Ferrous vs Non-Ferrous Metals: The Fundamental Division

    This simple distinction creates two vast families of alloys with distinct properties and applications.

    PropertyFerrous MetalsNon-Ferrous Metals
    Iron ContentPrimary componentNo significant iron
    MagneticGenerally magneticNon-magnetic (exceptions exist)
    Corrosion ResistancePoor (except stainless steel)Generally excellent
    WeightHeavier (higher density)Lighter options available
    CostGenerally economicalVaries widely
    RecyclingHighly recyclableRecyclable, value varies

    Ferrous Alloys

    Steel is the ferrous alloy that built modern civilization. Its versatility comes from carbon content and additional alloying elements.

    Carbon steel contains primarily iron and carbon. Small carbon increases make a huge difference:

    • Low carbon (0.05-0.25%): Formable, used for car bodies
    • Medium carbon (0.25-0.60%): Stronger, used for machinery
    • High carbon (0.60-1.00%): Very hard, used for cutting tools

    Alloy steels add other elements for specific properties:

    • Chromium: Hardness, wear resistance
    • Nickel: Toughness, corrosion resistance
    • Manganese: Strength, hot working characteristics
    • Molybdenum: High-temperature strength
    • Vanadium: Grain refinement, strength

    Non-Ferrous Alloys

    Non-ferrous alloys excel where weight, corrosion resistance, or conductivity matter most.

    Aluminum alloys power the aerospace industry. Aluminum itself is light and corrosion-resistant, but alloying adds strength. Common additions include:

    • Copper: Strength
    • Magnesium: Strength without weight penalty
    • Silicon: Castability
    • Zinc: Strength (7000-series aircraft alloys)

    Copper alloys serve where conductivity or aesthetics matter. Bronze and brass dominate this category.

    Titanium alloys offer the ultimate strength-to-weight ratio with excellent corrosion resistance. These properties make titanium essential for aerospace, medical implants, and chemical processing.

    Common Alloy Systems and Their Applications

    Steel Alloys: The Workhorse Materials

    Steel production exceeds 1.8 billion tons annually worldwide. This staggering demand reflects steel’s unmatched versatility.

    Carbon Steel

    Carbon steel forms the backbone of construction and manufacturing. Its properties scale directly with carbon content.

    TypeCarbon ContentPropertiesTypical Uses
    Low Carbon0.05-0.25%Soft, ductile, easily formedAuto bodies, pipe, wire
    Medium Carbon0.25-0.60%Stronger, less ductileGears, rails, machinery
    High Carbon0.60-1.00%Hard, wear-resistantCutting tools, springs

    Steel Composition: Iron is the primary element (98-99.5%). Carbon content ranges from 0.02% to just over 2%. Additional elements such as manganese, silicon, phosphorus, and sulfur are present in small amounts.

    Stainless Steel

    Stainless steel contains at least 10.5% chromium. This chromium forms a thin, invisible oxide layer that protects the underlying metal from corrosion.

    Common stainless steel compositions include:

    • 304 (18-8 stainless): 18% chromium, 8% nickel. The most common grade for general use
    • 316: Adds molybdenum for superior corrosion resistance
    • 410: Lower chromium, heat-treatable for cutlery
    • 17-4 PH: Precipitation hardening for high strength

    Stainless steel’s self-healing oxide layer makes it ideal for food processing, medical instruments, architecture, and marine environments.

    Tool Steels

    Tool steels contain tungsten, molybdenum, cobalt, and vanadium in various combinations. These elements create hard, wear-resistant materials that retain their edges at high temperatures.

    I’ve worked with tool steel in machining applications. The difference between cheap carbon steel drill bits and proper tool steel bits becomes obvious within minutes of use. Good tool steel stays sharp through hundreds of holes where cheaper steel dulls quickly.

    Aluminum Alloys: Lightweight Champions

    Pure aluminum is too soft for structural use, but alloying creates materials that are both light and strong.

    The Aluminum Association uses a four-digit numbering system:

    SeriesPrimary AlloyCharacteristicsApplications
    1xxxNone (99%+ Al)Excellent conductivityElectrical conductors
    2xxxCopperHigh strengthAircraft structures
    3xxxManganeseGood workabilityCooking utensils, roofing
    5xxxMagnesiumExcellent corrosion resistanceMarine, cryogenic tanks
    6xxxMagnesium + SiliconFormable, extrudableStructural extrusions
    7xxxZincHighest strengthAircraft, military

    Alloy 7075 contains zinc, magnesium, and copper. It develops tensile strength comparable to some steels at one-third the weight. This alloy makes modern commercial aviation possible.

    Copper Alloys: Conductive and Aesthetic

    Copper has served humanity for over 10,000 years. Its excellent conductivity and distinctive appearance keep it relevant today.

    Bronze vs Brass: Understanding the Difference

    CharacteristicBronzeBrass
    Primary Alloying ElementTin (typically 5-12%)Zinc (5-40%)
    ColorReddish-brownYellow-gold
    HardnessHarderSofter
    Corrosion ResistanceExcellent (especially saltwater)Good (can dezincify)
    Typical UsesBearings, marine hardware, statuesPlumbing, musical instruments, fittings

    Bronze traditionally defined the Bronze Age (3300-1200 BCE). Its lower melting point compared to pure copper made it accessible to ancient metalworkers.

    Brass became prominent later, valued for its gold-like appearance at a fraction of the cost. The addition of zinc lowers the melting point further and increases malleability.

    Titanium Alloys: High-Performance Materials

    Titanium offers an exceptional combination of properties: low density (45% lighter than steel), high strength, and outstanding corrosion resistance.

    Commercially pure titanium (grades 1-4) serves chemical processing and marine applications where corrosion resistance is paramount.

    Titanium alloys (grades 5 and above) provide higher strength for aerospace use:

    • Ti-6Al-4V (Grade 5): The workhorse titanium alloy. 6% aluminum, 4% vanadium. Used in aircraft engines, frames, and fasteners
    • Ti-6Al-4V ELI: Extra low interstitial version for medical implants
    • Ti-3Al-8V-6Cr-4Mo-4Zr: Deep hardening for high-strength applications

    Titanium’s biocompatibility makes it ideal for medical implants. Hip replacements, dental implants, and pacemaker cases commonly use titanium alloys.

    Nickel-Based Superalloys

    Superalloys maintain strength at extreme temperatures. They make jet turbine engines possible.

    Typical compositions include:

    • Nickel: 50-60% (base metal)
    • Chromium: 10-20% (corrosion resistance)
    • Cobalt: 5-15% (high-temperature strength)
    • Aluminum + Titanium: 3-6% (precipitation hardening)
    • Tungsten, Molybdenum, Rhenium: solid solution strengthening

    Inconel 718, a common superalloy, operates continuously at temperatures up to 1300degF (700degC). This performance enables modern jet engines and rocket motors.

    Heat Treatment: Transforming Properties Through Temperature

    The same steel can be soft, brittle, or tough depending entirely on heat treatment. This versatility explains why steel remains indispensable after thousands of years.

    Heat Treatment Processes

    Annealing

    Heating metal above its critical temperature, holding it, then cooling slowly. This softens the metal, relieves internal stresses, and increases ductility.

    I anneal steel before machining complex parts. The softer material cuts more cleanly and produces less tool wear. After machining, I can heat-treat again for hardness.

    Normalizing

    Similar to annealing but with faster cooling (air cooling). This creates a more uniform grain structure and relieves stresses from forging or rolling.

    Quenching

    Rapid cooling from high temperature, typically in water, oil, or polymer solutions. The rapid cooling “freezes” the high-temperature crystal structure, creating martensite—an extremely hard but brittle phase in steel.

    Quenching creates maximum hardness. The tradeoff is brittleness. Most quenched parts require tempering.

    Tempering

    Reheating quenched steel to a lower temperature (300-1300degF) to reduce brittleness while retaining most of the hardness. Tempering time and temperature determine the final balance of properties.

    Quick Summary: Quenching makes steel hard but brittle. Tempering trades some hardness for toughness. Higher tempering temperatures produce softer but tougher steel.

    Precipitation Hardening

    Also called age hardening. This process forms tiny particles (precipitates) within the metal that impede dislocation movement.

    Aluminum alloys like 2024 and 7075 gain their strength through precipitation hardening. The alloy is solution-treated, quenched, then aged at moderate temperature for hours.

    This process can double or triple the strength of aluminum without adding weight.

    How Composition Affects Mechanical Properties

    Understanding the relationship between composition and properties lets engineers select the right material for any application.

    Strength

    Strength increases through several mechanisms:

    1. Solid solution strengthening: Adding atoms that differ in size from the base metal creates lattice strain
    2. Grain size reduction: Smaller grains mean more grain boundaries, which block dislocation movement
    3. Precipitation hardening: Fine particles impede dislocation motion
    4. Work hardening: Deforming the metal creates more dislocations that tangle with each other

    Hardness

    Hardness relates closely to strength but specifically measures resistance to surface deformation. Carbon is the most effective hardness enhancer for iron-based alloys.

    Carbon content determines steel’s maximum attainable hardness. Higher carbon allows higher hardness after proper heat treatment.

    Ductility

    Ductility measures how much a material can deform before breaking. Pure metals are typically very ductile. Alloying generally reduces ductility while increasing strength.

    This tradeoff between strength and ductility forms one of metallurgy’s fundamental challenges. Engineers balance these competing demands based on application requirements.

    Corrosion Resistance

    Chromium creates the most effective corrosion resistance in iron alloys. At least 10.5% chromium enables the protective oxide layer that defines stainless steel.

    For non-ferrous metals, alloying can improve or reduce corrosion resistance. Bronze’s tin addition improves corrosion resistance compared to pure copper.

    Modern Alloys: The Cutting Edge

    Metallurgy continues advancing rapidly. New compositions enable technologies that were impossible just decades ago.

    High-Entropy Alloys

    Traditional alloys contain one primary element with small amounts of others. High-entropy alloys flip this model completely.

    HEAs contain five or more elements in roughly equal proportions (typically 5-35% each). This unusual composition creates unique properties:

    • Exceptional strength at high temperatures
    • Excellent wear resistance
    • Enhanced corrosion resistance
    • Stable microstructure

    These properties make HEAs promising for turbine engines, nuclear reactors, and cutting tools.

    High-Entropy Alloy: An alloy containing multiple principal elements in roughly equal proportions. The high configurational entropy stabilizes solid solutions rather than forming intermetallic compounds.

    Nanostructured Alloys

    Reducing grain size to the nanometer scale creates extraordinary properties. Nanostructured metals can be several times stronger than their conventional counterparts.

    These materials are produced through severe plastic deformation, electrodeposition, or powder consolidation techniques.

    Amorphous Metals (Metallic Glasses)

    Most metals have orderly crystal structures. Amorphous metals lack this long-range order, more like frozen liquid than crystal.

    This unusual structure provides:

    • Exceptional strength and hardness
    • High elasticity (elastic limit ~2%)
    • Excellent corrosion resistance
    • Soft magnetic properties

    Metallic glasses find applications in electronics, medical devices, and sports equipment.

    Shape Memory Alloys

    Nitinol (nickel-titanium alloy) remembers its original shape. After deformation, heating returns it to the predetermined shape.

    This property enables stents that expand at body temperature, medical guidewires that navigate complex anatomy, and actuators in aerospace systems.

    Sustainability and Metal Recycling

    Metals are infinitely recyclable without losing their properties. This recyclability makes metals central to a circular economy.

    Steel is the most recycled material on Earth. Over 650 million tons are recycled annually worldwide. Recycled steel requires 60% less energy than primary production.

    Aluminum recycling saves even more energy—95% compared to primary production. An aluminum can recycled today can be back on shelves as a new can in just 60 days.

    Alloy composition affects recyclability. Mixed alloy scrap creates challenges because different alloys have different melting points and processing requirements.

    The industry addresses this through:

    • Improved sorting technology (X-ray fluorescence, laser-induced breakdown spectroscopy)
    • Alloy design for recyclability
    • Better labeling and tracking of alloy grades

    Modern alloy development increasingly considers life cycle impact. Sustainable metallurgy aims to minimize energy use, emissions, and waste while maintaining performance.

    Frequently Asked Questions

    What is metal composition?

    Metal composition refers to the chemical makeup of metallic substances, specifically the combination of elements in alloys. This composition determines properties such as strength, hardness, ductility, and corrosion resistance.

    What is an alloy?

    An alloy is a metallic substance made by combining two or more elements, with at least one being a metal. The resulting material exhibits metallic properties while often having enhanced characteristics compared to its constituent elements.

    What is the difference between ferrous and non-ferrous metals?

    Ferrous metals contain iron as the primary component and are generally magnetic. Non-ferrous metals do not contain significant amounts of iron and are typically non-magnetic. Ferrous metals tend to be heavier and less corrosion-resistant than non-ferrous alternatives.

    What elements are in steel?

    Steel is primarily iron (98-99.5%) with carbon content ranging from 0.02% to just over 2%. Additional elements may include manganese, silicon, phosphorus, sulfur, and various alloying elements like chromium, nickel, and molybdenum depending on the steel grade.

    How does carbon affect steel properties?

    Carbon is the most critical alloying element in steel. Higher carbon content increases hardness and strength but reduces ductility and weldability. Low carbon steel is soft and formable, while high carbon steel is hard and wear-resistant.

    What is stainless steel made of?

    Stainless steel must contain at least 10.5% chromium, which forms a protective oxide layer. Common grades also contain nickel, molybdenum, and other elements. The 304 grade, most common for general use, contains approximately 18% chromium and 8% nickel.

    What is the difference between bronze and brass?

    Bronze is primarily copper alloyed with tin (typically 5-12%), while brass is copper alloyed with zinc (5-40%). Bronze has a reddish-brown color, is harder, and offers superior corrosion resistance, especially in marine environments. Brass has a yellow-gold color and is more malleable.

    What are the types of alloys?

    Alloys are classified by atomic structure into substitutional alloys (similar-sized atoms replace each other in the crystal lattice) and interstitial alloys (smaller atoms fit into spaces between larger atoms). They are also classified by composition into ferrous alloys (containing iron) and non-ferrous alloys (all other metals).
  • 2T vs 4T: The Complete Guide to All Three Meanings

    2T vs 4T: The Complete Guide to All Three Meanings

    Searching for “2T vs 4T” can be confusing because this term has completely different meanings depending on your context. You might be a welder wondering about torch control modes, a motorcycle enthusiast comparing engine types, or a parent trying to understand toddler clothing sizes.

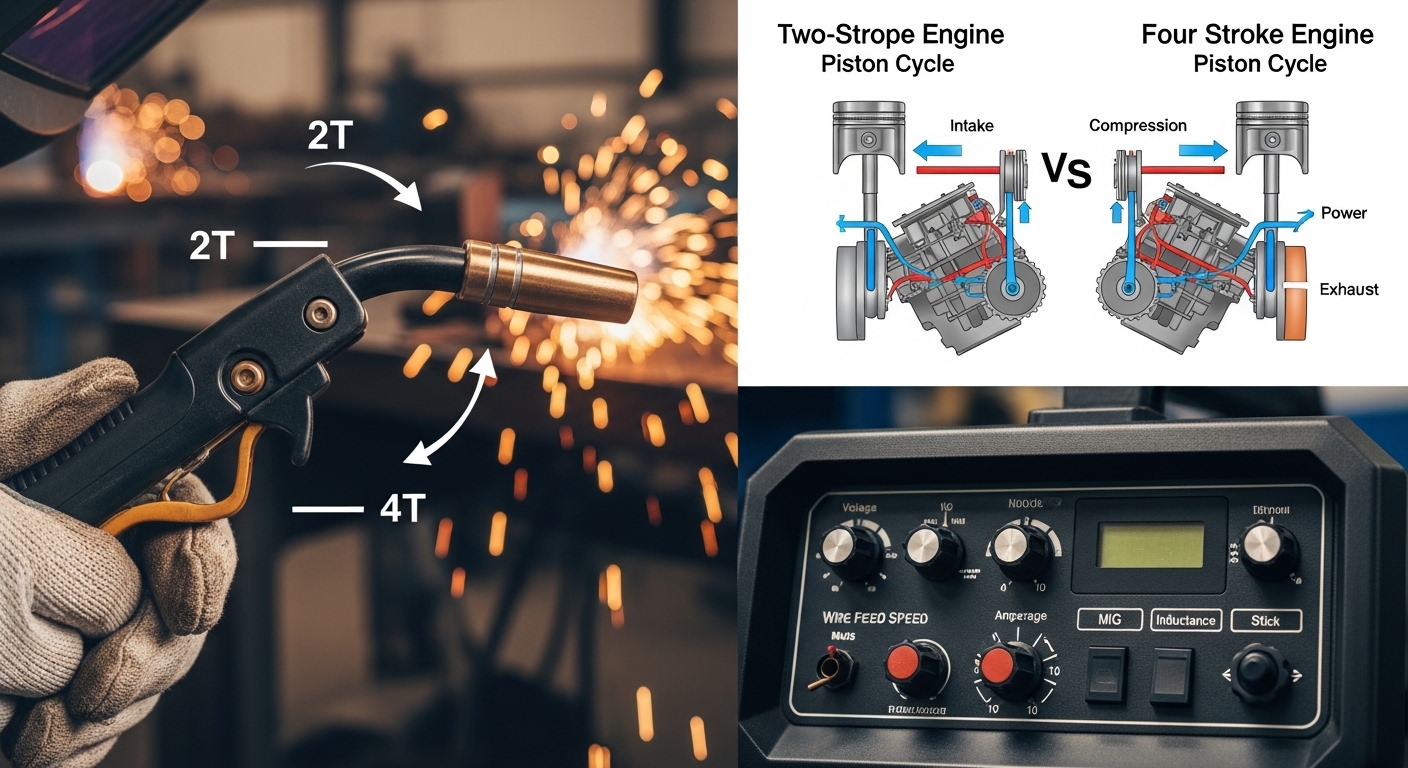
    2T vs 4T refers to three different things: In welding, it compares torch trigger modes (2-touch vs 4-touch). For engines and motorcycles, it compares 2-stroke vs 4-stroke engine designs. For children’s clothing, it indicates toddler sizes (2T fits roughly 2-year-olds, 4T fits roughly 4-year-olds).

    I’ve researched all three contexts to help you find the information that actually applies to your situation. Let me quickly help you identify which section you need.

    Which Context Applies to You?

    Quick Context Guide: Find your situation below and jump to the relevant section.

    If You’re Looking For…Your Context Is…Jump To Section
    Welding torch settings, trigger control, MIG/TIG modesWelding (Torch Control)2T vs 4T in Welding
    Dirt bikes, motorcycles, engine types, stroke differencesEngines (2-Stroke vs 4-Stroke)2-Stroke vs 4-Stroke Engines
    Toddler clothes, children’s sizing, age 2-4 clothingClothing (Toddler Sizes)2T vs 4T Toddler Sizes

    2T vs 4T in Welding: Torch Control Modes Explained

    2T and 4T in welding refer to how your torch trigger operates. 2T (2-touch) is momentary control where you hold the trigger to weld and release to stop. 4T (4-touch) is latching control where you press once to start and once to stop.

    Think of 2T like a car’s horn that only works while you press it. 4T is like cruise control on your car.

    2T Mode (2-Touch): Press and hold the torch trigger to start welding. Release the trigger to stop the arc. Simple, direct control for quick start and stop welding.

    4T Mode (4-Touch): Press trigger once to start welding. Release trigger and welding continues. Press trigger again to stop welding. Reduces hand fatigue during long weld runs.

    How Each Mode Works in Practice

    In 2T mode, your finger stays on the trigger the entire time you’re welding. This gives you immediate control to stop the arc instantly by releasing.

    I’ve welded in 2T mode for tack welds and short joints. It feels natural for quick work because you’re already holding the trigger anyway.

    4T mode works differently. You press and release to start, the welder keeps the arc going, and you press and release again when finished.

    This is like setting cruise control. Once welding starts, you can focus on your technique without maintaining constant trigger pressure.

    Professional welders I’ve spoken with on welding forums consistently mention hand fatigue as a deciding factor. One welder put it simply: “I prefer 4T because it saves fatigue in your hand.”

    2T vs 4T in TIG Welding

    For TIG welding, both modes serve different purposes depending on your weld length and complexity.

    2T for TIG is best when: You’re making short welds, doing tack welds, or need frequent starts and stops. The trigger gives you precise control over arc initiation and termination.

    4T for TIG excels when: You’re running long beads or welding in awkward positions where maintaining trigger pressure becomes difficult. The latching feature lets you focus entirely on torch manipulation.

    Many TIG welders use 2T for most work. However, 4T becomes valuable during long pipe welds or extensive fabrication work where hand fatigue becomes a real issue.

    2T vs 4T in MIG Welding

    MIG welding applications for these modes follow similar logic, but 4T sees more frequent use in production environments.

    2T for MIG works well for: Short stitch welds, spot welding, and repair work. The momentary control helps with heat management on thin materials.

    4T for MIG shines during: Long continuous welds, production work, and situations requiring consistent travel speed. Forum feedback indicates “4T is mostly for long runs. It’s handy if you’re doing lots of long runs.”

    Pros and Cons: Welding Edition

    2T Mode4T Mode
    Best ForShort welds, tacking, quick start/stopLong runs, reduced fatigue
    Control TypeMomentary (hold to weld)Latching (press on, press off)
    Finger FatigueHigher during long weldsSignificantly reduced
    Learning CurveEasier for beginnersRequires practice for timing
    Emergency StopInstant (just release)Requires second trigger press

    Which Welding Mode Should You Choose?

    Start with 2T mode if you’re new to welding. The direct control helps you develop proper technique without complicating the process.

    Switch to 4T once you’re comfortable and notice hand fatigue affecting your weld quality. The difference becomes obvious during longer projects.

    Many welders keep their machine in 2T for general work and switch to 4T only for specific jobs that involve extended welding time.

    2-Stroke vs 4-Stroke Engines: The Complete Comparison

    2T and 4T in engines refer to how many piston strokes complete one power cycle. 2-stroke engines complete the cycle in two movements (up and down). 4-stroke engines need four movements (intake, compression, combustion, exhaust).

    This fundamental difference creates distinct advantages for each engine type depending on how and where you ride.

    How the Engine Cycles Work

    2-Stroke Cycle (2 movements):

    1. Up stroke: Compression creates power, fresh fuel enters the bottom
    2. Down stroke: Combustion pushes piston down, exhaust exits

    Everything happens in two piston movements. The engine fires every revolution, which is why 2-strokes feel punchy and responsive.

    4-Stroke Cycle (4 movements):

    1. Intake stroke: Piston goes down, fuel-air mixture enters
    2. Compression stroke: Piston goes up, mixture compresses
    3. Combustion stroke: Spark plug fires, piston pushed down
    4. Exhaust stroke: Piston goes up, pushes out exhaust gases

    The engine fires once every two revolutions. This creates smoother, more predictable power delivery.

    Power Characteristics and Performance

    2-stroke engines deliver their power differently than 4-strokes. Understanding this difference helps you choose the right engine for your riding style.

    2-stroke power delivery: Explosive and hit hard in the mid-to-high RPM range. Riders describe this as “coming on the pipe” when the power band suddenly engages.

    4-stroke power delivery: Smooth and linear across the RPM range. Power builds progressively from low to high RPM without sudden spikes.

    Quick Summary: 2-strokes feel like lightswitch power – off then suddenly ON. 4-strokes feel like a dimmer switch – gradual power that builds steadily.

    Power comparison gets interesting when comparing engine sizes. A 125cc 2-stroke produces similar power to a 250cc 4-stroke. This is why 2-strokes are called “powerful for their size.”

    Weight and Physical Differences

    2-stroke engines weigh less than comparable 4-strokes. This matters when you’re loading your bike into a truck or picking it up after a crash.

    Because they have fewer parts, 2-strokes are simpler and lighter. A modern 250 4-stroke can weigh 20-30 pounds more than its 2-stroke counterpart.

    This weight difference affects handling. Lighter bikes feel more agile and easier to maneuver through tight terrain.

    Maintenance and Reliability

    2-strokes have fewer moving parts. This means fewer things can break and simpler maintenance procedures.

    However, 2-strokes require pre-mixed fuel (oil and gas combined). You need to measure and mix fuel correctly every time you fill up.

    4-strokes have more complex internal components: valves, camshafts, timing chains. When a 4-stroke needs engine work, it costs significantly more.

    Forum members consistently mention maintenance costs as a major factor. One rider noted: “Another disadvantage to a modern water cooled 4t over a 2t is more complicated maintenance and the higher cost for engine repairs and rebuilds.”

    Riding Characteristics by Terrain

    Real rider experiences from forums reveal clear preferences based on where and how you ride.

    Tight woods and technical trails: 2-strokes excel here. Their lighter weight and snappy power help navigate obstacles. The ability to quickly blip the throttle helps in technical sections.

    Open tracks and desert riding: 4-strokes dominate. Their smooth power and stability at speed make them less fatiguing for long rides. One rider explained: “Faster pace wide open riding, 4t all day.”

    Enduro and hard enduro: Opinions vary, but many prefer 2-strokes for extreme terrain. “For woods, racing on mixed terrain, tricks or hard/extreme enduro then it has to be 2t.”

    Long distance dual-sport: 4-strokes win. “I use 4t for any bike that is on the road or has to go long distance.”

    2-Stroke vs 4-Stroke Comparison Table

    2-Stroke4-Stroke
    Power Cycle2 piston movements4 piston movements
    Power DeliveryExplosive, hits hardSmooth, linear
    WeightLighterHeavier
    Moving PartsFewerMore
    FuelPre-mix requiredOil and gas separate
    Maintenance CostLowerHigher
    TractionCan be trickyBetter rear wheel traction
    Best TerrainTight, technical trailsOpen tracks, long distance

    Environmental Considerations

    2-strokes produce more emissions because some unburned fuel escapes through the exhaust. This led to EPA regulations that restricted 2-strokes in street bikes and many recreational vehicles.

    Modern 2-strokes have improved significantly. Direct injection and other technologies have reduced emissions while maintaining the characteristic power advantage.

    4-strokes burn fuel more completely, producing fewer emissions. This environmental advantage helped 4-strokes become dominant in street-legal motorcycles.

    Is 2T or 4T Better for Beginners?

    This question appears frequently in forums. The answer depends on your riding goals and prior experience.

    4-strokes are generally considered easier for beginners because the smooth power delivery is more forgiving. You’re less likely to loop out or lose traction unexpectedly.

    However, some experienced riders argue beginners should start on 2-strokes to learn proper throttle control and riding fundamentals.

    The consensus: If you’re riding easy trails and learning basic skills, start with a 4-stroke. If you’re ambitious and want to develop advanced techniques, a 2-stroke can teach valuable lessons about power management.

    2T vs 4T in Toddler Clothing Sizes

    2T and 4T in clothing refer to toddler sizes for approximately 2-year-olds and 4-year-olds respectively. The “T” stands for toddler and indicates these clothes are designed for children who are not yet potty trained.

    What Toddler Sizes Mean

    2T: Fits toddlers approximately 2 years old, typically 26-28 pounds and 32-34 inches tall. These clothes feature roomier bottoms to accommodate diapers.

    4T: Fits toddlers approximately 4 years old, typically 34-38 pounds and 37-40 inches tall. Slightly slimmer than 2T and 3T as children transition away from diapers.

    The key difference between toddler sizes (2T, 3T, 4T) and regular children’s sizes (2, 3, 4) is the cut. Toddler sizes allow more room for diapers.

    Toddler Size Reference Chart

    SizeApproximate AgeWeightHeight
    2T2 years26-28 lbs32-34 inches
    3T3 years29-32 lbs34-37 inches
    4T4 years34-38 lbs37-40 inches

    Choosing Between Sizes

    Every child grows differently. Use the size guidelines as a starting point, but always consider your child’s current measurements.

    If your child is between sizes, size up for longer wear. Toddlers grow quickly, and slightly larger clothes last through growth spurts.

    For pants, prioritize waist fit if your child wears diapers. Toddler sizes provide the extra room needed for comfort.

    Quick Reference: All 2T vs 4T Meanings

    Context2T Means4T Means
    Welding2-Touch (momentary trigger control)4-Touch (latching/cruise control)
    Engines2-Stroke (2 movements per power cycle)4-Stroke (4 movements per power cycle)
    ClothingSize 2 Toddler (approx. age 2)Size 4 Toddler (approx. age 4)

    How to Choose Between 2T and 4T

    Welding Mode Decision Guide

    Choose 2T for welding if you make short welds, do frequent tack welds, prioritize quick start/stop control, or are just learning to weld.

    Choose 4T for welding if you make long continuous welds, experience hand fatigue, weld in awkward positions, or want to focus entirely on technique rather than trigger control.

    Pro Tip: Start with 2T until you notice hand fatigue affecting your weld quality. That’s your signal to try 4T mode.

    Engine Type Decision Guide

    Choose a 2-stroke engine if you ride tight technical trails, want lighter weight for easier handling, prefer simpler and cheaper maintenance, enjoy responsive power delivery, or mostly ride off-road.

    Choose a 4-stroke engine if you ride open tracks and desert, need street legality, prefer smooth predictable power, want better traction, or ride long distances regularly.

    Pro Tip: Many experienced riders eventually own both. One forum member shared: “Having owned both at the same time I’d agree, the 2T are awesome single track / woods bikes and so so when the distances start to stretch out.”

    Toddler Clothing Decision Guide

    Choose 2T if your child is approximately 2 years old, weighs 26-28 pounds, is 32-34 inches tall, and still wears diapers regularly.

    Choose 4T if your child is approximately 4 years old, weighs 34-38 pounds, is 37-40 inches tall, or is transitioning away from diapers.

    Frequently Asked Questions

    What’s better, 2T or 4T?

    The answer depends entirely on your context. For welding, 4T is better for long runs while 2T excels at short welds. For engines, 2-strokes are lighter and punchier while 4-strokes offer smooth power and stability. The key is identifying which context applies to your situation first.

    What’s the difference between 2T and 4T?

    In welding, 2T means momentary trigger control (hold to weld) while 4T means latching control (press on, press off). For engines, 2T is a 2-stroke engine that completes its power cycle in two piston movements, while 4T is a 4-stroke engine using four movements. In clothing, 2T and 4T refer to toddler sizes for approximately 2-year-olds and 4-year-olds respectively.

    Why do people prefer 2-stroke over 4-stroke?

    Riders prefer 2-strokes because they’re lighter, simpler, and produce more power per cubic centimeter. A 125cc 2-stroke delivers similar power to a 250cc 4-stroke. 2-strokes also have fewer moving parts, making maintenance easier and cheaper. Their snappy power delivery makes them fun to ride in technical terrain where quick throttle response matters.

    Why is 2T two-stroke?

    2T stands for two-stroke because the engine completes its entire power cycle in two piston movements: one up and one down. During the up stroke, compression happens while fresh fuel enters the bottom. The down stroke creates power from combustion while exhaust exits. This efficient design produces power every revolution.

    Is 4T better than 2T?

    Neither is universally better. 4-stroke engines are better for street use, long distance riding, and riders who want smooth predictable power. 2-strokes are better for tight trails, riders who want lightweight bikes, and those who enjoy punchy power delivery. In welding, 4T mode reduces fatigue during long welds while 2T offers better control for short work. The right choice depends on your specific application.

    Is 2T more powerful than 4T?

    2-strokes produce more power per cubic centimeter than 4-strokes. A general rule is that a 2-stroke produces roughly double the power of a same-size 4-stroke. This is why 125cc 2-strokes compete with 250cc 4-strokes. However, 4-strokes can still be more powerful overall in larger displacements and deliver that power more smoothly across the RPM range.

    Is it harder to ride a 2-stroke or 4-stroke?

    4-strokes are generally considered easier to ride, especially for beginners. Their smooth, linear power delivery is more forgiving and less likely to catch riders off guard. 2-strokes require more skill to manage their explosive power band. The snappy throttle response that makes 2-strokes fun also demands better throttle control and rider technique to avoid traction loss or looping out.

  • Can You Run A Generator In The Rain: Uncover the Mystery

    Can You Run A Generator In The Rain: Uncover the Mystery

    Have you ever wondered if running your generator in the pouring rain is safe? You might think it’s a necessary risk when the power’s out and it’s teeming outside, but let’s delve into the facts before you make any hasty decisions.

    Understanding the dynamics of electricity and water is crucial – two elements that don’t mix well. Running a generator in the rain is not just potentially damaging to the unit itself. It can also lead to dangerous, even life-threatening situations.

    Please don’t get disheartened thinking you’re left without a power source when it’s raining. There are safe and effective ways to use a generator during wet conditions that won’t compromise your safety.

    This article will provide you with a detailed guide to using a generator in rainy weather so you can keep the lights on without putting yourself, your family, or your property at risk. After all, being part of a community means looking out for each other’s safety; sharing knowledge is one of the best ways to do that.

    Can You Run a Generator in the Rain?

    Can You Run a Generator in the Rain?

    You can’t run a generator in the rain as it poses significant safety risks. These risks include causing electrical shocks or even starting a fire. Such incidents could turn your stormy night into a dangerous disaster.

    It’s not just about the generator getting wet; it’s the potential for water to come into contact with electricity. This combination creates a highly hazardous situation. Water and electricity should never be mixed as they are a volatile combination.

    The safety of you and your family is paramount. Understanding the risks associated with rain and generators is essential to that safety consciousness. When you’re part of a community that values safety and well-being like ours, it’s important to be aware of the proper practices and precautions.

    Although it may seem like a good idea to have a generator running during a storm to keep the lights on and the heat going, the potential risks far outweigh the benefits.

    However, don’t despair because there are ways to use a generator when it’s raining safely. Let’s equip ourselves with the knowledge necessary to navigate these tricky situations safely. We can start with some practical tips for using a generator when it’s raining.

    5 Tips for Using a Generator When It’s Raining

    If you’re planning to use a generator in the rain, following a few safety tips is important to ensure smooth operation and prevent accidents.

    Designate a solid, dry outdoor space for operating the generator

    Just like a knight needs his dry castle to protect his armor from rusting, your generator also requires a solid, dry outdoor space to operate efficiently without the risk of damage from rain or other adverse weather conditions.

    It’s not just about keeping your generator dry but also about providing a sturdy base to minimize vibration and ensure stability during operation. Look for a flat, level area that is not prone to flooding.

    Keep it away from windows and vents to prevent carbon monoxide from entering your home. Also, avoid placing it near flammable materials to reduce the risk of fire.

    Remember, your generator is an integral part of your home’s emergency plan, akin to a loyal watchdog, ready to jump into action immediately. Therefore, it deserves a designated spot to keep it safe and ready to perform when needed.

    Keeping the generator in a well-ventilated but covered area can significantly reduce potential problems. An outdoor canopy, for example, can keep your generator dry while allowing for adequate ventilation.

    As you secure your generator’s position, another crucial aspect to consider is the power cord connecting your generator to your home, making sure that it’s weatherproof.

    Ensure the power cord connected to your home is weatherproof

    When ensuring your home’s safety, it’s critical to make sure the power cord connecting to your generator is weatherproof. This isn’t just about running a generator in the rain, it’s about creating an environment where you can rely on your generator to keep you safe and comfortable.

    Weatherproof power cords are designed to withstand not just rain but also snow, wind, and other harsh weather conditions. They’re made of durable materials and have special insulation that prevents water from seeping into the electrical connections. Remember, a wet power cord can lead to short circuits, electrical shocks, or even a fire. That’s a risk you don’t want to take.

    So, make it a habit to check your power cord before starting your generator. Ensure it’s in good condition and replace it if it’s frayed, damaged, or worn out. Also, consider using a weather-resistant extension cord cover for additional protection. This won’t only ensure the longevity of your power cord but also give you peace of mind, knowing that you’re doing everything you can to keep your home safe.

    Ultimately, it’s about creating a sense of security for yourself and your family, a little haven where you can weather any storm. Now, with your generator humming away securely, it’s time to turn our attention to another important aspect – making sure there’s adequate ventilation for your generator.

    Ensure There’s Adequate Ventilation

    Always remember that providing ample ventilation for your power source is crucial, as this minimizes risks and ensures smooth operation. Ventilation is not just about fresh air; it’s a vital safety measure to prevent carbon monoxide buildup, which can be lethal.

    As a responsible generator owner, you are part of a community that values safety and efficiency. Therefore, ensure your generator’s exhaust is directed away from any enclosed spaces, including homes, garages, or tents. If you’re running your generator in an outdoor setting, choosing a space with good natural airflow is key.

    So, while it’s important to keep your generator dry, you also need to prioritize its ventilation. This balance can be difficult to strike, especially when the weather is not cooperating. But remember, you’re not alone in this; we all face these challenges, and we overcome them together. By following these guidelines, you’re contributing to a safer, more efficient use of power generators for everyone.

    Speaking of weather, the next thing to consider is how to protect your generator from it. Yes, you guessed it, you need to add an operational cover suitable for the generator. This ensures your generator stays dry and operational, even in adverse weather conditions.

    Add an operational cover suitable for the generator

    Equipping your power source with a suitable operational cover is essential, ensuring its efficiency and longevity, even in the face of severe weather conditions. A well-fitted, robust cover protects your generator from rain and shields it from snow, dust, and other environmental elements that could damage its components.

    And remember, it’s not just any cover that will do. Your generator’s cover should be breathable to avoid overheating, water-resistant to protect against rain, and durable to withstand the test of time and harsh weather. It’s also crucial to ensure that the cover doesn’t obstruct the generator’s ventilation system to prevent the buildup of harmful fumes.

    When choosing a cover for your generator, consider one that fits snugly and doesn’t move easily with the wind—this way, you ensure that your generator is always protected, no matter the weather conditions. If possible, opt for a cover with an opening that allows you to access the generator’s control panel without removing the entire cover. This feature will make it easier for you to operate the generator during a downpour.

    Now that we’ve covered the importance of equipping your generator with a suitable cover, it’s crucial to remember that it’s not the ultimate solution. In the next section, we’ll discuss why it’s not recommended to run your generator during extreme weather events.

    Don’t Run Your Generator During Extreme Weather Events

    Surely, we’ve all been tempted to keep our power sources operating, even amidst severe weather, haven’t we? However, there’s a line to be drawn regarding your generator’s performance and safety.

    During extreme weather conditions, such as hurricanes, blizzards, hailstorms, and torrential rain, it’s not advisable to operate your generator. These severe conditions can damage the unit, compromise its operation, and potentially create hazardous situations.

    It’s all about being part of a community that values safety, prudence, and the longevity of our possessions.

    Remember, as a responsible generator owner, your safety and those around you are paramount. It can be frustrating in the face of a power outage, and your first instinct might be to keep your generator running.

    However, ensuring your equipment is operating safely and effectively is more important. Don’t let the desire to keep the lights on override your judgment.

    So, when Mother Nature is at her worst, take a step back, prioritize safety, and remember there are other ways to handle a power outage without risking your safety or damaging your generator. Speaking of which, wouldn’t it be great if you could still enjoy your day without letting a power outage rain on your parade? You can, and we’ll show you how in the next section.

    Don’t Let a Power Outage Rain on Your Parade

    Don’t let a power outage dampen your spirits even when it’s pouring outside; you need to be smart about running your generator.

    Safety should always be your top priority, especially when dealing with electricity during a rainstorm. Generators are great for keeping the lights on and your household appliances running, but they aren’t designed to be used in wet conditions.

    Rain or any form of moisture can easily seep into the outlets and cause a short circuit, leading to generator failure or, in worse cases, a dangerous electrical shock or a fire.

    Therefore, you must protect your generator from the elements. Consider investing in a generator tent or a portable generator enclosure. They’re designed to shield your generator from rain, snow, and dust while ensuring proper ventilation to prevent overheating.

    You’ll be able to keep the power running safely, even during the harshest weather conditions. Remember, we’re all in this together, navigating the challenges of power outages and unpredictable weather. By taking the necessary precautions, you’ll ensure your comfort, your safety, and that of your loved ones.

    Frequently Asked Questions

    What type of fuel should be used in a generator during rainy weather?

    You might be wondering about generator fuel in wet weather. Regardless of the weather, use the manufacturer’s recommended fuel for safety. Rain or shine, this rule doesn’t change. It’s all about belonging to a safe, informed community.

    How often should a generator be serviced to ensure safe use in the rain?

    You should service your generator at least once a year. Regular maintenance ensures it’s in top shape, keeping you safe and connected during rainy weather. Remember, you’re part of a community that values preparedness and safety.

    Is it safe to store a generator indoors during a rainstorm?

    No, storing a generator indoors during a rainstorm is unsafe. Generators emit carbon monoxide, a deadly gas. Always store them outdoors, away from doors, windows, and vents, to protect your household. Safety first!

    Can a generator be used in other types of extreme weather, like snow or high winds?

    Nearly 75% of generator failures occur due to improper use in extreme weather. You shouldn’t run your generator in snow or high winds, it’s risky. The safe operation ensures you’re part of the smart, prepared 25%.

    What are the potential dangers of running a generator in the rain without proper precautions?

    Running your generator in the rain without proper precautions can be risky. You’re risking electrocution, damage to the generator, or even a fire. Always ensure safety measures are taken to protect you and your equipment.

    Conclusion

    Running a generator in the rain isn’t the safest idea. You risk causing serious harm, such as electrocution, damaging your generator, or even causing a fire.

    Imagine you’re at a family gathering when a storm hits and decide to run your generator in the rain. You could end up ruining the event and endangering everyone present.

    However, with the right precautions, you can keep the lights on when it’s pouring. Use a weather-resistant enclosure, place it in an elevated position, and never touch it when you’re wet. These tactics can keep you powered up and safe even when the weather’s not on your side.

  • Predator 212 Oil Type, Capacity, and Change Interval Guide

    When it comes to maintaining the performance and longevity of your Predator 212 engine, one of the key factors that should never be overlooked is choosing the right oil type and ensuring timely changes. As engines work hard to power your equipment, keeping up with regular oil changes at recommended intervals plays a crucial role in preventing wear, tear, and potential damage.

    This guide will provide a detailed understanding of the Predator 212 oil type, capacity, and change interval, as well as maintenance tips. By following this guide, you can keep your Predator 212 engine running at peak performance for years to come.

    Understanding the Predator 212 Engine

    Understanding the Predator 212 engine is essential before diving into the specifics of oil types, capacities, and change intervals. This particular engine is popular among go-kart enthusiasts, mini-bike riders, and those needing durable equipment for various outdoor tasks. Produced by Harbor Freight Tools, this engine sports a 6.5 horsepower rating and a 212 cc displacement.

    Predator 212 oil type

    One impressive feature of the Predator 212 engine is its affordability. It offers a lot of power and durability for its price, making it a go-to option for those looking for a cost-effective alternative to more expensive engines. Additionally, its simple design means that it’s also easy to modify and maintain.

    Here are some key specifications of the Predator 212 engine:

    • Displacement: 212 cc
    • Horsepower: 6.5 HP
    • Fuel Tank Capacity: 0.95 gallons
    • Oil Capacity: 20 oz.
    • Cooling: Air-cooled
    • Shaft Size: 3/4″ diameter, 2.43″ length
    • Start Type: Recoil

    The engine features an overhead valve design (OHV), ensuring efficient operation and improved performance while keeping the engine compact. Its maximum torque reaches up to 9.7 ft-lbs at 2,500 RPM.

    When it comes to fuel type, the Predator 212 engine runs on unleaded gasoline with an octane rating of 87 or higher. Using high-quality fuel is important, as it can extend the life of your engine and increase overall performance. To keep your engine safe and reliable, it’s crucial to use the correct oil type and follow the recommended maintenance schedule.

    Moreover, the Predator 212 engine is known for its versatility. It can be used in various applications, such as:

    • Go-karts
    • Mini bikes
    • Tillers
    • Pressure washers
    • Small wood chippers
    • Log splitters
    • Generators

    Now that you have a better understanding of the Predator 212 engine, you can make more informed decisions about the type of oil to use, the appropriate capacity, and the ideal change interval. Stay tuned as I delve deeper into these topics in the following sections.

    Predator 212 Oil Types

    Predator 212 oil type

    When choosing the right oil for your Predator 212 engine, it’s important to be aware of different factors, including temperature and viscosity requirements. I’ll walk you through some suitable oil types for this engine in this section.

    Multi-grade Oils

    Predator 212 oil type: Multi-grade oils

    Multi-grade oils, such as 10W-30 or 10W-40, provide a good range of protection across various temperatures. They’re designed to perform in hot and cold climates, making them suitable for most Predator 212 applications. Here’s a table that demonstrates the various suitable multi-grade oils:

    Oil TypeTemperature Range
    10W-30-4°F to 86°F (-20°C to 30°C)
    10W-4014°F to 104°F (-10°C to 40°C)

    Single-grade Oils

    Single-grade oils can be more cost-effective if you’re operating your Predator 212 engine in a consistent climate. However, it’s essential to choose the correct viscosity for your environment. Some popular single-grade oils include SAE 30 and SAE 40:

    • SAE 30: Works well in warmer climates, with temperatures ranging from 50°F to 104°F (10°C to 40°C).
    • SAE 40: Recommended for hotter temperatures, generally above 77°F (25°C).

    Keep in mind that single-grade oils don’t offer the same flexibility as multi-grade options, so they’re less versatile when dealing with temperature fluctuations.

    Synthetic Oils

    Synthetic oils, such as 5W-30 or 5W-40, can offer improved performance, increased mileage, and better protection for your engine. They’re created through a chemical process, allowing for more consistent performance in extreme temperatures than conventional oils. Some advantages of synthetic oils include:

    • Reduced sludge formation
    • Quicker oil flow at startup
    • Improved fuel economy

    It’s worth noting that synthetic oils can be more expensive than conventional options, so they might not be the best choice if you’re looking to minimize costs.

    Making Your Decision

    To choose the right oil for your Predator 212 engine, consider the typical operating temperature and your budget first. A multi-grade oil is likely your best bet if you need a versatile option that performs well across various temperatures. For consistent climates, single-grade oils provide a cost-effective option. Finally, synthetic oils can be a worthwhile investment for those looking for improved performance and protection.

    Always consult your engine’s owner manual for specific oil recommendations, change intervals, and capacity before making your final decision. This will ensure the best performance and longevity of your Predator 212 engine.

    Determining Predator 212 Oil Capacity

    When it comes to Predator 212 engines, it’s essential to know the proper oil capacity to keep your engine running smoothly. In this section, I’ll break down the key factors in figuring out the right amount of oil for your Predator 212 engine.

    To begin, Predator 212 engines typically have an oil capacity of 20 ounces (approximately 0.59 liters). However, it’s always best to consult the owner’s manual that came with your specific engine model to confirm the precise oil capacity. Manufacturers may slightly alter the capacity in different models or revisions, so double-checking is crucial.

    It’s worth noting that using the correct oil type plays a significant role in your engine’s performance. For Predator 212 engines, the recommended oil type is SAE 10W-30. This particular oil type provides optimal protection and performance across a wide range of temperatures.

    For further clarification, here’s a breakdown of the oil capacity and type information for Predator 212 engines:

    Oil CapacityOil Type
    20 oz (0.59 L)SAE 10W-30

    Ideal Change Intervals for Top Performance

    Knowing the proper oil change interval for your Predator 212 engine will keep it running smoothly and at top performance. My experience and research reveal that the change interval really depends on numerous factors, including the type of oil you’re using, engine usage, and your desired level of maintenance.

    Here are some guidelines to follow for achieving peak performance:

    • Break-in Period: Just like any other engine, the Predator 212 also requires a break-in period. After the initial 5 hours or so of runtime, it’s best to change the oil.
    • Regular Use: An oil change every 20 to 50 operational hours is recommended for standard engine usage. Be attentive to the engine’s performance and the appearance of the oil over time.
    • Intensive Use: If you’re putting your Predator 212 engine through a rigorous test, it’s wise to change the oil more frequently. Aim for an oil change after every 10 to 20 hours of operation for optimal results.

    To give you a better perspective, here’s a markdown table of the recommended oil change intervals:

    Use TypeInterval
    Break-in PeriodFirst 5 hours
    Regular Use20-50 hours
    Intensive Use10-20 hours

    It’s important to note that these are general recommendations and can vary based on the type of oil you use in your engine. Here’s a quick rundown of some popular oil types for the Predator 212:

    • Synthetic Oil: Known for its superior performance and extended intervals, synthetic oil provides better protection for your engine. You can easily go up to 50 hours on this oil type.
    • Conventional Oil: Being more prevalent and affordable, conventional oil serves as a standard choice. However, with this oil type, you’d be better off changing it every 20 to 30 hours.

    Regardless of the oil type, always be sure to check the oil level before each operation. It’s a good habit to have and will contribute to the engine’s overall health. Remember, it’s better to change the oil more frequently than to risk damaging your engine due to contaminated oil.

    Remember, properly taking care of your Predator 212 engine ensures long-lasting and reliable performance. By understanding and following the guidelines for determining oil capacity, type, and change intervals, you’re setting yourself up for success with your engine.

    Step-by-Step Guide to Changing Predator 212 Oil

    I know that changing the oil in your Predator 212 engine is essential for maintaining its performance and longevity. That’s why I’ve put together this handy step-by-step guide to make the process as smooth as possible.

    Before we begin, gather these items:

    • Clean rags or paper towels
    • Socket wrench with appropriate socket size
    • Oil drain pan
    • A funnel
    • Fresh oil that matches the recommended oil type

    Here’s how to change the oil in your Predator 212 engine:

    1. Allow the engine to cool down. It’s important to let your engine cool down for at least 30 minutes before starting the oil change process. This helps avoid burns and ensures the oil has settled down in the engine.
    2. Locate the oil drain plug. Underneath your Predator 212 engine, you’ll find the oil drain plug. This is typically either on the bottom or side of the engine.
    3. Place the oil drain pan. Put the oil drain pan directly beneath the drain plug to catch the used oil as it drains from the engine.
    4. Remove the oil drain plug. Use the socket wrench to loosen and remove the oil drain plug. Be careful as you take it out, as the oil may start to drain quickly.
    5. Drain the oil. Allow the old oil to drain completely into the oil drain pan. This may take a few minutes.
    6. Clean the drain plug. While the oil is draining, take this opportunity to clean the drain plug with a rag or paper towel.
    7. Reinstall the drain plug. Once the oil has completely drained, reinstall the drain plug and tighten it securely using the socket wrench.
    8. Locate the oil fill cap. You’ll find the oil fill cap on the top of your Predator 212 engine. It’s often marked with an oil can symbol or the word “oil.”
    9. Remove the oil fill cap. Unscrew and remove the oil fill cap and set it aside.
    10. Add fresh oil. Using the recommended oil type, slowly pour new oil into the engine through the oil fill hole, using a funnel to avoid spills. Predator 212 engines typically have an oil capacity of 20 ounces. Be sure not to overfill the engine.
    11. Replace the oil fill cap. Replace the oil fill cap and tighten it securely once you’ve added the appropriate amount of fresh oil.
    12. Clean up and dispose of the used oil. Carefully transfer the used oil from the drain pan into a sealable container. Be sure to dispose of it properly, following local regulations or taking it to a designated recycling facility.

    With this simple and easy-to-follow guide to changing the oil in your Predator 212 engine. Regular maintenance is key to ensuring your engine’s performance remains top-notch, so keep this guide handy for future reference.

    Troubleshooting Common Oil-Related Issues

    Regarding the Predator 212 engine, ensuring proper maintenance of the oil system helps maintain top-notch performance. In this section, I’ll address a few common oil-related issues, their possible causes, and potential solutions.

    One issue that may occur is oil leaking. Possible causes for this problem include:

    • Loose bolts on the side cover or oil drain plug
    • Damaged or worn-out gaskets

    To fix these issues, try tightening the bolts and replacing the gaskets with new ones if needed.

    Low oil pressure is another commonly encountered problem. It could be caused by:

    • Insufficient oil level
    • Incorrect oil type
    • Clogged oil filter or strainer
    • Worn-out oil pump

    To tackle this problem, ensure the oil level is within the recommended range, use the right oil type (SAE 30) for the Predator 212, and clean or replace the filter and strainer as needed. If the oil pump is worn out, it’s best to replace it.

    Next, experiencing excessive oil consumption can be troubling as well. Here are a few possible reasons:

    • Overfilling the oil tank
    • Inaccurate oil level reading due to an uneven surface
    • Worn piston rings or valve seals

    To address these issues, double-check the oil level and refill only as needed, making sure the engine is on a level surface when measuring. In the case of worn parts, consult with an expert to replace the necessary components.

    Lastly, if you notice bluish or black smoke from the exhaust, it might be another sign of oil-related issues. Common causes include:

    • Excess oil in the combustion chamber
    • Worn piston rings or valve seals
    • Crankcase ventilation system issues

    Initially, ensure the oil level is correct and avoid overfilling. Replace worn piston rings or valve seals if necessary, and check the crankcase ventilation system.

    Regular oil maintenance is essential for your Predator 212’s performance. Addressing oil-related problems promptly will help prevent more serious issues and keep your engine running smoothly. Don’t hesitate to consult with an expert if you’re unsure about any of the above troubleshooting steps.

    Maintenance Tips for Extended Engine Life

    Regular maintenance of your Predator 212 engine is essential in ensuring it performs at its best and enjoys a prolonged lifespan. In this section, I’ll share some valuable maintenance tips to keep your engine running smoothly.

    1. Regularly check and change the oil

    The importance of engine oil can’t be overstated. Using the recommended 20W-50 oil is vital, as it ensures that the engine runs smoothly and efficiently and helps prevent wear and tear. Always check the oil level and make sure to change it according to the manufacturer’s guidelines – commonly every 20 hours or after 100 miles for the break-in period and then after every 100 hours or 500 miles of use.

    2. Keep the air filter clean

    A clean air filter is key to keeping dust and debris out of your engine. Regularly inspect and clean the air filter, paying close attention to the foam pre-filter. Consider replacing the air filter altogether if you notice excessive dirt or damage.

    3. Inspect and clean the fuel system

    Maintaining optimal engine performance is crucial to keep the fuel system clean. Check the fuel tank, fuel lines, and carburetor for any signs of dirt or contamination. Consider using a fuel stabilizer to protect the engine and keep the fuel fresh during prolonged storage periods.

    4. Adjust the valves

    Performing a valve adjustment in accordance with the manufacturer’s guidelines is essential for maintaining proper engine performance. This will ensure the correct valve clearance and prevent potential damage from occurring. Typically, valve adjustments should be done every 100 hours of engine use.

    5. Regularly inspect the spark plug

    Inspect the spark plug regularly for wear or damage and replace it if necessary. Keep in mind that a poorly functioning spark plug can lead to inefficient engine performance and increased fuel consumption.

    6. Keep engine and surrounding areas clean

    An accumulation of dirt and debris around the engine can lead to overheating and other issues. Make sure to clean the engine area regularly, cooling fins, and muffler for optimal performance.

    Some additional maintenance tips include:

    • Lubricating the choke and throttle linkage
    • Inspecting the recoil starter for wear
    • Checking the engine mounting bolts for tightness

    By following these maintenance tips, you’ll ensure that your Predator 212 engine remains in excellent condition, providing a reliable and efficient performance for years to come.

    Conclusion

    To wrap it up, knowing the correct oil type, capacity, and change interval for the Predator 212 engine is crucial for optimal performance and longevity. This guide provided a comprehensive one-stop reference for effectively operating and maintaining the engine. Let’s go over the key points covered:

    • Oil type: Stick with good-quality SAE 10W-30 or SAE 30 synthetic oil for ambient temperatures above 32°F (0°C). In colder conditions, it’s better to use SAE 5W-30 synthetic oil.
    • Oil capacity: The Predator 212 has a capacity of 20 fluid ounces (0.59 liters) of oil for proper lubrication.
    • Change interval: Regularly check and change the oil for the first 5 hours of engine use, then every 20 hours of use.

    I hope I’ve made it easy for you to navigate the world of the Predator 212 engine. By following these guidelines, you will surely have a smooth-operating engine with a long and trouble-free lifespan. Happy riding!

  • Storing Your Generator: Short-Term & Long-Term Storage Tips

    If you own a portable generator, you know that it can be a lifesaver during a power outage or when you need to power tools or appliances in remote locations. But when it comes to storing your generator, there are some important things to consider.

    Whether you’re storing your generator short-term or long-term, there are steps you can take to ensure that it remains in good condition and is ready to use when you need it.

    Short-term storage typically refers to storing your generator for a few weeks or months, while long-term storage refers to storing it for six months or longer. Regardless of how long you plan to store your generator, the first step is to prepare it for storage.

    This includes cleaning the generator, checking the oil level, and draining the fuel system. You’ll also want to remove any attachments, such as cords or adapters, and store them separately.

    By taking these steps, you can help prevent damage to your generator and ensure that it’s ready to go when you need it.

    Key Considerations for Storing Your Generator

    As an owner of a portable generator, it’s essential to know how to store it correctly to maintain its longevity and ensure it’s always ready to use when you need it. Whether for short or long-term storage, here are some key considerations to keep in mind:

    Storing Your Generator

    1. Location

    Store your generator in a dry and well-ventilated area. It’s best to keep it indoors to prevent rust, corrosion, and exposure to extreme weather conditions. If you must store it outdoors, make sure to cover it with a waterproof and UV-resistant cover.

    2. Fuel

    Before storing your generator, make sure to drain all the fuel from the tank and carburetor, especially if you plan to store it for an extended period. Storing the generator with fuel inside can lead to varnish build-up in the carburetor, which can cause starting and running problems.

    3. Oil

    Change the oil before storing your generator, even if you haven’t reached the recommended number of hours for an oil change. Used oil contains contaminants that can corrode your engine over time. Also, be sure to use oil with the recommended viscosity and type as specified in your generator manual.

    4. Battery

    If your portable generator has a battery, remove it before storage and store it separately. Batteries can discharge over time, and leaving it attached to the generator can lead to corrosion.

    5. Run it occasionally

    For long-term storage, consider running your generator occasionally to keep the engine lubricated and prevent corrosion. Running it for 10-15 minutes every month can help keep the engine in good shape.

    By following these key considerations for storing your portable generator, you can ensure its readiness and longevity while also preventing any damage. Remember to consult your generator manual for additional storage instructions specific to your generator model.

    Short-Term Storage Tips for Portable Generators

    When storing your generator for a short period, such as a few weeks or months, there are a few things you should consider to ensure that it remains in good condition and is ready for use when you need it.

    Here are some essential tips to guide you through the process:

    1. Store your generator in a dry and well-ventilated place, preferably in a garage or shed, to protect it from dust, moisture, and other harmful elements.
    2. Before storing your generator, power it off and let it cool down for at least 15 minutes. Then, drain the fuel tank and the carburetor to prevent the fuel from becoming stale and gumming up the carburetor. Use a fuel stabilizer to avoid clogging the carburetor, too.
    3. Clean your generator’s exterior and remove any debris, dirt, or dust buildup. You can use a soft brush or a vacuum cleaner to get rid of the dirt.
    4. Check your generator’s oil and filter levels and change them if necessary. Dirty oil can damage your engine if you start the generator in the future, so it’s essential to change it regularly.
    5. Finally, cover your generator with a protective covering, such as a tarp, to safeguard it from dust, dirt, and other damages. Ensure to leave enough space for air circulation when covering your generator.

    By following these simple short-term storage tips, you can protect your generator from damage and ensure it runs smoothly when needed.

    In the next section, I’ll share some long-term storage tips to help you store your generator safely for an extended period.

    Long-Term Storage Tips

    Proper storage of a portable generator is essential to extend its lifespan and ensure that it functions effectively when needed. If you plan to store your generator for more than 30 days, you need to follow a specific storage process to minimize damage from corrosion, rust, and stale fuel.

    Storing Your Generator

    Here are some long-term storage tips for your generator:

    1. Clean the Generator

    Before storing your generator, make sure to clean it thoroughly using a soft brush and damp cloth. You should remove all debris, dirt, or grime on the surface and ensure that it’s dry before storing it. This will prevent the buildup of dust, which can clog the filters or reduce the generator’s performance.

    1. Change the Oil and Filter

    Stale oil can damage your generator’s engine, especially during long-term storage. Before storing your generator, change the oil and oil filter to prevent corrosive damage caused by contaminants, acids, and moisture. Using fresh oil and a clean filter will also protect the engine and ensure that it starts easily when you need it later.

    1. Add Fuel Stabilizer

    Fuel stabilizer is an essential additive that helps preserve gasoline in your generator’s fuel system. If you plan to store your generator for more than 30 days, add a fuel stabilizer to the gas tank and run the generator for a few minutes to circulate it through the fuel lines. This process will prevent the fuel from becoming stale, oxidizing, or gumming up in the carburetor.

    1. Empty the Fuel Tank

    If you don’t plan to use your generator for several months, it’s better to empty the fuel tank before storing it. You can do this by running the generator until it runs out of gas or by using a fuel siphon to drain the tank. This will prevent condensation from forming inside the tank, which can lead to corrosion or rust.

    By following these long-term storage tips, you can ensure that your generator remains in good condition and ready to use whenever you need it. Properly stored generators can last for many years, saving you money and providing you with reliable backup power during blackouts or emergencies.

    Things To Look For While Bringing Your Portable Generator Out of Storage

    Whether you are planning for short-term or long-term storage, there are different conditions to consider before making your generator operational again.

    Short-Term Storage

    If you have stored your generator for short-term storage, meaning less than a month, you can bring it out when you need it. However, it is important to perform a few checks before using it to ensure that it is in good working condition. Here is a checklist of things to do:

    • Check the oil and fuel levels and refill them as necessary.
    • Inspect the generator for any damage or wear and tear.
    • Test the generator by starting it up and running a few appliances to make sure everything works properly.

    Long-Term Storage

    If you have stored your generator for long-term storage, meaning more than a month, there are a few things to consider before bringing it out. Here are some tips to follow:

    1. Check the Battery

    If your generator has a battery, it is important to check its condition before using it. A battery that has been left idle for a long time can lose its charge and become damaged. Before starting your generator, check the battery’s voltage level and charge it if necessary.

    1. Inspect the Fuel

    When gasoline sits for too long, it can become stale and gum up the carburetor. Drain and refill the tank with fresh gasoline to avoid such problems.

    1. Change the Oil

    Change the oil and oil filter to avoid engine damage from old or contaminated oil.

    1. Conduct a thorough Inspection

    Check the air filters, spark plugs, fuel hoses, and other parts for any signs of damage, wear and tear, or deterioration.

    1. Run a Load Bank Test

    Before using your generator, it is recommended to run a load bank test to ensure that it can handle the expected load. This test will also help to identify any issues with the generator.

    By following these tips, you can ensure that your portable generator is always in good working condition and ready to use when you need it.

    Conclusion

    Storing a portable generator properly is vital to ensure its longevity and optimal performance. Whether you plan on storing it short-term or long-term, there are certain steps you can take to protect your investment.

    Firstly, you need to ensure the fuel is properly stabilized to prevent it from going stale or corroding the generator’s carburetor. You can do this by using a fuel stabilizer or draining the fuel entirely.

    Secondly, you need to clean the generator thoroughly and protect it from the elements. Covering it with a weatherproof cover and storing it in a dry, cool place will prevent dust, debris, and moisture from damaging the unit.

    Lastly, performing regular maintenance checks, such as oil changes and filter replacements, is essential as part of your storage routine. This will help avoid any potential problems or malfunctions when you’re ready to use your generator again.

    Following these simple steps will help you store your portable generator properly and ensure it remains reliable and ready for use when you need it most.

  • Predator 2000 Generator Oil Type, Capacity & Change Interval

    Predator 2000 Generator Oil Type, Capacity & Change Interval

    Just like a warrior needs his sword in prime condition for battle, you need your Predator 2000 generator running smoothly at all times.

    However, maintaining top performance isn’t just about regular use; it’s about understanding the specifics of its oil requirements.

    This guide is your faithful companion in this journey, shedding light on the ideal Predator 2000 Generator oil type, capacity, and change interval for your Predator 2000.

    Whether you’re curious about oil viscosity, pondering the use of synthetic oil, or looking out for signs of low engine oil, we’ve got you covered.

    This isn’t just a set of instructions; it’s a shared understanding of the importance of routine generator maintenance.

    So, let’s dive in and arm you with the knowledge to keep your generator – your ‘warrior’ in times of power outages – in its best fighting shape.

    Predator 2000 Generator Oil Type, Capacity & Change Interval

    Key Takeaways

    • Predator 2000 generator requires regular maintenance, including oil changes, for top performance
    • SAE 10W-30 oil is recommended for general use, while SAE 5W-30 is recommended for colder climates
    • The generator requires 13 ounces of oil and should not be overfilled.
    • Oil should be checked and maintained regularly, with an initial oil change after the first 20 hours of use, followed by oil changes every 100 hours or 6 months.
    • Check The User Manual.

    Predator 2000 Generator Oil Type, Capacity & Change Interval Guide

    Ready to maximize your Predator 2000 generator’s performance? Let’s dive into the right oil type, capacity, and the optimal oil change interval you should be following.

    Your choice of oil is crucial to the longevity and efficiency of your generator. It’s recommended to use SAE 10W-30 oil for general use. However, for colder climates, SAE 5W-30 is the way to go.

    The capacity of oil your Predator 2000 generator requires is about 13 ounces. Be sure not to overfill it, as it may cause damage. Checking and maintaining the oil level is an important part of your generator’s upkeep, so make sure you’re doing it regularly.

    Now, let’s talk about the oil change interval. For optimal performance, change the oil after the first 20 hours of use, then every 100 hours or every 6 months, whichever comes first. This will ensure your generator runs smoothly and efficiently.

    Remember, you’re part of a community of Predator 2000 owners who understand the importance of proper generator maintenance. Taking care of your generator means it’ll take care of you when you most need it. So, keep up with these maintenance tasks, and your generator will thank you with reliable performance.

    Keep in Mind the Oil Viscosity

    When it comes to ensuring optimal performance, remember it’s not just about the machine itself but also the lubricant’s viscosity.

    The Predator 2000 Inverter Generator specifically requires SAE 10W-30 oil. This oil viscosity is designed to provide the best protection during high-temperature operation. It’s crucial to maintain your generator’s engine as it mitigates friction and heat, reducing wear and tear.

    Understanding the significance of oil viscosity can make a world of difference in ensuring your generator’s longevity and reliability. The ’10W’ in SAE 10W-30 means that the oil will remain fluid at lower temperatures, while the ’30’ indicates its resistance to thinning at high temperatures. This balance is vital to keep your generator running smoothly in different weather conditions.

    Now, you’re not just a generator user but an informed and responsible owner. You’re part of a community that values performance and longevity in its equipment.

    Knowing the right oil viscosity and using it correctly is your ticket to belonging to this group, and more importantly, it ensures that your Predator 2000 Inverter Generator delivers consistent, reliable power whenever you need it.

    The Ideal Oil Change Frequency

    Understanding, respecting, and acting upon the recommended frequency of lubricant swaps is essential to maximize your machine’s lifespan, minimize its downtime, and optimize its power delivery. This isn’t just a suggestion; it’s a fundamental part of owning and operating your Predator 2000-Watt generator.

    Predator 2000 Generator Oil Change Interval

    The break-in oil change at 30 hours is crucial. During this period, the generator’s parts are settling in, and the oil helps ensure everything functions smoothly. Following the break-in period, an oil change every 6 months or 100 hours of use (whichever comes first) keeps your generator in peak condition. This routine maintenance prevents the build-up of harmful deposits that can affect performance and ultimately lead to costly repairs.

    As part of the Predator 2000 Watt generator community, we understand that you’re not just safeguarding your equipment. You’re preserving your peace of mind during those times when you need your generator the most. Remember, regular oil changes are more than just routine maintenance. They’re your investment in reliable, uninterrupted power.

    Can I Use a Synthetic Oil in My Generator?

    Sure, you can go ahead and use synthetic oil in your trusty machine but always remember to double-check if it meets the specifications stated in the user’s manual.

    The caveat here is that the oil must meet all the requirements as per Honda’s specifications, regardless of whether it’s synthetic or petroleum-based.

    Here are a few points that you should consider:

    • Synthetic oil offers superior engine protection and performance over traditional oils. It’s engineered to resist breakdown and degradation, providing longer intervals between changes.
    • Not all synthetic oils are created equal. Some might not meet the requirements of your generator.
    • Always check the user’s manual for oil specifications. This is your guide to ensuring you use the right type of oil.
    • Using incorrect oil can lead to engine damage, voiding your warranty.
    • Regular oil changes are crucial. Even with synthetic oil, don’t skip this maintenance step.

    The bottom line is, yes, you can use synthetic oil if it meets the specifications. But don’t forget the importance of regular oil changes. They’re essential to keeping your generator running smoothly and efficiently.

    Be a part of the savvy group that knows how to take care of their equipment properly.

    Signs of Low Engine Oil

    Like a thirsty camel in the desert, your machine may show some telltale signs when running low on that crucial engine juice. The first sign you should look out for is the warning light on the control panel. If it’s blinking, then your oil level might be low.

    You might also notice your Predator 2000 generator making unusual noises like knocking or ticking. These sounds are often an early warning sign that your machine needs a top-up.

    Another symptom of low oil is reduced power output. You’ll notice your generator isn’t performing as it should. Maybe it’s not providing enough power for your appliances or tools. This could be due to low oil levels hindering the engine’s ability to work efficiently.

    In more severe cases, your machine may overheat or even shut down altogether.

    If your generator has an oil pressure gauge, keep an eye on it. A sudden drop in oil pressure is a clear sign that the oil level is low.

    And let’s not overlook the obvious – if you see smoke or smell something burning, it’s probably because your oil levels are dangerously low. Remember, running your generator without sufficient oil can cause engine damage, which could lead to costly repairs. So, always keep your oil levels in check.

    How to Change the Oil in Your Generator?

    Ready to give your trusty machine a little TLC? Let’s dive into how you can easily swap out the old engine juice for some fresh stuff and keep your equipment purring like a kitten.

    First things first, gear up with protective gloves and goggles. Next, warm up the old oil by running your generator for a few minutes.

    Once it’s warmed up, place your generator securely on blocks, ensuring there’s ample room under the oil drain plug. Now, you’ll need to disconnect the spark plug wire to prevent accidental engine ignition.

    Locate the oil drain plug, typically a 3/8′ nut with a square or hexagonal head. Wipe away any grime and position your drain canister underneath.

    Now comes the draining part. Use a socket wrench to loosen the drain plug and let the old oil flow out. Once it’s empty, give the drain plug a good clean before moving onto the refill stage.

    Using an oil funnel, pour in the new oil. Refer to your generator’s manual for the right quantity and type of oil.

    So, there you have it! A step-by-step guide to changing the oil in your generator. By following this process, your generator will continue to run smoothly and efficiently, keeping you part of the power-filled community.

    Frequently Asked Questions

    Is it possible to use a different brand of oil in the Predator 2000 generator?

    Absolutely, you can use a different brand of oil in the Predator 2000 generator. Ensure it’s high-quality, 4-stroke engine oil. However, always follow the viscosity grade recommended in the user manual for optimal performance.

    How does the oil viscosity affect the performance of the Predator 2000 generator?

    Imagine running your generator in freezing weather with thick oil. It wouldn’t work efficiently, right? Oil viscosity directly affects your Predator 2000’s performance. Thicker oil in colder temperatures may hinder its smooth operation.

    Can the Predator 2000 generator run without oil?

    No, your Predator 2000 generator can’t run without oil. The oil lubricates the engine parts, reducing friction and overheating. Operating it without oil will lead to engine damage and reduced performance.

    Are there any specific tools required for changing the oil in the Predator 2000 generator?

    No specific tools are required to change the oil in your Predator 2000 generator. You’ll just need a clean container for the old oil, a funnel for the new oil, and some rags for cleanup.

    Can I use a higher capacity of oil than recommended in the Predator 2000 generator?

    No, you shouldn’t use a higher capacity of oil than recommended in your Predator 2000 generator. Overfilling can cause damage, including oil leaks and performance issues. Always stick to the manufacturer’s specifications for optimal performance.

    Conclusion

    In wrapping things up, remember that proper oil maintenance is the lifeblood of your generator. Synthetic oil can be your ace in the hole for optimal performance.

    Don’t ignore the telltale signs of low oil – they’re a red flag waving in the wind. Stick to the recommended oil change intervals to keep your Predator 2000 purring like a well-oiled machine.

    Knowledge is power, so use this guide to keep your generator running smoothly.

  • Predator 3500 Generator Spark Plug Gap, Number & Socket Size

    Predator 3500 Generator Spark Plug Gap, Number & Socket Size

    Just like a key fits perfectly into its lock, your Predator 3500 generator requires an exact spark plug gap and socket size to function at its best. This guide will be your locksmith, providing precise, technical information on selecting the Predator 3500 Generator spark plug, measuring the correct gap, and ensuring proper installation.

    If your spark plug is incorrectly gapped or sized, your generator could face serious issues. But don’t fret, we’ve got your back. We’ll also delve into when it’s time to replace your old spark plugs and the benefits of doing so regularly on your Predator 3500 engine.

    By the end of this journey, you’ll not just own a Predator 3500, you’ll belong to the community of well-informed users who understand the heart of their machines. So, tighten your grip and get ready to unlock the potential of your Predator 3500 generator.

    Predator 3500 Generator Spark Plug Gap, Number & Socket Size Guide

    Key Takeaways

    • Recommended spark plug gap for Predator 3500 generator: 0.027″– 0.031″ (0.7-0.8 mm)
    • Spark plug socket size required: 13/16″ (21mm)
    • Use spark plug gap gauge for accurate measurement and adjust as needed
    • Consider upgrading to NGK Iridium Spark Plug (BPR6EIX) for improved performance and lifespan.

    Predator 3500 Generator Spark Plug Gap and Socket Size

    Here’s an in-depth guide detailing the spark plug gap and socket size for your Predator 3500 generator.

    Your generator’s spark plug type is either F7RTC (Torch) or an equivalent. If you’re looking to upgrade, the BPR6EIX – NGK Iridium Spark Plug is a great option.

    The crucial gap for your spark plug is between 0.027″– 0.031″ (0.7-0.8 mm). This precise gap ensures optimal generator performance.

    As for the socket size, it is 13/16″ (21mm), perfect for accommodating the spark plug.

    How to Measure the Correct Spark Plug Gap for a Predator 3500 Engine?

    Measuring this critical distance with accuracy demands precision, and I’m going to walk you through the steps to ensure you get it just right.

    First, you’ll need a spark plug gap gauge. This handy tool helps you measure the gap between your spark plug’s center and the ground electrode.

    Insert the gauge into the gap and read the measurement. If it’s not between 0.027′ and 0.031′ (0.7-0.8mm), adjust it.

    To increase the gap, gently pry the ground electrode away from the center electrode. To decrease it, press the ground electrode closer.

    Always remember accuracy is key in this process.

    Tips on Ensuring Proper Installation of the New Spark Plugs in a Predator 3500 Engine

    Let’s dive into some handy tips that’ll help you nail the installation of your new engine component without a hitch. When installing new spark plugs in your Predator 3500 engine, there are some important guidelines to follow:

    • Always use a spark plug socket to remove and install spark plugs. This helps protect the delicate ceramic insulator from damage.
    • Make sure the spark plug gap is correctly set. Check the engine manual for specifications.
    • Never over-tighten spark plugs. This can damage the threads in the engine head.
    • Apply a small amount of anti-seize compound to the plug threads before installation.
    • Finally, always re-install the spark plug wire boot until it clicks into place.

    By following these tips, you are ensuring a smoother, more efficient engine operation. But what happens when things go south? Let’s take a look at potential problems when spark plugs are gapped or sized incorrectly.

    Common Issues with Incorrectly Gapped and Sized Sparks Plugs in a Predator 3500 Engine

    When you don’t get right with the configuration of your engine components, you’re bound to face a few hiccups. Incorrectly gapped spark plugs can cause a whole host of problems for your Predator 3500 generator.

    Too wide a gap can lead to a weak spark, poor combustion, and reduced power output. Conversely, if the gap is too narrow, the spark might not occur at all, causing your generator to run rough or not start.

    Using the wrong spark plug number or socket size might also result in improper fit and sealing, leading to oil leaks and potential engine damage.

    These problems can be quite a nuisance, but with regular maintenance and appropriate replacements, you’re on the road to better engine health and performance. Let’s delve into the benefits of regular spark plug replacements next.

    Benefits of Regularly Replacing Your Spark Plugs on your Predator 3500 Engine

    Regular maintenance of your 3500 engine, including changing out those vital components, can significantly boost its performance and longevity. By regularly replacing your spark plugs, you ensure optimal fuel efficiency and smoother engine operation.

    You’ll also notice a decrease in emissions, contributing to a cleaner environment. Importantly, it also reduces the risk of serious engine damage. We’re all part of the Predator 3500 community, and it’s this shared responsibility to keep our engines running smoothly that bonds us together.

    Regular maintenance, like spark plug replacement, is an integral part of that. By maintaining your engine, you not only reap personal benefits but contribute to the overall health of our collective group of Predator 3500 enthusiasts.

    Let’s now delve into the signs that indicate when those old spark plugs need a swift change-out.

    When to Replace Your Old Sparks Plugs with new ones?

    Understanding the importance of maintaining your Predator 3500 generator is one thing, but knowing when to actually replace the spark plugs is another. It’s crucial to recognize the signs that your spark plugs need changing. Here’s a brief guide to help you:

    1. Decreased performance: If your generator fails to start properly or runs roughly, old spark plugs could be the issue.
    2. Increased fuel consumption: Worn spark plugs can decrease your generator’s fuel efficiency.
    3. Persistent engine problems: Issues like engine misfires or surging could be due to faulty spark plugs.
    4. Over 100 hours of operation: As a rule of thumb, replace your spark plugs every 100 hours of use to maintain optimal performance.

    Remember, your Predator 3500’s lifespan is in your hands, so stay on top of maintenance.

    Frequently Asked Questions

    What is the average lifespan of a spark plug in a Predator 3500 Generator?

    On average, the spark plug in your Predator 3500 generator can last around 500 hours of use. However, it’s best to check it every 100 hours to ensure optimal performance and prolong its lifespan.

    Can the wrong spark plug damage the Predator 3500 engine?

    Absolutely, using the wrong spark plug can damage your Predator 3500 engine. Misfit spark plugs can cause overheating, pre-ignition, or even cylinder head damage. Always ensure you’re using the correct spark plug for optimal performance.

    Is there a specific brand of spark plug that works best with the Predator 3500 Generator?

    Just like a conductor choosing the perfect orchestra, you’ll want the right spark plug for your Predator 3500 generator. NGK’s spark plugs have proven to be a harmonious fit, delivering reliable and efficient performance.

    How does a Predator 3500 Generator perform with incorrectly installed spark plugs?

    If you install spark plugs incorrectly in your Predator 3500 generator, it may run inefficiently, misfire, or not start at all. Proper installation ensures optimal performance and longevity, so always double-check your work.

    What are the signs of a malfunctioning spark plug in a Predator 3500 Generator?

    You might notice trouble starting your generator or erratic performance. Perhaps there’s increased fuel consumption or even engine misfires. These could all be signs of a malfunctioning spark plug in your Predator 3500 generator.

    Conclusion

    Maintaining the right spark plug gap and size in your Predator 3500 engine ensures optimal performance and longevity. If you neglect this, you may encounter frequent engine issues. Regular spark plug replacement also boosts your engine’s efficiency.

    Remember, it’s not just a theory, it’s a practical truth that proper spark plug maintenance is key to your generator’s health. So, stay informed and keep your generator running smoothly.

  • Honda GX620 Spark Plug Gap, Number, and Socket Size Guide

    Honda GX620 Spark Plug Gap, Number, and Socket Size Guide

    You’re in the right place if you’re looking for a comprehensive guide to understanding the intricacies of your Honda GX620 spark plug gap, number, and socket size. As any seasoned mechanic will tell you, getting these aspects right is crucial to ensuring optimal engine performance.

    This article provides you with a clear, detailed guide on these technical aspects, using language you can grasp. We’ve also included a list of all Honda Engines for your reference.

    You’re not just a Honda owner but part of a community. So let’s dive into the nitty-gritty of your machine. With this knowledge, you’ll keep your Honda GX620 running smoothly and join the ranks of those who truly understand the heart of their vehicle.

    So let’s get started, shall we?

    Honda GX620 Spark Plug Gap, Number & Socket Size Guide

    Key Takeaways

    • The spark plug gap, number, and socket size are important factors in maintaining a Honda GX620 engine.
    • The recommended spark plug options for this engine are ZGR5A (NGK) or J16CR-U (DENSO), with a gap of 0.028′ to 0.031′ (0.7 to 0.8 mm).
    • Using the wrong spark plug or improper gap can cause issues and potentially damage the engine.
    • Investing in a 13/16′ (21 mm) socket is worth it to ensure a perfect fit and reduce the risk of damage to the engine or ignition system.

    Honda GX620 Spark Plug Gap & Number

    For your HONDA GX620, you’ll need a ZGR5A (NGK), or J16CR-U (DENSO) spark plug or an equivalent. You’ve to set the gap just right, between 0.028′ and 0.031′ (0.7 to 0.8 mm if you prefer metric).

    This isn’t just a random number; the Honda’s official manual strictly recommends it. It’s all about precision and accuracy. The spark plug gap is crucial for proper engine performance and longevity.

    Choosing the right spark plug might seem like a minor detail, but let’s not forget small things matter. The wrong spark plug or improperly gapped can cause performance issues, increase emission levels, and even potentially damage your engine.

    The ZGR5A (NGK) / J16CR-U (DENSO) or equivalent spark plug ensures optimal performance, better fuel efficiency, and reduced emissions for your HONDA GX620 engine.

    When you’re part of the Honda family, you understand and appreciate the importance of precision. It’s not just about getting from point A to point B but about the journey, the performance, and the satisfaction of knowing your machine is running at its best.

    Remember, the right spark plug with the correct gap isn’t a suggestion, it’s a necessity. It’s the attention to these details that sets us apart.

    Honda GX620 Spark Plug Socket Size

    You’ll need a 13/16′ (or 21 mm) wrench to handle that replacement job, an essential piece of information that can’t be stressed enough! This specific socket size isn’t arbitrary. It’s been designated by the manufacturers themselves and is crucial for carrying out the job smoothly and efficiently.

    Here are some key points to consider:

    • The socket size is directly related to the size of the spark plug. Using a socket of incorrect size can potentially damage the spark plug.
    • A 13/16′ socket isn’t a common size, so you might not have it in your regular tool kit, but investing in one is worth it.
    • The right size socket ensures a perfect fit. This makes removing and installing the spark plug a breeze.
    • It also reduces the risk of damaging the engine or the ignition system.

    Remember, precision in every step is the key to successful maintenance of your Honda GX620 engine.

    Choosing the right tools is as important as choosing the right parts. Without a 13/16′ socket, the replacement or maintenance of the spark plug in your Honda GX620 could turn into an unnecessary struggle. So, make sure you’re well-equipped before you begin.

    List Of All Honda Engine Series

    Let’s dive into the world of engines and explore the comprehensive list of all the powerhouses that have been meticulously designed and produced over the years. Honda, a globally recognized brand, has a wide array of engines under its belt.

    From small, single-cylinder engines to powerful, complex V6 engines, Honda has been consistent in delivering power and performance.

    Honda’s engines fall under several categories. The Honda GX series features commercial-grade engines offering exceptional durability. The GC series is home to small, four-stroke engines designed for premium residential use. The GS series is known for its efficient, low-emission, and economical engines.

    For high-performance needs, Honda has the NSX series engines, renowned for their power and speed. The i-VTEC series engines offer precise valve timing resulting in high performance and fuel efficiency. The i-DTEC series are diesel engines known for their low emissions and high mileage.

    Honda’s innovative spirit is evident in its Hybrid engine designs. Integrated Motor Assist (IMA) and Earth Dreams Technology are specific systems designed to maximize efficiency and reduce environmental impact.

    As you can see, Honda’s engine lineup is diverse, designed to cater to various needs, preferences, and expectations. It’s an impressive testament to Honda’s commitment to innovation, performance, and environmental responsibility.

    Frequently Asked Questions

    What is the average lifespan of a Honda GX620 spark plug?

    Did you know that the average lifespan of a spark plug in a Honda GX620 is about 300 hours of operation? For best performance, inspecting and possibly replacing it after this period is advisable.

    What are the signs of a failing spark plug in a Honda GX620?

    You’ll notice a failing spark plug in your Honda GX620 by experiencing poor fuel economy, difficulty starting the engine, engine misfires, or a rough idle. These are telltale signs of a spark plug in decline.

    Can I use a different brand spark plug for my Honda GX620?

    Absolutely, you can use a different brand spark plug for your Honda GX620. But it’s crucial to ensure the spark plug’s specifications match your engine’s requirements to avoid any performance issues.

    How can I safely remove and replace the spark plug in my Honda GX620?

    Ready to feel like a pro mechanic? First, ensure your engine’s cool. Grab a spark plug socket and wrench to unscrew the old plug. Then, meticulously insert your new plug, taking care not to over-tighten it.

    Conclusion

    So, you’ve got the scoop on the Honda GX620 spark plug gap, number, and socket size. It’s like you’ve got the secret recipe to a gourmet dish!

    With this knowledge, you can ensure your engine runs as smoothly as a well-conducted symphony. Remember, just as a chef needs the right ingredients, your Honda needs the right parts.

    Keep this guide handy and your engine’s performance will never miss a beat!

  • Guide To Honda GC160 Spark Plug Gap, Number & Socket Size

    Guide To Honda GC160 Spark Plug Gap, Number & Socket Size

    Just as the human heart needs a steady rhythm to pump life-giving blood, your Honda GC160 engine relies on well-tuned spark plugs to keep it humming along.

    This guide is your one-stop shop for everything you need to know about the Honda GC160 spark plug gap, number, and socket size. We’ll delve into the nitty-gritty of what symptoms to look out for if your spark plug is on the fritz, and we’ll also walk you through the process of changing it yourself.

    As a fellow gearhead, I’ll equip you with the technical know-how you need to keep your engine firing on all cylinders. So, buckle up and get ready to ride the information superhighway. With this guide, you’ll feel right at home under the hood of your Honda GC160.

    Welcome to our community; let’s get your engine running smoother than ever.

    Guide To Honda GC160 Spark Plug Gap, Number & Socket Size

    Key Takeaways

    • For optimal combustion and fuel economy, the spark plug gap for Honda GC160 should be set between 0.028′ and 0.031′.
    • Regular maintenance, including checking and adjusting the spark plug gap, is crucial for engine performance.
    • Using the correct spark plug socket size (13/16′ or 21mm) is important to ensure a snug fit and protect the durability of the plug and socket.
    • Symptoms of a bad spark plug, such as misfires, ignition trouble, and increased fuel consumption, should be addressed promptly through inspection and replacement if necessary.
    • Owner’s Manual: Click Here To Download

    Honda GC160 Spark Plug Gap

    You’ll want to keep the spark plug gap for your Honda GC160 between 0.028″ and 0.031″ for optimal performance. The precision of this gap measurement isn’t just a minor detail, it’s of utmost importance.

    A properly gapped spark plug enables efficient combustion, leading to smoother engine performance and improved fuel economy. Too large a gap can cause misfires, while too small a gap may prevent the spark from firing at all. It’s a balance, and with your trusty Honda, you’re part of a community that values this attention to detail.

    Regular maintenance, including checking and adjusting the spark plug gap, is part of the journey. This isn’t just about upkeep, it’s about belonging to a group of informed and meticulous Honda owners.

    Honda GC160 Spark Plug Socket Size

    Curious about the right tool for the job? It’s a 13/16″ (21mm) socket that’s needed for your engine’s spark plug. This size is just perfect for your Honda GC160 engine, ensuring a snug fit and ease of installation or removal.

    When you’re working on your engine, socket compatibility is critical. Using the right socket size will ensure that you can accurately torque your spark plug to the manufacturer’s specifications. It’ll also protect the durability of both your spark plug and the socket itself.

    Remember, the correct socket size is just as important as the right spark plug gap and number. It’s part of the trifecta that guarantees your engine will run smoothly and efficiently. So, always use a 13/16″ (21mm) socket for your Honda GC160’s spark plug.

    Symptoms of a Bad Spark Plug

    Feeling frustrated with your engine’s performance lately? It’s possibly due to a faulty spark plug. You might be experiencing symptoms like plug misfires, ignition trouble, or even engine overheating. It’s crucial to understand that these signs aren’t just frustrating; they indicate a need for immediate attention.

    With your Honda GC160, increased fuel consumption can be a clear-cut sign of a bad spark plug. If your engine needs repeated attempts to start, or worse, won’t start at all, that’s another red flag. You might also notice a buildup of residue on your spark plug or physical damage to the plug itself.

    All these symptoms scream out for a spark plug check and possibly replacement. Remember, your engine’s reliable performance is only as good as its spark plug.

    How to Change Spark Plug on Your Engine?

    Ready to give your engine a fresh start? Here’s how to switch out a crucial component in your machinery.

    First, ensure your motor is off and fully cooled before proceeding. Locate the vital piece on the side of your engine, connected to a wire running to the ignition system. Gently pull the boot off, avoiding any damage to the wire.

    Loosen the component carefully with a socket and ratchet, turning counterclockwise. Once it’s loose, remove it and check its condition. If it appears worn or dirty, it’s time for a replacement. Remember, your engine’s performance impact depends on proper maintenance.

    Reinstalling is simple but never over-tighten. Lastly, reattach the wire and listen for any engine abnormalities. With proper replacement frequency, your engine will thank you.

    Frequently Asked Questions

    What is the average lifespan of a Honda GC160 spark plug?

    The average lifespan of your Honda GC160’s spark plug is around 300 hrs. Its lifespan varies, influenced by plug maintenance and other factors. Look for replacement indicators like misfires. Your membership in the well-tuned engine club continues.

    How can I check the condition of my Honda GC160 spark plug without removing it?

    Without removing it, you can’t directly inspect your spark plug. However, faulty ignition symptoms like misfiring or rough idling suggest a problem. Visual inspection methods only apply if the plug is removed.

    Can I use a different spark plug brand in my Honda GC160 engine?

    Just like swapping out a chess piece, brand compatibility matters in spark plug efficiency. You can use a different brand in your Honda GC160, but ensure replacement frequency aligns with the new brand’s guidelines.

    What happens if the spark plug gap on my Honda GC160 is not set correctly?

    If your spark plug gap isn’t set correctly, your engine performance may suffer, leading to increased fuel consumption and ignition issues. Ensuring accurate gap settings for optimal engine functioning in your Honda GC160 is crucial.

    What are the signs of a spark plug overheating in a Honda GC160 engine?

    Like a canary in a coal mine, your Honda GC160 signals trouble. Overheating causes include melted electrodes and blistered insulators. Overheating prevention is key to avoiding damage consequences to your engine’s performance and longevity.

    Conclusion

    So, you’ve got this, pal! Remember, the Honda GC160 spark plug gap is crucial for optimal performance. Don’t overlook the right socket size, either.

    If you notice any of those pesky symptoms, it might be time for a change. And hey, changing a spark plug isn’t rocket science. Keep your engine happy, and it’ll return the favor.

    Coincidentally, a well-maintained engine is the key to a smooth ride.

  • Honda GC190 Spark Plug Gap, Number, and Socket Size Guide

    Honda GC190 Spark Plug Gap, Number, and Socket Size Guide

    Maintaining your Honda GC190 engine is as crucial as the air you breathe. One key component in ensuring optimal performance is the spark plug. But it’s not just about having a spark plug; it’s about having the right one with the correct gap and socket size.

    This guide is your ultimate companion in understanding the specifics of the Honda GC190 spark plug gap, number, and socket size.

    We’ll walk you through the importance of these measurements, how to adjust them, and everything in between. Whether you’re a seasoned mechanic or a beginner, you’ll find the information detailed, knowledgeable, and easy to understand.

    By the end of this guide, you’ll feel a sense of accomplishment and belonging to the community of Honda GC190 owners who take engine maintenance into their own hands. Let’s gear up and dive into the world of spark plugs – your engine’s unsung hero.

    Honda GC190 Spark Plug Gap, Number, and Socket Size Guide

    Key Takeaways

    • Maintaining the Honda GC190 engine is crucial for optimal performance, and a key component in engine maintenance is the spark plug.
    • The spark plug for the Honda GC190 should be the BPR6ES (NGK) 98079-56846 or an equivalent.
    • The spark plug gap should be set between 0.028″– 0.031″, and precision is important for efficient engine performance.
    • The spark plug socket size for the Honda GC190 is 13/16″ (21mm), and using the correct socket size ensures a secure fitting of the spark plug.
    • Owner’s Manual: Click Here to Download

    Honda GC190 Spark Plug Gap & Number

    You’ll need to remember that the spark plug for your Honda GC190 should be a BPR6ES (NGK) 98079-56846 or its equivalent, and the gap should be set between 0.028″– 0.031″.

    This specific information is crucial for the optimal performance of your engine. It’s not just about plugging in any spark plug but the correct one with the right gap.

    Understanding the number and gap of your spark plug is essential. The number BPR6ES (NGK) 98079-56846 identifies the type of spark plug your Honda GC190 requires. This number is a unique identification that ensures you get the exact match for your engine.

    The gap, set between 0.028″– 0.031″, is also important. This is the distance between the center and side electrodes, a setting that must be accurate for ideal engine operation.

    Being part of the Honda family, you deserve the best performance from your engine. Stick to the recommendation, use the right spark plug number, and set the correct gap. This way, you not only keep your engine happy but also play your part in maintaining the legacy of quality that Honda represents.

    Your GC190 engine will thank you for its optimal performance and longevity.

    Honda GC190 Spark Plug Socket Size

    For your engine maintenance, it’s essential to know that a 13/16″ (21mm) tool will be perfect for tightening or removing the spark plug. This size of the socket will ensure that you can securely fit the spark plug into the Honda GC190 engine, making it as efficient as possible.

    1. Confidence: Using the 13/16″ (21mm) socket size provides assurance. You can confidently maintain your Honda GC190 engine, knowing you’re using the right tool.
    2. Ease of Mind: No more guesswork. You have precise information, saving you from potential damage or inefficiency.
    3. Community: By adhering to the standardized 13/16″ (21mm) socket size, you’re joining the ranks of responsible Honda owners who prioritize proper engine maintenance.
    4. Longevity: Properly gapped and installed spark plugs with the correct tool help prolong your engine’s life, giving you more time to enjoy your Honda experience.

    Remember, every detail counts when it comes to maintaining your Honda GC190 engine. Using the correct 13/16″ (21mm) socket size for your spark plug isn’t just about adhering to a manual’s recommendation.

    It’s about being part of a community that values precision, efficiency, and the longevity of its engines. Keep these values in mind next time you’re working on your engine.

    The Importance of Correct Measurements

    Getting your measurements spot on is like hitting the bullseye in archery – it’s a surefire way to keep your engine purring like a contented cat.

    Correct measurements, specifically in relation to your Honda GC190 engine’s spark plug gap, number, and socket size, are crucial for optimum performance. Think of it as getting tailored clothing – the precise fit ensures the best look and feel, just as the right spark plug dimensions ensure your engine runs smoothly.

    When you have accurate information, you’re part of an exclusive club of Honda GC190 owners who understand the value of precise specifications.

    You’re not just blindly following instructions; you’re tuning in to your engine’s unique needs, ensuring top-notch function and longevity. You’re actively participating in maintaining your engine’s health rather than leaving it to chance.

    So remember, using the correct type of spark plug—BPR6ES (NGK) 98079-56846 or equivalent—with a gap of 0.028″– 0.031″ and a socket size of 13/16″ (21mm) isn’t a mere suggestion. It’s a key ingredient in your recipe for a well-tuned, powerful, and reliable Honda GC190 engine. It’s like being part of a secret society where everyone knows the importance of precision.

    How to change Spark Plug Gap?

    Ready to tweak that engine performance? Let’s dive into the nitty-gritty of adjusting your spark plug’s gap. You may be questioning why it’s necessary to adjust this tiny space, but let me assure you, it’s crucial for your Honda GC190’s optimum performance. A properly gapped spark plug ensures efficient fuel combustion, leading to a smoother ride and a more reliable engine.

    Here’s a simple 3-step guide to help you adjust your spark plug gap:

    1. First, identify the correct spark plug gap for your Honda GC190. This information is typically found in your owner’s manual.
    2. Equip yourself with a feeler gauge or a spark plug gap tool. These are designed to measure and adjust the gap accurately.
    3. Carefully adjust your spark plug’s gap using the tool. Apply gentle pressure and avoid forcing the gap to change, as it can damage the spark plug.

    Remember, precision matters in this task. It’s not just about making sure your engine runs; it’s about ensuring it runs as efficiently as possible. The right spark plug gap will lead your Honda GC190 to deliver the performance you’ve been longing for. Embrace the power within your grasp and make that necessary adjustment today!

    Frequently Asked Questions

    What is the lifespan of a Honda GC190 spark plug?

    The lifespan of your Honda GC190 spark plug typically ranges from 200-300 hrs. However, checking the plug condition regularly is always advisable to ensure your engine’s optimal performance.

    Are there any specific brands of spark plugs recommended for the Honda GC190?

    Certainly! For your Honda GC190, it’s advisable to stick with genuine Honda spark plugs for optimal performance. Alternatively, NGK spark plugs also come highly recommended due to their quality and compatibility.

    Can a different-size spark plug be used in a Honda GC190 if the recommended size is not available?

    While using a different-size spark plug in your Honda GC190 is possible, it’s not recommended. Using the incorrect size can negatively affect engine performance and potentially cause damage. Always try to use the recommended size.

    What are some common symptoms of a faulty spark plug in a Honda GC190?

    You may notice poor fuel efficiency, engine misfires, or difficulty starting your Honda GC190. These issues often indicate a faulty spark plug. Regular maintenance can help prevent these problems and ensure smooth operation.

    Conclusion

    Neglecting your Honda GC190’s spark plug gap and socket size may seem insignificant, but it’s a juxtaposition that could impact your engine’s performance.

    It’s crucial to get these measurements right. Remember, a minor tweak in the spark plug gap can make a world of difference. So, don’t underestimate these little details – your vehicle’s efficiency and longevity hang in the balance.

    Stay detailed, stay informed, and keep your engine running smoothly.

  • Honda GX200 Spark Plug Gap, Number & Socket Size Guide

    Honda GX200 Spark Plug Gap, Number & Socket Size Guide

    Nothing is as critical as the little yet mighty spark plug in the electrifying world of engine maintenance.

    You’re about to delve into an in-depth guide on the Honda GX200 spark plug gap, number, and socket size. Although small, this essential component plays a colossal role in your engine’s performance.

    Understanding the correct gap, model number, and socket size can be the difference between a smooth ride and a frustrating misfire.

    This guide is your trusty companion, providing you with the detailed, accurate technical information you need. Perfect for those who share a common love for efficient, well-maintained engines.

    You’re not just reading an article, you’re joining a community of Honda GX200 enthusiasts who value performance and precision.

    So, strap in as we navigate the intricate world of spark plugs, ensuring your Honda GX200 runs as smoothly as the day it rolled off the production line.

    Honda GX200 Spark Plug Gap, Number & Socket Size Guide

    Key Takeaways

    • The Honda GX200 spark plug gap should be set between 0.028″– 0.031″ (0.7 – 0.8 mm) for optimal combustion and fuel efficiency.
    • The spark plug socket size required for Honda GX200 is 13/16′ (21mm); using the correct socket size prevents damage during installation or removal of the spark plug.
    • The number of spark plugs indicates the heat range and design, which affects the performance of the engine.
    • Honda offers a wide range of engine models catering to different needs, including the GX200, which is known for its durability and reliability. The GX100 for compactness and fuel efficiency, the GXV Series for high performance and lower fuel consumption, the GCV Series for easy starting and quiet operation, and V-Twin series for powerful and reliable engines.
    • Owner´s manual – https://cdn.powerequipment.honda.com

    Honda GX200 Spark Plug Gap & Number

    You’ll need to ensure your Honda GX200’s spark plug is gapped correctly at 0.028″– 0.031″ (0.7 – 0.8 mm) for optimal engine performance. This isn’t just a suggestion; it’s a critical aspect of maintaining your engine’s efficiency, longevity, and overall health.

    A properly gapped spark plug ensures optimal combustion, leading to better fuel efficiency and smoother engine operation.

    Now, let’s dive into specifics. The number associated with your spark plug, whether it’s the BPR6ES (NGK) 98079-56846 or the W20EPR-U (DENSO) 98079-56855, isn’t just a random sequence.

    It’s a unique identifier telling you the heat range and design of the plug. Understanding this can help you make more informed decisions about your engine’s maintenance and performance.

    As a member of the Honda GX200 engine community, paying attention to these details is essential. They’re not merely technical specs but a testament to your commitment to excellence and your engine’s reliable performance.

    We’re all on this journey together, striving to get the best out of our Honda engines. Remember, a correctly gapped and numbered spark plug is a key ingredient in that recipe for success.

    Honda GX200 Spark Plug Socket Size

    Imagine wielding a 13/16′ (21mm) wrench, feeling its cool metal in your hand as you prepare to install or remove that essential piece of your engine – the spark plug. The Honda GX200 spark plug socket size is key to your successful maintenance or repair work.

    It’s not just a random figure; it’s calibrated to fit the spark plug perfectly, ensuring effective and safe handling. The 13/16′ (21mm) socket size is ideal for a secure grip on the spark plug. This size ensures that the spark plug is neither too loose nor too tight in the socket. The right socket size prevents damage to the spark plug during installation or removal.

    You are part of a community of Honda engine owners who value precision and accuracy. Armed with the correct information, you’re ready to handle your engine’s needs professionally. Remember, using the right tools, like a 13/16′ (21mm) socket size for your Honda GX200 spark plug, is paramount to the longevity and performance of your engine.

    So, wear that wrench with pride, knowing you’re not only maintaining your engine but also upholding the high standards of the Honda community.

    All Honda Engines Series

    Diving into the world of engines, it’s intriguing to explore the extensive list of all the powerhouses that have been crafted by a certain renowned automaker.

    Honda, a name synonymous with power and performance, has a remarkable range of engines that cater to varying needs and applications. From the smallest, the GC Series, to the largest, the iGX Series, Honda has always set the bar high with its engines.

    You’re part of an exclusive group of engine enthusiasts who appreciate the craftsmanship and technical excellence that goes into creating each Honda engine.

    Whether it’s the GX200, known for its durability and reliability in demanding conditions, or the GX100, noted for its compact size and fuel efficiency, each Honda engine has its unique features and benefits.

    Other notable engines include the GXV Series, which boasts high performance and lower fuel consumption, and the GCV Series, designed for easy starting and quiet operation. Honda also offers the V-Twin series, a testament to Honda’s commitment to providing powerful, efficient, and reliable engines.

    So, whichever path you take in your engine exploration journey, remember that Honda’s diverse engine lineup has something for everyone.

    Frequently Asked Questions

    What are the signs of a bad spark plug in a Honda GX200 engine?

    Imagine your Honda GX200 stuttering, struggling to start, or losing power. These are signs of a bad spark plug. You may also notice poor fuel economy, rough idling, or even engine misfires. Always check regularly!

    How often should I change the spark plug in my Honda GX200?

    Typically, it’s recommended to replace the spark plug in your Honda GX200 every 300 hours of use. However, if you’re experiencing issues or the spark plug appears worn or damaged, consider replacing it sooner.

    What are the potential consequences of using the wrong spark plug gap in a Honda GX200?

    Using the wrong spark plug gap in your Honda GX200 can cause poor engine performance, increased fuel consumption, and possibly engine damage. It’s crucial to use the correct gap for optimum engine health.

    Can I use a different brand of spark plug in my Honda GX200 engine other than the one recommended by Honda?

    Sure, you can use different spark plug brands in your GX200. Around 80% of engine issues arise from improper maintenance, not brand choice. But ensure it meets Honda’s specifications to maintain your engine’s performance.

    How does a spark plug affect the performance of a Honda GX200 engine?

    The right spark plug boosts your GX200’s performance by ensuring optimal combustion. It affects fuel efficiency, engine power, and longevity. Using incorrect ones could lead to misfires or engine damage, so choose wisely.

    Conclusion

    In wrapping up, you’ve learned the ins and outs of your Honda GX200 spark plug. You’ve grasped the perfect gap, number, and ideal socket size.

    Doesn’t it feel powerful to have such detailed technical knowledge? With this, you’ve debunked any misplaced theories, and you’re now armed with accurate information.

    Remember, maintaining your engine’s spark plug is key to its performance. So, let’s keep those engines roaring, shall we?

  • Guide To Honda GX630 Spark Plug Gap, Number and Socket Size

    Guide To Honda GX630 Spark Plug Gap, Number and Socket Size

    Just as the heart needs the perfect rhythm to keep a body running smoothly, your Honda GX630 engine requires an ideally gapped spark plug to maintain its performance.

    Welcome, fellow gearheads! This guide is all about the ins and outs of your engine’s lifeline – the spark plug. We’re diving deep into Honda GX630 spark plug gaps, numbers, and socket sizes that are key for your Honda GX630. Knowing these technicalities helps you get more juice out of your machine while ensuring its longevity.

    Together, we’ll ensure that your ride remains not just a vehicle but an extension of you – powerful, efficient, and always ready for action.

    Guide To Honda GX630 Spark Plug Gap, Number and Socket Size

    Key Takeaways

    • Proper spark plug gap size (0.028″– 0.031″) is crucial for the optimum performance of the Honda GX630 engine.
    • The recommended spark plug type for Honda GX630 is ZFR5F (NGK) 98079-5587G or equivalent.
    • Maintaining the correct spark plug and gap size ensures smoother engine operation and better fuel economy.
    • Using a 5/8″ (16mm) socket wrench for spark plug removal and installation prevents damage to the spark plugs.
    • Owner´s manual – https://cdn.powerequipment.honda.com

    Honda GX630 Spark Plug Gap & Number

    For your Honda GX630, you’ll need a spark plug that matches the type ZFR5F (NGK) 98079-5587G or its equivalent, and make sure it’s gapped correctly between 0.028″– 0.031″. This isn’t just a suggestion but a crucial requirement for optimum performance of your engine.

    The correct spark plug and gap size will ensure efficient combustion, leading to smoother engine operation and better fuel economy.

    Remember, the ‘ZFR5F’ signifies important specifications about this spark plug’s design features and heat range. To interpret these symbols accurately shows you’re part of the knowledgeable crowd who deeply cares about their engines.

    When it comes to gap size, setting it accurately at 0.028″– 0.031″ guarantees properly timed ignition and optimal burn of the air-fuel mixture within the cylinders of your Honda GX630 engine.

    As an enthusiast who values belonging to a community that values accuracy and technical know-how, understanding these details matters significantly to you. Your dedication ensures peak performance from your Honda GX630 each time you start it up – knowing every detail counts makes you part of an exclusive club that values precision in maintaining their machines.

    Honda GX630 Spark Plug Socket Size

    You’ll need a 5/8′ (16mm) socket to handle the removal and installation of your engine’s spark plugs. This is the precise fit for Honda GX630 engines, which ensures that you won’t cause any damage while changing them out. A reliable socket wrench also lets you apply just the right amount of torque.

    Here are three key points to remember:

    1. The correct size: Always use a 5/8′ (16mm) socket when working with the Honda GX630 spark plug. Using a different size could lead to stripping or cracking.
    2. Quality matters: Invest in a high-quality tool that’ll last a lifetime and provide an excellent grip so it’s easy to handle.
    3. Practice safety: Use gloves during this process to protect yourself from potential burns, slippage, or dropping.

    When it comes down to it, caring for your Honda is about more than just following maintenance schedules – it’s about becoming part of a community that values reliability and performance above all else.

    Every time you roll up your sleeves to work on your engine, you’re ensuring its longevity and joining others who share your dedication to quality and attention to detail. Remember, using the right tools, like the 5/8′ (16mm) socket, is essential in continuing this tradition of excellence!

    Frequently Asked Questions

    What are the signs that the spark plug on a Honda GX630 needs to be replaced?

    If you’re noticing a rough idle, misfires, or poor fuel economy, these could be signs your spark plug needs replacing. A worn-out spark plug can reduce the efficiency of your Honda GX630 by up to 30%.

    Can I use any other brand’s spark plug in my Honda GX630?

    Absolutely, you can use other brands’ spark plugs in your Honda GX630. However, make sure they’re compatible and meet the engine’s requirements. Always cross-reference with your owner’s manual for the correct specifications.

    How often should I change the spark plug on my Honda GX630?

    Just like a doctor’s regular check-up, your Honda GX630 needs its spark plug changed every 300 hours of use or annually. Whichever comes first, ensure it’s done to keep your engine running smoothly.

    What are the consequences of using an incorrect spark plug gap in a Honda GX630?

    Using an incorrect spark plug gap in your Honda GX630 can cause poor fuel efficiency, engine misfires, or even damage to your engine. Always ensure the gap is set correctly for optimal performance.

    Is there a specific torque required when installing the spark plug in a Honda GX630?

    Just like a finely tuned symphony, your Honda GX630 needs the right torque for its spark plug. It’s crucial to tighten it to 13 ft-lbs. Remember, over-tightening can be as damaging as under-tightening.

    Conclusion

    In conclusion, getting the right spark plug gap and number for your Honda GX630 is as crucial as hitting a bull’s eye! An incorrect spark plug can cause more trouble than a bull in a china shop.

    The socket size? It’s like finding Cinderella’s perfect fit. So guys, don’t gamble with your engine’s health. Ensure you’ve got those details down pat. Trust me, it’ll make your ride smoother than silk on buttered glass!