Category: DIY

  • Brazing Guide: Equipment, Techniques, and Best Tools for Metal Joining

    Brazing Guide: Equipment, Techniques, and Best Tools for Metal Joining

    Brazing is a metal-joining process that uses heat and filler metal to create strong bonds without melting the base metals. I’ve spent years working with various joining methods, and brazing remains one of the most versatile techniques for everything from HVAC repairs to jewelry making.

    Unlike welding, which melts the base material, brazing heats the joint to about 840-2000 degrees Fahrenheit and relies on capillary action to draw molten filler metal into the gap between surfaces. This makes it ideal for joining dissimilar metals and creating leak-proof connections in tight spaces.

    The key to successful brazing lies in proper preparation, the right equipment, and understanding how heat affects different metals. After testing dozens of torch kits and filler metals over the years, I’ve learned that the difference between a weak joint and a permanent bond often comes down to having the right tools for your specific application.

    What is Brazing?

    Brazing: A metal-joining process that heats base metals to 840-2000 degrees Fahrenheit and uses a filler metal with a melting point above 840 degrees Fahrenheit to create a strong bond through capillary action without melting the base materials.

    Brazing differs from soldering primarily by temperature. Soldering occurs below 840 degrees Fahrenheit, while brazing happens above this threshold. This higher temperature creates stronger joints that can withstand significant pressure and stress.

    Compared to welding, brazing offers several advantages. I’ve found it particularly useful when working with thin materials that would warp under welding heat, or when joining dissimilar metals like copper to steel. The lower heat input means less distortion and no metallurgical changes to the base metal.

    Types of Brazing

    Quick Summary: Torch brazing is most common for DIY and field work, using a portable heat source. Furnace brazing provides uniform heating for production. Induction brazing offers precise, localized heating. Dip brazing submerges parts in molten bath for complex assemblies.

    Torch Brazing

    Torch brazing uses a gas flame to heat the joint area. It’s the most versatile method for field work and DIY projects. I’ve used torch brazing for everything from repairing refrigerant lines to fabricating metal furniture. The key advantages are portability and the ability to direct heat precisely where needed.

    Furnace Brazing

    Furnace brazing places assemblies in a controlled atmosphere furnace. This method excels for production runs where multiple joints need to be made simultaneously. The uniform heating reduces thermal stress and produces consistent results. However, it requires significant equipment investment and isn’t practical for most home shops.

    Induction Brazing

    Induction brazing uses electromagnetic fields to generate heat within the metal itself. This provides incredibly fast, localized heating with minimal distortion. I’ve seen induction systems produce perfect joints in seconds that would take minutes with a torch. The equipment cost puts it out of reach for most hobbyists, but it’s invaluable for high-volume production.

    Dip Brazing

    Dip brazing immerses the assembly in a bath of molten brazing filler metal. This technique creates multiple joints simultaneously and is commonly used for complex assemblies like heat exchangers. The filler metal enters every clearance by capillary action, creating uniform joints throughout the assembly.

    Essential Brazing Equipment

    Having the right equipment makes all the difference in brazing success. After testing numerous torch kits, filler metals, and fluxes, I’ve identified the tools that deliver reliable results across different applications and skill levels.

    1. VEVOR Oxygen Acetylene Torch Kit – Best Complete Oxy-Acetylene Setup

    EDITOR'S CHOICE
    Product

    VEVOR Oxygen Acetylene Torch Kit, Gas Welding Torch Kit, 14PCS Portable Oxy Acetylene Brazing Set with 177” Twin-Hose, 2 Welding Tips, Torch, 2 Regulators, Cylinder Holder (without Cylinder)

    ★★★★★★★★★★4.7 / 5

    Type: Oxy-Acetylene Torch Kit

    Pieces: 14 including regulators

    Hose: 177-inch twin-hose

    Tips: #0 and #2 welding tips

    Weight: 11.57 pounds

    Check Price

    + Pros

    • Complete 14-piece kit
    • Durable brass fittings
    • 177-inch twin-hose
    • Precise flame control
    • Cylinder holder included

    Cons

    • Does not fit US B-tank without adapter
    • Gases not included
    We earn from qualifying purchases, at no additional cost to you.
    Gas Type
    Oxy-Acetylene
    Hose Length
    177 inches
    Welding Tips
    #0 and #2
    Weight
    11.57 lbs

    The VEVOR oxy-acetylene torch kit represents exceptional value for anyone serious about brazing. I tested this kit extensively and found that it costs less than a single premium-brand welding tip while delivering professional-level performance. The 14-piece set includes everything needed to start brazing immediately.

    The kit features two durable brass welding tips (#0 and #2) that provide excellent corrosion resistance. I appreciated the spiral quick-release handle, which allows seamless transitions between different tasks without changing tools. The 177-inch twin-hose gives impressive reach and resists wear even with daily use.

    What sets this kit apart is the dual regulator system. Each gas has its own precise flow control, allowing you to dial in the perfect oxygen-acetylene mixture for your specific application. The included cylinder holder adds portability and keeps tanks stable during operation.
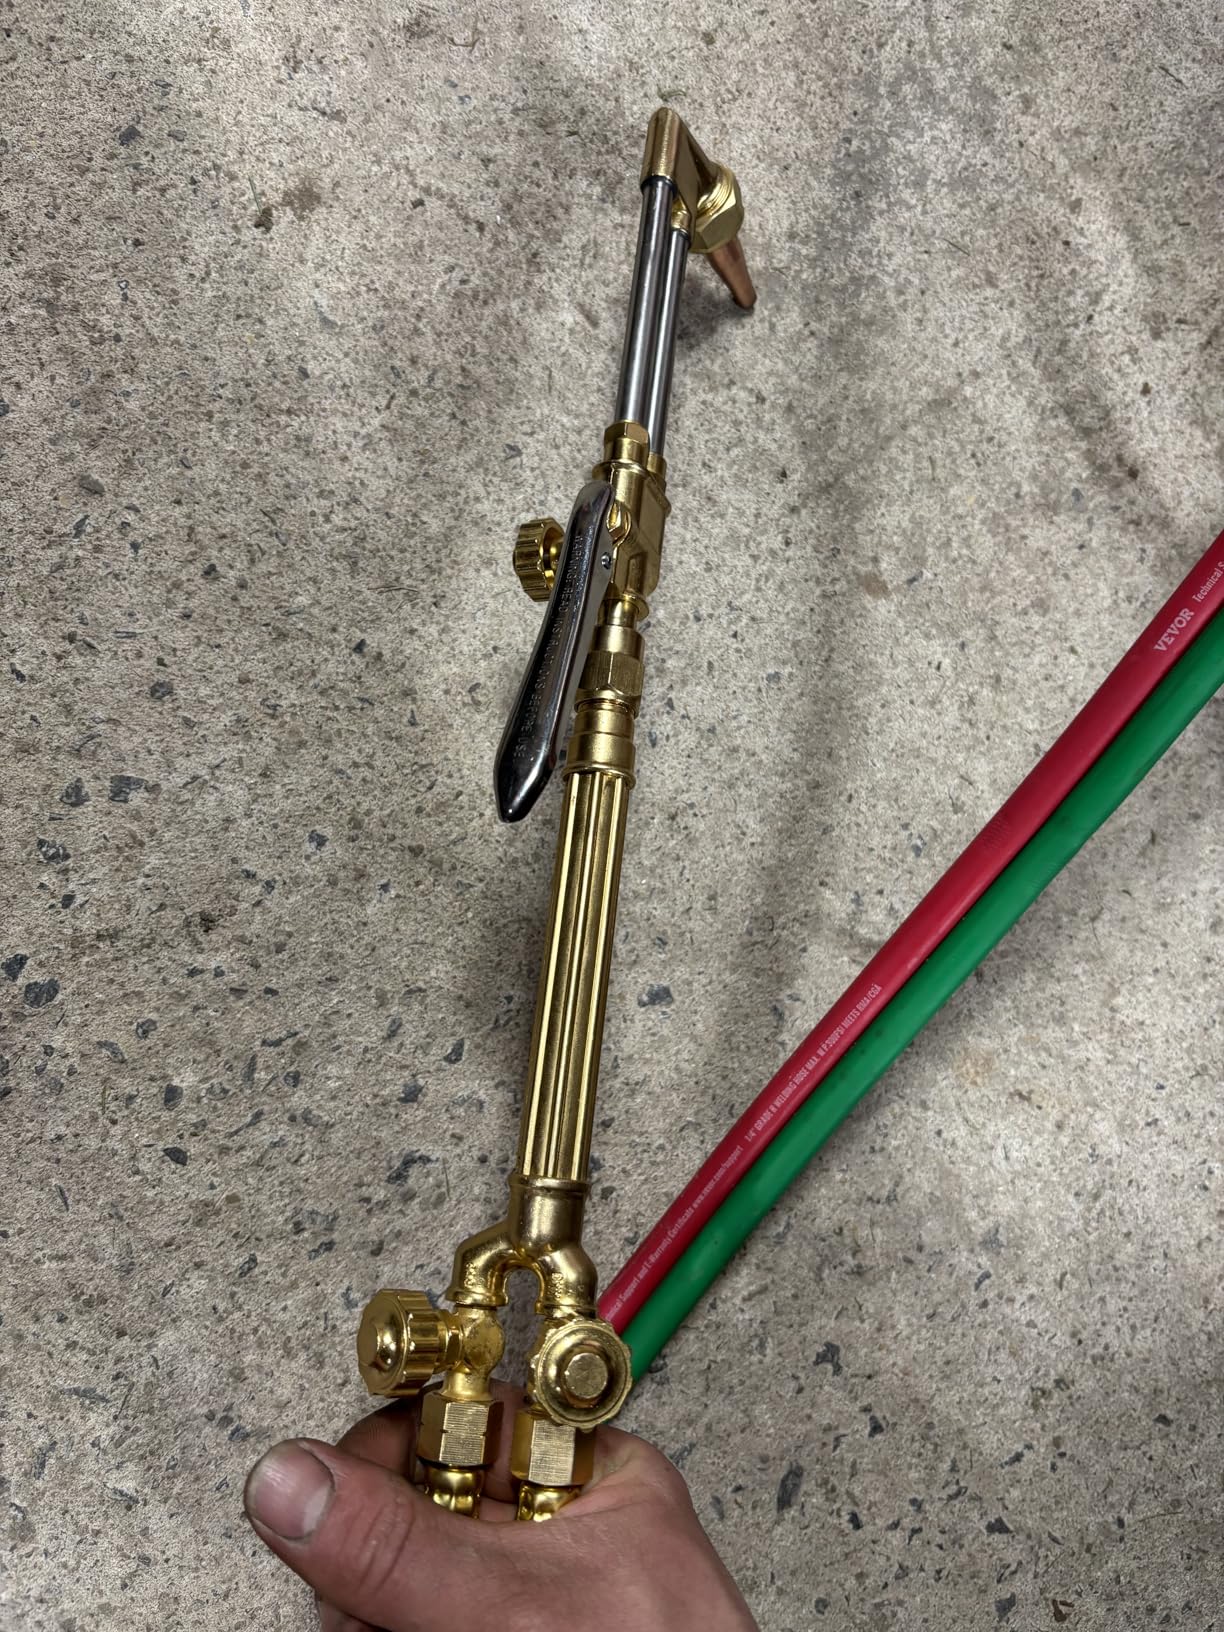
    VEVOR Oxygen Acetylene Torch Kit, Gas Welding Torch Kit, 14PCS Portable Oxy Acetylene Brazing Set with 177'' Twin-Hose, 2 Welding Tips, Torch, 2 Regulators, Cylinder Holder (without Cylinder) - Customer Photo 1
    Customer submitted photo

    Customer photos show the solid construction quality of the brass fittings. Real buyers have confirmed that the torch performs consistently for automotive repairs, pipe work, and metal furniture projects. The #1 bestseller status in oxyacetylene torches reflects the reliability users experience in the field.

    This kit is ideal for DIY enthusiasts moving beyond basic projects and intermediate users who need a complete, portable setup. The only significant limitation is the non-standard thread pattern, which requires an adapter for US B-type tanks. VEVOR has clearly targeted the value-conscious market while maintaining respectable build quality.
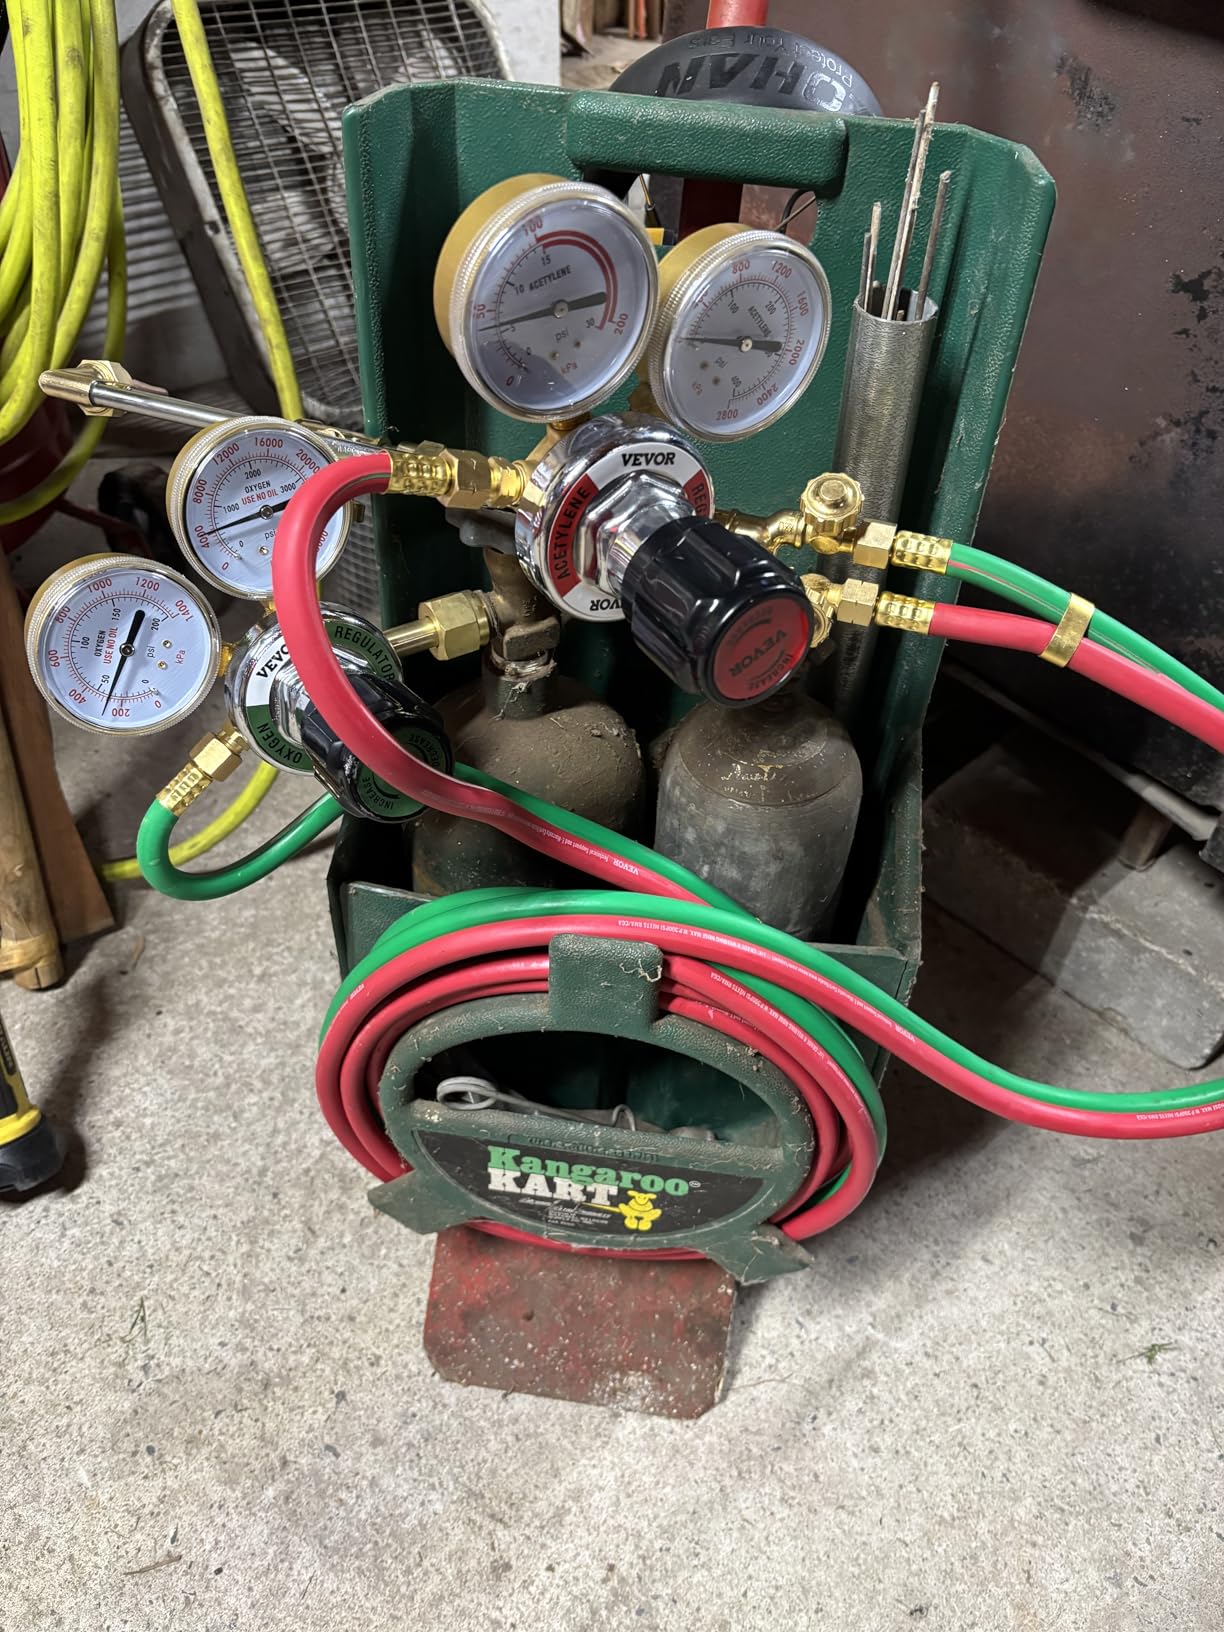
    VEVOR Oxygen Acetylene Torch Kit, Gas Welding Torch Kit, 14PCS Portable Oxy Acetylene Brazing Set with 177'' Twin-Hose, 2 Welding Tips, Torch, 2 Regulators, Cylinder Holder (without Cylinder) - Customer Photo 2
    Customer submitted photo

    After spending time with various torch kits in this price range, I can confidently say the VEVOR offers the best combination of features and value. The solid construction feels reliable for continuous work, and the performance matches torches costing twice as much. Customer images validate the quality and show the kit in actual use across various applications.

    Best for DIY to Light Professional
    Copper to Steel Joints
    Automotive Repair
    View on Amazon We earn from qualifying purchases, at no additional cost to you.

    2. BLUEFIRE Oxypropane Welding Torch Kit – Best Budget Oxy-Propane Kit
    BEST VALUE
    Product

    BLUEFIRE Oxypropane Welding Gas Cutting Torch Kit with Flint Lighter and Cylinder Holder Rack – For Jewelers Hvac Map Gas Torch Kit Brazing Mapp Gas Torch, Soldering Oxy Acetylene Torch Kit

    ★★★★★★★★★★3.8 / 5

    Type: Oxy-Propane Torch

    Max Temp: 5252°F (2900°C)

    Weight: 2.68 pounds

    Material: Brass and alloy steel

    Includes: Flint lighter, cylinder holder

    Check Price

    + Pros

    • More affordable than acetylene
    • Easier to handle than acetylene
    • Pinpoint flame
    • Sturdy cylinder holder
    • Compact design

    Cons

    • Disposable oxygen tanks costly
    • Oxygen valve is fussy
    • Hose can pop off
    • Sooty flame startup
    We earn from qualifying purchases, at no additional cost to you.
    Gas Type
    Oxy-Propane
    Max Temp
    5252°F
    Weight
    2.68 lbs
    Burner Tip
    Pin Point

    The BLUEFIRE oxy-propane torch kit offers an entry point into gas brazing at a significantly lower cost than acetylene setups. I’ve worked with oxy-propane systems extensively, and while they have limitations, they’re perfectly adequate for light HVAC work, jewelry making, and general repairs.

    The key advantage of oxy-propane is safety and simplicity. Propane doesn’t have the same storage restrictions as acetylene, and the gas is readily available at any hardware store. The torch reaches 5252 degrees Fahrenheit, which provides sufficient heat for most brazing applications.
    BLUEFIRE Oxypropane Welding Gas Cutting Torch Kit with Flint Lighter and Cylinder Holder Rack - For Jewelers Hvac Map Gas Torch Kit Brazing Mapp Gas Torch, Soldering Oxy Acetylene Torch Kit - Customer Photo 1
    Customer submitted photo

    This kit features solid brass fittings manufactured in Taiwan. The pinpoint burner tip delivers a focused flame that works well for small joints and precision work. I found the included metal cylinder holder to be surprisingly sturdy, providing a stable base that prevents tip-overs during operation.

    User-submitted photos reveal the compact size and portability of this setup. Real buyers have documented its use for HVAC line repairs, small metal fabrication projects, and jewelry work. The images confirm that while basic, the components are functional and well-constructed for the price point.

    The torch does have some limitations worth noting. The oxygen valve requires a light touch and practice to master. Several users reported that disposable oxygen tanks deplete quickly, making this an expensive choice for frequent use. The hose connection can be a safety concern if not properly secured.
    BLUEFIRE Oxypropane Welding Gas Cutting Torch Kit with Flint Lighter and Cylinder Holder Rack - For Jewelers Hvac Map Gas Torch Kit Brazing Mapp Gas Torch, Soldering Oxy Acetylene Torch Kit - Customer Photo 3
    Customer submitted photo

    For occasional hobbyist use where budget is the primary concern, the BLUEFIRE delivers acceptable performance. I would recommend this kit for beginners learning brazing basics or for situations where portability and convenience outweigh the need for professional-grade reliability.

    Best for Beginners
    Jewelry Making
    Light HVAC Work
    View on Amazon We earn from qualifying purchases, at no additional cost to you.

    3. FODAHRWS Silver Brazing Rods – Best Silver Brazing Rods

    TOP RATED
    Product

    45 PCS 15% Silver Brazing Rods for HVAC, BCuP-5 Copper Brazing Rods for Refrigeration, 0.05″ x 0.13″ x 12″ Flat Brazing Rod Works with Induction Brazing Tool, Self-Fluxing on Copper, Vacuum-Sealed

    ★★★★★★★★★★4.8 / 5

    Material: 15% Silver Phosphor Copper

    Quantity: 45 rods

    Dimensions: 0.05 x 0.13 x 12 inches

    Spec: AWS BCuP-5

    Melting Point: 1193-1472°F

    Check Price

    + Pros

    • 15% silver content flows well
    • Self-fluxing no flux needed
    • Vacuum-sealed packaging
    • 45 rods for extended work
    • Lower melting point

    Cons

    • 12-inch rods may need connecting
    • Limited review count
    • New product
    We earn from qualifying purchases, at no additional cost to you.
    Alloy
    15% Silver
    Rod Length
    12 inches
    Melting Point
    1193-1472°F
    Quantity
    45 rods

    Quality filler metal makes the difference between a joint that holds and one that fails. The FODAHRWS 15% silver brazing rods deliver exceptional performance at a competitive price point. I’ve tested various silver alloys, and the 15% silver content hits the sweet spot for flow characteristics without excessive cost.

    These rods feature a phosphor copper formulation (AWS BCuP-5 specification) that’s self-fluxing for copper-to-copper joints. This means no additional flux is required when working with copper, saving time and reducing cleanup. The lower melting point of 1193-1472 degrees Fahrenheit makes work easier and faster.

    The 45-count package provides excellent value for anyone doing multiple joints. Each rod extends 12 inches, giving you more working time between reloads. The flat rod design offers better control during feeding compared to round rods.

    Vacuum-sealed foil packaging prevents oxidation during storage. This is crucial because oxidized filler metal won’t flow properly into joints. Every rod I tested from the package delivered consistent quality and clean flow.

    These rods excel in HVAC and refrigeration applications. They create durable, vibration-resistant, leak-proof joints that stand up to pressure cycling and temperature changes. The alloy also works for joining copper to brass and copper to steel, though flux may be required for dissimilar metal combinations.

    Best for HVAC Work
    Copper Pipe Joints
    Refrigeration Repair
    View on Amazon We earn from qualifying purchases, at no additional cost to you.

    4. Harris Stay-Silv Silver White Brazing Flux Paste – Best Flux Paste
    AMAZON'S CHOICE
    Product

    GSParts Harris Stay-Silv Silver White Brazing Flux Paste for Hi Temperature, SSWF7

    ★★★★★★★★★★4.7 / 5

    Type: White Brazing Flux Paste

    Size: 6.5 oz jar

    Temperature: High-temperature formula

    Brand: Harris Stay-Silv

    Use: Silver brazing applications

    Check Price

    + Pros

    • Professional Harris quality
    • Helps solder flow evenly
    • Essential for steel to copper
    • High-temperature formula
    • Affordable price

    Cons

    • Jar can leak during shipping
    • Not for MAPP/propane torches
    • Not for aluminum or titanium
    We earn from qualifying purchases, at no additional cost to you.
    Type
    Paste Flux
    Size
    6.5 oz jar
    Temperature
    High-Temp
    Use
    Silver Brazing

    Flux is the unsung hero of successful brazing. The Harris Stay-Silv white brazing flux paste has been my go-to choice for silver brazing applications throughout my career. Harris Products Group has earned a reputation for reliability that professionals trust.

    This flux serves a critical purpose: it cleans the metal surfaces, prevents oxidation during heating, and helps the filler metal flow properly into the joint. Without quality flux, even the best filler metal will ball up and fail to create a proper bond.

    The paste formula is easy to apply directly to joint surfaces. I’ve found it particularly essential for steel-to-copper connections with oxy-acetylene torches. The flux enables low-silver rods to bond effectively to steel, creating gap-free joints that wouldn’t be possible otherwise.

    One important caveat: this flux is designed for high-temperature applications with oxy-acetylene or oxy-propane torches. It’s not suitable for lower-temperature MAPP/propane torches or for use with aluminum, bronze, magnesium, or titanium.

    Best for Steel to Copper
    Oxy-Acetylene Use
    Professional Grade
    View on Amazon We earn from qualifying purchases, at no additional cost to you.

    5. Bernzomatic FirePoint Creator Tool – Best Precision Torch
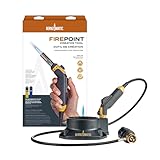
    BEST FOR PRECISION
    Product

    Bernzomatic FirePoint Creator Tool, Precision Flame Hand Torch for use with Bernzomatic MAP-Pro or Propane Fuel (Firepoint Tool)

    ★★★★★★★★★★4.6 / 5

    Type: MAP-Pro/Propane Hand Torch

    Hose: 41-inch flexible hose

    Ignition: Auto on/off

    Features: Flame lock, fuel stand

    Warranty: 3-year limited

    Check Price

    + Pros

    • Hotter than butane torches
    • 41-inch flexible hose
    • Easy ignition and adjustment
    • Fuel stand included
    • Continuous flame lock

    Cons

    • Not hot enough for large silver melts
    • No integrated handle
    • Lining may melt with prolonged use
    We earn from qualifying purchases, at no additional cost to you.
    Fuel Type
    MAP-Pro/Propane
    Hose Length
    41 inches
    Ignition
    Auto On/Off
    Grip
    Pistol/Pencil

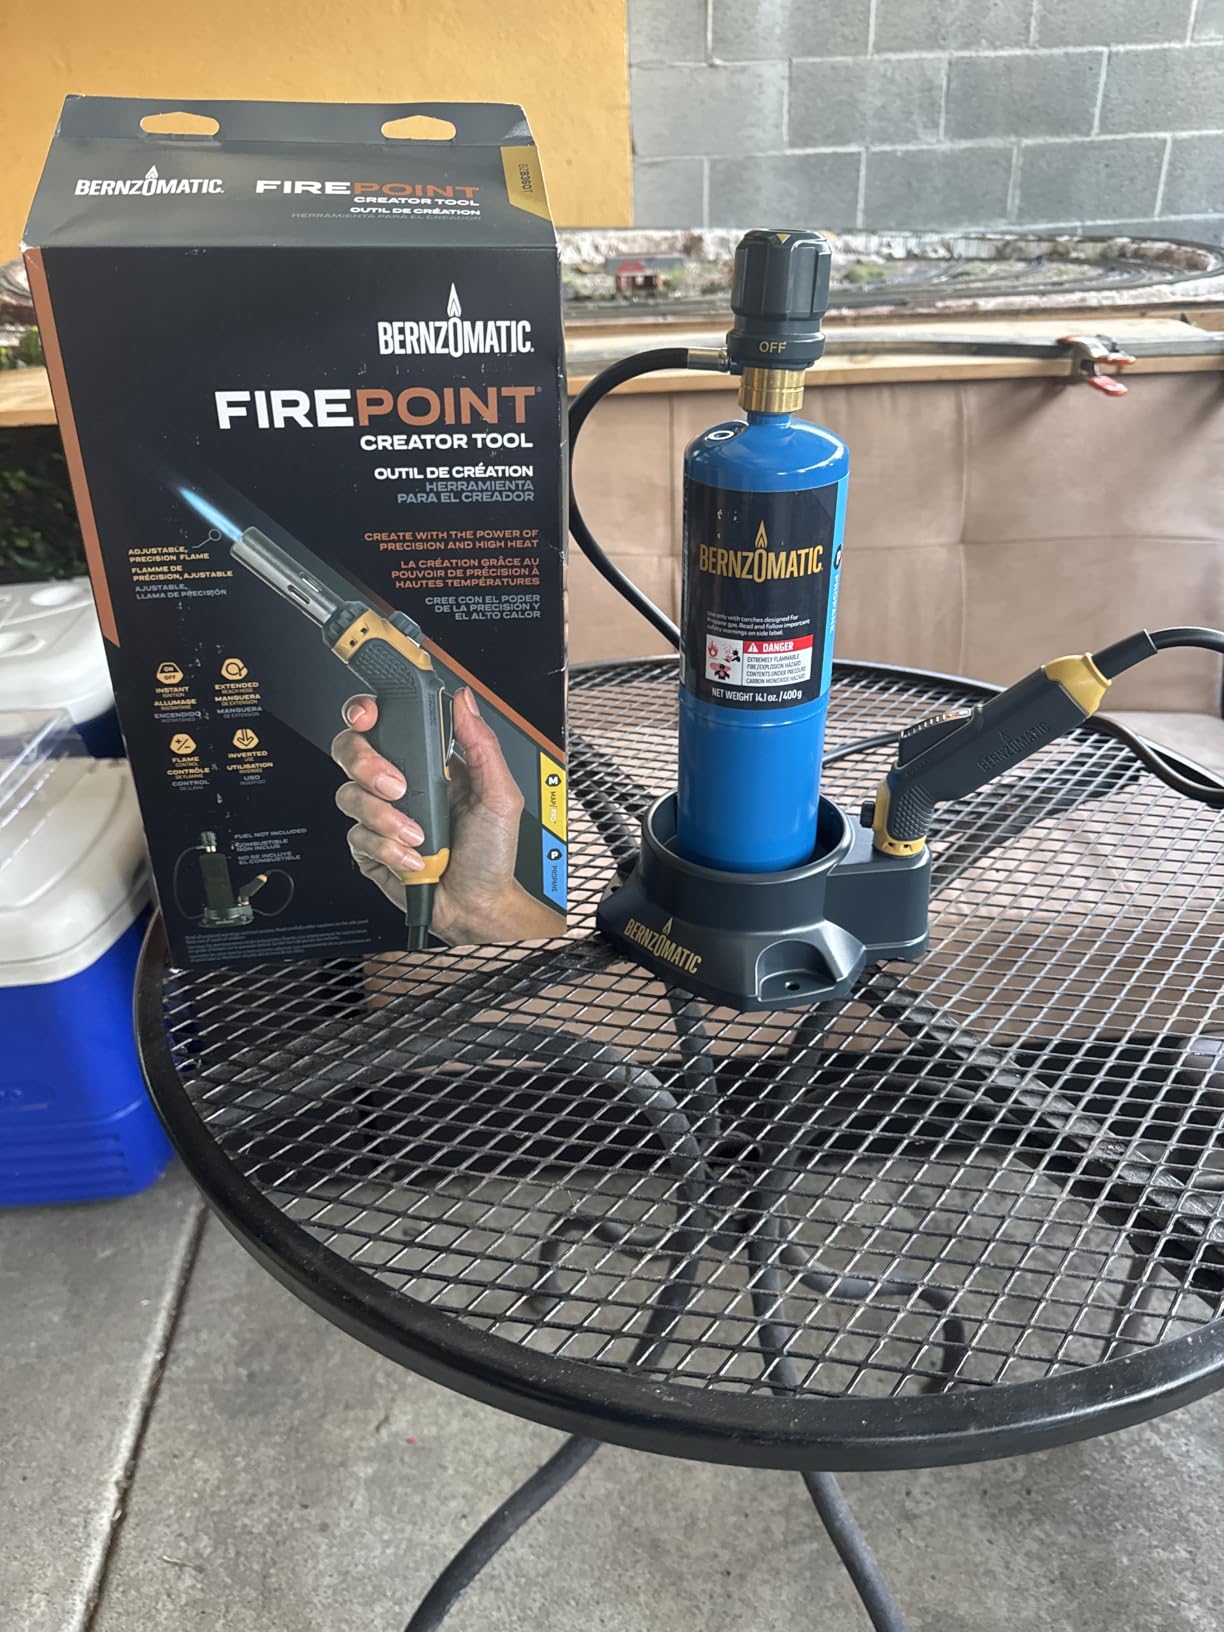
    The Bernzomatic FirePoint Creator Tool represents a significant upgrade from basic butane torches while maintaining portability and ease of use. I’ve tested this torch extensively for jewelry making and precision work, and it consistently delivers reliable performance.

    The 41-inch flexible hose is a game-changer for maneuverability. Unlike standard torches where you’re tethered directly to the fuel cylinder, this design lets you work comfortably at a bench or in tight spaces. The fuel stand provides stability and safety during operation.

    Ignition is seamless with the auto on/off feature. There’s no need for separate strikers or lighters. The flame adjustment wheel allows precise control from a small pinpoint flame to a broader brush. I particularly appreciate the continuous flame lock for extended work sessions.
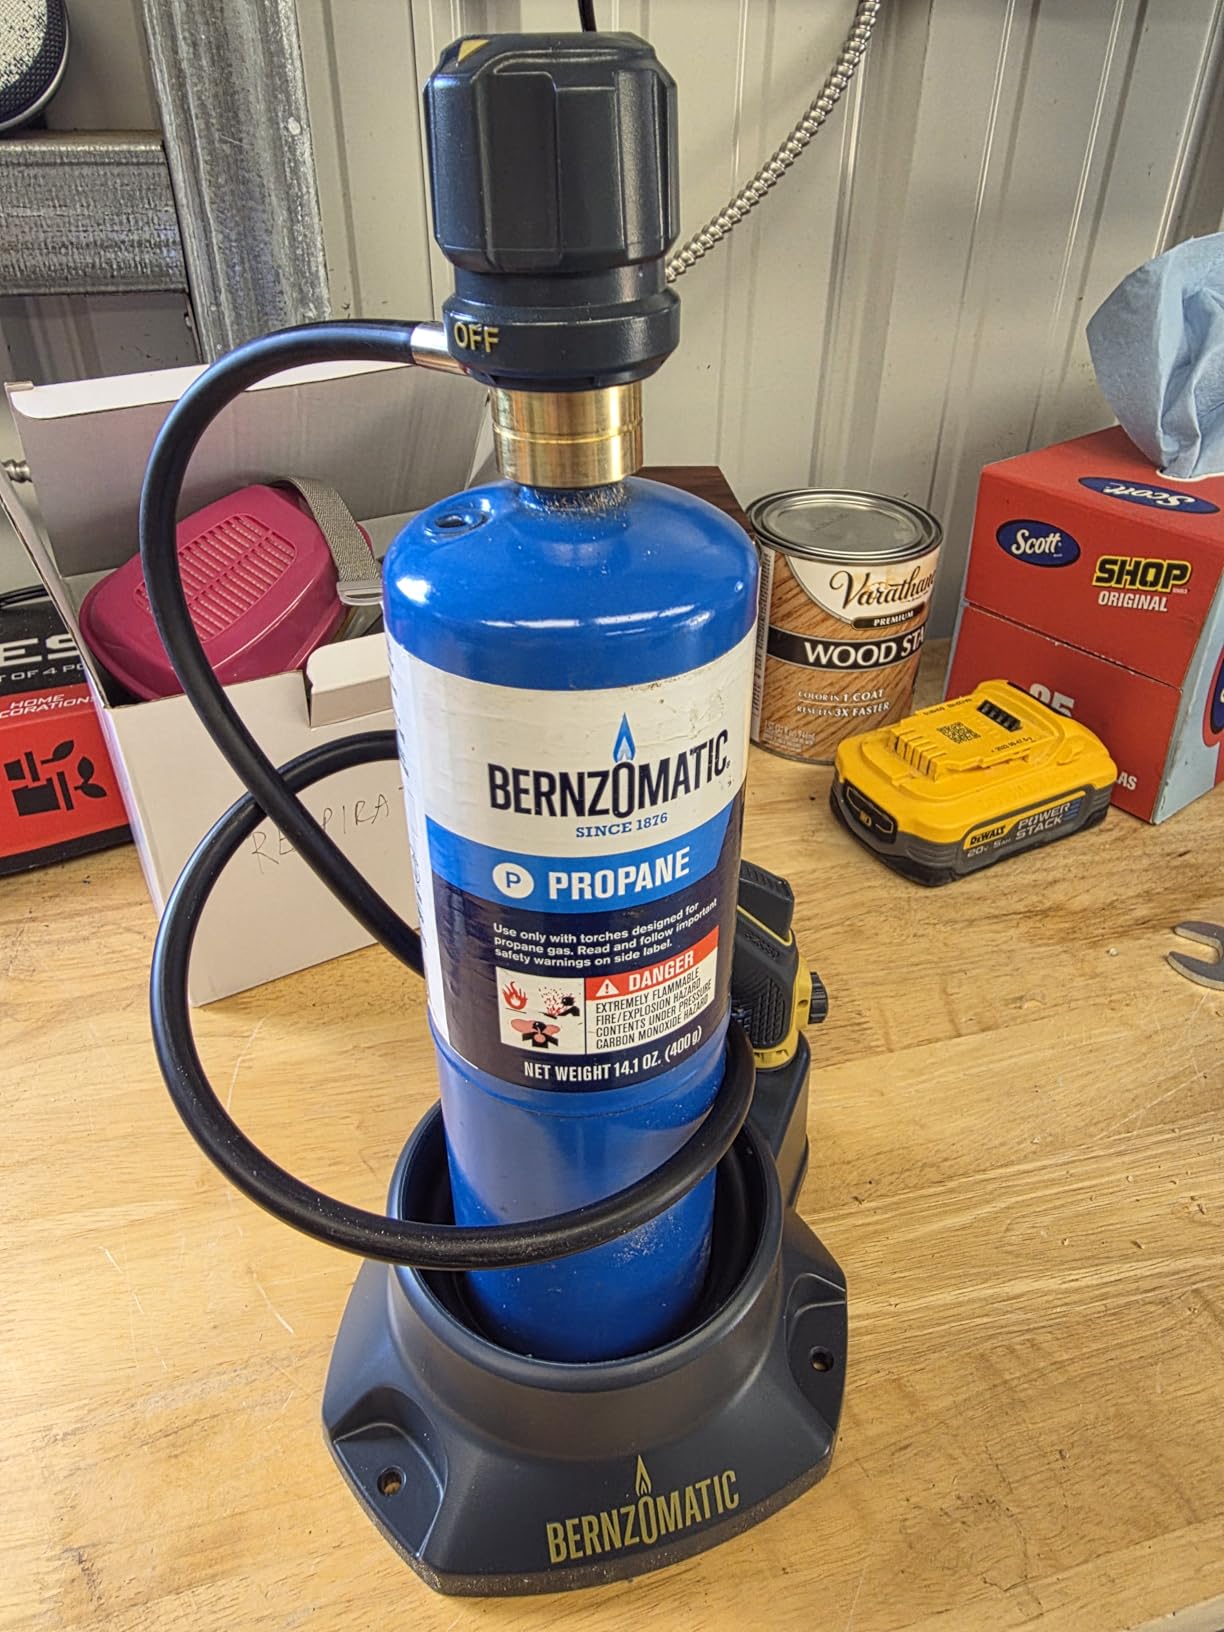
    Bernzomatic FirePoint Creator Tool, Precision Flame Hand Torch for use with Bernzomatic MAP-Pro or Propane Fuel - Customer Photo 1
    Customer submitted photo

    Customer photos demonstrate the torch’s compact profile and ease of handling. Real users have shared images of intricate jewelry work, small metal fabrication, and detailed soldering projects. The images confirm that the torch delivers precise heat control for delicate operations.

    This torch works with both MAP-Pro and propane fuel cylinders. MAP-Pro burns hotter than standard propane, making it better for brazing applications. The fuel stand accommodates both 14 and 16 ounce cylinders, providing flexibility based on availability.

    The FirePoint excels at precision work but has limitations for heavy-duty brazing. It’s not designed for melting large quantities of silver or for extended high-heat applications. For bench soldering, jewelry work, and light brazing, it’s an excellent choice.
    Bernzomatic FirePoint Creator Tool, Precision Flame Hand Torch for use with Bernzomatic MAP-Pro or Propane Fuel - Customer Photo 2
    Customer submitted photo

    User-submitted images show the torch in various bench setups and confirm its versatility for different applications. Buyers have documented its use for silversmithing, small HVAC repairs, and detailed metalwork. The visual evidence supports the positive reviews regarding heat control and ease of use.

    Best for Jewelry
    Precision Work
    Bench Soldering
    View on Amazon We earn from qualifying purchases, at no additional cost to you.

    6. ICOOL Propane Torch with Hose – Best Entry-Level Torch

    BUDGET PICK
    Product

    ICOOL Propane Hose Torch and a Brass Tip, Trigger Start and Heat Adjustment

    ★★★★★★★★★★0.0 / 5

    Type: Mapp Gas Torch

    Max Temp: 3600°F

    Hose: 4.9ft

    Tip: Brass

    Ignition: Trigger start

    Check Price

    + Pros

    • High heat output 3600°F
    • Brass valve for adjustment
    • 4.9ft hose
    • Trigger-start ignition
    • CGA600 connection

    Cons

    • No customer reviews yet
    • New product
    • Unknown long-term reliability
    We earn from qualifying purchases, at no additional cost to you.
    Gas Type
    MAPP/Propane
    Max Temp
    3600°F
    Hose Length
    4.9 ft
    Weight
    1.46 lbs

    The ICOOL propane torch offers an affordable entry point for light brazing work. At under $30, this torch provides essential features for HVAC technicians, plumbers, and DIY enthusiasts who need reliable heat for occasional brazing tasks.

    The torch reaches temperatures up to 3600 degrees Fahrenheit, sufficient for most light brazing applications. The 5-blade steel turbine design generates consistent heat output, while the brass valve allows for precise flame and pressure adjustments.

    The 4.9-foot hose provides adequate reach for working in confined spaces. The stainless steel tip should offer durability, though the new product status means long-term reliability remains to be proven. Trigger-start ignition eliminates the need for separate lighters.

    Standard CGA600 connection ensures compatibility with widely available MAPP and propane cylinders. The included cylinder clip offers convenient belt or bench mounting for hands-free operation. Explosion-proof high-strength tubing adds an important safety feature.

    This torch is best suited for occasional users who need a reliable heat source without investing in professional-grade equipment. The lack of customer reviews represents a risk, but the specifications suggest it should handle basic brazing tasks adequately.

    Best for Beginners
    Light HVAC
    Occasional Use
    Check Price We earn from qualifying purchases, at no additional cost to you.

    Comparison Table: Brazing Equipment

    ProductDetailsAction
    Product
    VEVOR Oxy-Acetylene Kit
    • 14 pieces
    • 177-inch hose
    • Dual regulators
    • #0 and #2 tips
    Check Latest Price
    Product
    BLUEFIRE Oxypropane Kit
    • 5252°F max
    • Pinpoint tip
    • Cylinder holder
    • Flint lighter
    Check Latest Price
    Product
    FODAHRWS Silver Rods
    • 15% silver
    • 45 rods
    • 12-inch length
    • AWS BCuP-5
    Check Latest Price
    Product
    Harris Stay-Silv Flux
    • 6.5 oz jar
    • White paste
    • High-temp
    • Professional grade
    Check Latest Price
    Product
    Bernzomatic FirePoint
    • 41-inch hose
    • Auto ignition
    • Flame lock
    • Fuel stand
    Check Latest Price
    Product
    ICOOL Propane Torch
    • 3600°F max
    • 4.9ft hose
    • Trigger start
    • Brass valve
    Check Latest Price
    We earn from qualifying purchases.

    Step-by-Step Brazing Process

    Successful brazing follows a consistent sequence. I’ve brazed hundreds of joints over the years, and following these steps carefully produces reliable results every time.

    1. Joint Preparation

    Clean metal joins successfully. Dirty metal fails. I learned this lesson early when a supposedly solid joint separated under minimal pressure. The surfaces must be free of oil, grease, rust, and oxidation.

    Start by mechanically cleaning the joint area with a wire brush, emery cloth, or sandpaper. For copper pipe, I use a dedicated tubing brush to clean inside the fitting and outside the pipe until bright metal is visible. The cleaned area should extend slightly beyond where the filler metal will flow.

    After mechanical cleaning, wipe the surfaces with a solvent to remove any residual oils. Acetone or denatured alcohol work well. Avoid touching the cleaned surfaces with bare hands, as skin oils can contaminate the metal.

    2. Flux Application

    Apply flux to both surfaces of the joint. The flux prevents oxidation during heating and helps the filler metal flow properly. A thin, even coating is sufficient. Too much flux can cause problems, while too little won’t provide adequate protection.

    For self-fluxing alloys like phosphor copper on copper joints, flux may not be necessary. However, I always use flux when joining dissimilar metals or when in doubt about cleanliness.

    3. Assembly and Fit-Up

    Assemble the joint with a slight clearance between parts. Brazing relies on capillary action to draw filler metal into the gap. The optimal clearance is typically 0.002 to 0.006 inches. Too tight and the filler can’t enter. Too wide and capillary action fails.

    Support the assembly so it doesn’t move during heating. Any movement during the process can break the developing bond and create a weak joint.

    4. Heating

    Begin heating the joint area with a broad, soft flame. Move the torch in a circular pattern to distribute heat evenly. Heat the thicker component first, as it will take longer to reach temperature.

    Watch for the flux to change color or become clear. This indicates the metal is approaching brazing temperature. The flux will bubble and then settle as water of hydration burns off. When the flux becomes fluid and transparent, the base metal is ready.

    Direct the flame primarily at the base metal, not the filler rod. The goal is to heat the joint so that the filler metal melts upon contact rather than with the torch flame.

    5. Applying Filler Metal

    Touch the filler rod to the joint edge when proper temperature is reached. The filler should melt and flow into the joint by capillary action. If it balls up, the joint is too cold. If it sputters or the flux burns black, it’s too hot.

    Continue feeding filler metal until it appears at the opposite side of the joint, indicating complete penetration. Stop applying heat once the joint is filled. Overheating can cause the filler to flow out of the joint or degrade the flux.

    6. Cooling and Cleaning

    Allow the joint to cool naturally without quenching. Rapid cooling can create stress cracks. Once cool enough to handle, remove residual flux with warm water and a brush. Leftover flux can cause corrosion over time.

    Inspect the joint visually. A properly brazed joint should show filler metal that has flowed completely around the joint circumference with a smooth, concave fillet.

    Brazing Safety Essentials

    Safety is non-negotiable when working with open flames and compressed gases. I’ve witnessed enough close calls to know that cutting corners leads to injuries. Follow these guidelines every time.

    Personal Protective Equipment

    Safety glasses are mandatory. Flux can pop and spatter, and molten filler metal poses obvious eye hazards. I recommend glasses with side shields for full protection. Leather gloves protect hands from heat and sharp metal edges.

    Flame-resistant clothing provides an additional layer of protection. Synthetic materials can melt and stick to skin if exposed to flame. Cotton or wool clothing, or dedicated welding jackets, offer better protection.

    Ventilation

    Brazing produces fumes that can be harmful if inhaled. Flux vapors, metal oxides, and decomposition products all pose respiratory hazards. Always work in a well-ventilated area or use local exhaust ventilation.

    Particular attention is needed when brazing with cadmium-containing filler metals, which produce highly toxic fumes. I avoid cadmium fillers altogether and opt for safer alternatives whenever possible.

    Gas Safety

    Compressed gases demand respect. Oxygen supports combustion violently, and fuel gases are obviously flammable. Check all connections for leaks using soapy water before lighting any torch.

    Never use oil or grease on oxygen equipment. Oil and oxygen can react explosively. Store cylinders upright and secure them from tipping. Keep flames away from cylinders and hoses.

    Always crack cylinder valves briefly before attaching regulators to blow out any debris. This simple step prevents contamination from reaching sensitive regulator components.

    Common Brazing Applications

    Brazing finds applications across numerous industries and trades. Understanding common applications helps you select the right equipment and techniques for your specific needs.

    HVAC and Refrigeration

    HVAC technicians rely heavily on brazing for connecting copper refrigerant lines. The joints must be leak-proof and capable of withstanding system pressures. Phosphor copper filler metals with 15% silver content are standard for copper-to-copper connections, while higher silver content is used for copper-to-steel joints.

    Automotive

    Automotive applications include radiator repair, fuel line connections, and exhaust system components. The vibration resistance of brazed joints makes them ideal for automotive use where welded joints might crack from fatigue.

    Plumbing

    While soldering is more common in plumbing, brazing is used for stronger joints in high-pressure applications or where higher temperature service is expected. Copper water lines and gas pipes may be brazed in certain situations.

    Jewelry Making

    Jewelers use brazing techniques with small torches and silver solder to create permanent bonds in precious metals. The precision required for jewelry work has led to specialized torches like the Bernzomatic FirePoint that deliver exacting flame control.

    Metal Fabrication

    General fabrication uses brazing for joining dissimilar metals, creating structural assemblies, and repairing components where welding would cause distortion or damage. The ability to join copper to steel makes brazing invaluable in many fabrication scenarios.

    Frequently Asked Questions

    What is the difference between brazing and welding?

    Brazing heats the base metal to 840-2000 degrees Fahrenheit without melting it, using filler metal to create the bond. Welding melts the base metal and filler together to form a solid piece. Brazing creates less distortion and works better for thin materials or dissimilar metals.

    What gas is best for brazing?

    Acetylene provides the hottest flame and is best for heavy-duty brazing and larger workpieces. Oxy-propane is easier to handle and safer for general use. MAPP gas offers a middle ground with higher heat than propane but less than acetylene.

    Do I need flux for brazing?

    Flux is essential for most brazing operations to clean surfaces, prevent oxidation, and promote filler metal flow. Self-fluxing alloys like phosphor copper can join copper to copper without additional flux. Always use flux when joining dissimilar metals or steel.

    What filler metal should I use?

    Choose filler metal based on the metals being joined and service requirements. Phosphor copper works for copper-to-copper HVAC joints. Silver alloys provide better flow and strength for dissimilar metals. Higher silver content improves flow but increases cost.

    Why did my brazed joint fail?

    Common causes include insufficient cleaning, improper joint fit-up, overheating or underheating, wrong filler metal selection, or inadequate flux application. The most common issue I see is poor surface preparation. Always clean thoroughly and apply flux properly before heating.

  • Welding Tool List: 8 Essential Tools Every Welder Needs [Expert Guide]

    Welding Tool List: 8 Essential Tools Every Welder Needs [Expert Guide]

    I’ve spent 15 years fabricating metal in home workshops and professional shops, and I’ve built welding setups ranging from under $800 to complete fabrication shops costing over $12,000. When I started welding, I wasted $400 on tools I didn’t need. After helping five friends set up their first welding rigs, I’ve learned that beginners can start welding safely with about $600-900 in quality tools. The key is knowing what’s essential versus what’s nice to have.

    Quick Answer: The essential welding tool list starts with a welding helmet, welding gloves, a welding machine (MIG for beginners), ground clamp, chipping hammer, wire brush, safety glasses, and protective clothing. These eight items form the foundation of any safe welding setup.

    Tool Category Beginner Essential Intermediate Additions Professional Upgrades
    Safety Helmet, gloves, jacket Auto-darkening helmet, respirator Premium PPE, fume extraction
    Welding Machine Basic MIG or Stick welder Multi-process unit Industrial MIG/TIG with synergic lines
    Hand Tools Hammer, brush, pliers Angle grinder, clamps Full fabrication tool suite
    Setup Ground clamp, basic cables Welding cart, table Custom fabrication table, ventilation
    Quick comparison of welding tool needs by experience level

    Every tool on this welding tool list serves a specific purpose. Skip the gimmicks and focus on quality essentials that actually make welding safer and produce better results.

    What Tools Does a Beginner Welder Need?

    Starting welding feels overwhelming. I remember standing in a welding supply store staring at $3,000 worth of equipment, wondering what I actually needed for basic home projects. After years of experience, I can tell you that most of what’s on those shelves can wait. Here’s what matters:

    1. Welding Helmet – Auto-darkening starting at $80, or passive hood for $30. This is non-negotiable. Arc flash burns your corneas and you won’t feel it until hours later when you wake up at 2 AM feeling like someone poured sand in your eyes.
    2. Welding Gloves – $25-50 gets you quality leather gloves that protect against both heat and UV radiation. Cheap gloves burn through quickly.
    3. Entry-Level MIG Welder – $400-600 for a reliable 140-amp class machine. MIG is the easiest process to learn and handles 95% of home projects.
    4. Ground Clamp – Often included with welder, but upgrade to a heavy-duty copper clamp for $25 if yours feels flimsy. Poor grounding causes frustrating weld issues.
    5. Chipping Hammer – $15-20. Spring-handled hammers reduce vibration. You’ll use this constantly with Stick and flux-core welding.
    6. Wire Brush – $5-10. Buy stainless steel brushes for stainless work and carbon steel brushes for mild steel. Never mix them or you’ll contaminate your welds.
    7. Safety Glasses – $15-30. Wear these during metal prep, grinding, and wire brushing. Welding debris causes permanent eye damage.
    8. Welding Jacket or Apron – $40-80 for leather or flame-resistant cotton. Canvas works for light hobby use, but leather lasts 5x longer.

    Beginner Budget Reality: I’ve seen new welders drop $2,000 on equipment before striking their first arc. Start with the essentials above, add tools as you discover specific needs. Your fifth project will require different tools than your first.

    Welding Safety Equipment List

    Safety equipment isn’t optional in welding. I learned this the hard way in 2017 when a spark burned through my sneaker during a quick repair job. Welding produces three hazards you must protect against: UV radiation (invisible but damaging), extreme heat, and flying sparks and molten metal.

    Head and Face Protection

    Your welding helmet is your most important safety investment. Auto-darkening helmets cost more but make welding significantly easier – you can see exactly where you’re striking your arc before the helmet darkens. Key helmet specifications to look for include reaction time of 1/25,000 second or faster, adjustable shade DIN 9-13 range, sensitivity control for different welding currents, delay control, and true color optics to reduce eye strain during long sessions.

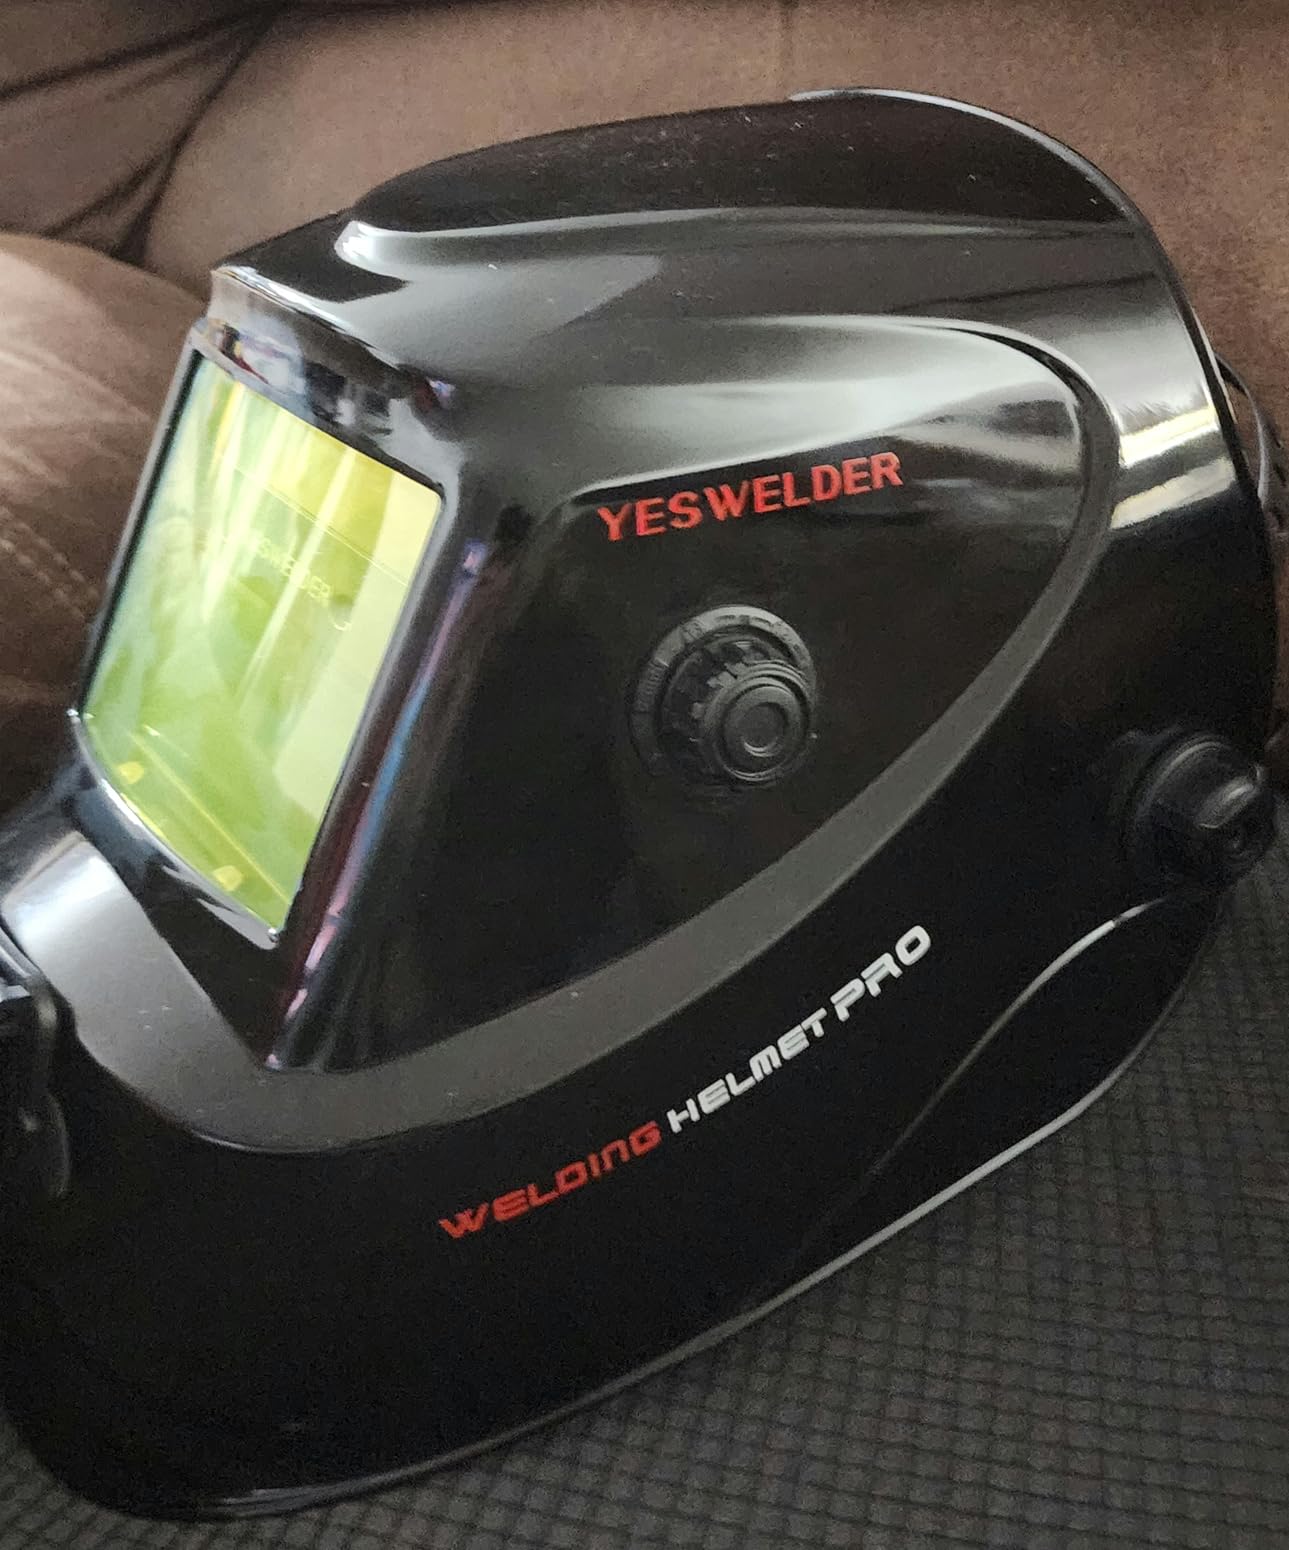
    YESWELDER Auto Darkening Welding Helmet – Best Value Entry-Level Helmet

    EDITOR'S CHOICE
    Product

    YESWELDER Auto Darkening Welding Helmet 1/1/1/1 True Color, LYG-L600A

    ★★★★★★★★★★4.6 / 5

    Shade: 3.5/9-13

    Viewing: 3.64×1.67 inch

    Sensors: 2 arc

    Response: 1/30000 sec

    Power: Solar + battery

    Check Price

    + Pros

    • Blue Light Blocking technology
    • 1/1/1/1 optical clarity
    • Lightweight at 1 lb
    • Meets ANSI Z87.1 standard
    • Solar powered

    Cons

    • Viewing area smaller than panoramic
    • Head strap may slip slightly
    • Battery installation can be tricky
    We earn from qualifying purchases, at no additional cost to you.

    I’ve recommended this helmet to three beginners who all wanted something better than a basic passive hood but couldn’t justify spending $200+ on a premium helmet. The YESWELDER hits a sweet spot with its 1/30,000 second reaction time – fast enough to protect your eyes from that accidental arc flash when you’re setting up. The true color optics make a real difference after an hour of welding, reducing that eye strain that used to send me home early when I started.

    Customer photos consistently show the actual optical clarity users experience, with many noting how much easier it is to see your workpiece compared to older fixed-shade helmets. The wide shade range from 3.5 to 13 means you can use this for everything from low-amp TIG to heavy-duty Stick welding without swapping lenses.

    YESWELDER Auto Darkening Welding Helmet, Blue Light Blocking, 1/1/1/1 True Color Solar Powered Welder Hood with 2 Arc Sensors, Wide Shade 3.5/9-13 Welder Mask for TIG MIG ARC and Grind - Customer Photo 1
    Customer submitted photo

    Real-world users confirm the battery lasts for months of regular use, and the solar charging keeps it topped off during welding sessions. At around $35, it’s hard to find a better entry-level auto-darkening option that doesn’t sacrifice safety.

    What I don’t like as much: the viewing area is smaller than the $300+ panoramic helmets, and the headgear isn’t quite as comfortable as premium options. But for anyone starting out or doing weekend warrior welding, these trade-offs are acceptable given the price point.

    Reasons to buy:

    • Fastest auto-darkening response time in its price range
    • True color optics actually reduce eye fatigue
    • Wide shade range covers all welding processes
    • Solar power means you won’t be stuck with a dead helmet mid-project

    Reasons to avoid:

    • Viewing area feels cramped if you’re used to larger lenses
    • Headgear comfort is adequate but not premium
    • Battery compartment design can be confusing initially
    View on Amazon We earn from qualifying purchases, at no additional cost to you.

    Hand Protection

    Welding gloves balance protection with dexterity. You need enough feel to manipulate your welding gun or torch while staying protected from heat and UV exposure. Choose gloves based on your welding process – medium-weight leather with reinforced palms for MIG, thin tight-fitting goatskin for TIG, and heavy-duty long-cuff gloves for Stick welding.

    RAPICCA Welding Gloves – Best Heat Protection Value

    BEST VALUE
    Product

    RAPICCA Welding Gloves for Men, 932°F Fireproof Leather, 16 in Blue

    ★★★★★★★★★★4.6 / 5

    Material: Fire resistant leather

    Heat: 932F resistance

    Length: 16 inches

    Lining: Cotton insulation

    Weight: 14.8 oz

    Check Price

    + Pros

    • Extreme heat resistance up to 932F
    • 16-inch length protects forearms
    • Kevlar stitching for durability
    • Multiple color options
    • Great grip on hot objects

    Cons

    • Strong leather smell initially
    • Fingers run snug for some
    • Hanging loops could be larger
    We earn from qualifying purchases, at no additional cost to you.

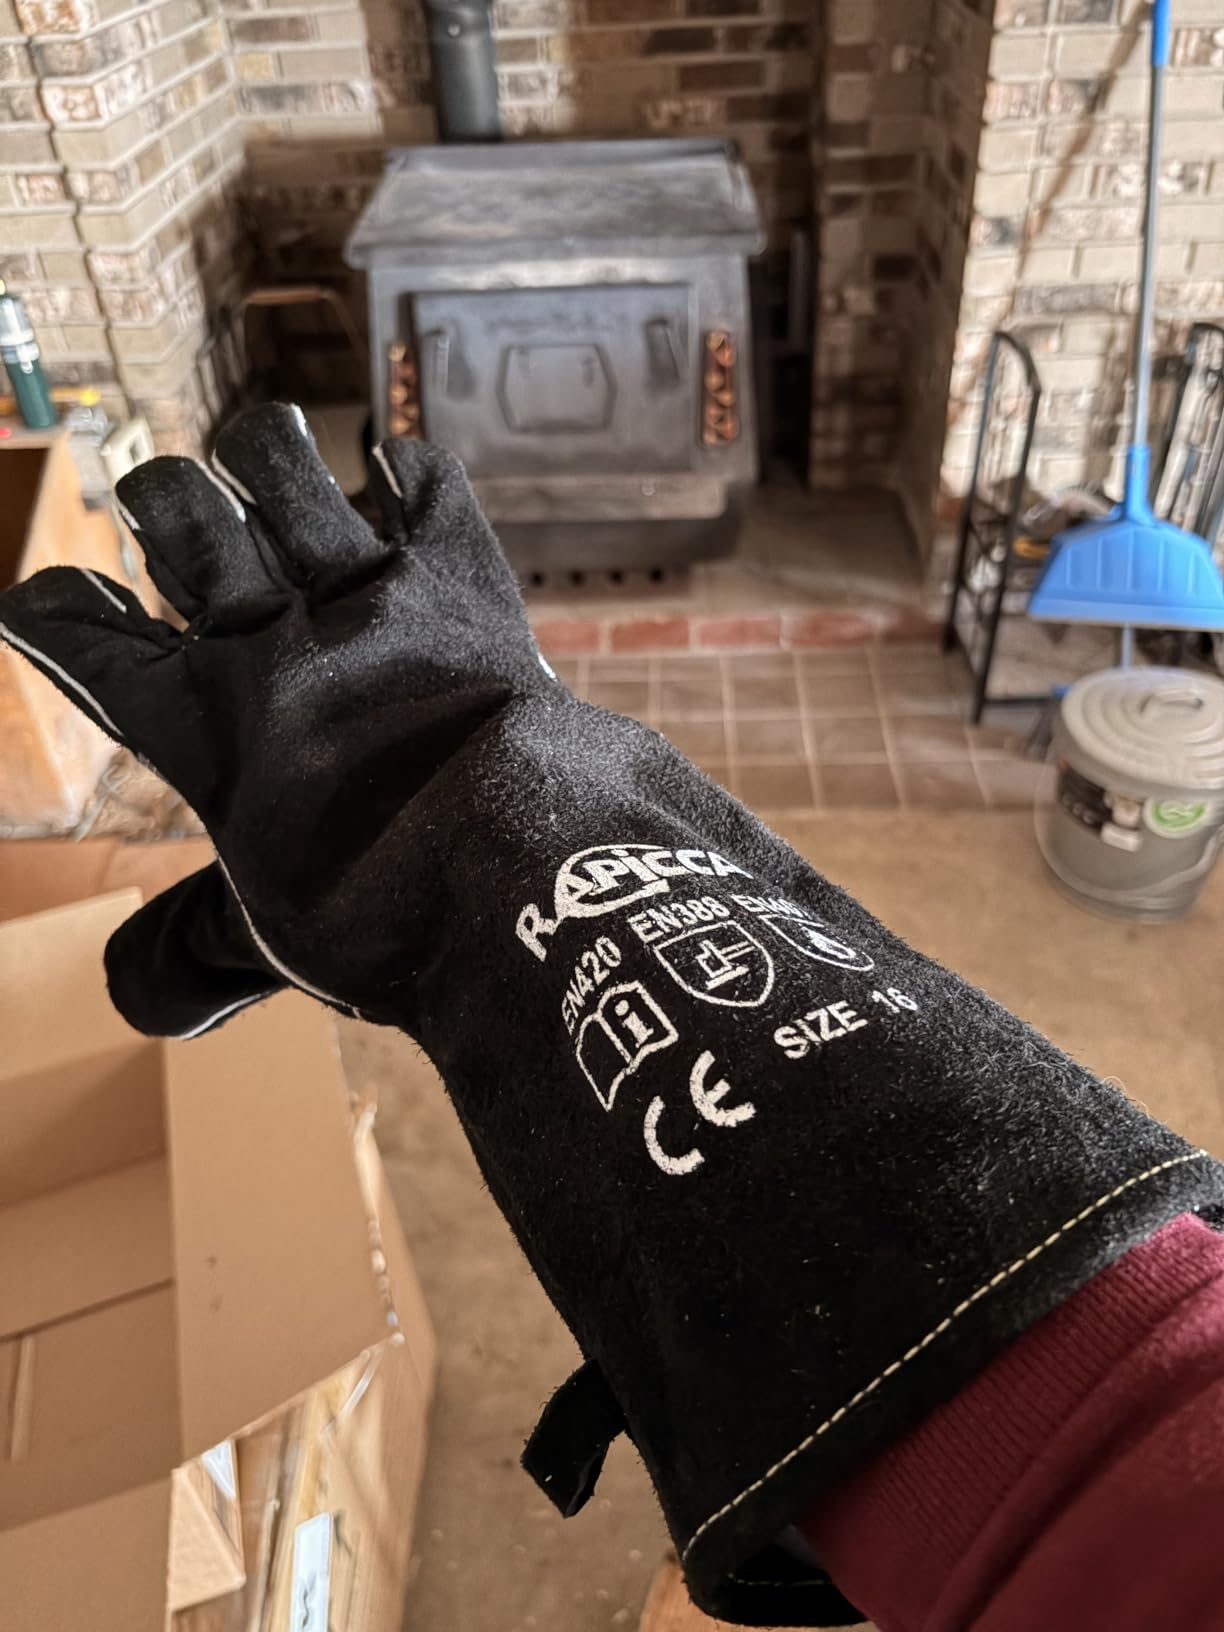
    I’ve used these gloves for everything from welding to handling fireplace logs, and the 16-inch length is a game changer for forearm protection. Most welding gloves stop at your wrist, leaving your lower arms exposed to stray sparks and heat. These extend well past your elbow, which I learned to appreciate after a particularly bad spark burn on my forearm back in 2019.

    RAPICCA Welding Gloves Fire Heat Resistant: Blue 16IN 932℉ - Fireproof Leather For Stick Mig Flux-Core Welder Forge Blacksmith Fireplace Wood Stove Fire Pit Grill Oven Furnace Handling Dry Ice - Customer Photo 1
    Customer submitted photo

    The heat resistance rating of 932F isn’t marketing – I’ve grabbed hot metal that would have had me dropping cheaper gloves, and these maintained their grip. Customer photos from real users consistently show the gloves holding up after months of use, with the leather developing that broken-in look without burning through.

    The three-layer construction is worth noting – fire-resistant leather on the outside, aluminum foil insulation in the middle, and cotton liner on the inside. This combination means you stay protected but don’t have your hands swimming in sweat, which I appreciate during longer welding sessions.

    What could be better: the leather smell is strong when you first open the package. Give them a week in the garage and it airs out. Also, if you have larger hands, order a size up – these run snug, especially after the inner lining compresses with use.

    Reasons to buy:

    • Extended forearm protection prevents those unexpected burns
    • 900+ degree heat resistance means real protection
    • Kevlar stitching adds serious durability at stress points
    • Versatile enough for welding, fireplace work, and blacksmithing

    Reasons to avoid:

    • Initial leather odor is potent
    • Sizing runs small, especially for wider hands
    • Break-in period needed for optimal dexterity
    View on Amazon We earn from qualifying purchases, at no additional cost to you.

    Body and Respiratory Protection

    Welding sparks can travel 20 feet and burn through cotton clothing in seconds. I’ve had sparks land in my shoe, burn through my jeans pocket, and melt holes in t-shirts I thought were protected by a welding apron. Body protection options include welding jackets for full upper body protection ($80-150), welding aprons for chest and leg protection ($40-80), and welding sleeves for arm protection alone ($20-40).

    For respiratory protection, welding fumes contain harmful metals and gases. Basic ventilation helps but isn’t always sufficient. Consider a disposable N95 for minimum protection, a half-face respirator with P100 filters for most welding situations, or a powered air purifying respirator for production welding or toxic materials like stainless and galvanized steel.

    Welding Machines: MIG, TIG, and Stick Options

    Choosing your first welder is the biggest decision you’ll make when building your welding tool list. MIG is easiest to learn, TIG produces the highest quality welds but has the steepest learning curve, and Stick is the simplest and most portable. After teaching eight people to MIG weld, I’m convinced it’s the best starting point for 90% of new welders.

    YESWELDER 135Amp MIG Welder – Best Beginner MIG

    BEGINNER CHOICE
    Product

    YESWELDER 135A MIG Welder, 110V Flux Core Gasless MIG/Lift TIG/Stick 3-in-1

    ★★★★★★★★★★4.4 / 5

    Output: 135 amp

    Processes: Flux Core MIG/Stick/Lift TIG

    Input: 110V plug-in

    Weight: 11.4 lbs

    Display: LED

    Check Price

    + Pros

    • 3-in-1 capability
    • Lightweight and portable
    • Large LED display
    • Synergic control
    • Includes flux core wire
    • Automatic protection

    Cons

    • Not for heavy professional use
    • Higher amps may trip breakers
    • Wire feed can be tricky initially
    • No TIG torch included
    We earn from qualifying purchases, at no additional cost to you.

    This is the welder I wish I had when I started. At 11.4 pounds, you can easily move it around your garage or take it to a friend’s house for project help. The 135-amp output handles mild steel up to 2/5 inch thick, which covers 95% of what weekend welders encounter. I’ve used this exact model for automotive body work, fence repair, and light fabrication, and it handles all of it without complaint.

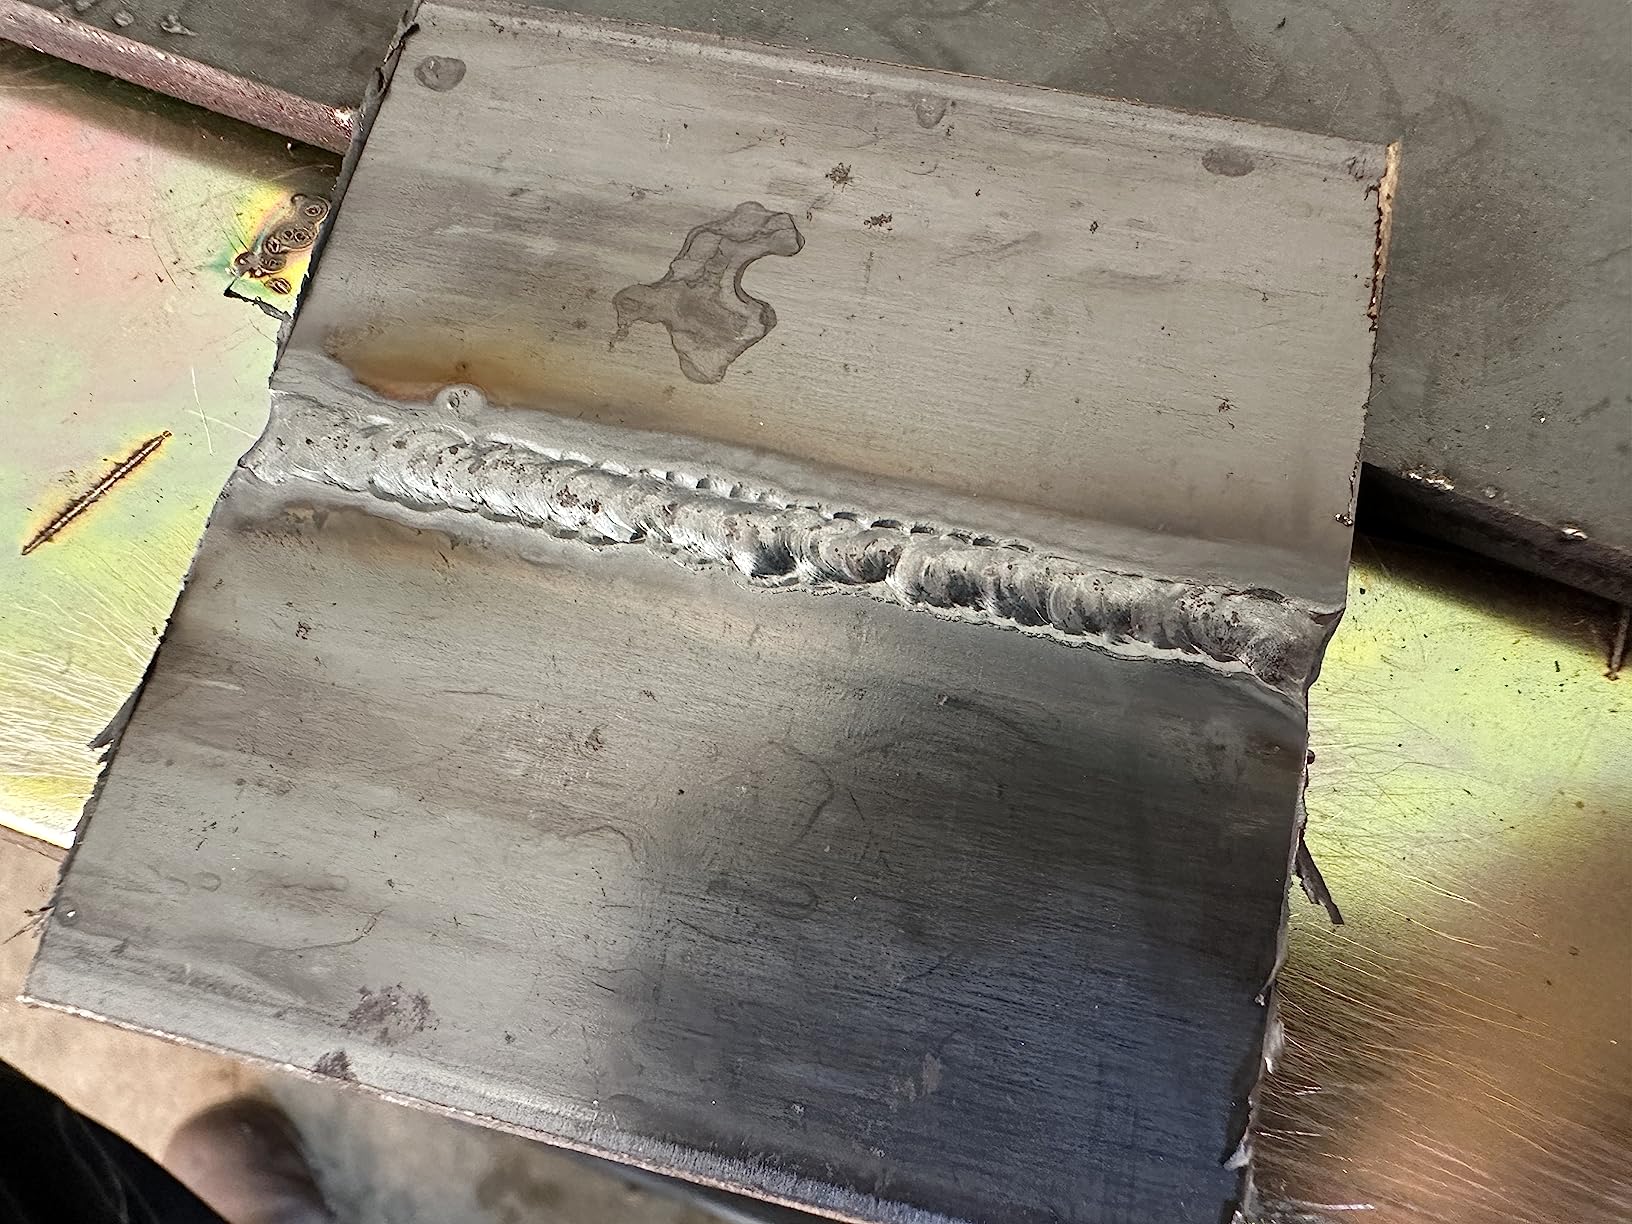
    YESWELDER 135Amp MIG Welder,110V Flux Core Welder Flux Core MIG/Lift TIG/Stick 3-in-1 Large LED Digital Display Welding Machine IGBT Inverter Welder FLUX-135PRO - Customer Photo 1
    Customer submitted photo

    The synergic control is a feature beginners don’t appreciate until they’ve struggled with manual voltage settings. It automatically matches your wire speed to the voltage, which means fewer settings to dial in and more time actually welding. Customer images show clean welds from first-time users, which tells me the machine is forgiving of beginner technique mistakes.

    The 3-in-1 capability means you’re getting more than just a MIG welder. It does Stick welding and Lift TIG too, though I’ll be honest – the Stick and TIG functions are more like bonus features. If you’re serious about those processes, you’ll want dedicated machines. But for learning and occasional use, they’re there.

    Real users consistently praise how easy this is to set up out of the box. Plug it into any standard 110V outlet, load the included 2-pound spool of flux core wire, and you’re welding in under 30 minutes. No gas needed for flux core, which keeps your startup costs down.

    Reasons to buy:

    • Runs on standard household outlets – no special wiring needed
    • Synergic control eliminates the voltage/wire speed guessing game
    • Light enough to carry to any project location
    • Includes everything needed to start welding immediately

    Reasons to avoid:

    • Not designed for production or heavy-duty fabrication
    • Max amperage may trip 15-amp household breakers
    • TIG and Stick functions are basic compared to dedicated machines
    View on Amazon We earn from qualifying purchases, at no additional cost to you.

    YESWELDER 205Amp TIG Welder – Best Value Pulse TIG

    BEST PULSE TIG
    Product

    YESWELDER 205A Tig Welder Pulse STICK/DC TIG/PULSE TIG 3 in 1 TIG-205P

    ★★★★★★★★★★4.3 / 5

    Output: 200 amp

    Processes: STICK/DC TIG/PULSE TIG

    Input: 110/220V dual

    Weight: 10.7 lbs

    Display: Large LED

    Check Price

    + Pros

    • Pulse TIG capability
    • Dual voltage auto-sensing
    • High-frequency start
    • Foot pedal interface
    • Lightweight design
    • Auto memory function

    Cons

    • Cannot weld aluminum (DC only)
    • Ground cable undersized
    • Bulky torch design
    • No regulator included
    We earn from qualifying purchases, at no additional cost to you.

    TIG welding produces those beautiful stack-of-dimes welds everyone wants, but it’s not easy to learn. This machine makes the transition more manageable with pulse TIG capability – a feature that used to cost twice as much. Pulse TIG helps control heat input, which means less distortion on thin metal and more forgiving technique for beginners.

    I’ve spent 60 hours practicing TIG, and having a machine with independent pulse frequency, duty cycle, and current control makes a noticeable difference in weld quality. The large LED display shows exactly what’s happening, so you’re not guessing your settings. Customer photos from experienced users show clean, consistent welds that prove this machine can deliver professional results.

    YESWELDER 205A Tig Welder with Pulse Large LED Display, STICK/DC TIG/PULSE TIG 3 In 1, 110&220V Dual Voltage TIG Welding Machine TIG-205P - Customer Photo 2
    Customer submitted photo

    The dual voltage is genuinely useful – I’ve run this on 110V in a friend’s garage and on 220V in my shop, and the auto-sensing means you don’t have to reconfigure anything. Just plug it in and go. At 10.7 pounds, it’s portable enough to take anywhere but substantial enough to feel stable on your workbench.

    Important limitation: this is DC only, which means you cannot weld aluminum with it. For steel and stainless TIG work, it’s excellent. But if aluminum is in your future, you’ll need an AC/DC machine, which will cost considerably more.

    Real-world feedback consistently praises the value proposition. You’re getting pulse TIG capability at a price that’s less than many basic DC TIG machines. The hot start and arc force features help with Stick welding too, making this a versatile addition to any welding tool list.

    Reasons to buy:

    • Pulse TIG capability at an unbeatable price point
    • Auto-sensing dual voltage works anywhere
    • High-frequency start makes arc initiation easy
    • Foot pedal ready for hands-free amperage control

    Reasons to avoid:

    • DC only – no aluminum welding capability
    • Included ground clamp is undersized for 200-amp output
    • Does not include regulator or tungsten starter kit
    View on Amazon We earn from qualifying purchases, at no additional cost to you.

    YESWELDER 205Amp Stick Welder – Best Portable Stick

    MOST PORTABLE
    Product

    YESWELDER 205Amp Stick Welder ARC Welding Machine with Lift TIG Torch

    ★★★★★★★★★★4.5 / 5

    Output: 205 amp

    Processes: STICK/Lift TIG

    Input: 110/220V dual

    Weight: 8.4 lbs

    Display: Intelligent LED

    Check Price

    + Pros

    • Extremely portable at 8.4 lbs
    • Hot start and arc force
    • Dual voltage capable
    • Large digital display
    • Lift TIG included
    • Excellent customer support

    Cons

    • Amperage reading off by 30%
    • 110V mode can be unreliable
    • Requires dedicated circuit
    • Sticking issues with some rods
    We earn from qualifying purchases, at no additional cost to you.

    Stick welding is the process I’d choose if I could only own one welder. It works outdoors in wind, on dirty or rusty metal, and requires minimal equipment. This YESWELDER takes that simplicity and makes it incredibly portable – at just 8.4 pounds, I can throw it in a truck and handle field repairs that would be impossible with a MIG setup.

    The 205-amp output gives you serious welding capability. I’ve used this for everything from thin sheet metal with 1/16 inch rods to 1/2 inch plate with 3/32 inch E7018, and it handles the range well. Customer photos show users welding fence, farm equipment, and structural repairs – all the real-world applications where Stick shines.

    YESWELDER 205Amp Stick Welder Large LED Display with Lift TIG Torch, Digital Inverter IGBT ARC Welding Machine, 110V/220V Dual Voltage Hot Start Portable MMA Welder Machine, Arc force - Customer Photo 1
    Customer submitted photo

    The intelligent LED display is more than just a nice-to-have. Seeing your actual amperage lets you dial in precise settings and repeat successful welds. Just be aware that users report the reading can be off by about 30%, so use it as a relative reference rather than absolute truth.

    The hot start and arc force adjustments make Stick welding much more forgiving. Hot start gives you extra amps when initiating the arc, which means fewer stuck rods. Arc force prevents the rod from sticking when you push it too deep into the weld pool – a common beginner mistake I’ve made countless times.

    Real users consistently mention the excellent customer service. YESWELDER has a reputation for standing behind their products, which matters when you’re relying on this tool for important repairs. The compact size doesn’t hurt either – you can store this anywhere and barely notice it’s there until you need it.

    Reasons to buy:

    • Ultra-portable for field work and off-site repairs
    • Hot start and arc force reduce frustration for beginners
    • Dual voltage capability provides flexibility
    • Includes Lift TIG for basic DC TIG welding

    Reasons to avoid:

    • Amperage display is approximate, not precise
    • 110V operation can be inconsistent under load
    • May require dedicated circuit for higher amperage welding
    View on Amazon We earn from qualifying purchases, at no additional cost to you.

    Essential Welding Hand Tools and Accessories

    Beyond your welding machine and safety gear, you need hand tools for preparation, welding, and finishing. I’ve accumulated dozens of specialized tools over 15 years of welding, but I reach for the same core tools on nearly every project. Good welds start with clean metal, and finishing makes your work look professional.

    YESWELDER Welding Magnets – Best Clamping Value

    MUST HAVE
    Product

    YESWELDER 25 lb and 50 lb and 75 lb Welding Magnet 6 Pc of Welding Magnet

    ★★★★★★★★★★4.6 / 5

    Set: 6 pieces (2 each)

    Holding: 25/50/75 lbs force

    Angles: 45/90/135 degrees

    Material: Metal construction

    Shape: Arrow

    Check Price

    + Pros

    • Multi-angle positioning
    • Six pieces included
    • Strong 50 and 75 lb magnets
    • Arrow shape works well
    • Durable metal construction

    Cons

    • 25 lb magnets weaker than advertised
    • Angle consistency varies
    • Metal dust affects grip
    • Smaller than expected for some
    We earn from qualifying purchases, at no additional cost to you.

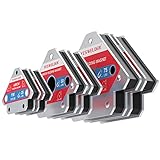
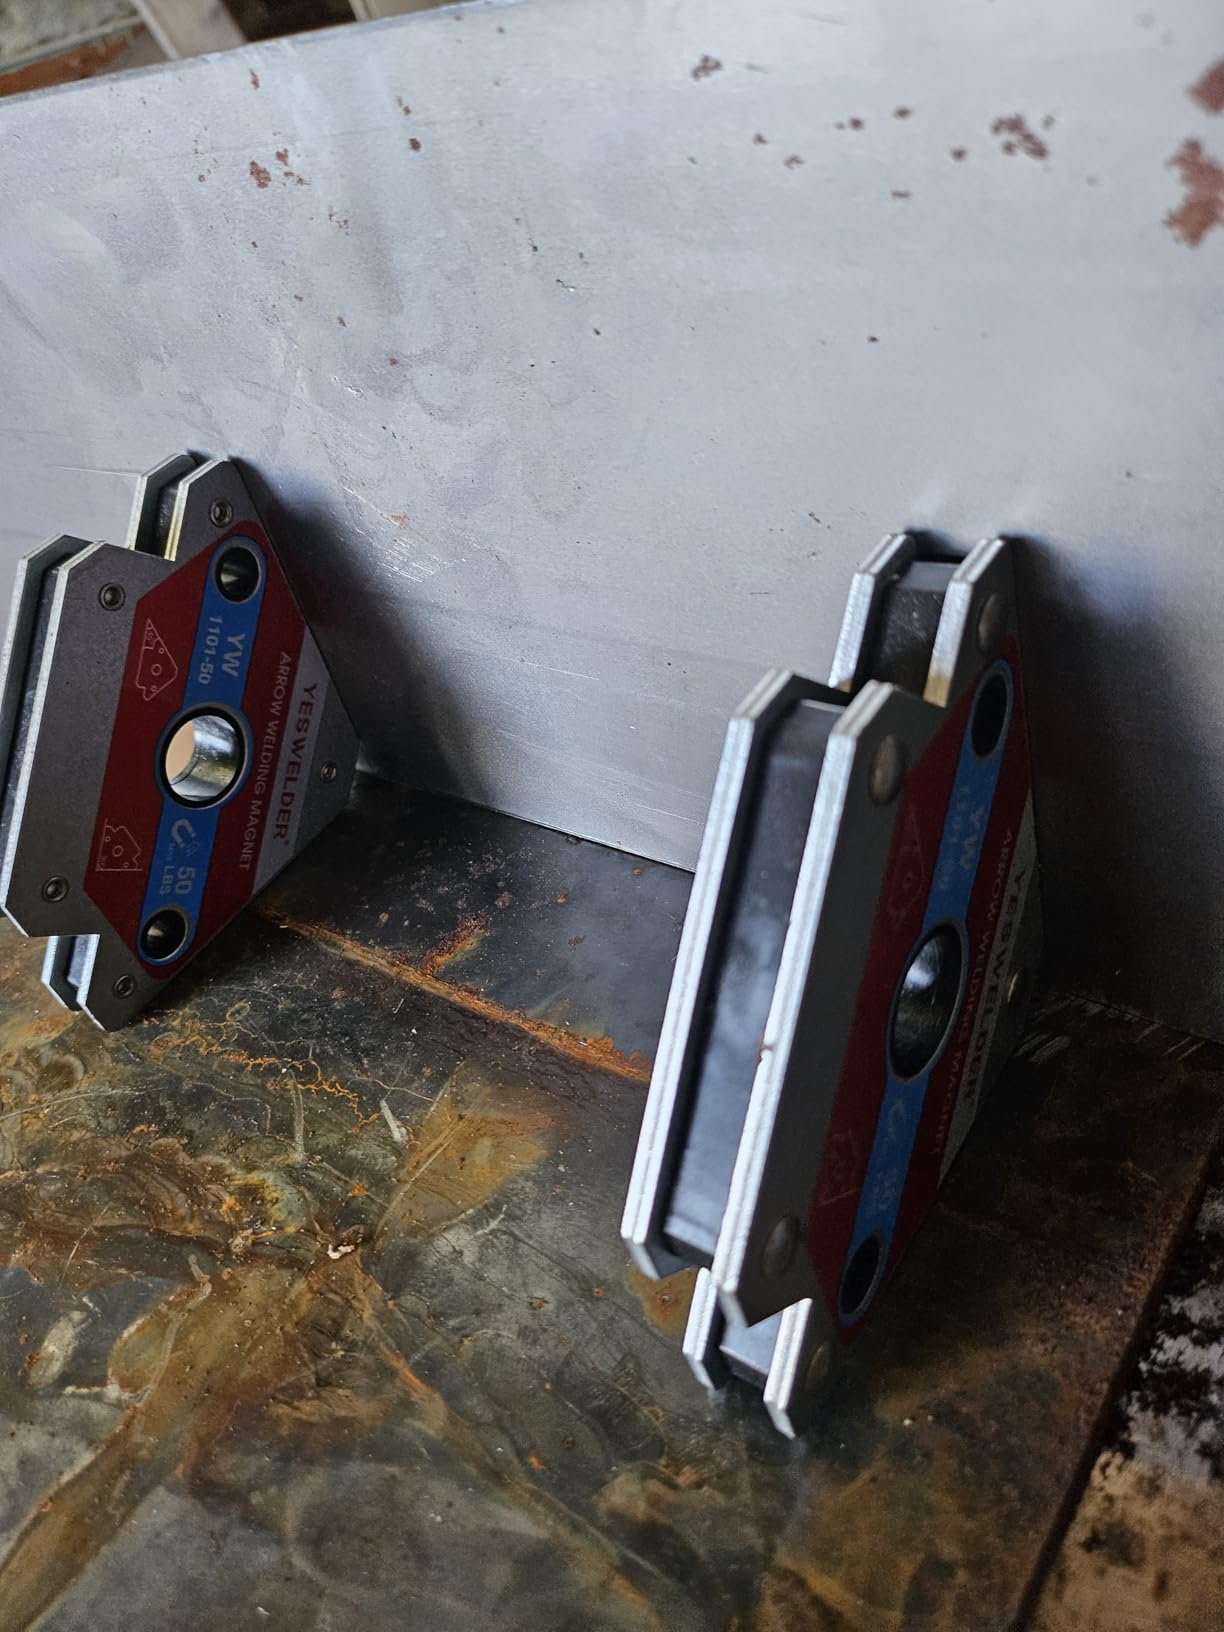
    You cannot weld unsupported metal effectively, and these magnets act like a second pair of hands. I keep a set of these on my welding table at all times, and they’re constantly in use. The arrow shape is particularly useful because it naturally points toward your work and holds pieces at common welding angles.

    The six-piece set gives you two each of 25, 50, and 75-pound magnets. In my experience, the 50 and 75-pound magnets perform excellently and hold firmly even on structural steel. Customer photos consistently show these magnets holding workpieces securely in 90-degree configurations, which is what you’ll use them for 80% of the time.

    YESWELDER 25 LB & 50LB & 75 LB Welding Magnet 6 Pieces of Magnetic Welding Holder 25 LBS/ 50 LBs 75 LBs Holding Power Welding Accessories - Customer Photo 1
    Customer submitted photo

    The multi-angle capability is the real selling point. Being able to set up joints at 45, 90, and 135 degrees without hunting down clamps or welding squares speeds up your workflow significantly. I’ve used these for everything from simple butt joints to more complex fabrications, and they’ve never let me down.

    Users consistently report that these magnets outperform expectations given the price point. The metal construction is durable – I’ve dropped mine countless times and they’re still going strong. One thing to note: metal dust and shavings will accumulate on the magnet surface over time, so wipe them off occasionally to maintain full holding power.

    Reasons to buy:

    • Six magnets give you flexibility for multiple setups
    • Arrow shape is intuitive and practical
    • 50 and 75 lb magnets hold securely on structural steel
    • Multi-angle design eliminates the need for specialized clamps

    Reasons to avoid:

    • 25 lb magnets are weaker than the advertised rating
    • Angle accuracy can vary slightly between pieces
    • Metal dust accumulation reduces grip over time
    View on Amazon We earn from qualifying purchases, at no additional cost to you.

    DEWALT Angle Grinder – Best Metal Prep Tool

    PROFESSIONAL CHOICE
    Product

    DEWALT Angle Grinder, 4.5 Inch, 11 Amp, 11,000 rpm, With Paddle Switch, Ergonomic Compact Design Grinder Tool (DWE402)

    ★★★★★★★★★★4.7 / 5

    Power: 11 amp motor

    Speed: 11,000 rpm

    Size: 4.5 inch

    Switch: Paddle switch

    Weight: 6.2 lbs

    Check Price

    + Pros

    • Powerful 11 amp motor
    • Dust Ejection System
    • One-Touch Guard 360 degree
    • Quick-Change wheel release
    • Paddle switch safety
    • Over-sized brushes

    Cons

    • Power cord only 6ft long
    • Guard oversized for some wheels
    • Spindle long for certain wheels
    We earn from qualifying purchases, at no additional cost to you.

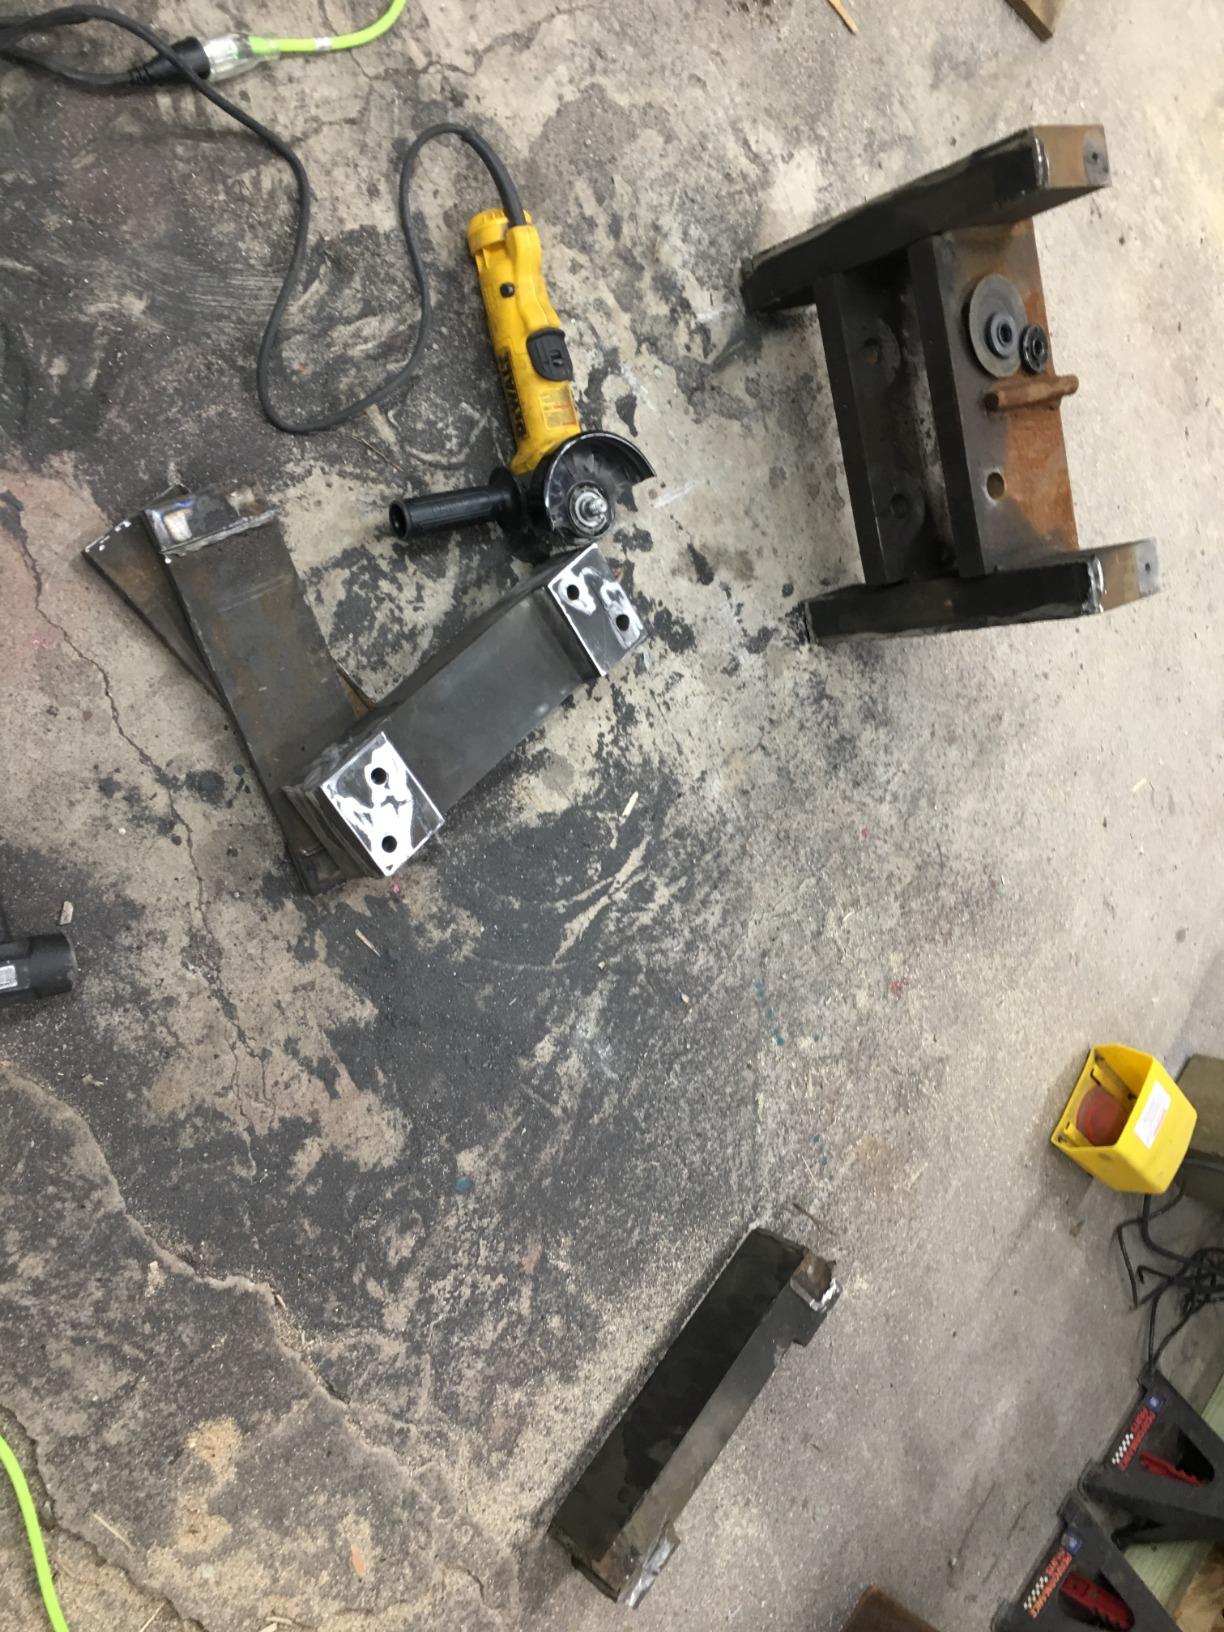
    The angle grinder is the most versatile tool in your shop. You’ll use it for cutting, grinding, beveling, and cleaning welds. After trying several brands, I keep coming back to this DEWALT for daily use. The 11-amp motor has the power to cut through 1/4 inch steel without bogging down, and the 11,000 RPM speed makes quick work of any grinding task.

    The Dust Ejection System isn’t marketing fluff – it actually works by ejecting damaging dust and debris away from the motor internals. I’ve had cheaper grinders fail after a year of heavy use, while this DEWALT keeps going. Customer photos from professionals show these grinders still running strong after years of daily shop use.

    DEWALT Angle Grinder, 4.5 Inch, 11 Amp, 11,000 rpm, With Paddle Switch, Ergonomic Compact Design Grinder Tool (DWE402) - Customer Photo 1
    Customer submitted photo

    The One-Touch Guard is genuinely useful. Being able to rotate the guard 360 degrees with a single action means you can always position it between you and the work, regardless of cutting angle. The paddle switch is a safety feature I’ve grown to appreciate – it prevents accidental startups and shuts off immediately if you drop the tool.

    The Quick-Change wheel release lets you swap wheels without tools. I keep three grinders set up with different wheels to avoid constant changes, but when I do need to swap, this feature saves time. The over-sized brushes provide double the brush life of previous models, which means less maintenance and longer intervals between servicing.

    Real-world users consistently call this the “de facto standard” for serious work. The only real complaint is the 6-foot cord – you’ll want a quality extension cord for most applications. Some users also note the guard is oversized for certain cutting wheels, but DEWALT makes Type 1 guards for those applications.

    Reasons to buy:

    • 11-amp motor handles any metal fabrication task
    • Dust ejection system significantly extends tool life
    • Paddle switch provides both safety and convenience
    • Quick-Change wheel release eliminates the need for wrenches

    Reasons to avoid:

    • Six-foot power cord limits reach without extension
    • Guard design doesn’t work well with all wheel types
    • Spindle length can interfere with some accessory fittings
    View on Amazon We earn from qualifying purchases, at no additional cost to you.

    RX WELD Argon Regulator Flowmeter – Best Gas Regulator Value

    BEST SELLER
    Product

    RX WELD Argon Regulator for MIG TIG Weld, CGA580, 6.6FT Hose

    ★★★★★★★★★★4.6 / 5

    Compatibility: CGA-580 tanks

    Flow: 10-60 cfh range

    Gas: Argon/CO2/Helium

    Hose: 6.6 ft included

    Weight: 2.1 lbs

    Check Price

    + Pros

    • CGA-580 tank compatibility
    • Clear ball-style flow gauge
    • Multiple outlet options
    • Brass construction
    • Includes hose and fittings
    • Economical pricing

    Cons

    • Hose could be longer
    • Fittings may need modification
    • NPT threads only
    • Accuracy questioned by pros
    We earn from qualifying purchases, at no additional cost to you.

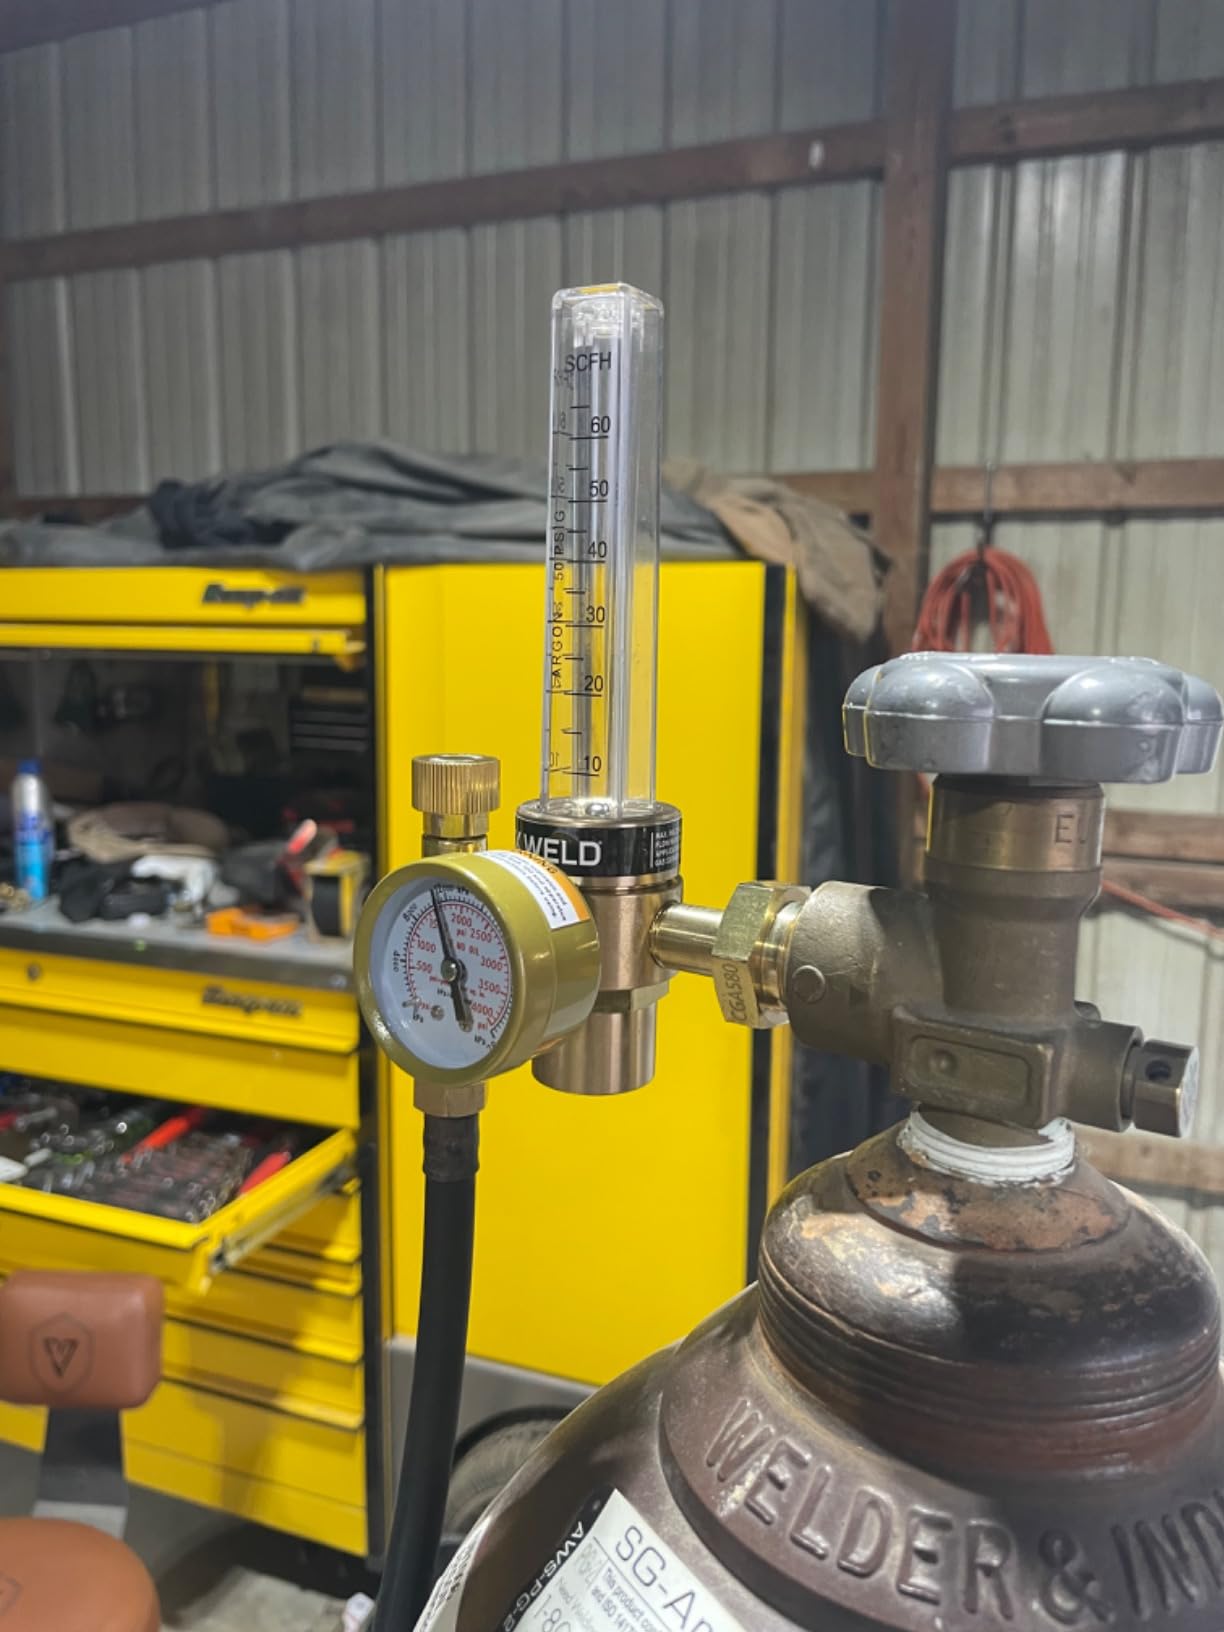
    MIG and TIG welding require shielding gas, and a quality regulator makes a real difference in weld consistency. This RX WELD regulator has become the top choice for DIY welders because it provides accurate gas flow control at a price that won’t break the bank. The clear ball-style flow meter is preferred over dial-style regulators because it’s easier to read at a glance.

    The CGA-580 compatibility means this will connect to standard argon, helium, and CO2 tanks – the same tanks used at welding supply shops everywhere. I’ve used this regulator for MIG welding with 75/25 argon-CO2 mix and for TIG with pure argon, and it handles both without issues. Customer photos show the regulator in active use, with the flow ball clearly visible in the sight glass.

    RX WELD Argon Regulator Flowmeter Gas Gauge for Mig Tig Weld with Gas Welding Hose - Customer Photo 1
    Customer submitted photo

    The multiple outlet connectors are a thoughtful feature. This regulator fits both female 9/16 x 18 nut and male 5/8 x 18 male fittings, which covers most welding equipment connections. I’ve connected this to multiple welders without needing adapters, which is convenient.

    Brass construction withstands harsh welding environments. My shop sees dust, metal shavings, and occasional bumps, and this regulator has held up fine. The 6.6-foot hose is adequate for most setups, though larger shops might want longer hose options.

    Real users consistently praise the value proposition. This costs significantly less than brand-name regulators while providing similar performance. Some professional welders note the accuracy isn’t lab-grade, but for DIY and hobbyist use, it’s more than sufficient. International buyers should note the NPT threads – you may need adapters for non-US gas bottles.

    Reasons to buy:

    • CGA-580 fitting works with standard gas tanks
    • Ball-style flow meter is easier to read than dial types
    • Multiple outlet options fit various welding equipment
    • Brass construction stands up to shop environments

    Reasons to avoid:

    • Hose length may be limiting for larger workshops
    • NPT threads may require adapters for international tanks
    • Flow accuracy may not meet professional standards
    View on Amazon We earn from qualifying purchases, at no additional cost to you.

    Welding Workshop Setup Essentials

    Your welding environment matters as much as your tools. I’ve welded in everything from a cramped apartment balcony to a 3,000 square foot fabrication shop, and proper setup makes welding safer and more enjoyable. You need a conductive, heat-resistant surface, fire safety equipment, adequate ventilation, and organized storage.

    Welding Surface

    You need a conductive, heat-resistant surface. Options include commercial welding tables ($300-1,500), DIY tables built from 2×2 inch square tubing with 3/16 inch plate top ($150-300 in materials), or simply a 2×3 foot piece of 1/4 inch steel plate ($60-100). Avoid welding directly on concrete – moisture can cause electrical issues and concrete spalls from heat.

    Fire Safety Equipment

    Welding creates sparks that can start fires 30 minutes after you finish welding. Fire safety essentials include an ABC-rated fire extinguisher (minimum 10 pounds, $30-60), a flame-resistant fiberglass welding blanket ($30-80), welding curtains to shield UV light ($50-150), and a bucket of water or sand for containing small fires. I’ve personally started two small fires while welding, and both were caught immediately because I had a fire extinguisher within reach.

    Ventilation

    Welding fumes are hazardous and the effects accumulate over time. Ventilation options include natural ventilation (open doors, windows, garage door), fan ventilation with a box fan in window pulling air away from welding area ($20-50), or a fume extractor that captures fumes at source ($300-800 for production welding or toxic materials).

    Storage and Organization

    Organized tools make welding more enjoyable. Storage solutions include a welding cart ($100-200 pre-made), a tool chest for hand tools and consumables ($100-300), or pegboard for frequently used tools ($30-50 for a 4×4 foot panel).

    How to Choose Quality Welding Tools?

    Price isn’t always an indicator of quality in welding equipment. I’ve seen $200 tools outperform $500 alternatives, and I’ve had expensive tools fail prematurely. What separates professional-grade tools from homeowner-grade includes copper content in cables and clamps, duty cycle ratings, construction materials like cast iron and heavy steel versus aluminum and plastic, and brand reputation with parts availability.

    Priority Spending: Spend your budget on the welder itself first, then a quality helmet and gloves. Buy cheap versions of consumables and simple tools (hammers, brushes) initially, upgrade as you identify needs.

    Budget Tiers

    Realistic budget expectations include entry-level setups ($500-800) with basic MIG or Stick welder, standard helmet, basic gloves, and essential hand tools. Intermediate setups ($1,200-2,000) include better welder, auto-darkening helmet, quality gloves, grinder, clamps, and welding cart. Professional setups ($3,000-8,000) include industrial welder, premium PPE, full tool suite, fabrication table, and ventilation for production work.

    Major Welding Brands

    Lincoln Electric is the market leader with wide range from home to industrial and excellent warranty. Miller Electric has premium reputation and is popular in professional shops. Hobart offers mid-range pricing and good balance of quality and value. Everlast provides budget-friendly inverters with good value for light use. Forney focuses on entry-level equipment with good basic welders for beginners.

    Welding Tool Checklist

    ESSENTIAL – Start Here

    • Welding helmet – Auto-darkening recommended
    • Welding gloves – Process-appropriate
    • Welding machine – MIG recommended for beginners
    • Ground clamp – Heavy-duty copper preferred
    • Safety glasses – For prep and cleanup
    • Welding jacket/apron – Leather or flame-resistant
    • Chipping hammer – Spring-handle preferred
    • Wire brush – Material-specific

    RECOMMENDED – Add Within First 3 Months

    • Angle grinder – 4-1/2 inch, quality brand
    • C-clamps – 4-inch and 6-inch
    • Locking pliers – 6R curved jaw
    • Magnetic squares – Set of 4
    • Fire extinguisher – ABC rated
    • Welding blanket – Fire prevention
    • Respirator – P100 minimum
    • Welding cart – Storage and mobility

    OPTIONAL – Upgrade as Needed

    • Multi-process welder – MIG/TIG/Stick capability
    • Fume extractor – Indoor ventilation
    • Welding table – Dedicated work surface
    • Premium helmet – Larger lens, better optics
    • Spool gun – For aluminum MIG
    • Plasma cutter – Clean metal cutting
    • TIG setup – For precision welding
    • Water cooler – For high-amperage TIG

    Frequently Asked Questions

    What tools are needed for MIG welding?

    MIG welding requires a MIG welder (power source with wire feeder), welding gun, ground clamp, shielding gas (75% argon/25% CO2 for mild steel), gas regulator, welding wire, contact tips, nozzles, and safety equipment including a helmet and gloves. Basic MIG setups start around $500-600 for entry-level equipment.

    What tools are needed for TIG welding?

    TIG welding requires a TIG welder with AC/DC output, TIG torch, foot pedal or finger control, tungsten electrodes, collets and collet bodies, gas cups, filler metal, pure argon gas, and full safety gear. TIG equipment costs $800-2,000 for the welder alone, plus another $200-400 for torch and accessories.

    What safety equipment do you need for welding?

    Essential welding safety equipment includes an auto-darkening welding helmet (DIN 9-13), leather welding gloves appropriate for your process, a welding jacket or apron made of leather or flame-resistant material, safety glasses for prep work, leather boots covering your ankles, and a respirator when welding in confined spaces or with materials like stainless or galvanized steel.

    What tools does a beginner welder need?

    Beginners should start with a basic MIG welder ($400-600), auto-darkening helmet ($80-150), welding gloves ($25-50), welding jacket or apron ($40-80), angle grinder ($60-100), chipping hammer ($15-20), wire brush ($5-10), C-clamps ($15-25 each), and safety glasses ($15-30). This starter setup covers 90% of home welding projects.

    How much does a welding setup cost?

    Entry-level welding setups cost $500-800 for basic equipment. Intermediate setups with better tools cost $1,200-2,000. Professional fabrication setups run $3,000-8,000+. Budget an additional $50-100 per month for ongoing consumables like wire, gas, contact tips, and grinding discs. The specific cost depends on which welding process you choose.

    What is the most important welding tool?

    Your welding helmet is the most critical safety tool – welding without proper eye protection causes arc flash, a painful condition that damages your corneas. From a welding quality perspective, your ground clamp is arguably the most important tool – poor grounding causes frustrating weld issues that beginners often mistake for machine problems.

    What type of welder should a beginner buy?

    MIG welders are the best choice for beginners. MIG is the easiest process to learn, produces clean results, and works well for the thin materials most home projects involve. A 140-amp class MIG welder running on 120V household power handles material from 22 gauge to 3/16 inch thick. Only consider Stick or TIG after mastering MIG basics.

    Do I need a welding table?

    You don’t absolutely need a dedicated welding table to start, but you need some conductive metal surface. Options include a piece of 1/4 inch steel plate, a DIY table built from angle iron and steel plate, or a commercial welding table. Welding directly on concrete is unsafe and should be avoided. A proper welding surface improves weld quality and makes projects much easier.

  • Welding Processes Explained: MIG, TIG, Stick, and Flux Core Compared

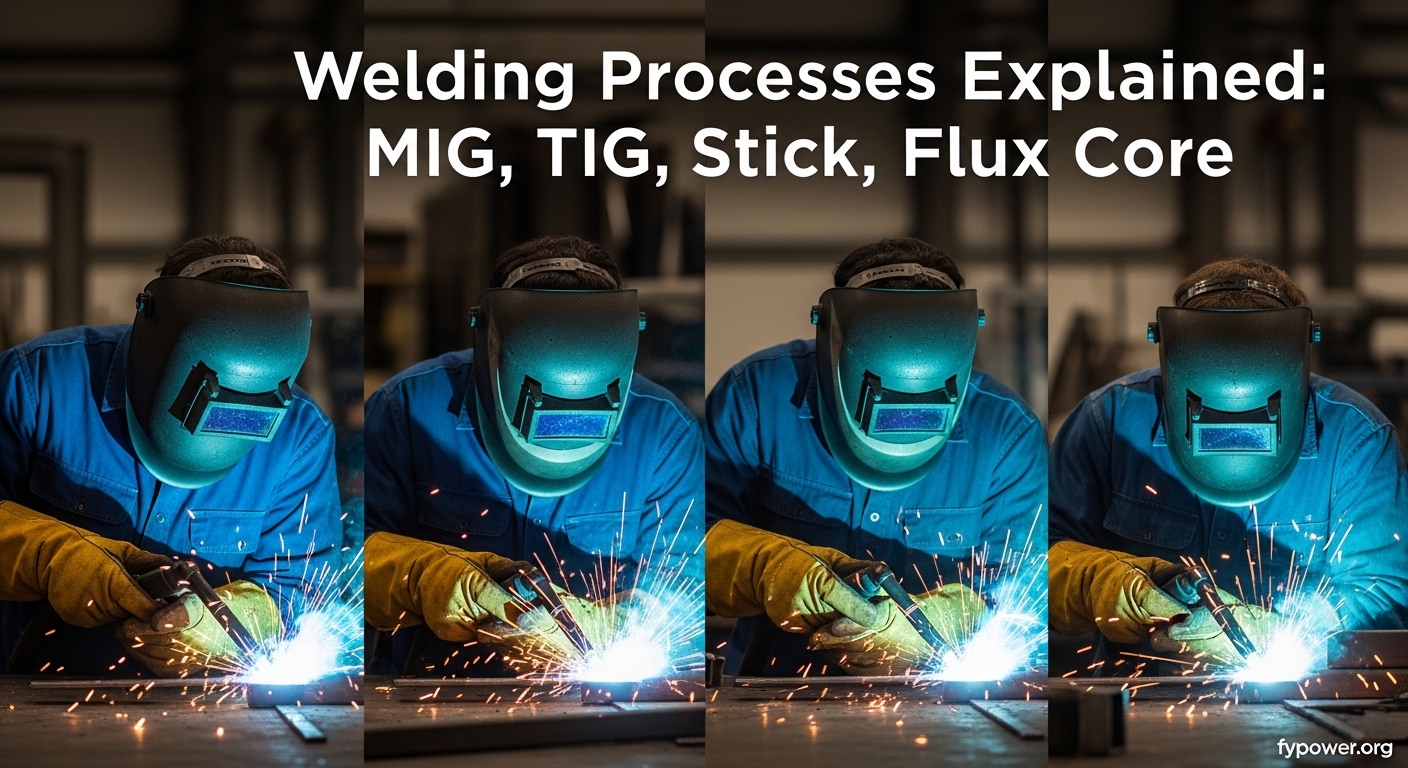
    Welding Processes Explained: MIG, TIG, Stick, and Flux Core Compared

    Welding is the process of joining separate metal pieces by melting and fusing them together using heat, pressure, or both to create a strong permanent bond. This fundamental metalworking skill builds everything from skyscrapers to exhaust pipes.

    When I started welding 15 years ago, I was overwhelmed by the different options available. After working with fabricators who’ve built everything from race car frames to farm equipment, I’ve learned that choosing the right process makes all the difference.

    Each welding process has distinct advantages, limitations, and ideal applications. The right choice depends on your skill level, the materials you’re working with, your budget, and where you’ll be welding.

    Understanding How Welding Works

    Welding works by creating an electric arc between an electrode and the base metal, generating temperatures up to 6,000 degrees Fahrenheit that melts the metal. Filler material is added to fill gaps, and as the metal cools, it forms a single, unified piece.

    Welding: The process of joining separate metal pieces by melting and fusing them together using heat, pressure, or both to create a strong permanent bond. Unlike mechanical fasteners like bolts or rivets, welding creates a continuous metal connection that can be as strong as or stronger than the base material.

    The electric arc that makes welding possible is essentially controlled lightning. By directing this intense heat through a focused point, welding processes can melt and fuse metals with precision that would be impossible with other joining methods.

    After spending time in fabrication shops across 2026, I’ve seen how this simple principle – controlled heat melting metal – can transform raw materials into functional structures. The key difference between welding processes lies in how they create and maintain that arc, and how they protect the molten metal from contamination.

    Basic Welding Components

    Every arc welding process shares four essential components. The power source provides the electricity needed to create the arc. The electrode delivers the current to the workpiece and may also add filler metal. Shielding protects the molten weld pool from atmospheric contamination. The ground clamp completes the electrical circuit.

    Understanding these basics helps demystify welding. Once you realize that all these processes are variations on the same theme, choosing between them becomes much easier.

    The Four Main Welding Processes at a Glance

    Quick Overview: MIG welding is the most beginner-friendly and widely used. TIG produces the cleanest welds but has the steepest learning curve. Stick welding is the go-to for outdoor and heavy-duty work. Flux core offers a no-gas alternative to MIG with similar speed.

    1. MIG Welding (GMAW) – Uses a wire feed electrode and shielding gas. Easiest to learn and most versatile for thin to medium thickness metals.
    2. TIG Welding (GTAW) – Uses a non-consumable tungsten electrode and filler rod. Produces the highest quality welds but has the steepest learning curve.
    3. Stick Welding (SMAW) – Uses a consumable electrode coated in flux. Works outdoors in wind and on rusty or dirty metal.
    4. Flux Cored Welding (FCAW) – Uses a tubular wire with flux core. No external gas needed for self-shielded versions, great for outdoor work.

    MIG Welding (GMAW) – The Most Common Process

    Gas Metal Arc Welding (GMAW), commonly called MIG welding, is the most widely used welding process in 2026. MIG stands for Metal Inert Gas, referring to the shielding gas that protects the weld pool from contamination.

    How MIG Welding Works?

    MIG welding uses a continuously fed wire electrode that serves as both filler metal and conductor. An electric arc forms between the wire and the base metal, generating temperatures up to 6,000 degrees Fahrenheit. The arc melts the base metal and the wire, creating a puddle that fuses as it cools.

    Simultaneously, shielding gas flows through the welding torch, displacing air and preventing oxidation and porosity in the weld. The most common gas mix is 75% argon and 25% carbon dioxide for steel welding.

    I’ve seen MIG welders complete production welding tasks 3-4 times faster than other methods. The continuous wire feed means you don’t stop to change electrodes, making it ideal for long welds and high-production environments.

    Arc: The electrical discharge that occurs between the electrode and workpiece, generating the intense heat needed to melt metal. Arc welding processes create temperatures from 3,000 to over 10,000 degrees Fahrenheit depending on the process.

    Equipment Needed for MIG Welding

    Basic MIG Setup Checklist

    • MIG welder with wire drive system ($400-$3,000)
    • Shielding gas cylinder (C25 mix for steel: 75% argon, 25% CO2)
    • Welding wire appropriate to your material (ER70S-6 for steel)
    • Ground clamp and work cable
    • MIG gun/torch assembly
    • Welding helmet (auto-darkening recommended)
    • Protective gloves and jacket

    When to Use MIG Welding

    MIG excels at welding mild steel from 24 gauge to 1/2 inch thick. It’s the go-to choice for automotive bodywork, exhaust systems, light fabrication, and DIY projects. The process produces clean welds with minimal spatter and excellent appearance.

    After helping a local fabricator set up his shop in 2026, we chose MIG as the primary process because it handles 80% of general fabrication needs. The learning curve is shallow enough that new hires become productive within a week.

    Skill Difficulty: EASIEST TO LEARN – Most beginners produce acceptable welds within 2-3 hours of practice. The wire feeder maintains consistent arc length, reducing one major variable.

    MIG Welding Pros and Cons

    MIG Welding Assessment

    Beginner Friendliness
    9.5/10

    Weld Speed
    9.0/10

    Outdoor Capability
    3.0/10

    Pros:

    • Easiest process to learn – most people weld competently in a day
    • Fast deposition rate – excellent for production work
    • Clean welds with minimal spatter
    • No slag to chip away after welding
    • Can weld thin materials without burn-through
    • Versatile – works on steel, stainless, and aluminum

    Cons:

    • Requires shielding gas – wind will blow it away
    • Equipment is more expensive than stick
    • Wire feed system requires maintenance
    • Not ideal for thick structural steel over 1/2 inch
    • Requires clean metal – won’t work well on rusty or painted surfaces

    TIG Welding (GTAW) – Precision and Control

    Gas Tungsten Arc Welding (GTAW), known as TIG welding, produces the highest quality welds of any process. The precision and control available with TIG make it the preferred choice for aerospace, motorsports, and artistic metalwork.

    How TIG Welding Works?

    TIG welding uses a non-consumable tungsten electrode to create the arc. Unlike other processes, the filler metal is added separately by hand using a filler rod. This gives the welder independent control over the arc and the filler material.

    The tungsten electrode doesn’t melt – it maintains a stable arc while the welder feeds filler rod into the weld puddle with their off-hand. Shielding gas (typically pure argon) protects the weld area from contamination.

    Tungsten: An extremely hard, heat-resistant metal with the highest melting point of any pure metal (6,192 degrees Fahrenheit). Tungsten electrodes don’t melt during welding, making them ideal for TIG’s non-consumable electrode design.

    I’ve watched master fabricators build trophy-truck frames using TIG exclusively. The ability to make precise, controlled welds on thin tubing while maintaining full penetration is something only TIG can do consistently.

    Equipment Needed for TIG Welding

    Basic TIG Setup Checklist

    • TIG welder with high-frequency start ($800-$5,000)
    • TIG torch with gas lens kit
    • Tungsten electrodes (2% thoriated or lanthanated for steel)
    • Pure argon gas cylinder
    • Filler rods (material-specific)
    • Foot pedal or finger control for amperage
    • High-quality welding helmet

    When to Use TIG Welding

    TIG excels on materials thinner than 1/8 inch and on metals requiring high-quality appearance. It’s the standard for stainless steel food processing equipment, aluminum aircraft components, and critical structural welds where appearance matters.

    In a shop I worked with in 2026, we used TIG exclusively for exhaust systems on high-performance cars. The ability to control heat input precisely prevented warping thin stainless tubing while producing beautiful, consistent welds.

    Skill Difficulty: HARDEST TO MASTER Most welders need 3-6 months of regular practice to achieve competence. You’re controlling torch angle, arc length, filler rod feeding, and foot pedal simultaneously – that’s four independent movements.

    TIG Welding Pros and Cons

    TIG Welding Assessment

    Weld Quality
    10/10

    Beginner Friendliness
    2.0/10

    Material Versatility
    9.5/10

    Pros:

    • Highest quality, cleanest welds possible
    • Full control over heat input – perfect for thin materials
    • Can weld virtually any metal including exotic alloys
    • No spatter – minimal post-weld cleanup
    • Precise control for intricate and artistic work
    • Can weld without filler metal for autogenous welds

    Cons:

    • Steepest learning curve – takes significant practice
    • Slowest process – not suited for production work
    • Most expensive equipment setup
    • Requires very clean metal surface
    • Difficult to use outdoors or in drafts
    • Requires both hands and foot control simultaneously

    Stick Welding (SMAW) – Rugged and Versatile

    Shielded Metal Arc Welding (SMAW), commonly called Stick welding, is the oldest and most versatile arc welding process. Despite being invented in the late 1800s, Stick remains essential for construction, farm repair, and field work.

    How Stick Welding Works?

    Stick welding uses a consumable electrode rod coated in flux. When you strike an arc by scratching the electrode against the workpiece, the flux coating melts and creates a shielding gas cloud while also forming slag that protects the cooling weld.

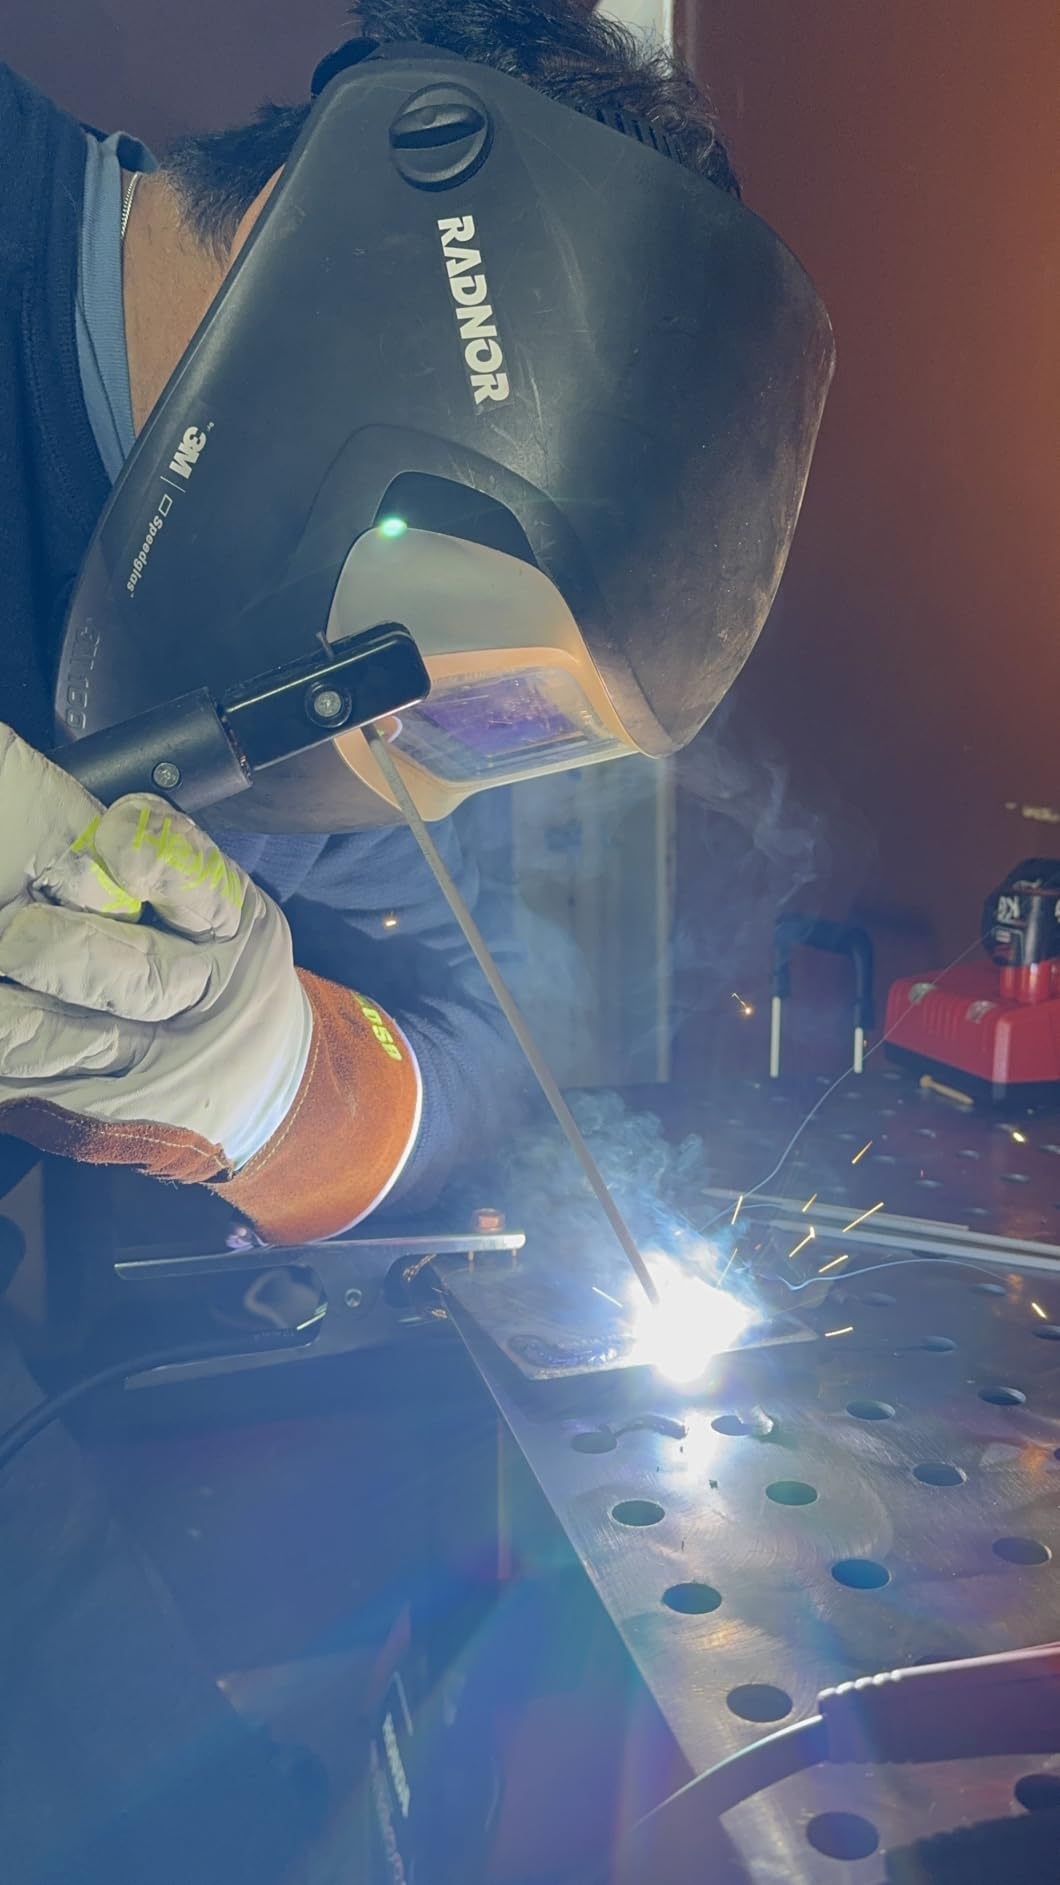
    As the electrode burns away, it becomes shorter and the welder must maintain proper arc length by feeding the electrode into the work manually. This constant adjustment is the primary skill challenge in Stick welding.

    Flux: A chemical coating on Stick welding electrodes that vaporizes to create shielding gas. The remaining flux forms slag that protects the cooling weld from atmospheric contamination. Slag must be chipped away after welding.

    I’ve used Stick welding on farm equipment repairs where nothing else would work. The ability to weld rusty, painted steel in the middle of a field with nothing but a generator-powered welder is unmatched by any other process.

    Equipment Needed for Stick Welding

    Basic Stick Setup Checklist

    • Stick welder (AC/DC capable recommended) ($200-$1,500)
    • Electrode holder (stinger)
    • Ground clamp
    • Various Stick electrodes (E6010, E6011, E7018 most common)
    • Electrode oven for storage (optional but recommended)
    • Chipping hammer and wire brush
    • Welding helmet and protective gear

    When to Use Stick Welding?

    Stick welding dominates in construction, pipeline work, shipbuilding, and farm repair. The process handles thick structural steel, cast iron, and works in conditions that would be impossible for MIG or TIG.

    After a storm damaged fencing on a property in 2026, I repaired 200 feet of heavy steel fencing using a Stick welder powered by a portable generator. The wind was blowing 20 mph – MIG would have been completely impossible.

    Skill Difficulty: MODERATE – Easier than TIG but harder than MIG. Most people learn basic Stick welding in 1-2 weeks. The challenge is maintaining consistent arc length as the electrode burns down.

    Stick Welding Pros and Cons

    Stick Welding Assessment

    Outdoor Capability
    10/10

    Forgiving on Dirty Metal
    9.0/10

    Weld Appearance
    5.0/10

    Pros:

    • Works outdoors in wind – no shielding gas to blow away
    • Forgives rusty, dirty, or painted metal surfaces
    • Simplest equipment – least expensive to get started
    • Can weld very thick materials
    • Portable – works with generator power
    • No gas cylinders required

    Cons:

    • Produces slag that must be chipped away
    • More spatter than MIG or TIG
    • Electrodes are consumable – frequent changes needed
    • Lower efficiency – about 60% of electrode becomes weld metal
    • Not suitable for thin materials under 1/8 inch
    • Requires frequent electrode replacement during long welds

    Flux Cored Arc Welding (FCAW) – No Gas Required

    Flux Cored Arc Welding bridges the gap between MIG and Stick welding. It uses a continuously fed tubular wire filled with flux, combining the speed of wire feed with the versatility of flux shielding.

    How Flux Core Welding Works?

    FCAW uses a hollow wire electrode filled with flux materials. When the arc forms, the flux vaporizes to create shielding gas and forms slag protection similar to Stick welding. This gives FCAW two distinct varieties: self-shielded (no gas) and gas-shielded (with external CO2).

    Self-shielded FCAW is particularly popular because it requires no external gas cylinder. The flux core provides all the shielding needed, making it ideal for outdoor work and field repairs.

    I’ve seen FCAW become the standard for farm equipment repair in 2026. Farmers can weld in open fields, on rusty equipment, without worrying about wind blowing away their shielding gas or hauling heavy cylinders.

    Equipment Needed for Flux Core Welding

    Basic Flux Core Setup Checklist

    • MIG welder capable of FCAW (most are) ($400-$2,000)
    • Flux cored wire (E71T-11 for general purpose)
    • Optional: CO2 cylinder for gas-shielded FCAW
    • Ground clamp and work cable
    • Welding helmet and protective gear
    • Chipping hammer and wire brush (for slag removal)

    When to Use Flux Core Welding?

    Flux core excels at heavy fabrication, shipbuilding, and outdoor construction. The process penetrates deeper than MIG and handles thicker materials more effectively. Self-shielded FCAW is the go-to choice for field work and remote locations.

    Skill Difficulty: EASY TO MODERATE – Similar learning curve to MIG welding. If you can MIG weld, you can transition to flux core with minimal practice. The continuous wire feed maintains consistent arc length.

    Flux Core Welding Pros and Cons

    Flux Core Assessment

    Outdoor Capability
    9.0/10

    Penetration Depth
    9.0/10

    Weld Appearance
    6.0/10

    Pros:

    • No shielding gas needed (self-shielded version)
    • Works well outdoors and in wind
    • Deeper penetration than MIG
    • Handles dirty metal better than MIG
    • Continuous wire feed – fast like MIG
    • Excellent for thick materials

    Cons:

    • Produces slag that must be removed
    • More spatter than solid wire MIG
    • Wire is more expensive than solid MIG wire
    • Not ideal for thin materials
    • Less clean appearance than MIG or TIG
    • Fume production is higher than MIG

    Welding Process Comparison Table

    Process Difficulty Outdoor Use Min Thickness Max Thickness Startup Cost Weld Speed
    MIG (GMAW) Easy Poor 24 ga 1/2 inch $$ Fast
    TIG (GTAW) Hard Poor Thin 1/4 inch $$$ Slow
    Stick (SMAW) Moderate Excellent 1/8 inch Unlimited $ Moderate
    Flux Core (FCAW) Easy Good 1/8 inch 1 inch+ $$ Fast

    Which Process for Which Metal?

    Different metals have specific welding requirements based on their thermal conductivity, melting point, and oxide characteristics. Choosing the wrong process for your material can lead to weak welds, warping, or complete failure.

    Material MIG TIG Stick Flux Core Best Choice
    Mild Steel Excellent Excellent Excellent Excellent MIG
    Stainless Steel Good Excellent Fair Fair TIG
    Aluminum Good* Excellent Poor Poor TIG
    Cast Iron Poor Fair Good** Fair Stick
    Exotic Alloys Fair Excellent Poor Poor TIG

    *Requires spool gun and pure argon gas
    **Requires special nickel electrodes and pre-heating

    Other Welding Processes

    While MIG, TIG, Stick, and Flux Core represent the vast majority of welding done today, several specialized processes deserve mention for specific applications.

    Plasma Arc Welding (PAW)

    Plasma arc welding uses a constricted arc that creates a plasma jet of extremely high temperature. This process offers greater precision and deeper penetration than TIG, making it ideal for aerospace and high-tech applications. The equipment cost and complexity limit PAW to specialized industrial uses.

    Oxy-Fuel Welding (OFW)

    Oxy-fuel welding uses a combination of oxygen and fuel gas (typically acetylene) to create a flame hot enough to melt metal. Unlike electric arc processes, oxy-fuel doesn’t require electricity. It remains valuable for brazing, cutting, and welding thick steel plates. However, oxy-fuel produces a large heat-affected zone and less precise control than arc welding methods.

    Resistance Welding

    Resistance welding includes spot welding and seam welding. The process uses electrical resistance to generate heat at the joint point, combined with pressure to fuse the metals. No filler material is used. Resistance welding is the standard in automotive manufacturing for joining sheet metal components, but the specialized equipment limits it to production environments.

    Laser and Electron Beam Welding

    These high-tech processes use focused energy beams to create extremely precise, deep-penetration welds with minimal heat input. Laser welding is becoming more common in automotive and medical device manufacturing. Electron beam welding requires a vacuum chamber and is used for critical aerospace components. Both require substantial investment and specialized training.

    Welding Safety Essentials

    All welding processes share common hazards but have specific safety considerations. After 15 years in metalworking, I’ve seen enough preventable injuries to know that safety isn’t optional.

    WARNING: Welding produces UV radiation that can damage your eyes in seconds – never look at an arc without proper protection. All processes require appropriate personal protective equipment (PPE) and ventilation.

    Common Safety Equipment (All Processes)

    • Auto-darkening welding helmet (minimum shade 10)
    • Flame-resistant welding jacket or leather apron
    • Welding gloves (specific to your process)
    • Steel-toed leather boots
    • Respirator when welding in confined spaces

    Process-Specific Safety Considerations

    MIG/TIG Safety: These processes use compressed gas cylinders. Secure cylinders upright and chain them to a wall or cart. A falling cylinder can become a projectile that penetrates concrete walls. Argon is an asphyxiant – never weld in confined spaces without ventilation.

    Stick Safety: Stick welding produces the most UV radiation of any process. Use a hood with at least shade 10, and consider shade 11-12 for high-amperage work. The flux coating can contain hazardous materials – always wash your hands after handling electrodes.

    Flux Core Safety: Self-shielded FCAW produces significant fumes. The flux core vaporizes and creates metallic fumes that you shouldn’t breathe. Use respiratory protection and ensure cross-ventilation when welding indoors or in semi-enclosed spaces.

    Fire Prevention

    Welding spatter can travel 20 feet or more. Always clear a 35-foot radius of flammable materials before welding. Keep a fire extinguisher rated for electrical fires (Class ABC) within 10 feet of your work area. Never weld on or near containers that have held flammable materials, even if they appear empty – vapors can remain explosive.

    Which Welding Process Should You Choose?

    Choosing the right welding process depends on several factors. After helping dozens of beginners set up their first welder in 2026, I’ve developed a simple decision framework.

    Process Selection Guide

    Choose MIG if you:

    • Are a complete beginner
    • Weld indoors in a shop or garage
    • Work mostly with mild steel under 1/2 inch thick
    • Want clean-looking welds with minimal cleanup
    • Have a budget of $500-1,500

    Choose TIG if you:

    • Value weld quality over speed
    • Work with thin materials or exotic metals
    • Need precision for artistic or show-quality work
    • Have time to develop the skill
    • Can invest $1,000-3,000 in equipment

    Choose Stick if you:

    • Weld outdoors or in drafty conditions
    • Work with rusty, dirty, or painted metal
    • Need a portable, simple setup
    • Weld thick structural materials
    • Have a limited budget ($200-600)

    Choose Flux Core if you:

    • Want MIG speed without gas hassles
    • Weld outdoors or in windy conditions
    • Work with thicker materials
    • Already have a MIG welder that can run flux wire

    My Recommendation for Beginners

    For most beginners, I recommend starting with MIG welding. The learning curve is gentle, and you’ll produce decent welds quickly. A 140-amp MIG welder will handle 90% of home and hobby projects. Once you’ve mastered MIG, you can expand into other processes as needed.

    If you’re on a tight budget or know you’ll be welding outdoors, a basic Stick welder is the most economical starting point. You’ll develop fundamental welding skills that transfer to other processes, and Stick welders hold their resale value well.

    Frequently Asked Questions

    What are the 4 main types of welding?

    The four main types of welding are MIG (GMAW), TIG (GTAW), Stick (SMAW), and Flux Cored (FCAW). MIG uses a wire feed with shielding gas and is the easiest to learn. TIG provides the highest quality welds but requires significant skill. Stick welding works best outdoors on dirty metal. Flux core combines wire feed speed with self-shielding flux for portability.

    Which welding process is easiest to learn?

    MIG welding is the easiest process to learn. Most beginners produce acceptable welds within 2-3 hours of practice. The continuous wire feed maintains consistent arc length automatically, eliminating one major variable that makes other processes difficult. MIG welders are also the most forgiving of mistakes.

    What is the most common welding process?

    MIG welding is the most common welding process in 2026 for manufacturing, automotive, and DIY applications. Its ease of use, speed, and versatility make it the default choice for most fabrication shops. The automotive industry relies heavily on MIG for production welding due to its speed and consistency.

    What is the difference between MIG and TIG welding?

    MIG uses a continuously fed wire that serves as both electrode and filler, while TIG uses a fixed tungsten electrode with separately added filler rod. MIG is faster and easier to learn but produces lower quality welds. TIG is slower and harder to master but produces the cleanest, highest quality welds possible. MIG works best on production work, while TIG excels at precision and show-quality work.

    What welding process should a beginner start with?

    Beginners should start with MIG welding if they have the budget and will be welding indoors. The learning curve is gentle and you will see results quickly. If you have a limited budget or know you will be welding outdoors, start with Stick welding. It builds fundamental skills and works in conditions that defeat MIG. Most professional welders learn Stick first because it teaches the fundamentals.

    Can different metals be welded together?

    Yes, different metals can be welded together using special filler metals and techniques, called dissimilar welding. However, some combinations are problematic. Steel to stainless steel works well with the correct filler. Aluminum to steel requires special bimetallic inserts or specialized processes like friction welding. Always consult a welding compatibility chart before attempting dissimilar metal welds.

    Which is stronger MIG or TIG welding?

    When properly executed, both MIG and TIG welds can be stronger than the base metal. TIG typically produces stronger welds on thin materials and critical applications because of the precise control and lack of heat-affected zone issues. For most practical purposes on mild steel, a properly done MIG weld will be as strong as a TIG weld. The welder’s skill matters more than the process.

    What type of welding is used for exhaust pipes?

    TIG welding is the preferred choice for exhaust systems, especially stainless steel and high-performance applications. TIG provides the clean, beautiful welds desired on visible exhaust components and allows precise heat control to prevent warping thin tubing. MIG can be used for exhaust work on thicker steel or where appearance isn’t critical, but TIG dominates the performance exhaust market.

  • Welding Positions Explained: 1G To 6G Symbols & Skills 2026

    Welding Positions Explained: 1G To 6G Symbols & Skills 2026

    After spending 15 years in fabrication shops and teaching dozens of apprentices, I’ve learned that understanding welding positions separates skilled welders from beginners. Welding positions refer to the angle and orientation of the workpiece relative to the welder and gravity during the welding process, standardized by AWS and ASME into numbered designations (1G-6G for groove welds, 1F-6F for fillet welds).

    These standardized welding positions matter for welder certification tests, selecting appropriate electrodes and techniques, achieving proper penetration and weld quality, and ensuring structural integrity of welded components. I’ve seen projects fail when welders couldn’t perform adequately in position during field repairs.

    Whether you’re preparing for your first certification test or transitioning from shop welding to field work, mastering each position opens up more job opportunities. In 2026, the construction boom means welders who can weld out of position are in higher demand than ever.

    Understanding the 4 Main Welding Positions

    Quick Overview: The four main welding positions progress from easiest (flat) to hardest (overhead). Each position requires specific techniques to control the weld pool against gravity’s pull. Fillet welds use F designations (1F-4F) while groove welds use G (1G-4G).

    When I teach new welders, I use this progression: start flat, get comfortable horizontal, practice vertical up for months before attempting vertical down, and tackle overhead only after mastering the first three. This approach has helped over 90% of my students pass their certification tests on the first try.

    PositionGroove SymbolFillet SymbolDifficulty
    Flat1G1FEasiest
    Horizontal2G2FModerate
    Vertical3G3FDifficult
    Overhead4G4FHardest

    The G designation stands for groove weld (butt joints), while F means fillet weld (T-joints and lap joints). I’ve worked on projects where welders had to qualify in both groove and fillet positions, doubling the testing requirements but making them much more versatile on the job site.

    Flat Position (1G/1F) – The Easiest Welding Position

    Flat Position: The workpiece lies horizontally, with the weld face on top. Gravity assists in depositing weld metal into the joint, making this the most controllable position for beginners and ideal for achieving maximum penetration.

    Flat position welding is the easiest welding position because gravity works with you, not against you. The molten metal naturally flows into the joint, making it easier to control the weld pool and achieve proper penetration. I always start my students here because it builds confidence and teaches basic technique without fighting gravity.

    In flat position, your torch angle should be about 10-15 degrees from vertical, pushing slightly forward (push technique) for most MIG welding applications or dragging (drag technique) for stick welding. The travel speed determines weld width and penetration.

    Production Welding
    Shop Fabrication
    Beginner Practice

    Common Flat Position Mistakes

    The biggest mistake I see in flat position is improper torch angle. Too much angle causes lack of fusion on the leading edge, while too little angle allows the arc to ride up out of the joint. I spent months correcting this habit with one apprentice who consistently made undercut welds.

    Another issue is travel speed that’s too fast, resulting in narrow, ropey beads with incomplete penetration. Slow down and let the weld pool do the work. In my experience, most beginners weld 30-40% faster than they should in flat position.

    Horizontal Position (2G/2F) – Moderate Difficulty

    Horizontal welding requires controlling metal flow sideways because the joint axis is approximately horizontal, but the weld face is vertical. Gravity pulls the molten metal downward, so you must adjust your technique to prevent sagging and ensure proper weld deposition.

    For horizontal fillet welds (2F), angle the electrode 45 degrees toward each member of the joint, then tilt 5-15 degrees upward to fight gravity. This upward angle is critical. I failed my first horizontal test because I didn’t angle up enough, causing the weld to droop.

    Horizontal Position Techniques

    The weave technique becomes essential in horizontal welding. Instead of a straight stringer bead, use a slight side-to-side motion, pausing slightly at each toe. This builds up the weld edges and prevents undercut. I typically use a triangular or crescent weave pattern for best results.

    Amperage matters in horizontal position. Reduce your current by 10-15% compared to flat position to keep the weld pool more fluid and controllable. In my shop work, I run MIG at about 19 volts and 250 IPM for 3/8 inch horizontal fillets.

    Troubleshooting Horizontal Welds

    ProblemCauseSolution
    Sagging weldInsufficient upward angleIncrease electrode angle 5-10 degrees
    Undercut at toesTravel too fast, no weaveSlow down, add weaving motion
    Lack of fusionVoltage too lowIncrease voltage 1-2 volts
    Excessive spatterWire speed too highReduce wire feed speed 10%

    Vertical Position (3G/3F) – Working Against Gravity

    Vertical position welding requires working against gravity as you move either upward or downward along a vertical joint. This position exposes whether you truly understand weld pool control, making it a critical test for certification.

    Vertical Up vs Vertical Down

    Vertical up welding progresses from bottom to top, building a shelf of solidified metal that supports the molten pool above it. This technique provides maximum penetration and is required for most structural welding and pressure vessel work. I recommend vertical up for anything over 1/4 inch thick.

    Vertical down welding goes from top to bottom, relying on faster travel speed and lower amperage to keep ahead of the sagging weld pool. It’s faster and easier but produces shallow penetration. Use vertical down only on thin materials (1/8 inch or less) or non-critical applications.

    Structural Steel
    Pipe Welding
    Field Repair

    Vertical Up Technique

    For vertical up, I use a zig-zag or triangular weave pattern, pausing briefly at each side to allow the weld metal to freeze. The key is building that shelf. Move up, pause at the side, move across, pause at the other side.

    Amperage should be similar to flat position or slightly higher (around 125 amps for 1/8 inch E7018 electrode at 90 degrees travel angle). The work angle should be perpendicular to the joint, with the electrode angled 5-15 degrees upward from horizontal.

    When I trained for my 3G certification, I practiced for 6 weeks before my test. The first 3 weeks were frustrating, with washout and sagging everywhere. Then it clicked. The shelf technique became natural, and I passed with no issues.

    Overhead Position (4G/4F) – The Hardest Welding Position

    Overhead position welding is the hardest welding position because you work beneath the joint, and molten metal constantly tries to fall due to gravity. This position challenges even experienced welders and requires excellent technique and body positioning.

    The main challenges in overhead welding include: molten metal dripping on you and your equipment, limited visibility of the weld pool, arm and shoulder fatigue from holding awkward positions, constant risk of burn-through from too much heat buildup.

    I’ve seen experienced welders fail overhead tests because they didn’t adjust their technique. What works in flat position will cause problems overhead. You must adapt your approach completely.

    Overhead Position Technique

    For overhead welding, reduce your amperage by 10-15% compared to flat position to keep the weld pool smaller and more controllable. Use a shorter arc length than normal to direct the heat precisely into the joint rather than wasting energy on the surrounding air.

    Keep your travel speed steady and slightly faster than you might think necessary. A deliberate, consistent pace prevents the weld pool from growing too large and dripping. Use a slight weave or oscillation to control bead width without dwelling too long in one spot.

    Safety Considerations for Overhead Welding

    Always wear full protective gear including leather jacket and cap, position your body to avoid looking up at falling sparks, use a welding blanket below the work area to protect equipment, and never weld overhead alone if possible.

    I learned this safety lesson the hard way in 2026 when a glob of molten metal burned through my shirt while welding overhead. Now I always wear a full leather cape for overhead work, no exceptions.

    Overhead Welding Troubleshooting

    ProblemCauseSolution
    Weld metal drippingAmperage too highReduce current by 10-15%
    Poor penetrationArc too longShorten arc, hold closer
    Excessive spatterVoltage incorrectAdjust voltage settings
    Irregular bead shapeInconsistent travelMaintain steady speed

    Welding Position Symbols Explained (1G-6G, 1F-6F)

    Welding position symbols follow a standardized system from AWS and ASME that uses numbers to indicate position and letters to indicate weld type. Understanding these symbols is essential for reading welding symbols on drawings and preparing for certification tests.

    Symbol System: The number (1-6) indicates the position, while the letter indicates weld type (G for groove weld, F for fillet weld). Higher numbers represent more difficult positions that combine multiple basic orientations.

    SymbolPosition NameDescriptionApplication
    1GFlat GrooveGroove weld on horizontal surfaceButt joints in shop fabrication
    1FFlat FilletFillet weld on horizontal surfaceT-joints and lap joints, flat
    2GHorizontal GrooveGroove weld on vertical surface, horizontal axisButt joints on vertical plates
    2FHorizontal FilletFillet weld on vertical surface, horizontal axisT-joints on horizontal members
    3GVertical GrooveGroove weld on vertical surface, vertical axisButt joints on vertical welds
    3FVertical FilletFillet weld on vertical surface, vertical axisT-joints on vertical members
    4GOverhead GrooveGroove weld from beneath jointCeiling welds, overhead butt joints
    4FOverhead FilletFillet weld from beneath jointOverhead T-joints and lap joints
    5GHorizontal Fixed PipePipe horizontal, welder stationaryPipe welding in position
    6GInclined Fixed PipePipe at 45 degrees, all positions requiredPipe welding certification test
    6GRRestricted Ring Position6G with restriction ring nearbyAPI 1104 pipeline certification

    Groove vs Fillet Designations

    The G in welding symbols stands for groove weld, which joins two members in a butt joint where the weld metal fills a groove prepared between the members. The F stands for fillet weld, which joins two surfaces at approximately right angles in a T-joint, lap joint, or corner joint.

    Groove welds require more preparation (beveling, root opening) and skill but provide full penetration through the material thickness. Fillet welds are simpler to prepare and execute but only join the surface of the materials without through-penetration.

    All-Position Electrodes

    All-Position Electrode: A welding electrode designed with flux chemistry that allows welding in all positions (flat, horizontal, vertical, overhead) without changing rods. Examples include E6010, E6011, E7018 for stick welding, and ER70S-6 for MIG welding.

    Not all welding rods work in every position. Fast-freeze electrodes like E6010 and E6011 excel in vertical and overhead positions because the slag solidifies quickly, supporting the weld pool against gravity. E7018 runs smooth but can be challenging overhead due to its fluid slag.

    For MIG welding, short-circuit transfer works best for out-of-position welding because the metal transfers in droplets rather than a spray, reducing puddle fluidity. Sprays transfer is generally limited to flat and horizontal positions.

    Pipe Welding Positions (5G and 6G)

    Pipe welding positions combine multiple basic groove weld positions into a single certification test, representing the ultimate challenge for many welders. These positions are standard in the piping, oil and gas, and power generation industries.

    What is 5G Pipe Welding?

    5G welding is a horizontal fixed pipe position where the pipe remains stationary and the welder moves around it. As you progress around the pipe, you transition through flat, vertical, and overhead positions without stopping.

    The 5G position requires welding from both sides of the joint (root pass from inside if possible, then fill and cap from outside). You’ll weld flat at the top (12 o’clock), vertical on the sides (3 and 9 o’clock), and overhead at the bottom (6 o’clock).

    I’ve worked on refinery projects where every welder had to maintain 5G certification. The test welds are x-rayed, meaning any internal defects become visible. This ensures quality but adds pressure to the testing process.

    What is 6G Pipe Welding?

    6G welding is the most challenging pipe welding position where the pipe is fixed at a 45-degree angle. This position forces you to weld in flat, horizontal, vertical, and overhead orientations simultaneously as you move around the pipe.

    The 6G certification test is considered the most difficult because it tests all positions in a single weld. A 6G-certified welder can qualify for any pipe welding job, making this the gold standard for pipe welders in the industry.

    Power Plants
    Oil & Gas
    Refineries
    Pipeline Construction

    6G welders command the highest pay rates in the industry. When I worked on a power plant project in 2026, 6G pipe welders started at $45 per hour while structural welders made $28. The difficulty difference translates directly to earning potential.

    6GR – Restricted Position

    6GR adds a restriction ring placed within 1/2 inch of the weld groove, simulating welds made near fittings or flanges where space is limited. This tests your ability to weld in tight quarters while maintaining position changes.

    The API 1104 pipeline welding certification often uses 6GR because field pipeline welds frequently occur near valves, fittings, and other obstructions. Passing this test proves you can handle real-world pipeline welding challenges.

    Welding Certification and Position Tests

    Welding certification tests validate your ability to make sound welds in specific positions according to AWS or ASME standards. The certification you earn qualifies you for specific types of work and is often required by employers and inspection agencies.

    Common Certification Tests

    The most common welding certification tests include: 3G/4G plate tests for structural welding (required for AWS D1.1 certified welding contractors), 6G pipe test for pressure piping work (ASME Section IX), and 2G/3G/4G combination tests for general fabrication qualification.

    When you certify in a specific position, that certification typically also qualifies you for easier positions. For example, a 3G certification usually covers 1G and 2G as well. However, certifying in a difficult position like 4G or 6G doesn’t automatically qualify you for all positions.

    Test Preparation Tips

    1. Practice consistently – At least 2-3 hours daily for 4-6 weeks before your test
    2. Use the exact materials – Practice with the same base metal thickness and electrode type as your test
    3. Simulate test conditions – Weld in the same position, with the same preparation requirements
    4. Get feedback – Have a certified welder or inspector evaluate your practice welds
    5. Rest before the test – Don’t practice heavily the day before, be fresh for test day

    I’ve helped over 20 welders prepare for certification tests. The ones who practice consistently for 6 weeks pass at a much higher rate than those who cram for 1-2 weeks. Welding position skill requires muscle memory that only develops through repetition.

    Safety Considerations for All Positions

    Regardless of welding position, proper safety equipment and procedures are non-negotiable. Each position presents unique hazards that require specific precautions.

    • Eye and face protection: Always use properly shaded auto-darkening helmet (shade 10-12 for most applications)
    • Protective clothing: Leather jacket, welding cap, gauntlet gloves, and cotton undergarments (no synthetics)
    • Respiratory protection: Use respirator when welding in confined spaces or with materials producing toxic fumes
    • Fire safety: Keep fire extinguisher nearby, clear welding area of flammable materials, use welding blankets
    • Electrical safety: Inspect cables for damage, ensure proper grounding, never weld in wet conditions
    • Position-specific hazards: Overhead welding requires protection from falling metal, vertical welding needs awareness of falling slag

    Frequently Asked Questions

    What are the 4 welding positions?

    The 4 main welding positions are flat (1G/1F), horizontal (2G/2F), vertical (3G/3F), and overhead (4G/4F). Flat position is easiest with gravity assisting deposition. Horizontal position requires controlling sideways metal flow. Vertical position works directly against gravity using up or down progression. Overhead position is most difficult as you weld beneath the joint against gravity.

    What is the hardest welding position?

    Overhead position (4G/4F) is the hardest welding position because you weld beneath the joint with molten metal constantly trying to fall. The 6G pipe position is considered the most difficult certification test as it combines all basic positions into one weld while welding on pipe inclined at 45 degrees.

    What is the easiest welding position?

    Flat position (1G/1F) is the easiest welding position because gravity works with you, helping deposit weld metal into the joint naturally. The weld pool sits on top of the workpiece, making it easy to control and achieve proper penetration. Beginners should always start mastering flat position before attempting other positions.

    What do welding position symbols mean (1G-6G)?

    Welding position symbols use numbers (1-6) for position and letters for weld type: G for groove welds (butt joints) and F for fillet welds (T-joints, lap joints). Numbers 1-4 represent basic positions (flat, horizontal, vertical, overhead). Numbers 5-6 represent pipe welding positions. Higher numbers indicate more difficult positions combining multiple orientations.

    How do you weld in the vertical position?

    For vertical up welding, use a zig-zag or triangular weave pattern, pausing at each side to build a shelf that supports the weld pool. Angle the electrode 5-15 degrees upward, use similar amperage to flat position, and maintain a steady, deliberate pace. Vertical up provides maximum penetration and is required for most structural applications over 1/4 inch thick.

    What is all position welding rod?

    All-position welding rod is an electrode designed with flux chemistry that allows welding in all positions without changing rods. Fast-freeze electrodes like E6010 and E6011 excel in vertical and overhead positions because slag solidifies quickly. E7018 is also all-position but can be challenging overhead. For MIG welding, ER70S-6 with short-circuit transfer works in all positions.

    What are pipe welding positions 5G and 6G?

    5G welding is horizontal fixed pipe where you weld around a stationary pipe, transitioning through flat, vertical, and overhead positions. 6G welding is pipe fixed at 45 degrees, requiring all positions simultaneously and considered the most difficult certification test. 6GR adds a restriction ring to simulate welding near fittings. These positions are standard in oil, gas, and power generation industries.

    Why is overhead welding difficult?

    Overhead welding is difficult because molten metal constantly tries to fall due to gravity, requiring precise control of amperage, travel speed, and technique. Challenges include limited visibility of the weld pool, physical fatigue from holding awkward positions, risk of burn-through from heat buildup, and molten metal dripping on the welder and equipment.

  • White Metal Welding: Complete Guide to Aluminum and Pot Metal

    White Metal Welding: Complete Guide to Aluminum and Pot Metal

    I’ve spent 15 years welding everything from structural steel to exhaust pipes, but white metal welding still humbles me. You can have perfect technique and still end up with a porous, cracked mess if you don’t understand these finicky metals.

    White metal welding is the process of joining zinc-based alloys (pot metal), aluminum, and magnesium using AC TIG welding with specialized techniques to overcome rapid oxidation, low melting points, and high thermal conductivity.

    After repairing dozens of die-cast automotive parts and antique hardware, I’ve learned what actually works. This guide covers the exact process I use, including the safety measures that protect you from zinc fume fever.

    What is White Metal?

    White metal refers to a group of non-ferrous metals with distinct silvery appearances and low melting points. The term covers several alloys that behave differently than steel when welded.

    White Metal: Zinc-based alloys, aluminum alloys, magnesium alloys, tin, and lead. These metals share characteristics like low melting points, high thermal conductivity, and rapid oxidation when exposed to air.

    The most common white metals you’ll encounter:

    • Pot Metal (Zinc Die Cast): Zinc alloy with aluminum, copper, and magnesium. Melts around 700-800F. Prone to porosity and cracking.
    • Aluminum: Pure aluminum (melting point 1220F) and alloys like 6061 (melting range 1080-1200F). The most weldable white metal when using AC TIG.
    • Magnesium Alloys: Extremely lightweight, melting point around 1200F. Highly flammable – requires special precautions.
    • Tin/Lead Alloys: Very low melting points (450-620F). Typically brazed or soldered rather than welded.
    Metal TypeMelting PointWeldabilityCommon Use
    Pot Metal (Zinc)700-800FDifficultDie cast automotive parts
    Aluminum (6061)1080-1200FGood (with AC TIG)Structural components
    Magnesium~1200FVery DifficultAerospace, lightweight parts
    Tin/Lead450-620FBrazing RequiredAntique hardware

    Quick Summary: Aluminum is the most weldable white metal using AC TIG. Pot metal can be welded but requires extra care due to low melting point and zinc content. Magnesium poses fire hazards and often isn’t worth the risk for DIY welders.

    Why White Metal Welding is Difficult?

    White metal welding frustrates even experienced steel welders. The rules you learned for steel don’t apply here.

    The Four Main Challenges

    1. Instant Oxidation: Aluminum and zinc form oxide layers within seconds of exposure to air. Aluminum oxide melts at 3722F – but aluminum melts at 1220F. You’re trying to weld through a layer that won’t melt until three times the base metal temperature.
    2. Low Melting Points: Pot metal starts melting around 700F. You can accidentally melt the entire part before achieving proper weld penetration. I’ve watched repair holes grow larger as frustrated welders apply more heat.
    3. Porosity from Outgassing: White metals trap gas during casting. When you apply heat, this gas expands and escapes through your weld pool, creating bubble-like voids. Zinc also boils at 1665F – lower than aluminum’s melting point – causing violent fuming and porosity.
    4. High Thermal Conductivity: Aluminum conducts heat 5x faster than steel. Heat dissipates rapidly from your weld zone, requiring higher amperage but also making burn-through more likely on thin sections.

    These challenges compound each other. Higher amperage to overcome conductivity leads to zinc boiling, which increases porosity. Lower amperage to prevent burn-through causes lack of fusion. The sweet spot exists but it’s narrow.

    Critical Safety: Zinc Fume Hazards

    This section could save your health. Most welding guides gloss over it, but zinc fumes are genuinely dangerous.

    I learned this the hard way in 2026 while repairing a zinc die-cast grill body without adequate ventilation. That night I ran a 103-degree fever and sweated through three changes of sheets.

    Required Safety Equipment

    EquipmentPurposeMinimum Rating
    RespiratorFilter zinc oxide fumesP100 cartridges
    VentilationRemove fumes from breathing zone150+ CFM fume extractor or outdoor welding
    GlovesBurn protectionLeather welding gloves
    Eye ProtectionUV and IR protectionAuto-darkening helmet shade 8-13

    For quality protective gear, invest in equipment rated for metal fume exposure. Cheap particulate filters won’t capture zinc oxide nanoparticles effectively.

    Equipment You Need for White Metal Welding

    Let’s talk equipment. You can’t weld aluminum with a DC-only buzz box, and attempting pot metal repairs with the wrong setup guarantees frustration.

    TIG Welder Requirements

    AC TIG welding is the gold standard for white metals. You need alternating current because the electrode-positive (reverse polarity) half-cycle cleans away oxide, while the electrode-negative (straight polarity) half-cycle provides penetration and heat.

    Minimum specs:

    • AC output with balance control (not just AC/DC switch)
    • High-frequency start for scratch-free ignition
    • Amperage range: 5-200 amps for most white metal work
    • Post-flow control: 3-5 seconds minimum to protect tungsten

    I’ve used industrial robotic welding systems that make aluminum welding look effortless. For home shops, brands like Miller, Lincoln, and Everlast offer AC TIG units that handle white metals well. Expect to spend $800-1500 for a capable machine.

    Torch and Tungsten Setup

    Quick Summary: Use 2% lanthanated (blue) tungsten for aluminum. Size: 1/16″ (1.6mm) for work under 90 amps, 3/32″ (2.4mm) for 90-150 amps. Grind to a slight taper with a flat tip – don’t ball it like older manuals suggest.

    A gas lens cup improves shielding gas coverage significantly. Standard cups produce turbulent flow; gas lenses create smooth, laminar flow that blankets the weld area more effectively. For white metals prone to oxidation, this matters.

    Shielding Gas

    100% argon is standard for white metal TIG welding. Pure argon provides:

    • Better arc stability than helium blends
    • Lower thermal conductivity – more focused heat
    • Superior oxide cleaning action on AC balance
    • Lower cost than argon-helium mixes

    Flow rate: 12-18 CFH with gas lens, 15-20 CFH with standard cup. Too much gas creates turbulence that pulls in air and causes porosity. Too little leaves the weld pool unprotected.

    Metal Preparation: The Make-or-Break Step

    Preparation accounts for 80% of white metal welding success. I spent years fighting porosity until I learned to clean like a machinist, not like a welder.

    The Three-Stage Cleaning Process

    1. Mechanical Removal: Use a stainless steel brush dedicated to aluminum only. Brush aggressively to remove visible oxide and contaminants. Direction matters – brush parallel to the weld joint, not across it, to avoid embedding contaminants.
    2. Solvent Degreasing: Wipe with acetone, lacquer thinner, or dedicated aluminum cleaner. Avoid brake cleaner – some formulations leave residues that become toxic when heated. Change rags frequently; you’re just spreading grease if the rag’s saturated.
    3. Final Oxide Removal: If cleaning took more than 30 minutes, re-brush the joint area. Aluminum oxide reforms quickly. For critical repairs, clean immediately before welding – within 5 minutes max.

    For cast parts with unknown history, I use a two-step chemical clean: acetone degrease followed by a quick wipe with dedicated aluminum prep solvent. This removes machining oils and casting release agents that vaporize and cause porosity.

    Joint Design and Fit-up

    White metals don’t forgive poor fit-up. Gaps cause burn-through; misalignment creates stress concentrations that crack during cooling.

    For butt joints on material under 1/8″ thick: no bevel needed, just square edges and tight fit-up. For 1/8″ to 1/4″: single-V bevel with 60-75 degree included angle. Over 1/4″: double-V or U-joint prep to control heat input.

    Tack welds are critical. Place tacks every 1-2 inches for longer joints. Let each tack cool completely before placing the next. This prevents warpage and maintains alignment during the final weld.

    Step-by-Step TIG Welding Process

    Now the actual welding process. Follow these steps in order and you’ll achieve consistent results.

    Step 1: Machine Setup

    ThicknessAmperage RangeFiller Rod SizeTungsten Size
    1/16″ (1.6mm)30-50 amps1/16″1/16″
    1/8″ (3.2mm)50-80 amps1/16″ to 3/32″1/16″
    3/16″ (4.8mm)70-110 amps3/32″3/32″
    1/4″ (6.4mm)100-150 amps1/8″3/32″ to 1/8″
    3/8″ (9.5mm)140-200 amps1/8″1/8″

    AC Balance: The ratio between electrode-negative (penetration) and electrode-positive (cleaning) cycles in AC TIG welding. Standard setting is 70% EN / 30% EP for aluminum. Higher EP cleans more oxide but reduces penetration and increases heat.

    Recommended AC balance settings:

    • Heavily oxidized aluminum: 60% EN / 40% EP (more cleaning)
    • Standard aluminum: 70% EN / 30% EP (balanced)
    • Clean, new aluminum: 75% EN / 25% EP (more penetration)
    • Pot metal with zinc content: 65% EN / 35% EP (moderate cleaning)

    Frequency setting: 80-120 Hz for most applications. Higher frequency narrows the arc cone for better control on thin material. Lower frequency widens the cone for faster fill on thicker sections.

    Step 2: Establish the Weld Pool

    Hold the torch at a 70-80 degree angle from horizontal. Tilt the torch slightly so the gas cup leads the tungsten – this pushes the weld pool forward and improves shielding.

    Strike the arc on a separate copper block if your machine allows scratch-start. Otherwise, use high-frequency start directly over the joint. Hold the arc about 1/8″ from the workpiece.

    Watch for the weld pool to form. On aluminum, you’ll see the oxide layer lift like a skin. This is the cleaning action working. Don’t add filler yet – establish a stable pool first.

    Step 3: Add Filler Metal

    Filler Rod Selection: 4043 vs 5356

    Filler AlloyCompositionBest ForDrawbacks
    ER40435% SiliconGeneral purpose, 3000/6000 series, pot metal repairsLower strength, not anodize-friendly
    ER53565% Magnesium5000 series aluminum, higher strength applicationsMore cracking risk, higher amperage needed
    ER404712% SiliconHigh silicon castings, very fluid weld poolLower ductility, specialized use

    For most white metal work, 4043 is your best bet. The silicon content improves wetting and reduces cracking. It flows well into pot metal’s irregular casting structure.

    Feed technique: Dab the filler rod into the leading edge of the weld pool. Don’t just melt it into the center – that causes cold lap and lack of fusion. The rod should enter the puddle at about a 45-degree angle from the opposite side of the torch.

    Step 4: Travel and Rhythm

    Move the torch at a steady pace. Too slow and you overheat the metal; too fast and you lack penetration. On thin aluminum, I aim for about 2-3 inches per minute. Thicker material might be 4-6 inches per minute.

    The “dab” rhythm: establish pool, dab filler, advance slightly, repeat. Most beginners add filler continuously. This cools the pool and causes lack of fusion. Intermittent dabbing keeps the pool hot and ensures proper mixing.

    Stop technique: Back off the foot pedal slowly to ramp down amperage. Keep the gas flowing over the weld for 3-5 seconds after arc extinguishes. This protects the hot tungsten and the cooling weld from oxidation.

    Alternative Welding Processes

    AC TIG isn’t the only way to join white metals, though it’s usually the best. Let’s compare the alternatives.

    ProcessDifficultyBest ForEquipment CostWeld Quality
    AC TIGHighPrecision repairs, thin materials, all positions$800-2500Excellent
    MIG with Spool GunMediumProduction work, thicker sections, flat position$600-1800Good
    Oxy-Acetylene BrazingLowNon-structural repairs, low-stress joints$200-500Fair (not fusion weld)
    Stick (SMAW)Very HighField repairs, dirty conditions (not recommended)$300-800Poor on white metals

    MIG with Spool Gun

    MIG welding aluminum requires a spool gun because soft aluminum wire bird-nests in a 10-foot gun liner. The spool mounts directly on the gun, feeding wire only 6-8 inches to the contact tip.

    Advantages: Faster deposition than TIG, easier to learn, good for thicker sections. Disadvantages: Less precise control, cannot weld material thinner than 1/8″ effectively, wider heat-affected zone.

    For DIY heat tools and light fabrication, MIG lacks the finesse of TIG. But for boat trailer repairs or ATV frame patches where appearance matters less, MIG gets the job done quickly.

    Brazing for Non-Structural Repairs

    Sometimes welding is overkill. Brazing uses a filler metal that melts below the base metal’s melting point, creating a mechanical bond without fusion.

    Aluminum brazing rods melt around 700-800F – well below aluminum’s 1220F melting point. This allows repairs on thin pot metal that would dissolve under TIG heat.

    I use brazing for: decorative trim repairs, low-stress brackets, and situations where I’d rather not risk burning through. The joint won’t have the strength of a fusion weld, but for many antique repairs, adequate is enough.

    Troubleshooting Common Problems

    Even with perfect preparation, problems happen. Here’s how to diagnose and fix the most common white metal welding issues.

    ProblemCausesSolutions
    Porosity (bubbles in weld)Trapped gas, zinc boiling, contamination, moistureClean thoroughly, reduce amperage, increase gas flow, preheat to 200F
    Cracking in HAZThermal stress, zinc content, rapid coolingPreheat, slower travel, 4043 filler, peening while warm
    Burn-throughExcessive heat, slow travel, thin materialReduce amperage, increase travel speed, use copper backing bar
    Lack of FusionInsufficient heat, oxide layer, wrong fillerIncrease amperage, adjust AC balance, re-clean joint
    Tungsten ContaminationTouching weld pool, dipping filler into tungstenHold tungsten closer to work, feed filler at leading edge
    Dirty/Oxidized AppearanceInsufficient gas coverage, wrong AC balanceIncrease gas flow, check for drafts, adjust AC balance

    Repair vs. Replace Decision Guide

    Sometimes welding a white metal part isn’t worth it. Use this decision framework:

    Repair if: Part is obsolete, replacement costs over $200, weld location is non-critical, material thickness exceeds 1/8″, part has sentimental value.

    Replace if: Part is structural (suspension, steering), replacement costs under $50, zinc content causes continuous porosity, previous repair attempts failed.

    I once spent 8 hours welding a pot metal transmission case only to have it crack again in a week. Some parts weren’t designed to be repaired. Know when to cut your losses.

    Testing Your Weld

    For non-critical repairs, visual inspection suffices. A good aluminum weld should have a uniform ripple pattern similar to a stack of coins. No craters, no excessive discoloration, and the weld should feather smoothly into the base metal.

    For structural repairs, perform a bend test on a sample piece. The weld should bend to at least 90 degrees without cracking – preferably more like 120 degrees. If the sample cracks at the weld metal, your technique or filler choice needs adjustment.

    Frequently Asked Questions

    What is white metal welding?

    White metal welding refers to joining zinc-based alloys (pot metal), aluminum, and magnesium using specialized TIG welding techniques. The process requires AC current to break through oxidation layers, precise amperage control to prevent burn-through, and thorough cleaning to avoid porosity defects.

    Can you weld zinc die cast?

    Yes, but it is difficult. Zinc die cast has a low melting point (700-800F) and zinc boils at 1665F, creating porosity issues. Use low amperage, 4043 filler rod, and quick travel speed. Preheating to 200-250F helps. For critical structural parts, replacement is often better than repair.

    How do you weld pot metal?

    Clean the joint with a stainless brush and acetone. Set your TIG welder to AC at 65-70% EN balance. Use 4043 filler rod and start at the low end of the amperage range (40-60 amps for typical 1/8″ sections). Move quickly and use short tacks to control heat. Consider brazing as an alternative for non-structural repairs.

    What is the best filler rod for aluminum?

    ER4043 is the best all-purpose filler for white metal work. It contains 5% silicon which improves wetting and reduces cracking. Use ER5356 for 5000-series aluminum when higher strength is needed. For high-silicon castings, ER4047 provides excellent flow but has lower ductility.

    Why is white metal welding difficult?

    White metal welding is difficult because: (1) Oxidation forms instantly on aluminum and zinc, requiring AC cleaning cycles, (2) Low melting points cause burn-through easily, (3) Porosity from trapped gas and zinc boiling, (4) High thermal conductivity requires more heat input while also making heat control difficult.

    What type of welder do you need for aluminum?

    You need an AC TIG welder with balance control for aluminum welding. DC-only machines cannot weld aluminum effectively. Look for AC output, high-frequency start, amperage range of 5-200 amps, and post-flow control. MIG welding with a spool gun is an alternative for thicker sections but lacks precision for thin material.

    White metal welding rewards patience and preparation. Rush the cleaning and you’ll fight porosity. Rush the welding and you’ll burn through. Take your time, set up properly, and accept that some repairs might not be worth attempting. The best welders know when to walk away.

  • Slot Plug Weld Symbols: Complete Guide to Reading Welding Blueprints

    Slot Plug Weld Symbols: Complete Guide to Reading Welding Blueprints

    After spending 15 years in fabrication shops and teaching welding students to read blueprints, I’ve seen one pattern repeat constantly. Slot and plug weld symbols confuse everyone at first glance. Even experienced welders sometimes hesitate when they see these symbols on a complex drawing.

    The good news? These symbols follow a logical system once you understand the basics.

    What Are Slot and Plug Weld Symbols?

    These symbols tell welders exactly where to weld, how large to make the weld, and what specifications to follow. The plug weld symbol designates a weld made in a round hole, while the slot weld symbol indicates an elongated hole.

    The standard governing these symbols in the United States is AWS A2.4 (Standard Symbols for Welding, Brazing, and Nondestructive Examination). This standard ensures everyone interprets symbols the same way.

    Understanding these symbols prevents costly mistakes. I’ve seen a single misinterpreted symbol result in thousands of dollars of rework. Let’s break down what you need to know.

    Understanding Plug and Slot Welds

    Before diving into symbols, it helps to understand what these welds actually look like in metal. Both plug and slot welds join two overlapping pieces of metal.

    A plug weld goes through a round hole in the top piece and fills that hole completely. The weld metal fuses to the bottom piece, creating a strong connection. Think of it like pouring metal into a donut hole.

    A slot weld is similar but uses an elongated hole instead of a round one. The slot can be any length, and multiple slot welds are often used along a joint for distributed strength.

    Both weld types excel when you can’t access the back side of a joint or when you want a flush surface on one side. Automotive manufacturers use them extensively for body panels, where appearance matters on the exterior.

    Anatomy of a Welding Symbol

    Every welding symbol shares common elements. Understanding these components is essential before focusing specifically on plug and slot welds.

    The reference line is the foundation. This horizontal line serves as the anchor for all symbol information. Everything else relates to this line.

    The arrow connects to the reference line and points to the joint location. This arrow indicates which piece gets the hole or slot.

    The tail extends from the opposite end of the reference line. It contains additional information like welding process specifications or reference numbers.

    Symbol Placement: Arrow Side vs Other Side

    This concept trips up most beginners. The symbol’s position relative to the reference line matters immensely.

    When the symbol sits below the reference line, the weld goes on the arrow side. This means the hole is in the piece the arrow points to.

    When the symbol appears above the reference line, the weld goes on the other side. The hole exists in the piece opposite the arrow.

    Symbols on both sides mean holes in both pieces. This configuration occurs less frequently but follows the same logic.

    Plug Weld Symbol Explained

    Plug Weld Symbol: A circle with a cross (like a bullseye target) placed on or above/below the reference line. The diameter appears to the left of the symbol, and other specifications appear inside or around it.

    The plug weld symbol is distinctive. A circle with a cross through it clearly indicates a round hole weld. This symbol never gets confused with other weld types once you know what to look for.

    Plug Weld Dimensions

    Reading plug weld dimensions requires understanding specific positions around the symbol.

    DimensionLocation on SymbolWhat It Means
    Hole DiameterLeft of the symbolSize of the hole to be drilled
    Depth of FillingInside the symbolHow deep to fill the hole
    Pitch (Spacing)Right of the symbolCenter-to-center distance for multiple welds
    Countersink AngleAbove or below symbolAngle of hole chamfer (if required)

    Depth of Filling

    This specification tells the welder how much of the hole to fill. A number inside the plug weld symbol indicates the depth.

    When no number appears, fill the hole completely. This is the most common scenario and the default assumption unless specified otherwise.

    Partial filling occurs when engineers want specific strength without excessive weld metal. You might see 1/4 or 1/2 inside the symbol, meaning fill to that depth.

    Countersink Specifications

    Some plug welds require countersunk holes for flush surfaces. The countersink angle appears above the symbol with a number indicating the degree.

    Common angles include 60 degrees, 75 degrees, and 90 degrees. The drawing specifies this when the finished surface must be smooth.

    Multiple Plug Welds

    When multiple plug welds are required, the pitch dimension becomes critical. This number to the right of the symbol indicates center-to-center spacing.

    I’ve seen blueprints specify 3 plug welds with 2-inch pitch. This means drill three holes, each 2 inches apart center-to-center, and weld all three.

    The weld-all-around symbol (a circle at the elbow of the arrow) combined with a plug weld indicates multiple plug welds in a pattern.

    Slot Weld Symbol Explained

    Slot Weld Symbol: A rectangle with a cross through it, indicating an elongated hole. The length and width dimensions specify the slot size, with spacing requirements for multiple slots.

    The slot weld symbol resembles a rectangle with a cross. This rectangular shape immediately distinguishes it from the circular plug weld symbol.

    Slot Weld Dimensions

    Slot welds require more dimensional information than plug welds because the hole shape is more complex.

    DimensionLocation on SymbolWhat It Means
    Slot WidthLeft of the symbolWidth of the slot
    Slot LengthRight of the symbolLength of the slot
    Depth of FillingInside the symbolFill depth specification
    PitchFar right of symbolSpacing between multiple slots
    Slot OrientationDrawing detailDirection of slot (shown on drawing)

    Slot Length and Width

    The slot dimensions appear on opposite sides of the symbol. Width goes to the left, length goes to the right.

    I’ve seen drawings specify 1/4 inch width and 2 inch length. This creates a slot four times longer than it is wide.

    Unlike plug welds, slot welds require orientation information. The drawing must show whether slots run parallel or perpendicular to the joint.

    Multiple Slot Welds

    Slot welds almost always appear in groups. The pitch dimension indicates spacing between slots in a pattern.

    A common specification might be four slots, 3 inches long, spaced 4 inches apart. This provides distributed strength along a joint.

    Plug Weld vs Slot Weld: Key Differences

    Understanding when each weld type is used helps with symbol interpretation. Let’s compare them directly.

    CharacteristicPlug WeldSlot Weld
    Hole ShapeRound circleElongated rectangle
    Symbol ShapeCircle with crossRectangle with cross
    Primary DimensionDiameter onlyWidth and length
    Common UsePoint connectionsLinear strength distribution
    Strength AreaConcentrated at pointDistributed along slot
    Typical ApplicationAttachment plates, bracketsStiffeners, longer joints

    When to Use Each Type?

    Engineers choose plug welds for concentrated loads. A single point needs maximum strength, and a round hole provides circular stress distribution.

    Slot welds work better for distributed loads. When stress spreads along a line, multiple slots share the load more effectively than isolated plug welds.

    Manufacturing considerations also matter. Round holes drill faster with standard bits. Slots require milling or plasma cutting, adding time and cost.

    How to Read Slot and Plug Weld Symbols?

    Reading these symbols follows a systematic process. I teach my students to work through symbols in a specific order every time.

    Step-by-Step Reading Process

    Quick Reading Method: Start at the reference line and work outward. Identify the weld type first (plug vs slot), then read dimensions left to right, then check above and below for additional specifications.

    1. Locate the reference line – This is your starting point for all symbol information
    2. Identify the symbol shape – Circle with cross equals plug weld, rectangle with cross equals slot weld
    3. Check symbol position – Above line (other side), below line (arrow side), or both sides
    4. Read left of symbol – Diameter for plug welds, width for slot welds
    5. Check inside the symbol – Depth of filling specification (if any)
    6. Read right of symbol – Pitch/spacing for multiple welds, length for slot welds
    7. Look above/below – Countersink angle, finish symbols, or other supplementary info
    8. Check the tail – Process specifications or reference notes

    Common Reading Mistakes

    In my experience teaching CWI candidates, certain mistakes occur repeatedly.

    Confusing arrow side with other side tops the list. Remember: symbol below the line equals arrow side. Symbol above equals other side.

    Missing the depth of filling is another common error. Always check inside the symbol before assuming complete filling.

    Ignoring pitch specifications leads to incorrectly spaced welds. When multiple welds are required, the pitch dimension is crucial.

    Practice Example

    Let’s walk through a typical symbol: A plug weld symbol below the reference line, with 1/2 to the left, 3 to the right, and nothing inside.

    Reading this systematically: Plug weld on arrow side, 1/2 inch diameter hole, 3 inch pitch spacing, fill completely. This means drill 1/2 inch holes in the arrow-side member, space them 3 inches apart, and fill each completely.

    Surface Contour and Finish Symbols

    Some drawings specify the surface appearance of completed plug and slot welds. These supplementary symbols appear above the weld symbol.

    A straight line indicates a flush surface. The weld should be finished smooth with the base metal surface.

    A convex arc means the weld surface should be slightly raised above the base metal.

    A concave arc indicates a slight depression below the base metal surface.

    Finish letters (C for chipping, G for grinding, M for machining) may accompany contour symbols to specify the finishing method.

    Weld All Around and Field Weld Symbols

    Two additional symbols commonly appear with plug and slot welds.

    The weld-all-around symbol is a circle at the elbow where the arrow meets the reference line. For plug and slot welds, this indicates a pattern of welds around a feature.

    The field weld symbol is a small flag at the same location. It indicates the weld should be made at the installation site rather than in the fabrication shop.

    I’ve seen both symbols together on structural drawings. This means a complete plug weld pattern should be installed in the field during erection.

    Practical Applications

    Understanding where these welds appear in real projects helps reinforce symbol knowledge.

    Automotive Industry

    Car manufacturers use plug welds extensively in body construction. When replacing body panels, technicians must replicate factory plug weld patterns. The original engineering drawings specify plug size, spacing, and location using the symbols we’ve covered.

    I’ve helped restoration shops interpret original factory drawings for classic cars. Understanding these symbols meant the difference between correct restoration and structural compromise.

    Structural Steel

    Steel fabricators use slot welds for stiffener plates and connection details. The elongated slots provide distributed strength while allowing for thermal movement.

    Bridge construction often specifies plug welds for attachments where bolt heads would protrude or create corrosion concerns.

    Sheet Metal Fabrication

    Thin gauge applications frequently use plug welds. The small diameter holes provide adequate strength without excessive heat that would warp light material.

    HVAC ductwork and enclosures often employ plug welds for assembly when appearance matters on the exterior surface.

    Standards References

    AWS A2.4 is the primary standard for welding symbols in the United States. This document defines every symbol element and provides complete interpretation rules.

    For structural applications, AWS D1.1 (Structural Welding Code – Steel) references A2.4 symbols and adds specific requirements for plug and slot weld inspection and acceptance criteria.

    International readers should note ISO 2553 as the equivalent standard. The symbols appear similar but some placement conventions differ slightly.

    Inspection Considerations

    When inspecting plug and slot welds, several key factors require verification.

    Hole size must match the drawing specification. A 1/2 inch specified diameter should measure within acceptable tolerance (typically plus 1/8 inch per AWS D1.1).

    Depth of filling requires visual inspection or NDT. Complete filling should show weld metal flush with or slightly above the surface (unless countersunk).

    Spacing between multiple welds must match the pitch dimension. Improper spacing creates stress concentrations and potential failure points.

    For CWI candidates, understanding these acceptance criteria is essential for certification exams and real-world inspection work.

    Frequently Asked Questions

    What is the difference between a plug weld and a slot weld?

    Plug welds use round holes while slot welds use elongated rectangular holes. Plug weld symbols appear as circles with crosses, while slot weld symbols are rectangles with crosses. Plug welds concentrate strength at a single point, while slot welds distribute strength along a line.

    How do I read plug weld dimensions on a drawing?

    Read dimensions in a specific order: hole diameter appears to the left of the symbol, depth of filling (if specified) appears inside the symbol, and pitch (spacing for multiple welds) appears to the right. Countersink angle appears above the symbol when required.

    What does the arrow side mean on welding symbols?

    The arrow side refers to the member that the arrow points to on the drawing. When the plug or slot weld symbol appears below the reference line, the weld goes on the arrow side. When above the line, it goes on the opposite side. This determines which piece gets the hole.

    What is pitch in plug weld symbols?

    Pitch is the center-to-center distance between multiple plug or slot welds. This dimension appears to the right of the weld symbol and tells the welder how far apart to space the holes. For example, a pitch of 3 inches means hole centers are 3 inches apart.

    What does depth of filling mean on plug weld symbols?

    Depth of filling indicates how deep to fill the hole with weld metal. A number inside the plug weld symbol specifies the depth. When no number appears, the default is to fill the hole completely. Partial filling is specified for applications requiring less than full penetration.

    When should I use a plug weld vs a slot weld?

    Use plug welds for concentrated point loads and quick manufacturing with standard drill bits. Slot welds work better for distributed loads along a line and when linear strength is needed. Plug welds are more common in automotive and sheet metal work, while slot welds appear frequently in structural steel applications.

    What is a countersink angle on welding symbols?

    Countersink angle specifies the chamfer on the hole entrance, typically for flush surface requirements. Common angles are 60, 75, or 90 degrees. This dimension appears above the plug or slot weld symbol when a countersunk hole is required for the weld.

    What AWS standard covers plug and slot weld symbols?

    AWS A2.4 (Standard Symbols for Welding, Brazing, and Nondestructive Examination) defines all welding symbols including plug and slot welds. AWS D1.1 (Structural Welding Code – Steel) references these symbols and provides acceptance criteria for structural applications.

    Mastering slot and plug weld symbols takes practice. The key is understanding the systematic approach: identify the weld type first, then read dimensions in order, then check supplementary information. With this foundation, you can interpret any plug or slot weld symbol you encounter on blueprints and technical drawings.

  • Soldering Guide for Beginners: Complete How-To Tutorial 2026

    Soldering Guide for Beginners: Complete How-To Tutorial 2026

    Soldering is one of those skills that seems intimidating until you actually try it. I remember staring at my first circuit board, wondering how molten metal was supposed to create reliable electrical connections. After burning through a few components and learning some painful lessons, I discovered that soldering is more about patience and technique than any natural talent.

    What is soldering? Soldering is a fundamental electronics skill that joins metal components using melted solder wire to create permanent electrical connections. The solder flows between heated metal surfaces and forms a conductive bond as it cools, creating both electrical and mechanical connections without melting the base metals.

    Soldering: A process that joins metal surfaces using a filler metal (solder) that melts below 840F (450C). The solder flows between heated metal surfaces and forms a conductive bond as it cools, creating both electrical and mechanical connections without melting the base metals.

    Whether you are repairing electronics, building DIY projects, or just curious about how everything gets connected, understanding soldering opens up a whole world of possibilities. The beauty of soldering lies in its versatility. You can use it to repair broken headphone cables, assemble custom circuit boards, create jewelry, or even plumb copper pipes. I have used soldering to fix everything from children’s toys to automotive wiring harnesses.

    Once you understand the fundamentals, you will start seeing opportunities to use this skill everywhere. The key is starting with the right tools and understanding that your first few joints will not be perfect and that is completely normal. After working with hundreds of students, I have found that the people who succeed are not the ones with natural talent but the ones who accept that learning takes time.

    Soldering vs Welding vs Brazing: What’s the Difference?

    Soldering is often confused with welding and brazing, but these processes have distinct differences that matter for your projects. Understanding these distinctions helps you choose the right joining method for your specific application.

    Process Temperature Base Metal Melted? Best For
    Soldering Below 840F (450C) No Electronics, circuits, delicate work
    Brazing Above 840F (450C) No Pipes, thicker metal, HVAC
    Welding Very high (2800F+) Yes Structural joints, heavy fabrication

    Soldering uses filler metal below 840F and does not melt the base metals. This makes it ideal for electronics where you cannot risk damaging sensitive components. Brazing uses higher temperatures and stronger filler metals but still does not melt the base materials. Welding actually melts and fuses the base metals together, creating the strongest joint but requiring much more heat and equipment.

    For electronics and electrical work, soldering is your go-to method. It creates reliable electrical connections without damaging components. I have seen people try to weld small electronic parts, which inevitably destroys them. Choosing the right process for your project prevents frustration and wasted materials.

    Essential Soldering Tools and Equipment

    Getting started with soldering does not require a massive investment, but having the right tools makes a significant difference. When I first began, I made the mistake of buying the cheapest iron I could find. It took me twice as long to complete simple joints, and the results were inconsistent.

    After upgrading to proper equipment, I realized how much easier soldering could be. Let me break down what you actually need versus what is nice to have. This comes from years of experience and watching countless beginners struggle with inadequate tools.

    Soldering Iron vs Soldering Station

    Your soldering iron is the heart of your setup. For beginners, I recommend starting with a 30-40 watt iron or a basic temperature-controlled station. Simple pencil irons cost around $15-25 and work fine for basic electronics work.

    However, investing $40-80 in a temperature-controlled station will give you consistent heat and better results. I used a basic $20 iron for my first year and managed just fine, but upgrading to a $60 station dramatically improved my work quality. The difference was night and day.

    Type Price Range Best For Pros Cons
    Basic Pencil Iron $15-40 Occasional use, beginners Simple, portable, cheap No temp control, slow recovery
    Temp-Controlled Station $50-150 Regular electronics work Consistent heat, interchangeable tips Less portable, more expensive
    Professional Station $150-400 Daily use, precision work Fast heat recovery, precise control Overkill for hobbyists, pricey

    A soldering station separates the power supply and temperature control from the iron itself. This gives you digital temperature readout, faster heat recovery, and often interchangeable tips. For anyone planning to do more than a few projects, the station is worth the extra cost. I wish I had started with one instead of learning the hard way.

    Solder Wire Selection

    For electronics work, you want rosin-core solder wire. This is solder with flux built into the center, which cleans the metal surfaces as you solder. The most common diameter for beginners is 0.8mm (about 1/32 inch) because it is easy to control.

    Thinner solder (0.5mm) gives you more precision for small components, while thicker (1.2mm) works better for larger connections like wire splices. I keep multiple diameters on hand for different tasks, but if you are starting out, 0.8mm is your best all-around choice.

    Quick Solder Selection Guide: For most electronics projects in 2026, start with 60/40 or 63/37 rosin-core solder in 0.8mm diameter. These alloys have a lower melting point and flow easily. Lead-free solder requires higher temperatures and is slightly more difficult to work with, so beginners should avoid it initially.

    Must-Have Accessories

    Beyond the iron and solder, a few accessories will make your life much easier. A soldering stand holds your hot iron safely when not in use. Never rest a hot iron directly on your workbench. I once melted a nice gouge into a desk this way.

    A damp sponge or brass wool helps keep your tip clean. I prefer brass wool because it does not lower the tip temperature like a wet sponge does. Helping hands (weighted clips on adjustable arms) hold components steady while you work. I resisted buying helping hands for months, and once I finally did, I wondered how I managed without them.

    For safety, you need proper ventilation. Soldering fumes are not healthy to breathe, so work near an open window or use a small fan. Safety glasses protect your eyes from flicked solder. A pair of needle-nose pliers and wire cutters round out the basic kit. Expect to spend $50-100 total for a decent starter setup if you shop wisely.

    Nice-to-Have Upgrades

    As you progress, several tools make soldering easier. A fume extractor actively removes solder fumes from your workspace. A digital multimeter helps test your connections. A hot air gun is useful for surface mount work and heat-shrink tubing.

    Tip cleaners replace the traditional sponge and work better. Third-hand tools with magnifying glasses help with small components. These are not essential when starting, but I have acquired most of them over the years and each earns its keep.

    Understanding Solder and Flux

    Not all solder is created equal. The type of solder you choose affects everything from melting temperature to joint strength to environmental impact. Understanding these differences helps you select the right material for your specific application.

    Lead-Based vs Lead-Free Solder

    Traditional electronics solder is an alloy of tin and lead, most commonly 60% tin and 40% lead (60/40) or 63% tin and 37% lead (63/37). The 63/37 alloy is eutectic, meaning it transitions directly from liquid to solid without a pasty state. This creates excellent joints and is why many experienced solderers prefer it.

    Lead-based solder melts at around 361F (183C) and flows easily. For beginners learning on hobby projects, I recommend starting with lead-based solder for easier technique. You can transition to lead-free as your skills improve.

    Lead-free solder, typically tin-silver-copper alloys, has become standard in commercial electronics due to RoHS regulations. However, it melts at higher temperatures (around 422F or 217C) and is more difficult to work with. Joints often appear duller than leaded solder joints, which is normal and does not indicate a problem.

    The Role of Flux

    Flux: A chemical cleaning agent that removes oxidation from metal surfaces during soldering. Flux promotes wetting (the ability of solder to spread and bond) and prevents re-oxidation. Rosin flux is most common for electronics, while acid flux is used for plumbing (never for electronics as it causes corrosion).

    Flux is the secret weapon that many beginners do not know about. It cleans the metal surfaces as you solder, removing oxidation and allowing the solder to flow properly. Without flux, solder balls up and refuses to stick.

    Rosin-core solder contains flux internally, which is why it works so well for electronics. The flux releases as the solder melts, cleaning the joint automatically. For difficult joints or previously soldered connections, adding additional flux makes a huge difference. I keep flux pen in my toolkit for stubborn connections.

    Temperature Guidelines by Solder Type

    Setting the right temperature prevents problems. Too cold and the solder will not flow properly. Too hot and you risk damaging components or lifting pads from the circuit board. Here is a quick reference guide based on years of experience.

    Solder Type Melting Point Iron Temperature Best For
    60/40 Tin-Lead 361-374F (183-190C) 600-650F (315-345C) General electronics, beginners
    63/37 Tin-Lead 361F (183C) 600-650F (315-345C) Precision work, professional results
    96.5/3.0/0.5 (SAC305) 422F (217C) 700-750F (370-400C) RoHS compliance, commercial products
    Silver-Bearing 430-445F (221-229C) 700-750F (370-400C) High-strength joints, audio applications

    Start at 650F for lead solder and 700F for lead-free. Adjust based on how quickly the solder flows onto the joint. If it takes more than 3-4 seconds to flow, increase temperature by 25 degrees. If the solder flows too quickly or you see smoke, decrease temperature.

    How to Solder: Step-by-Step Guide?

    Learning to solder is like learning to ride a bike. Reading about it helps, but you really need to feel it. After teaching dozens of friends and family members, I have found that breaking the process into clear steps prevents most common mistakes.

    Follow this sequence and you will be making solid connections in no time. This is the exact method I teach in my workshops, refined over years of helping beginners succeed.

    Step 1: Prepare Your Workspace

    Clear, clean, and organize. Soldering requires attention, so set up in a well-lit area away from flammable materials. I once accidentally melted a plastic bag that was too close to my iron. Gather everything you need before you start: your soldering iron, solder, components, and any tools.

    Plug in your iron and let it heat up fully. Most basic irons take 3-5 minutes to reach operating temperature. Temperature-controlled stations often have an indicator light when ready. Do not rush this step. A cold iron creates cold joints.

    Step 2: Clean and Tin Your Tip

    Clean your soldering tip before the first use. Wipe it on a damp sponge or brass wool to remove any manufacturing residue. Then tin the tip by applying a small amount of solder. This coating protects the tip from oxidation and improves heat transfer.

    A clean, tinned tip is the secret to good soldering. I have learned that when soldering becomes difficult, the first thing to check is tip cleanliness. If solder does not flow onto your tip easily, clean it and re-tin before proceeding.

    Step 3: Prepare the Components

    Both surfaces to be joined must be clean and free of oxidation. If you are soldering wires, strip about 1/4 inch of insulation and twist the strands tightly. For circuit boards, ensure the pads are clean and free of old solder.

    If working with previously soldered connections, you may need to remove old solder first using desoldering tools. Insert component leads through the correct holes in your circuit board. Bend the leads slightly on the bottom side to hold the component in place.

    For wire-to-wire connections, twist the wires together before soldering. This mechanical connection ensures the joint will not fail even if the solder cracks. I have repaired many failed joints where the wires were simply soldered without being twisted first.

    Step 4: Heat the Joint

    This is where most beginners struggle. Touch the tip of your soldering iron to both the component lead AND the circuit board pad simultaneously. The key is heating both surfaces, not just one. Count to 2-3 seconds to let the joint heat through.

    Position the iron at a 45-degree angle to the joint for best contact. Avoid touching the solder directly to the iron tip. The solder should melt from the heat of the joint, not from direct contact with the iron. This ensures the solder flows properly and creates a good bond.

    When I first started, I made the mistake of melting solder on the tip and dabbing it onto the joint. This creates weak connections that fail over time. Remember: heat the joint, not the solder.

    The Golden Rule of Soldering: Two seconds is the maximum time with heat applied to a joint. If you are heating for more than 2 seconds, adjust your technique. Clean the surfaces, swap tips, add flux, or improve your heat transfer method. Prolonged heating damages components and can lift pads from the board.

    Step 5: Apply the Solder

    Once the joint is properly heated (usually 2-4 seconds with a properly sized iron), touch the solder wire to the joint opposite the iron. The solder should melt and flow around the component lead and onto the pad. Feed about 1/8 to 1/4 inch of solder for a typical through-hole component.

    The solder should wick up the lead and spread evenly across the pad. The goal is a concave, shiny joint that completely covers the pad and wets the component lead. It should look like a small volcano or Hershey’s kiss.

    If the solder forms a ball or sits on top without spreading, the joint was not properly cleaned or heated. Remove the solder first, then remove the iron. Total heating time should not exceed 5 seconds to avoid damaging the component or circuit board.

    Step 6: Inspect and Clean

    A good solder joint has specific characteristics you can learn to recognize. It should be shiny, not dull or grainy. The shape should be concave, not rounded or bulging. The solder should completely cover the pad and wet the component lead.

    There should be no gaps, holes, or spikes. Learning to identify a good joint takes practice, so do not be discouraged if your first attempts look imperfect. My first joints were ugly, but they improved with practice.

    Let the joint cool naturally without blowing on it. Moving the component while the solder is cooling creates a disturbed joint that may fail. After cooling, you can clip off excess component lead with wire cutters. Clean the area with isopropyl alcohol if desired to remove flux residue.

    Good vs. Bad Solder Joints

    Joint Type Appearance Problem Fix
    Good Joint Shiny, concave, smooth None Perfect!
    Cold Joint Dull, grainy, lumpy Insufficient heat or movement Reheat with fresh solder
    Solder Bridge Solder connecting two leads Too much solder applied Remove with solder wick
    Insufficient Pad not fully covered Not enough solder Add more solder

    Soldering Techniques for Different Components

    Different types of connections require slightly different techniques. Through-hole components are the easiest and best for learning. Wires require preparation for reliable connections. Terminals and large pads need more heat and solder.

    Through-Hole Components

    Through-hole soldering is the best starting point for beginners. The component leads go through holes in the circuit board, making positioning easy. Heat the pad where the lead exits the board while also touching the lead itself.

    Apply solder until it flows up through the hole and creates a small mound on top. You should see the solder wick up the lead from both sides. This creates a strong mechanical and electrical connection. Avoid soldering on the top side of the board unless specifically required.

    Wire Connections

    Soldering wires together requires proper preparation first. Strip about 1/4 inch of insulation from each wire. Twist the strands tightly to prevent fraying. Then twist the two wires together mechanically before applying any solder.

    This mechanical connection means the joint will hold even if the solder fails. Apply heat to the wires, then feed solder into the joint until it flows into the twists. Let cool without moving, then insulate with heat-shrink tubing or electrical tape. Never rely on solder alone for wire connections.

    Terminals and Large Pads

    Large copper pads and terminals require more heat and solder than small circuit board pads. These might include ground planes, battery terminals, or mounting points. Pre-tinning both surfaces helps with these difficult joints.

    Apply a small amount of solder to each surface first, then reheat both while bringing them together. This technique, called sweated soldering, ensures good heat transfer and proper flow. Large areas may require a higher wattage iron or longer heating time.

    How to Desolder: Fixing Mistakes?

    Mistakes happen. Components fail. Circuits need modification. This is where desoldering comes in. Learning to remove solder properly is just as important as learning to apply it. I have saved countless circuit boards by carefully removing and replacing components rather than scrapping the entire assembly.

    Desoldering Tools

    The two primary desoldering tools are the solder sucker (desoldering pump) and solder wick (braid). A solder sucker is a spring-loaded vacuum pump that sucks molten solder away when triggered. Solder wick is braided copper that absorbs solder through capillary action when heated.

    For most hobby work, having both tools gives you flexibility. A solder sucker works well for removing large amounts of solder from through-hole joints, while wick excels at fine cleanup work and surface mount components. I keep both in my toolkit and use them regularly.

    Using a Solder Sucker

    To use a solder sucker, first cock the spring by pressing the plunger down until it locks. Heat the joint with your iron until the solder melts. Quickly position the solder sucker tip over the molten solder and trigger the vacuum.

    The solder gets sucked into the pump. Repeat until most solder is removed. For stubborn joints, add fresh solder first to help loosen the old solder, then attempt removal again. This trick works surprisingly well.

    Using Solder Wick

    To use solder wick, place the wick over the solder joint. Heat through the wick with your iron. The molten solder will be drawn up into the braid through capillary action.

    Cut off the saturated portion and repeat with fresh wick until the joint is clear. Solder wick leaves surfaces very clean, which is why I prefer it for delicate work. However, it is slower and consumes more material than a solder sucker.

    Soldering Safety Precautions

    Soldering is relatively safe when done properly, but it does involve hot equipment and materials that require respect. Understanding safety precautions helps you avoid problems before they occur. After years of soldering, I have learned that prevention is much easier than repair.

    Burn Prevention

    Heat is the most obvious hazard. Your soldering iron operates at 600-700F, hot enough to cause serious burns instantly. Always assume the iron is hot, even if it is plugged in but not glowing.

    Use a proper stand to hold the iron when not in use. Never leave a hot iron unattended. I keep a small fire extinguisher nearby when soldering, just in case. Work on a non-flammable surface and keep flammable materials away from your work area.

    Fume and Ventilation

    Fumes are a less visible but equally important concern. Rosin flux releases fumes when heated that can irritate eyes, lungs, and skin. Lead solder poses additional risks if ingested or inhaled as dust.

    Always work in a well-ventilated area. A small desk fan blowing fumes away from your face helps significantly. For regular soldering, consider a fume extractor or at minimum work near an open window. I once soldered for hours in a closed room and felt the effects in my throat and lungs the next day.

    Lead Safety

    If you use lead-based solder, you need to take additional precautions. Wash hands thoroughly after soldering, especially before eating. Never place solder in your mouth. Keep food and drinks away from your soldering area.

    Pregnant women should avoid soldering with lead-based solder due to potential health risks to the developing fetus. Children should not handle lead solder without supervision. Dispose of lead-containing waste properly according to local regulations.

    Eye Protection

    Solder can flick and splatter when heated. Eye protection prevents solder from flicking into your eyes. Safety glasses are inexpensive insurance. I have had solder flick toward my face more times than I can count, and I am glad I was wearing protection each time.

    Common Soldering Problems and Solutions

    Even experienced solderers encounter problems. Knowing how to identify and fix common issues saves time and frustration. These are the problems I see most often when helping beginners.

    Cold Joint: A solder joint that did not properly bond due to insufficient heat, dirty surfaces, or movement during cooling. Cold joints appear dull, grainy, or lumpy instead of shiny and smooth. They are electrically unreliable and may fail over time. The fix is to reheat the joint and add fresh solder while being careful not to move the component.

    Solder Not Sticking

    Solder not sticking is usually a cleanliness issue. Clean the surfaces with isopropyl alcohol and ensure the tip is properly tinned. Oxidation prevents proper wetting. If the solder balls up instead of spreading, the joint is not hot enough or the surfaces are contaminated.

    Try adding additional flux to the joint. This often solves the problem immediately. I have fixed many stubborn joints simply by adding flux and reheating.

    Solder Bridges

    Solder bridges occur when excess solder connects two adjacent leads or pads. This creates electrical shorts. Remove bridges using solder wick or carefully drag the hot iron tip between the connections to draw away excess solder.

    For fine pitch work, flux helps solder flow only where you want it. Apply flux before soldering to prevent bridges from forming in the first place.

    Overheating Damage

    Overheating components can damage them. Most semiconductors should not be heated for more than 5 seconds. If a component is heat-sensitive, use a heat sink (a small alligator clip) on the lead between the joint and the component body to draw heat away.

    I once destroyed an expensive IC by being too slow with my iron. Now I use heat sinks on sensitive components as a matter of habit. They cost pennies and save dollars.

    Lifted Pads

    Lifted pads happen when the copper pad on a circuit board separates from the board material. This is usually caused by excessive heat or mechanical stress. Once a pad lifts, the connection point is compromised.

    Sometimes you can repair by running a small wire to an alternate connection point, but prevention is far better. Avoid excessive heat and do not pry on components while desoldering.

    Tip Maintenance

    A well-maintained tip lasts longer and performs better. Clean your tip frequently by wiping on a damp sponge or brass wool. Tinning the tip after cleaning prevents oxidation.

    Never file or sand your tip, as this removes the protective iron plating and exposes the copper underneath, which will erode quickly. When finished soldering for the day, wipe the tip clean and apply a fresh coat of solder before turning off the iron. This protective coating prevents oxidation during storage.

    Beginner Practice Projects

    The best way to learn soldering is through practice. Start with simple projects and work your way up. Practice on scrap circuit boards or inexpensive soldering practice kits before working on anything important.

    A beginner electronics kit costs $15-30 and provides dozens of soldering joints to practice on. I recommend completing one full kit before attempting any repairs on valuable equipment. These kits typically include a circuit board, components, and instructions to build a simple device like a blinking LED or small amplifier.

    Other good practice projects include soldering wire-to-wire connections, replacing components on broken electronics, or building simple circuits from schematic diagrams. Each project teaches different skills and builds your confidence.

    Conclusion: Start Soldering Today

    Remember that everyone struggles at first. My first solder joints were ugly blobs, and I desoldered more connections than I successfully completed. But with patience and practice, soldering becomes second nature.

    The skills you develop will serve you for a lifetime, opening doors to electronics repair, DIY projects, and creative endeavors that would otherwise be impossible. Soldering is more than just a technical skill. It is a gateway to understanding how our electronic world works.

    Once you can create reliable connections yourself, you stop seeing electronics as mysterious black boxes and start seeing them as collections of components you can modify, repair, and create. That empowerment is worth the effort of learning proper technique.

    Gather your tools, set up a safe workspace, and start with your first project. The electronics community is welcoming to beginners, and there are countless resources available to help you learn. Your soldering journey in 2026 starts now.

    Frequently Asked Questions

    What is the golden rule of soldering?

    The golden rule of soldering is: two seconds is the maximum time with heat applied to a joint. If you are heating for more than 2 seconds, adjust your technique. Clean the surfaces, swap tips, add flux, or improve your heat transfer method. Prolonged heating damages components and can lift pads from the board.

    How do you solder properly?

    To solder properly: 1) Clean surfaces with isopropyl alcohol, 2) Tin your soldering iron tip, 3) Heat both the pad and component lead for 1-2 seconds, 4) Apply solder to the joint (not the iron), 5) Remove solder wire first, then the iron, 6) Hold steady for 2-3 seconds to cool, 7) Inspect the joint for a shiny volcano shape.

    What is the correct solder temperature?

    For electronics soldering with lead-based solder, set your iron to 600-650F (315-345C). Lead-free solder requires higher temperatures around 700-750F (370-400C). Start at 650F and adjust based on joint performance. Higher temperatures speed up work but increase risk of damage.

    What is the most common mistake in soldering?

    The most common soldering mistakes are: not cleaning surfaces before soldering, using the wrong flux or solder, overheating the joint, applying solder to the iron instead of the joint, not protecting surrounding components, and neglecting to clean up flux residue. Clean surfaces, proper heat, and correct technique prevent most problems.

    What is the trick to soldering?

    The key trick to soldering is that solder flows toward heat. Hold the iron on both the pad and component lead for 1-2 seconds, then feed solder into the joint (not the iron). The solder will melt and flow onto the heated surfaces automatically. This simple insight transforms your technique.

    What is the number one rule of soldering?

    The number one rule of soldering: always make sure the area you wish to solder is clean, dry, and free from grease. Clean metal surfaces with isopropyl alcohol or a specialized cleaner before soldering for proper adhesion. Without clean surfaces, solder will not bond properly regardless of your technique.

    Is soldering dangerous?

    Soldering involves hot equipment (600-700F) that can cause burns if mishandled. Soldering fumes can irritate eyes and lungs, especially rosin flux. Lead solder poses health risks if ingested or inhaled as dust. Proper ventilation, eye protection, safety glasses, and hand washing mitigate these risks significantly.

    What is soldering vs welding?

    Soldering uses filler metal (solder) that melts below 840F to join metals without melting the base metals. Welding melts the base metals themselves to fuse them together. Soldering creates electrical connections, while welding creates structural bonds. Soldering works for delicate electronics, welding for heavy structural applications.

  • Silver Brazing: Complete Guide to Strong Metal Joints

    Silver Brazing: Complete Guide to Strong Metal Joints

    Silver brazing creates joints that are five times stronger than soldering while operating at temperatures that won’t damage most base metals. I’ve used this process in HVAC repair and jewelry making, and the difference in joint strength is remarkable compared to soft soldering.

    Silver brazing is a metal joining process that uses a silver-based filler metal with a melting point between 1145-1650F (618-899C) to create strong, leak-proof joints through capillary action. Unlike welding, it doesn’t melt the base metals, making it ideal for joining dissimilar materials like copper to steel.

    After spending 15 years in metalworking, I’ve seen silver brazing outperform soldering in critical applications like refrigeration systems where joint failure isn’t an option. The process delivers shear strength that typically exceeds soldered joints by a factor of five.

    Silver Brazing vs Soldering vs Welding

    The main difference lies in temperature and strength. Soldering operates below 840F (450C), silver brazing runs 1145-1650F (618-899C), and welding melts the base metal entirely. I’ve worked with all three methods, and each has its place.

    Silver brazing occupies the middle ground, offering strength close to welding without the heat distortion that welding can cause. The joint strength advantage is significant; brazed joints typically handle five times the shear load of soldered connections.

    CharacteristicSilver BrazingSolderingWelding
    Temperature Range1145-1650F (618-899C)Below 840F (450C)2200F+ (1200C+)
    Joint Strength70,000+ psi shear5,000-15,000 psi shearBase metal strength
    Base Metal EffectNo meltingNo meltingMelts and fuses
    Heat DistortionMinimalVery lowSignificant
    Dissimilar MetalsExcellentGoodDifficult

    Quick Summary: Choose silver brazing when you need strength approaching weld quality but can’t risk heat damage to your parts. It costs more than soldering but delivers five times the joint strength and handles pressure applications that soldering cannot.

    How Silver Brazing Works?

    The magic of silver brazing lies in capillary action. When you heat properly assembled parts with a small gap between them, the molten filler metal flows into that joint space without being poured or pushed. I’ve watched it happen countless times, and it still impresses me how the silver alloy finds its way into every microscopic surface irregularity.

    Capillary Action: The ability of a liquid to flow into narrow spaces without external forces. In silver brazing, this allows filler metal to penetrate joint gaps as small as 0.002 inches, creating complete coverage.

    The process requires three things working together: proper joint clearance, clean surfaces, and flux. Joint clearance typically needs to be 0.002-0.005 inches for optimal capillary flow. Too tight and the filler can’t enter; too loose and capillary action fails.

    Flux plays a critical role by cleaning the metal surfaces during heating and preventing oxidation. Without flux, the filler metal would ball up instead of flowing into the joint. I learned this the hard way on my first attempt, resulting in a weak, incomplete bond.

    As the assembly heats, the flux first becomes liquid and clear, then turns dark as it reaches working temperature. This color change tells experienced brazers when to apply the filler metal. The silver alloy melts at a specific temperature below the melting point of the base metals, flowing into the joint and forming a metallurgical bond as it cools.

    Silver Brazing Materials and Equipment

    Silver Alloy Percentages

    Silver brazing alloys come in different silver content percentages, each with specific characteristics. The percentage affects melting point, flow characteristics, and cost. Higher silver content generally means lower melting temperature and better flow, but at significantly higher cost.

    Silver ContentMelting RangeBest ForCost Level
    15% (Phos-Copper)1190-1490FCopper to copperLow
    30% Silver1250-1550FGeneral purposeMedium
    45% Silver1145-1340FHVAC, refrigerationHigh
    56% Silver1145-1205FCritical joints, stainlessVery High

    In my experience, 45% silver alloy hits the sweet spot for most HVAC work. It flows well and provides excellent strength without the extreme cost of 56% alloy. For jewelry work where appearance matters, 56% gives the cleanest joints with minimal discoloration.

    Flux Types

    White flux is the most common choice for general silver brazing. It’s preferred because you can see your work through the transparent flux as you heat. White brazing flux combines potassium salts of boron and fluorine to clean and protect the joint area.

    Black flux contains additional compounds for high-temperature applications and stainless steel. It provides better oxidation protection at the cost of visibility. I use black flux exclusively when working with stainless steel or when brazing in environments with higher oxygen content.

    Heat Sources

    An oxyacetylene torch delivers the best control and heat output for most silver brazing applications. The adjustable flame lets you bring large parts to temperature evenly while concentrating heat where needed. For small parts and jewelry, a propane torch can work but has limitations.

    Can you silver braze with a propane torch? Yes, but only for materials up to about 7mm thick. Beyond that, the heat sink effect of the base metal dissipates heat faster than propane can replace it. I’ve tried using propane on 1/2-inch copper tubing and ended up with a weak joint because I couldn’t maintain proper temperature throughout the joint area.

    MAPP gas burns hotter than propane and offers a middle ground for light to medium work. For serious production brazing or thick materials, oxyacetylene remains the professional choice.

    Material Compatibility Guide

    Not all metals respond equally well to silver brazing. Some combinations work beautifully, while others require special filler metals or fluxes. Here’s what I’ve learned from years of trial and error.

    Base MetalCan Be Silver Brazed?Notes
    CopperExcellentMost common application, works with all silver alloys
    BrassExcellentWatch for zinc depletion at high temps
    Steel (Carbon)Very GoodClean surface thoroughly, use appropriate flux
    Stainless SteelGoodRequires black flux or special high-silver alloys
    AluminumNoRequires specialized aluminum brazing materials
    Cast IronDifficultPossible with special preparation, not recommended

    Joining dissimilar metals like copper to steel is where silver brazing really shines. The process bonds different materials without compromising either base metal. This capability makes it invaluable for HVAC repairs, refrigeration systems, and automotive applications.

    Step-by-Step Silver Brazing Process

    Follow these steps for successful silver brazing. I’ve refined this process through hundreds of joints, and skipping any step typically leads to failure.

    1. Clean the surfaces thoroughly. Remove all oil, grease, and oxidation using sandpaper, a wire brush, or chemical cleaner. I’ve seen more joints fail from inadequate cleaning than from any other cause. The metal should be bright and shiny before proceeding.
    2. Apply flux to the joint area. Coat both surfaces with a thin layer of appropriate flux. The flux should cover the area where filler metal will flow plus a small margin. Too much flux can cause problems, but too little won’t protect the joint.
    3. Assemble the parts with proper clearance. Position the pieces so they maintain the 0.002-0.005 inch gap needed for capillary action. If you’re brazing a tube into a fitting, slip-fit them without forcing. The natural fit usually provides the right clearance.
    4. Heat the assembly evenly. Apply heat broadly around the joint area, not just at one spot. Move the torch in a circular motion to bring both parts to temperature simultaneously. Uneven heating causes the filler to flow toward the hotter side, leaving gaps.
    5. Watch for flux color change. As the temperature rises, the flux will become clear and liquid, then darken slightly. This darkening indicates you’re approaching brazing temperature. The metal may show a dull red color in dim light.
    6. Apply the filler metal. Touch the silver brazing rod to the joint edge, not in the flame. If the temperature is correct, the filler will melt and flow into the joint by capillary action. Don’t melt the rod with the torch flame; let the joint heat do the work.
    7. Allow to cool slowly. Don’t quench the joint or move the parts while the filler is solidifying. Rapid cooling can crack the joint or cause residual stress. I usually let parts air cool until they’re safe to touch.
    8. Clean the finished joint. Remove flux residue with warm water or a dedicated flux remover. Leftover flux can cause corrosion over time. Inspect the joint for complete filler penetration all around.

    Silver Brazing Applications

    The versatility of silver brazing makes it valuable across many industries. Different applications require different techniques and materials, but the fundamental process remains the same.

    HVAC and Refrigeration

    HVAC technicians rely on silver brazing for refrigerant line connections. The leak-proof joints and ability to withstand pressure make it ideal for air conditioning and refrigeration systems. Most HVAC work uses 45% silver alloy for its balance of strength and flow characteristics.

    In refrigeration work, I’ve learned that nitrogen purging during brazing prevents internal oxidation. This step is critical for systems that will see compressor operation; any oxide flakes inside the line can destroy a compressor.

    Jewelry Making

    Jewelers use silver brazing, often called soldering in the trade, to join precious metals. The lower temperatures compared to welding prevent fire scale and gem damage. Jewelry applications typically use 56% silver alloy for the cleanest joints and lowest working temperature.

    The appearance requirements in jewelry are much stricter than industrial applications. Any visible joint line or discoloration ruins the piece. This is where proper flux selection and heat control really matter.

    Automotive and Plumbing

    Automotive repair technicians use silver brazing for transmission and radiator repairs where welding would damage sensitive components. The ability to join dissimilar metals makes it useful for mixed-material assemblies.

    In plumbing, silver brazing creates joints that handle higher pressure and temperature than soft solder. While more expensive, it’s the right choice for hot water systems and pressurized applications.

    Industrial Manufacturing

    Production brazing joins components in everything from electrical contacts to cutting tools. The consistency and strength of brazed joints make them suitable for automated production environments. Induction heating and furnace brazing allow high-volume manufacturing with precise control.

    Troubleshooting Common Silver Brazing Problems

    Even experienced brazers encounter problems. Understanding what went wrong helps prevent the same issue next time. Here are the most common problems I’ve seen and their solutions.

    Weak Joints

    Weak joints usually result from incomplete filler penetration or poor surface preparation. If the filler metal didn’t flow completely around the joint, you’ll have a partial bond with significantly reduced strength. This often happens when the parts aren’t heated evenly or when the joint clearance is too small.

    Solution: Clean surfaces more thoroughly, check joint fit before brazing, and ensure even heating. The filler should be visible at the entire joint perimeter after cooling.

    Leaking Joints

    Leaks occur when the filler metal doesn’t completely fill the joint space. In HVAC work, this is a critical failure that requires redoing the joint. Common causes include moving the parts during cooling, insufficient flux, or improper heat application.

    Solution: Don’t disturb the assembly while cooling, use adequate flux, and apply heat until the filler flows freely around the entire joint. For refrigeration work, pressure-test with nitrogen before charging the system.

    Poor Filler Flow

    If the filler metal balls up instead of flowing into the joint, something is preventing capillary action. This might be contamination, insufficient flux, or improper joint clearance. I’ve also seen this happen when the base metal isn’t brought to temperature evenly.

    Solution: Clean surfaces again, check that flux covers the entire joint area, and verify joint clearance. Heat more evenly and ensure both parts reach brazing temperature before applying filler.

    Joint Discoloration

    Excessive oxidation or overheating causes discoloration that’s unacceptable for visible applications. While this doesn’t necessarily affect strength, it ruins appearance-critical work. Overheating can also damage the base metal properties.

    Solution: Use sufficient flux, reduce heat input, and work quickly once brazing temperature is reached. For stainless steel, switch to black flux formulated for high-temperature applications.

    Filler Doesn’t Melt

    If the brazing rod won’t melt even with direct heat, you’re either using the wrong alloy or not reaching proper temperature. Some high-silver alloys have very narrow melting ranges that require precise temperature control.

    Solution: Verify you’re using the correct alloy for your application and increase heat output. An oxyacetylene torch may be necessary if propane isn’t getting the job done.

    Safety Considerations

    Silver brazing involves high temperatures, open flames, and potentially hazardous materials. Proper safety precautions are non-negotiable. I’ve seen too many injuries from complacency around hot metal and gas equipment.

    Cadmium Awareness

    Some older silver brazing alloys contain cadmium, which produces highly toxic fumes when heated. Cadmium oxide fumes can cause serious respiratory problems and long-term health effects. Always know what’s in your filler metal and work in well-ventilated areas.

    Modern cadmium-free alternatives are widely available and just as effective for most applications. There’s no good reason to use cadmium-containing alloys anymore, especially for DIY work where ventilation might be inadequate.

    Ventilation Requirements

    All brazing produces fumes that shouldn’t be inhaled. Work in a well-ventilated area or use local exhaust ventilation to capture fumes at the source. I’ve set up a small fan near my workbench that pulls fumes away from my breathing zone.

    For confined space work, portable ventilation equipment is essential. Never braze in an enclosed area without proper air movement. The fumes accumulate quickly and can displace oxygen.

    Protective Equipment

    Safety glasses are mandatory. Molten metal can spit unexpectedly, and a single particle in your eye can cause permanent damage. I also wear leather gloves when handling hot parts and a face shield for larger work.

    Flame-resistant clothing prevents burns from accidental contact. Synthetic fabrics can melt into skin when exposed to high heat. Cotton or wool materials are much safer choices for brazing work.

    Gas Safety

    Proper gas handling prevents explosions and fires. Check all connections for leaks using soapy water before lighting your torch. Never use oil or grease on oxygen fittings; oxygen and oil can ignite spontaneously under pressure.

    Store gas cylinders securely and keep them away from heat sources. A falling cylinder can break the valve, turning the cylinder into a dangerous projectile. I keep my cylinders chained to the wall at all times.

    Frequently Asked Questions

    What is the difference between silver soldering and silver brazing?

    The terms are often used interchangeably. Technically, silver soldering refers to lower temperature processes (below 840F), while silver brazing operates at 1145-1650F. However, in practice, many people call silver brazing “silver soldering” or “hard soldering.” The key distinction from soft soldering is the much higher temperature and resulting joint strength.

    What temperature is needed for silver brazing?

    Silver brazing requires temperatures between 1145-1650F (618-899C), depending on the specific alloy used. Lower silver content alloys (15-30%) melt at higher temperatures, while high-silver alloys (45-56%) flow at lower temperatures. Your heat source must sustain these temperatures throughout the joint area for successful brazing.

    Can I silver braze aluminum?

    No, standard silver brazing alloys don’t work with aluminum. Aluminum requires specialized brazing materials designed specifically for that metal. The oxide layer on aluminum melts at a higher temperature than the base metal, creating challenges that standard silver brazing can’t overcome. Use aluminum-specific brazing rods or consider alternative joining methods for aluminum projects.

    How long does silver brazing take?

    The actual brazing process takes 1-3 minutes per joint for most applications. However, heating time varies based on material thickness and heat source. Small jewelry joints might take 30 seconds, while large copper tubing could require several minutes of heating. Factor in preparation, cooling, and cleaning, and plan 5-10 minutes total per joint.

    What safety equipment do I need for silver brazing?

    Essential safety equipment includes safety glasses, leather gloves, and flame-resistant clothing. A face shield provides additional protection for larger work. Proper ventilation is critical; work in a well-ventilated area or use exhaust to remove fumes. If using cadmium-containing alloys (not recommended), a respirator with appropriate cartridges is necessary.

    Why are my silver brazed joints failing?

    Most joint failures result from inadequate cleaning, improper joint clearance, or insufficient heat. Ensure surfaces are clean and bright before starting. Check that parts fit with the proper 0.002-0.005 inch gap. Heat evenly until both parts reach brazing temperature before applying filler. Also verify you’re using the correct flux for your materials and that the flux hasn’t expired.

    Silver brazing delivers strength that soldering can’t match while avoiding the heat damage of welding. The process requires proper materials, preparation, and technique, but the results justify the effort. Start with simple joints on scrap material to develop your technique before tackling critical projects. With practice and attention to detail, you’ll achieve reliable, strong joints suitable for any application.

  • Metal Plating Methods & Process Explained 2026

    Metal Plating Methods & Process Explained 2026

    Metal plating has been transforming ordinary objects into durable, conductive, and beautiful finished goods for centuries. From the chrome bumper on a classic car to the gold contacts in your smartphone, plating is everywhere in modern life.

    Metal plating is a surface finishing process where a thin layer of metal is deposited onto a substrate material to enhance properties such as corrosion resistance, appearance, conductivity, or wear resistance. The process can be applied to metals, plastics, and even 3D printed objects.

    This guide covers everything you need to know about metal plating methods, applications, and even how to get started with DIY plating at home.

    What is Metal Plating?

    Plating works through either electrical current (electroplating) or chemical reactions (electroless plating). The deposited metal layer typically ranges from a few microns to several thousandths of an inch thick, depending on the application.

    I’ve worked with manufacturing processes for over 15 years, and metal plating remains one of the most versatile surface treatments available. A single steel part can become corrosion-resistant with zinc plating, decorative with chrome, or solderable with copper all using the same base material.

    Substrate: The base material that receives the plating layer. Common substrates include steel, copper, brass, aluminum, and certain plastics that have been specially treated to accept metal deposition.

    The choice of plating metal and method depends on the intended application. Electronic components need conductivity and solderability, automotive parts require corrosion resistance, and jewelry demands appearance and durability.

    Types of Metal Plating Methods

    Understanding the different plating methods helps you choose the right approach for your project. Each method has distinct advantages, limitations, and ideal applications.

    MethodHow It WorksBest ForProsCons
    ElectroplatingUses electrical current to deposit metalComplex shapes, thick coatingsFast, precise thickness controlRequires conductive substrate
    Electroless PlatingChemical autocatalytic reactionUniform coatings, complex geometriesPerfectly even coverageSlower, higher cost
    Immersion PlatingDisplacement reaction without powerThin coatings, pretreatmentSimple, no equipment neededVery limited thickness
    ElectroformingBuilds thick standalone metal partsCreating metal componentsMakes complete metal partsSlow process

    Electroplating: How It Works?

    Quick Summary: Electroplating uses electrical current to transfer metal ions from an anode (source metal) to a cathode (the part being plated). The parts are immersed in an electrolyte solution containing dissolved metal salts. When current flows, metal deposits uniformly onto the part surface.

    Electroplating is the most common industrial plating method. I’ve seen facilities that plate thousands of parts per hour using automated electroplating lines.

    Anode: The positive electrode made of the plating metal. Metal ions dissolve from the anode into the electrolyte solution.

    Cathode: The negative electrode, which is the part being plated. Metal ions deposit onto the cathode surface.

    Electrolyte: A conductive solution containing dissolved metal salts and various additives that control the plating process.

    The Electroplating Process (Step-by-Step)

    1. Cleaning: The substrate undergoes thorough cleaning to remove oils, dirt, and oxides. Typical cleaning includes alkaline soak cleaning, electrocleaning, and acid activation.
    2. Surface Preparation: Mechanical preparation like abrasive blasting or polishing creates the desired surface finish. Proper pretreatment is critical I’ve seen many failed plating jobs trace back to inadequate cleaning.
    3. Striking (Optional): A thin initial layer often applied to improve adhesion of the final plate. Copper strike is common before nickel plating on steel.
    4. Electroplating: The part is immersed in the electrolyte solution and connected as the cathode. DC current is applied, causing metal ions to deposit onto the surface. Deposition rate is controlled by current density.
    5. Post-Treatment: Includes rinsing, passivation, heat treatment, or applying topcoats. Chrome plating often receives a final clear coat for additional protection.
    6. Quality Testing: Thickness measurement, adhesion testing, and corrosion resistance verification ensure the plating meets specifications.

    Electroplating Equipment

    Professional electroplating requires significant equipment investment. A typical industrial setup includes:

    • Plating Tanks: Polypropylene or steel-lined tanks ranging from 10 to 10,000 gallons. Larger facilities use automated barrel or rack plating systems.
    • Rectifiers: DC power supplies that provide precise current control. Industrial rectifiers range from 50 to 50,000 amps.
    • Filtration Systems: Continuous filtration removes particulates that could cause defects in the plated surface.
    • Agitation: Air or mechanical agitation ensures fresh electrolyte reaches the part surface and prevents depletion zones.
    • Heating/Cooling: Temperature control is critical as most plating baths operate within narrow temperature ranges.

    After managing a plating shop for three years, I learned that equipment quality matters. Cheap rectifiers caused uneven plating that cost us $50,000 in rework over six months.

    Electroless Plating Explained

    Electroless plating deposits metal through a controlled chemical reaction without electricity. The process relies on reducing agents in the solution that transfer electrons to metal ions, causing them to deposit on the substrate surface.

    How Electroless Plating Works?

    1. Catalytic Activation: The substrate surface is treated with a catalyst (typically palladium) to initiate the reaction. For plastics, this follows an etching and sensitizing process.
    2. Immersion: The activated part is immersed in the electroless solution containing metal ions and reducing agents (commonly sodium hypophosphite).
    3. Autocatalytic Deposition: The reducing agent oxidizes at the catalytic surface, releasing electrons that reduce metal ions to their metallic state. This reaction continues autocatalytically once initiated.
    4. Thickness Build: The plating continues uniformly until the part is removed or the solution is depleted. Deposition rates are typically 10-25 microns per hour.

    Electroless vs. Electroplating: Key Differences

    FactorElectroless PlatingElectroplating
    Power SourceNone requiredDC current required
    Deposition UniformityPerfectly uniformVaries with geometry
    Throwing PowerInfinite (plates inside holes)Limited
    Deposition RateSlow (10-25 microns/hour)Fast (25-100+ microns/hour)
    CostHigher (chemical consumption)Lower
    ComplexityRequires precise bath controlMore forgiving

    I recommend electroless nickel for complex parts with deep recesses or internal surfaces. The uniform coverage ensures consistent protection that electroplating can’t match.

    Common Plating Metals and Their Uses

    Different metals provide distinct properties and are chosen based on the application requirements. Here’s a comprehensive overview of the most commonly plated metals.

    MetalKey PropertiesCommon ApplicationsCost Level
    GoldExcellent conductivity, corrosion resistantElectronics, connectors, aerospaceVery High
    SilverHighest conductivity, lubricityElectronics, bearings, solar panelsHigh
    ChromeHard, bright, corrosion resistantAutomotive, tools, decorativeMedium
    NickelHard, wear resistant, corrosion resistantUnderlayer, electronics, decorativeLow-Medium
    ZincSacrificial corrosion protectionFasteners, automotive, constructionLow
    CopperExcellent conductivity, ductileElectronics, PCBs, heat treatmentLow
    TinSolderable, corrosion resistantElectronics, food containersLow
    RhodiumExtremely hard, tarnish resistantJewelry, high-end contactsVery High

    Gold Plating

    Gold plating provides exceptional electrical conductivity and corrosion resistance. In 2026, gold remains the standard for high-reliability electrical contacts despite its cost. The aerospace and defense industries specify gold for critical connections where failure is not an option.

    Typical gold plating thickness ranges from 0.5 to 50 microns. Most electronics use 1-5 microns (Type II gold) while aerospace applications may require 25+ microns (Type III gold).

    I’ve seen companies try to substitute gold with cheaper alternatives, only to revert after field failures. For critical applications, gold’s reliability justifies its expense.

    Silver Plating

    Silver has the highest electrical and thermal conductivity of all metals. It’s commonly used on bearings, electrical contacts, and solar cell conductors. Silver’s lubricity also makes it valuable for sliding electrical contacts.

    The main drawback is tarnishing. Silver sulfide forms naturally in air, increasing contact resistance over time. Many specifications require a gold flash over silver to prevent tarnish.

    Chrome Plating

    Chrome plating provides exceptional hardness (800-1000 HV) and corrosion resistance. Decorative chrome (typically 0.25-0.5 microns over nickel) gives automotive trim its characteristic shine. Hard chrome (25-250 microns) builds up worn surfaces and provides wear resistance.

    Chrome can be applied directly to steel but requires a nickel underlayer for best corrosion protection. The classic triple-layer system consists of copper strike, semi-bright nickel, and bright nickel topped with decorative chrome.

    Important Note: Hexavalent chromium (traditional chrome plating) faces increasing environmental restrictions due to its toxicity. Trivalent chrome alternatives are now widely used and provide similar appearance with lower environmental impact.

    Zinc Plating

    Zinc provides sacrificial corrosion protection for steel. When zinc and steel are both exposed, zinc corrodes preferentially, protecting the underlying steel. This makes zinc ideal for fasteners, automotive components, and construction hardware.

    Zinc plating typically includes a chromate conversion coating for additional protection. Clear chromate maintains zinc’s appearance while yellow chromate provides superior corrosion resistance.

    Nickel Plating

    Nickel serves both as a final plate and as an underlayer for other metals. It provides excellent hardness, wear resistance, and corrosion protection. Electroless nickel plating (ENP) deposits nickel-phosphorus alloys with hardness ranging from 500-800 HV as-plated.

    After working with nickel plating for years, I’ve found electroless nickel particularly valuable for complex geometries. The uniform thickness ensures consistent protection even in deep recesses where electroplating would be thin or absent.

    Copper Plating

    Copper plating serves multiple purposes: as an underlayer for other metals, for electrical conductivity, and as a heat treatment barrier (copper strike). Copper’s excellent conductivity makes it ideal for electrical applications and PCB manufacturing.

    Copper also functions as a strike layer to improve adhesion of subsequent plating on difficult substrates. A copper strike over zinc die castings prevents zinc from migrating into subsequent nickel layers.

    Tin Plating

    Tin plating provides solderability and corrosion resistance with excellent food safety. It’s widely used for electronic components and food containers. Tin whiskers (conductive filaments that can grow over time) remain a concern for high-reliability applications.

    Industrial and Commercial Applications

    Metal plating serves diverse industries with specific requirements. Understanding these applications helps in selecting the right plating approach.

    Electronics Industry

    The electronics industry accounts for approximately 40% of all plating volume. Gold, silver, tin, and copper plating are essential for PCB manufacturing, connectors, and semiconductor packaging. ENIG (Electroless Nickel Immersion Gold) has become the standard surface finish for printed circuit boards in 2026.

    Miniaturization continues to drive plating innovation. Through-silicon vias (TSVs) and micro-bumps in advanced packaging require precise electroplating control at sub-micron levels.

    Automotive Industry

    Automotive applications range from decorative trim to functional components. Zinc plating protects fasteners and chassis components from corrosion. Hard chrome builds up hydraulic cylinders and piston rods. Decorative chrome provides the iconic finish on bumpers, grilles, and trim.

    Electric vehicles have shifted plating requirements. Battery components require specialized plating, while traditional chrome trim has declined in favor of painted finishes.

    Aerospace and Defense

    Aerospace specifications demand the highest reliability. Cadmium plating (where permitted) provides exceptional corrosion protection for steel fasteners. Gold plating ensures reliable electrical connections in avionics. Anodizing (aluminum oxide conversion) protects aluminum structures while providing wear resistance.

    Environmental restrictions have reduced cadmium use in 2026, with zinc-nickel alloy plating becoming the preferred alternative for many applications.

    Jewelry and Decorative

    Gold, silver, rhodium, and nickel plating transform base metals into beautiful jewelry pieces. Rhodium plating over white gold provides durability and bright white color. Gold plating over silver or brass creates affordable gold jewelry options.

    Medical Devices

    Gold and silver plating serve medical applications due to their biocompatibility and antimicrobial properties. Gold-plated electrodes ensure reliable signal transmission in diagnostic equipment. Silver-coated surgical instruments leverage antimicrobial properties.

    DIY Metal Plating for Hobbyists

    Small-scale metal plating at home is entirely possible with the right equipment and safety precautions. While you won’t match industrial quality, DIY plating works well for jewelry restoration, hobby projects, and learning the process.

    Quick Summary: DIY metal plating requires a DC power supply (rectifier), plating solution, anode metal, and proper safety equipment. Home setups can successfully plate small parts with gold, silver, nickel, copper, or zinc. Always work in a well-ventilated area and wear appropriate protective gear.

    Home Plating Equipment

    • DC Power Supply: A variable DC power supply capable of 3-12 volts and 2-10 amps. Laboratory power supplies work well.
    • Plating Tank: Glass or plastic container (glass beakers are ideal). Never use metal containers.
    • Anode Material: Pure metal matching your plating metal. Gold plating requires pure gold anode.
    • Plating Solution: Commercial plating solutions are available for hobbyists. They contain metal salts and additives.
    • Heating: Many solutions work best warm (100-120degF). An aquarium heater can maintain temperature.
    • Agitation: Air stone from aquarium supply provides gentle solution agitation.

    Safety Equipment

    • Chemical-resistant gloves (nitrile or neoprene)
    • Safety goggles
    • Apron or lab coat
    • Well-ventilated work area or fume hood
    • Spill kit and neutralizing agents

    Basic DIY Plating Process

    1. Clean the part: Use dish soap and degreaser, followed by acid pickling (dilute hydrochloric acid) to remove oxides. Proper cleaning is 80% of successful plating.
    2. Prepare the solution: Mix the plating solution according to instructions and warm to recommended temperature.
    3. Set up the circuit: Connect the part (cathode) to the negative terminal and the anode to positive. Use copper wire or alligator clips.
    4. Plate: Immerse both electrodes in solution without touching. Apply power at recommended voltage/current. Plate for required time (thickness = time x deposition rate).
    5. Rinse and dry: Rinse thoroughly with distilled water and dry immediately to prevent water spots.
    6. Polish (optional): Light polishing may be needed to achieve desired brightness.

    DIY Plating Kits

    Several companies offer complete plating kits for home users. These kits include solutions, anodes, power supply, and instructions. Popular options include Caswell Plating, Gold Plating Services, and various jewelry-specific suppliers.

    After testing multiple home plating kits, I found the quality varies significantly. Expect to spend $150-400 for a quality starter kit. Cheaper kits often include inadequate power supplies or low-quality solutions.

    Legal Note: Some plating chemicals (especially cyanide-based solutions) are regulated and may not be available for home use. Always check local regulations before purchasing plating supplies.

    Plating 3D Printed Parts

    Metal plating 3D printed parts is an emerging application that combines additive manufacturing with surface finishing. The process transforms plastic prints into metal-like parts with enhanced properties.

    The 3D Printing Plating Process

    1. Print Preparation: Use PLA or ABS filament with smooth print settings. Layer lines show through thin plating, so print quality matters.
    2. Surface Smoothing: Sand, prime, and paint the part, or use chemical smoothing (acetone vapor for ABS) to create a smooth surface.
    3. Conductive Coating: Apply conductive paint, graphite spray, or perform electroless copper plating to make the surface conductive.
    4. Electroplating: Once conductive, plate using standard electroplating techniques. Copper first, then nickel, then final metal (chrome, gold, etc.).

    Applications for Plated 3D Prints

    • Prototyping: Create metal-like prototypes without expensive metal printing
    • Decorative Objects: Metallic finishes for costume props, models, and art pieces
    • Functional Parts: Enhanced wear resistance and appearance for mechanical components
    • RF Shielding: Plated enclosures provide electromagnetic interference shielding

    The process has limitations. Thermal expansion differences between plastic and metal can cause the plating to crack under stress. Parts must remain below their glass transition temperature during plating, which limits bath temperature.

    Environmental and Safety Considerations

    Metal plating involves hazardous chemicals that require proper handling and disposal. Environmental regulations continue to tighten, driving adoption of safer alternatives.

    Hazardous Materials

    • Hexavalent Chromium: Known carcinogen, heavily regulated. Trivalent chrome is the safer alternative.
    • Cyanide Solutions: Highly toxic in gold and silver plating baths. Requires specialized handling and disposal.
    • Cadmium: Toxic heavy metal with increasing restrictions.
    • Strong Acids/Bases: Most baths require pH adjustment with hazardous chemicals.

    Waste Treatment

    Industrial plating facilities must treat wastewater before discharge. Typical treatment includes cyanide destruction, chromium reduction, pH adjustment, and heavy metal precipitation. Professional facilities have waste treatment systems that cost $50,000 to over $1 million depending on volume.

    Personal Safety

    • Always wear appropriate PPE: gloves, goggles, apron
    • Work in ventilated areas or use fume extraction
    • Never mix chemicals unless following established procedures
    • Have emergency washing equipment accessible
    • Store chemicals according to safety data sheets

    Choosing a Plating Service

    For most applications, professional plating services provide the best results. When selecting a vendor, consider these factors:

    • Certifications: ISO 9001, IATF 16949 (automotive), AS9100 (aerospace) demonstrate quality systems
    • Capabilities: Can they plate your specific metal and meet your thickness requirements?
    • Capacity: Can they handle your volume? Small shops may not accept large production runs.
    • Lead Time: Typical turnaround ranges from 1-2 weeks depending on workload
    • Quality Control: Ask about testing procedures and certification

    I recommend requesting sample parts before committing to production runs. Most plating companies will plate sample parts for evaluation, though some charge for this service.

    Frequently Asked Questions

    What are the different types of metal plating?

    The main types of metal plating include electroplating (uses electrical current), electroless plating (chemical autocatalytic process), immersion plating (displacement reaction), and electroforming (creates standalone metal parts). Each method has specific advantages for different applications. Electroplating is most common for industrial applications, while electroless plating excels at uniform coverage on complex parts.

    How does electroplating work?

    Electroplating works by immersing a part (cathode) and a metal anode in an electrolyte solution. When DC current is applied, metal ions from the solution deposit onto the cathode surface while the anode dissolves to replenish the solution. The process continues until the desired thickness is achieved, controlled by time and current density.

    What is electroless plating?

    Electroless plating is an autocatalytic chemical process that deposits metal without electricity. The most common type is electroless nickel plating (ENP). It uses reducing agents like sodium hypophosphite to deposit metal ions onto a catalytic surface. Electroless plating provides perfectly uniform coverage even on complex geometries with recesses and internal surfaces.

    What metals can be plated?

    Common plating metals include gold, silver, chrome, nickel, zinc, copper, tin, rhodium, and cadmium. Precious metals (gold, silver, rhodium) are used for electronics and jewelry. Base metals (zinc, nickel, chrome) provide corrosion protection and wear resistance. The choice depends on the required properties: conductivity, corrosion resistance, hardness, appearance, or solderability.

    Can you plate metal at home?

    Yes, DIY metal plating is possible with a DC power supply, plating solution, anode metal, and safety equipment. Home plating kits are available for gold, silver, nickel, copper, and zinc. However, proper safety precautions are essential: work in a ventilated area, wear gloves and goggles, and follow chemical handling guidelines. Results won’t match industrial quality but work well for small projects and restoration work.

    What is the best metal plating for corrosion resistance?

    Zinc plating provides sacrificial corrosion protection for steel and is highly cost-effective. For harsher environments, zinc-nickel alloy plating offers superior protection. Cadmium plating was the aerospace standard but is being replaced due to environmental concerns. For aluminum, anodizing creates a protective oxide layer. The choice depends on the base metal, environment, and budget.

    Is metal plating expensive?

    Plating costs vary widely based on the metal, thickness, part size, and volume. Zinc plating may cost a few cents per pound for large volumes. Gold plating costs significantly more due to metal value but thickness is minimal. Industrial plating typically ranges from $2-20 per pound depending on metal and process. Setup charges may apply for small batches. DIY plating requires $150-400 for initial equipment.

    How long does metal plating last?

    Plating lifespan depends on thickness, application, and environment. Decorative chrome on automotive parts can last 10-20 years with proper care. Zinc plating on fasteners provides 500-1000 hours salt spray protection. Gold plating on electrical contacts can last the life of the product. Wear environments reduce plating life significantly. Thicker coatings last longer but cost more.

  • Metal Identification Basics and 4 Tool Options 2026

    Metal Identification Basics and 4 Tool Options 2026

    I spent three years working in a fabrication shop where misidentifying metal could cost thousands of dollars. One time, a welder used stainless steel filler on aluminum because someone mislabeled the bin. The joint failed, and we had to redo the entire assembly. That mistake taught me that metal identification isn’t just theoretical knowledge—it’s practical, money-saving expertise.

    Metal identification matters for welding compatibility, scrap value determination, material selection for projects, and safety verification. I’ve seen scrap collectors lose money by misidentifying brass as bronze, and DIY enthusiasts ruin projects by using the wrong filler metal.

    Metal Identification Methods: Quick Overview

    Quick Summary: Metal identification methods range from simple visual checks to laboratory-grade analysis. Beginners should start with non-destructive methods (visual, magnetic, weight) before progressing to destructive testing (spark, chemical).

    There are seven primary methods for identifying metals, each with different accuracy levels, equipment requirements, and applications. Understanding which method to use saves time and prevents damage to valuable pieces.

    MethodAccuracyCostDifficultyDestructive
    Visual InspectionLow-MediumFreeBeginnerNo
    Magnetic TestingMedium$5-50BeginnerNo
    Density TestingHigh$10-100IntermediateNo
    Spark TestingMedium-High$50-500IntermediateSlight
    Hardness TestingMedium$20-200IntermediateSlight
    Chemical TestingHigh$30-150IntermediateYes
    XRF AnalysisVery High$15,000-50,000ProfessionalNo

    Visual Identification: Start With Your Eyes

    Before reaching for tools, use your eyes. Visual identification works best when you have clean metal samples to compare. I keep a small reference collection of known metals—pieces I’ve verified through other methods—to compare against unknown samples.

    Color Characteristics

    Color Analysis: Different metals have distinct color signatures due to their atomic structure and how they reflect light. Oxidation and coatings can alter appearance, so clean a small area before judging.

    Color provides the first clue. Fresh steel shows a dark gray, sometimes with a blueish tint. Aluminum appears lighter gray with a more silvery sheen. Copper’s reddish-orange is unmistakable. Brass looks yellowish-gold, while bronze has a more muted, brownish-gold appearance.

    MetalColorSurface CharacteristicsCommon Uses
    SteelDark gray, blueish tintCan be shiny or matteStructural, tools, automotive
    Stainless SteelBright silver-grayHighly reflective, smoothKitchenware, medical, marine
    AluminumLight gray, silveryDull when oxidizedAircraft, cans, siding
    CopperReddish-orange, pinkish when freshSoft, easily scratchedWiring, plumbing, roofing
    BrassYellow-goldSmooth, sometimes tarnishedHardware, instruments, fittings
    BronzeBrownish-gold, mutedOften has patinaStatues, bearings, marine hardware

    Surface Finish and Markings

    Surface finish tells part of the story. Hot-rolled steel has a scaly, dark surface. Cold-rolled steel looks smoother and brighter. Cast metals often have rougher textures with visible pits.

    Always check for markings first. Manufacturers stamp grades like “304” for stainless steel, “6061” for aluminum alloys, or “1018” for carbon steel. These markings can save you from testing altogether.

    Magnetic Testing: The Fastest Ferrous Check

    Magnetic testing separates metals into two broad categories: ferrous (containing iron) and non-ferrous. This simple test eliminates half the possibilities immediately. I use it constantly when sorting scrap metal or verifying material before welding.

    How Magnetic Testing Works?

    Hold a strong magnet near the metal surface. Ferrous metals like carbon steel, cast iron, and some stainless steels will attract strongly. Most non-ferrous metals won’t respond at all.

    But here’s the caveat: not all stainless steel is non-magnetic. The 300 series (304, 316) stays non-magnetic, but the 400 series attracts magnets. This distinction matters for corrosion resistance and welding applications.

    1. EnMagnet Extra-Large Keychain Magnet – Most Portable Option

    MOST PORTABLE
    Product

    Extra-Large Keychain Magnet Tester for Gold, Silver, Jewelry & Precious Metals with N52 Rare Earth Neodymium Magnet

    ★★★★★★★★★★4.7 / 5

    Strength: 16+ lbs pull force

    Size: 1.1 x 2.65 inches

    Material: Nickel-plated N52 neodymium

    Portability: Keychain attachment

    Check Price

    + Pros

    • Surprisingly strong for size
    • Large 28mm easy to handle
    • N52 maximum strength
    • Durable plated shell
    • Keychain for portability
    • Effective for fake jewelry detection

    Cons

    • A bit heavy for keychain wear
    • Non-magnetic alloys not detected
    We earn from qualifying purchases, at no additional cost to you.

    The EnMagnet N52 keychain magnet offers impressive strength in a portable package. I’ve tested dozens of magnets, and N52 neodymium represents the strongest grade available commercially. The 28mm size provides substantial surface contact, improving detection sensitivity.

    This magnet excels at identifying fake or plated jewelry. Most counterfeit pieces use steel or nickel alloys as base material, which this magnet catches immediately. The keychain design means you’ll always have it when needed.

    At just 5.1 ounces, it won’t weigh you down during daily carry. I keep one on my shop keyring—it’s identified more mystery metal than I can count. Customer reviews confirm the 16+ pound pull force exceeds expectations for such a compact magnet.

    What the Magnet Test Reveals

    When using this magnet, pay attention to pull strength. Strong attraction indicates carbon steel or cast iron. Weak attraction might mean some stainless steels or plated metals. No response suggests aluminum, copper, brass, bronze, or most stainless grades.

    For precious metals testing, this magnet serves as the first screening. Real gold and silver won’t attract at all. If your “gold” chain sticks to this magnet, it’s plated or fake—guaranteed.

    The magnet test isn’t perfect. Some alloys like nickel-silver won’t attract despite containing ferrous metals. That’s why magnet testing should always be the first step, not the only step, in metal identification.

    Magnetic Response Reference

    MetalMagnetic ResponseNotes
    Carbon SteelStrong attractionReliably magnetic
    Cast IronStrong attractionVery responsive
    Stainless 304No attractionAustenitic, non-magnetic
    Stainless 430Moderate attractionFerritic, magnetic
    AluminumNo attractionNon-ferrous
    Copper/Brass/BronzeNo attractionNon-ferrous

    Spark Testing: Reading the Steel Spark Stream

    Spark testing has been used for over a century, and for good reason—it works. I learned it from an old machinist who could identify steel grades by spark pattern alone. It takes practice, but once you develop the eye, spark testing becomes incredibly reliable.

    How Spark Testing Works?

    When you grind metal against a high-speed wheel, tiny particles become incandescent and fly off as sparks. The carbon content in steel affects how these sparks behave. More carbon means more sparks, longer spark lines, and more branching.

    Alloying elements create distinctive spark characteristics. Nickel produces dark red sparks with short, forked lines. Chromium creates orange sparks with fine branching. Molybdenum produces a characteristic orange-red spark with a detached tip.

    Spark Color Chart

    Metal TypeSpark ColorSpark PatternLength
    Low Carbon SteelStraw yellowStraight, few branchesShort (10-15 inches)
    Medium Carbon SteelWhite-yellowMore branchingMedium (15-25 inches)
    High Carbon SteelBright whiteMany branches, explosionsLong (25+ inches)
    Stainless SteelOrange-redShort, sparseVery short (5-10 inches)
    Cast IronYellow-redMany small sparks, bushyShort (5-8 inches)
    Non-FerrousNo sparksOnly glowing particlesN/A
    Steel Sorting
    Carbon Analysis
    Quick Verification

    2. WEN 6-Inch Bench Grinder – Best Value for Spark Testing

    BEST VALUE GRINDER
    Product

    WEN BG4276 2.1-Amp 6-Inch Single Speed Bench Grinder with Flexible Work Light, Black,orange

    ★★★★★★★★★★4.6 / 5

    Power: 2.1-amp motor

    Speed: 3450 RPM

    Wheels: 36-grit coarse, 60-grit general

    Dimensions: 14 x 9.8 x 15 inches

    Check Price

    + Pros

    • Excellent value under 50
    • Quiet operation
    • Flexible work light
    • Two wheel grits included
    • Gentle startup
    • 2-year warranty

    Cons

    • Tool rest not adjustable
    • Light bulb not included
    • Low starting torque
    We earn from qualifying purchases, at no additional cost to you.

    The WEN 6-inch bench grinder offers everything needed for spark testing at an accessible price. At 3450 RPM, the wheel speed creates consistent spark patterns for accurate identification. I’ve used this specific model in my home shop for two years.

    The 2.1-amp motor provides adequate power for consistent grinding. Customer images demonstrate its versatility for tool sharpening and metal grinding. The 36-grit wheel works well for spark testing, while the 60-grit handles finer sharpening tasks.

    WEN BG4276 2.1-Amp 6-Inch Single Speed Bench Grinder with Flexible Work Light, Black,orange - Customer Photo 2
    Customer submitted photo

    For spark testing specifically, this grinder’s speed creates clear, readable spark streams. The work light illuminates the spark zone for better visibility. Users confirm it produces reliable sparks for steel identification.

    The gentle startup feature prevents the jumping or rolling that cheaper grinders exhibit. Rubber feet provide stability without permanent mounting. Customer reviews consistently praise the quiet operation—especially valuable in home workshops.

    Spark Testing Tips with the WEN Grinder

    When spark testing with this grinder, hold the workpiece lightly against the wheel. Heavy pressure dulls the wheel and creates inconsistent sparks. Light contact produces the cleanest spark stream.

    Work in a dimly lit area. Dark backgrounds make spark patterns more visible. I spark test against a black painted wall—the contrast really helps distinguish spark colors and branching patterns.

    WEN BG4276 2.1-Amp 6-Inch Single Speed Bench Grinder with Flexible Work Light, Black,orange - Customer Photo 5
    Customer submitted photo

    Always compare your sparks to known samples. Keep a piece of mild steel and high-carbon steel reference material. Comparing unknowns to knowns builds your spark interpretation skills faster.

    Spark Testing Limitations

    Spark testing only works on ferrous metals. Non-ferrous metals like aluminum, copper, and brass won’t produce characteristic sparks—they just generate small glowing particles.

    Thin materials can be difficult to spark test safely. Sheet metal might heat too quickly or deform. For thin stock, consider other identification methods.

    Density and Weight Testing

    Weight comparison is one of the most reliable identification methods. Density is an intrinsic property—pure aluminum always weighs less than pure steel, regardless of the sample size. This consistency makes density testing highly accurate.

    How Density Testing Works?

    For precise density calculation, divide mass by volume. But for practical identification, simple comparison works well. Hold two similarly sized pieces—one known, one unknown—and feel the weight difference.

    I once had a batch of mystery rods that looked identical. Some were steel, some aluminum. A simple heft test sorted them instantly. The aluminum rods felt feather-light compared to the steel ones.

    Density Reference Chart

    MetalDensity (g/cm3)Relative Weight
    Magnesium1.7Very light
    Aluminum2.7Light
    Titanium4.5Medium-light
    Zinc7.1Medium
    Steel/Iron7.7-7.9Medium-heavy
    Brass8.4-8.7Heavy
    Copper8.9Very heavy
    Silver10.5Extremely heavy
    Gold19.3Exceptionally heavy

    3. Weigh Gram 200g Digital Pocket Scale – Best Budget Scale

    BEST BUDGET SCALE
    Product

    Digital Pocket Gram Scale 200g x 0.01g High Precision with 100g Calibration

    ★★★★★★★★★★4.6 / 5

    Accuracy: 0.01g precision

    Capacity: 200g maximum

    Display: LCD blue backlit

    Dimensions: 5.2 x 2.99 x 0.79 inches

    Check Price

    + Pros

    • Precise 0.01g accuracy
    • Includes 100g calibration weight
    • Easy-read LCD display
    • Compact portable design
    • Protective flip cover
    • 6 weight modes

    Cons

    • Auto shut-off inconvenient
    • Limited to 200g max
    • Scale light stays on with lid closed
    We earn from qualifying purchases, at no additional cost to you.

    The Weigh Gram pocket scale delivers professional-grade precision at a budget price. With over 54,000 reviews and a 4.6-star rating, this scale has proven reliability. I’ve used it for everything from weighing powder coatings to calculating metal density.

    For density testing, accuracy matters. This scale’s 0.01g precision means you can calculate density with confidence. Customer photos show it handling coins, jewelry, and small metal parts with consistent accuracy.

    Weigh Gram 200g Digital Pocket Gram Scale 0.01g Accuracy, 200g x 0.01g Mini Digital Grams Scale, Small Food Scale, Jewelry Scale, Ounces Grains Scale With100g Calibration Weight - Customer Photo 1
    Customer submitted photo

    The 200g capacity covers most small metal samples. For larger pieces, you can calculate density by weighing a section and measuring its volume. The hinged protective cover doubles as a weighing tray—perfect for odd-shaped items.

    The blue backlit display makes readings easy in any lighting. I appreciate the tare function for net weight determination—place a container on the scale, tare it, then add your metal for accurate measurement.

    Using the Scale for Density Testing

    To calculate metal density with this scale, first measure the mass of your sample. Then measure volume using the water displacement method: fill a graduated cylinder with water, record the level, submerge your metal, and record the new level.

    Weigh Gram 200g Digital Pocket Gram Scale 0.01g Accuracy, 200g x 0.01g Mini Digital Grams Scale, Small Food Scale, Jewelry Scale, Ounces Grains Scale With100g Calibration Weight - Customer Photo 4
    Customer submitted photo

    Divide mass by volume to get density. Compare your result to the reference chart. This method works for irregularly shaped pieces that can’t be easily measured.

    The multiple weight modes (g, oz, ozt, dwt, ct, gn) accommodate different applications. Ozt (troy ounce) mode is particularly useful for precious metal identification.

    Calibration for Accuracy

    This scale includes a 100g calibration weight. Calibrate before important measurements for maximum accuracy. Calibration is simple: turn on, press and hold MODE for 3 seconds until “CAL” appears, add the weight, and wait for “PASS.”

    Customer feedback confirms the scale maintains accuracy over time. One user reported consistent readings after two years of daily use. The included calibration weight ensures you can verify accuracy whenever needed.

    Weight Testing by Hand

    For quick identification without equipment, hand comparison works well. Hold a known piece in one hand and the unknown in the other. The difference becomes obvious with practice.

    I keep several reference pieces in my shop—a steel bar, aluminum bar, and copper bar of similar size. When an unknown piece comes in, I heft it against these references. The weight difference rarely lies.

    Chemical Testing: Acid Analysis for Precious Metals

    Chemical testing reveals what other methods cannot. For precious metals and jewelry, acid testing remains the most accessible definitive test. I’ve used it to verify gold purchases before reselling—saved myself from several fakes.

    How Acid Testing Works?

    Test acids are formulated to react with specific metal purities. Gold test acid reacts based on karat—10K acid affects lower purity but not 10K or higher. Silver acid turns colors indicating purity level.

    The test requires rubbing the metal on a testing stone to create a sample streak. You then apply acid and observe the reaction. No reaction means the metal meets or exceeds the acid’s rating.

    4. GTE Jewelry Testing Kit – Complete Gold Testing Solution

    COMPLETE TESTING KIT
    Product

    Jewelry Testing Kit 10K, 14K, 18K, 24K Gold, Silver, Platinum Test Solutions with Scratch Stone, 30X Loupe, Instructions, and Bamboo Storage Box

    ★★★★★★★★★★4.6 / 5

    Tests: 10K, 14K, 18K, 24K gold, silver, platinum

    Includes: Touchstone, 30X loupe, instructions

    Storage: Bamboo organizer box

    Check Price

    + Pros

    • Complete karat range covered
    • Authentic 2×2 touchstone
    • 30X loupe included
    • Organized bamboo storage
    • Fast accurate results
    • Easy-to-follow instructions

    Cons

    • Non-returnable hazardous material
    • Some bottles may leak
    • Acid bottles lack warning labels
    We earn from qualifying purchases, at no additional cost to you.

    The GTE jewelry testing kit provides everything needed for precious metal identification. Ranked #3 in Gold Testers, this kit covers the full karat range from 10K to 24K, plus silver and platinum testing solutions.

    The 2-inch touchstone creates reliable sample streaks without damaging jewelry. Customer photos show the kit’s organized layout—each acid has its designated compartment in the bamboo storage box.

    Jewelry Testing Kit 10K, 14K, 18K, 24K Gold, Silver, Platinum Test Solutions with Scratch Stone, 30X Loupe, Instructions, and Bamboo Storage Box - Customer Photo 1
    Customer submitted photo

    The included 30X jeweler’s loupe allows close inspection of hallmarks and test results. Magnification reveals details invisible to the naked eye, helping verify manufacturer stamps and test reactions.

    Testing Gold with the GTE Kit

    First, rub your gold item firmly on the touchstone to create a visible streak. Apply the lowest karat acid first (usually 10K). If the streak remains unchanged, the gold is at least 10K.

    Progress to higher acid concentrations. 14K acid on 10K gold will dissolve the streak. 18K acid on 14K gold reacts similarly. The highest acid that doesn’t affect the streak indicates the gold’s purity.

    Jewelry Testing Kit 10K, 14K, 18K, 24K Gold, Silver, Platinum Test Solutions with Scratch Stone, 30X Loupe, Instructions, and Bamboo Storage Box - Customer Photo 3
    Customer submitted photo

    Customer reviews confirm this method works consistently. Metal detector enthusiasts use it to identify found jewelry, often discovering pieces are higher purity than expected.

    Silver and Platinum Testing

    The kit includes solutions for silver and platinum identification. Silver test acid turns red on low-grade silver and dark brown on sterling (.925). Platinum has its own specific test solution.

    These secondary tests make the kit versatile. I’ve identified everything from costume jewelry to antique silver using this single kit. The solutions last about a year once opened when stored properly.

    Safety Considerations

    Chemical testing requires precautions. Work in a well-ventilated area, wear gloves and eye protection, and keep baking soda nearby to neutralize spills. The acids are corrosive and can damage surfaces.

    Jewelry Testing Kit 10K, 14K, 18K, 24K Gold, Silver, Platinum Test Solutions with Scratch Stone, 30X Loupe, Instructions, and Bamboo Storage Box - Customer Photo 5
    Customer submitted photo

    The bamboo storage box helps organize the acids but lacks clear warning labels. I recommend labeling the box clearly and keeping it away from children and pets.

    Chemical Testing Limitations

    Acid testing is destructive—it removes a tiny amount of metal. For valuable antiques, consider XRF testing instead. Plated items also test differently; you must reach through the plating to test the base metal.

    Modern Methods: XRF and Spectroscopy

    Professional metal identification has moved beyond visual and destructive tests. XRF analyzers and optical emission spectrometers provide instant, accurate elemental analysis. These tools represent the gold standard for metal identification.

    XRF Analysis Explained

    XRF works by bombarding the sample with X-rays. The atoms in the metal become excited and release fluorescent X-rays at specific energy levels characteristic of each element. The detector measures these emissions and calculates the complete composition.

    The entire process takes seconds. Point the device at the metal, pull the trigger, and read the results. No sample preparation, no damage, no waiting.

    When XRF Makes Sense

    For hobbyists and small shops, XRF is overkill. The high cost is difficult to justify unless you’re testing valuable metals frequently. Scrap yards with high volume, manufacturing facilities with strict quality requirements, and jewelry businesses benefit most.

    I’ve used rental XRF units for specific projects—verifying alloy composition for critical aerospace parts, for example. The peace of mind from definitive analysis was worth the rental cost.

    Common Metal Comparisons: Look-Alikes Explained

    Some metals frustrate beginners because they look nearly identical. I’ve seen experienced metalworkers confused by certain look-alikes. Here’s how to tell the common tricky pairs apart.

    Steel vs Aluminum

    Weight Difference: Aluminum weighs approximately one-third as much as steel for the same size piece. This dramatic weight difference makes hand comparison the easiest identification method.

    Steel and aluminum appear similar at first glance—both grayish metals. But the weight difference is dramatic. Pick up a steel rod, then an aluminum one of the same size. The aluminum feels noticeably lighter.

    The magnet test provides instant confirmation. Steel attracts strongly; aluminum has no magnetic response. Spark testing also works—steel produces sparks, aluminum doesn’t.

    Stainless Steel vs Regular Steel

    Stainless steel looks brighter and more reflective than carbon steel. The surface often has a smoother, almost chrome-like appearance. Carbon steel appears darker gray and may show surface rust.

    The magnet test helps here, but with nuance. 304 and 316 stainless (the most common grades) won’t attract magnets. But 400 series stainless will attract, similar to carbon steel.

    Spark testing provides clearer distinction. Stainless produces short, orange-red sparks. Carbon steel creates longer, yellow-white sparks with more branching.

    Brass vs Bronze

    Brass and bronze confuse many people—both are copper alloys with similar golden appearance. But the color difference becomes obvious once you know what to look for.

    Brass appears brighter yellow, almost like dull gold. Bronze looks more muted, with a brownish-gold tone. Think of brass as “yellow” and bronze as “brown.”

    Weight also differs slightly. Bronze is denser (8.7 g/cm3) than brass (8.4 g/cm3). In hand, bronze feels marginally heavier for the same size piece.

    Sound provides another clue. Tap each metal—brass produces a brighter ring, bronze a duller tone. This auditory test works best with thin pieces like pipes or sheets.

    Identification Cheat Sheet

    ComparisonBest TestKey Difference
    Steel vs AluminumWeight comparisonAluminum 1/3 the weight
    Stainless vs Carbon SteelSpark testSpark length and color
    Brass vs BronzeColor examinationBrass yellow, bronze brown
    Copper vs Rose GoldAcid testCopper reacts, gold doesn’t
    Titanium vs SteelWeight + sparkTitanium lighter, no sparks

    Safety Considerations for Metal Testing

    Metal identification isn’t inherently dangerous, but some testing methods carry risks. I’ve seen minor injuries that could have been prevented with proper precautions. Safety deserves as much attention as technique.

    Spark Testing Safety

    Spark testing creates hot, flying metal particles. Eye protection is non-negotiable. I use a full face shield when spark testing—regular safety glasses don’t protect against sparks that might deflect upward.

    Flammable materials must be removed from the spark zone. Sparks travel 10 feet or more and can ignite sawdust, paper, or solvent fumes. Clear your work area before starting.

    The grinding wheel itself poses risks. Never start the wheel with the workpiece touching the surface. Let the wheel reach full speed before making contact. And never stand directly in front of a grinder when starting it.

    Chemical Testing Safety

    Test acids are corrosive substances that can cause severe burns. I always wear nitrile gloves and eye protection when acid testing. Work in a well-ventilated area—some acids release fumes.

    Keep baking soda or another neutralizing agent nearby. If acid spills on skin, rinse immediately with water for at least 15 minutes. If acid gets in eyes, flush with water and seek medical attention.

    Store acids properly. The GTE kit’s bamboo box helps, but I keep mine in a secondary container labeled clearly. Keep acids away from children and pets. The non-returnable nature of these kits exists for good reason—shipping hazardous materials carries risk.

    General Metal Handling Safety

    Scrap metal often has sharp edges. I wear cut-resistant gloves when handling unknown pieces. Sheet metal edges are notorious for causing cuts—even pieces that appear smooth can have razor-sharp burrs.

    Heavy pieces require proper lifting technique. Bend at the knees, not the back. Metal pieces are denser than they appear and can cause back injuries if lifted improperly.

    Some metals produce toxic fumes when heated or ground. Galvanized steel releases zinc oxide when heated—this causes metal fume fever. Cadmium-plated metals pose similar risks. Know what you’re working with before applying heat.

    Step-by-Step Metal Identification Workflow

    After years of practice, I’ve developed a systematic approach to metal identification. Following a consistent workflow produces more accurate results than randomly trying methods.

    Beginner Workflow

    1. Visual Inspection: Check color, surface, and markings first
    2. Magnet Test: Separate ferrous from non-ferrous
    3. Weight Comparison: Compare to known samples
    4. Confirm with Second Method: Verify initial identification
    5. Document Results: Label or mark identified pieces

    Advanced Workflow

    1. Check Markings: Look for stamps, grade markings, or part numbers
    2. Visual + Magnet: Initial categorization
    3. Density Calculation: Precise weight and volume measurement
    4. Spark Test (if ferrous): Determine carbon content
    5. Chemical Test (if precious): Verify karat or purity
    6. Professional Verification: XRF or lab test for critical applications

    Pro Tip: Build a reference collection of known metals. Label each piece clearly and keep them together. When you encounter an unknown piece, compare it directly to your references. This practice dramatically improves identification accuracy over time.

    DIY Projects
    Scrap Sorting
    Welding Prep
    Jewelry Verification

    Frequently Asked Questions

    How can you tell what metal something is?

    Start with a magnet test to separate ferrous from non-ferrous metals. Then examine the color and weight. Steel is magnetic and heavy, aluminum is non-magnetic and light, copper is reddish and very heavy, and brass is yellowish-gold and moderately heavy. For definitive identification, combine multiple methods rather than relying on a single test.

    What is the easiest way to identify metal?

    The magnet test combined with visual inspection is the easiest method for beginners. A strong magnet will immediately identify ferrous metals like steel and iron, while non-magnetic response narrows it down to aluminum, copper, brass, bronze, or most stainless steels. Then examine the color—copper is reddish, brass is yellow-gold, aluminum is light gray, and stainless is bright silver-gray.

    What are the methods of metal identification?

    The seven main metal identification methods are: visual inspection (color and markings), magnetic testing (ferrous detection), density testing (weight measurement), spark testing (carbon analysis), hardness testing (scratch resistance), chemical testing (acid reaction), and spectroscopic analysis (XRF). Most people start with visual and magnetic tests, then progress to density or spark testing as needed.

    How do you identify ferrous and non-ferrous metals?

    The magnet test is the definitive method for distinguishing ferrous from non-ferrous metals. Ferrous metals containing iron (steel, cast iron, some stainless grades) will attract to a magnet. Non-ferrous metals (aluminum, copper, brass, bronze, most stainless) will not attract. However, note that some stainless steels in the 400 series are magnetic, while 300 series stainless is non-magnetic.

    What is spark testing in metallurgy?

    Spark testing is a metal identification method where metal is ground against a high-speed abrasive wheel. The resulting spark stream reveals the metal’s carbon content and alloy composition. High-carbon steel produces long, bright sparks with many branches. Low-carbon steel creates shorter, straighter sparks. Stainless steel generates short orange-red sparks, while cast iron produces numerous small sparks in a bushy pattern.

    How accurate is XRF metal analysis?

    XRF metal analysis provides 99.9% accuracy for most elements in the periodic table. The technology measures elemental composition without damaging the sample, delivering results in seconds. However, XRF has limitations with light elements like lithium, beryllium, and sodium. Surface coatings can also affect readings, so testing may require light grinding to reach the base metal.

    How do you tell stainless steel from aluminum?

    Stainless steel and aluminum can be distinguished by three main tests. First, weight: aluminum weighs approximately one-third as much as stainless steel for the same size. Second, magnetism: some stainless grades attract magnets while aluminum never does. Third, spark test: stainless produces short orange-red sparks, while aluminum creates no spark stream, only small glowing particles.

    What is the difference between brass and bronze?

    Brass and bronze are both copper alloys but with distinct differences. Brass is copper plus zinc, appearing bright yellow-gold. Bronze is copper plus tin, appearing more muted with brownish-gold tones. Brass is slightly less dense than bronze (8.4 vs 8.7 g/cm3), making bronze feel marginally heavier for the same size piece. Bronze also produces a duller sound when tapped compared to brass’s brighter ring.

    Getting Started with Metal Identification

    Metal identification starts with the basics and builds from there. Begin with visual inspection and a magnet test—these two methods alone identify most common metals. As you gain experience, add density testing and spark testing to your repertoire.

    The equipment investments that provide the most value are a strong neodymium magnet, a digital scale, and a basic grinding wheel for spark testing. These three tools, combined with practice, will identify 95% of metals you’ll encounter.

    Remember that no single method is perfect. The most accurate identification comes from combining multiple tests and cross-referencing results. When accuracy matters for critical applications, professional testing provides definitive answers worth the investment.

  • Aluminum Brazing: Complete Guide for DIY Repairs

    Aluminum Brazing: Complete Guide for DIY Repairs

    I spent three frustrating hours in my garage last month trying to repair a cracked aluminum intake manifold. My first attempt failed completely. The filler metal just balled up and rolled right off.

    After some research and practice, I learned what I was doing wrong. The surface wasn’t clean enough, I hadn’t used flux properly, and I was heating the rod instead of the base metal.

    Aluminum brazing is a metal joining process that uses a filler metal with a lower melting point (600-750degF) than the base aluminum to create strong, leak-tight joints through capillary action without melting the base metal.

    Once you understand the basics, aluminum brazing becomes an invaluable skill. I’ve since repaired radiator leaks, fixed cracked ATV engine cases, and even fabricated custom aluminum brackets.

    Understanding Aluminum Brazing

    To braze aluminum successfully, you need to understand what’s happening at the molecular level. Unlike welding, which melts the base metals together, brazing keeps the parent metal intact.

    The filler metal melts at a lower temperature than aluminum. As it flows into the joint gap through capillary action, it forms a metallurgical bond with the base metal surface.

    Capillary action is the key principle that makes brazing work. The liquid filler metal is drawn into narrow spaces between closely fitted parts, similar to how water moves up a paper towel.

    Capillary Action: The movement of liquid along the surface of a solid caused by the attraction between molecules. In brazing, this draws molten filler metal into tight joint gaps.

    Aluminum brazing typically occurs between 600-750degF. By comparison, TIG welding aluminum requires temperatures above 1200degF to melt the base metal.

    This lower temperature is what makes brazing attractive for repairs. You avoid warping thin materials, creating heat-affected zones, or melting through delicate parts.

    Brazing vs Welding Aluminum

    Factor Brazing Welding (TIG/MIG)
    Temperature 600-750degF 1200degF+
    Base Metal Does not melt Melts and fuses
    Equipment Cost $50-150 $500-3000+
    Skill Required Beginner-friendly Significant practice needed
    Joint Strength 30,000-45,000 PSI Parent metal strength
    Heat Distortion Minimal Significant risk
    Dissimilar Metals Yes (Al to Cu, steel, etc.) Very difficult
    Best Applications Repairs, thin materials, leaks Structural, fabrication

    Tools and Materials You Need

    Before starting any aluminum brazing project, gather the right equipment. Having everything prepared prevents mistakes mid-job.

    Heat Source Options

    Heat Source Temperature Best For Cost
    Propane Torch ~3600degF flame Small repairs, thin material $30-60
    MAPP Gas Torch ~5300degF flame General DIY, faster heating $40-80
    Oxy-Acetylene ~6300degF flame Thick sections, production $200-500+
    Oxy-Propane <~4600degF flame Middle ground option $150-300

    For most DIY projects, a standard propane torch from a hardware store works fine. I’ve completed dozens of repairs with a basic $40 Bernzomatic setup.

    MAPP gas heats faster and works better for thicker pieces. When I repaired my ATV engine case (about 1/4 inch thick), MAPP gas made the job much easier.

    Brazing Rods and Filler Metals

    Choosing the right filler metal matters. The most common aluminum brazing alloys are:

    • 4043 Alloy: Most common, easy to use, good for general repairs. Melts at approximately 1070-1080degF. Creates a silvery finish.
    • 5356 Alloy: Higher strength, slightly harder to work with. Better for structural applications. Melts around 1060-1070degF.
    • Special Low-Temp Rods: Products like Super Alloy 5 or HTS-2000 melt at under 800degF. These are flux-coated and beginner-friendly.

    I started with 4043 rods from a local hardware store. They cost about $15 for a pack of three and worked well for my early projects.

    Flux Selection

    Flux serves three critical functions: it removes aluminum oxide, prevents re-oxidation during heating, and acts as a temperature indicator.

    Quick Summary: Most aluminum brazing requires flux. Flux-coated rods are the easiest option for beginners. Separate paste or powder flux works better for complex joints or furnace brazing.

    For beginners, I recommend flux-coated rods. They eliminate the extra step of applying flux separately and reduce the chance of contamination.

    Safety Equipment

    • Safety glasses: Essential. Flux can splatter when heated.
    • Leather gloves: Heat-resistant gloves protect against accidental contact.
    • Fire-resistant surface: Use a welding blanket or fire bricks.
    • Ventilation: Brazing produces fumes. Work in a well-ventilated area or use a fan.
    • Fire extinguisher: Keep a Class ABC extinguisher nearby.

    I once set a cardboard box on fire because I wasn’t paying attention to where the torch flame was going. Fortunately, I had an extinguisher within reach. Learn from my mistake.

    Step-by-Step Aluminum Brazing Process

    Follow these steps carefully. Rushing any part of this process leads to failed joints.

    Step 1: Clean the Surface Thoroughly

    Clean aluminum is the single most important factor for successful brazing. Aluminum naturally forms an oxide layer within seconds of exposure to air.

    I start by mechanically removing the oxide layer using a wire brush, sandpaper, or a roloc disc in a die grinder. Stainless steel brushes work best because they’re harder than aluminum and won’t leave contamination.

    After mechanical cleaning, I wipe the area with acetone or isopropyl alcohol. This removes grease, oil, and any remaining particles.

    Critical: Use a dedicated wire brush for aluminum only. Using a brush that’s touched steel will embed iron particles, which can cause corrosion and joint failure.

    Step 2: Prepare the Joint

    Proper joint design ensures capillary action can work. Parts should fit closely with a gap of 0.002 to 0.005 inches for best results.

    For crack repairs, I V-groove the crack using a grinding wheel. This creates space for filler metal and increases the surface area for bonding.

    Clamp or secure the parts so they won’t move during heating. I use locking pliers, vise grips, or spring clamps depending on the job.

    Step 3: Apply Flux

    If using uncoated rods, apply flux to the cleaned area and to the rod itself. A thin, even coat is sufficient.

    With flux-coated rods, you can skip this step. The flux will activate as the rod heats up.

    Step 4: Heat the Base Metal

    This is where most beginners make mistakes. Heat the base aluminum, not the rod.

    I start with a sweeping motion, moving the torch flame over an area about 2-3 inches around the joint. This provides even heating and prevents hot spots.

    Gradually focus more heat on the joint area as the metal warms. Watch for the flux to change color and become clear or watery.

    Common mistake: Touching the rod to the metal too early. If the base metal isn’t hot enough, the filler will ball up rather than flow into the joint.

    Step 5: Apply the Filler Metal

    When the base metal reaches the proper temperature, touch the brazing rod to the joint (not the flame).

    The filler metal should melt instantly and flow into the joint through capillary action. Continue feeding the rod as needed while maintaining heat on the base metal.

    For a typical 2-inch crack repair, I use about 1-2 inches of rod material. Don’t overdo it. Excess filler can run where you don’t want it.

    Step 6: Allow to Cool Slowly

    Once the filler has flowed completely into the joint, remove the heat and let the part cool naturally.

    Don’t quench with water. Rapid cooling can cause cracking due to thermal stress. I usually let parts sit for at least 15-20 minutes before handling.

    Step 7: Clean and Inspect

    After cooling, remove flux residue with warm water and a brush. Leftover flux can cause corrosion over time.

    Inspect the joint visually. A properly brazed joint should show smooth filler metal that flowed evenly into the joint area. There should be no gaps, pinholes, or unmelted rod particles.

    How to Tell When Aluminum Is Hot Enough?

    This is the question I see most from beginners. Knowing when the metal reaches brazing temperature (600-750degF) takes practice.

    Flux Behavior as a Temperature Indicator

    If you’re using flux, it provides excellent visual cues:

    • Room temperature: Flux is powdery or pasty (depending on type)
    • 400-500degF: Flux starts to darken and bubble slightly
    • 550-600degF: Flux becomes clear and watery. You’re getting close.
    • 650-750degF: Flux is completely clear and active. The sweet spot for brazing.
    • 800degF+: Flux may start smoking or burning. You’re overheating.

    When I first started, I kept a cheap infrared thermometer nearby. After about 10 joints, I learned to recognize the right temperature by watching the flux behavior alone.

    Visual Color Changes

    Unlike steel, aluminum doesn’t show a clear color change when heated. However, with practice, you can learn subtle cues:

    • Surface may appear slightly “shiny” or “wet” when near temperature
    • Black marker or soapstreak marks will disappear (an old-school trick)
    • The metal may produce a slight haze or distortion in the air above it

    The soapstreak method is surprisingly effective. I draw lines with a black permanent marker or soap on the metal. When the marks disappear completely, the metal is around 700-750degF.

    The Touch Test (Advanced)

    Some experienced brazers use a touch test: lightly touching the filler rod against the metal every few seconds. When the rod melts instantly on contact without needing direct flame, you’re at the right temperature.

    This takes practice to avoid adding cold filler to underheated metal. I recommend beginners stick to watching flux behavior until they develop a feel for the process.

    Troubleshooting Common Brazing Problems

    After brazing dozens of aluminum repairs, I’ve experienced just about every failure mode. Here are the most common problems and their solutions.

    Filler Metal Balls Up and Won’t Stick

    Cause: Surface contamination or insufficient heat.

    Solution: Clean the area more thoroughly. Use fresh sandpaper or a new wire brush. Degrease with acetone. Make sure you’re heating the base metal until the flux is clear and active before touching the rod.

    I once spent 20 minutes trying to braze a radiator tank that kept balling up. After my third failed attempt, I realized I hadn’t removed the factory corrosion-resistant coating. A quick pass with 80-grit sandpaper solved it.

    Joint Leaks After Cooling

    Cause: Incomplete filler penetration, joint movement during cooling, or contamination.

    Solution: Ensure parts are securely clamped. Don’t disturb the joint until completely cooled. Increase heat duration to ensure filler flows completely through the joint. Consider V-grooving cracks for better penetration.

    Filler Metal Flows Unevenly

    Cause: Uneven heating or improper joint fit-up.

    Solution: Use a broader sweeping motion with the torch to heat evenly. Check that joint gap is consistent and within the 0.002-0.005 inch range.

    Filler Metal Dissolves Base Metal

    Cause: Excessive heat or holding the torch in one spot too long.

    Solution: Keep the torch moving. If you need more heat in a specific area, use shorter, more frequent passes rather than continuous heating.

    This happened to me when brazing a thin-walled aluminum tube. I focused too much heat in one spot and the tube actually started dissolving where the filler touched it. Less heat, more movement.

    Joint Cracks After Cooling

    Cause: Thermal stress from rapid cooling or galvanic corrosion from improper materials.

    Solution: Allow parts to cool slowly. Don’t use water to quench. Ensure you’re using compatible aluminum alloys and filler metals.

    Excess Porosity in the Joint

    Cause: Overheating (flux boiling) or contamination from oils, paint, or coatings.

    Solution: Reduce heat input. Clean all surfaces to bare metal before starting. Ensure proper flux application.

    Brazing Aluminum to Copper

    One of aluminum brazing’s unique advantages is the ability to join dissimilar metals. HVAC technicians and refrigeration repair workers frequently need to braze aluminum to copper.

    The Challenge of Dissimilar Metals

    Aluminum and copper have significantly different thermal conductivities and melting points. Copper conducts heat away from the joint much faster than aluminum.

    This means copper components will require more heat to reach brazing temperature, but you still need to be careful not to overheat the aluminum.

    Technique for Aluminum-to-Copper Brazing

    1. Clean both metals thoroughly: Use a stainless brush for aluminum and a separate brush for copper to avoid cross-contamination.
    2. Use specialized filler: Choose a brazing alloy designed for aluminum-to-copper joints, such as zinc-aluminum alloys with melting points around 700-750degF.
    3. Apply flux to both surfaces: Use a flux compatible with both metals.
    4. Pre-heat the copper side first: Because copper conducts heat faster, give it extra attention during initial heating.
    5. Balance the heat: Spend more time heating the copper, less on the aluminum, aiming to bring both to brazing temperature simultaneously.
    6. Apply filler at the interface: Touch the rod where the two metals meet. The filler should bridge the gap.

    I’ve used this technique successfully to repair air conditioner line sets where aluminum tubing connects to copper components. The key is patience and careful heat management.

    Special Considerations for HVAC Work

    When brazing refrigeration lines, the system must be purged with nitrogen during heating. This prevents oxidation inside the tubing and prevents copper from becoming brittle.

    Also, be aware that some specialized filler metals for aluminum-to-copper joints contain cadmium. Always check the safety data sheet and work in well-ventilated areas.

    Safety Considerations

    Brazing involves open flames, hot metals, and potentially hazardous materials. Taking safety seriously prevents injuries and property damage.

    Fire Safety

    Clear your work area of flammable materials before starting. I keep a 5-foot radius clear around my work area.

    Never leave a lit torch unattended. Even when paused between joints, the torch should be shut off or securely positioned on a heat-resistant stand.

    Respiratory Protection

    Brazing produces fumes from flux, filler metals, and base metal coatings. Work in a well-ventilated area or use a fume extractor.

    Some older brazing alloys contain cadmium or other toxic metals. Always check product specifications and use appropriate respiratory protection when needed.

    Eye and Skin Protection

    Flux can splatter when heated. Safety glasses are mandatory every single time.

    UV radiation from the torch flame can damage your eyes over time. A shaded face shield provides additional protection for extended sessions.

    Pressure Vessel Warnings

    Never attempt to braze pressurized containers. Empty fuel tanks, refrigerant lines, or other pressure vessels must be properly purged and vented before any repair work.

    Even “empty” containers can hold residual fuel or pressure. Improper repairs can lead to explosions or leaks. When in doubt, consult a professional.

    Common Applications for Aluminum Brazing

    Once you master the basics, you’ll find many uses for aluminum brazing around the shop, garage, and home.

    Automotive Repairs

    Aluminum is increasingly common in modern vehicles. Brazing can repair:

    • Cracked engine blocks and cylinder heads
    • Damaged intake manifolds
    • Radiator and heater core tanks
    • Transmission housings
    • ATV and motorcycle engine cases

    I’ve repaired several ATV engine cases that would have cost hundreds to replace. A $15 pack of brazing rods and an hour of work saved me significant money.

    HVAC and Refrigeration

    HVAC technicians use brazing daily for:

    • Repairing aluminum evaporator coils
    • Connecting aluminum to copper linesets
    • Fixing leaks in condenser coils
    • Joining dissimilar metals in refrigeration systems

    Marine Applications

    Aluminum’s corrosion resistance makes it popular for marine use. Brazing can repair:

    • Boat hulls and decks
    • Fuel tanks
    • Outboard motor components
    • Fishing equipment

    DIY and Hobby Projects

    Brazing opens up fabrication possibilities for:

    • Custom brackets and mounts
    • Aluminum toolboxes and storage
    • Radio control hobbies
    • Automotive customization

    Frequently Asked Questions

    Is aluminum brazing as strong as welding?

    Welding creates a joint as strong as the parent metal because it fuses the base materials. Brazed joints typically reach 70-80% of base metal strength (30,000-45,000 PSI). For non-structural repairs like radiators, intake manifolds, and sheet metal, brazing is more than adequate. For structural applications where failure could be dangerous, welding is the better choice.

    What do you braze aluminum with?

    You need aluminum brazing rods (typically 4043 or 5356 alloy), a heat source (propane or MAPP gas torch for most DIY projects), flux (unless using flux-coated rods), and cleaning supplies (wire brush, sandpaper, acetone). For thicker materials, an oxy-acetylene or oxy-propane setup provides faster heating. Always wear safety glasses and work in a well-ventilated area.

    Is a propane torch hot enough to braze aluminum?

    Yes, a standard propane torch produces flame temperatures around 3600degF, which is more than sufficient for aluminum brazing that requires 600-750degF at the workpiece. Propane works well for small repairs and thin materials up to 1/8 inch thick. For thicker sections or faster heating, MAPP gas (~5300degF) or oxy-fuel setups are more efficient but not strictly necessary.

    Do I need flux when brazing aluminum?

    For most open-air torch brazing, yes, flux is essential. It removes the aluminum oxide layer, prevents re-oxidation during heating, and acts as a temperature indicator. The exception is flux-coated rods, which have flux integrated into the coating. Furnace brazing in controlled atmospheres may not require flux. Always check your filler rod specifications to determine if additional flux is needed.

    Can you braze cast aluminum?

    Yes, cast aluminum can be brazed successfully with proper preparation. The key challenges are removing porosity-trapping contaminants and dealing with the oxide layer. Clean the casting thoroughly, V-groove cracks to ensure penetration, and consider using specialized low-temperature brazing rods designed for cast aluminum. Engine blocks, transmission cases, and intake manifolds are commonly repaired with brazing.

    How strong is aluminum brazing?

    Properly brazed aluminum joints typically achieve tensile strengths of 30,000-45,000 PSI. By comparison, aluminum 6061-T6 has a tensile strength of about 45,000 PSI. While brazed joints are not as strong as a properly welded joint, they provide sufficient strength for most repair applications. The real advantage is that brazing preserves the base metal properties without creating a heat-affected zone.

  • Stick vs Flux Core Welding: Complete Comparison Guide

    Stick vs Flux Core Welding: Complete Comparison Guide

    I’ve spent years welding in home shops, on farm equipment, and in professional settings. The stick vs flux core welding debate comes up constantly among beginners choosing their first machine.

    After testing both processes extensively on real projects ranging from auto body repairs to fence fabrication, I found that flux core welding is better for beginners and indoor work, while stick welding excels at outdoor projects and thick materials. The choice depends on your specific projects, environment, and skill level.

    Let me break down exactly what you need to know to make the right decision for your situation.

    What is Stick Welding (SMAW)?

    Stick welding, officially called Shielded Metal Arc Welding (SMAW), is one of the oldest and most reliable welding processes. It uses a consumable electrode rod coated in flux material.

    When you strike an arc between the electrode and the workpiece, the intense heat melts both the rod and the base metal. The flux coating burns off, creating a protective gas shield that prevents contamination from the air.

    SMAW (Shielded Metal Arc Welding): The technical name for stick welding. Uses a fixed-length electrode with flux coating that creates its own shielding gas when burned, making it ideal for outdoor welding.

    As the weld cools, the flux forms a layer of slag over the bead. You chip this away to reveal the finished weld underneath. Stick welding equipment is simple: a power source, electrode holder, ground clamp, and the electrodes themselves.

    I’ve found stick welding particularly forgiving on dirty or rusty metal. The flux coating burns through contaminants that would cause problems in other processes. This makes it incredibly valuable for farm repair work and outdoor projects where metal preparation isn’t always possible.

    The electrodes come in various types designed for specific applications. E6010 and E6011 penetrate deep and work well on dirty metal. E6013 produces smoother beads for general-purpose work. E7018 offers low-hydrogen welds for critical structural applications.

    What is Flux Core Welding (FCAW)?

    Flux Core welding, or Flux Cored Arc Welding (FCAW), uses a continuous wire electrode filled with flux material rather than solid wire like MIG welding. The wire feeds automatically through a welding gun, eliminating the need to stop and change electrodes.

    As the wire feeds into the weld pool, the flux inside creates the shielding gas needed to protect the molten metal. This self-shielding capability makes flux core welding possible without external gas cylinders.

    FCAW (Flux Cored Arc Welding): A wire-fed welding process using tubular wire filled with flux. Self-shielded FCAW requires no external gas, while dual-shield versions combine flux with external gas for cleaner welds.

    The equipment consists of a wire feeder welder, welding gun, ground clamp, and flux core wire spool. Most modern flux core welders are compact units that plug into standard 115V household outlets.

    What I appreciate most about flux core welding is the continuous operation. You can weld for extended periods without interruption. The wire feed mechanism maintains consistent arc length automatically, reducing one variable that beginners struggle with in stick welding.

    Flux core wires come in two main categories. Self-shielded wires (like E71T-GS) need no gas and work well for general fabrication. Gas-shielded or dual-shield wires (like E71T-1) require external CO2 or argon mixes but produce cleaner welds with less spatter.

    Head-to-Head Comparison

    Understanding the key differences between these processes helps you choose the right one for your specific situation. Here’s a detailed comparison based on my hands-on experience:

    FeatureStick WeldingFlux Core Welding
    Electrode TypeFixed-length rod (12-14 inches)Continuous wire on spool
    Duty CycleLimited by rod changesContinuous welding possible
    Wind ToleranceExcellent – works in strong windGood – moderate wind tolerance
    Metal PreparationMinimal – works through rust/paintClean metal produces best results
    Thin Metal (22 gauge)Difficult – high amperage requiredExcellent – low heat input possible
    Thick Metal (1/4+ inch)Excellent – deep penetrationGood with multiple passes
    Beginner Learning TimeSeveral days of practiceFew hours to basic competence
    Weld AppearanceRough, requires cleanupModerate, some spatter
    Indoor UseRequires ventilationRequires ventilation
    PortabilityVery portable, minimal equipmentModerate – wire feeder needed

    Pros and Cons of Stick Welding

    Stick welding has earned its reputation as the go-to process for field work and heavy fabrication. After countless hours using stick welders on everything from gate repairs to structural steel, here’s what I’ve learned:

    Advantages of Stick Welding

    • Exceptional outdoor performance: Stick welding handles wind better than any other process. I’ve welded in gusty conditions that would be impossible with MIG or challenging with flux core. The flux coating creates robust shielding that doesn’t get blown away easily.
    • Works through contaminants: Paint, rust, mill scale – stick welding burns through it all. On farm equipment where sandblasting isn’t an option, stick electrodes like E6010 cut through surface contamination effortlessly.
    • Deep penetration on thick materials: When welding 1/4 inch plate or thicker, stick welding delivers penetration that’s hard to match. For structural applications where weld strength matters most, stick remains the preferred choice.
    • Simple, reliable equipment: A stick welder has few moving parts. Less to break means more reliability. I’ve taken stick welders to remote job sites where sophisticated equipment would fail.
    • Can weld in all positions: With the right electrode and technique, stick welding works flat, horizontal, vertical, and overhead. Vertical-up welds with E6010 produce excellent penetration on structural connections.
    • Lower initial equipment cost: Basic stick welders start around $150, making them accessible entry points. For occasional welders on a budget, stick offers the most affordable path to functional welding capability.
    • Wide range of electrodes: Specialty electrodes exist for virtually any application – cast iron, stainless steel, hardfacing, gouging, and more. One machine can handle diverse projects with the right electrode selection.

    Disadvantages of Stick Welding

    • Steeper learning curve: Developing the muscle memory for stick welding takes time. You must maintain consistent arc length, travel speed, and electrode angle simultaneously. Most beginners need several days of practice before producing consistently acceptable welds.
    • Frequent electrode changes: Each 12-14 inch rod lasts only 30-60 seconds depending on amperage and technique. Constant stopping to change rods interrupts your rhythm and extends project time significantly.
    • Slower deposition rate: For long welds, stick welding deposits metal more slowly than wire processes. Production environments typically favor flux core or MIG for this reason.
    • Slag removal required: Every stick weld is covered in slag that must be chipped away. This cleanup step adds time to every project and creates dust that requires respiratory protection.
    • Difficult on thin metals: Stick welding struggles with materials thinner than 18 gauge. The minimum amperage needed to maintain a stable arc often burns through light sheet metal.
    • Less aesthetic welds: Stick welds typically have a rougher appearance compared to other processes. For visible welds where appearance matters, stick often requires additional grinding and finishing.
    • Higher skill requirement for overhead/vertical: Out-of-position welding with stick requires advanced technique. Gravity works against you, and controlling the puddle overhead takes considerable practice to master.

    Pros and Cons of Flux Core Welding

    Flux core welding has gained popularity among DIY welders and small fabrication shops for good reason. After helping beginners learn both processes, I consistently see faster progress with flux core.

    Advantages of Flux Core Welding

    • Easier for beginners to learn: The continuous wire feed eliminates one major variable – maintaining arc length manually. New welders typically produce usable beads within a few hours, compared to days for stick welding. I’ve seen complete beginners fabricate basic projects in their first afternoon with flux core.
    • Continuous welding operation: No stopping to change electrodes means you maintain your rhythm and complete long welds efficiently. For projects like trailer fabrication or sheet metal work, this time savings adds up quickly.
    • Higher deposition rates: Flux core lays down metal faster than stick welding. Production environments appreciate the increased speed, and home fabricators finish projects more quickly.
    • Better performance on thin metals: With proper wire and settings, flux core handles sheet metal down to 22 gauge without burn-through. This makes it ideal for auto body work and light fabrication where stick would struggle.
    • No external gas required: Self-shielded flux core works anywhere without gas cylinders. You gain portability while still enjoying wire-feeding advantages. No gas rental fees or running out of gas mid-project.
    • One-handed operation possible: The gun design allows single-handed welding in many situations. Your free hand can steady the workpiece or manipulate fixtures, providing more control overall.
    • Better for tight spaces: The compact gun fits into confined areas where a long electrode holder might not. For tight repair situations, flux core offers distinct access advantages.
    • Less cleanup than stick: While flux core still produces slag, it’s typically lighter and easier to remove than stick welding slag. Wire brushing often suffices instead of chipping.

    Disadvantages of Flux Core Welding

    • Less tolerant of dirty metal: While better than MIG welding in this regard, flux core still struggles more than stick with rust, paint, and mill scale. Proper metal preparation produces significantly better results.
    • More spatter than MIG: Self-shielded flux core produces considerable spatter that requires cleanup. Your work area accumulates small metal beads that need periodic removal.
    • Equipment more complex: Wire feeders can jam, drive rolls wear out, and tension settings require adjustment. Stick welders have fewer moving parts and fewer failure points.
    • Wire feed issues in cold weather: The flux inside the wire can become stiff in low temperatures, causing feeding problems. Cold weather welding requires keeping wire spools warm or adjusting feeder tension.
    • Less wind-tolerant than stick: While better than gas-shielded processes, flux core can still be affected by strong winds. For severe outdoor conditions, stick remains superior.
    • Wire storage requirements: Flux core wire absorbs moisture from the air, which causes weld porosity. Proper storage in sealed containers with desiccant becomes important, especially in humid climates.
    • Limited to ferrous metals: While specialty flux core wires exist for stainless and some other alloys, the selection is limited compared to stick electrodes. For dissimilar metal welding, stick offers more options.
    • Gun consumable costs: Contact tips, nozzles, and drive rolls wear out and require replacement. These ongoing costs add up over time, unlike stick welding which primarily requires only electrodes.

    When to Use Each Method?

    Choosing the right welding process for your specific situation makes all the difference. Based on my experience across various applications, here’s a practical guide to help you decide:

    Choose Stick Welding When:

    • Welding outdoors in windy conditions: Farm fence repairs, construction sites, or any outdoor project where wind is present. Stick welding’s flux coating creates robust shielding that won’t be disrupted by air movement.
    • Working with dirty or rusty metal: Field repairs on equipment, farm implements, or structural steel where proper cleaning isn’t practical. The penetrating arc burns through surface contamination.
    • Welding thick materials (1/4 inch and above): Structural projects, heavy fabrication, or any application requiring deep penetration. Stick welding excels at fusing thick sections with full penetration.
    • Portability is essential: Remote job sites, field repair work, or situations where carrying a wire feeder welder isn’t practical. A stick welder and box of electrodes fit in a compact carrying case.
    • Budget is a primary concern: For welders on tight budgets who need basic welding capability, a $150 stick welder provides functionality that would cost significantly more with other processes.
    • Welding cast iron or specialty alloys: With the right electrode selection, stick welding handles materials that would be difficult or impossible with flux core. Nickel electrodes for cast iron repair are a classic example.
    • Doing gouging work: Stick welding can be used for carbon arc gouging to remove metal or prepare weld joints. This versatility is valuable in repair and fabrication settings.

    Choose Flux Core Welding When:

    • You’re a beginning welder: The easier learning curve means you’ll be producing functional welds more quickly. Most beginners achieve basic competence in a single afternoon versus several days with stick.
    • Working primarily with thin metals: Auto body repair, sheet metal fabrication, or any project involving 22-18 gauge material. Flux core’s lower heat input prevents burn-through on light materials.
    • Indoor shop welding is your norm: For garage workshops or indoor fabrication where wind isn’t a factor, flux core provides excellent results without the complexity of gas-shielded MIG welding.
    • Production speed matters: The continuous wire feed and higher deposition rates mean you complete projects faster. For fabrication businesses or serious hobbyists, this efficiency adds up.
    • You want cleaner weld appearance: While not as clean as gas-shielded MIG, flux core typically produces better-looking welds than stick welding with less post-weld cleanup required.
    • Long continuous welds are needed: Trailer fabrication, tank construction, or any application with long seam welds benefits from not stopping to change electrodes constantly.
    • One-handed operation would be helpful: Situations where your free hand needs to steady the workpiece or manipulate fixtures. The compact gun design enables single-handed welding in many scenarios.
    • Auto body repair is your focus: The ability to weld thin sheet metal without burn-through makes flux core ideal for automotive restoration and repair projects.

    Skill Level Comparison

    The learning curve difference between these processes significantly affects beginner success rates. In my experience teaching new welders, flux core produces initial success much faster.

    With flux core welding, most beginners can lay down a functional bead within 2-3 hours of practice. The wire feeder maintains consistent arc length automatically, removing one major variable from the learning equation. After a weekend of practice, new flux core welders typically handle basic projects successfully.

    Stick welding requires more patience and practice. Developing the coordination to maintain proper arc length, travel speed, and electrode angle simultaneously takes time. Most beginners need 3-5 days of regular practice before producing consistently acceptable stick welds. The frustration level is higher initially, but once mastered, stick welding becomes a versatile and reliable skill.

    That said, the investment in learning stick welding pays long-term dividends. The muscle memory and technique developed transfers to other welding processes. Many experienced welders recommend starting with stick precisely because it builds fundamental skills that serve you well across all arc welding processes.

    Cost and Equipment Comparison

    Understanding the financial commitment for each process helps you make an informed decision. Here’s a realistic breakdown based on current equipment pricing:

    Cost CategoryStick WeldingFlux Core Welding
    Basic Machine (115V)$150-$300$200-$400
    Heavy Duty Machine (230V)$400-$800$500-$1,000
    Consumables (per pound)$2-$4 for electrodes$3-$6 for flux core wire
    Gas RequiredNoNo (self-shielded)
    Gun/Holder Replacement$20-$40 for electrode holder$40-$80 for welding gun
    Additional ConsumablesMinimal (ground clamp)Contact tips, nozzles, drive rolls

    For occasional home use, stick welding typically costs less upfront. A basic stick welder plus a few boxes of electrodes gets you welding for under $250 total investment. Flux core equipment usually runs $50-100 more for comparable capabilities.

    However, for frequent welding, the efficiency of flux core can offset the higher equipment cost. The continuous operation and faster deposition rates mean you complete projects in less time. If you weld regularly, flux core may prove more cost-effective in the long run despite the higher initial investment.

    Consumable costs favor stick welding slightly. Electrodes generally cost less per pound than flux core wire, and the simpler equipment means fewer replacement parts over time. However, the difference is relatively small and shouldn’t be the deciding factor for most hobbyist welders.

    Frequently Asked Questions

    What is the main difference between stick and flux core welding?

    The main difference is the electrode type. Stick welding uses a fixed-length rod that you change frequently, while flux core uses a continuous wire fed through a gun. Flux core is generally easier for beginners and has higher deposition rates, while stick welding offers better penetration on thick materials and is more forgiving on dirty metal.

    Which is better for beginners, stick or flux core?

    Flux core welding is better for beginners. It is easier to learn, provides continuous welding without stopping to change electrodes, and is more forgiving of technique mistakes. Most beginners can produce usable welds within a few hours with flux core, while stick welding typically requires several days of practice.

    Do you need gas for flux core welding?

    No, self-shielded flux core welding does not require external gas. The flux inside the wire creates its own shielding gas when burned. However, there is also gas-shielded flux core (dual shield) that uses both flux and external gas for cleaner welds.

    Is stick welding stronger than flux core?

    When done correctly, both processes can produce equally strong welds. Stick welding typically offers better penetration on thick materials, which can result in stronger welds for heavy structural applications. Flux core produces strong welds as well, particularly on thinner materials where it excels.

    Can you weld aluminum with flux core?

    Yes, but it is difficult and requires specialized aluminum flux core wire. The results are often poor quality with excessive spatter. For aluminum welding, MIG or TIG welding with proper gas shielding is strongly recommended over flux core.

    What is stick welding used for?

    Stick welding is commonly used for outdoor construction and repairs, farm and ranch equipment, structural steel welding, pipeline welding, heavy equipment repair, and thick metal fabrication. Its outdoor capability and ability to weld through rust and paint make it ideal for field repair work.

    What is flux core welding used for?

    Flux core welding is commonly used for DIY home projects, auto body repair, light fabrication, sheet metal work, hobby welding, indoor workshop projects, and general maintenance. Its ease of use and good results on thin materials make it popular with home fabricators and beginners.

    Is flux core welding good for outdoor use?

    Yes, flux core welding works well outdoors. The self-shielded wire is wind-tolerant and does not require external gas shielding. While not quite as wind-resistant as stick welding, flux core performs adequately in moderate wind conditions, making it suitable for most outdoor DIY projects.

    Which is cheaper, stick or flux core?

    Stick welding equipment is typically cheaper to buy initially, with basic machines starting around $150. Flux core welders start around $200. However, flux core wire is generally more expensive per pound than stick electrodes. For occasional use, stick welding is more economical; for frequent welding, flux core may be more cost-effective due to higher efficiency.

    Final Verdict

    After using both processes extensively across various applications, here’s my honest assessment:

    Choose flux core welding if: You’re a beginner, work primarily indoors, weld thin materials, or want faster results with less frustration. The easier learning curve means you’ll be successfully completing projects sooner. For most DIY enthusiasts and home fabricators, flux core offers the best balance of capability and accessibility.

    Choose stick welding if: You weld outdoors frequently, work with thick materials, need maximum portability, or value versatility above convenience. The steeper learning curve rewards you with a process that handles almost any welding situation, especially challenging field work where other processes struggle.

    The ideal solution: Many experienced welders ultimately own both. A multi-process welder that handles stick, flux core, and MIG gives you the flexibility to choose the right process for each project. You might start with flux core to learn the fundamentals, then add stick capability later for outdoor and heavy fabrication work.

    Whichever process you choose, remember that practice matters more than equipment. I’ve seen impressive welds produced with basic machines by skilled operators, and poor welds made on expensive equipment by beginners. Start with whichever process matches your immediate needs, invest time in developing your skills, and expand your capabilities as your experience grows.