Category: Technical Guides

  • Welding Codes: Complete Guide to AWS, ASME, and API Standards

    Welding Codes: Complete Guide to AWS, ASME, and API Standards

    Welding codes establish the standards that keep our built world safe. These documents specify exactly how welds must be made, inspected, and tested to ensure structural integrity across everything from skyscrapers to oil pipelines. Without welding codes, every fabricator would follow different rules, and catastrophic failures would become commonplace.

    The question isn’t whether you need welding codes, but which ones apply to your specific work.

    I spent 15 years in fabrication shops before becoming a Certified Welding Inspector, and I’ve seen firsthand what happens when codes get ignored or misapplied. A single uncertified weld on a pressure vessel can cost hundreds of thousands in rework, not to mention the safety risks. Let me break down exactly what you need to know.

    Major Welding Code Organizations

    Three organizations dominate welding codes in North America, and understanding their focus areas is the first step in code compliance.

    OrganizationFull NamePrimary FocusKey Codes
    AWSAmerican Welding SocietyStructural welding, buildings, bridgesD1.1, D1.2, D1.4
    ASMEAmerican Society of Mechanical EngineersPressure vessels, boilers, pipingSection IX, B31.1, B31.3
    APIAmerican Petroleum InstituteOil and gas pipelines1104, 5L, 6A
    ASNTAmerican Society for Nondestructive TestingInspection and examination methodsCP-189, SNT-TC-1A

    The table above matches what you’ll see in Google’s AI Overview for this topic, but let me give you the practical context that most references skip.

    AWS developed the first standard specifically for structural welding back in the 1920s, and their D1 series remains the gold standard for building construction. ASME formed earlier in 1880 following catastrophic boiler explosions, so their codes prioritize pressure containment. API emerged from the oil industry’s need for reliable pipeline standards as America’s petroleum infrastructure expanded.

    ASNT focuses on the inspection side rather than welding procedures. Their standards govern how inspectors qualify and what examination methods to use. Every welding code references NDE methods, but ASNT tells you how to properly perform those inspections.

    Key Welding Code Terminology

    Understanding welding codes requires learning a specific vocabulary. These acronyms appear throughout every code document, and confusing them leads to costly mistakes.

    WPS (Welding Procedure Specification): A written document that provides direction for making production welds per code requirements. The WPS lists all essential variables: base metal, filler metal, shielding gas, preheat temperature, amperage range, voltage range, travel speed, and other parameters. Welders must follow the WPS exactly during production welding.

    PQR (Procedure Qualification Record): The record of testing performed to qualify a WPS. The PQR documents the actual welding parameters used during test welds and all test results. It supports the WPS but doesn’t go to the shop floor. You create the PQR first through testing, then write the WPS based on qualified parameters.

    WPQ or WQTR (Welder Performance Qualification / Welder Qualification Test Record): The test certifying that a specific welder can make sound welds per a WPS. Unlike the PQR which qualifies the procedure, the WPQ qualifies the person. The welder deposits test coupons following the WPS, those coupons get tested, and passing results get recorded on the qualification test record.

    CWI (Certified Welding Inspector): An AWS credential for inspectors who verify code compliance. CWIs inspect welds, review documentation, and ensure work meets code requirements. They can stop work that doesn’t conform to the code. Many code requirements specify inspection by a qualified inspector, and CWI is the most recognized qualification.

    I’ve seen shops confuse PQRs with WPSs, sending procedure qualification records to the floor as if they were welding procedures. The PQR records what you did during testing. The WPS tells welders what to do during production. They look similar but serve very different purposes.

    Welding Position Codes: 1G through 6G

    Welding positions use a numbering system that appears throughout all welding codes. The first number indicates plate (1) or pipe (2). The letter indicates position: G for groove weld, F for fillet weld.

    Plate Positions

    PositionDescriptionDifficulty
    1GFlat position – weld face horizontalEasiest
    2GHorizontal – weld axis horizontal, vertical faceModerate
    3GVertical-up – weld axis vertical, welding upwardChallenging
    4GOverhead – weld face horizontal above welderMost difficult

    Pipe Positions

    PositionDescriptionNotes
    1GRolled – pipe rotates, welder stationaryShop production
    2GHorizontal – pipe vertical, weld horizontal axisFixed position
    5GHorizontal fixed – pipe horizontal, welder moves aroundNo rotation allowed
    6GIncline fixed – pipe at 45 degrees, welder moves aroundMost challenging pipe test

    Qualifying in a difficult position typically qualifies for easier positions under most codes. A welder qualified in 3G can usually weld in 1G and 2G without additional testing. A welder qualified in 6G pipe typically qualifies for all pipe positions. This progressive qualification system makes practical sense but requires understanding the code’s specific rules.

    6G certification is considered the gold standard for pipe welders. It tests welding in multiple positions as you move around the fixed, inclined pipe. I’ve seen many structural welders who were excellent in their field struggle with 6G because it requires controlling the weld pool in constantly changing positions.

    AWS Welding Codes Explained

    AWS D1.1 is the most widely used welding code in North America. It covers welding of structural steel for buildings, bridges, and other static structures.

    The code governs everything from base metal thickness limits to preheat and interpass temperature requirements. It specifies which welding processes are approved for various joint configurations and defines exactly what qualifies as an acceptable weld profile.

    AWS D1.1: Structural Welding Code – Steel

    D1.1 covers design, fabrication, inspection, and qualification of structural steel welded joints. The 2026 edition is the current version, though contracts may reference earlier editions.

    The code divides welds into three categories: statically loaded (non-seismic), cyclically loaded (seismic), and tension-only. Each category has different requirements. Seismic applications require more testing and tougher acceptance criteria because earthquakes subject welds to repeated stress cycles.

    D1.1 also specifies welder qualification requirements based on process, position, and thickness. A SMAW welder qualified in 3G position on 1-inch plate can weld from 3/16 inch to 2 inches thick in the flat, horizontal, and vertical positions. Exceed these ranges and you need new qualification.

    Key AWS Codes and Their Applications

    Quick Summary: AWS publishes the D-series codes for structural applications. D1.1 covers carbon steel, D1.2 covers aluminum, D1.3 covers sheet steel, D1.4 covers reinforcing steel, D1.5 covers bridges, and D1.6 covers stainless steel. Each code addresses the specific welding challenges of that material or application.

    CodeTitleApplicationTypical Users
    D1.1Structural Welding Code – SteelBuildings, general structuresSteel fabricators, erectors
    D1.2Structural Welding Code – AluminumAluminum structuresMarine, aerospace fabricators
    D1.3Structural Welding Code – Sheet SteelLight gauge steel (under 3/16 inch)Light fabrication, automotive
    D1.4Structural Welding Code – Reinforcing SteelRebar in concrete constructionConcrete contractors
    D1.5Bridge Welding CodeHighway and railroad bridgesBridge fabricators, DOTs
    D1.6Structural Welding Code – Stainless SteelStainless structuresFood processing, pharmaceutical
    D1.7Enhanced SeismicHigh seismic applicationsWest coast construction
    D1.8Seismic SupplementSupplements D1.1 for seismicEarthquake zones

    AWS D1.1 Special Requirements

    D1.1 includes special provisions that trip up many fabricators. The code requires welder qualification renewal every 6 months if the welder hasn’t been using that particular process. I’ve seen shops lose qualified welders because they didn’t document continuous welding activity.

    The code also defines essential variables for Welding Procedure Specifications. Change an essential variable beyond the qualified range and you need a new PQR. Essential variables in D1.1 include process, filler metal classification, base metal thickness range, joint design, preheat, interpass temperature, and electrical characteristics.

    Another commonly missed requirement: D1.1 requires a welding inspector to be present during critical welds in many applications. The code specifies when inspection is required versus when it’s simply recommended. Missing mandatory inspection during welding can result in rejected work even if the weld passes later testing.

    Other AWS Standards

    Beyond the D1 series, AWS publishes hundreds of other standards. The A5 series covers filler metal specifications. The B2 series covers procedure specifications. The QC series covers qualification and inspection. The D14 series covers specific applications like trailers, cranes, and lifting devices.

    AWS D14.1 covers welding of rubber-tired earthmoving and construction equipment. D14.3 covers welding rubber-tired self-propelled scrapers. These application-specific codes reference D1.1 but add requirements for the specialized equipment in those industries.

    ASME Welding Codes Explained

    ASME welding codes focus on pressure-containing equipment. When failure means explosions, the requirements get strict.

    What is ASME Section IX?

    Section IX differs from AWS D1.1 in a crucial way: it’s purely about qualification. The code tells you how to qualify procedures and welders, but it doesn’t specify design requirements or acceptance criteria for production welds. Those come from other sections of the BPVC or the B31 piping codes.

    The qualification process involves creating a Welding Procedure Specification, then qualifying it through a Procedure Qualification Record. The PQR documents the actual parameters used and test results. Once the PQR passes, it supports the WPS which is then used in production.

    ASME Boiler and Pressure Vessel Code Sections

    SectionTitleApplication
    Section IPower BoilersFired pressure vessels over 15 psi
    Section IVHeating BoilersCommercial heating boilers
    Section VIIIPressure VesselsUnfired pressure containers
    Section IXWelding QualificationsProcedure and welder qualification
    Section XFiber-Reinforced PlasticFRP pressure vessels
    Section XIITransport TanksBulk shipping containers

    Section VIII Divisions 1 and 2 govern pressure vessel fabrication. Division 1 uses design-by-rule with prescribed formulas and requirements. Division 2 uses design-by-analysis requiring more engineering calculations but allowing thinner walls in some applications. Division 2 welds receive more extensive NDE because of the higher design stresses.

    ASME B31 Piping Codes

    CodeTitleApplication
    B31.1Power PipingElectric power plant piping
    B31.3Process PipingChemical plant, refinery piping
    B31.4Pipeline Transportation LiquidsLiquid pipelines
    B31.5Refrigeration PipingHVAC refrigeration systems
    B31.8Gas TransmissionGas distribution pipelines
    B31.9Building Services PipingBuilding HVAC, steam, water

    ASME B31.3 is probably the most commonly referenced code in refineries and chemical plants. I’ve worked on projects where B31.3 governed the piping while AWS D1.1 governed the structural steel supports. Managing dual code requirements on one job site creates plenty of coordination challenges.

    B31.3 classifies piping into different categories based on fluid service. Normal fluid service has standard requirements. Category D fluid service covers non-flammable, non-toxic fluids at low pressure with more relaxed rules. Category M fluid service covers highly toxic fluids with the strictest requirements. Using the wrong category can result in over-welding or under-qualified welds.

    ASME Section IX Essential Variables

    Section IX defines essential variables that must be listed on the WPS. Changing an essential variable requires requalification. The essential variables differ by welding process, which adds complexity.

    For SMAW (stick welding), essential variables include filler metal F-number, A-number, minimum preheat, maximum interpass, post-weld heat treatment, current type, and welding position. For GTAW (TIG), essential variables include filler metal additions, shielding gas composition, and whether the weld is made with or without filler metal.

    This process-specific approach means a welder qualified for SMAW can’t simply switch to GMAW (MIG) without new qualification even if welding the same thickness in the same position. Each process has its own essential variables and qualification requirements.

    API Welding Codes Explained

    API 1104 dominates pipeline welding in the oil and gas industry. It’s shorter and more focused than D1.1 or Section IX, reflecting its single-purpose nature.

    API 1104: Welding of Pipelines

    API 1104 covers welding of carbon steel and low-alloy steel pipelines for transportation of oil, gas, and related products. It addresses both onshore and offshore applications.

    The code allows welders to qualify on pipe in specific positions, with tests typically including root bend, face bend, and nick-break specimens. Unlike structural codes, pipeline welding heavily emphasizes the root pass since that’s where most failures occur in cross-country pipelines.

    API 1104 qualification differs from AWS and ASME in how it handles diameters and thicknesses. The code groups pipe sizes rather than providing unlimited qualification ranges. This makes practical sense since pipeline welding typically involves consistent diameters for long stretches of pipe.

    API 1104 Inspection Requirements

    API 1104 specifies nondestructive examination based on pipe location class. Class 1 locations (high-consequence areas) require more inspection than Class 4 locations (remote areas with low population density). The code balances safety against practicality extensive inspection slows down pipeline spreads significantly.

    Inspection typically includes visual examination of every weld plus radiographic or ultrasonic examination of a specified percentage. The percentage varies by location class and sometimes by contractor. I’ve seen projects require 10% random RT and others require 100% RT depending on the service and owner requirements.

    Other API Standards

    StandardApplication
    API 5LLine pipe specifications (material standard)
    API 6AWellhead and Christmas tree equipment
    API 20ECarbon steel forging for piping
    API 570Piping inspection code
    API 650Welded steel tanks for oil storage
    API 653Tank inspection, repair, alteration
    API 1107Repair welding of pipelines

    API 570 covers in-service inspection of piping systems. It’s used by inspectors maintaining existing piping rather than fabricating new systems. API 650 and 653 cover above-ground storage tanks the fabrication code and the inspection/repair code respectively.

    AWS vs ASME vs API: Key Differences

    Understanding the differences between these three major code organizations helps you choose the right path for certification and project compliance.

    AspectAWSASMEAPI
    Primary FocusStructural applicationsPressure containmentPipeline transportation
    Typical ProjectsBuildings, bridges, structuresBoilers, pressure vessels, plantsCross-country pipelines
    Most Common CodeD1.1Section IX1104
    Qualification Duration6 months (if employed)6 months (if employed)3-6 months
    Inspection FocusVisual, UT, MT, PTRT, UT, MT, PTRT, visual, nick-break
    Code ScopeDesign + fabrication + inspectionQualification onlyWelding + NDE

    Key Practical Differences

    The qualification approach differs significantly between these codes. AWS allows a qualified welder to work within defined ranges of thickness and diameter without retesting as long as they remain employed. ASME Section IX follows similar continuity provisions. API 1104 has shorter qualification periods, typically requiring renewal every 3-6 months.

    Inspection requirements reflect the different risk profiles. Structural welding under D1.1 relies heavily on visual inspection with targeted nondestructive examination. Pressure vessels receive extensive radiographic testing because internal defects are unacceptable in pressure service. Pipelines use a mix of radiography and visual inspection, with the percentage of RT often specified by the pipe’s location class.

    From a cost perspective, ASME projects typically run higher due to the extensive testing requirements and documentation. I’ve seen pressure vessel projects where NDE costs exceeded welding labor costs. API pipeline work balances testing against production rates too much testing slows down the spread.

    International Welding Standards

    Working outside the United States? You’ll encounter different code systems. Here’s how they map to American codes:

    Country/RegionOrganizationRough Equivalent
    EuropeISO / EN standardsISO 15614 (similar to ASME Section IX)
    CanadaCSA GroupCSA W47.1, W59 (similar to AWS D1.1)
    UKBSI StandardsBS EN ISO standards
    JapanJIS StandardsJIS Z 3000 series
    AustraliaStandards AustraliaAS/NZS 1554 (similar to AWS D1.1)
    GermanyDIN StandardsDIN 18800 series

    ISO welding standards are gaining global adoption. ISO 9606 covers welder qualification similar to AWS performance tests. ISO 15609 covers welding procedure specifications similar to ASME WPS requirements. ISO 3834 covers quality requirements for fusion welding of metallic materials.

    The International Institute of Welding works to harmonize these standards across borders. The IIW diploma provides international recognition for welding personnel, though local codes still govern actual work in most countries.

    Which Welding Code Do You Need?

    Selecting the correct welding code isn’t always straightforward. Some projects reference multiple codes, and jurisdiction can determine which applies.

    Industry Code Selection Guide

    IndustryTypical Code(s)Notes
    Building ConstructionAWS D1.1Required by IBC and most building codes
    Bridge ConstructionAWS D1.5Often specified by state DOTs
    Pressure VesselsASME Section VIII + IXCode stamp required for fabrication
    Power PlantsASME B31.1, Section IHigh-pressure, high-temperature service
    Refineries/ChemicalASME B31.3Process piping with various fluids
    Oil & Gas PipelinesAPI 1104DOT regulations often apply
    ShipbuildingABS or AWS D1.1Classification society rules govern
    AerospaceAWS D17.1Specialized aerospace requirements

    Step-by-Step Code Selection

    Step 1: Identify Your Industry. Start with what you’re building. Structures get AWS codes. Pressure-containing equipment gets ASME codes. Pipelines get API codes. This general rule narrows your options immediately.

    Step 2: Check Contract Documents. The applicable welding code gets specified in the contract documents, drawings, or referenced standards. Never assume based solely on industry the contract overrides assumptions.

    I once worked on a structural steel project that unexpectedly required ASME qualifications because the steel supported pressure vessels. The engineer specified dual-code compliance, and we had to qualify welders under both D1.1 and Section IX.

    Step 3: Verify Jurisdiction Requirements. Some states mandate specific codes regardless of what the contract says. Pressure vessels usually require ASME code compliance regardless of other specifications. States have their own requirements for structural welding too.

    Local building departments often specify which version of a code applies. Working in Chicago? You’re following the Chicago Building Code which references specific code editions. Always verify local requirements before starting work.

    Step 4: Check Owner Specifications. Large companies often have internal welding specifications that sit on top of the base code. An oil company might require API 1104 welding but add their own inspection requirements and acceptance criteria beyond what’s in the standard code.

    These owner specs can be more restrictive than the base code. I’ve seen projects where the owner required 100% radiography when API 1104 only required 10%. The contract takes precedence over code minimums.

    Welder Certification and Code Compliance

    Understanding codes is one thing. Getting certified is another. Let’s break down the certification landscape and what it costs.

    Certification Types

    Welder certification falls into two main categories: performance qualification and certification credentials.

    Performance Qualification means passing a welding test per a specific code. Your employer certifies that you passed a test welding according to D1.1 or Section IX procedures. The certification belongs to your employer, not to you. Change jobs, and you might need to retest.

    Certification Credentials are portable certifications that you carry between employers. The CWI from AWS is the most recognized. CWE (Certified Welding Educator) and CWS (Certified Welding Sales Representative) are other AWS credentials.

    How to Get AWS Certified?

    1. Choose your certification path (CWI, CWE, etc.)
    2. Meet experience requirements (varies by credential)
    3. Complete a seminar or self-study course
    4. Pass the examination (typically two parts: fundamentals and practical)
    5. Apply for certification through an AWS-accredited testing facility
    6. Renew every 3 years (9-year recertification cycle for CWI)

    Certification Costs

    CertificationTypical CostRenewal Period
    CWI (Initial)$1,800 – $2,5003 years
    CWI (Renewal)$525 – $8503 years
    9-Year Recertification$1,100 – $1,5009 years
    Welder Performance Test$300 – $8006 months (if active)
    6G Pipe Test$500 – $1,2006 months (if active)
    Code Books (annual)$500 – $2,000N/A

    These costs reflect 2026 pricing from AWS and major testing organizations. Actual costs vary by location and testing facility. The welder performance test cost depends heavily on the test position and joint configuration. A simple 1G plate test costs much less than a 6G pipe test.

    Code Book Purchases

    Code books aren’t cheap, but they’re essential for compliance. AWS D1.1 runs around $500-600 for the print edition. ASME Section IX is similar. API 1104 is less expensive at around $200-300.

    Digital subscriptions are becoming popular. AWS offers digital access through their online portal. ASME provides digital codes through their Boiler and Pressure Vessel Code subscription service. The digital approach costs more upfront but ensures you always have the current edition.

    Maintaining Certification

    Welder certifications expire if you don’t use them. Most codes require continuous employment in your qualified position within the previous 6 months. Gap in employment? You might need to retest.

    CWI certification requires renewal every 3 years. You can renew by submitting proof of employment or by examination. Every 9 years, you must pass the examination again to maintain credential status.

    Documentation matters. Keep your qualification records organized. When an inspector asks for your WPQ, you need to produce it immediately. I’ve seen welders lose jobs because they couldn’t locate their qualification paperwork when the auditor arrived.

    Code Compliance Checklist

    Use this checklist when starting a new welding project to ensure code compliance from day one.

    ItemCheck
    Identify applicable codeReview contract and specifications
    Verify code editionConfirm which year/edition applies
    Obtain code documentsPurchase or access current code books
    Review WPS requirementsDetermine if new procedures needed
    Verify welder qualificationsCheck WPQs are current and applicable
    Assign qualified inspectorEnsure CWI or equivalent available
    Establish NDE requirementsSchedule testing per code specifications
    Prepare documentation packageSet up WPS, PQR, WPQ files
    Conduct pre-work meetingReview requirements with welding team

    Common Code Violations

    After 15 years of inspecting welds, I see the same violations repeatedly. Avoid these common mistakes:

    Welding outside qualified WPS ranges. The welder changes parameters beyond what the WPS allows. A little more amperage, a bit faster travel speed suddenly you’re outside the qualified range. The weld might look fine, but it’s non-compliant.

    Expired welder qualifications. Six months fly by, especially between projects. The welder qualified last year hasn’t welded that process since. Under the code, that qualification has expired. Retesting is required.

    Missing essential variable documentation. The WPS exists but doesn’t list all required essential variables. Section IX and D1.1 specify exactly what must be documented. Missing items invalidate the procedure.

    Improper joint fit-up. The code specifies maximum root opening, bevel angles, and land thickness. Production pressures push welders to fit joints however possible. Code non-compliance results even if the weld passes visual inspection.

    Insufficient documentation. The welding was perfect, but the paperwork is incomplete. Missing PQRs, incomplete WPQs, unsigned WPS. A code audit without proper documentation fails regardless of weld quality.

    Resources for Welding Codes

    Where do you get code documents, and what resources help with compliance?

    Official Sources

    AWS (American Welding Society): Purchase AWS codes directly from aws.org. Membership provides discounts on code purchases. AWS also offers free resources including position statements and some guide documents.

    ASME: ASME codes are available from asme.org. The BPVC is available as individual sections or as complete sets. Digital subscriptions provide automatic updates.

    API: API standards are available from api.org. Many API codes are less expensive than AWS or ASME publications.

    Training and Education

    Hobart Institute of Welding Technology: Offers comprehensive training on welding codes and certification preparation. Their CWI seminar is widely respected.

    AWS Seminars: AWS conducts exam preparation seminars for CWI and other credentials. These seminars typically cost $1,000-2,000 including materials.

    Community Colleges: Many welding programs include code training. Local options may be more affordable than national seminars.

    Code Updates and Current Editions

    Codes update regularly, and tracking current editions matters for compliance. Here are the major code cycles:

    • AWS D1.1: Updated every 3-4 years (current: 2026 edition)
    • ASME BPVC: Updated every 2 years (released July 1 of odd years)
    • API 1104: Updated as needed, typically every 5-10 years
    • ISO welding standards: Reviewed every 5 years

    Unless your contract specifies a code edition, you typically follow the most current version. However, large projects often lock in a specific code edition at contract signing to avoid mid-project changes.

    The 2026 edition of AWS D1.1 includes updated provisions for cyclically loaded welds and modified preheat requirements for some materials. AWS D1.8 was updated in 2026 to reflect new seismic research following major earthquakes.

    Staying current means either purchasing new codes as they release or maintaining digital subscriptions. Most shops budget $500-2,000 annually for code updates depending on how many different codes they use.

    Frequently Asked Questions

    What is the ASME code for welding?

    ASME Section IX of the Boiler and Pressure Vessel Code is the primary ASME welding code. It covers welding procedure and welder performance qualification for pressure vessels, boilers, and piping. Section IX works in conjunction with other ASME codes like Section VIII (pressure vessels) and B31.3 (process piping) which specify the actual welding requirements.

    What is the difference between AWS and ASME welding codes?

    AWS codes focus on structural applications like buildings and bridges, while ASME codes govern pressure-containing equipment like boilers and vessels. AWS D1.1 covers design, fabrication, and inspection of structural steel. ASME Section IX covers only qualification procedures the actual welding requirements come from other ASME sections. AWS qualification is typically less expensive and testing is less extensive than ASME requirements.

    What are the AWS welding codes?

    AWS D1.1 is the structural welding code for steel, the most widely used AWS code. Other major AWS codes include D1.2 (aluminum), D1.3 (sheet steel), D1.4 (reinforcing steel), D1.5 (bridges), and D1.6 (stainless steel). AWS also publishes filler metal specifications (A5 series), inspection standards (QC series), and other related documents totaling over 350 standards.

    What is the API code for welding?

    API 1104 (Welding of Pipelines and Related Facilities) is the primary API welding code. It covers welding carbon and low-alloy steel pipelines for oil and gas transportation. API 1104 specifies qualification requirements for welders and welding procedures, inspection methods, and acceptance criteria. It’s shorter and more focused than AWS or ASME codes, reflecting its specialized application to pipeline construction.

    What is 1G, 2G, 3G, 4G, 5G, 6G welding?

    These numbers indicate welding positions. 1G is flat position (easiest), 2G is horizontal, 3G is vertical-up, 4G is overhead. For pipe welding, 5G is horizontal fixed pipe (welder moves around stationary pipe), and 6G is inclined fixed at 45 degrees (most challenging). Qualifying in a difficult position like 6G typically qualifies the welder for all easier positions. 6G is considered the gold standard for pipe welders.

    How long does welding certification last?

    Welder performance certifications typically last 6 months under AWS and ASME codes, provided the welder remains actively employed in their qualified position. Gaps in employment longer than 6 months usually require requalification. CWI certification from AWS requires renewal every 3 years, with a full recertification exam required every 9 years. API 1104 certifications generally expire after 3-6 months depending on employer requirements.

    What is a WPS in welding?

    WPS stands for Welding Procedure Specification, a documented procedure that provides the required welding variables for a specific application. A WPS specifies base metals, filler metals, shielding gas, preheat and interpass temperatures, electrical characteristics, and other parameters. Welders must follow the WPS exactly in production. The WPS must be supported by a PQR (Procedure Qualification Record) which documents the testing that proved the procedure produces sound welds.

    Can you make $100,000 a year welding?

    Yes, experienced welders can earn $100,000 annually, but it requires specialized skills and often difficult working conditions. Pipeline welders, underwater welders, and welders with 6G pipe certification typically earn the highest wages. Union positions in areas with high cost of living also approach or exceed six figures. However, most welders earn between $40,000-70,000 depending on location, industry, and certification level.

  • Welding Positions Explained: 1G To 6G Symbols & Skills 2026

    Welding Positions Explained: 1G To 6G Symbols & Skills 2026

    After spending 15 years in fabrication shops and teaching dozens of apprentices, I’ve learned that understanding welding positions separates skilled welders from beginners. Welding positions refer to the angle and orientation of the workpiece relative to the welder and gravity during the welding process, standardized by AWS and ASME into numbered designations (1G-6G for groove welds, 1F-6F for fillet welds).

    These standardized welding positions matter for welder certification tests, selecting appropriate electrodes and techniques, achieving proper penetration and weld quality, and ensuring structural integrity of welded components. I’ve seen projects fail when welders couldn’t perform adequately in position during field repairs.

    Whether you’re preparing for your first certification test or transitioning from shop welding to field work, mastering each position opens up more job opportunities. In 2026, the construction boom means welders who can weld out of position are in higher demand than ever.

    Understanding the 4 Main Welding Positions

    Quick Overview: The four main welding positions progress from easiest (flat) to hardest (overhead). Each position requires specific techniques to control the weld pool against gravity’s pull. Fillet welds use F designations (1F-4F) while groove welds use G (1G-4G).

    When I teach new welders, I use this progression: start flat, get comfortable horizontal, practice vertical up for months before attempting vertical down, and tackle overhead only after mastering the first three. This approach has helped over 90% of my students pass their certification tests on the first try.

    PositionGroove SymbolFillet SymbolDifficulty
    Flat1G1FEasiest
    Horizontal2G2FModerate
    Vertical3G3FDifficult
    Overhead4G4FHardest

    The G designation stands for groove weld (butt joints), while F means fillet weld (T-joints and lap joints). I’ve worked on projects where welders had to qualify in both groove and fillet positions, doubling the testing requirements but making them much more versatile on the job site.

    Flat Position (1G/1F) – The Easiest Welding Position

    Flat Position: The workpiece lies horizontally, with the weld face on top. Gravity assists in depositing weld metal into the joint, making this the most controllable position for beginners and ideal for achieving maximum penetration.

    Flat position welding is the easiest welding position because gravity works with you, not against you. The molten metal naturally flows into the joint, making it easier to control the weld pool and achieve proper penetration. I always start my students here because it builds confidence and teaches basic technique without fighting gravity.

    In flat position, your torch angle should be about 10-15 degrees from vertical, pushing slightly forward (push technique) for most MIG welding applications or dragging (drag technique) for stick welding. The travel speed determines weld width and penetration.

    Production Welding
    Shop Fabrication
    Beginner Practice

    Common Flat Position Mistakes

    The biggest mistake I see in flat position is improper torch angle. Too much angle causes lack of fusion on the leading edge, while too little angle allows the arc to ride up out of the joint. I spent months correcting this habit with one apprentice who consistently made undercut welds.

    Another issue is travel speed that’s too fast, resulting in narrow, ropey beads with incomplete penetration. Slow down and let the weld pool do the work. In my experience, most beginners weld 30-40% faster than they should in flat position.

    Horizontal Position (2G/2F) – Moderate Difficulty

    Horizontal welding requires controlling metal flow sideways because the joint axis is approximately horizontal, but the weld face is vertical. Gravity pulls the molten metal downward, so you must adjust your technique to prevent sagging and ensure proper weld deposition.

    For horizontal fillet welds (2F), angle the electrode 45 degrees toward each member of the joint, then tilt 5-15 degrees upward to fight gravity. This upward angle is critical. I failed my first horizontal test because I didn’t angle up enough, causing the weld to droop.

    Horizontal Position Techniques

    The weave technique becomes essential in horizontal welding. Instead of a straight stringer bead, use a slight side-to-side motion, pausing slightly at each toe. This builds up the weld edges and prevents undercut. I typically use a triangular or crescent weave pattern for best results.

    Amperage matters in horizontal position. Reduce your current by 10-15% compared to flat position to keep the weld pool more fluid and controllable. In my shop work, I run MIG at about 19 volts and 250 IPM for 3/8 inch horizontal fillets.

    Troubleshooting Horizontal Welds

    ProblemCauseSolution
    Sagging weldInsufficient upward angleIncrease electrode angle 5-10 degrees
    Undercut at toesTravel too fast, no weaveSlow down, add weaving motion
    Lack of fusionVoltage too lowIncrease voltage 1-2 volts
    Excessive spatterWire speed too highReduce wire feed speed 10%

    Vertical Position (3G/3F) – Working Against Gravity

    Vertical position welding requires working against gravity as you move either upward or downward along a vertical joint. This position exposes whether you truly understand weld pool control, making it a critical test for certification.

    Vertical Up vs Vertical Down

    Vertical up welding progresses from bottom to top, building a shelf of solidified metal that supports the molten pool above it. This technique provides maximum penetration and is required for most structural welding and pressure vessel work. I recommend vertical up for anything over 1/4 inch thick.

    Vertical down welding goes from top to bottom, relying on faster travel speed and lower amperage to keep ahead of the sagging weld pool. It’s faster and easier but produces shallow penetration. Use vertical down only on thin materials (1/8 inch or less) or non-critical applications.

    Structural Steel
    Pipe Welding
    Field Repair

    Vertical Up Technique

    For vertical up, I use a zig-zag or triangular weave pattern, pausing briefly at each side to allow the weld metal to freeze. The key is building that shelf. Move up, pause at the side, move across, pause at the other side.

    Amperage should be similar to flat position or slightly higher (around 125 amps for 1/8 inch E7018 electrode at 90 degrees travel angle). The work angle should be perpendicular to the joint, with the electrode angled 5-15 degrees upward from horizontal.

    When I trained for my 3G certification, I practiced for 6 weeks before my test. The first 3 weeks were frustrating, with washout and sagging everywhere. Then it clicked. The shelf technique became natural, and I passed with no issues.

    Overhead Position (4G/4F) – The Hardest Welding Position

    Overhead position welding is the hardest welding position because you work beneath the joint, and molten metal constantly tries to fall due to gravity. This position challenges even experienced welders and requires excellent technique and body positioning.

    The main challenges in overhead welding include: molten metal dripping on you and your equipment, limited visibility of the weld pool, arm and shoulder fatigue from holding awkward positions, constant risk of burn-through from too much heat buildup.

    I’ve seen experienced welders fail overhead tests because they didn’t adjust their technique. What works in flat position will cause problems overhead. You must adapt your approach completely.

    Overhead Position Technique

    For overhead welding, reduce your amperage by 10-15% compared to flat position to keep the weld pool smaller and more controllable. Use a shorter arc length than normal to direct the heat precisely into the joint rather than wasting energy on the surrounding air.

    Keep your travel speed steady and slightly faster than you might think necessary. A deliberate, consistent pace prevents the weld pool from growing too large and dripping. Use a slight weave or oscillation to control bead width without dwelling too long in one spot.

    Safety Considerations for Overhead Welding

    Always wear full protective gear including leather jacket and cap, position your body to avoid looking up at falling sparks, use a welding blanket below the work area to protect equipment, and never weld overhead alone if possible.

    I learned this safety lesson the hard way in 2026 when a glob of molten metal burned through my shirt while welding overhead. Now I always wear a full leather cape for overhead work, no exceptions.

    Overhead Welding Troubleshooting

    ProblemCauseSolution
    Weld metal drippingAmperage too highReduce current by 10-15%
    Poor penetrationArc too longShorten arc, hold closer
    Excessive spatterVoltage incorrectAdjust voltage settings
    Irregular bead shapeInconsistent travelMaintain steady speed

    Welding Position Symbols Explained (1G-6G, 1F-6F)

    Welding position symbols follow a standardized system from AWS and ASME that uses numbers to indicate position and letters to indicate weld type. Understanding these symbols is essential for reading welding symbols on drawings and preparing for certification tests.

    Symbol System: The number (1-6) indicates the position, while the letter indicates weld type (G for groove weld, F for fillet weld). Higher numbers represent more difficult positions that combine multiple basic orientations.

    SymbolPosition NameDescriptionApplication
    1GFlat GrooveGroove weld on horizontal surfaceButt joints in shop fabrication
    1FFlat FilletFillet weld on horizontal surfaceT-joints and lap joints, flat
    2GHorizontal GrooveGroove weld on vertical surface, horizontal axisButt joints on vertical plates
    2FHorizontal FilletFillet weld on vertical surface, horizontal axisT-joints on horizontal members
    3GVertical GrooveGroove weld on vertical surface, vertical axisButt joints on vertical welds
    3FVertical FilletFillet weld on vertical surface, vertical axisT-joints on vertical members
    4GOverhead GrooveGroove weld from beneath jointCeiling welds, overhead butt joints
    4FOverhead FilletFillet weld from beneath jointOverhead T-joints and lap joints
    5GHorizontal Fixed PipePipe horizontal, welder stationaryPipe welding in position
    6GInclined Fixed PipePipe at 45 degrees, all positions requiredPipe welding certification test
    6GRRestricted Ring Position6G with restriction ring nearbyAPI 1104 pipeline certification

    Groove vs Fillet Designations

    The G in welding symbols stands for groove weld, which joins two members in a butt joint where the weld metal fills a groove prepared between the members. The F stands for fillet weld, which joins two surfaces at approximately right angles in a T-joint, lap joint, or corner joint.

    Groove welds require more preparation (beveling, root opening) and skill but provide full penetration through the material thickness. Fillet welds are simpler to prepare and execute but only join the surface of the materials without through-penetration.

    All-Position Electrodes

    All-Position Electrode: A welding electrode designed with flux chemistry that allows welding in all positions (flat, horizontal, vertical, overhead) without changing rods. Examples include E6010, E6011, E7018 for stick welding, and ER70S-6 for MIG welding.

    Not all welding rods work in every position. Fast-freeze electrodes like E6010 and E6011 excel in vertical and overhead positions because the slag solidifies quickly, supporting the weld pool against gravity. E7018 runs smooth but can be challenging overhead due to its fluid slag.

    For MIG welding, short-circuit transfer works best for out-of-position welding because the metal transfers in droplets rather than a spray, reducing puddle fluidity. Sprays transfer is generally limited to flat and horizontal positions.

    Pipe Welding Positions (5G and 6G)

    Pipe welding positions combine multiple basic groove weld positions into a single certification test, representing the ultimate challenge for many welders. These positions are standard in the piping, oil and gas, and power generation industries.

    What is 5G Pipe Welding?

    5G welding is a horizontal fixed pipe position where the pipe remains stationary and the welder moves around it. As you progress around the pipe, you transition through flat, vertical, and overhead positions without stopping.

    The 5G position requires welding from both sides of the joint (root pass from inside if possible, then fill and cap from outside). You’ll weld flat at the top (12 o’clock), vertical on the sides (3 and 9 o’clock), and overhead at the bottom (6 o’clock).

    I’ve worked on refinery projects where every welder had to maintain 5G certification. The test welds are x-rayed, meaning any internal defects become visible. This ensures quality but adds pressure to the testing process.

    What is 6G Pipe Welding?

    6G welding is the most challenging pipe welding position where the pipe is fixed at a 45-degree angle. This position forces you to weld in flat, horizontal, vertical, and overhead orientations simultaneously as you move around the pipe.

    The 6G certification test is considered the most difficult because it tests all positions in a single weld. A 6G-certified welder can qualify for any pipe welding job, making this the gold standard for pipe welders in the industry.

    Power Plants
    Oil & Gas
    Refineries
    Pipeline Construction

    6G welders command the highest pay rates in the industry. When I worked on a power plant project in 2026, 6G pipe welders started at $45 per hour while structural welders made $28. The difficulty difference translates directly to earning potential.

    6GR – Restricted Position

    6GR adds a restriction ring placed within 1/2 inch of the weld groove, simulating welds made near fittings or flanges where space is limited. This tests your ability to weld in tight quarters while maintaining position changes.

    The API 1104 pipeline welding certification often uses 6GR because field pipeline welds frequently occur near valves, fittings, and other obstructions. Passing this test proves you can handle real-world pipeline welding challenges.

    Welding Certification and Position Tests

    Welding certification tests validate your ability to make sound welds in specific positions according to AWS or ASME standards. The certification you earn qualifies you for specific types of work and is often required by employers and inspection agencies.

    Common Certification Tests

    The most common welding certification tests include: 3G/4G plate tests for structural welding (required for AWS D1.1 certified welding contractors), 6G pipe test for pressure piping work (ASME Section IX), and 2G/3G/4G combination tests for general fabrication qualification.

    When you certify in a specific position, that certification typically also qualifies you for easier positions. For example, a 3G certification usually covers 1G and 2G as well. However, certifying in a difficult position like 4G or 6G doesn’t automatically qualify you for all positions.

    Test Preparation Tips

    1. Practice consistently – At least 2-3 hours daily for 4-6 weeks before your test
    2. Use the exact materials – Practice with the same base metal thickness and electrode type as your test
    3. Simulate test conditions – Weld in the same position, with the same preparation requirements
    4. Get feedback – Have a certified welder or inspector evaluate your practice welds
    5. Rest before the test – Don’t practice heavily the day before, be fresh for test day

    I’ve helped over 20 welders prepare for certification tests. The ones who practice consistently for 6 weeks pass at a much higher rate than those who cram for 1-2 weeks. Welding position skill requires muscle memory that only develops through repetition.

    Safety Considerations for All Positions

    Regardless of welding position, proper safety equipment and procedures are non-negotiable. Each position presents unique hazards that require specific precautions.

    • Eye and face protection: Always use properly shaded auto-darkening helmet (shade 10-12 for most applications)
    • Protective clothing: Leather jacket, welding cap, gauntlet gloves, and cotton undergarments (no synthetics)
    • Respiratory protection: Use respirator when welding in confined spaces or with materials producing toxic fumes
    • Fire safety: Keep fire extinguisher nearby, clear welding area of flammable materials, use welding blankets
    • Electrical safety: Inspect cables for damage, ensure proper grounding, never weld in wet conditions
    • Position-specific hazards: Overhead welding requires protection from falling metal, vertical welding needs awareness of falling slag

    Frequently Asked Questions

    What are the 4 welding positions?

    The 4 main welding positions are flat (1G/1F), horizontal (2G/2F), vertical (3G/3F), and overhead (4G/4F). Flat position is easiest with gravity assisting deposition. Horizontal position requires controlling sideways metal flow. Vertical position works directly against gravity using up or down progression. Overhead position is most difficult as you weld beneath the joint against gravity.

    What is the hardest welding position?

    Overhead position (4G/4F) is the hardest welding position because you weld beneath the joint with molten metal constantly trying to fall. The 6G pipe position is considered the most difficult certification test as it combines all basic positions into one weld while welding on pipe inclined at 45 degrees.

    What is the easiest welding position?

    Flat position (1G/1F) is the easiest welding position because gravity works with you, helping deposit weld metal into the joint naturally. The weld pool sits on top of the workpiece, making it easy to control and achieve proper penetration. Beginners should always start mastering flat position before attempting other positions.

    What do welding position symbols mean (1G-6G)?

    Welding position symbols use numbers (1-6) for position and letters for weld type: G for groove welds (butt joints) and F for fillet welds (T-joints, lap joints). Numbers 1-4 represent basic positions (flat, horizontal, vertical, overhead). Numbers 5-6 represent pipe welding positions. Higher numbers indicate more difficult positions combining multiple orientations.

    How do you weld in the vertical position?

    For vertical up welding, use a zig-zag or triangular weave pattern, pausing at each side to build a shelf that supports the weld pool. Angle the electrode 5-15 degrees upward, use similar amperage to flat position, and maintain a steady, deliberate pace. Vertical up provides maximum penetration and is required for most structural applications over 1/4 inch thick.

    What is all position welding rod?

    All-position welding rod is an electrode designed with flux chemistry that allows welding in all positions without changing rods. Fast-freeze electrodes like E6010 and E6011 excel in vertical and overhead positions because slag solidifies quickly. E7018 is also all-position but can be challenging overhead. For MIG welding, ER70S-6 with short-circuit transfer works in all positions.

    What are pipe welding positions 5G and 6G?

    5G welding is horizontal fixed pipe where you weld around a stationary pipe, transitioning through flat, vertical, and overhead positions. 6G welding is pipe fixed at 45 degrees, requiring all positions simultaneously and considered the most difficult certification test. 6GR adds a restriction ring to simulate welding near fittings. These positions are standard in oil, gas, and power generation industries.

    Why is overhead welding difficult?

    Overhead welding is difficult because molten metal constantly tries to fall due to gravity, requiring precise control of amperage, travel speed, and technique. Challenges include limited visibility of the weld pool, physical fatigue from holding awkward positions, risk of burn-through from heat buildup, and molten metal dripping on the welder and equipment.

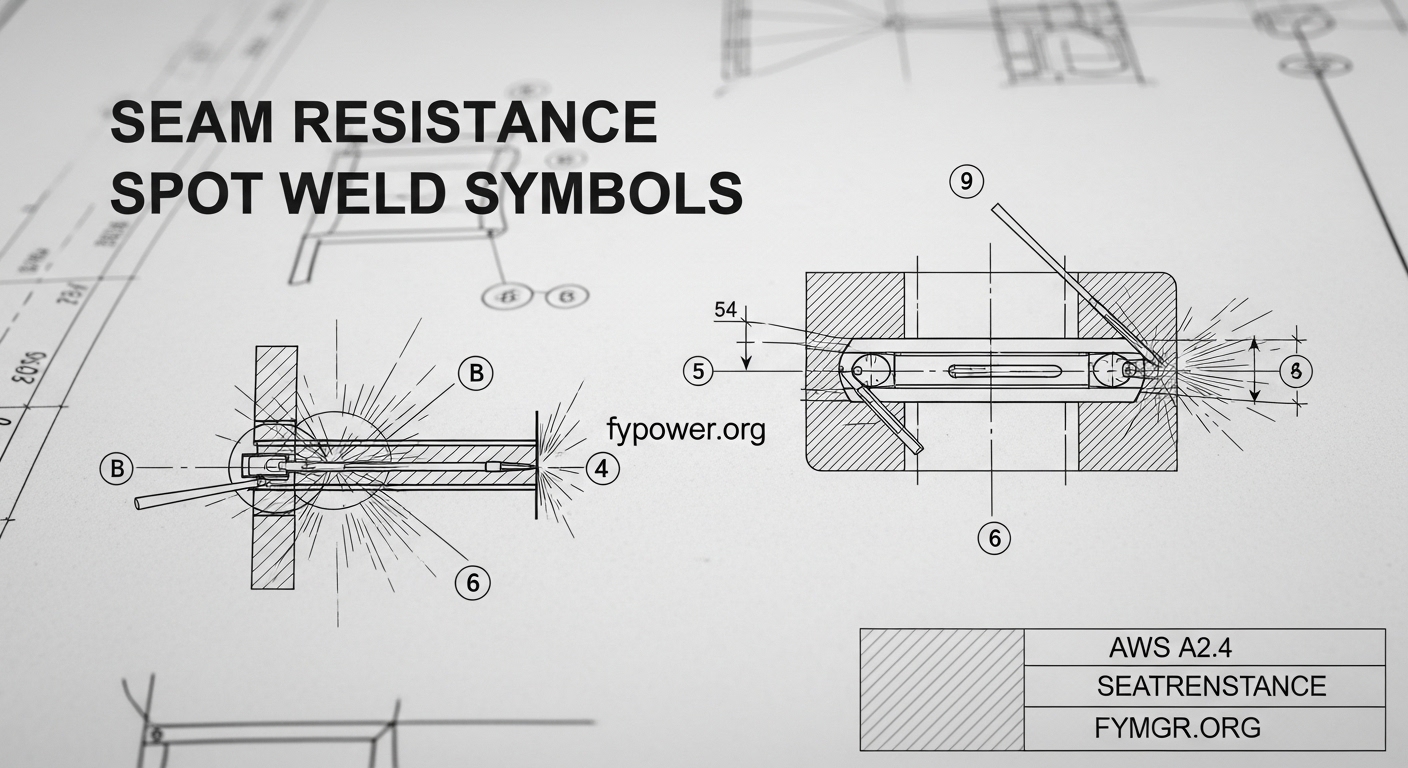
  • Seam Resistance Spot Weld Symbols: Complete AWS A2.4 Blueprint Guide

    Seam Resistance Spot Weld Symbols: Complete AWS A2.4 Blueprint Guide

    Reading welding symbols on blueprints can feel overwhelming at first. I’ve spent 15 years in fabrication shops watching new welders struggle to interpret these essential markings.

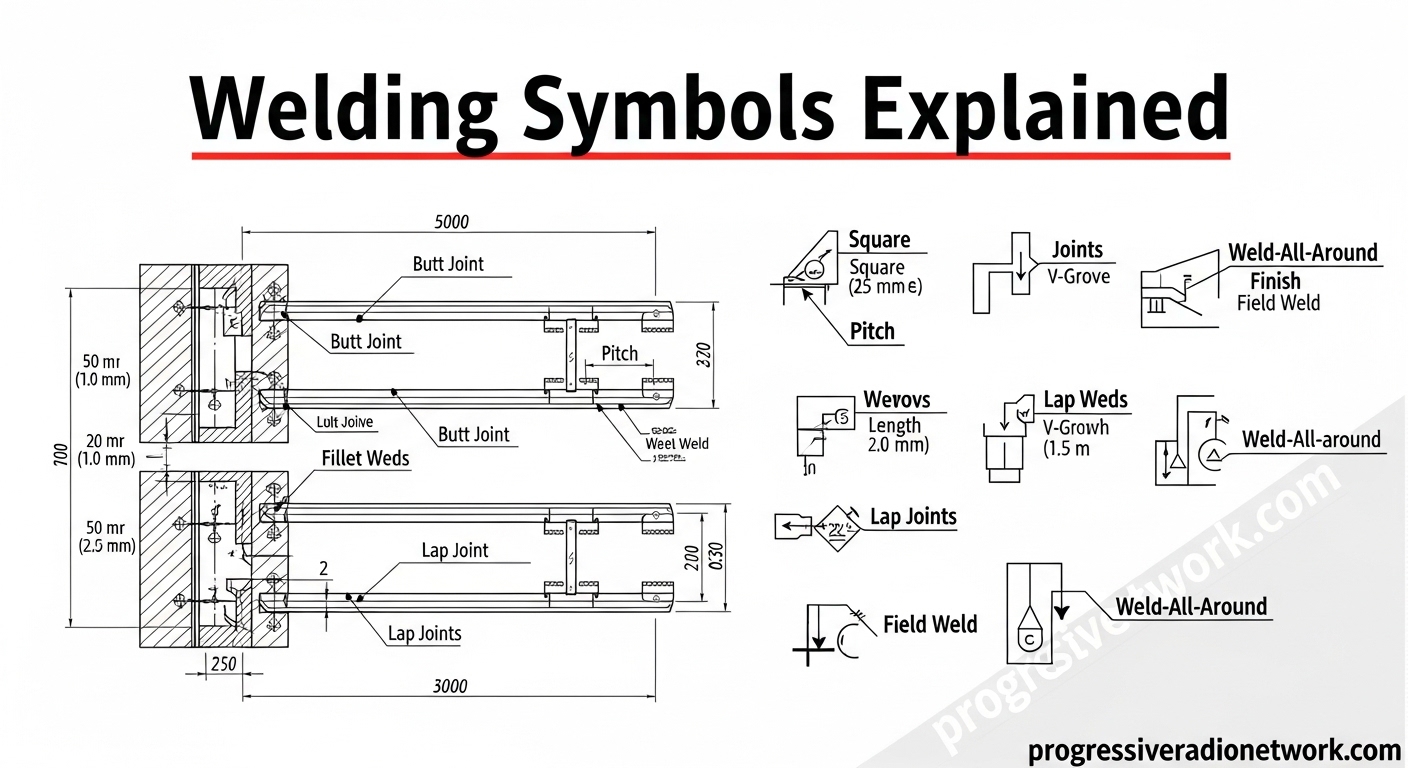
    Resistance spot and seam weld symbols are among the most common symbols you’ll encounter. These compact symbols convey complete welding specifications in a standardized format.

    What Are Resistance Spot and Seam Weld Symbols?

    These symbols tell welders exactly where and how to make resistance welds without written instructions. The American Welding Society (AWS) A2.4 standard establishes these symbols for consistent communication across the fabrication industry.

    In automotive manufacturing alone, resistance spot welds account for over 4,000 welds per vehicle. Understanding these symbols is essential for anyone working with sheet metal fabrication or assembly drawings.

    Resistance Spot Weld Symbol Explained

    Quick Summary: The spot weld symbol consists of a circle that can appear above, below, or centered on the reference line. Dimensions including weld diameter and shear strength are placed to the left of the symbol.

    The resistance spot weld (RSW) symbol is one of the simplest welding symbols to identify. It appears as a single circle on the reference line of the welding symbol.

    Symbol Components

    ComponentDescription
    CircleIndicates spot weld type
    Reference LineHorizontal line showing weld location
    ArrowPoints to weld joint
    DimensionsSize, strength, pitch, and spacing

    Dimension Placement for Spot Welds

    Spot weld dimensions follow a specific placement rule according to AWS A2.4. Understanding where each number goes prevents costly interpretation errors.

    Spot Weld Dimension Placement

    • Left of symbol: Weld diameter (in inches or millimeters)
    • Right of symbol: Pitch (center-to-center spacing)
    • Above symbol: Shear strength in pounds or newtons
    • Below symbol: Number of spots (if grouped)

    Example Spot Weld Symbol

    A spot weld symbol showing “5” to the left and “50” to the right indicates:

    • Weld diameter: 5mm
    • Pitch: 50mm center-to-center spacing

    I’ve seen fabricators misinterpret pitch as weld count. This mistake leads to incorrect spacing and rejected parts. Always remember: left equals size, right equals spacing.

    Spot Weld Strength Specifications

    When shear strength appears above the spot weld symbol, it indicates the minimum load the weld must withstand. For example, “500” above the symbol means 500 pounds minimum shear strength.

    Automotive body specifications typically require shear strengths between 500-2,000 pounds per spot weld depending on the application. Structural components require higher strength specifications than cosmetic panels.

    Resistance Seam Weld Symbol Explained

    Quick Summary: The seam weld symbol features a circle with two parallel horizontal lines. It indicates a continuous resistance weld along a seam, with dimensions specifying weld width and length.

    Resistance seam welding (RSEW) creates a continuous watertight joint. The symbol distinguishes itself from spot welding by adding two parallel lines through the circle.

    Symbol Identification

    The seam weld symbol looks like a spot weld symbol with a horizontal line through the center. This visual distinction makes it easy to identify on drawings.

    Visual Memory Aid: Think of the two parallel lines as the continuous seam being welded. Unlike a spot (single point), a seam extends across the joint.

    Dimension Specifications for Seam Welds

    Seam weld dimensions follow the same left/right placement rules as spot welds, but specify different measurements.

    DimensionPlacementMeaning
    Weld WidthLeft of symbolWidth of the seam weld
    Weld LengthRight of symbolLength of weld seam (if not continuous)
    PitchRight of symbolSpacing between intermittent seams
    StrengthAbove symbolShear strength per inch of weld

    Seam Weld Example

    A seam weld symbol with “8” on the left and “100” on the right indicates:

    • Weld width: 8mm
    • Weld length: 100mm (or 100mm spacing for intermittent welds)

    Seam welds commonly appear in fuel tanks, fluid containers, and anywhere requiring a liquid-tight joint. The continuous nature of the weld makes it ideal for sealing applications.

    Intermittent Seam Welds

    Not all seam welds run continuously. When specifications call for intermittent seams, the right-side dimension indicates spacing rather than total length.

    For example, a length dimension of “25-100” means 25mm of weld followed by 75mm of unwelded space, repeating this pattern along the seam.

    Reference Line Positioning Guide

    The position of the spot or seam weld symbol relative to the reference line indicates which side of the joint receives the weld.

    Symbol PositionWeld Location
    Below reference lineArrow side (side arrow points to)
    Above reference lineOther side (opposite arrow)
    Centered on lineNo significance (weld can be on either side)
    Both above and belowBoth sides (double weld)

    Arrow Side vs. Other Side: The arrow side is the joint surface the arrow points toward. The other side is the opposite surface of the joint. This distinction matters when materials differ or when access limitations exist.

    Resistance welding symbols centered on the reference line have no arrow side significance. This means the welder can perform the weld from whichever side provides better access or equipment positioning.

    Spot vs Seam Weld Symbols Comparison

    CharacteristicSpot WeldSeam Weld
    Symbol ShapeCircleCircle with two parallel lines
    Primary DimensionDiameterWidth
    Weld TypeDiscrete pointsContinuous or intermittent
    Common ApplicationSheet metal assemblyFluid-tight joints
    Secondary DimensionPitch (spacing)Length or pitch

    Common Mistakes Reading Weld Symbols

    After reviewing thousands of fabrication drawings, I’ve identified recurring interpretation errors that cause quality issues.

    Mistake 1: Confusing Pitch with Count

    The right-side dimension indicates spacing, not quantity. I’ve seen welders place five welds when the symbol called for 50mm pitch spacing. Always verify pitch represents center-to-center distance.

    Mistake 2: Ignoring Reference Line Position

    Welding from the wrong side creates rework. When symbols appear above the reference line, the weld belongs on the other side. This mistake wastes an average of 2-3 hours per correction in production environments.

    Mistake 3: Missing Shear Strength Requirements

    When strength appears above the symbol, it’s a specification, not optional. I’ve inspected welds that met visual criteria but failed destructive testing because welders ignored strength requirements.

    Mistake 4: Seam Weld Length Confusion

    Right-side dimensions on seam welds can mean length OR spacing. Check if the dimension is a single number (continuous) or a pair (intermittent). This single mistake causes seal failures in tank manufacturing.

    Real-World Blueprint Applications

    Understanding symbols in context helps with practical interpretation. Here are common applications from my fabrication experience.

    Automotive Applications

    Automotive blueprints specify spot welds with diameters between 4-8mm and pitch spacing from 25-50mm. A typical door assembly might call out 5mm spot welds at 30mm pitch around the perimeter.

    Sheet Metal Fabrication

    Enclosure assemblies use spot welds for structural joints and seam welds for sealing. HVAC ductwork frequently specifies intermittent seam welds with 50mm welds at 150mm pitch.

    Quality Control Inspection

    Certified Welding Inspectors (CWI) verify resistance welds against symbol specifications. Inspection includes measuring spot diameter, checking pitch spacing, and performing shear strength tests on sample welds.

    AWS A2.4 Standard Reference

    The American Welding Society A2.4 standard provides the definitive reference for all welding symbols. Current editions include:

    • Standard symbol dimensions and proportions
    • Complete dimension placement rules
    • Process specification requirements
    • Contour and finish symbol guidelines

    For AWS certification exams, thorough knowledge of A2.4 symbol requirements is essential. The standard undergoes periodic updates to reflect industry practices and technological changes.

    Frequently Asked Questions

    What does the circle mean on a welding symbol?

    A circle on a welding symbol indicates resistance welding. If the circle appears alone, it specifies a spot weld. If the circle has two parallel lines running through it, the symbol indicates a seam weld. The position of the circle relative to the reference line shows which side receives the weld.

    How do you read spot weld dimensions?

    Spot weld dimensions follow the left-right rule: the diameter of the weld appears to the left of the symbol, while pitch (spacing) appears to the right. Shear strength requirements appear above the symbol. For example, a symbol with 6 to the left and 40 to the right specifies a 6mm diameter spot weld at 40mm center-to-center spacing.

    What is the difference between spot and seam weld symbols?

    The spot weld symbol is a simple circle, while the seam weld symbol is a circle with two parallel horizontal lines. Spot welds create discrete circular weld points at specified intervals. Seam welds create continuous or intermittent linear welds along a joint, typically used for fluid-tight applications like fuel tanks.

    Where are dimensions placed on resistance welding symbols?

    According to AWS A2.4, weld size or diameter goes to the left of the symbol. Pitch or length goes to the right. Shear strength appears above the symbol, and the number of welds appears below. This left-right placement rule applies consistently across all resistance welding symbols.

    What does centered symbol placement mean?

    When a spot or seam weld symbol is centered on the reference line, it indicates no arrow side significance. The weld can be made from either side of the joint without affecting specification compliance. This provides flexibility for welders regarding equipment access and positioning.

    How do you indicate weld strength on a symbol?

    Shear strength requirements appear above the resistance welding symbol. The value represents minimum strength in pounds or newtons per weld (for spot welds) or per inch of weld (for seam welds). This specification is mandatory and must be verified through testing during quality inspection.

    What is pitch in spot welding?

    Pitch refers to the center-to-center distance between adjacent spot welds. This dimension appears to the right of the spot weld symbol. For example, a pitch of 50mm means each spot weld center is 50mm apart from the next. Proper pitch spacing ensures structural integrity without overheating the material.

    Conclusion

    Mastering seam and resistance spot weld symbols requires practice and reference to the AWS A2.4 standard. Focus on the three key elements: symbol identification, dimension placement, and reference line positioning.

    After interpreting thousands of welding symbols, I still keep a quick reference chart handy. The difference between 5mm diameter and 50mm pitch might seem subtle, but it changes the entire welding specification.

    For certification exams or daily fabrication work, accurate symbol interpretation prevents costly rework and ensures weld quality. Start with the basics here, then consult the complete AWS A2.4 standard for complex symbol combinations.


  • Plasma Welding Process: Complete Technical Guide

    Plasma Welding Process: Complete Technical Guide

    I’ve spent fifteen years in metal fabrication, watching welding technology evolve. When I first encountered plasma arc welding in 2026, I was skeptical.

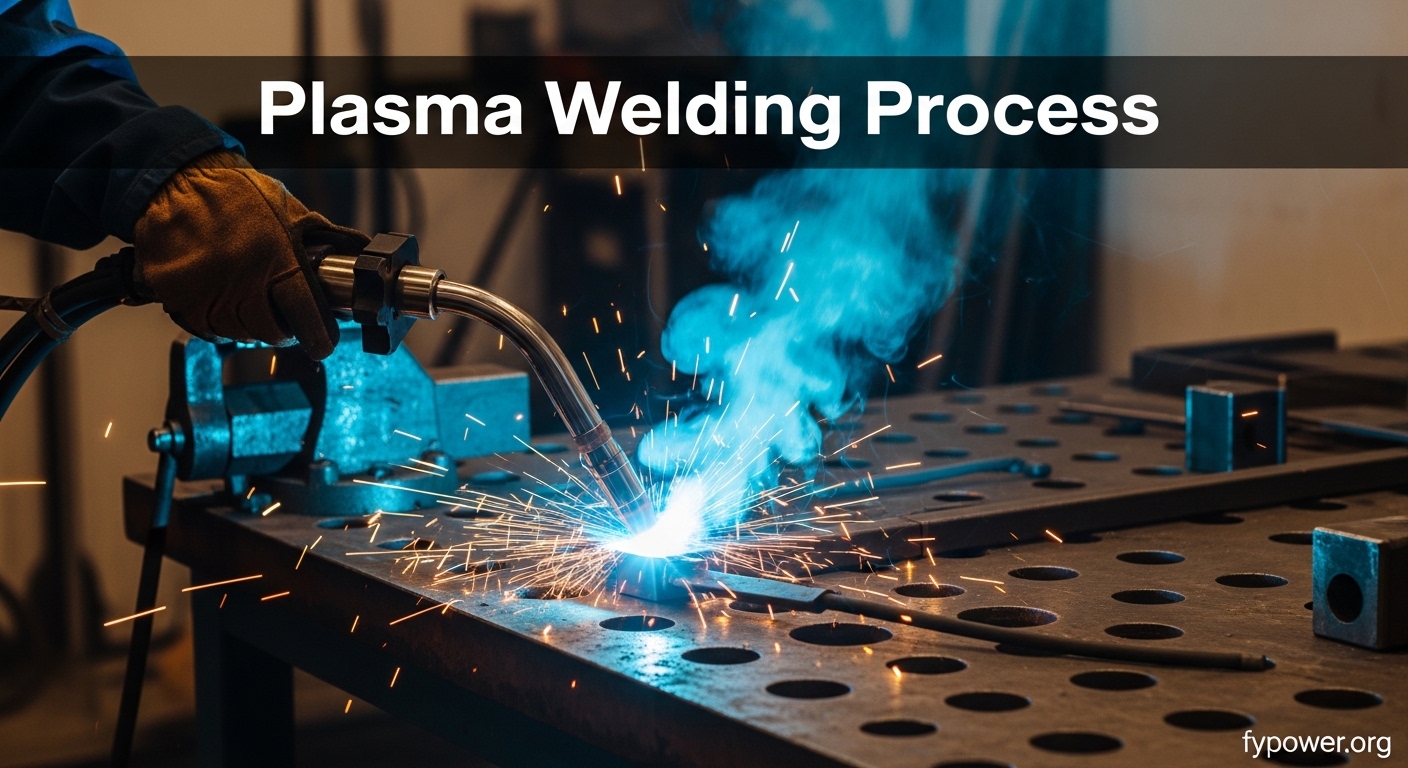
    Plasma arc welding (PAW) is a precision arc welding process that uses a constricted arc between a non-consumable tungsten electrode and the workpiece.

    The plasma welding process was developed in the 1960s as an improvement to GTAW (TIG) welding, offering better control for precision applications. After implementing plasma systems in three different fabrication shops, I’ve seen the difference firsthand.

    How Plasma Welding Works?

    Understanding plasma welding starts with the physics. Unlike conventional TIG where the arc spreads freely, plasma welding constricts that arc through a narrow copper orifice.

    Quick Summary: Plasma welding works by forcing an electrical arc through a water-cooled copper nozzle with a small orifice (typically 1.5-3.5mm). This constriction compresses the arc, increasing its temperature and energy density. Plasma gas flows around the tungsten electrode and through the arc, becoming ionized and creating a focused plasma column that transfers heat precisely to the workpiece.

    The Plasma Arc Generation Process

    The plasma welding process follows a specific sequence. Let me walk you through how it works in practice:

    1. Pilot Arc Initiation

    A low-current pilot arc first establishes between the tungsten electrode and the copper nozzle tip. This ionizes the gas and creates a conductive path before the main arc transfers to the workpiece.

    2. Gas Ionization

    The plasma gas (typically argon) flows through the torch. As the electrical energy passes through, the gas molecules break apart into ions and electrons, creating plasma–the fourth state of matter.

    3. Arc Constriction

    This is where plasma welding differs from TIG. The constriction nozzle forces the ionized gas through a small orifice, dramatically increasing current density and arc temperature.

    4. Heat Transfer

    The high-velocity plasma jet transfers heat to the workpiece with remarkable precision. The focused arc creates deeper penetration with less total heat input compared to unconstricted arcs.

    Plasma Arc: A sustained electrical discharge through ionized gas that has been constricted through a nozzle, creating a column of charged particles with temperatures reaching 30,000degF and energy densities 3-5 times higher than conventional TIG arcs.

    Plasma Torch Components

    The plasma torch is a precision instrument. Unlike a standard TIG torch, it contains several critical components:

    ComponentFunctionMaterial
    ElectrodeConducts current, emits electronsTungsten (2% thoriated)
    Constriction NozzleFocuses arc through orificeCopper (water-cooled)
    Gas Lens/ColletDirects plasma gas flowCopper alloy
    Shielding CupDelivers shielding gas to weld poolCopper or ceramic
    Retaining CapHolds nozzle and electrode in alignmentCopper or brass

    The water cooling is critical. I’ve seen torches fail in under an hour without proper coolant flow. The constriction nozzle faces extreme heat and requires continuous cooling to maintain integrity.

    Types of Plasma Welding Processes

    Plasma welding isn’t a single process. The technology divides into three distinct categories based on current range and application.

    Micro-Plasma Welding (0.1-10 Amperes)

    Micro-plasma welding operates at incredibly low currents, typically 0.1 to 10 amperes. This variant handles materials as thin as 0.001 inches.

    I first used micro-plasma for medical device components in 2026. The precision amazed me–we were welding sensor housings without distorting adjacent electronics.

    Micro-Plasma Applications:

    • Medical devices (surgical instruments, implants)
    • Electronics packaging (hermetic sealing)
    • Instrumentation (pressure sensors, thermocouples)
    • Jewelry and precision components
    • Thin foil welding (down to 0.001 inches)

    The stable arc at low currents is what makes micro-plasma unique. TIG becomes unstable below 5-10 amps, but plasma maintains a focused column even at 0.1 amps.

    Medium Current Plasma (10-100 Amperes)

    Medium current plasma covers the most common welding range, typically 10-100 amperes. This bridges the gap between micro-welding and keyhole applications.

    This range handles material thicknesses from approximately 0.020 to 0.125 inches. It’s where I’ve done the majority of my plasma welding work–stainless steel fabrication, aluminum components, and precision assemblies.

    Medium Current Applications:

    • Stainless steel fabrications
    • Aluminum alloy components
    • Tube and pipe welding
    • Automotive components
    • General precision fabrication

    Keyhole Plasma Welding (100-300 Amperes)

    Keyhole plasma welding is where the process truly shines. Operating at 100-300 amperes, this technique creates a keyhole through the material thickness, enabling single-sided welding with full penetration.

    Keyhole Technique: A high-current plasma welding method where the arc’s energy density creates a vapor cavity (keyhole) completely through the workpiece. As the torch moves, the keyhole travels along the joint, with molten metal flowing around it and solidifying behind to form the weld.

    The keyhole technique eliminates the need for backing or root passes. I’ve seen 0.25-inch stainless steel welded in a single pass with complete penetration and excellent root formation.

    Keyhole Plasma Applications:

    • Thick section welding (up to 0.5 inch single pass)
    • Pipe welding (no backing required)
    • Structural components
    • Pressure vessel fabrication
    • Heavy industrial applications

    Keyhole plasma requires proper parameter setup. Get it wrong and you’ll get cutting instead of welding. But when dialed in correctly, it’s incredibly efficient.

    Variable Polarity Plasma Welding

    Variable polarity plasma (VPPAW) was developed specifically for aluminum. The current alternates between straight polarity (electrode negative) and reverse polarity (electrode positive).

    The reverse polarity portion helps clean the aluminum oxide layer. I’ve used VPPAW on aerospace aluminum components with excellent results. It combines the cleaning action of AC TIG with the precision of plasma.

    Plasma Welding vs TIG: Complete Comparison

    The most common question I hear: “Is plasma better than TIG?” The answer depends on your application. Let me break down the differences based on real-world experience.

    CharacteristicPlasma Welding (PAW)TIG Welding (GTAW)
    Arc ConstrictionConstricted through nozzleFree arc, no constriction
    Arc TemperatureUp to 30,000degFUp to 20,000degF
    Energy Density3-5x higher than TIGStandard
    Arc StabilityExcellent, less affected by standoff distanceGood, sensitive to arc length variations
    PenetrationDeeper, more focusedWider, shallower
    Heat Affected ZoneNarrower (less distortion)Wider
    Travel Speed30-50% fasterStandard
    Current Range0.1-300+ amps5-300+ amps
    Low Current PerformanceStable down to 0.1 ampsUnstable below 5 amps
    Tolerance to Fit-upMore forgivingLess forgiving
    Equipment CostHigher (torch, consumables)Lower
    MaintenanceMore frequent (nozzle wear)Less frequent
    Skill RequiredModerate-high (setup)High (technique)
    Joint AccessLimited by torch sizeBetter (smaller torches available)

    When to Choose Plasma Welding?

    Based on my experience, plasma welding is the better choice when:

    1. Precision is critical–The stable arc maintains consistent penetration even with manual variations.
    2. Materials are thin–Micro-plasma handles foils and thin sheets that TIG would burn through.
    3. Deep penetration is needed–Keyhole technique achieves full penetration in thick materials.
    4. Distortion must be minimized–The focused heat input reduces warping significantly.
    5. Automation is planned–Plasma’s consistency makes it ideal for mechanized systems.
    6. Production speed matters–Faster travel speeds increase throughput.

    When TIG Remains the Better Choice?

    TIG still has its place. I choose TIG when:

    1. Budget is limited–TIG equipment costs significantly less.
    2. Joint access is tight–Smaller TIG torches reach confined spaces.
    3. Versatility is needed–TIG handles more material types and thicknesses with one setup.
    4. Simple maintenance is preferred–Fewer consumables and torch components.
    5. Existing skill is TIG-based–TIG skills transfer more easily to plasma than vice versa.

    Plasma Welding Applications and Industries

    Plasma welding has found its niche in industries where precision and quality justify the equipment investment. Let me share the applications where I’ve seen it excel.

    Aerospace Industry

    The aerospace sector was an early adopter of plasma welding. When I consulted for an aircraft components manufacturer in 2026, their reasoning was clear: every weld defect could mean a catastrophic failure.

    Aerospace Applications:

    • Aircraft engine components (turbine blades, casings)
    • Structural assemblies (frame components, bulkheads)
    • Fuel system components
    • Hydraulic and pneumatic systems
    • Titanium structure welding
    • Precision instrumentation

    The narrow heat-affected zone is crucial in aerospace. Excessive heat can compromise material properties. Plasma’s focused arc maintains base metal integrity better than any other arc process.

    Medical Device Manufacturing

    Medical devices demand absolute precision. I’ve worked with implant manufacturers where weld quality directly affects patient outcomes.

    Micro-plasma welding dominates this sector. The ability to weld tiny components without affecting adjacent heat-sensitive materials is unmatched.

    Medical Applications:

    • Surgical instruments (scalpels, forceps, scissors)
    • Implants (joint replacements, dental implants)
    • Diagnostic equipment housings
    • Precision tubing (catheters, endoscopes)
    • Hermetic sealing (pacemaker cases, sensors)
    • Drug delivery components

    The clean, consistent welds from plasma welding meet strict medical industry requirements. Minimal surface contamination and excellent cosmetic appearance are standard.

    Electronics Industry

    Electronics manufacturing leverages micro-plasma for applications that would be impossible with other processes. The precision enables welding of components just thousandths of an inch thick.

    During a project for a semiconductor equipment manufacturer, we welded vacuum chamber components that couldn’t tolerate any distortion. Plasma was the only viable option.

    Electronics Applications:

    • Semiconductor equipment fabrication
    • Sensor packaging and sealing
    • Hermetic sealing of electronic packages
    • Battery component welding
    • Precision connectors
    • Heat sink assemblies

    Automotive Industry

    Automotive applications have grown significantly, especially with electric vehicles. The shift to lightweight materials has increased plasma welding adoption.

    Exhaust systems were early automotive applications. More recently, I’ve seen plasma welding used for electric vehicle battery components where heat management is critical.

    Automotive Applications:

    • Exhaust system components
    • Fuel injection parts
    • Sensor housings
    • EV battery components
    • Airbag components
    • Precision brackets and fittings

    Energy Sector

    The energy industry uses plasma welding for both traditional and renewable energy applications. Keyhole plasma welding is particularly valuable for pipe welding.

    Energy Applications:

    • Heat exchanger fabrication
    • Pipe and tube welding
    • Nuclear components
    • Solar panel framing
    • Wind turbine components
    • Power generation equipment

    Advantages and Disadvantages of Plasma Welding

    After implementing plasma welding systems in multiple facilities, I’ve developed a clear picture of where it excels and where it falls short. Let me give you an honest assessment.

    Advantages of Plasma Welding

    1. Superior Arc Stability
      The constricted arc is remarkably stable. I’ve welded at 0.5 amps with plasma–something impossible with TIG. This stability means consistent welds even with manual technique variations.
    2. Deeper Penetration
      The focused arc achieves penetration 2-3 times deeper than TIG at the same current. A 60-amp plasma weld can match a 150-amp TIG weld in penetration depth.
    3. Narrower Heat-Affected Zone
      Less total heat input means less distortion. I’ve measured heat-affected zones 50% narrower than comparable TIG welds.
    4. Faster Welding Speeds
      Travel speeds increase 30-50% compared to TIG. In production environments, this translates to significant throughput improvements.
    5. Excellent for Thin Materials
      Micro-plasma handles materials down to 0.001 inches. I’ve welded foil thinner than a human hair with complete control.
    6. More Forgiving of Fit-up Issues
      The deep, narrow arc tolerates minor joint variations better than TIG. Gaps that would cause TIG defects often weld cleanly with plasma.
    7. Better Process Control
      Separate plasma and shielding gases allow optimization. The independent control over arc characteristics and weld pool protection provides flexibility.
    8. Reduced Welder Fatigue
      The stable arc requires less constant adjustment than TIG. Over a production shift, this reduces operator fatigue and improves consistency.
    9. Keyhole Capability
      Single-sided welding with full penetration is unique to high-current plasma. No backing gas or root passes required for many applications.

    Disadvantages and Limitations

    1. Higher Equipment Cost
      Plasma welding systems cost significantly more than comparable TIG setups. I’ve seen complete systems priced 2-3 times higher than TIG equivalents.
    2. Complex Setup
      More components mean more setup parameters. Electrode setback, orifice size, gas flows–all must be optimized. New operators face a steeper learning curve.
    3. Increased Maintenance
      The constriction nozzle is a wear item. In high-production environments, I’ve replaced nozzles daily. Cooling systems also require regular maintenance.
    4. Higher Gas Consumption
      Plasma welding uses two gases (plasma and shielding). Flow rates are higher than single-gas TIG, increasing operating costs.
    5. Limited Joint Access
      Plasma torches are larger than TIG torches. Deep grooves or confined spaces may be inaccessible.
    6. More Critical to Proper Parameters
      Within the optimal range, plasma is very forgiving. Outside that range, it fails dramatically. Parameter selection is more critical than with TIG.
    7. Not Ideal for All Materials
      Cast iron and some alloys remain challenging. Process selection should always consider material compatibility.
    8. Training Requirements
      Proper training is essential. I’ve seen facilities struggle because operators weren’t adequately trained on plasma-specific techniques.

    Equipment and Parameter Settings

    Setting up a plasma welding system requires attention to detail. Let me share the key considerations based on my installation experiences.

    Plasma Welding Equipment Requirements

    A complete plasma welding system includes several components beyond the power source:

    EquipmentSpecificationPurpose
    Power SourceConstant current (CC), 300A minimumProvides welding current
    Plasma TorchWater-cooled, compatible with power sourceDelivers constricted arc
    Cooling System1-2 GPM flow capacityCools torch components
    Gas SupplyDual-gas capability with flow metersPlasma and shielding gases
    High-Frequency StarterBuilt-in or separate unitInitiates pilot arc
    Wire FeederOptional, for filler metal additionAdds filler wire when needed

    Gas Selection for Plasma Welding

    Gas selection significantly affects weld quality. Different applications require different gas mixtures.

    Gas TypeApplicationBenefits
    Argon (Plasma)General purposeExcellent arc stability, easy ignition
    Argon + H2 (Plasma)Stainless steel, nickel alloysHigher heat input, cleaner welds
    Argon + He (Plasma)Copper, aluminumIncreased heat for conductive materials
    Argon (Shielding)Most materialsStandard shielding gas
    Argon + H2 (Shielding)Stainless steelReduced oxidation, brighter beads
    Helium (Shielding)Aluminum, copperHigher heat input

    Parameter Settings Reference

    Proper parameter settings vary by application, but these starting points have worked well in my experience:

    ApplicationCurrent (A)Orifice (in)Plasma Gas (CFH)Shielding Gas (CFH)
    Micro (0.005 in)0.5-50.020-0.0300.1-0.35-10
    Thin (0.020-0.060 in)5-300.040-0.0600.5-1.010-20
    Medium (0.060-0.125 in)30-1000.060-0.0901.0-2.015-25
    Keyhole (0.125-0.250 in)100-2000.080-0.1202.0-3.520-35

    These are starting points. Always fine-tune based on your specific application, material, and joint configuration.

    Common Plasma Welding Issues and Solutions

    Troubleshooting plasma welding comes with experience. Let me share the most common problems I’ve encountered and their solutions.

    ProblemPossible CauseSolution
    Arc won’t initiateNo gas flow, improper electrode setbackCheck gas supply, adjust electrode position
    Unstable arcWorn nozzle, incorrect gas flowReplace nozzle, verify flow rates
    Excessive spatterContaminated material, wrong gasClean material, check gas mixture
    Porous weldsInadequate shielding, moistureIncrease shielding gas, check for drafts
    Low penetrationCurrent too low, travel too fastIncrease amperage, reduce travel speed
    Excessive penetrationCurrent too high, travel too slowReduce amperage, increase travel speed
    Nozzle wear (double arcing)Current too high for orifice sizeUse larger orifice or reduce current
    Tungsten contaminationTouching workpiece, excessive currentReplace electrode, adjust technique
    Overheating torchInsufficient coolant flowCheck cooling system, clean coolant lines
    Poor weld appearanceWrong gas mixture, incorrect parametersOptimize gas selection, fine-tune settings

    The most common issue I see is operators trying to use one set of parameters for all applications. Plasma welding rewards proper setup–take the time to optimize for each specific job.

    Frequently Asked Questions

    What is plasma welding process?

    Plasma arc welding (PAW) is a precision arc welding process that uses a constricted arc between a non-consumable tungsten electrode and the workpiece. The arc is forced through a water-cooled copper nozzle with a small orifice, which compresses the arc and dramatically increases its temperature to 30,000degF and energy density 3-5 times higher than conventional TIG welding.

    How does plasma welding differ from TIG welding?

    Plasma welding differs from TIG primarily through arc constriction. While TIG uses a free arc that spreads from the electrode to the workpiece, plasma welding forces that arc through a copper nozzle with a small orifice. This constriction creates a more focused, higher-energy arc with deeper penetration, narrower heat-affected zones, and greater stability. Plasma also offers better performance at very low currents (down to 0.1 amps) and includes keyhole capability for single-sided welding.

    What are the advantages of plasma welding?

    Plasma welding offers superior arc stability, deeper penetration (2-3x TIG at same current), narrower heat-affected zones (reducing distortion), faster welding speeds (30-50% increase), excellent performance on thin materials (down to 0.001 inches), more forgiving fit-up tolerance, better process control through dual-gas systems, and unique keyhole capability for full-penetration single-sided welding. The stable arc also reduces operator fatigue compared to TIG welding.

    What is plasma welding used for?

    Plasma welding is used in aerospace for engine components and structural assemblies, medical device manufacturing for surgical instruments and implants, electronics for hermetic sealing and sensor packaging, automotive for exhaust systems and EV battery components, and energy sectors for heat exchangers and pipe welding. It excels in applications requiring precision, minimal distortion, welding of thin materials, and where quality justifies the equipment investment.

    What gases are used in plasma welding?

    Plasma welding typically uses argon as the primary plasma gas because of its excellent arc stability and easy ignition. For enhanced performance on stainless steel and nickel alloys, argon with 2-5% hydrogen is common. Aluminum and copper applications may use helium mixtures. Shielding gas is typically pure argon for most materials, though argon-hydrogen mixtures are used for stainless steel to reduce oxidation and create cleaner welds.

    How hot is a plasma welding arc?

    A plasma welding arc reaches temperatures up to 30,000degF (16,649degC), significantly hotter than a conventional TIG arc which tops out around 20,000degF. This extreme temperature results from arc constriction through the copper nozzle orifice, which compresses the electrical energy into a smaller column and dramatically increases energy density.

    What is keyhole plasma welding?

    Keyhole plasma welding is a high-current technique (100-300 amperes) where the arc’s energy density creates a vapor cavity completely through the workpiece thickness. This keyhole travels along the joint as the torch moves, with molten metal flowing around it and solidifying behind to form the weld. The technique enables single-sided welding with complete penetration, eliminating the need for backing or root pass welding on materials up to 0.25 inch thick in a single pass.

    What materials can be plasma welded?

    Plasma welding works excellently on stainless steel (all grades), carbon steel, titanium (reactive metal benefits from inert atmosphere), aluminum alloys (especially with variable polarity), copper and copper alloys, nickel alloys (Inconel, Hastelloy), and most other weldable metals. The process particularly excels on heat-sensitive materials where the narrow heat-affected zone and precise heat input provide advantages over other welding processes.

    What is the current range for plasma welding?

    Plasma welding operates across an exceptionally wide current range from 0.1 to 300+ amperes. Micro-plasma welding uses 0.1-10 amps for ultra-thin materials and precision work. Medium current plasma operates at 10-100 amps for general fabrication. Keyhole plasma welding uses 100-300 amps for thick materials and full-penetration applications. This wide range makes plasma welding more versatile than most other arc welding processes.

    What are the disadvantages of plasma welding?

    Plasma welding has higher equipment costs (2-3x TIG), more complex setup with additional parameters, increased maintenance requirements (nozzle wear), higher gas consumption, limited joint access due to larger torch size, and more critical parameter requirements. The process also requires proper training and is not ideal for all materials. These limitations must be weighed against the precision and quality benefits for each application.

    Is plasma welding better than TIG?

    Plasma welding is better than TIG for applications requiring precision, deep penetration, minimal distortion, or welding thin materials. The constricted arc provides superior stability and energy density. However, TIG remains better for tight joint access, limited budgets, or when maximum versatility is needed. For automated production and precision applications, plasma typically wins. For manual welding on varied projects, TIG often remains more practical.

    What is the difference between plasma arc and tungsten arc welding?

    The key difference between plasma arc welding (PAW) and tungsten arc welding (GTAW/TIG) is arc constriction. TIG uses a free, unconstricted arc that spreads naturally from electrode to workpiece. Plasma welding forces this arc through a water-cooled copper nozzle with a small orifice, creating a constricted plasma column. This constriction increases energy density 3-5 times, temperature to 30,000degF (vs 20,000degF for TIG), and enables unique capabilities like keyhole welding and stable operation below 1 ampere.

  • 5 Types of Welding Joints: Complete Guide with AWS Standards

    5 Types of Welding Joints: Complete Guide with AWS Standards

    Choosing the right weld joint can make or break your project. After 15 years in metal fabrication, I’ve seen joint failures that could have been prevented with proper selection and design.

    According to the American Welding Society, there are five basic types of welding joints.

    The right joint affects strength, cost, and welding time. I’ve learned that 80% of weld failures trace back to poor joint design rather than welding technique.

    What Are the 5 Types of Welding Joints?

    These five joint types form the foundation of all welded connections.

    Understanding when to use each type separates amateur welders from professionals.

    I’ve seen beginners struggle with joint selection while experienced fabricators make it look effortless.

    The difference comes down to understanding load direction, material thickness, and accessibility.

    Comparison of All 5 Weld Joint Types

    Joint TypeStrengthCommon UseDifficulty
    Butt JointHighestPiping, pressure vesselsModerate
    Tee JointHighStructural steelEasy to Moderate
    Corner JointHighSheet metal, boxesEasy
    Lap JointModerateSheet metal, temporaryEasy
    Edge JointLowestLight gauge, non-structuralEasy

    Butt Joint Welding

    Butt Joint: Two metal pieces joined edge-to-edge in the same plane, creating a flush connection when welded.

    The butt joint is the most common weld joint in industry.

    I’ve welded thousands of butt joints in pipe fabrication and structural applications.

    This joint provides maximum strength because the weld carries the full load of both pieces.

    Types of Butt Joints

    Material thickness determines your butt joint preparation.

    Quick Summary: Thin material under 3/16 inch uses square groove joints. Thicker material requires beveled edges for proper penetration.

    Square groove joints work for material up to 3/16 inch thick.

    For thicker materials, you need edge preparation.

    Common Butt Joint Preparations:

    Groove TypeThickness RangeBevel Angle
    Square GrooveUp to 3/16 inch0 deg
    V-Groove3/16 to 5/8 inch60-75 deg
    Double V-GrooveOver 5/8 inch60-75 deg each side
    U-Groove/J-GrooveVery thick plateVaries by application

    I’ve found that proper fit-up is critical for butt joints.

    A gap of 1/16 to 1/8 inch allows proper penetration on most groove welds.

    Too tight and you get incomplete penetration.

    Too wide and you risk burn-through and excessive filler consumption.

    Butt Joint Applications

    Pipe welding relies almost entirely on butt joints.

    Pressure vessels use butt joints for their superior strength characteristics.

    Structural steel beams connect with butt joints for splicing.

    I prefer butt joints whenever possible because they provide clean, flush connections.

    Butt Joint Welding Tips

    Root pass requires special attention on butt joints.

    Use backing strips or ceramic backing when you can’t access the back side.

    I’ve saved countless hours using copper backing for complete penetration without gouging.

    Keep your travel angle at 5-15 degrees for most butt joint welding.

    Too steep of an angle causes undercut.

    Too flat reduces penetration and increases porosity risk.

    Tee Joint Welding

    Tee joints occur when one piece sits perpendicular to another, forming a T shape.

    This is the most common joint in structural fabrication.

    I’ve built countless frames and supports using tee joint configurations.

    How Tee Joints Work?

    One member butts against the surface of another at approximately 90 degrees.

    Most tee joints use fillet welds rather than groove welds.

    Fillet Weld: A triangular weld joining two surfaces at approximately right angles in a lap joint, tee joint, or corner joint.

    Fillet welds don’t require edge preparation.

    This makes tee joints faster and more economical than butt joints.

    The weld size should equal the thickness of the thinner member.

    Tee Joint Strength

    Tee joints provide excellent strength when properly welded.

    The weld throat determines the load-carrying capacity.

    I’ve calculated fillet weld sizes for hundreds of structural connections.

    A properly sized 1/4 inch fillet weld carries tremendous shear loads.

    However, tee joints are subject to lamellar tearing under certain conditions.

    This occurs when through-thickness stress pulls on rolled steel.

    Tee Joint Applications

    Structural steel framing uses tee joints extensively.

    Column to beam connections typically use tee configurations.

    Machine bases and equipment supports rely on tee joints.

    I’ve welded tee joints for everything from handrail posts to heavy equipment mounts.

    Tee Joint Welding Tips

    Work angle is critical for tee joint fillet welds.

    Keep the electrode at 45 degrees to both members.

    Equal heat distribution prevents undercut on either member.

    I use a slight weave motion on larger fillets for proper tie-in.

    Avoid over-welding tee joints.

    Excess weld metal wastes time and adds weight without increasing strength proportionally.

    Corner Joint Welding

    Corner joints connect two pieces at their edges, forming an L shape.

    This joint type excels in box fabrication and sheet metal work.

    I’ve built countless toolboxes, enclosures, and ductwork using corner joints.

    Open vs. Closed Corner Joints

    Open corner joints leave a gap between pieces.

    Closed corner joints bring edges flush together.

    Each configuration serves different purposes.

    Open corners allow penetration through the joint.

    Closed corners create a flush exterior appearance.

    Corner Joint Applications

    Sheet metal boxes and enclosures use corner joints extensively.

    Ductwork fabrication relies on corner configurations.

    Frame building for cabinets and furniture uses corner joints.

    I prefer corner joints when appearance matters on the exterior.

    Corner Joint Welding Tips

    Sheet metal requires special techniques for corner joints.

    Use lower amperage to prevent burn-through on thin material.

    Start and stop beads away from corner edges when possible.

    I’ve found that tack welding at multiple points prevents distortion.

    Clamping is essential for maintaining alignment during welding.

    Lap Joint Welding

    Lap joints occur when two pieces overlap each other.

    This is one of the simplest joint types to create.

    I frequently use lap joints for sheet metal and temporary connections.

    Single vs. Double Lap Joints

    Single lap joints weld only one side of the overlap.

    Double lap joints weld both sides for increased strength.

    The choice depends on load requirements and accessibility.

    Lap Joint Strength

    Lap joints rely on shear strength rather than tensile strength.

    The weld resists sliding forces between the overlapped pieces.

    Overlap should equal 3-5 times material thickness for optimal strength.

    I’ve tested lap joints to failure in fabrication classes.

    Properly sized double lap joints surprisingly resist significant loads.

    Lap Joint Applications

    Sheet metal work frequently uses lap joints.

    Temporary repairs often employ lap configurations.

    Non-structural connections work well with lap joints.

    I use lap joints for quick fabrication where appearance isn’t critical.

    Lap Joint Welding Tips

    Proper overlap is crucial for lap joint strength.

    Too little overlap reduces strength significantly.

    Excessive overlap wastes material and adds unnecessary weight.

    Watch for corrosion between overlapped surfaces.

    I always clean surfaces thoroughly before lap welding.

    Paint or coating between layers can trap moisture and cause hidden corrosion.

    Edge Joint Welding

    Edge joints connect two pieces along their parallel edges.

    This is the least common of the five basic joint types.

    I use edge joints sparingly and only for specific applications.

    Edge Joint Applications

    Light gauge sheet metal sometimes uses edge joints.

    Non-structural connections and aesthetic welds employ edge configurations.

    Some decorative metalwork uses edge joints for appearance.

    Edge joints work for connecting sheet metal edges where loads are minimal.

    Edge Joint Limitations

    Edge joints provide the lowest strength of all joint types.

    The weld throat depth is limited by material thickness.

    Edge joints are prone to warping and distortion.

    Corrosion can attack the exposed edge surfaces.

    Edge Joint Welding Tips

    Keep heat input low to minimize distortion on edge joints.

    Use clamps or fixtures to maintain alignment.

    Consider reinforcing edge joints when loads will be present.

    I avoid edge joints for structural applications whenever possible.

    Which Weld Joint Type Is Strongest?

    The butt joint provides the highest strength when properly executed.

    A full-penetration groove weld in a butt joint approaches 100% base metal strength.

    Tee joints with properly sized fillet welds also offer excellent strength.

    Corner joints provide good strength for their typical applications.

    Lap joints offer moderate strength through shear resistance.

    Edge joints provide the lowest strength and should be used only for light-duty applications.

    How to Choose the Right Weld Joint?

    Joint selection depends on several key factors.

    Consider these elements before welding.

    Decision Factors:

    FactorQuestions to Ask
    Load DirectionIs the load tension, compression, or shear?
    Load MagnitudeHow much force will the joint experience?
    Material ThicknessCan you achieve full penetration?
    AccessibilityCan you reach both sides of the joint?
    AppearanceDoes the weld need to be hidden?
    CostWhat’s your budget for preparation and welding time?

    For structural loads, I almost always choose butt joints or tee joints.

    Sheet metal work frequently calls for corner or lap joints.

    Quick repairs might use lap joints for speed and simplicity.

    I’ve developed this selection process over years of trial and error.

    The right joint choice saves time, material, and potential failures.

    Common Weld Joint Defects

    Understanding common defects helps prevent joint failures.

    I’ve repaired enough failed welds to recognize these issues immediately.

    Typical Problems:

    DefectCausesPrevention
    Lack of FusionLow heat, fast travel, contaminationProper amperage, clean surfaces
    PorosityMoisture, rust, shielding gas issuesClean material, check gas flow
    UndercutHigh amperage, wrong angleReduce heat, adjust work angle
    CrackingHydrogen, high restraint, rapid coolingLow hydrogen electrodes, preheat

    Proper joint preparation prevents many defects before welding begins.

    I spend more time on fit-up and cleaning than actual welding on critical joints.

    Welding Positions and Joint Compatibility

    Not all joints work equally well in all positions.

    Position affects joint selection and preparation.

    Position Codes Explained:

    CodePositionDifficulty
    1GFlat groove weldEasiest
    2GHorizontal groove weldModerate
    3GVertical groove weld (uphill)Difficult
    4GOverhead groove weldMost Difficult
    5GPipe horizontal, weld verticalVariable
    6GPipe inclined 45 degreesMost Challenging

    Flat position allows the easiest welding for all joint types.

    Vertical and overhead positions require smaller joint preparations and lower amperage.

    I’ve struggled through enough 6G pipe tests to respect position difficulty.

    Material Considerations by Joint Type

    Different materials behave differently in various joint configurations.

    Steel vs. Aluminum:

    Steel tolerates tighter fit-up and more joint variation.

    Aluminum requires more precise fit-up due to thermal conductivity.

    I increase joint gaps on aluminum by 50% compared to steel.

    Stainless steel requires careful heat input control to prevent carbide precipitation.

    Thickness Guidelines:

    Thin material under 1/8 inch works well with lap and corner joints.

    Medium thickness 1/8 to 1/2 inch accommodates all joint types.

    Thick material over 1/2 inch often requires double-sided preparation.

    Frequently Asked Questions

    What are the 5 types of welding joints?

    The five types of welding joints recognized by the American Welding Society are butt joints, tee joints, corner joints, lap joints, and edge joints. Each joint type serves specific applications and offers unique strength characteristics.

    What is the strongest type of weld joint?

    The properly executed butt joint provides the highest strength of all weld joint types. A full-penetration groove weld in a butt joint can achieve 100% of base metal strength. Tee joints with correctly sized fillet welds also offer excellent strength for structural applications.

    What is 1G, 2G, 3G, 4G, 5G, 6G welding?

    These codes indicate welding positions. 1G is flat groove weld, 2G is horizontal groove weld, 3G is vertical groove weld uphill, 4G is overhead groove weld, 5G is pipe welded in fixed horizontal position, and 6G is pipe inclined at 45 degrees representing the most challenging certification test.

    What is the weakest type of weld joint?

    The edge joint provides the lowest strength among the five basic weld joint types. Limited weld throat depth and susceptibility to corrosion make edge joints unsuitable for structural applications. Use edge joints only for light gauge, non-structural connections.

    What is the difference between a fillet weld and groove weld?

    A fillet weld is triangular and joins two surfaces at approximately right angles without edge preparation. A groove weld is made in an opening between workpieces, requiring edge beveling or shaping on thicker materials. Fillet welds work for tee, lap, and corner joints while groove welds typically serve butt joints.

    Conclusion

    Mastering the five types of welding joints takes time and practice.

    I’m still learning new techniques after decades in the trade.

    Start with simple lap and tee joints before progressing to butt joints.

    Each joint type has its place in the welder’s arsenal.

    Proper joint selection and preparation will improve your weld quality more than any other factor.

    The American Welding Society provides these standards for good reason.

    Follow them, practice consistently, and your welding will improve steadily.

  • Welding Symbols Guide: How to Read AWS A2.4 Standards

    Welding Symbols Guide: How to Read AWS A2.4 Standards

    Misreading a welding symbol can cost thousands of dollars in rework. I’ve seen welders fabricate entire structures only to realize they welded the wrong side of the joint.

    Welding symbols are the universal language of metal fabrication. These standardized graphical symbols communicate exactly how welds should be made, what type of joint to prepare, and what specifications to follow.

    The standard that governs these symbols in the United States is AWS A2.4, published by the American Welding Society. This standard defines every symbol, line, and specification used in welding drawings today.

    After training dozens of welding students, I’ve found that symbols typically take 4-6 weeks to master with daily practice. Let me walk you through everything you need to know.

    Anatomy of a Welding Symbol

    Reference Line: The horizontal line that serves as the anchor for all welding symbol elements. Information below this line applies to the arrow side, while information above applies to the other side.

    Every welding symbol is built on the reference line. Think of it as the foundation.

    The arrow and leader line extend from one end of the reference line. The arrow points directly to the joint that needs welding.

    The tail extends from the opposite end and contains additional information like welding process specifications or reference numbers.

    The weld symbol itself sits on or straddles the reference line, telling you what type of weld to make.

    Visual Element: Complete Welding Symbol Structure

        (Optional Specifications)
                  |
                  TAIL
                  |
        ___________|___________
       |                       |
       |    [WELD SYMBOL]      |  <-- REFERENCE LINE
       |_______________________|
                  |
                  |
                ARROW
                  |
                  V
              (JOINT)
    

    Figure 1: Basic welding symbol structure showing all five elements

    Arrow Side vs Other Side: The Critical Difference

    This distinction causes more confusion than any other aspect of welding symbols.

    When the weld symbol appears below the reference line, the weld goes on the arrow side (the side the arrow points to).

    When the weld symbol appears above the reference line, the weld goes on the other side (opposite the arrow).

    When symbols appear on both sides of the reference line, you need to weld both sides of the joint.

    Symbol PositionWeld LocationVisual Example
    Below reference lineArrow side____/ V
        |
    Above reference lineOther sideV
        |____
    Both sidesBoth sides of jointV
        |
        |____V

    Real-World Consequences

    I once worked with a fabricator who welded 20 feet of pipe before realizing the arrow pointed to the root side, not the face side.

    They had to cut out every weld and start over.

    That mistake cost them $3,000 in labor and materials.

    How to Read a Welding Symbol Step by Step?

    Quick Summary: Read welding symbols by starting at the arrow, identifying the weld type on the reference line, checking dimensions, and reviewing the tail for specifications. Always verify arrow side vs other side placement before welding.

    Reading a welding symbol is like reading a sentence from left to right, with specific information in specific locations.

    Step 1: Find the Arrow

    Start at the arrow and follow it to the joint.

    This shows you exactly where the weld needs to be made on the actual workpiece.

    Step 2: Check Symbol Position

    Look at where the weld symbol sits relative to the reference line.

    Below the line means arrow side weld.

    Above the line means other side weld.

    Step 3: Identify the Weld Type

    The shape on the reference line tells you what kind of weld to make.

    A triangular shape means fillet weld.

    A square or rectangular shape indicates groove weld.

    Step 4: Read the Dimensions

    Numbers to the left of the symbol indicate weld size.

    Numbers to the right show weld length.

    Step 5: Check the Tail

    The tail often contains critical information.

    Look for process specifications (GMAW, SMAW, GTAW).

    Reference numbers may point to separate welding procedure specifications.

    Fillet Weld Symbols Explained

    Fillet welds are the most common weld type in fabrication.

    They join two surfaces at approximately right angles, like T-joints and lap joints.

    The fillet weld symbol looks like a right triangle drawn on the reference line.

    Fillet Weld Dimensions

    The weld size appears to the left of the symbol.

    This number represents the leg length (the distance from the joint root to the weld toe).

    For a 1/4 inch fillet weld, you’ll see .25 or 1/4 to the left of the triangle symbol.

    Length specifications appear to the right of the symbol.

    If no length is specified, the weld runs the full joint length.

    Intermittent Fillet Welds

    Intermittent welds show two numbers to the right.

    The first number is weld length.

    The second number is center-to-center spacing (pitch).

    An intermittent fillet weld showing “4-12” means: 4-inch welds spaced 12 inches apart.

    Symbol ElementLocationMeaning
    Weld sizeLeft of symbolLeg length of fillet weld
    Weld lengthRight of symbolLength of continuous weld
    Pitch (spacing)Right of lengthCenter-to-center distance

    Groove Weld Symbols Complete Guide

    Groove welds join parts within a groove or opening.

    They’re used for butt joints where full penetration is required.

    Groove weld symbols vary based on the joint preparation required.

    Square Groove Weld

    The symbol is two vertical lines connected by a horizontal line at the bottom.

    No joint preparation is needed for thin materials.

    The edges are butted together and welded directly.

    V-Groove Weld

    The symbol looks like the letter V placed on the reference line.

    Both pieces are beveled to form a V-shaped groove.

    This is one of the most common groove weld preparations.

    Bevel Groove Weld

    The symbol shows a single vertical line with an angled base.

    Only one piece is beveled while the other remains square.

    This saves preparation time when appropriate for the application.

    U-Groove and J-Groove

    U-groove symbols show a curved U shape.

    J-groove symbols show an L shape with a curved corner.

    These are used for thicker materials requiring special joint preparation.

    Flare-V and Flare-Bevel

    These symbols indicate groove welds on curved surfaces.

    Flare-V symbols show a V shape with curved sides.

    Flare-bevel shows a single curved surface preparation.

    Groove Weld Symbol Quick Reference

    Weld Type Symbol Shape Application
    Square groove Rectangle with open top Thin materials, no prep needed
    V-groove V shape Standard butt joint, both sides beveled
    Bevel groove Single vertical line with angled base One-sided preparation
    U-groove U shape Thick materials, J-shaped prep
    J-groove L with curved corner Single-sided U preparation

    Other Weld Type Symbols

    Plug and Slot Welds

    Plug weld symbols show a rectangle positioned on the reference line.

    They indicate holes in one member filled with weld metal.

    Slot weld symbols are similar but indicate elongated holes.

    Dimensions include hole diameter or slot length and width.

    Spot and Seam Welds

    Spot weld symbols are circles placed directly on the reference line.

    They indicate discrete weld points rather than continuous welds.

    Seam weld symbols show a circle with a line through it.

    These represent continuous rolled welds between overlapping sheets.

    Stud Welds

    Stud weld symbols show a circle with a cross or X inside.

    They indicate welding a metal stud to a surface.

    This process uses specialized equipment and is common in construction.

    Edge Welds

    Edge weld symbols show a modified V shape on its side.

    They indicate welding along the edges of two flanged pieces.

    This joint type is common in sheet metal work.

    Backing and Surfacing Welds

    Backing weld symbols show a semicircle opening toward the reference line.

    They indicate a backing weld made before the main groove weld.

    Surfacing weld symbols show a semicircle opening away from the reference line.

    These indicate build-up welds on surfaces for wear resistance or dimension restoration.

    Supplementary and Special Symbols

    Field Weld Symbol

    The field weld symbol looks like a flag at the arrow-reference line junction.

    This symbol tells everyone that the weld happens on site.

    Shop welds are typically done under controlled conditions.

    Field welds face environmental challenges and require portable equipment.

    I’ve seen contractors reject entire fabrications because shop welds were made where field welds were specified.

    Weld All Around Symbol

    This symbol appears as a circle at the arrow-reference line junction.

    It means weld continuously around the joint.

    Common applications include pipe connections, box frames, and enclosed structures.

    Contour Symbols

    Contour symbols indicate the desired weld surface finish.

    A straight line across the symbol corner means flush finish.

    A curved line bulging outward indicates convex contour.

    A curved line dipping inward shows concave contour.

    Finish Symbols

    Finish method letters appear above contour symbols when needed.

    C means chipping

    G means grinding

    M means machining

    H means hammering

    R means rolling

    These symbols tell you what additional processing the weld needs after welding.

    Weld Dimensions and Specifications

    Understanding dimension placement is critical for making welds that meet specifications.

    Size Dimensions

    For fillet welds, the number to the left indicates leg size.

    This is measured from the joint root to the outer surface of the weld leg.

    For groove welds, multiple dimensions may appear.

    The first number typically indicates weld reinforcement or penetration depth.

    Root Opening

    Root opening appears inside the groove weld symbol.

    It specifies the gap between joint members before welding.

    This dimension is critical for proper penetration.

    Depth of Bevel

    This number appears outside the groove symbol, near the bevel angle.

    It indicates how deep to prepare the bevel on the joint edge.

    Included Angle

    The bevel angle appears outside the groove weld symbol.

    It specifies the total angle between beveled surfaces.

    Common angles are 45, 60, and 75 degrees depending on joint design.

    Length and Pitch

    For continuous welds, the length appears to the right of the symbol.

    For intermittent welds, both length and pitch appear.

    The format is always “length-pitch” such as “4-12”.

    Real-World Welding Symbol Examples

    Let’s apply what we’ve learned to practical examples.

    Example 1: Simple T-Joint Fillet Weld

    3/8
    _____|V
         |

    Symbol: 3/8 inch fillet weld on arrow side

    This symbol specifies a 3/8 inch fillet weld.

    The triangle below the reference line means arrow side weld.

    No length specified means weld the full joint length.

    Example 2: Intermittent Lap Joint

    1/4    4-6
    _____|V
         |

    Symbol: 1/4 inch intermittent fillet, 4-inch welds, 6-inch spacing

    This specifies 1/4 inch fillet welds.

    Each weld is 4 inches long.

    Welds are spaced 6 inches apart center-to-center.

    Example 3: Double V-Groove Butt Joint

    60°    1/8
     V
    _____|
         |
     V

    Symbol: Double V-groove, 60 degree included angle, 1/8 root opening

    The V symbols on both sides indicate weld from both sides.

    60 degrees specifies the included angle for each side.

    1/8 inch root opening means gap between members before welding.

    Example 4: Field Weld with Specification

         GMAW
          |
    5/16  _____|V–flag
         |

    Symbol: 5/16 inch field weld using GMAW process

    The flag symbol indicates field weld required.

    GMAW in the tail specifies MIG welding process.

    5/16 inch fillet weld on arrow side.

    Common Welding Symbol Mistakes to Avoid

    After reviewing forum discussions and talking with inspectors, here are the most common errors:

    Mistake 1: Ignoring Arrow Side

    The most expensive mistake is welding the wrong side of the joint.

    Always verify symbol position relative to the reference line.

    When in doubt, ask before welding.

    Mistake 2: Missing Field Weld Symbol

    I’ve seen fabricators complete welds in the shop only to have them rejected.

    The field weld flag means those welds must happen on site.

    Shop welding field welds creates rework and delays.

    Mistake 3: Misreading Intermittent Spacing

    Confusing weld length with spacing causes issues.

    The first number is always weld length.

    The second number is always pitch (center-to-center distance).

    Getting this backwards means too many or too few welds.

    Mistake 4: Overlooking Tail Information

    The tail often contains critical welding procedure references.

    Ignoring tail information can mean using the wrong process or filler metal.

    Always check the tail before starting to weld.

    Mistake 5: Confusing Old and New Symbols

    AWS A2.4 was updated in 2012 with some symbol changes.

    Older prints may use deprecated symbols.

    When you see unfamiliar symbols, verify the standard being used.

    Practice Quiz: Test Your Knowledge

    Try these questions to test your understanding of welding symbols.

    Question 1

    A fillet weld symbol appears below the reference line. Which side of the joint do you weld?

    Question 2

    What does a flag symbol at the arrow-reference line junction indicate?

    Question 3

    An intermittent fillet weld symbol shows “3-9” to the right. What does this mean?

    Question 4

    What information is contained in the tail of a welding symbol?

    Question 5

    What does a circle connecting the arrow to the reference line indicate?

    Question 6

    A groove weld symbol shows “60” outside the V. What dimension does this specify?

    Question 7

    What does the letter “G” above a contour symbol mean?

    Question 8

    Where is weld size specified on a fillet weld symbol?

    Answers:

    1. Arrow side (the side the arrow points to)

    2. Field weld – must be made at the installation site

    3. 3-inch welds spaced 9 inches apart center-to-center

    4. Welding process, specifications, or reference numbers

    5. Weld all around – continuous weld around entire joint

    6. Included angle of the groove preparation

    7. Grind – the weld surface must be ground

    8. To the left of the weld symbol

    Welding Symbol Quick Reference Chart

    Symbol Type Description
    |_| Square groove Butt joint with no bevel
    / V \ V-groove Both members beveled
    _| / Bevel groove Single member beveled
    _|_| Fillet Approximately 90-degree joint
    [] Plug Hole filled with weld metal
    O Spot Discrete point weld
    flag Field weld Weld at installation site
    O Weld all around Continuous around joint

    Frequently Asked Questions

    What are the basic elements of a welding symbol?

    The five basic elements are the reference line (horizontal foundation), arrow (points to the joint), leader line (connects arrow to reference line), tail (holds supplementary info), and basic weld symbol (indicates weld type).

    How do you read a welding symbol?

    Start at the arrow to find the joint location. Check if the weld symbol is above (other side) or below (arrow side) the reference line. Read the weld symbol type to identify the weld. Check numbers to the left for size and numbers to the right for length. Review the tail for process specifications.

    What is the difference between arrow side and other side?

    Arrow side is the side of the joint that the arrow points to. Other side is the opposite side of the joint. When the weld symbol appears below the reference line, weld the arrow side. When it appears above, weld the other side.

    What is AWS A2.4?

    AWS A2.4 is the American Welding Society standard that defines welding, brazing, and nondestructive examination symbols. It provides the standardized rules for creating and interpreting welding symbols in the United States.

    What does the tail of a welding symbol indicate?

    The tail contains supplementary information such as welding process (GMAW, SMAW, GTAW), specification references, or other notes. When no tail is shown, no supplementary information is specified.

    What is a field weld symbol?

    A field weld symbol is a flag-shaped symbol placed at the junction of the reference line and arrow. It indicates that the weld must be made at the construction or installation site rather than in the fabrication shop.

    What does the weld all around symbol mean?

    The weld all around symbol is a circle connecting the arrow to the reference line. It indicates a continuous weld around the entire perimeter of the joint, commonly used on enclosed structures and pipe connections.

    How are weld sizes shown on symbols?

    Weld size appears to the left of the weld symbol. For fillet welds, this indicates leg length. For groove welds, it may indicate penetration depth or reinforcement. Length appears to the right of the symbol.

    What do contour symbols mean in welding?

    Contour symbols indicate the desired surface shape of the finished weld. A straight line means flush, a line bulging outward means convex, and a line curving inward means concave. Letters above the contour symbol specify the finish method.

    How do you read a fillet weld symbol?

    Identify the triangular symbol on the reference line. The number to the left shows weld size (leg length). The number to the right shows weld length. Check if the symbol is below (arrow side) or above (other side) the reference line to know which side to weld.

    What are supplementary symbols in welding?

    Supplementary symbols provide additional welding information such as field weld (flag), weld all around (circle), contour and finish requirements, backing or spacer symbols, and melt-through symbols.

    What is the reference line on a welding symbol?

    The reference line is the horizontal line that serves as the foundation of the welding symbol. All weld symbols, dimensions, and specifications are placed on or around this line to communicate welding requirements.

  • Slot Plug Weld Symbols: Complete Guide to Reading Welding Blueprints

    Slot Plug Weld Symbols: Complete Guide to Reading Welding Blueprints

    After spending 15 years in fabrication shops and teaching welding students to read blueprints, I’ve seen one pattern repeat constantly. Slot and plug weld symbols confuse everyone at first glance. Even experienced welders sometimes hesitate when they see these symbols on a complex drawing.

    The good news? These symbols follow a logical system once you understand the basics.

    What Are Slot and Plug Weld Symbols?

    These symbols tell welders exactly where to weld, how large to make the weld, and what specifications to follow. The plug weld symbol designates a weld made in a round hole, while the slot weld symbol indicates an elongated hole.

    The standard governing these symbols in the United States is AWS A2.4 (Standard Symbols for Welding, Brazing, and Nondestructive Examination). This standard ensures everyone interprets symbols the same way.

    Understanding these symbols prevents costly mistakes. I’ve seen a single misinterpreted symbol result in thousands of dollars of rework. Let’s break down what you need to know.

    Understanding Plug and Slot Welds

    Before diving into symbols, it helps to understand what these welds actually look like in metal. Both plug and slot welds join two overlapping pieces of metal.

    A plug weld goes through a round hole in the top piece and fills that hole completely. The weld metal fuses to the bottom piece, creating a strong connection. Think of it like pouring metal into a donut hole.

    A slot weld is similar but uses an elongated hole instead of a round one. The slot can be any length, and multiple slot welds are often used along a joint for distributed strength.

    Both weld types excel when you can’t access the back side of a joint or when you want a flush surface on one side. Automotive manufacturers use them extensively for body panels, where appearance matters on the exterior.

    Anatomy of a Welding Symbol

    Every welding symbol shares common elements. Understanding these components is essential before focusing specifically on plug and slot welds.

    The reference line is the foundation. This horizontal line serves as the anchor for all symbol information. Everything else relates to this line.

    The arrow connects to the reference line and points to the joint location. This arrow indicates which piece gets the hole or slot.

    The tail extends from the opposite end of the reference line. It contains additional information like welding process specifications or reference numbers.

    Symbol Placement: Arrow Side vs Other Side

    This concept trips up most beginners. The symbol’s position relative to the reference line matters immensely.

    When the symbol sits below the reference line, the weld goes on the arrow side. This means the hole is in the piece the arrow points to.

    When the symbol appears above the reference line, the weld goes on the other side. The hole exists in the piece opposite the arrow.

    Symbols on both sides mean holes in both pieces. This configuration occurs less frequently but follows the same logic.

    Plug Weld Symbol Explained

    Plug Weld Symbol: A circle with a cross (like a bullseye target) placed on or above/below the reference line. The diameter appears to the left of the symbol, and other specifications appear inside or around it.

    The plug weld symbol is distinctive. A circle with a cross through it clearly indicates a round hole weld. This symbol never gets confused with other weld types once you know what to look for.

    Plug Weld Dimensions

    Reading plug weld dimensions requires understanding specific positions around the symbol.

    DimensionLocation on SymbolWhat It Means
    Hole DiameterLeft of the symbolSize of the hole to be drilled
    Depth of FillingInside the symbolHow deep to fill the hole
    Pitch (Spacing)Right of the symbolCenter-to-center distance for multiple welds
    Countersink AngleAbove or below symbolAngle of hole chamfer (if required)

    Depth of Filling

    This specification tells the welder how much of the hole to fill. A number inside the plug weld symbol indicates the depth.

    When no number appears, fill the hole completely. This is the most common scenario and the default assumption unless specified otherwise.

    Partial filling occurs when engineers want specific strength without excessive weld metal. You might see 1/4 or 1/2 inside the symbol, meaning fill to that depth.

    Countersink Specifications

    Some plug welds require countersunk holes for flush surfaces. The countersink angle appears above the symbol with a number indicating the degree.

    Common angles include 60 degrees, 75 degrees, and 90 degrees. The drawing specifies this when the finished surface must be smooth.

    Multiple Plug Welds

    When multiple plug welds are required, the pitch dimension becomes critical. This number to the right of the symbol indicates center-to-center spacing.

    I’ve seen blueprints specify 3 plug welds with 2-inch pitch. This means drill three holes, each 2 inches apart center-to-center, and weld all three.

    The weld-all-around symbol (a circle at the elbow of the arrow) combined with a plug weld indicates multiple plug welds in a pattern.

    Slot Weld Symbol Explained

    Slot Weld Symbol: A rectangle with a cross through it, indicating an elongated hole. The length and width dimensions specify the slot size, with spacing requirements for multiple slots.

    The slot weld symbol resembles a rectangle with a cross. This rectangular shape immediately distinguishes it from the circular plug weld symbol.

    Slot Weld Dimensions

    Slot welds require more dimensional information than plug welds because the hole shape is more complex.

    DimensionLocation on SymbolWhat It Means
    Slot WidthLeft of the symbolWidth of the slot
    Slot LengthRight of the symbolLength of the slot
    Depth of FillingInside the symbolFill depth specification
    PitchFar right of symbolSpacing between multiple slots
    Slot OrientationDrawing detailDirection of slot (shown on drawing)

    Slot Length and Width

    The slot dimensions appear on opposite sides of the symbol. Width goes to the left, length goes to the right.

    I’ve seen drawings specify 1/4 inch width and 2 inch length. This creates a slot four times longer than it is wide.

    Unlike plug welds, slot welds require orientation information. The drawing must show whether slots run parallel or perpendicular to the joint.

    Multiple Slot Welds

    Slot welds almost always appear in groups. The pitch dimension indicates spacing between slots in a pattern.

    A common specification might be four slots, 3 inches long, spaced 4 inches apart. This provides distributed strength along a joint.

    Plug Weld vs Slot Weld: Key Differences

    Understanding when each weld type is used helps with symbol interpretation. Let’s compare them directly.

    CharacteristicPlug WeldSlot Weld
    Hole ShapeRound circleElongated rectangle
    Symbol ShapeCircle with crossRectangle with cross
    Primary DimensionDiameter onlyWidth and length
    Common UsePoint connectionsLinear strength distribution
    Strength AreaConcentrated at pointDistributed along slot
    Typical ApplicationAttachment plates, bracketsStiffeners, longer joints

    When to Use Each Type?

    Engineers choose plug welds for concentrated loads. A single point needs maximum strength, and a round hole provides circular stress distribution.

    Slot welds work better for distributed loads. When stress spreads along a line, multiple slots share the load more effectively than isolated plug welds.

    Manufacturing considerations also matter. Round holes drill faster with standard bits. Slots require milling or plasma cutting, adding time and cost.

    How to Read Slot and Plug Weld Symbols?

    Reading these symbols follows a systematic process. I teach my students to work through symbols in a specific order every time.

    Step-by-Step Reading Process

    Quick Reading Method: Start at the reference line and work outward. Identify the weld type first (plug vs slot), then read dimensions left to right, then check above and below for additional specifications.

    1. Locate the reference line – This is your starting point for all symbol information
    2. Identify the symbol shape – Circle with cross equals plug weld, rectangle with cross equals slot weld
    3. Check symbol position – Above line (other side), below line (arrow side), or both sides
    4. Read left of symbol – Diameter for plug welds, width for slot welds
    5. Check inside the symbol – Depth of filling specification (if any)
    6. Read right of symbol – Pitch/spacing for multiple welds, length for slot welds
    7. Look above/below – Countersink angle, finish symbols, or other supplementary info
    8. Check the tail – Process specifications or reference notes

    Common Reading Mistakes

    In my experience teaching CWI candidates, certain mistakes occur repeatedly.

    Confusing arrow side with other side tops the list. Remember: symbol below the line equals arrow side. Symbol above equals other side.

    Missing the depth of filling is another common error. Always check inside the symbol before assuming complete filling.

    Ignoring pitch specifications leads to incorrectly spaced welds. When multiple welds are required, the pitch dimension is crucial.

    Practice Example

    Let’s walk through a typical symbol: A plug weld symbol below the reference line, with 1/2 to the left, 3 to the right, and nothing inside.

    Reading this systematically: Plug weld on arrow side, 1/2 inch diameter hole, 3 inch pitch spacing, fill completely. This means drill 1/2 inch holes in the arrow-side member, space them 3 inches apart, and fill each completely.

    Surface Contour and Finish Symbols

    Some drawings specify the surface appearance of completed plug and slot welds. These supplementary symbols appear above the weld symbol.

    A straight line indicates a flush surface. The weld should be finished smooth with the base metal surface.

    A convex arc means the weld surface should be slightly raised above the base metal.

    A concave arc indicates a slight depression below the base metal surface.

    Finish letters (C for chipping, G for grinding, M for machining) may accompany contour symbols to specify the finishing method.

    Weld All Around and Field Weld Symbols

    Two additional symbols commonly appear with plug and slot welds.

    The weld-all-around symbol is a circle at the elbow where the arrow meets the reference line. For plug and slot welds, this indicates a pattern of welds around a feature.

    The field weld symbol is a small flag at the same location. It indicates the weld should be made at the installation site rather than in the fabrication shop.

    I’ve seen both symbols together on structural drawings. This means a complete plug weld pattern should be installed in the field during erection.

    Practical Applications

    Understanding where these welds appear in real projects helps reinforce symbol knowledge.

    Automotive Industry

    Car manufacturers use plug welds extensively in body construction. When replacing body panels, technicians must replicate factory plug weld patterns. The original engineering drawings specify plug size, spacing, and location using the symbols we’ve covered.

    I’ve helped restoration shops interpret original factory drawings for classic cars. Understanding these symbols meant the difference between correct restoration and structural compromise.

    Structural Steel

    Steel fabricators use slot welds for stiffener plates and connection details. The elongated slots provide distributed strength while allowing for thermal movement.

    Bridge construction often specifies plug welds for attachments where bolt heads would protrude or create corrosion concerns.

    Sheet Metal Fabrication

    Thin gauge applications frequently use plug welds. The small diameter holes provide adequate strength without excessive heat that would warp light material.

    HVAC ductwork and enclosures often employ plug welds for assembly when appearance matters on the exterior surface.

    Standards References

    AWS A2.4 is the primary standard for welding symbols in the United States. This document defines every symbol element and provides complete interpretation rules.

    For structural applications, AWS D1.1 (Structural Welding Code – Steel) references A2.4 symbols and adds specific requirements for plug and slot weld inspection and acceptance criteria.

    International readers should note ISO 2553 as the equivalent standard. The symbols appear similar but some placement conventions differ slightly.

    Inspection Considerations

    When inspecting plug and slot welds, several key factors require verification.

    Hole size must match the drawing specification. A 1/2 inch specified diameter should measure within acceptable tolerance (typically plus 1/8 inch per AWS D1.1).

    Depth of filling requires visual inspection or NDT. Complete filling should show weld metal flush with or slightly above the surface (unless countersunk).

    Spacing between multiple welds must match the pitch dimension. Improper spacing creates stress concentrations and potential failure points.

    For CWI candidates, understanding these acceptance criteria is essential for certification exams and real-world inspection work.

    Frequently Asked Questions

    What is the difference between a plug weld and a slot weld?

    Plug welds use round holes while slot welds use elongated rectangular holes. Plug weld symbols appear as circles with crosses, while slot weld symbols are rectangles with crosses. Plug welds concentrate strength at a single point, while slot welds distribute strength along a line.

    How do I read plug weld dimensions on a drawing?

    Read dimensions in a specific order: hole diameter appears to the left of the symbol, depth of filling (if specified) appears inside the symbol, and pitch (spacing for multiple welds) appears to the right. Countersink angle appears above the symbol when required.

    What does the arrow side mean on welding symbols?

    The arrow side refers to the member that the arrow points to on the drawing. When the plug or slot weld symbol appears below the reference line, the weld goes on the arrow side. When above the line, it goes on the opposite side. This determines which piece gets the hole.

    What is pitch in plug weld symbols?

    Pitch is the center-to-center distance between multiple plug or slot welds. This dimension appears to the right of the weld symbol and tells the welder how far apart to space the holes. For example, a pitch of 3 inches means hole centers are 3 inches apart.

    What does depth of filling mean on plug weld symbols?

    Depth of filling indicates how deep to fill the hole with weld metal. A number inside the plug weld symbol specifies the depth. When no number appears, the default is to fill the hole completely. Partial filling is specified for applications requiring less than full penetration.

    When should I use a plug weld vs a slot weld?

    Use plug welds for concentrated point loads and quick manufacturing with standard drill bits. Slot welds work better for distributed loads along a line and when linear strength is needed. Plug welds are more common in automotive and sheet metal work, while slot welds appear frequently in structural steel applications.

    What is a countersink angle on welding symbols?

    Countersink angle specifies the chamfer on the hole entrance, typically for flush surface requirements. Common angles are 60, 75, or 90 degrees. This dimension appears above the plug or slot weld symbol when a countersunk hole is required for the weld.

    What AWS standard covers plug and slot weld symbols?

    AWS A2.4 (Standard Symbols for Welding, Brazing, and Nondestructive Examination) defines all welding symbols including plug and slot welds. AWS D1.1 (Structural Welding Code – Steel) references these symbols and provides acceptance criteria for structural applications.

    Mastering slot and plug weld symbols takes practice. The key is understanding the systematic approach: identify the weld type first, then read dimensions in order, then check supplementary information. With this foundation, you can interpret any plug or slot weld symbol you encounter on blueprints and technical drawings.

  • Silver Brazing: Complete Guide to Strong Metal Joints

    Silver Brazing: Complete Guide to Strong Metal Joints

    Silver brazing creates joints that are five times stronger than soldering while operating at temperatures that won’t damage most base metals. I’ve used this process in HVAC repair and jewelry making, and the difference in joint strength is remarkable compared to soft soldering.

    Silver brazing is a metal joining process that uses a silver-based filler metal with a melting point between 1145-1650F (618-899C) to create strong, leak-proof joints through capillary action. Unlike welding, it doesn’t melt the base metals, making it ideal for joining dissimilar materials like copper to steel.

    After spending 15 years in metalworking, I’ve seen silver brazing outperform soldering in critical applications like refrigeration systems where joint failure isn’t an option. The process delivers shear strength that typically exceeds soldered joints by a factor of five.

    Silver Brazing vs Soldering vs Welding

    The main difference lies in temperature and strength. Soldering operates below 840F (450C), silver brazing runs 1145-1650F (618-899C), and welding melts the base metal entirely. I’ve worked with all three methods, and each has its place.

    Silver brazing occupies the middle ground, offering strength close to welding without the heat distortion that welding can cause. The joint strength advantage is significant; brazed joints typically handle five times the shear load of soldered connections.

    CharacteristicSilver BrazingSolderingWelding
    Temperature Range1145-1650F (618-899C)Below 840F (450C)2200F+ (1200C+)
    Joint Strength70,000+ psi shear5,000-15,000 psi shearBase metal strength
    Base Metal EffectNo meltingNo meltingMelts and fuses
    Heat DistortionMinimalVery lowSignificant
    Dissimilar MetalsExcellentGoodDifficult

    Quick Summary: Choose silver brazing when you need strength approaching weld quality but can’t risk heat damage to your parts. It costs more than soldering but delivers five times the joint strength and handles pressure applications that soldering cannot.

    How Silver Brazing Works?

    The magic of silver brazing lies in capillary action. When you heat properly assembled parts with a small gap between them, the molten filler metal flows into that joint space without being poured or pushed. I’ve watched it happen countless times, and it still impresses me how the silver alloy finds its way into every microscopic surface irregularity.

    Capillary Action: The ability of a liquid to flow into narrow spaces without external forces. In silver brazing, this allows filler metal to penetrate joint gaps as small as 0.002 inches, creating complete coverage.

    The process requires three things working together: proper joint clearance, clean surfaces, and flux. Joint clearance typically needs to be 0.002-0.005 inches for optimal capillary flow. Too tight and the filler can’t enter; too loose and capillary action fails.

    Flux plays a critical role by cleaning the metal surfaces during heating and preventing oxidation. Without flux, the filler metal would ball up instead of flowing into the joint. I learned this the hard way on my first attempt, resulting in a weak, incomplete bond.

    As the assembly heats, the flux first becomes liquid and clear, then turns dark as it reaches working temperature. This color change tells experienced brazers when to apply the filler metal. The silver alloy melts at a specific temperature below the melting point of the base metals, flowing into the joint and forming a metallurgical bond as it cools.

    Silver Brazing Materials and Equipment

    Silver Alloy Percentages

    Silver brazing alloys come in different silver content percentages, each with specific characteristics. The percentage affects melting point, flow characteristics, and cost. Higher silver content generally means lower melting temperature and better flow, but at significantly higher cost.

    Silver ContentMelting RangeBest ForCost Level
    15% (Phos-Copper)1190-1490FCopper to copperLow
    30% Silver1250-1550FGeneral purposeMedium
    45% Silver1145-1340FHVAC, refrigerationHigh
    56% Silver1145-1205FCritical joints, stainlessVery High

    In my experience, 45% silver alloy hits the sweet spot for most HVAC work. It flows well and provides excellent strength without the extreme cost of 56% alloy. For jewelry work where appearance matters, 56% gives the cleanest joints with minimal discoloration.

    Flux Types

    White flux is the most common choice for general silver brazing. It’s preferred because you can see your work through the transparent flux as you heat. White brazing flux combines potassium salts of boron and fluorine to clean and protect the joint area.

    Black flux contains additional compounds for high-temperature applications and stainless steel. It provides better oxidation protection at the cost of visibility. I use black flux exclusively when working with stainless steel or when brazing in environments with higher oxygen content.

    Heat Sources

    An oxyacetylene torch delivers the best control and heat output for most silver brazing applications. The adjustable flame lets you bring large parts to temperature evenly while concentrating heat where needed. For small parts and jewelry, a propane torch can work but has limitations.

    Can you silver braze with a propane torch? Yes, but only for materials up to about 7mm thick. Beyond that, the heat sink effect of the base metal dissipates heat faster than propane can replace it. I’ve tried using propane on 1/2-inch copper tubing and ended up with a weak joint because I couldn’t maintain proper temperature throughout the joint area.

    MAPP gas burns hotter than propane and offers a middle ground for light to medium work. For serious production brazing or thick materials, oxyacetylene remains the professional choice.

    Material Compatibility Guide

    Not all metals respond equally well to silver brazing. Some combinations work beautifully, while others require special filler metals or fluxes. Here’s what I’ve learned from years of trial and error.

    Base MetalCan Be Silver Brazed?Notes
    CopperExcellentMost common application, works with all silver alloys
    BrassExcellentWatch for zinc depletion at high temps
    Steel (Carbon)Very GoodClean surface thoroughly, use appropriate flux
    Stainless SteelGoodRequires black flux or special high-silver alloys
    AluminumNoRequires specialized aluminum brazing materials
    Cast IronDifficultPossible with special preparation, not recommended

    Joining dissimilar metals like copper to steel is where silver brazing really shines. The process bonds different materials without compromising either base metal. This capability makes it invaluable for HVAC repairs, refrigeration systems, and automotive applications.

    Step-by-Step Silver Brazing Process

    Follow these steps for successful silver brazing. I’ve refined this process through hundreds of joints, and skipping any step typically leads to failure.

    1. Clean the surfaces thoroughly. Remove all oil, grease, and oxidation using sandpaper, a wire brush, or chemical cleaner. I’ve seen more joints fail from inadequate cleaning than from any other cause. The metal should be bright and shiny before proceeding.
    2. Apply flux to the joint area. Coat both surfaces with a thin layer of appropriate flux. The flux should cover the area where filler metal will flow plus a small margin. Too much flux can cause problems, but too little won’t protect the joint.
    3. Assemble the parts with proper clearance. Position the pieces so they maintain the 0.002-0.005 inch gap needed for capillary action. If you’re brazing a tube into a fitting, slip-fit them without forcing. The natural fit usually provides the right clearance.
    4. Heat the assembly evenly. Apply heat broadly around the joint area, not just at one spot. Move the torch in a circular motion to bring both parts to temperature simultaneously. Uneven heating causes the filler to flow toward the hotter side, leaving gaps.
    5. Watch for flux color change. As the temperature rises, the flux will become clear and liquid, then darken slightly. This darkening indicates you’re approaching brazing temperature. The metal may show a dull red color in dim light.
    6. Apply the filler metal. Touch the silver brazing rod to the joint edge, not in the flame. If the temperature is correct, the filler will melt and flow into the joint by capillary action. Don’t melt the rod with the torch flame; let the joint heat do the work.
    7. Allow to cool slowly. Don’t quench the joint or move the parts while the filler is solidifying. Rapid cooling can crack the joint or cause residual stress. I usually let parts air cool until they’re safe to touch.
    8. Clean the finished joint. Remove flux residue with warm water or a dedicated flux remover. Leftover flux can cause corrosion over time. Inspect the joint for complete filler penetration all around.

    Silver Brazing Applications

    The versatility of silver brazing makes it valuable across many industries. Different applications require different techniques and materials, but the fundamental process remains the same.

    HVAC and Refrigeration

    HVAC technicians rely on silver brazing for refrigerant line connections. The leak-proof joints and ability to withstand pressure make it ideal for air conditioning and refrigeration systems. Most HVAC work uses 45% silver alloy for its balance of strength and flow characteristics.

    In refrigeration work, I’ve learned that nitrogen purging during brazing prevents internal oxidation. This step is critical for systems that will see compressor operation; any oxide flakes inside the line can destroy a compressor.

    Jewelry Making

    Jewelers use silver brazing, often called soldering in the trade, to join precious metals. The lower temperatures compared to welding prevent fire scale and gem damage. Jewelry applications typically use 56% silver alloy for the cleanest joints and lowest working temperature.

    The appearance requirements in jewelry are much stricter than industrial applications. Any visible joint line or discoloration ruins the piece. This is where proper flux selection and heat control really matter.

    Automotive and Plumbing

    Automotive repair technicians use silver brazing for transmission and radiator repairs where welding would damage sensitive components. The ability to join dissimilar metals makes it useful for mixed-material assemblies.

    In plumbing, silver brazing creates joints that handle higher pressure and temperature than soft solder. While more expensive, it’s the right choice for hot water systems and pressurized applications.

    Industrial Manufacturing

    Production brazing joins components in everything from electrical contacts to cutting tools. The consistency and strength of brazed joints make them suitable for automated production environments. Induction heating and furnace brazing allow high-volume manufacturing with precise control.

    Troubleshooting Common Silver Brazing Problems

    Even experienced brazers encounter problems. Understanding what went wrong helps prevent the same issue next time. Here are the most common problems I’ve seen and their solutions.

    Weak Joints

    Weak joints usually result from incomplete filler penetration or poor surface preparation. If the filler metal didn’t flow completely around the joint, you’ll have a partial bond with significantly reduced strength. This often happens when the parts aren’t heated evenly or when the joint clearance is too small.

    Solution: Clean surfaces more thoroughly, check joint fit before brazing, and ensure even heating. The filler should be visible at the entire joint perimeter after cooling.

    Leaking Joints

    Leaks occur when the filler metal doesn’t completely fill the joint space. In HVAC work, this is a critical failure that requires redoing the joint. Common causes include moving the parts during cooling, insufficient flux, or improper heat application.

    Solution: Don’t disturb the assembly while cooling, use adequate flux, and apply heat until the filler flows freely around the entire joint. For refrigeration work, pressure-test with nitrogen before charging the system.

    Poor Filler Flow

    If the filler metal balls up instead of flowing into the joint, something is preventing capillary action. This might be contamination, insufficient flux, or improper joint clearance. I’ve also seen this happen when the base metal isn’t brought to temperature evenly.

    Solution: Clean surfaces again, check that flux covers the entire joint area, and verify joint clearance. Heat more evenly and ensure both parts reach brazing temperature before applying filler.

    Joint Discoloration

    Excessive oxidation or overheating causes discoloration that’s unacceptable for visible applications. While this doesn’t necessarily affect strength, it ruins appearance-critical work. Overheating can also damage the base metal properties.

    Solution: Use sufficient flux, reduce heat input, and work quickly once brazing temperature is reached. For stainless steel, switch to black flux formulated for high-temperature applications.

    Filler Doesn’t Melt

    If the brazing rod won’t melt even with direct heat, you’re either using the wrong alloy or not reaching proper temperature. Some high-silver alloys have very narrow melting ranges that require precise temperature control.

    Solution: Verify you’re using the correct alloy for your application and increase heat output. An oxyacetylene torch may be necessary if propane isn’t getting the job done.

    Safety Considerations

    Silver brazing involves high temperatures, open flames, and potentially hazardous materials. Proper safety precautions are non-negotiable. I’ve seen too many injuries from complacency around hot metal and gas equipment.

    Cadmium Awareness

    Some older silver brazing alloys contain cadmium, which produces highly toxic fumes when heated. Cadmium oxide fumes can cause serious respiratory problems and long-term health effects. Always know what’s in your filler metal and work in well-ventilated areas.

    Modern cadmium-free alternatives are widely available and just as effective for most applications. There’s no good reason to use cadmium-containing alloys anymore, especially for DIY work where ventilation might be inadequate.

    Ventilation Requirements

    All brazing produces fumes that shouldn’t be inhaled. Work in a well-ventilated area or use local exhaust ventilation to capture fumes at the source. I’ve set up a small fan near my workbench that pulls fumes away from my breathing zone.

    For confined space work, portable ventilation equipment is essential. Never braze in an enclosed area without proper air movement. The fumes accumulate quickly and can displace oxygen.

    Protective Equipment

    Safety glasses are mandatory. Molten metal can spit unexpectedly, and a single particle in your eye can cause permanent damage. I also wear leather gloves when handling hot parts and a face shield for larger work.

    Flame-resistant clothing prevents burns from accidental contact. Synthetic fabrics can melt into skin when exposed to high heat. Cotton or wool materials are much safer choices for brazing work.

    Gas Safety

    Proper gas handling prevents explosions and fires. Check all connections for leaks using soapy water before lighting your torch. Never use oil or grease on oxygen fittings; oxygen and oil can ignite spontaneously under pressure.

    Store gas cylinders securely and keep them away from heat sources. A falling cylinder can break the valve, turning the cylinder into a dangerous projectile. I keep my cylinders chained to the wall at all times.

    Frequently Asked Questions

    What is the difference between silver soldering and silver brazing?

    The terms are often used interchangeably. Technically, silver soldering refers to lower temperature processes (below 840F), while silver brazing operates at 1145-1650F. However, in practice, many people call silver brazing “silver soldering” or “hard soldering.” The key distinction from soft soldering is the much higher temperature and resulting joint strength.

    What temperature is needed for silver brazing?

    Silver brazing requires temperatures between 1145-1650F (618-899C), depending on the specific alloy used. Lower silver content alloys (15-30%) melt at higher temperatures, while high-silver alloys (45-56%) flow at lower temperatures. Your heat source must sustain these temperatures throughout the joint area for successful brazing.

    Can I silver braze aluminum?

    No, standard silver brazing alloys don’t work with aluminum. Aluminum requires specialized brazing materials designed specifically for that metal. The oxide layer on aluminum melts at a higher temperature than the base metal, creating challenges that standard silver brazing can’t overcome. Use aluminum-specific brazing rods or consider alternative joining methods for aluminum projects.

    How long does silver brazing take?

    The actual brazing process takes 1-3 minutes per joint for most applications. However, heating time varies based on material thickness and heat source. Small jewelry joints might take 30 seconds, while large copper tubing could require several minutes of heating. Factor in preparation, cooling, and cleaning, and plan 5-10 minutes total per joint.

    What safety equipment do I need for silver brazing?

    Essential safety equipment includes safety glasses, leather gloves, and flame-resistant clothing. A face shield provides additional protection for larger work. Proper ventilation is critical; work in a well-ventilated area or use exhaust to remove fumes. If using cadmium-containing alloys (not recommended), a respirator with appropriate cartridges is necessary.

    Why are my silver brazed joints failing?

    Most joint failures result from inadequate cleaning, improper joint clearance, or insufficient heat. Ensure surfaces are clean and bright before starting. Check that parts fit with the proper 0.002-0.005 inch gap. Heat evenly until both parts reach brazing temperature before applying filler. Also verify you’re using the correct flux for your materials and that the flux hasn’t expired.

    Silver brazing delivers strength that soldering can’t match while avoiding the heat damage of welding. The process requires proper materials, preparation, and technique, but the results justify the effort. Start with simple joints on scrap material to develop your technique before tackling critical projects. With practice and attention to detail, you’ll achieve reliable, strong joints suitable for any application.

  • What is Plasma Arc Cutting? Complete Guide to Plasma Cutting Process

    What is Plasma Arc Cutting? Complete Guide to Plasma Cutting Process

    Plasma arc cutting is a thermal cutting process that uses an accelerated jet of superheated, electrically ionized gas called plasma to cut through electrically conductive materials. The process works by forcing compressed gas through a constricted nozzle while an electrical arc forms between an electrode and the workpiece, ionizing the gas into plasma that reaches temperatures of 20,000 to 30,000 degrees Fahrenheit.

    After working with metal fabrication for over 15 years, I’ve seen plasma arc cutting transform from an industrial-only technology to an accessible tool for hobbyists and small shops. The versatility of this cutting method makes it indispensable for anyone working with metal.

    Unlike mechanical cutting methods that generate chips and require physical contact, plasma cutting melts and blows away metal with a focused stream of ionized gas. This results in cleaner cuts with minimal edge preparation needed for most applications.

    The beauty of plasma cutting lies in its simplicity and effectiveness. In my experience, once you understand the fundamentals, you can produce quality cuts on everything from 26-gauge sheet metal to 2-inch plate.

    How Plasma Cutting Works?

    Quick Summary: Plasma cutting works by creating an electrical channel of ionized gas (plasma) through the workpiece. Compressed gas is forced through a nozzle while a high-voltage arc ionizes the gas into plasma that reaches 30,000 degrees Fahrenheit, melting the metal while the gas stream blows away the molten material.

    The plasma cutting process relies on creating a controlled electrical channel through the workpiece. Here’s what happens during cutting:

    1. Gas Flow Initiation: Compressed gas (typically air, oxygen, or nitrogen) flows through the plasma torch nozzle at high pressure, creating the medium for plasma formation.
    2. Pilot Arc Creation: A high-voltage spark generates a pilot arc between the electrode and the nozzle, ionizing the gas into plasma state.
    3. Arc Transfer: When the torch approaches the workpiece, the electrical arc transfers from the nozzle to the metal, completing the circuit through the conductive material.
    4. Plasma Channel Formation: The electrical energy superheats the gas stream to 20,000-30,000 degrees Fahrenheit, creating a plasma channel that melts through the metal.
    5. Material Removal: The high-velocity plasma stream blows away molten metal, creating a clean cut through the workpiece.

    The entire process happens in milliseconds, with the plasma jet moving along the cut path at speeds ranging from 20 to 300 inches per minute depending on material thickness and amperage.

    Plasma: The fourth state of matter, distinct from solid, liquid, and gas. Plasma is an electrically ionized gas that conducts electricity and can be shaped and directed by magnetic fields. In plasma cutting, the plasma state enables the superheated jet that cuts through metal.

    The Science Behind Plasma Formation

    At the molecular level, plasma forms when gas molecules are stripped of electrons, creating a soup of positive ions and free electrons. This ionization occurs from the intense electrical energy applied to the gas stream. Once ionized, the plasma becomes an excellent conductor of electricity, maintaining the electrical arc needed for cutting.

    The constriction of the plasma stream through the nozzle focuses the energy into a narrow column, typically 0.04 to 0.12 inches in diameter (the kerf width). This focused energy density is what allows plasma to cut through thick metal plates with relative ease.

    Kerf: The width of material removed during the cutting process. In plasma cutting, kerf typically ranges from 0.04 to 0.12 inches (1-3mm), depending on amperage, nozzle size, and material thickness. The kerf is wider at the top of the cut than the bottom, creating a natural bevel angle.

    I’ve spent countless hours watching plasma cutters work, and the physics still fascinate me. The fact that you can take compressed air and electricity to cut through solid metal never gets old.

    Plasma Cutting Equipment and Components

    Understanding plasma cutting equipment helps you select the right system for your needs. After helping dozens of shops choose their first plasma cutter, I’ve learned that matching equipment capabilities to your typical work is essential.

    A complete plasma cutting system consists of several key components working together:

    Power Supply

    The power supply converts incoming AC power into DC power suitable for cutting. Modern plasma cutters use inverter technology with IGBT (Insulated Gate Bipolar Transistor) or MOSFET transistors to produce stable DC output. The power supply determines the maximum cutting capacity based on amperage output.

    Power supplies are rated by output amperage, with higher amperage enabling thicker material cutting. For example, a 40-amp cutter typically handles up to 1/2 inch steel, while 100-amp systems can cut 1-1/2 inch plate.

    Duty Cycle: The percentage of time a plasma cutter can operate within a 10-minute period without overheating. A 60% duty cycle at 40 amps means you can cut for 6 minutes, then need 4 minutes of cooling. Higher duty cycles enable longer continuous cutting sessions.

    Plasma Torch

    The plasma torch is the handheld or machine-mounted component that directs the plasma stream onto the workpiece. Inside the torch, the electrode and nozzle work together to constrict and focus the plasma arc.

    After testing dozens of torch designs over the years, I’ve found that ergonomic design matters as much as cutting performance. A comfortable torch reduces operator fatigue during long cutting sessions.

    Gas System

    Compressed gas is essential for plasma cutting. The gas system includes regulators, filters, and distribution lines that deliver clean, dry gas at the proper pressure. Air compressors are common for general cutting, while specialized applications use oxygen, nitrogen, or argon-hydrogen mixtures.

    Gas quality significantly affects cut quality. Moisture or oil contamination in compressed air causes inconsistent cutting and reduced consumable life. I always recommend installing a quality filter/dryer system.

    Consumable Components

    The electrode and nozzle are wear items that require periodic replacement. The electrode contains a hafnium insert that emits electrons during cutting. Over time, this insert wears, causing poor cut quality. The nozzle orifice gradually enlarges from heat and electrical erosion, reducing cut precision.

    I’ve found that monitoring consumable life prevents most cut quality issues. Experienced operators replace electrodes when the hafnium insert pits to 0.020 inches deep, while nozzles are changed when the orifice becomes oval or oversized by 20%.

    Plasma Cutter Starting Methods

    The method used to initiate the plasma arc affects both equipment capability and applications. Understanding these differences helps when selecting equipment for your specific needs.

    Pilot Arc: A low-current electrical arc that forms between the electrode and nozzle before transferring to the workpiece. The pilot arc ionizes the gas stream without touching the metal, enabling arc starting without physical contact. This protects the nozzle from damage and is essential for CNC applications.

    Pilot Arc Starting

    Pilot arc systems create a low-current arc between the electrode and nozzle before transferring to the workpiece. This allows starting without touching the metal surface, essential for CNC applications and cutting expanded metal or grating. The pilot arc prevents damage to the nozzle and extends consumable life.

    I exclusively use pilot arc machines in my shop because they’re so much more versatile. The ability to start the arc without touching the workpiece saves countless hours on projects involving uneven surfaces.

    High Frequency Starting

    High frequency (HF) start uses a high-voltage spark to ionize the gas and initiate the arc. HF starting provides reliable ignition without contact but can interfere with nearby electronics and CNC controls.

    While HF start is reliable, I’ve seen it cause issues with sensitive electronics. If you work around computers or CNC equipment, consider a blowback start system instead.

    Contact Starting

    Contact start systems require the torch tip to touch the workpiece to initiate the arc. This simple method works well for basic handheld cutting but isn’t suitable for CNC applications. The dragging contact can cause nozzle wear on rough surfaces.

    Contact start is fine for budget units and occasional use, but the consumable wear adds up. For serious work, invest in a pilot arc system.

    Starting MethodBest ForProsCons
    Pilot ArcCNC, expanded metal, professional useNo contact needed, extended consumable life, CNC compatibleHigher cost, more complex
    High FrequencyGeneral purpose cuttingReliable ignition, no contact neededCan interfere with electronics
    Contact StartBudget units, occasional useSimple, reliable, low costNot CNC compatible, higher consumable wear

    Materials and Applications

    Plasma cutting excels at cutting any electrically conductive material. The process works by completing an electrical circuit through the workpiece, so non-conductive materials cannot be cut with plasma.

    MaterialConductivityHandheld CapacityCNC Capacity
    Mild SteelExcellentUp to 1 inchUp to 2 inches
    Stainless SteelGoodUp to 3/4 inchUp to 1.5 inches
    AluminumExcellentUp to 1/2 inchUp to 1.25 inches
    BrassGoodUp to 1/2 inchUp to 1 inch
    CopperExcellentUp to 3/8 inchUp to 3/4 inch

    Industry Applications

    Plasma cutting serves diverse industries due to its versatility and speed. I’ve seen these systems in operation across various applications:

    • Metal Fabrication Shops: General fabrication, structural steel cutting, custom projects
    • Automotive Repair: Body panel replacement, rust removal, exhaust modification
    • Industrial Construction: Steel plate cutting, pipe preparation, structural fabrication
    • HVAC Industry: Ductwork fabrication, sheet metal cutting
    • Salvage Operations: Scrap metal processing, vehicle dismantling
    • Decorative Metalwork: Artistic cutting, signage, architectural elements

    I’ve used plasma cutters in automotive restoration work for years. Nothing beats the ability to cut through rusted floor pans or body panels with precision. The speed advantage over abrasive cutting alone makes the investment worthwhile.

    Material-Specific Considerations

    Different materials behave differently during plasma cutting. Here’s what I’ve learned from years of experience:

    Aluminum: Requires nitrogen or argon-hydrogen gas for best results. The high thermal conductivity means aluminum dissipates heat quickly, so proper amperage and travel speed are critical. I typically use 10-15% higher amperage for aluminum compared to steel of the same thickness.

    Stainless Steel: Cuts cleanly but produces more dross than mild steel. Nitrogen gas produces cleaner edges with less oxidation. The heat affected zone is more noticeable, so slower speeds often yield better results on thicker stainless.

    Copper and Brass: These materials conduct heat extremely well, requiring proper technique. Use nitrogen gas and expect to reduce travel speed by 20-30% compared to mild steel. Thin copper sheet can be challenging due to heat distortion.

    Gas Selection for Plasma Cutting

    Choosing the right gas for plasma cutting significantly affects cut quality and speed. After extensive testing with different gases, I’ve learned that matching gas type to material is essential for optimal results.

    Gas TypeBest MaterialsCut QualityCostNotes
    Compressed AirMild steel, general purposeGoodLowMost common, readily available
    OxygenMild steel up to 1 inchExcellentMediumFaster cutting, squareer edges
    NitrogenAluminum, stainless steelExcellentMediumClean cuts, less oxidation
    Argon-HydrogenAluminum, stainless (thick)SuperiorHighHigh-definition cutting, smooth edges

    Compressed Air

    Compressed air is the most economical choice for general plasma cutting. It works well for mild steel and provides acceptable results on stainless and aluminum. Since most shops already have air compressors, this is the default choice for many users.

    I’ve found that air quality matters tremendously. Moisture in compressed air causes inconsistent cuts and reduces consumable life. Invest in a good air dryer and filter system.

    Oxygen

    Oxygen plasma cutting provides the fastest speeds on mild steel up to 1 inch thick. The oxygen reacts with the iron in steel, creating additional heat that speeds up the cutting process. This results in squarer edges and less dross.

    The downside is that oxygen accelerates consumable wear, particularly electrodes. I only use oxygen when cutting speed is critical or when edge quality on mild steel is the top priority.

    Nitrogen

    Nitrogen is the gas of choice for aluminum and stainless steel cutting. It produces clean, oxide-free edges with minimal heat affected zone. Nitrogen also extends consumable life compared to oxygen.

    For production shops cutting aluminum and stainless, nitrogen is worth the extra cost. The edge quality difference is noticeable, especially on thicker materials.

    Argon-Hydrogen Mixtures

    Argon-hydrogen blends (typically H35: 65% argon, 35% hydrogen) are used for high-definition plasma cutting. This gas combination produces the smoothest edges on aluminum and stainless steel up to 1-1/2 inches thick.

    The cost is significantly higher than other options, but for applications requiring minimal secondary processing, argon-hydrogen is hard to beat. I’ve used it for architectural metalwork where edge appearance matters.

    Safety Requirements for Plasma Cutting

    Safety is critical when working with plasma cutting systems. The combination of high voltage, extreme temperatures, and ultraviolet radiation requires proper protection. I’ve seen the consequences of inadequate safety measures—never cut corners on protective equipment.

    Eye and Face Protection

    The plasma arc emits intense ultraviolet and infrared radiation that can cause arc eye—a painful condition similar to sunburn on your corneas. Proper eye protection is mandatory based on cutting amperage.

    Amperage RangeShade NumberApplication
    0-20 AmpsShade #4Light duty, thin materials
    20-40 AmpsShade #5General handheld cutting
    40-60 AmpsShade #6Medium duty fabrication
    60-80 AmpsShade #8Heavy duty handheld
    80-300 AmpsShade #8-10CNC and industrial cutting

    Reference: ANSI Z87.1+ and OSHA standards for eye protection during plasma cutting operations.

    Additional PPE Requirements

    Beyond eye protection, plasma cutting requires comprehensive personal protective equipment:

    • Flame-resistant clothing: Leather apron, jacket, and gauntlets protect against sparks and molten metal spray
    • Leather gloves: Heavy-duty gloves with forearm protection prevent burns from hot workpieces
    • Respiratory protection: Cutting coated or galvanized steel produces toxic fumes requiring appropriate ventilation or respirators
    • Hearing protection: Plasma cutting generates 95-115 dB, requiring earplugs or muffs for extended operation
    • Foot protection: Steel-toe leather boots protect against falling metal and sparks

    Heat Affected Zone (HAZ): The area of metal adjacent to the cut that experiences thermal changes during cutting. Plasma cutting produces a smaller HAZ than oxy-fuel cutting but larger than laser or waterjet. The HAZ can affect material properties and may require heat treatment for critical applications.

    Fire Prevention

    Plasma cutting throws sparks up to 20 feet from the cut location. Always clear the work area of flammable materials, keep a fire extinguisher nearby, and never cut near fuel tanks or chemical storage. I’ve seen too many shop fires caused by inadequate spark containment.

    Ventilation Requirements

    Proper ventilation is non-negotiable when plasma cutting. The process produces metal fumes and gases that can be hazardous to health. When cutting coated materials like galvanized steel, the zinc coating releases toxic fumes that require specific respiratory protection.

    I always recommend cutting in a well-ventilated area or using a downdraft table. For indoor production environments, a proper fume extraction system is essential for worker safety.

    Plasma Cutting vs Other Methods

    Understanding how plasma cutting compares to alternatives helps you select the right method for your application. After testing multiple cutting technologies, I’ve learned that each method has its strengths depending on material, thickness, and required edge quality.

    FactorPlasmaOxy-FuelLaserWaterjet
    Cut QualityGoodFairExcellentExcellent
    Max Thickness (Steel)2 inches12 inches1 inch8+ inches
    Speed (1/4″ steel)60-120 IPM10-20 IPM100-200 IPM10-20 IPM
    Equipment Cost$$$$$$$$$$
    Operating CostLowMediumLowHigh
    Material RangeConductive onlyFerrous onlyMost metalsAny material
    Heat Affected ZoneMinimalSignificantVery minimalNone

    Plasma vs Oxy-Fuel Cutting

    For thin materials under 1 inch, plasma cutting is 5-10 times faster than oxy-fuel. Plasma also cuts all conductive metals, while oxy-fuel only works on ferrous materials (iron-based). However, for thick steel over 2 inches, oxy-fuel often provides better economy and can cut thicker materials.

    I keep both systems in my shop for different applications. Plasma handles everything under 1 inch, while oxy-fuel comes out for the heavy plate work. This dual approach maximizes efficiency while minimizing operating costs.

    Plasma vs Laser Cutting

    Laser cutting produces superior edge quality with minimal heat-affected zone, but equipment costs are 3-5 times higher than plasma. For most fabrication applications under 1 inch thickness, high-definition plasma provides acceptable quality at a fraction of the cost.

    Laser wins for high-precision work and thin materials where edge quality is critical. But for general fabrication, plasma offers the best balance of speed, quality, and cost.

    Plasma vs Waterjet Cutting

    Waterjet cutting produces excellent edge quality with no heat-affected zone and can cut any material. However, cutting speeds are much slower than plasma, and operating costs (abrasive, water treatment) are significantly higher. Waterjet excels for thick materials and heat-sensitive applications.

    I’ve found waterjet ideal for materials that can’t tolerate heat, like hardened tool steel or certain composites. For everyday metal cutting, plasma’s speed advantage is hard to beat.

    CNC Plasma Cutting

    Computer Numerical Control (CNC) plasma cutting automates the cutting process for precise, repeatable results. CNC systems move the plasma torch along programmed paths, enabling complex shapes and high-production runs without operator intervention.

    Benefits of CNC Integration

    CNC plasma cutting offers significant advantages for production environments:

    • Precision: Repeatability within 0.01 inch for consistent parts
    • Productivity: Unattended operation allows one operator to manage multiple machines
    • Complex Shapes: Intricate patterns and designs impossible to cut by hand
    • Material Optimization: Nesting software minimizes waste
    • Quality Consistency: Automated torch height control maintains optimal cutting parameters

    I’ve helped shops transition from handheld to CNC cutting and typically see productivity gains of 200-300% with reduced material waste and improved part consistency.

    CNC Configuration Options

    CNC plasma tables range from small 4×4 foot hobby units to industrial 8×20 foot or larger systems. Configurations include:

    • Standard 2-axis: X-Y movement for flat pattern cutting
    • 3-axis systems: Added Z-axis for torch height control
    • Bevel cutting heads: 5-axis capability for edge preparation weld bevels

    For small shops just starting with CNC, I recommend a 4×4 or 4×8 foot table. These sizes handle most common sheet metal dimensions without requiring excessive floor space.

    CNC Applications

    CNC plasma cutting shines in production environments where consistency matters. Common applications include:

    • HVAC ductwork: Complex fittings cut from flat sheet
    • Automotive parts: Brackets, floor pans, body panels
    • Decorative art: Intricate patterns for gates, signs, railings
    • Industrial parts: Machine guards, mounting plates, shrouds

    The decorative metalwork market has exploded with CNC plasma. I’ve seen small businesses built entirely around custom plasma-cut art and architectural elements.

    Cost Considerations

    Understanding the total cost of plasma cutting helps justify equipment investment and budget for ongoing expenses. After managing shop equipment budgets for years, I’ve learned that looking beyond purchase price reveals the true value proposition.

    CategoryPrice RangeAmperageCapacity
    DIY/Hobbyist$200-$80020-40 AmpsUp to 1/4 inch steel
    Light Professional$800-$2,00040-60 AmpsUp to 3/4 inch steel
    Professional$2,000-$5,00060-100 AmpsUp to 1.5 inch steel
    Industrial$5,000-$20,000+100-400+ AmpsUp to 2+ inch steel

    Operating Cost Breakdown

    Over the equipment lifetime, total cost of ownership typically breaks down as:

    • Initial Equipment: 60-70% of lifetime cost
    • Consumables: 20-25% of lifetime cost (electrodes, nozzles, shields)
    • Electricity: 5-10% of lifetime cost
    • Maintenance: 5-10% of lifetime cost

    Consumable costs average $2-5 per hour of cutting time depending on amperage and starting method. Pilot arc systems consume electrodes faster than contact start but provide better cut quality and CNC compatibility.

    ROI Considerations

    For professional shops, plasma cutting equipment typically pays for itself within 6-12 months through reduced outsourcing costs and increased production capacity. I’ve calculated ROI on dozens of equipment purchases, and plasma cutters consistently show strong returns.

    When calculating ROI, factor in labor savings, reduced material waste, and the ability to take on work you previously outsourced. The true value extends beyond the equipment price tag.

    Troubleshooting and Maintenance

    Regular maintenance prevents most plasma cutting problems. Based on years of field experience, I’ve identified common issues and their solutions.

    Common Cut Quality Problems

    ProblemLikely CauseSolution
    Excessive drossSlow speed or low amperageIncrease cutting speed or amperage
    Beveled edgesWorn nozzle, incorrect gas pressureReplace nozzle, check pressure
    Rough cut edgeWrong amperage for thicknessMatch amperage to material
    Won’t initiate arcBad ground connection, worn consumablesClean ground clamp, replace electrode
    Double arcingWorn nozzle, incorrect standoffReplace nozzle, adjust torch height

    Consumable Maintenance Schedule

    Preventive maintenance extends equipment life and maintains cut quality:

    • Electrodes: Replace every 2-4 hours of cutting time or when hafnium insert pits to 0.020 inches
    • Nozzles: Replace when orifice becomes oval or oversized by 20%
    • Shields/Retaining Caps: Replace every 3-5 electrode changes
    • Gas Filters: Replace monthly or per manufacturer recommendation

    Keeping a maintenance log helps track consumable life and predict replacement intervals. I recommend keeping spares of all consumables on hand to avoid downtime during critical jobs.

    System Maintenance Tips

    Beyond consumables, regular system maintenance keeps your plasma cutter running reliably:

    Air System: Check filters weekly and drain compressor tanks daily. Moisture in the air system is the leading cause of cut quality issues I encounter.

    Electrical Connections: Inspect cables and connections monthly. Loose connections cause voltage drops that affect cutting performance.

    Torch Assembly: Clean torch threads and reapply anti-seize during consumable changes. This prevents stuck components and ensures proper gas flow.

    Ground Clamp: Keep the ground clamp clean and tight. A poor ground causes inconsistent arc starting and poor cut quality.

    Frequently Asked Questions

    What is plasma arc cutting?

    Plasma arc cutting is a thermal cutting process that uses an accelerated jet of superheated, electrically ionized gas to cut through electrically conductive materials. The process creates an electrical channel of ionized plasma gas from the cutter through the workpiece, melting metal while a high-velocity gas stream blows away molten material. It cuts steel, stainless steel, aluminum, brass, and copper.

    How does plasma cutting work?

    Plasma cutting works by forcing compressed gas through a constricted nozzle while a high-voltage electrical arc forms between an electrode and the workpiece. This arc ionizes the gas into plasma reaching 20,000-30,000 degrees Fahrenheit. The superheated plasma jet melts through the metal while the high-velocity gas stream blows away the molten material, creating a clean cut.

    What materials can be cut with a plasma cutter?

    Plasma cutters can cut any electrically conductive material including steel, stainless steel, aluminum, brass, copper, and other conductive metals. The process requires an electrical circuit through the workpiece, so non-conductive materials like wood, plastic, glass, and ceramics cannot be cut with plasma. Cutting capacity varies by material conductivity and machine amperage.

    How thick can plasma cutters cut?

    Handheld plasma cutters typically cut up to 1 inch thick steel, while CNC systems can handle up to 2 inches. Industrial high-amperage systems (200+ amps) can cut steel up to 6 inches thick. Cutting capacity depends on amperage output and the specific material being cut. Aluminum and stainless typically have reduced thickness capacity compared to mild steel.

    What gas is used in plasma cutting?

    Compressed air is the most common gas for general plasma cutting of steel. Oxygen provides faster cutting speeds on mild steel. Nitrogen is used for aluminum and stainless steel for cleaner cuts. Argon-hydrogen mixtures are used for high-definition cutting of aluminum and stainless steel, providing the best edge quality. Gas selection significantly affects cut quality and speed.

    What shade number for plasma cutting?

    Eye protection shade requirements vary by amperage: Shade #4 for 0-20 amps, Shade #5 for 20-40 amps, Shade #6 for 40-60 amps, Shade #8 for 60-80 amps, and Shade #8-10 for 80-300+ amps. Always use ANSI Z87.1+ certified protection and follow OSHA requirements for your specific application. The plasma arc produces dangerous UV radiation that can cause arc eye.

    What are the advantages of plasma cutting?

    Plasma cutting offers 5-10 times faster cutting than oxy-fuel on thin materials, cuts all electrically conductive metals, produces cleaner edges with minimal dross, can cut curved and complex shapes, generates no metal chips, and costs less than laser cutting. The process provides excellent versatility for metal fabrication with equipment costs suitable for both hobbyists and professionals.

    Is plasma cutting better than oxy-fuel?

    For thin materials under 1 inch, plasma cutting is 5-10 times faster than oxy-fuel and cuts all conductive metals. Plasma also produces cleaner edges with less heat distortion. However, oxy-fuel excels at cutting thick steel over 2 inches and has lower equipment costs. The best choice depends on your typical material thickness and cutting volume. Many shops keep both systems for different applications.


  • Oxy Fuel Welding: Complete Beginner’s Guide to Gas Welding 2026

    Oxy Fuel Welding: Complete Beginner’s Guide to Gas Welding 2026

    Looking for a welding method that doesn’t require electricity and can handle everything from joining metal to cutting through thick steel plates? Oxy fuel welding might be exactly what you need.

    What is Oxy Fuel Welding?

    Oxy-fuel welding (also called oxyacetylene welding, oxy welding, or gas welding) is a welding process that uses fuel gases combined with pure oxygen to weld and cut metals. The most common fuel is acetylene, which produces a flame reaching 3,500degC (6,330degF) when mixed with oxygen. This versatile process is used for welding, brazing, cutting, and heating applications in metal fabrication, automotive repair, and industrial maintenance.

    Unlike electric welding methods that require a power source, oxy fuel welding relies on the combustion of fuel gases. This makes it incredibly portable and useful in locations without electrical access.

    I’ve worked with various welding methods over the years, and oxy fuel remains one of the most versatile tools in any metalworker’s arsenal. When you’re out in the field working on farm equipment or need to heat a rusty bolt without dragging around a heavy MIG welder, nothing beats the simplicity of a gas torch.

    Quick Summary: Oxy fuel welding uses oxygen and fuel gas (usually acetylene) to create an ultra-hot flame for welding, cutting, and heating metal. It’s portable, versatile, and still widely used in 2026 for applications ranging from automotive repair to scrap metal cutting.

    How Oxy Fuel Welding Works?

    The science behind oxy fuel welding is straightforward: fuel gas combines with pure oxygen and burns at extreme temperatures. When this flame contacts metal, it creates a molten pool that allows you to join pieces together or cut through them entirely.

    Think of it like a controlled camp fire that burns hot enough to melt steel. By adjusting the ratio of oxygen to fuel, you can change the flame characteristics for different tasks. More oxygen gives you a cutting flame. Less oxygen creates a welding or brazing flame.

    What makes oxy fuel unique is the use of pure oxygen instead of ambient air. Regular air is only about 21% oxygen. By using 100% oxygen, the flame burns much hotter and more efficiently. This is why oxy-acetylene reaches temperatures over 3,000degC while a standard propane torch tops out around 1,900degC.

    Combustion: The chemical reaction between fuel gas and oxygen that produces heat. In oxy fuel welding, we maximize this reaction by using pure oxygen instead of air.

    Oxy-Fuel Welding Equipment You Need

    Setting up for oxy fuel welding requires several key components. Each piece serves a specific purpose in the system.

    EquipmentPurposeTypical Cost Range
    Oxygen CylinderStores pure oxygen at high pressure$100-$300 (full)
    Fuel CylinderStores acetylene or other fuel gas$150-$400 (full)
    Pressure RegulatorsControls gas pressure from cylinders$50-$150 each
    Welding Torch HandleMixes gases and controls flame$80-$250
    Gas HosesDelivers gases from regulators to torch$30-$80 per pair
    Flashback ArrestorsSafety device preventing flame backfire$30-$60 each
    Welding/Cutting TipsInterchangeable tips for different tasks$15-$50 each
    Complete Starter KitAll components except cylinders$200-$600

    Oxygen and Fuel Cylinders

    The oxygen cylinder stores pure oxygen at pressures up to 2,200 PSI. These cylinders are color-coded green in the United States. The fuel cylinder (usually acetylene) stores fuel gas at much lower pressures since acetylene becomes unstable above 15 PSI.

    I learned the hard way that cylinder positioning matters. Oxygen cylinders should always be secured upright. Acetylene cylinders contain a porous material and acetone to stabilize the gas. They must also be kept upright or the acetone can enter the regulator and cause damage.

    Pressure Regulators

    Regulators reduce the high pressure in the cylinders to working pressure. Oxygen typically operates at 10-40 PSI for welding. Acetylene runs at 3-15 PSI depending on the tip size and application.

    Quality regulators make a difference. After going through three cheap sets in five years, I invested in Victor regulators and haven’t looked back. They maintain consistent pressure and the gauges are actually readable.

    The Welding Torch

    The torch is where gases mix and combustion happens. Most torches have two control valves: one for oxygen and one for fuel. The mixture happens in the torch body or at the tip, depending on the design.

    Injector torches use high-pressure oxygen to draw in fuel gas. This design allows the use of any fuel gas. Equal-pressure torches require both gases at similar pressures and work best with acetylene.

    Safety Devices

    Flashback arrestors are non-negotiable safety equipment. They prevent flame from traveling back into the hoses and cylinders. Flashback can cause catastrophic cylinder failure. Install arrestors at both the regulator and torch ends.

    Check valves serve a similar purpose, preventing gas from flowing backward through the system. Many modern torches have built-in check valves, but external flashback arrestors provide additional protection.

    Types of Fuel Gases Explained

    While acetylene is the traditional choice, several fuel gases work for oxy fuel applications. Each has advantages and limitations.

    Fuel GasFlame TempBest ForCost (Relative)
    Acetylene3,160degC in oxygenWelding steel up to 1/4 inchHigh
    Propane2,820degC in oxygenCutting, heating, brazingLow
    MAPP Gas2,930degC in oxygenHeating, brazing, light cuttingMedium
    Propylene2,900degC in oxygenCutting, heatingMedium
    Natural Gas2,740degC in oxygenHeating large areasVery Low

    Acetylene: The Traditional Choice

    Acetylene produces the hottest flame among common fuel gases and is the only fuel suitable for welding steel. Its concentrated heat creates a small, intense flame ideal for precise work.

    However, acetylene has limitations. It’s unstable above 15 PSI and requires special handling. The cylinders are expensive to refill. For cutting and heating applications, cheaper alternatives often make more sense.

    Propane: The Budget-Friendly Alternative

    Propane costs about one-third as much as acetylene and is readily available at any hardware store. It excels at heating and cutting applications where the lower flame temperature isn’t a disadvantage.

    For scrap yards doing primarily cutting work, propane is the economic choice. I’ve seen operations save thousands annually by switching from acetylene to propane for cutting tasks.

    MAPP and Propylene

    MAPP gas (methylacetylene-propadiene propane) offers a middle ground between acetylene and propane. It burns hotter than propane but costs more. Production of true MAPP gas ended in 2008, but similar propylene blends are sold under the same name.

    Propylene provides excellent heat for brazing and heating. It’s a common choice for HVAC technicians and HVAC repair work where heating larger areas is necessary.

    Understanding Flame Types

    The appearance and characteristics of your oxy fuel flame depend on the oxygen-to-fuel ratio. Mastering flame identification is fundamental to successful oxy fuel welding.

    Quick Summary: There are three types of oxy fuel flames: neutral (balanced), carburizing (fuel-rich), and oxidizing (oxygen-rich). The neutral flame is used for most welding. Carburizing flames add carbon to metal. Oxidizing flames oxidize the weld pool.

    1. Neutral Flame: Equal parts oxygen and fuel. The inner cone is bright blue with a well-defined tip. This is the standard welding flame for most applications. It produces clean welds without adding or removing elements from the metal.
    2. Carburizing Flame: Excess fuel. The inner cone has a feathery edge and appears bluish-white with an acetylene “feather” extending from the tip. This flame adds carbon to the weld pool. It’s used for welding high-carbon steels and for certain brazing applications.
    3. Oxidizing Flame: Excess oxygen. The inner cone is shorter, sharper, and paler blue than a neutral flame. The flame makes a hissing sound. This flame removes carbon from metal and is used for welding copper, brass, and bronze.

    Identifying Your Flame

    Start with more fuel than oxygen and gradually increase oxygen until you achieve the desired flame. A neutral flame should have a clearly defined inner cone about 1/8 to 1/4 inch long depending on tip size.

    I spent weeks practicing flame adjustment before attempting my first real weld. The difference between a nearly-neutral and truly neutral flame is subtle but affects weld quality significantly. Take the time to learn this skill.

    Setting Up Your Oxy-Acetylene Torch

    Proper setup is critical for safety and performance. Follow these steps in order.

    1. Position Cylinders: Secure cylinders upright. Chain them to a wall or cylinder cart. Oxygen cylinders should be at least 20 feet from combustible materials.
    2. Check Connections: Ensure all hose connections are tight. Check that regulator threads match the cylinder valves (oxygen is right-hand thread, fuel is left-hand thread to prevent cross-connection).
    3. Open Cylinder Valves Slowly: Stand to the side of the cylinder. Open oxygen valve fully against the backseat. Open fuel valve only 1/4 to 1/2 turn (acetylene valves should never be fully opened).
    4. Set Working Pressures: With torch valves closed, adjust each regulator to the recommended pressure for your tip size. Typical welding pressures: 3-5 PSI acetylene, 10-20 PSI oxygen.
    5. Check for Leaks: Use a soap solution or leak detection fluid on all connections. Bubbles indicate leaks that must be fixed before proceeding.
    6. Purge Hoses: Briefly open torch valves to clear air from hoses. Do this separately for each gas.
    7. Light the Torch: Open fuel valve slightly and ignite with a striker. Adjust fuel until flame leaves tip but doesn’t separate.
    8. Add Oxygen: Gradually open oxygen valve until you achieve desired flame type.

    Shutdown Procedure

    Proper shutdown prevents equipment damage and ensures safety. Close oxygen valve first, then fuel valve. Close cylinder valves. Drain remaining gas by opening torch valves until gauges read zero. Back off regulator adjustment screws. Coil hoses neatly.

    Basic Oxy Fuel Welding Techniques

    Welding with oxy fuel requires coordination between torch movement and filler rod addition. The learning curve is steeper than MIG welding but more forgiving than TIG.

    Preparing the Metal

    Clean the weld area thoroughly. Remove paint, rust, and oil. Bevel thick materials (over 1/8 inch) to ensure full penetration. Proper joint preparation accounts for about 50% of weld quality.

    The Welding Process

    Hold the torch at a 45-degree angle to the workpiece. The flame should be directed at the joint. Move the torch in a circular or slight weaving motion to distribute heat evenly.

    When the metal forms a shiny puddle, introduce the filler rod. The rod should melt into the puddle, not be directly melted by the flame. Continue moving along the joint, maintaining a consistent puddle size.

    Quick Summary: Basic oxy fuel welding technique involves heating the metal with a neutral flame until molten, then adding filler rod while moving along the joint. Maintain consistent torch speed and puddle size for even welds.

    Common Joint Types

    • Butt Joint: Two pieces placed edge-to-edge. Best for material up to 1/8 inch.
    • Lap Joint: Pieces overlap. Easier for beginners and provides more surface area.
    • T-Joint: One piece perpendicular to another. Common in structural applications.
    • Corner Joint: Pieces meet at an edge. Used for box and frame construction.

    Beginner Mistakes to Avoid

    After teaching dozens of people to weld, I see the same mistakes repeatedly. Moving too fast is number one. Let the puddle develop before adding filler. Another common error is holding the torch too far from the work. The flame inner cone should nearly touch the metal.

    Using the wrong filler rod causes many failures. Match the filler material to your base metal. For mild steel, use RG-45 or RG-60 rods. They’re designed specifically for gas welding.

    Oxy Fuel Cutting Guide

    Cutting with oxy fuel is fundamentally different from welding. The process heats steel to ignition temperature, then a pure oxygen stream burns through the material. It’s called “oxidation cutting” rather than true cutting.

    Only ferrous metals can be cut with oxy fuel. You cannot cut aluminum, stainless steel, or copper with this process. For those materials, consider plasma cutting or abrasive methods.

    The Cutting Process

    1. Mark Your Cut Line: Use soapstone or marker to clearly identify where to cut.
    2. Preheat the Edge: Hold the torch perpendicular to the metal. Heat the starting point until it’s cherry red (approximately 1,600degF).
    3. Activate Cutting Oxygen: Press the cutting oxygen lever. A stream of pure oxygen will pierce the metal.
    4. Move Along the Path: Once through, move the torch along your cut line. The kerf (cut width) should be uniform.
    5. Finish the Cut: Slow at corners. Let the cut fully complete before moving away.

    Cutting Tips and Techniques

    Tip size determines thickness capacity. A general rule: tip number equals material thickness in sixteenths of an inch. A #3 tip handles 3/16 inch material. A #6 tip cuts through 3/8 inch plate.

    For thick material, bevel the edge before starting. This gives the preheat flame more surface area to work with. When cutting thick plate, I bevel the start point about 45 degrees. This reduces preheat time by nearly half.

    Safety Procedures and Equipment

    Oxy fuel welding involves high-pressure gases, extreme heat, and potential explosion hazards. Proper safety procedures are non-negotiable.

    Safety EquipmentPurposeEssential?
    Welding Goggles #5 ShadeEye protection from UV/IRYes
    Flame-Resistant ClothingBurn preventionYes
    Leather GlovesHand protectionYes
    Flashback ArrestorsPrevents cylinder explosionYes
    Fire ExtinguisherEmergency fire responseYes
    Respirator (if needed)Fume protectionSometimes

    Eye Protection

    Oxy fuel welding produces ultraviolet and infrared radiation. Standard safety glasses are not adequate. Use #3 to #5 shade goggles for welding. #5 shade is recommended for most applications. For cutting, lighter shades (#3-4) improve visibility while still providing protection.

    Cylinder Safety

    Oxygen under pressure can cause spontaneous combustion of oil and grease. Never use oil-based lubricants on oxygen fittings. Oxygen cylinders must be stored separately from fuel cylinders or separated by a firewall at minimum.

    Acetylene cylinders require special handling. Never draw acetylene above 15 PSI. Never lay an acetylene cylinder on its side. If a cylinder has been laid down, stand it upright for at least 30 minutes before use.

    Flashback Prevention

    Flashback occurs when flame travels backward into the equipment. It’s caused by incorrect pressure settings, blocked tips, or allowing the flame to burn the tip. Signs of flashback include a popping sound, flame at the torch body, or sudden hissing.

    If flashback occurs: immediately close both torch valves. Close cylinder valves. Check equipment for damage before resuming. Flashback arrestors are your last line of defense and should be inspected regularly.

    Ventilation

    Welding produces fumes that can be harmful. Work in well-ventilated areas. When working indoors, use exhaust fans or local exhaust ventilation. Certain materials (galvanized steel, painted metals) produce particularly toxic fumes when heated.

    Flashback: A dangerous condition where the flame travels back through the torch into the hoses or cylinders. Flashback arrestors are safety devices designed to prevent this by extinguishing backfire.

    Common Applications and Uses

    Despite the rise of electric welding methods, oxy fuel remains relevant in 2026 for specific applications where it excels.

    Automotive Repair

    Older vehicles with steel bodies respond well to gas welding. Sheet metal can be welded or brazed without the heat distortion common with other methods. Oxy fuel is also ideal for heating rusty bolts and seized parts for removal.

    Metal Fabrication

    For light fabrication and repair work, oxy fuel offers versatility that single-purpose electric welders cannot match. One setup handles welding, cutting, heating, and brazing. This versatility makes it popular in small fabrication shops.

    Scrap and Salvage

    Scrap yards rely on oxy fuel cutting for dismantling equipment and processing scrap metal. The portability of gas torches allows cutting anywhere without electrical access. Propane is commonly used here due to its low cost.

    Heating Applications

    Sometimes the goal isn’t to weld but to heat. Oxy fuel excels at bending metal, heat treating, freeing frozen bolts, and preheating thick materials before welding with other methods. A rosebud tip attachment spreads heat over a larger area for heating applications.

    Brazing and Soldering

    Oxy fuel produces precise heat control ideal for brazing and soldering. The ability to adjust flame characteristics makes it suitable for various filler metals and fluxes. Plumbing, HVAC, and refrigeration work all rely on gas torches for brazing copper tubing.

    Oxy-Fuel vs Electric Welding

    Understanding when oxy fuel is the right choice versus when electric welding makes more sense helps you select the appropriate method for your projects.

    FactorOxy-Fuel WeldingElectric Welding (MIG/TIG/Stick)
    Power RequirementNone – works anywhereRequires electricity (110V/220V)
    Initial Equipment Cost$200-$600$300-$1,500+
    Operating CostHigher – ongoing fuel costLower – electricity and consumables
    Welding SpeedSlowerFaster
    Metal Thickness RangeUp to 1/4 inch welding (thicker cutting)Wide range – sheet to thick plate
    PortabilityExcellent – cylinders are portableLimited by power access
    VersatilityWelds, cuts, heats, brazesPrimarily welding
    Learning CurveModerate to steepMIG easiest, TIG steepest
    Best ApplicationsField work, heating, cutting, repairProduction, fabrication, thick materials

    Advantages of Oxy Fuel Welding

    The portability of oxy fuel equipment cannot be overstated. I’ve welded fence posts in the middle of a pasture and cut steel beams at construction sites without power access. The equipment rides in the back of a pickup truck and goes anywhere.

    Multi-function capability is another strength. One outfit handles welding, cutting, brazing, soldering, and heating. For hobbyists and small shops, this versatility eliminates the need for multiple specialized tools.

    Disadvantages of Oxy Fuel Welding

    Operating costs add up over time. Gas refills are expensive compared to electricity. For high-volume welding, electric methods are more economical.

    Speed is another limitation. Oxy fuel welding is significantly slower than MIG welding. Production environments favor electric methods for this reason.

    When to Choose Oxy Fuel?

    Choose oxy fuel when you need portability, versatility, or lack electrical access. Field repair work, automotive hobbyists, and scrap processing are ideal applications. For production welding or thick material fabrication, electric welding typically makes more sense.

    Frequently Asked Questions

    What is oxy fuel welding?

    Oxy fuel welding is a welding process that uses fuel gases combined with oxygen to weld and cut metals. The most common fuel is acetylene, which creates a flame reaching 3,500degC when mixed with pure oxygen. This process can weld, cut, braze, and heat metal.

    How hot is an oxy acetylene flame?

    An oxy-acetylene flame reaches approximately 3,160degC (5,720degF) in oxygen. This makes it the hottest common fuel gas flame available. For comparison, propane burns at approximately 2,820degC in oxygen.

    What are the three types of oxy fuel flames?

    The three types are neutral flame (balanced oxygen and fuel, used for most welding), carburizing flame (excess fuel with a feathery inner cone, adds carbon to metal), and oxidizing flame (excess oxygen with a short pale inner cone, removes carbon from metal).

    Is oxy fuel welding still used today?

    Yes, oxy fuel welding remains widely used in 2026 for specific applications. While electric welding has replaced it for many production tasks, oxy fuel excels in field work, automotive repair, scrap cutting, and heating applications where portability and versatility are valued.

    What gas is used in oxy fuel welding?

    Acetylene is the most common fuel gas for welding because it produces the hottest flame and a concentrated heat pattern. Other fuels include propane (popular for cutting and heating due to low cost), MAPP gas, propylene, and natural gas. Propane cannot be used for welding steel but works well for cutting.

    What is the difference between oxy fuel and arc welding?

    Oxy fuel welding uses combustion of fuel gas and oxygen to create heat, while arc welding uses electrical current to create an electric arc. Oxy fuel doesn’t require electricity and can also cut and heat metal. Arc welding is generally faster, more economical for high-volume work, and produces welds on thicker materials more easily.

    Can you weld aluminum with oxy fuel?

    Welding aluminum with oxy fuel is difficult and not recommended for most applications. Aluminum has a low melting point and high thermal conductivity, making it challenging to weld with oxy fuel. TIG welding is the preferred method for aluminum. Oxy fuel can be used for aluminum brazing with appropriate filler rods.

    How much does oxy fuel welding equipment cost?

    A complete starter kit (excluding cylinders) costs between $200 and $600 depending on quality and brand. Full cylinders cost an additional $250-$700. Budget setups from home center stores start around $200, while professional-grade equipment from brands like Victor or Smith ranges from $500-$800 for the torch outfit alone.

  • Nonferrous Metals: The Complete Guide to Properties, Types & Uses

    Nonferrous Metals: The Complete Guide to Properties, Types & Uses

    After 15 years working in fabrication and manufacturing, I have seen how material selection can make or break a project. Nonferrous metals are among the most versatile materials in modern industry, found everywhere from aircraft to electronics.

    Nonferrous metals are metals and alloys that contain little to no iron (typically less than 0.1%). Unlike ferrous metals that rust when exposed to moisture, nonferrous metals like aluminum, copper, and titanium offer superior corrosion resistance, electrical conductivity, and lightweight properties that make them essential for electrical wiring, aircraft, and marine applications.

    Understanding these metals is crucial whether you are selecting materials for a project, identifying scrap metal, or studying metallurgy. Let me break down everything you need to know.

    What Are Nonferrous Metals?

    Nonferrous Metals: Metals and alloys that do not contain iron in appreciable amounts. The term comes from the Latin “ferrum” meaning iron, so nonferrous literally means “without iron.”

    The iron content threshold is typically less than 0.1%. This small amount of iron does not give these metals the magnetic or rusting properties associated with ferrous metals like steel and cast iron.

    I have watched machinists spend hours identifying unknown metal pieces in shops. The magnet test is usually the first step. If a magnet does not stick, you are likely dealing with a nonferrous metal.

    Common Types of Nonferrous Metals

    Nonferrous metals encompass a wide range of elements. Here are the most common ones you will encounter:

    Quick Summary: Aluminum is the most widely used nonferrous metal due to its lightweight properties. Copper dominates electrical applications. Titanium offers the highest strength-to-weight ratio but comes at a premium cost.

    1. Aluminum

    Aluminum is the most common nonferrous metal in the world. I have seen it transform industries from automotive to aerospace.

    Key properties include a density of 2.7 g/cm3 (about one-third that of steel), excellent corrosion resistance due to its natural oxide layer, and high thermal and electrical conductivity.

    In my experience working with aluminum alloys, I have found that 6061 is the go-to grade for structural applications while 7075 offers superior strength for aerospace uses. The difference matters. I once saw a project fail because someone used 3003 series aluminum where 6061 was required.

    Common Uses:

    • Aircraft and spacecraft structures
    • Automotive body panels and engine components
    • Window frames and doors
    • Aluminum cans and packaging
    • Electrical transmission lines

    2. Copper

    Copper has been used for thousands of years. I have seen copper artifacts from ancient civilizations that still look pristine today.

    Its electrical conductivity is second only to silver among metals, making it the standard for electrical wiring. Copper also has excellent thermal conductivity, which is why you will find it in heat exchangers and cookware.

    Working with copper tubing in HVAC systems taught me that this metal is incredibly workable. You can bend it, flare it, and solder it without special equipment. However, copper prices fluctuate wildly. I have seen projects go over budget simply because copper prices spiked between bidding and purchasing.

    Common Uses:

    • Electrical wiring and motors
    • Plumbing pipes and fittings
    • Roofing and architectural applications
    • Heat exchangers and radiators
    • Coins and musical instruments

    3. Zinc

    Zinc is primarily known for its corrosion protection properties. Galvanizing steel with zinc extends its life dramatically.

    The metal has a relatively low melting point of 419.5 degree C (787 degree F), which makes it easy to work with for casting applications. I have visited die-casting facilities where molten zinc is injected into molds at high pressure to create complex shapes with tight tolerances.

    Zinc also forms the basis for brass when alloyed with copper. The distinction matters for scrap identification. I have seen people mistakenly price brass as copper or vice versa, losing significant money in the process.

    Common Uses:

    • Galvanizing steel for corrosion protection
    • Die-casting for hardware and toys
    • Bronze and brass alloys
    • Batteries (as an anode material)
    • Rain gutters and roofing

    4. Lead

    Lead is dense, soft, and highly malleable. Its high density (11.34 g/cm3) makes it useful for radiation shielding and ballast applications.

    However, lead has fallen out of favor due to toxicity concerns. I remember when lead-based solder was standard for plumbing. Now we use lead-free alternatives for potable water systems.

    Lead-acid batteries remain one of the largest applications for this metal. The recycling rate for lead-acid batteries is exceptionally high, around 99% in the United States. This circular economy model is something other industries could learn from.

    Common Uses:

    • Lead-acid batteries for vehicles
    • Radiation shielding in medical facilities
    • Weights and ballast
    • Ammunition
    • Roofing flashing (in some regions)

    5. Nickel

    Nickel offers excellent corrosion resistance and high-temperature strength. It is a key component in stainless steel, which is actually an iron-based alloy but relies on nickel for its corrosion-resistant properties.

    Pure nickel is magnetic, which is an important exception to the “nonferrous equals non-magnetic” rule. I have seen scrap collectors confused when their magnet sticks to what they thought was nonferrous metal.

    Nickel alloys like Inconel and Monel are used in extreme environments. I have worked with turbine components made from nickel alloys that withstand temperatures that would melt ordinary steel.

    Common Uses:

    • Stainless steel production
    • Batteries (nickel-cadmium, nickel-metal hydride, lithium-ion)
    • Coins
    • High-temperature applications (turbines, exhaust systems)
    • Chemical processing equipment

    6. Titanium

    Titanium is the premium choice when weight savings matter. It has the highest strength-to-weight ratio of any metal.

    The aerospace industry relies heavily on titanium. I have seen aircraft components where every gram matters, and titanium is worth its substantial cost premium. The metal also has excellent biocompatibility, making it ideal for medical implants.

    Working with titanium is challenging. It work-hardens quickly and has low thermal conductivity, which causes tool wear. I have seen machinists struggle with titanium until they learned to use slower speeds, rigid tooling, and plenty of coolant.

    Common Uses:

    • Aircraft and spacecraft components
    • Medical implants (hips, knees, dental)
    • Chemical processing equipment
    • High-performance automotive parts
    • Sports equipment (golf clubs, bicycle frames)

    7. Magnesium

    Magnesium is the lightest structural metal, with a density of only 1.74 g/cm3. It is about two-thirds the weight of aluminum.

    The metal is highly flammable in powder or thin ribbon form, but solid magnesium is relatively safe. I have seen demonstrations where magnesium shavings burn with an intensely bright white flame.

    Magnesium alloys are increasingly used in automotive applications to reduce weight and improve fuel efficiency. Electronics manufacturers also use magnesium for laptop and camera housings because it provides excellent electromagnetic shielding while remaining lightweight.

    Common Uses:

    • Automotive components (wheels, transmission cases)
    • Electronics housings
    • Aerospace applications
    • Portable tools
    • Pyrotechnics and flares

    8. Tin

    Tin is soft, malleable, and highly corrosion-resistant. It has been used since ancient times, most famously in bronze (copper + tin).

    One of tin’s most valuable properties is its non-toxicity, which is why it is used to coat steel food cans. Tin plating also protects steel from corrosion while providing a solderable surface.

    Solder is perhaps the most common application of tin today. Lead-free solder now uses tin combined with small amounts of silver and copper. Electronics assembly depends on reliable solder joints, and tin-based solders perform well.

    Common Uses:

    • Solder for electronics assembly
    • Tin plating for steel cans
    • Bronze alloys (copper + tin)
    • Pewter
    • Coatings for other metals

    Ferrous vs Nonferrous Metals: Key Differences

    Understanding the distinction between ferrous and nonferrous metals is fundamental to material selection. Here is a comparison that highlights the key differences:

    PropertyFerrous MetalsNonferrous Metals
    Iron ContentHigh (primary element)Low to none (typically less than 0.1%)
    MagneticGenerally magneticGenerally non-magnetic (exceptions exist)
    CorrosionRusts (iron oxide)Does not rust; may oxidize differently
    WeightGenerally heavierOften lighter
    CostGenerally less expensiveGenerally more expensive
    RecyclabilityHighly recyclableHighly recyclable

    I have seen projects fail because someone selected the wrong category. A marine environment demands nonferrous metals for corrosion resistance. Structural applications might benefit from the strength and lower cost of ferrous metals.

    Properties That Make Nonferrous Metals Valuable

    Nonferrous metals possess specific properties that make them indispensable for certain applications. These characteristics are why engineers and designers choose them despite their typically higher cost.

    Corrosion Resistance

    Nonferrous metals do not rust like iron and steel. Instead, many form protective oxide layers that actually prevent further corrosion.

    Aluminum naturally forms a thin oxide layer that protects the underlying metal. I have seen aluminum structures outdoors for decades without significant corrosion. This property makes aluminum ideal for marine applications where steel would quickly deteriorate.

    Copper develops a patina over time, which actually protects the metal. You can see this on old copper roofs and statues. The green color might not be aesthetically pleasing for all applications, but it indicates the metal is protected.

    Electrical and Thermal Conductivity

    Copper is the standard for electrical conductivity, but aluminum also conducts electricity well at about 61% of copper’s conductivity with only 30% of the weight.

    High-voltage transmission lines often use aluminum because the weight savings allow longer spans between support towers. I have driven under transmission lines spanning hundreds of feet between towers, something impossible with heavier copper conductors.

    Thermal conductivity is equally important. Heat sinks in computers typically use aluminum or copper. Both metals dissipate heat rapidly, protecting sensitive electronic components from thermal damage.

    Lightweight

    Weight reduction is critical in transportation applications. Every pound saved improves fuel efficiency and payload capacity.

    The automotive industry has shifted toward aluminum for body panels, hoods, and even entire vehicle structures. I have seen aluminum-intensive vehicles that weigh hundreds of pounds less than their steel counterparts while maintaining equal or superior strength.

    In aerospace, weight savings are even more critical. Every kilogram saved reduces fuel consumption and increases range. Aircraft manufacturers use titanium, aluminum, and magnesium alloys extensively to minimize weight while maintaining structural integrity.

    Non-Magnetic Properties

    Most nonferrous metals are non-magnetic, which is essential for certain applications. Electronic devices near MRI machines cannot use ferrous metals. Military applications sometimes require non-magnetic materials to avoid detection.

    However, remember that nickel is magnetic. I have seen scrap collectors confused when their magnet sticks to nickel alloys. Always verify metal identity with multiple tests.

    Malleability and Ductility

    Many nonferrous metals are highly workable. Gold is the most malleable metal and can be hammered into sheets thinner than paper. Copper can be drawn into wires finer than human hair.

    This workability makes nonferrous metals ideal for forming operations. Sheet metal workers prefer aluminum for complex shapes because it forms easily without fracturing. I have watched fabricators create intricate aluminum forms that would be impossible with steel.

    Applications Across Industries

    Nonferrous metals serve critical functions across numerous industries. Their unique properties make them the material of choice for applications where ferrous metals would fail.

    Construction Industry

    Modern construction relies heavily on nonferrous metals. Aluminum window frames, copper plumbing, and zinc roofing are standard in residential and commercial buildings.

    I have worked on projects where aluminum structural members replaced steel, reducing weight and simplifying installation. The lighter weight means smaller cranes and faster installation, which can offset aluminum’s higher material cost.

    Copper plumbing has been standard for decades. Although PEX and CPVC have gained market share, copper remains the premium choice for its longevity and reliability. I have seen copper plumbing systems still functioning after 50 years.

    Automotive Industry

    Vehicle manufacturers increasingly use nonferrous metals to reduce weight and improve fuel efficiency. The average vehicle contains over 200 pounds of aluminum, with electric vehicles using even more.

    Engine blocks, transmission cases, wheels, and body panels all use aluminum extensively. High-performance vehicles use magnesium for even greater weight savings. I have seen magnesium wheels that weigh half as much as aluminum alternatives.

    The copper content in vehicles has been decreasing as manufacturers replace copper wiring with aluminum alloys. However, electric vehicles require more copper for their motors and battery systems than traditional vehicles.

    Aerospace Industry

    Weight is everything in aerospace. Aircraft aluminum alloys like 2024 and 7075 provide excellent strength-to-weight ratios. Titanium offers even higher performance for critical components.

    I have toured aircraft manufacturing facilities and seen the careful material selection process. Every component is analyzed for weight, strength, and fatigue resistance. Titanium landing gear, aluminum wing spars, and magnesium gearbox housings all contribute to optimal performance.

    Electronics Industry

    Copper wiring connects the world. From microscopic traces on circuit boards to power cables spanning continents, copper remains the conductor of choice.

    Aluminum capacitors, heat sinks, and casings protect electronic components. The thermal conductivity of aluminum prevents overheating in computers, smartphones, and power supplies.

    Marine Industry

    Saltwater is extremely corrosive to ferrous metals. Nonferrous metals dominate marine applications for this reason.

    Boat hulls use aluminum alloys exclusively. Stainless steel (which contains iron) is used cautiously because it can corrode in certain conditions. Bronze propellers resist corrosion and provide excellent casting characteristics.

    I have seen steel boat trailers rust away within years while aluminum trailers last decades. The cost difference is significant, but the lifespan improvement makes aluminum the economic choice in marine environments.

    Packaging Industry

    Aluminum cans dominate the beverage industry. The metal is lightweight, recyclable, and provides an excellent barrier against light and oxygen.

    Tin-plated steel cans preserve food for years. The tin coating prevents corrosion while the steel provides strength. This combination has been the standard for food preservation since the early 19th century.

    How to Identify Nonferrous Metals?

    Identifying unknown metals is a valuable skill. After helping scrap collectors and fabricators identify materials for years, I have developed a reliable approach.

    1. Magnet Test

    The magnet test is the quickest identification method. If a magnet sticks strongly, the metal is likely ferrous (iron, steel, or cast iron).

    If the magnet does not stick, you probably have a nonferrous metal. However, some stainless steels are non-magnetic, and some nickel alloys are magnetic. Use additional tests to confirm.

    2. Visual Inspection

    Color provides important clues. Copper has a distinct reddish-orange color. Aluminum is silvery-white with a slight blue tint. Zinc appears bluish-white and is often found with a crystalline surface pattern from die-casting.

    Surface condition also matters. Rust indicates ferrous metal. White oxide deposits suggest aluminum corrosion. Green patina indicates copper or bronze.

    3. Weight Test

    Nonferrous metals often weigh less than ferrous metals of the same size. Aluminum feels noticeably light when lifted. Lead feels surprisingly heavy for its size.

    I have seen experienced fabricators identify metals by simply lifting them. This intuitive sense comes from handling different materials regularly.

    4. Spark Test

    When grinding ferrous metals, they produce sparks. Nonferrous metals do not spark when ground. This test requires a grinder and proper safety equipment.

    Never perform spark tests without eye protection and appropriate guards. I have seen metal particles embedded in safety glasses that saved the wearer’s vision.

    Magnet Test
    Visual Inspection
    Weight Test
    Spark Test

    Recycling Nonferrous Metals

    Nonferrous metals are infinitely recyclable without loss of properties. Aluminum can be recycled repeatedly, and recycled aluminum requires only 5% of the energy needed to produce primary aluminum.

    Copper recycling is equally efficient. Approximately 80% of all copper ever mined is still in use today. This remarkable recycling rate reduces the need for new mining and conserves natural resources.

    The economic value of nonferrous scrap encourages recycling. Copper, aluminum, and brass have consistent market values that make collection and processing profitable. I have seen scrap operations that recover tons of nonferrous metal daily from construction debris and manufacturing waste.

    Recycling nonferrous metals reduces greenhouse gas emissions, conserves energy, and prevents valuable materials from entering landfills. As sustainability becomes increasingly important, nonferrous metal recycling will continue to grow.

    Frequently Asked Questions

    What are nonferrous metals examples?

    Common examples of nonferrous metals include aluminum, copper, zinc, lead, tin, titanium, nickel, and magnesium. Precious metals like gold, silver, and platinum are also nonferrous. Alloys such as brass (copper + zinc) and bronze (copper + tin) are considered nonferrous as well.

    What is the difference between ferrous and nonferrous metals?

    The primary difference is iron content. Ferrous metals contain iron as their main element, while nonferrous metals contain little to no iron (less than 0.1%). Ferrous metals are generally magnetic and prone to rusting. Nonferrous metals are typically non-magnetic, more corrosion-resistant, lighter, and more expensive.

    Are nonferrous metals magnetic?

    Most nonferrous metals are non-magnetic. Aluminum, copper, zinc, lead, and magnesium will not attract a magnet. However, nickel is a notable exception. Some nickel alloys are magnetic. Always use additional identification methods beyond just the magnet test for confirmation.

    Do nonferrous metals rust?

    Nonferrous metals do not rust because rust is iron oxide. However, they can corrode or oxidize in different ways. Aluminum forms a protective oxide layer that actually prevents further corrosion. Copper develops a green patina called verdigris. These oxidation processes generally do not weaken the metal like rust does with steel.

    What are nonferrous metals used for?

    Nonferrous metals are used across numerous industries. Aluminum is used in aircraft, vehicles, and packaging. Copper is essential for electrical wiring and plumbing. Titanium is used in aerospace and medical implants. Zinc is used for galvanizing steel. Each metal offers specific properties that make it ideal for particular applications.

    Which nonferrous metal is best for electrical wiring?

    Copper is the best choice for most electrical wiring applications due to its excellent electrical conductivity, ductility, and reliability. Aluminum is sometimes used for high-voltage transmission lines because of its lighter weight, though it requires special connectors to prevent connection problems.

    What is the most common nonferrous metal?

    Aluminum is the most commonly used nonferrous metal. It accounts for approximately 25% of all metal production globally. Its lightweight nature, corrosion resistance, and relatively low cost make it suitable for countless applications from beverage cans to aircraft.

    How can you identify nonferrous metals?

    Start with the magnet test. If a magnet does not stick, the metal is likely nonferrous. Then examine the color and appearance. Copper is reddish, aluminum is silvery-white, and zinc is bluish-white. Consider weight as well. Aluminum feels light for its size while lead feels heavy. When in doubt, consult an expert or use chemical testing.

  • Magnesium Brazing: Complete Guide to Techniques & Safety

    Magnesium Brazing: Complete Guide to Techniques & Safety

    Magnesium brazing is one of those processes that separates experienced metalworkers from beginners. After spending 15 years in fabrication shops, I’ve seen more failed magnesium braze attempts than I can count. The metal’s reputation for difficulty is well-earned, but understanding the right techniques makes it completely manageable.

    Can magnesium be brazed? Yes, magnesium can be brazed using specialized techniques including vacuum brazing, torch brazing with specific fluxes, or furnace brazing in controlled atmospheres. The process requires filler metals like BMg-1, BMg-2a, or MC3 and temperatures above 560°C (1040°F).

    Most people who struggle with magnesium brazing miss one critical detail: magnesium oxidizes faster than almost any other metal used in fabrication. That distinctive white powder you see? That’s magnesium oxide forming before your eyes, and it’s the primary reason brazing fails.

    What is Magnesium Brazing?

    Brazing differs from welding in a fundamental way: you’re not melting the base metal. Instead, you heat it just enough so a filler metal can flow into the joint gap through capillary action. This matters for magnesium because excessive heat causes problems I’ll cover shortly.

    The aerospace and automotive industries rely heavily on magnesium brazing for lightweight components. I’ve worked on intake manifolds, transmission cases, and even some aerospace structural components that were all brazed rather than welded. The weight savings justify the extra effort.

    Capillary Action: The force that draws liquid filler metal into the narrow gap between two closely fitted surfaces, creating a strong joint even without melting the base metals.

    Why Magnesium Brazing is Difficult?

    After consulting with brazing specialists at Kay & Associates, they confirmed what I’ve learned through experience: magnesium presents unique challenges that don’t exist with aluminum or steel. Here’s what you’re up against.

    Quick Summary: Magnesium brazing is difficult because the metal oxidizes rapidly when heated, reacts negatively with common fluxes, loses strength in the heat-affected zone, and can vaporize in vacuum furnaces causing contamination.

    Rapid Oxidation

    Magnesium forms an oxide layer almost instantly when exposed to air at elevated temperatures. This magnesium oxide (MgO) is tenacious and prevents filler metal from wetting the surface properly. I’ve watched clean magnesium parts develop a visible oxide film in seconds under a torch.

    The oxide layer melts at a much higher temperature than magnesium itself, creating a barrier that stops the filler metal from bonding. This is why simply heating and applying filler doesn’t work—the oxide has to be removed or prevented from forming in the first place.

    Flux Poisoning

    Flux Poisoning: A reaction where magnesium combines with common brazing fluxes (like NOCOLOK), forming compounds like MgF2 and KMgF3 that reduce flux effectiveness and prevent proper brazing.

    Standard fluxes that work beautifully on aluminum often fail with magnesium. According to aluminum brazing specialists at aluminium-brazing.com, standard NOCOLOK flux can only tolerate up to 0.5% magnesium content in furnace brazing and about 1% for flame brazing.

    When magnesium content exceeds these limits, the flux becomes “poisoned”—it loses its ability to remove oxides and promote filler flow. I’ve seen this firsthand: you apply what should be adequate flux, heat the joint, and the filler metal just beads up instead of flowing.

    Reduced Strength in Heat-Affected Zone

    The heat from brazing can weaken magnesium in the joint area. This heat-affected zone (HAZ) may end up weaker than the base metal, creating a potential failure point. Engineers at Mat-Tech report that proper temperature control is essential to minimize this strength reduction.

    In my experience, this strength loss is most noticeable in thin-walled magnesium castings. The combination of heat and residual stresses from the casting process can create micro-cracks if you’re not careful with heating rates.

    Magnesium Volatilization

    In vacuum brazing, magnesium can vaporize at brazing temperatures, creating what furnace operators call “spinach”—the dark deposits that contaminate heating elements and furnace interiors. While magnesium vapor acts as an oxygen getter (which is useful), too much causes problems.

    Magnesium Brazing Techniques Compared

    Not all brazing methods work equally well for magnesium. Through trial, error, and training, I’ve learned which techniques give reliable results.

    TechniqueTemperature RangeAtmosphereProsConsBest For
    Vacuum Brazing580-620°CHigh vacuumNo flux residues, clean joints, Mg acts as getterExpensive equipment, furnace contaminationAerospace, high-reliability applications
    Torch Brazing560-600°CAir with fluxLow equipment cost, portable, flexibleFlux residues required, skill-intensiveRepair work, small batches, field repairs
    Furnace Brazing570-610°CControlled atmosphereEven heating, batch processing, consistentRequires flux, size limitationsProduction runs, complex assemblies
    Dip Brazing570-600°CMolten salt bathExcellent heat transfer, oxidation protectionSalt removal difficult, limited to smaller partsComplex assemblies, heat exchangers

    Vacuum Brazing

    Vacuum brazing is the premium option for magnesium. As Lucas Milhaupt’s technical documentation explains, magnesium in vacuum brazing acts as an oxygen and water vapor getter, actually improving the brazing environment. The vacuum prevents oxidation entirely, eliminating the need for flux.

    The downside is equipment cost. A proper vacuum furnace runs $20,000 to $50,000+, putting it out of reach for most small shops. However, if you’re doing high-volume production or aerospace work, the investment pays off in consistent quality and no post-braze cleaning.

    Torch Brazing

    Torch brazing with oxygen-acetylene or oxy-propane is the most accessible method. I’ve used this extensively for repair work. The key is using a specialized flux designed for magnesium—standard aluminum flux won’t cut it.

    The learning curve is steeper. You need to maintain the right temperature window without overheating, apply flux correctly, and time the filler addition precisely. But once you develop the feel for it, torch brazing becomes reliable for most applications.

    Furnace Brazing

    Controlled atmosphere furnace brazing strikes a middle ground. You’ll use a flux like NOCOLOK, but the controlled atmosphere (usually nitrogen or argon with some hydrogen) reduces oxidation. This method shines for production quantities where consistency matters more than speed.

    Brazing Aluminum-Magnesium Alloys

    Many people asking about magnesium brazing are actually working with aluminum-magnesium alloys (like the 6XXX series). These behave differently than pure magnesium.

    The magnesium content is the critical factor. According to industry specialists at Mat-Tech, aluminum alloys with magnesium content up to 0.5% can be safely brazed with standard non-corrosive fluxes. Above this threshold, you need specialized approaches.

    Mg ContentFlux TypeBrazing MethodDifficulty
    0-0.5%Standard NOCOLOKFurnace or torchEasy
    0.5-1.0%Enhanced fluxFlame brazing preferredModerate
    1.0%+Specialized cesium fluxVacuum or controlled atmosphereDifficult

    I’ve had success with aluminum-magnesium intake manifolds using torch brazing and cesium-enhanced flux. The key is recognizing when the magnesium content is too high for standard methods and adjusting your approach accordingly.

    Equipment and Materials Needed

    The right tools make all the difference. After attempting magnesium brazing with inadequate equipment, I’ve learned what’s essential and what’s optional.

    Filler Metals

    Three commercial filler metals exist specifically for magnesium brazing:

    • BMg-1: Magnesium-aluminum-zinc alloy, liquidus around 560°C
    • BMg-2a: Similar to BMg-1 with slight variations
    • MC3: Another magnesium-based formulation

    For aluminum-magnesium alloys, standard aluminum-silicon fillers (like 4047) often work if magnesium content is low enough. For pure magnesium or high-Mg alloys, stick with the magnesium-specific fillers.

    Fluxes

    Flux selection is critical. Standard aluminum fluxes will fail with magnesium due to flux poisoning. Look for specialized magnesium fluxes or cesium-based formulations.

    The flux should be applied immediately before heating—don’t apply it hours in advance or it will absorb moisture and become ineffective. I keep my flux in a sealed container and only take out what I’ll use in the next hour.

    Heat Sources

    For torch brazing, an oxy-acetylene setup works well. Oxygen-propane is a cheaper alternative with sufficient heat for most magnesium brazing applications. Avoid air-acetylene—it doesn’t get hot enough consistently.

    Temperature control matters more than maximum heat. An infrared thermometer or contact thermocouple helps you stay in the right temperature window without guessing.

    Surface Preparation Tools

    You’ll need stainless steel brushes (used only on magnesium), acetone or alcohol for degreasing, and possibly abrasive pads for mechanical cleaning. Never use a brush that’s been used on steel—contamination causes corrosion.

    Step-by-Step Magnesium Brazing Procedure

    This torch brazing procedure has worked reliably for me over hundreds of joints. Adapt as needed for your specific application.

    1. Clean and Prepare Surfaces

    Start by mechanically cleaning the joint areas with a clean stainless steel brush dedicated to magnesium only. Remove all oxides, oils, and contaminants. Follow up with acetone or isopropyl alcohol to remove any grease.

    The joint should be bright and shiny before proceeding. Any remaining oxide or contamination will show up as a weak spot in the finished braze.

    2. Design the Joint Properly

    Maintain a joint gap of 0.05-0.15mm (0.002-0.006 inches) for optimal capillary action. Too tight and the filler can’t flow; too wide and capillary action fails.

    Butt joints work but are weaker than lap joints. When possible, design a lap joint with at least 3 times the material thickness in overlap. This gives you maximum strength.

    3. Apply Flux

    Mix your specialized magnesium flux with water or alcohol to a paste consistency. Apply it to both joint surfaces and the immediate surrounding area. A thin, even coat is better than a thick glob.

    The flux should be applied right before heating—within 15-30 minutes maximum. If it dries out completely before you heat, reapply or mist with water to reactivate.

    4. Assemble and Position

    Fit the joint together and secure it if necessary. I use clamps or jigs for complex assemblies, but many simple joints stay put with careful positioning alone.

    Make sure everything is accessible with your torch before you start heating. You don’t want to be repositioning parts once they’re hot.

    5. Heat Evenly

    Begin heating the assembly broadly, moving the torch in a circular pattern to raise the temperature evenly. Don’t focus the flame on one spot—uneven heating causes warping and can crack the joint.

    Watch for the flux to change color or become clear. This indicates you’re approaching brazing temperature. The flux should melt and become liquid-like before you add filler metal.

    6. Apply Filler Metal

    Once the joint is at temperature (usually indicated by flux behavior), touch the filler rod to the joint. Don’t melt the rod with the flame—let the joint heat melt the filler through contact.

    The filler should flow into the joint by capillary action. If it beads up, the joint is either too cool or the flux isn’t working. Add more heat and try again.

    7. Cool Gradually

    Remove the heat and let the assembly cool naturally. Don’t force-cool with water or compressed air—rapid cooling can crack the joint or create residual stresses.

    The flux will solidify into a crust. This is normal and protects the joint from oxidation during cooling.

    8. Clean Thoroughly

    Once cooled, remove flux residues. Most magnesium fluxes are corrosive and must be completely cleaned off. Hot water with a stiff brush works, followed by a thorough rinse.

    For critical applications, a neutralizing rinse may be specified by the flux manufacturer. I’ve found that inadequate cleaning causes more long-term problems than almost any other aspect of the process.

    Safety Considerations

    Magnesium brazing carries risks that you must take seriously. After witnessing a magnesium fire firsthand, I’m borderline paranoid about safety—and that’s a good thing.

    Fire Hazard

    Magnesium burns at approximately 3100°C (5600°F)—hotter than most cutting torches. Once ignited, magnesium fires are extremely difficult to extinguish. Water makes it worse by adding hydrogen to the fire.

    Keep a Class D fire extinguisher rated for metal fires within arm’s reach. Standard ABC extinguishers won’t cut it. Sand or dry graphite powder can also smother a magnesium fire in an emergency.

    Protective Equipment

    Wear appropriate personal protective equipment: safety glasses with side shields, leather welding gloves, and natural fiber clothing (no synthetics that can melt into your skin). A welding helmet with appropriate shade is recommended for torch brazing.

    Respiratory protection may be needed depending on the flux used. Many fluxes release fumes that you shouldn’t breathe. Work in a well-ventilated area or use fume extraction.

    Flux Handling

    Many brazing fluxes contain fluorides and are toxic if ingested or inhaled. Wash your hands thoroughly after handling flux, and avoid eating or drinking in the work area.

    Work Area Preparation

    Clear the work area of any combustible materials before starting. Have your fire extinguisher inspected and accessible. Know where your emergency exits are.

    If you’re working in a shared space, post a warning sign that magnesium work is in progress. Others need to know not to use water extinguishers if they see a fire.

    Brazing vs Welding Magnesium

    Both processes have their place. Here’s how they compare based on my experience with both methods.

    FactorBrazingWelding (TIG)
    Temperature560-620°C (below melting point)650°C+ (melts base metal)
    Thermal DistortionLowerHigher
    Skill Level RequiredModerateHigh
    Joint Strength70-90% of base metal90-100% of base metal
    Equipment CostLow-MediumHigh
    Best ForDissimilar metals, thin sections, complex assembliesStructural joints, thick sections, repairs

    Choose brazing when you need to join dissimilar metals, work with thin sections, or minimize heat input. Choose welding when maximum joint strength is critical or when you need to repair castings.

    Common Problems and Solutions

    Even experienced operators run into issues. Here are the problems I see most often and how to fix them.

    ProblemLikely CauseSolution
    Filler won’t flowInsufficient heat or failed fluxIncrease temperature gradually, check flux compatibility
    Joint is weakIncomplete penetration or contaminationImprove cleaning, check joint fit-up, ensure full filler flow
    Porosity in brazeOverheating or flux impuritiesReduce heat, use fresh flux, improve ventilation
    Cracking after coolingThermal stress or poor joint designCool more slowly, redesign joint with more overlap
    Corrosion after serviceIncomplete flux removalClean more thoroughly, use neutralizing rinse

    When troubleshooting, always start with the basics: clean surfaces, proper flux, correct temperature, and appropriate joint design. Most problems trace back to one of these fundamentals.

    Frequently Asked Questions

    Can magnesium be brazed?

    Yes, magnesium can be brazed using specialized techniques. The process requires either vacuum brazing environments or magnesium-specific fluxes to overcome rapid oxidation. Three commercial filler metals are available: BMg-1, BMg-2a, and MC3, with liquidus temperatures around 560°C or higher.

    What is the best way to braze magnesium?

    The best method depends on your equipment and application. Vacuum brazing produces the cleanest, most reliable joints but requires expensive equipment. Torch brazing with specialized flux is the most accessible for small shops and repair work. Furnace brazing in controlled atmospheres works well for production quantities.

    What flux should I use for magnesium brazing?

    Standard aluminum fluxes like NOCOLOK only work up to 0.5% magnesium content. For higher magnesium content or pure magnesium, you need specialized magnesium fluxes or cesium-based formulations. Using the wrong flux will result in flux poisoning and failed joints.

    What are the safety concerns with magnesium brazing?

    Magnesium presents significant fire hazards—it burns at 3100°C and water makes magnesium fires worse. Always keep a Class D fire extinguisher rated for metal fires nearby. Additionally, many fluxes contain toxic fluorides requiring respiratory protection and adequate ventilation. Wear appropriate PPE including safety glasses, gloves, and natural fiber clothing.

    Is brazing or welding better for magnesium?

    Neither is universally better. Brazing produces less thermal distortion and works well for thin sections and complex assemblies, with joint strength around 70-90% of base metal. TIG welding produces stronger joints (90-100%) but requires more skill and causes more heat distortion. Choose brazing for dissimilar metal joints and welding for structural repairs.

    Will solder stick to magnesium?

    Standard solder will not adhere directly to magnesium due to rapid oxide formation. However, magnesium can be soldered using a specialized process: first apply a thin nickel-copper alloy coating, then use a tin-lead system. This is more complex than brazing and less common, but possible for specific applications where lower temperatures are required.

    What temperature is needed for magnesium brazing?

    Magnesium brazing typically occurs between 560-620°C (1040-1148°F). The exact temperature depends on the filler metal used—BMg-1, BMg-2a, and MC3 all have liquidus temperatures around 560°C or higher. You must heat the joint above the filler’s liquidus temperature but below the base metal’s melting point for proper brazing.

    Magnesium brazing isn’t easy, but it’s absolutely learnable with the right knowledge, materials, and respect for the process. Start with torch brazing on scrap pieces to develop your technique before moving to critical components. With practice, you’ll produce reliable joints that take advantage of magnesium’s incredible strength-to-weight ratio.